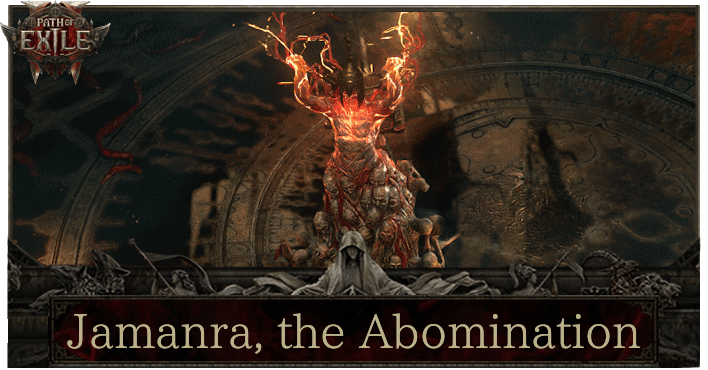
Jamanra, the Abomination Boss Guide
Latest: 0.5.0 Release Date
☆ Fate of the Vaal ▶︎ The Last of the Druids
┗ Bonded Mods | 0.4 Mystery Box
★ Druid: Class Overview | Builds
☆ NEW: Disciple of Varashta Ascendancy!
★ Best Class | Best Builds | Leveling Builds

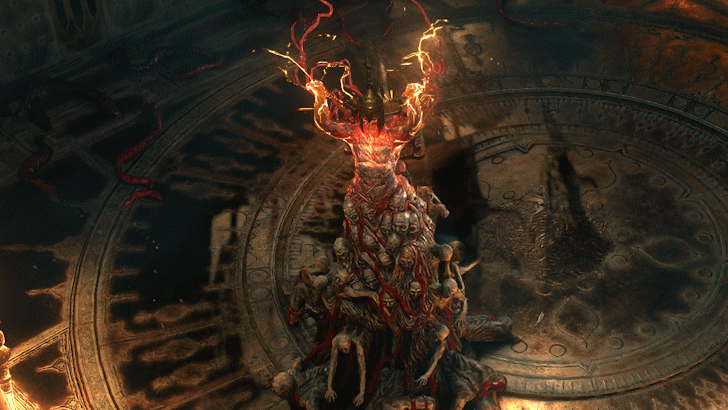
To beat Jamanra, the Abomination in Path of Exile 2 (PoE2), stay behind Asala during the sandstorm, avoid hazards, and save your flasks for later phases, ensure you have lightning resistance, stay close to Jamanra, and use cold damage as it is his weakness. Learn how to defeat Jamanra, the Abomination, his movesets and mechanics, location and rewards!
| Jamanra Boss Guides | |
|---|---|
| Jamanra, the Risen King | Jamanra, the Abomination |
How to Beat Jamanra, the Abomination
| Tips on Beating Jamanra, the Abomination |
|---|
|
|
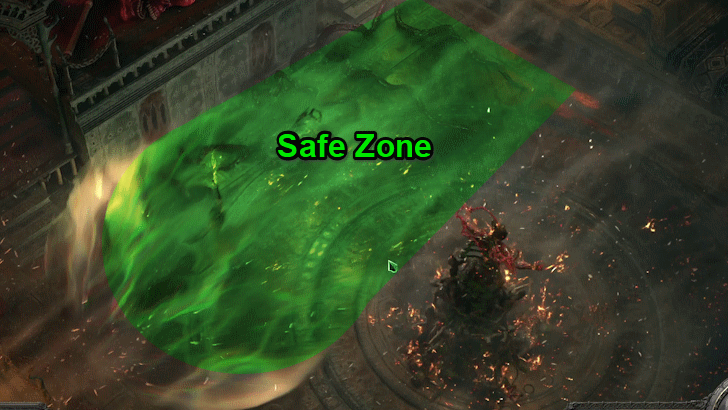
Stay Behind Asala to Protect Yourself from the Sand Storm

During Phase 1, Jamanra can summon a sandstorm which deals a great amount of damage when exposed to. Stay behind Asala to get protected from the storm. Asala's storm protection extends all the way to the other end of the boss arena so there's a lot of space to move around to deal with the additional enemies.
Dodge Roll Through Stage Hazards

In Phase 2, the arena is filled with hazards like lightning fences and blade-shooting gates, making navigation tricky. You can Dodge Roll through these obstacles to avoid most damage. However, be cautious—you cannot Dodge Roll through the Tornados.
Get Different Sources of Life and Mana Recovery
| Recommended Sources of Life and Mana Recovery |
|---|
|
・ % Life Regeneration from Passive Tree nodes ・ Flat Life Regeneration modifiers ・ Increased Mana Regeneration modifiers ・ “Gains X Charges per Second” Flask modifier |
Jamanra’s fight can be lengthy and drain your resources over time. To endure, ensure multiple recovery options for Life and Mana. If Regeneration isn’t viable, use Life and Mana flasks with the “Gains X Charges per Second” modifier to maintain flask charges and boost your survival chances during long boss fights.
Mitigate Damage by Getting More Lightning Resistance

Many of Jamanra's attacks deal Lightning damage. Increasing your Lightning Resistance significantly reduces his damage, helping with surviving one-shots and reducing Life Flask usage. Rings and Charms are cheap and good ways to boost your Lightning Resistance.
Get the Permanent Lightning Resist Upgrade
The Sisters of Garukhan altar at the Spires of Deshar of Act 2 gives a permanent +10% to Lightning Resistance upgrade. Make sure to grab this before fighting Jamanra, the Abomination.
Stay Close and Behind Jamanra
In the first phase, Jamanra's attacks can be challenging to dodge, especially at range. To minimize this threat, engage him in close combat. His melee attacks are less damaging, allowing you to stay close and avoid the more dangerous ranged attacks.
It's also wise to fight behind Jamanra, as most of his attacks target the area in front of him. Staying at his back minimizes the risk of getting hit.
Keep Your Distance in Phase 2
During the second phase, there would be a lot of area-denial hazards on the stage. It's best to keep your distance and take your time here to avoid any unnecessary damage.
Get More Levels and Gear in The Deadnought
Jamanra can be a tough fight if you're not ready. It's best to get more levels, for more Life and Passive Points, and hopefully a bit more gear before the fight. Fortunately, The Deadnought, the area before Jamanra, is one of the best spots to farm experience due to the easy layout and the sheer density of the monsters. You can keep leveling here for a bit until you're around 2 levels above the area level.
Use Cold Damage
Jamanra the Abomination is weak against cold damage. Incorporating cold attacks into your build can exploit this weakness, potentially enhancing your combat effectiveness against her. However, ensure that adding cold damage doesn't compromise the synergy of your existing build.
Jamanra, the Abomination Moveset and Mechanics
| Moves and Mechanics by Phase | |
|---|---|
| Phase 1 | Phase 2 |
Phase 1 Moves and Mechanics
| Move or Mechanic | Details & How to Dodge |
|---|---|
| “We repay in kind!” or “Justice!” Pillar Slam |
Calls forth pillars in front of him to do a Slam attack. This move is fairly slow but don't underestimate it's range. Try to get behind Jamanra to ensure you don't get hit by this attack. |
| “Vastiri vengeance!” or “By the sands! Sandstorm |
Conjures a sandstorm that deals physical damage when exposed. Stay behind Asala's barrier to be protected from the storm and deal with the additional enemies that spawn. |
| “Desert justice!” Arcing Pillars |
These two pillars with lightning arcing between them are pretty fast and can deal a lot of damage when ignored. It's best to stop attacking here and focus on going around Jamanra to avoid getting hit repeatedly. |
| “For my People” Roaming Pillars |
Summons two pillars that arcs lightning between them and roams around the arena. You can use the Dodge Roll as they approach you to avoid damage. |
| Beam Lightning | Fires bolts of lightning in front of him which spreads out to his sides. Stay behind Jamanra to completely avoid all damage from this skill, or Dodge Roll through the bolts of lightning to escape. |
Phase 2 Moves and Mechanics
| Move or Mechanic | Details & How to Dodge |
|---|---|
| “Our gift to you!” or “Forge of hate!” or “Take our hate!” Vertical Slash |
Prepares a sword and does an unblockable vertical slash after a short delay. This attack hits you slower than you would expect it. Wait for the delay and dodge accordingly. |
| “We will have blood!” or “Blood!” Lightning Fence |
Summons two static pillars with lightning arcing between them which slows you when you get hit. You can Dodge Roll through the lightning to avoid damage and the Slow it applies. |
| “Winds, to me!” Tornado |
Summons a tornado that roams around the stage and deals physical damage. Always be aware of the Tornado location in the arena and determine the safest spot to fight. |
| “The Maraketh will pay!” Unblockable Horizontal Slash |
Prepares a halberd and does an unblockable wide slash. Dodge Roll away or toward Jamanra at the right time to move out of this attack's range. |
| “We will blot out the sun!” or “Ten thousand spears!” Projectile Barrage |
Summons multiple blades to fire at you. Quickly move out of your position to avoid any of the projectiles as much as possible. |
| “You will be forgotten” or “I will erase you!” or “I will grind you to dust!” Lightning Orbs |
Conjures multiple lightning orbs that slowly creep out forward. Quickly plan your route to the opposite side of the arena and get there as soon as you can. |
| “Endless hate!” Projectile Gates |
Jamanra summons a gate that constantly shoots out projectiles. This skill denies a big portion of the stage but you can Dodge Roll through it to avoid damage. |
| Random Lightning Bolts | At the later stages of this phase, lightning bolts randomly hit the boss arena. Always look out for these orange vertical lines near you react accordingly to not get hit. |
Jamanra, the Abomination Location
Dreadnought Vanguard - Act 2

You'll encounter Jamanra the second time at the end of Act 2 in the Dreadnought Vanguard as Jamanra, the Abomination. Defeating Jamanra, the Abomination completes the second act of the game.
Dreadnought Vanguard Location, Quests, and Bosses
Dreadnought Vanguard Layout

It is important to note that the areas are randomly generated and that the maps used are meant to serve as a general guide to the map layout.
Jamanra, the Abomination Rewards
First Time Clear Rewards
| ・The Trail of Corruption quest completion |
Defeating Jamanra, the Abomination grants these rewards, either as direct drops or as a quest completion bonus.
Jamanra, the Abomination Overview
Basic Info

|
|
| Location | Act 2 Dreadnought Vanguard |
|---|---|
| Resistances |
・ Physical ・ Lightning ・ Fire |
| Weaknesses | ・ Cold |
| Damage Types |
・ Physical ・ Lightning |
| Debuffs |
・ Shock ・ Tornado ・ Slowed |
Path of Exile 2 (PoE 2) Related Guides
| All Boss Guides | |
|---|---|
| All Pinnacle Bosses | All Spirit Bosses |
All Act 1 Bosses
All Act 2 Bosses
All Act 3 Bosses
All Interlude Bosses
Trial Bosses
| Bahlak, the Sky Seer | Uxmal, the Beastlord | Chetza, the Feathered Plague |
| Rattlecage, the Earthbreaker | Terracota Sentinels | Ashar, the Sand Mother |
Abyss Bosses
| Tasgul, Swallower of Light | Vandroth, Blackblooded Enslaver | Vessel of Kulemak |
Atziri's Temple Bosses
| Xipocado, Royal Architect | Atziri, the Red Queen |
Pinnacle Bosses
| Zarokh, the Temporal | Xesht, We That Are One | The Arbiter of Ash |
| The Trialmaster | Kosis, the Revelation | Omniphobia, Fear Manifest |
Comment
Author
Jamanra, the Abomination Boss Guide
Rankings
- We could not find the message board you were looking for.
Gaming News
Popular Games

Genshin Impact Walkthrough & Guides Wiki

Umamusume: Pretty Derby Walkthrough & Guides Wiki

Pokemon Pokopia Walkthrough & Guides Wiki

Honkai: Star Rail Walkthrough & Guides Wiki

Monster Hunter Stories 3: Twisted Reflection Walkthrough & Guides Wiki

Arknights: Endfield Walkthrough & Guides Wiki

Wuthering Waves Walkthrough & Guides Wiki

Zenless Zone Zero Walkthrough & Guides Wiki

Pokemon TCG Pocket (PTCGP) Strategies & Guides Wiki

Monster Hunter Wilds Walkthrough & Guides Wiki
Recommended Games

Fire Emblem Heroes (FEH) Walkthrough & Guides Wiki

Diablo 4: Vessel of Hatred Walkthrough & Guides Wiki

Cyberpunk 2077: Ultimate Edition Walkthrough & Guides Wiki

Yu-Gi-Oh! Master Duel Walkthrough & Guides Wiki

Super Smash Bros. Ultimate Walkthrough & Guides Wiki

Pokemon Brilliant Diamond and Shining Pearl (BDSP) Walkthrough & Guides Wiki

Elden Ring Shadow of the Erdtree Walkthrough & Guides Wiki

Monster Hunter World Walkthrough & Guides Wiki

The Legend of Zelda: Tears of the Kingdom Walkthrough & Guides Wiki

Persona 3 Reload Walkthrough & Guides Wiki
All rights reserved
© 2010 - 2024 Grinding Gear Games
The copyrights of videos of games used in our content and other intellectual property rights belong to the provider of the game.
The contents we provide on this site were created personally by members of the Game8 editorial department.
We refuse the right to reuse or repost content taken without our permission such as data or images to other sites.


![Monster Hunter Stories 3 Review [First Impressions] | Simply Rejuvenating](https://img.game8.co/4438641/2a31b7702bd70e78ec8efd24661dacda.jpeg/show)

![Monster Hunter Stories 3 Review [First Impressions] | Simply Rejuvenating](https://img.game8.co/4438641/2a31b7702bd70e78ec8efd24661dacda.jpeg/thumb)
![The Seven Deadly Sins: Origin Review [First Impressions] | A Promising Start](https://img.game8.co/4440581/584e0bfb87908f12c4eab6e846eb1afd.png/thumb)


