The Arbiter of Ash Boss Guide
Latest: 0.5.0 Release Date
☆ Fate of the Vaal ▶︎ The Last of the Druids
┗ Bonded Mods | 0.4 Mystery Box
★ Druid: Class Overview | Builds
☆ NEW: Disciple of Varashta Ascendancy!
★ Best Class | Best Builds | Leveling Builds
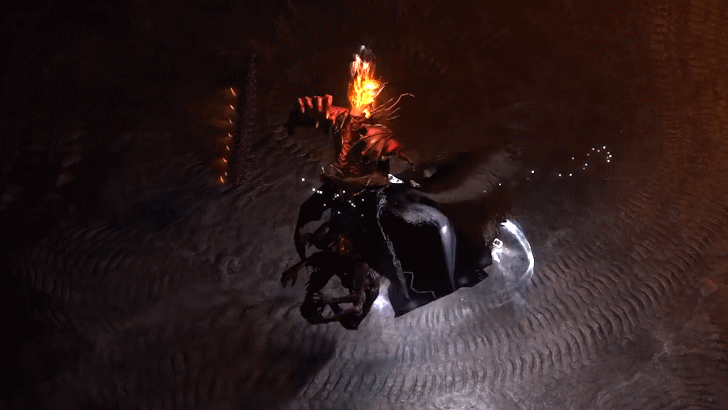
The Arbiter of Ash is a Pinnacle Boss in Path of Exile 2 (PoE 2). See the location, the drops or rewards, and tips on how to beat The Arbiter of Ash here.
List of Contents
The Arbiter of Ash Location
Use the Crisis Fragments at the Burning Monolith's Sealed Passageway
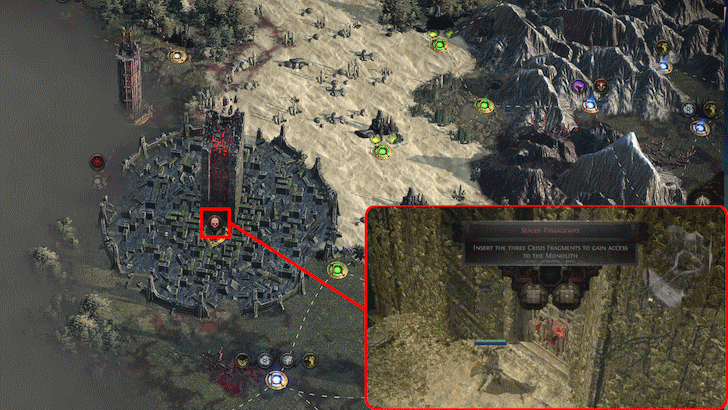
To face the Arbiter of Ash, you must use three different Crisis Fragments at the Sealed Passageway in the Burning Monolith. This will unlock the entrance to the pinnacle boss fight.
Obtain Crisis Fragments at the Atlas Citadels
| Crisis Fragments and Locations | ||
|---|---|---|
(Iron Citadel) |
(Copper Citadel) |
(Stone Citadel) |
Crisis Fragments are obtained by defeating the bosses found in the Citadels that randomly spawn in the Atlas. The Ancient Crisis Fragment can be acquired from the Iron Citadel, the Weathered Crisis Fragment from the Copper Citadel, and the Faded Crisis Fragment from the Stone Citadel.
Waystone Drop Chance Increases the Odds for More Crisis Fragments
Increases in “Waystone Drop Chance” improves the the number of Crisis Fragments that drop after defeating a Citadel boss. While each boss guarantees one fragment, this stat, available from the Waystone you use or the Atlas Passive Tree, raises the odds of extra Crisis Fragment drops. However, using Waystones with higher drop chances may come with more challenging map modifiers, so plan accordingly.
How to Beat The Arbiter of Ash
Stay Inside the Flame Bombs to Avoid a One-Shot Death
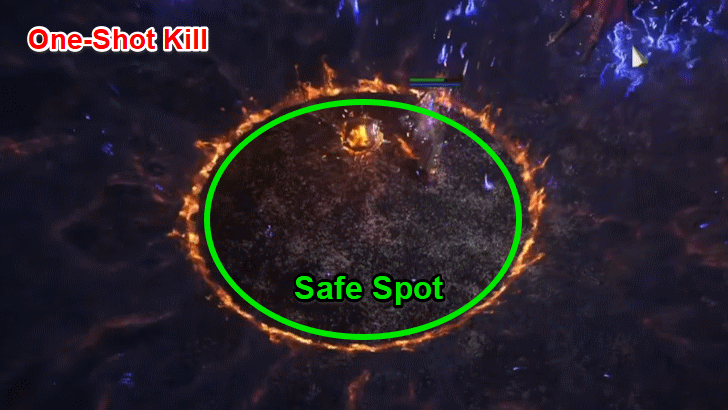
The Arbiter of Ash deploys flame bombs throughout the fight, creating a constant hazard that can instantly kill most characters. The only safe area is the small zone directly beneath each bomb. Position yourself carefully to remain inside these zones when the bombs detonate.
On the Second Phase, Wait for the Laser and the Dive Bomb First
During the second phase, the flame bomb mechanic becomes more complex. For the first bomb in this phase, a laser beam sweeps through the safe zone just before the bomb explodes. It is crucial to wait for the laser to end before moving under the bomb.
For the second bomb, the Arbiter of Ash performs a dive bomb attack aimed at the center of the flame bomb's safe spot. Wait for this dive bomb to finish before stepping into the safe area then immediately dodge away to avoid the vertical slash follow up with a vertical slash.
The Arbiter of Ash Moveset
List of All Attack Patterns
| Moves | Details and Tips |
|---|---|
| Phase 1 | |
| Laser Beam Line Attack |
The Arbiter of Ash fires a large laser beam in front of it that lasts for a few seconds. Dodge to the side to avoid damage and wait for the laser to dissipate. |
| Fiery Winds AoE Combo |
The Arbiter of Ash starts dashing around and summons fire orbs that explode and deal damage outside their AoE throughout the arena. Stay inside the fire orb's circle to avoid damage. |
| Firebolt Projectile Attack |
The Arbiter of Ash swings his wand and fires a single fire projectile towards the player. |
| Fire Stars Projectile Combo |
The Arbiter of Ash launches 2 large fire projectiles across the arena that also release multiple small fire projectiles for the duration. Dodge this by rolling away from the initial projectile and move aside from the smaller projectiles. |
| Blazing Waves AoE Combo |
The Arbiter of Ash summons a series of fiery waves with only a narrow space in the middle for you to go to. |
| Phase 2 | |
| Sword Slashes Melee Combo |
The Arbiter of Ash swings his sword multiple times while moving. Keep moving to avoid getting caught. |
| Fire Blast AoE Attack |
The Arbiter of Ash charges up the whole arena as an orb slowly descends. Once the orb is on the ground, the whole area burns except for the space nearby the orb itself. |
| Fire Blast Variant 1 AoE Combo |
The Arbiter of Ash uses a Fire Blast and shoots a Laser Beam at the safe area. Stay outside the safe area until after the beam is finished to minimize damage taken. |
| Fire Blast Variant 2 AoE Combo |
The Arbiter of Ash slashes the middle of the safe area right after the Fire Blast is triggered. Make sure to immediately dodge sideways to avoid taking damage. |
| Elemental Orbs Debuffs |
There are several elemental orbs you can find on the ground that you and the boss can trigger. When activated, these orbs imbue the ground with their corresponding element. If the Arbiter of Ash steps on an orb, you can negate the effects by activating another available orb. |
| Fire Pulse Orb Projectile Combo |
The Arbiter of Ash summons a large fire orb that continuously fires waves of small firebolts throughout the arena. Roll between each wave to avoid damage. |
| Sword Smash Melee Combo |
The Arbiter of Ash flies up and summons pillars of fire and eventually crashes down its sword to deal damage in a larger AoE. Dodge away as soon as the pillar of fire appears and start running away from The Arbiter of Ash to avoid the larger AoE. |
The Arbiter of Ash Rewards
First Time Clear Rewards
| ・Arbiter’s Book of Knowledge |
The first time you defeat The Arbiter of Ash at each difficulty tier, they will drop an Arbiter’s Book of Knowledge, which grants two Arbiter Atlas Passive Points when used.
Exclusive Unique Drops
| Unique Drops | |
|---|---|
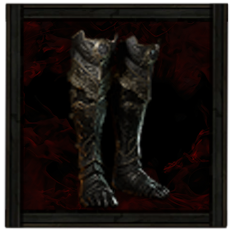 Ab Aeterno Grand Cuisses Ab Aeterno Grand Cuisses |
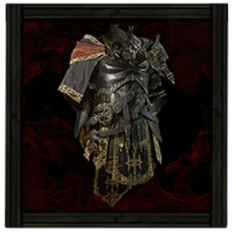 Morior Invictus Grand Regalia Morior Invictus Grand Regalia |
 Sine Aequo Grand Manchettes Sine Aequo Grand Manchettes
|
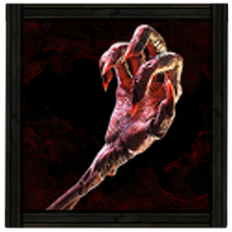 Sacred Flame Shrine Sceptre Sacred Flame Shrine Sceptre
|
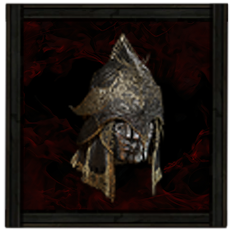 Solus Ipse Grand Visage Solus Ipse Grand Visage
|
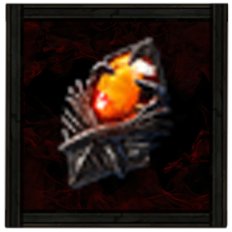 Prism of Belief Diamond Prism of Belief Diamond
|
The Arbiter of Ash drops one of several Unique Items upon defeat. Some of these Uniques have lower drop rates than others. However, increasing the difficulty affects the drop chances to make the rarer Uniques more likely to drop.
The Arbiter of Ash Overview
Basic Info
|
|
| Location | Atlas The Burning Monolith |
|---|---|
| Resistances |
・ Physical ・ Fire ・ Cold ・ Lightning |
| Weaknesses | ・ None |
| Damage Types |
・ Physical ・ Fire |
| Debuffs |
・ Ignite ・ Chill ・ Burning Ground |
Path of Exile 2 (PoE 2) Related Guides
| All Boss Guides | |
|---|---|
| All Pinnacle Bosses | All Spirit Bosses |
All Act 1 Bosses
All Act 2 Bosses
All Act 3 Bosses
All Interlude Bosses
Trial Bosses
| Bahlak, the Sky Seer | Uxmal, the Beastlord | Chetza, the Feathered Plague |
| Rattlecage, the Earthbreaker | Terracota Sentinels | Ashar, the Sand Mother |
Abyss Bosses
| Tasgul, Swallower of Light | Vandroth, Blackblooded Enslaver | Vessel of Kulemak |
Atziri's Temple Bosses
| Xipocado, Royal Architect | Atziri, the Red Queen |
Pinnacle Bosses
| Zarokh, the Temporal | Xesht, We That Are One | The Arbiter of Ash |
| The Trialmaster | Kosis, the Revelation | Omniphobia, Fear Manifest |
Comment
Author

The Arbiter of Ash Boss Guide
Rankings
- We could not find the message board you were looking for.

Gaming News


![Death Stranding 2: On The Beach [PC] Review | A Port That Delivers](https://img.game8.co/4447392/15310a0c9aa1b6843bb713b2ea216930.jpeg/thumb)

Popular Games

Genshin Impact Walkthrough & Guides Wiki
Umamusume: Pretty Derby Walkthrough & Guides Wiki
Pokemon Pokopia Walkthrough & Guides Wiki
Honkai: Star Rail Walkthrough & Guides Wiki
Monster Hunter Stories 3: Twisted Reflection Walkthrough & Guides Wiki
Arknights: Endfield Walkthrough & Guides Wiki
Wuthering Waves Walkthrough & Guides Wiki
Zenless Zone Zero Walkthrough & Guides Wiki
Pokemon TCG Pocket (PTCGP) Strategies & Guides Wiki
Monster Hunter Wilds Walkthrough & Guides Wiki


Recommended Games
Fire Emblem Heroes (FEH) Walkthrough & Guides Wiki
Diablo 4: Vessel of Hatred Walkthrough & Guides Wiki
Cyberpunk 2077: Ultimate Edition Walkthrough & Guides Wiki
Yu-Gi-Oh! Master Duel Walkthrough & Guides Wiki
Super Smash Bros. Ultimate Walkthrough & Guides Wiki
Pokemon Brilliant Diamond and Shining Pearl (BDSP) Walkthrough & Guides Wiki
Elden Ring Shadow of the Erdtree Walkthrough & Guides Wiki
Monster Hunter World Walkthrough & Guides Wiki
The Legend of Zelda: Tears of the Kingdom Walkthrough & Guides Wiki
Persona 3 Reload Walkthrough & Guides Wiki


All rights reserved
© 2010 - 2024 Grinding Gear Games
The copyrights of videos of games used in our content and other intellectual property rights belong to the provider of the game.
The contents we provide on this site were created personally by members of the Game8 editorial department.
We refuse the right to reuse or repost content taken without our permission such as data or images to other sites.