Trial of The Sekhemas Guide
Latest: 0.5.0 Release Date
☆ Fate of the Vaal ▶︎ The Last of the Druids
┗ Bonded Mods | 0.4 Mystery Box
★ Druid: Class Overview | Builds
☆ NEW: Disciple of Varashta Ascendancy!
★ Best Class | Best Builds | Leveling Builds
The Trial of the Sekhemas is an Ascension Trial in Path of Exile 2 (PoE 2). See how to get to The Trial of the Sekhemas, how to unlock it, how to defeat the bosses, tips and tricks, walkthrough guide, and all the rewards here in this guide!
List of Contents
Trial of the Sekhemas Location
How to Get to The Trial of the Sekhemas
These are the steps you need to follow in order to reach the Trial of the Sekhemas:
- Reach The Trail of Corruption Quest
- Defeat Balbala the Traitor
- Use Desert Map to Reach Trial of the Sekhemas
Reach The Trail of Corruption Quest
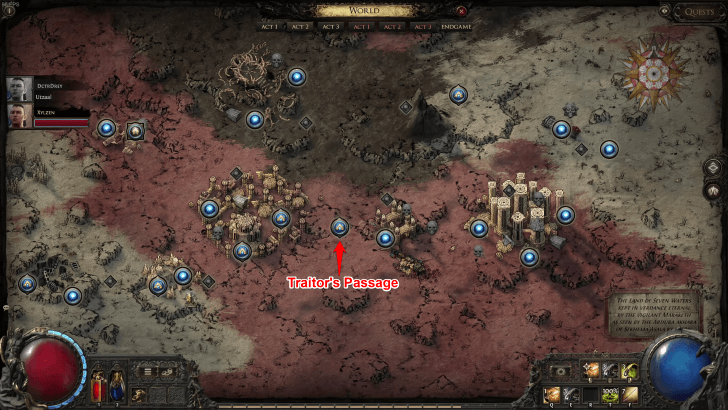
While progressing through Act 2, you will reach an area called Traitor's Passage during The Trail of Corruption quest. In this area, look for the Ancient Seal, then open the door, and interact with the three Runic Seals inside.
Defeat Balbala the Traitor

After removing the Runic Seals, you will face off against Balbala the Traitor. Defeating it will give you the Balbala's Barya, which is the key to opening Trial of the Sekhemas. Then, it will activate the quest Ascent to Power, where you talk to Zarka back at the Caravan.
Balbala, The Traitor Boss Guide
Use Desert Map to Reach Trial of the Sekhemas
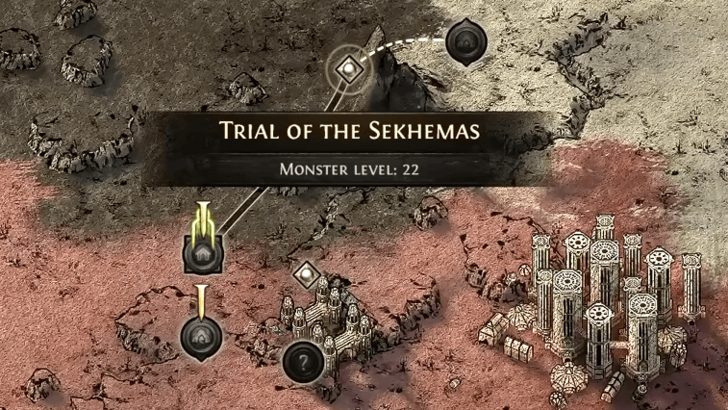
After talking to Zarka, you can now reach the Trial of the Sekhemas by interacting with the Desert Map and traveling directly to the Trial.
If you die in the Trial of the Sekhemas during the Ascent to Power quest, you can speak to Balbala to receive another Balbala's Barya, which will allow you to redo the trial until you succeed.
All Trial of the Sekhemas Challenges
There are five different Trials you can encounter in the Trials of Sekhemas:
| Trials | Difficulty |
|---|---|
| Escape Trial (Disable the Crystals) |
Easiest |
| Ritual Trial (Defeat the Ritual Casters) |
Easy |
| Chalice Trial (Find and Defeat all the Rare Monsters) |
Intermediate |
| Gauntlet Trial (Find the Exit) |
Hard |
| Hourglass Trial (Survive until the Timer Expires) |
Hardest |
Escape Trial
| Escape Trial Objectives |
|---|
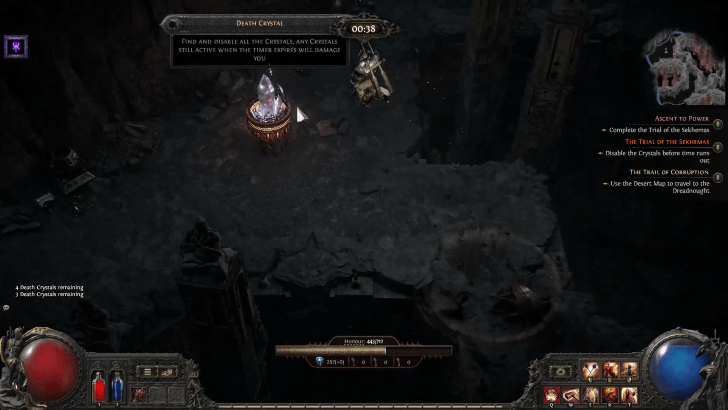
| ・Disable all Death Crystals.
・Rush to each crystal to disable them. ・Disabling one adds more time to the countdown. ・Each crystal points you toward the next one. ・Any Crystals still active once the timer expires will damage you. |
Avoid all enemies and dodge roll to move past them. Movement skills will be incredibly useful for this Trial as these can help you move around quicker. You can explore freely after disabling all crystals.
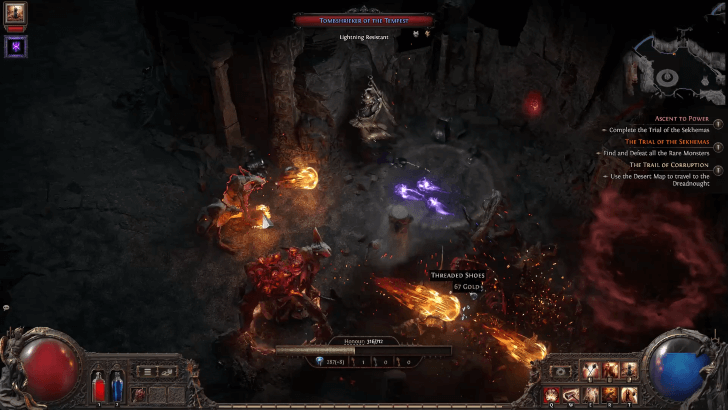
Ritual Trial
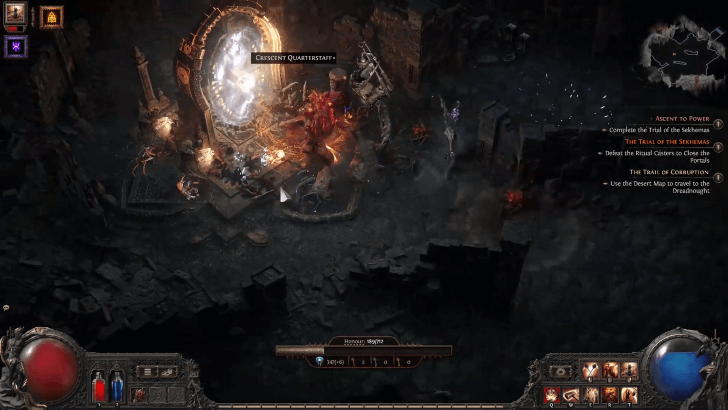
| Ritual Trial Objectives |
|---|
| ・Defeat all Ritual Casters next to each Portal to disable them.
・Disable all Portals to advance to the next trial. |
Focus on the casters and defeat them ASAP to get rid of the summoned enemies. Going fast and focusing firepower on them makes this trial a cakewalk.
Chalice Trial
| Chalice Trial Objectives |
|---|
| ・When interacting with the giant chalice, take note of the direction it points you toward.
・Go in those directions to find the rare monsters you need to kill. ・Defeat all rare monsters. ・Head back to the Chalice when they're all defeated. |
Play defensively and evasively to keep your Honour intact. Kill the mobs first to make dealing with the Rare monsters much easier.
Gauntlet Trial
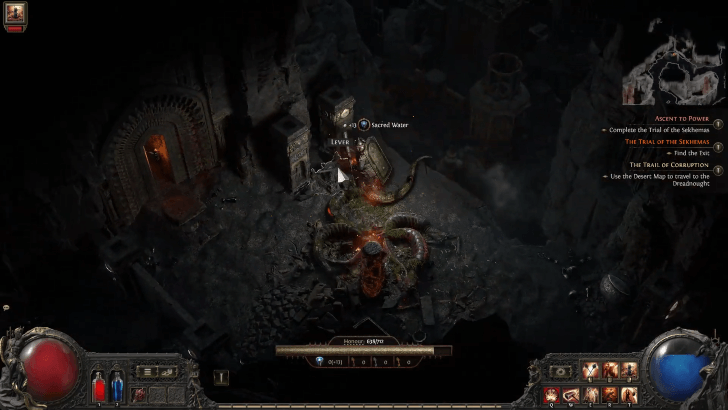
| Gauntlet Trial Objectives |
|---|
| ・Levers open locked doors.
・Find and use all levers in the level. ・Once unlocked, find the door that leads to the exit. |
The most important thing to remember is: Don't rush and take your time. Take note of locked doors and remember their locations for when you unlock them with the levers.
When confronted with traps, observe their timing before attempting them. You can dodge roll through traps to avoid damage.
Hourglass Trial
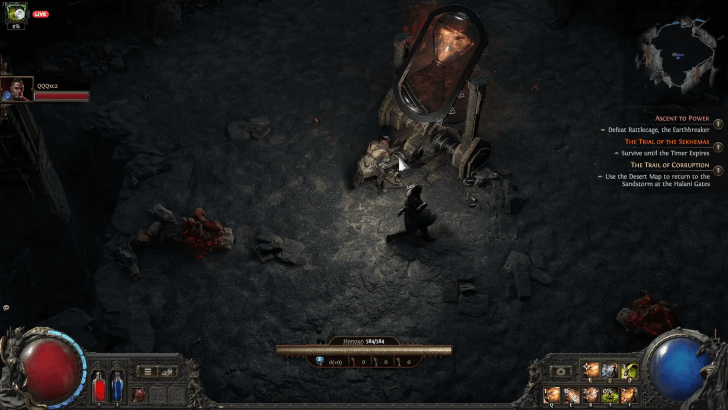
| Hourglass Trial Objectives |
|---|
| ・Activate the giant hourglass.
・Enemies will begin to spawn nonstop. ・Survive until time runs out. |
Play defensively. Backpedal and dodge as to avoid unnecessary damage. Defeat mobs as they spawn so you don't get overwhelmed.
Note that killing rare monsters will reduce the timer, so attempt this only if you can successfully fight them without losing too much Honour.
The Trial of the Sekhemas Tips and Tricks
| Trial of the Sekhemas Tips and Tricks |
|---|
|
|
Use Honour Resistance and Maximum Honour Relics

Let’s start with the most important stat for surviving the Trial: Honour Resistance. Capping it at 75% cuts Honour damage down to just 25%, effectively making your Honour pool four times larger. It’s by far the biggest boost to survivability — much more impactful than stacking Maximum Honour.
You can build Honour Resistance by equipping Relics with Resistance to Honour. Increasing your Maximum Honour, Maximum Life, or Energy Shield can also help, though they’re secondary. These Relics can drop from enemies or chests in lower difficulty Trials, or be picked up from the Trade Channel.
Avoid the Worst Afflictions
First priority: avoid all Afflictions whenever possible. Every affliction you pick up increases the odds that a future one will be run-ending — like Reduced Movement Speed, No Energy Shield, or big boosts to enemy Attack, Cast, or Movement Speed.
During the trial, you can see two rooms ahead, including their Afflictions — which are basically debuffs that affect your character. Plan your route carefully and skip any rooms with dangerous afflictions that could seriously hurt your build. The worst ones are those that block vision into upcoming rooms or stack movement speed penalties and enemy buffs.
Choose Rooms that Open Up to More Rooms
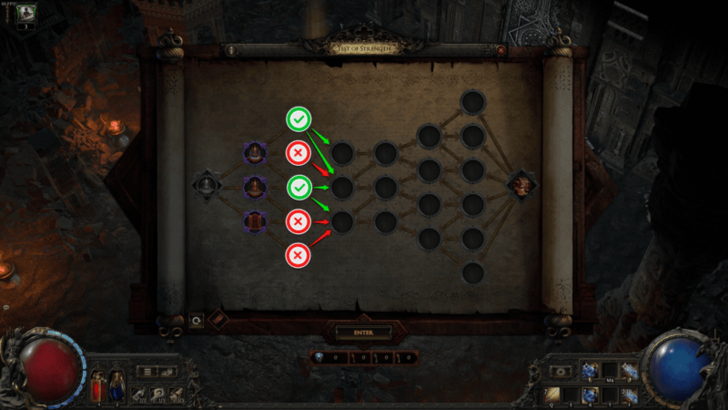
Pick paths that lead to more options down the line. The more rooms you have access to, the easier it is to dodge bad Afflictions. Planning your route ahead helps you avoid getting funneled into a single room with a nasty debuff you can’t skip.
Choose Rooms Suitable for Your Build
Try to go for rooms where you have the advantage in depending on your build:
- If your build is bulky and can tank quite a bit, go for the Hourglass Trial.
- If you have a lot of movement in your build, you can easily clear the Escape Trial.
- The Chalice Trial can be good for builds that deal single-target damage.
The Escape Trial is one of the easiest trials out of all the challenges since you'll mainly be running and avoiding enemies. The Ritual Trial is also an easy one, as you only need to kill the casters, which aren't too difficult.
Boost Your Defenses and Resistances
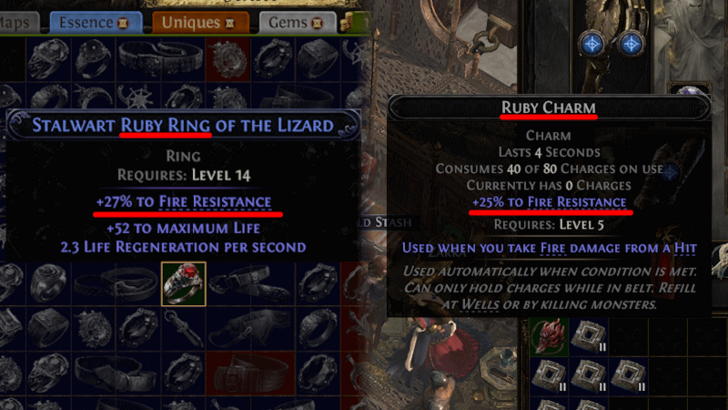
Your Resistances and Defenses directly affects how much damage your recieve and will affect how much honour is deducted from you. Make sure to increases your defenses for better honour sustain.
We recommend boosting Physical resistance for all rooms, Fire resistance for the Rattlecage boss fight, Fire and Ice resistance for the Terracota Sentinels, and Chaos resistance for Ashar.
Unlock More Relic Space by Finishing Earlier Trials
When aiming harder Trials, you can opt to stop at the previous ones to unlock Relic slots first. This will allow you to slot in one or two more powerful relics, make the succeeding runs a lot easier.
List of Relics
Save Sacred Water for the Merchant
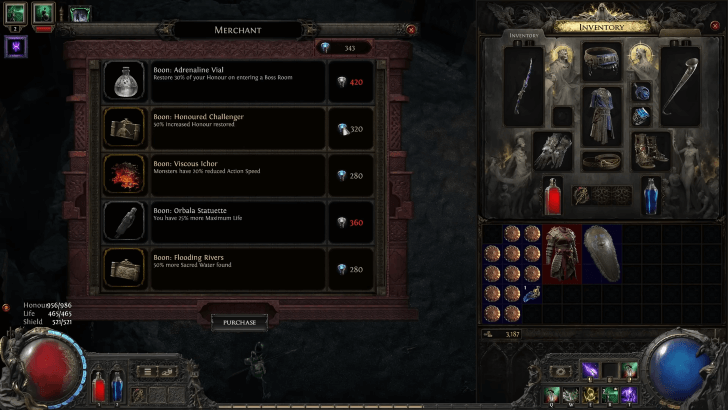
Sacred Water is one of the best rewards to collect. Save it for the guaranteed Merchant after each boss encounter, where you can buy top-tier Boons or stock up on heals to stay in the game longer.
How to Get and Use Sacred Water
Aim for Rooms that Replenish Honour
Honour is crucial to get through the trial so if the room doesn't have a nasty debuff, it wouldn't hurt to replenish your Honour, especially if you're very low.
Grind and Overlevel
A simple but more time-consuming way to get good at the Trial of Sekhemas would be to grind and overlevel yourself so you can survive long enough to finish the Trials.
Leveling Guide: How to Get XP Fast
All Trial of the Sekhemas Bosses
These are all of the bosses you will encounter during the Trial of the Sekhemas, and how to beat them:
| Boss | Overview |
|---|---|
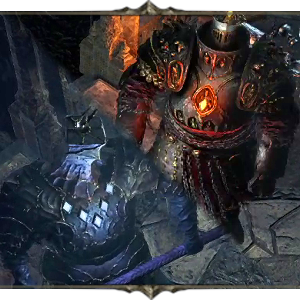
 Rattlecage, the Earthbreaker Rattlecage, the Earthbreaker
|
・Rewards: Floor 1 completion of the Trial of the Sekhemas
・Damage Types: Physical, Fire ・Resistances: Physical, Fire, Lightning ・Weakness: Cold |
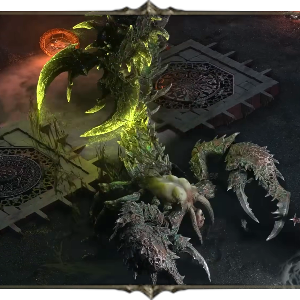
 Terracota Sentinels Terracota Sentinels
|
・Rewards: Floor 2 completion of the Trial of the Sekhemas; 2nd set of Ascendancy Points
・Damage Types: Physical, Cold, Fire ・Resistances: Physical, Fire (Hadi), Cold (Rafiq) ・Weakness: Cold (Hadi), Fire (Rafiq) |
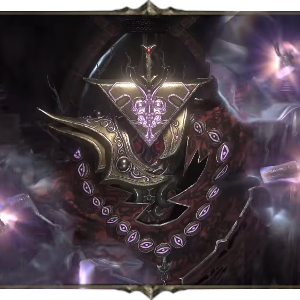
 Ashar, the Sand Mother Ashar, the Sand Mother
|
・Rewards: Floor 3 completion of the Trial of the Sekhemas; 3rd set of Ascendancy Points
・Damage Types: Physical, Chaos ・Resistances: Physical, Fire, Lightning ・Weakness: Cold |
 Zarokh, the Temporal Zarokh, the Temporal
|
・Rewards: Trial of Sekhemas completion; 4th set of Ascendancy Points
・Damage Types: Physical ・Resistances: Cold, Fire, Lightning ・Weakness: None |
All Trial of the Sekhemas Boons and Afflictions
List of All Boons and Afflictions
| Boons | Class | Description |
|---|---|---|
 Adrenaline Vial Adrenaline Vial
|
Minor Boon | Restore X of your Honour on entering a Boss Room |
 Assassin's Blade Assassin's Blade
|
Minor Boon | The next 10 non-Boss monsters you Hit are killed instantly |
 Balbala's Gift Balbala's Gift
|
Minor Boon | Your next purchase from the merchant has no cost |
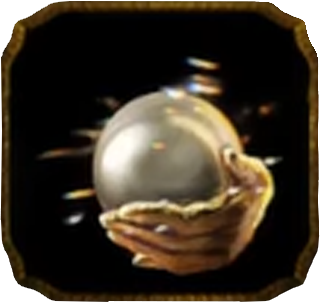
 Black Pearl Black Pearl
|
Minor Boon | Traps deal 50% reduced damage |
 Black Smoke Black Smoke
|
Minor Affliction | You can see one fewer room ahead on the Trial Map |
| Blunt Sword | Minor Affliction | You and your Minions deal 40% less Damage |
| Chains of Binding | Minor Affliction | Monsters inflict Binding Chains on Hit |
| Dark Pit | Minor Affliction | Traps deal 100% increased damage |
| Death Toll | Major Affliction | Take X Physical Damage after completing 8 Rooms |
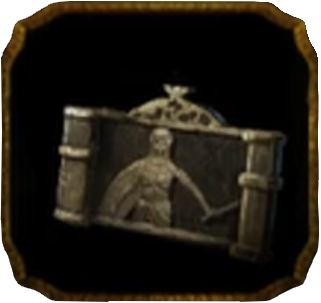
| Deceptive Mirror | Minor Affliction | You are not always taken to the room you select |
 Dishonoured Tattoo Dishonoured Tattoo
|
Minor Affliction | 100% increased damage taken while on Low Life |
 Diverted River Diverted River
|
Minor Boon | Sacred Water found on this floor is doubled |
| Earned Honour | Major Boon | Restore 40 of your Honour on room completion |
 Enchanted Urn Enchanted Urn
|
Minor Boon | 30% increased Effect of your Non-Unique Relics |
 Fiendish Wings Fiendish Wings
|
Minor Affliction | Monsters' Action Speed cannot be slowed below base and have 25% increased Attack, Cast, and Movement Speed |
 Flooding Rivers Flooding Rivers
|
Minor Boon | 50% more Sacred Water found |
| Forgotten Traditions | Minor Affliction | 50% reduced Effect of your Non-Unique Relics |
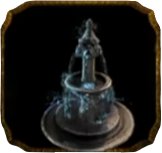 Fountain of Youth Fountain of Youth
|
Minor Boon | Restore X of your Honour when you venerate a Maraketh Shrine |
 Fright Mask Fright Mask
|
Minor Boon | Monsters deal 20% less damage |
| Garukhan's Favour | Major Boon | Ignore the first Damage taken from an enemy Hit in each room |
| Gate Toll | Minor Affliction | Lose 30 Sacred Water on room completion |
| Glowing Orb | Minor Boon | The next time you go below 30% Maximum Life, restore all Life, Energy Shield, and 50% of Honour |
| Golden Smoke | Minor Affliction | Rewards are unknown on the Trial Map |
 Haemorrhage Haemorrhage
|
Minor Affliction | You cannot restore Honour (removed after killing the next Boss) |
| Hare Foot | Minor Boon | 40% increased Movement Speed |
| Honed Claws | Minor Affliction | Monsters deal 30% more damage |
 Honoured Challenger Honoured Challenger
|
Minor Boon | 50% increased Honour restored |
| Hungry Fangs | Minor Affliction | Monsters remove 5% of your Life, Mana, and Energy Shield on Hit |
| Iron Manacles | Minor Affliction | You have no Evasion |
| Leaking Waterskin | Minor Affliction | Lose 20 Sacred Water when you take damage from an Enemy Hit |
| Low Rivers | Minor Affliction | 50% less Sacred Water found |
| Lustrous Lacquer | Minor Boon | You have 50% more Defences |
 Lustrous Pearl Lustrous Pearl
|
Minor Boon | Traps are slower |
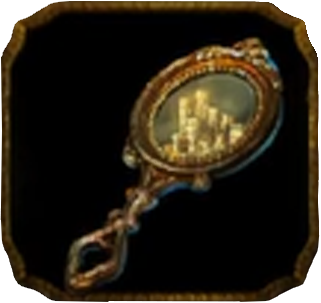 Mirror of Fortune Mirror of Fortune
|
Minor Boon | The next Key you pick up is duplicated |
 Moment's Peace Moment's Peace
|
Minor Boon | You cannot be damaged until you complete the next room |
 Orbala Statuette Orbala Statuette
|
Minor Boon | You have 25% more maximum Honour |
 Ornate Dagger Ornate Dagger
|
Minor Boon | You and your minions deal 50% more damage |
| Purple Smoke | Minor Affliction | Afflictions are unknown on the Trial Map |
| Rapid Quicksand | Minor Affliction | Traps are faster |
| Red Smoke | Minor Affliction | Room types are unknown on the Trial Map |
 Sanguine Vial Sanguine Vial
|
Minor Boon | Monsters have 30% less Maximum Life |
 Scrying Crystal Scrying Crystal
|
Minor Boon | You can see an additional room ahead on the Trial Map |
 Season of Famine Season of Famine
|
Minor Affliction | The Merchant offers 50% fewer choices |
 Sharpened Arrowhead Sharpened Arrowhead
|
Minor Affliction | You have no Armour |
| Shattered Shield | Minor Affliction | You have no Energy Shield |
 Silver Chalice Silver Chalice
|
Minor Boon | The next Minor Boon you gain is converted into a random Major Boon |
 Silver Tongue Silver Tongue
|
Minor Boon | 50% reduced Merchant prices |
| Spiked Exit | Minor Affliction | Take X of Physical Damage on room completion |
| Spiked Shell | Minor Affliction | Monsters have 50% increased maximum life |
| Suspected Sympathiser | Minor Affliction | 50% reduced Honour restored |
| Tattered Blindfold | Minor Affliction | 90% reduced Light Radius and Minimap is hidden |
| Trade Tariff | Minor Affliction | 50% increased Merchant prices |
| Tradition's Demand | Minor Affliction | The Merchant only offers one choice |
 Untouchable Untouchable
|
Minor Affliction | You are cursed with Enfeeble |
 Upward Path Upward Path
|
Minor Boon | Your Sacred Water found is increased by 10% on room completion |
 Viscous Ichor Viscous Ichor
|
Minor Boon | Monsters have 15% reduced Action Speed |
| Weakened Flesh | Minor Affliction | 25% less Maximum Honour |
| Winter Drought | Minor Affliction | Lose all Sacred Water on floor completion |
| Worn Sandals | Minor Affliction | 25% reduced Movement Speed |
These are the list of Boons and Afflictions in the Trial of Sekhemas. Boons can be bought from the merchant using Sacred Water, while Afflictions are obtained as an added challenge by entering a certain room.
Boons can also be obtained by pledging to Kochai, an optional reward if chosen from the Trial Map. Pledges may afflict you with a random debuff in exchange for the boon of your selection.
Trial of the Sekhemas Walkthrough
| Jump to a Section! | |
|---|---|
| Ascent to Power | Endgame |
Ascent to Power Guide
| Ascent to Power Guide | |
|---|---|
| 1 |
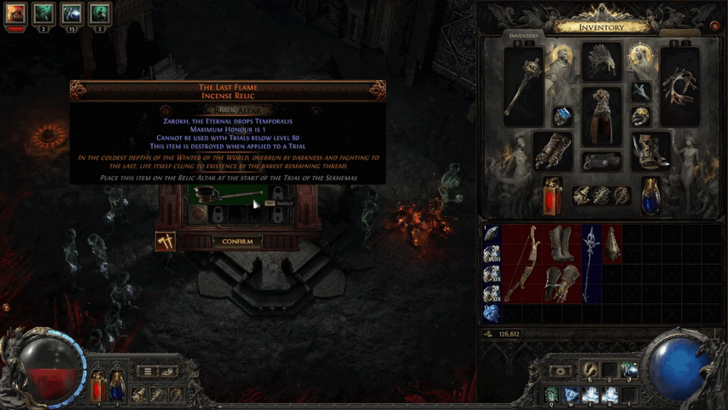
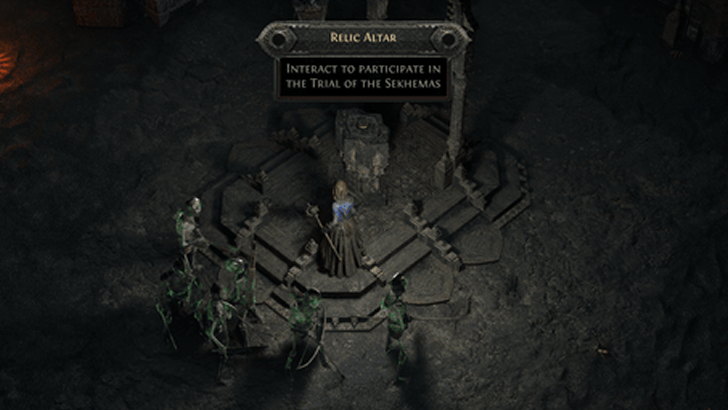 Start the Trial Begin by placing Balbala's Barya on the Relic Altar, activating the Trial of the Sekhemas. This marks your entry into a series of challenges. |
| 2 |
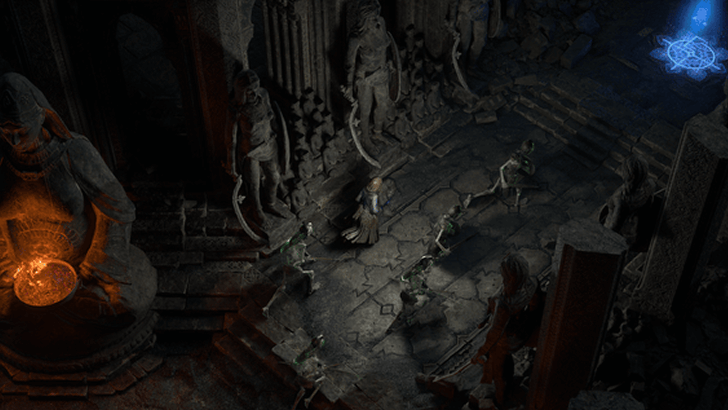 Overcome Each Challenge There are five different challenge types you can face throughout the Trial: ・Escape Trial ・Ritual Trial ・Chalice Trial ・Gauntlet Trial ・Hourglass Trial Be mindful of your Honour—each hit reduces it, and running out means you’ll need a new coin to restart. Stay agile to conquer the obstacles. All Trial of Sekhemas Challenges ▲ |
| 3 |
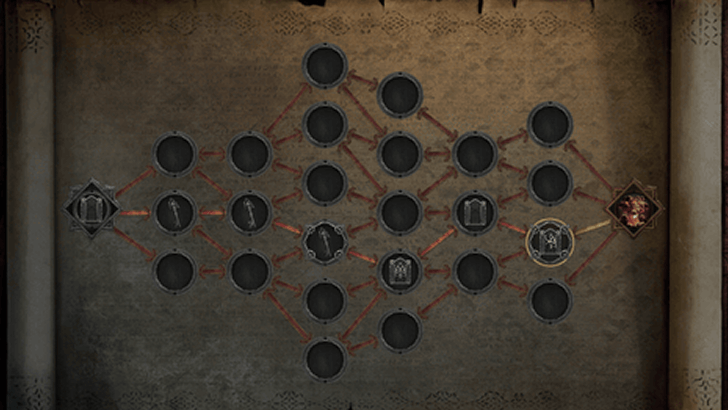
Navigate the Trial After completing each room, interact with the Trial Map and you’ll be shown a map of the remaining floor. You can choose which Trial to proceed to next. Some rooms may require you to adapt to new conditions, while others could impose persistent debuffs that make the entire trial more difficult. Plan your route carefully to balance risk and reward. |
| 4 |
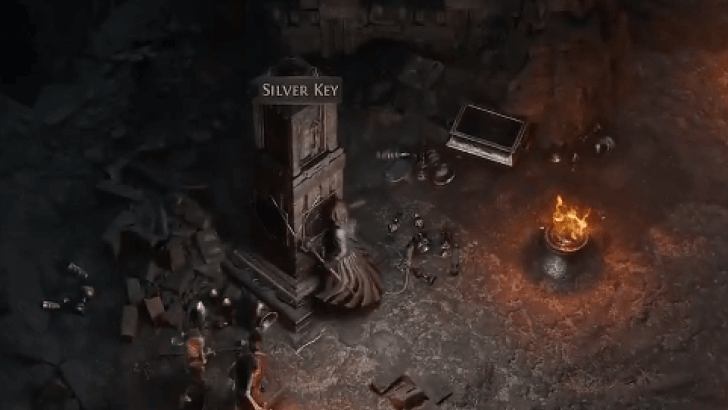 Seek Out Rewards and Boons Successfully clearing a room grants you rewards like keys to unlock treasure chests and other valuable items to aid your journey. As you progress, you’ll also earn powerful boons, such as Sekhema’s Cloak, which revives you upon death, giving you a second chance to continue the trial. You may also discover sacred water, an invaluable resource to the Djinn. Trading it with Babala can grant you various benefits, including recovering Honour, receiving extra boons, and cleansing harmful afflictions. |
| 5 |
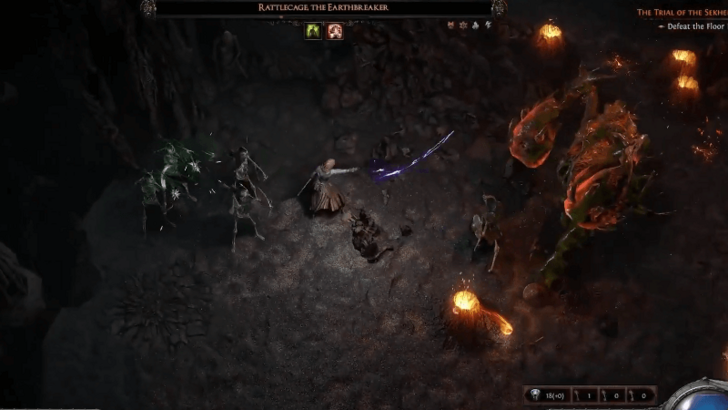 Defeat Rattlecage At the end, you will face Rattlecage, the Earthbreaker. Learn its attacks so you can dodge them easily. Follow our full boss guide below for more tips! Rattlecage, the Earthbreaker Boss Guide |
| 6 |
 Claim Your Ascendancy After defeating Rattlecage, you’ll reach the final stage—Ascendancy. Similar to the Ascendancy system of the previous game, this stage allows you to choose an Ascendancy Class, unlocking powerful new abilities and enhancing your character in unique ways. Each class offers different benefits, so choose wisely to complement your playstyle and strategies. |
Ascent to Power Quest Walkthrough
Endgame Guide
| The Trial of Sekhemas Endgame | |
|---|---|
| 1 |
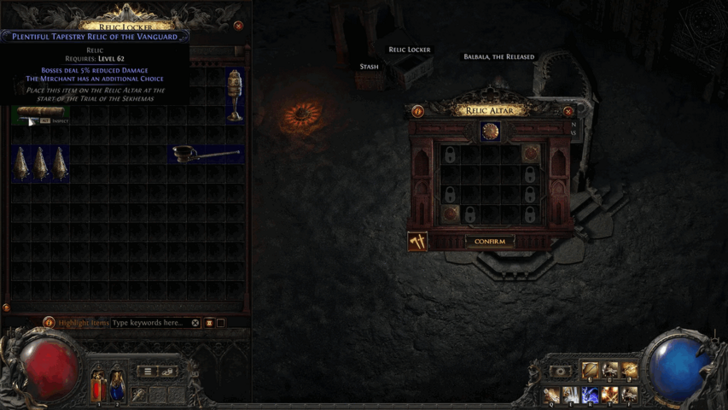 Add Relics to Modify Trials Adding Relics in the Relic Altar alongside the coins to access the trial modifies the rooms, making the rooms easier and increases rewards. Furthermore, it is highly recommended to increase your Honour resistance and your max life and energy shield, which results in increases to Honour points. Doing so will make you receive less Honour damage, making the trials much easier. List of Relics |
| 2 |
Access Next Floor Past the Locked Chests Players can access the entrance to the next floor past the locked chests at the end of a floor. Doing so will take you to the next floor with a new set of Trials and a new boss at the end. |
| 3 |
Defeat the Bosses of Each Floor At the end of every floor, you will face a boss. Here are all the bosses you will find in the Trial of the Sekhemas: ・Floor 1 - Rattlecage, the Earthbreaker ・Floor 2 - Terracota Sentinels ・Floor 3 - Ashar, the Sand Mother ・Floor 4 - Zarokh, the Temporal ▲ All Trial of Sekhemas Bosses ▲ |
| 4 |
Defeat the Pinnacle Boss The trial consists of four floors in total, where the Pinnacle Boss is encountered at the end of the last floor. Defeat the Pinnacle Boss to complete the trial and get a unique relic to be used in the next run. These unique relics adds difficulty to your next run, but rewards you with unique and powerful items if you finish it. |
Trial of the Sekhemas Rewards
Ascendancy Points
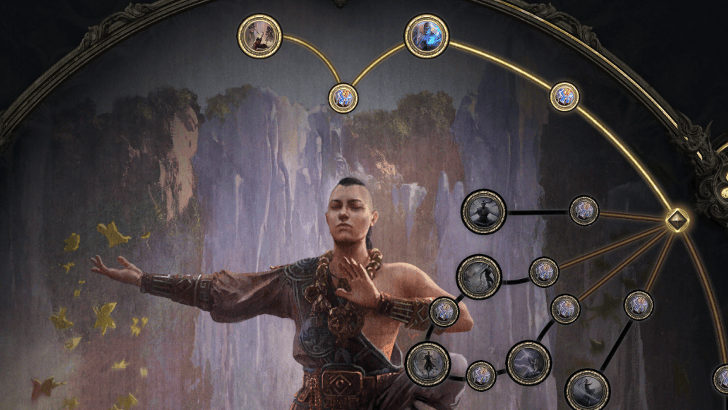
The main benefit of completing the Trial of the Sekhemas is to obtain Ascendancy Skill Points for character Ascension. These Ascendancy points are used to further improve your character, giving them powerful specialization skills.
List of Classes and Ascendancies
Magic and Rare Equipment a
You can obtain various Magic and Rare equipment from the trials. If you have keys, you can open chests at the end that contain various powerful weapons and armor.
Unique Relics
Unique relics are dropped by the final boss of the trial, which can modify your next run in the trial that increases the risk as well as the rewards.
Magic, Rare and Grand Spectrum Jewels

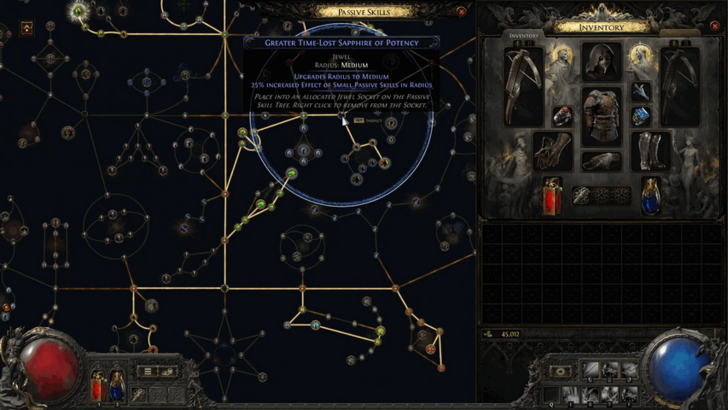
The Trial of the Sekhemas is also a reliable way to farm Magic and Rare Jewels. You can earn nearly a dozen jewels per run once you clear all four floors, with Jewels found in Royal Caches.
Look out for Time-Lost Jewels, which are exclusive to this trial and dropped from Time-lost Caches — these are rare but worth seeking out in every treasure chest room. Grand Spectrum Jewels are another rare reward, obtainable only from opening Spectrum Caches in the Trial.
Path of Exile 2 (PoE 2) Related Guides

All Ascension Trials
| All Ascension Trials | |
|---|---|
| Trial of the Sekhemas | The Trial of Chaos |
Comment
Author

Trial of The Sekhemas Guide
Rankings
- We could not find the message board you were looking for.

Gaming News


![Star Savior Review [First Impressions] | Engaging, Entertaining, and Expensive](https://img.game8.co/4447603/8f500e9bf666bdb8adb1af478e9dfdbd.png/thumb)
![Death Stranding 2: On The Beach [PC] Review | A Port That Delivers](https://img.game8.co/4447392/15310a0c9aa1b6843bb713b2ea216930.jpeg/thumb)
Popular Games

Genshin Impact Walkthrough & Guides Wiki
Umamusume: Pretty Derby Walkthrough & Guides Wiki
Pokemon Pokopia Walkthrough & Guides Wiki
Honkai: Star Rail Walkthrough & Guides Wiki
Monster Hunter Stories 3: Twisted Reflection Walkthrough & Guides Wiki
Arknights: Endfield Walkthrough & Guides Wiki
Wuthering Waves Walkthrough & Guides Wiki
Zenless Zone Zero Walkthrough & Guides Wiki
Pokemon TCG Pocket (PTCGP) Strategies & Guides Wiki
Monster Hunter Wilds Walkthrough & Guides Wiki


Recommended Games
Fire Emblem Heroes (FEH) Walkthrough & Guides Wiki
Diablo 4: Vessel of Hatred Walkthrough & Guides Wiki
Cyberpunk 2077: Ultimate Edition Walkthrough & Guides Wiki
Yu-Gi-Oh! Master Duel Walkthrough & Guides Wiki
Super Smash Bros. Ultimate Walkthrough & Guides Wiki
Pokemon Brilliant Diamond and Shining Pearl (BDSP) Walkthrough & Guides Wiki
Elden Ring Shadow of the Erdtree Walkthrough & Guides Wiki
Monster Hunter World Walkthrough & Guides Wiki
The Legend of Zelda: Tears of the Kingdom Walkthrough & Guides Wiki
Persona 3 Reload Walkthrough & Guides Wiki


All rights reserved
© 2010 - 2024 Grinding Gear Games
The copyrights of videos of games used in our content and other intellectual property rights belong to the provider of the game.
The contents we provide on this site were created personally by members of the Game8 editorial department.
We refuse the right to reuse or repost content taken without our permission such as data or images to other sites.