Trial of Chaos Guide
Latest: 0.5.0 Release Date
☆ Fate of the Vaal ▶︎ The Last of the Druids
┗ Bonded Mods | 0.4 Mystery Box
★ Druid: Class Overview | Builds
☆ NEW: Disciple of Varashta Ascendancy!
★ Best Class | Best Builds | Leveling Builds
The Trial of Chaos is one of the Ascension Trials in Path of Exile 2 (PoE 2). Discover how to access the Temple of Chaos and follow a step-by-step guide to navigate the challenges it presents, a list of tribulations, bosses, and the rewards you can get by completing the Trial of Chaos!
List of Contents
| Patch 0.3.0 Changes |
|---|
|
・More Vaal Orbs are now found during the Trials of Chaos, and less often from other sources.
・You are now able to respawn at checkpoint from the Escape Menu in the Trial of the Sekhemas and Trials of Chaos, which will take you back to the entrance of the respective Trial. ・Fixed a bug where the Trials of Chaos could sometimes be inaccessible in Couch Co-Op. |
All Trial of Chaos Tribulations
| Jump to a Section! | |
|---|---|
| List of All Tribulations | Best Tribulations |
List of All Tribulations
| Tribulation | Description |
|---|---|
 Blood Globules Blood Globules
|
Rank I: Globules of blood manifest nearby, tracking you. When above you they will fall, dealing physical damage. Rank II: Globules of blood manifest nearby, tracking you. When above you they will fall, dealing Physical damage and creating damaging blood ground. |
 Burning Turrets Burning Turrets
|
Rank I: Challenge area contains turrets that will periodically fire Fire Projectiles ahead |
 Chaotic Monsters Chaotic Monsters
|
Rank I: Monsters gain 20% of damage added as extra Chaos damage Rank II: Monsters gain 50% of damage added as extra Chaos damage |
 Damaged Defences Damaged Defences
|
Rank I: 40% less defences. Rank II: 75% less Defences |
 Deadly Monsters Deadly Monsters
|
Rank I: Monsters have 300% increased Critical Hit Chance Rank II: Monsters always deal critical hits |
 Drought Drought
|
Monsters grant no Flask or Charm Charges on death. |
 Enraged Bosses Enraged Bosses
|
Bosses deal more damage and take less damage |
 Entangling Monsters Entangling Monsters
|
Monsters inflict Grasping Vines on Hit |
 Escalating Damage Taken Escalating Damage Taken
|
In each encounter room, damage taken will slowly increase by 1% per second, up to 50% |
 Heart Tethers Heart Tethers
|
Rank I: Bloody hearts appear that apply tethers, slowing you. Breaking the tether will stun you. Rank II: Bloody hearts appear that apply tethers, Slowing you. Breaking the tether will Stun you and cause you to become vulnerable to damage for a duration |
 Impending Doom Impending Doom
|
Rank I: Rings of Doom appear on the ground which grow over time, exploding for physical damage once they reach a maximum area. Rank II: Rings and circles of Doom appear on the ground which grow over time, exploding for Physical damage once they reach a maximum area |
 Lessened Reach Lessened Reach
|
50% less Area of Effect and Projectile Speed |
 Lethal Rare Monsters Lethal Rare Monsters
|
Rare Monsters have 2 additional Modifiers. 30% increased Rare Monsters |
 Monster Speed Monster Speed
|
Monsters gain 20% increased Skill Speed |
 Petrification Statues Petrification Statues
|
Rank I: Challenge area contains several statues that petrify you if you stand within their gaze for a duration. |
 Pyramid Beams Pyramid Beams
|
Rank I: Pyramid objects appear, projecting four rotating lasers that inflict Corrupted Blood on Hit |
 Reduced Recovery Reduced Recovery
|
Rank I: 40% reduced Life, Mana, and Energy Shield Recovery Rate Rank II: 75% reduced Life, Mana, and Energy Shield Recovery Rate |
 Reduced Resistances Reduced Resistances
|
Rank I: -15% to Elemental Resistances and -10% to Maximum Elemental Resistances Rank II: -30% to Elemental Resistances and -20% to Maximum Elemental Resistances |
 Resistant Monsters Resistant Monsters
|
Monsters have +40% to all resistances. |
 Shocking Turrets Shocking Turrets
|
Rank I: Challenge area contains turrets that will periodically fire Lightning Projectiles ahead |
 Stalking Shade Stalking Shade
|
Rank I: An invulnerable shade stalks you, inflicting Ruin with its Melee hits. Fail the Trials on reaching 7 Ruin |
 Stormcaller Runes Stormcaller Runes
|
Rank I: Runes will appear that will call deadly lightning storms if you remain in them. Rank II: Large runes will appear that will call deadly Lightning storms if you remain in them Rank III: Many large runes will appear that will call deadly Lightning storms if you remain in them |
 Time Paradox Time Paradox
|
Buffs expire three times faster and Debuffs expire three times slower. |
 Toxic Monsters Toxic Monsters
|
Monster hits always inflict bleeding and poison. |
 Unstoppable Monsters Unstoppable Monsters
|
Monsters cannot be Slowed or Stunned |
 Vaal Omnitect Vaal Omnitect
|
Rank I: An ancient Vaal machination will deploy attacks against nearby intruders. |
 Volatile Fiends Volatile Fiends
|
Monsters release deadly volatiles on death. Rare monsters leave larger ones. |
Best Tribulations to Pick
| Best to Pick | Avoid Picking | ||||
|---|---|---|---|---|---|
|
Reduced Resistances -15% to Elemental Resistances and -10% to Maximum Elemental Resistances Reduced Resistances Reduced Resistances -15% to Elemental Resistances and -10% to Maximum Elemental Resistances Time Paradox Buffs expire three times faster and Debuffs expire three times slower. Time Paradox Time Paradox Buffs expire three times faster and Debuffs expire three times slower. Vaal Omnitect An ancient Vaal machination will deploy attacks against nearby intruders. Vaal Omnitect Vaal Omnitect An ancient Vaal machination will deploy attacks against nearby intruders. Burning Turrets Challenge area contains turrets that will periodically fire Fire Projectiles ahead Burning Turrets Burning Turrets Challenge area contains turrets that will periodically fire Fire Projectiles ahead Shocking Turrets Challenge area contains turrets that will periodically fire Lightning Projectiles ahead Shocking Turrets Shocking Turrets Challenge area contains turrets that will periodically fire Lightning Projectiles ahead Chaotic Monsters Monsters gain 20% of damage added as extra Chaos damage Chaotic Monsters Chaotic Monsters Monsters gain 20% of damage added as extra Chaos damage Lethal Rare Monsters Rare Monsters have 2 additional Modifiers. 30% increased Rare Monsters Lethal Rare Monsters Lethal Rare Monsters Rare Monsters have 2 additional Modifiers. 30% increased Rare Monsters |
Toxic Monsters Monster hits always inflict bleeding and poison. Toxic Monsters Toxic Monsters Monster hits always inflict bleeding and poison. Petrification Statues Challenge area contains several statues that petrify you if you stand within their gaze for a duration. Petrification Statues Petrification Statues Challenge area contains several statues that petrify you if you stand within their gaze for a duration. Heart Tethers Bloody hearts appear that apply tethers, slowing you. Breaking the tether will stun you. Heart Tethers Heart Tethers Bloody hearts appear that apply tethers, slowing you. Breaking the tether will stun you. Enraged Bosses Bosses deal more damage and take less damage Enraged Bosses Enraged Bosses Bosses deal more damage and take less damage Entangling Monsters Monsters inflict Grasping Vines on Hit Entangling Monsters Entangling Monsters Monsters inflict Grasping Vines on Hit Monster Speed Monsters gain 20% increased Skill Speed Monster Speed Monster Speed Monsters gain 20% increased Skill Speed Reduced Recovery 40% reduced Life, Mana, and Energy Shield Recovery Rate Reduced Recovery Reduced Recovery 40% reduced Life, Mana, and Energy Shield Recovery Rate Stalking Shade An invulnerable shade stalks you, inflicting Ruin with its Melee hits. Fail the Trials on reaching 7 Ruin Stalking Shade Stalking Shade An invulnerable shade stalks you, inflicting Ruin with its Melee hits. Fail the Trials on reaching 7 Ruin Unstoppable Monsters Monsters cannot be Slowed or Stunned Unstoppable Monsters Unstoppable Monsters Monsters cannot be Slowed or Stunned Pyramid Beams Pyramid objects appear, projecting four rotating lasers that inflict Corrupted Blood on Hit Pyramid Beams Pyramid Beams Pyramid objects appear, projecting four rotating lasers that inflict Corrupted Blood on Hit |
||||
| Consider Picking | |||||
|
Lessened Reach 50% less Area of Effect and Projectile Speed Lessened Reach Lessened Reach 50% less Area of Effect and Projectile Speed |
This is a bad pick for classes that rely on Area of Effect and Projectile Speeds such as the Ranger and Mercenary. | ||||
|
Deadly Monsters Monsters have 300% increased Critical Hit Chance Deadly Monsters Deadly Monsters Monsters have 300% increased Critical Hit Chance |
Deadly Monsters I is somewhat tolerable even though they have 300% critical hit chance, but consider avoiding it's next rank, Deadly Monsters II. The second rank will always deal critical hits, which can hit hard. | ||||
|
Drought Monsters grant no Flask or Charm Charges on death. Drought Drought Monsters grant no Flask or Charm Charges on death. |
Having great life and mana regeneration modifiers in your flasks can help you survive the trials even after picking this tribulation. In addition, there are wells you can use to replenish your flasks before entering boss rooms. | ||||
|
Damaged Defences 40% less defences. Damaged Defences Damaged Defences 40% less defences. |
This tribulation is better suited for ranged characters where they can deal damage from afar, avoiding hits from enemies as much as they can. 40% less defence means nothing when you're constantly avoiding attacks. | ||||
|
Volatile Fiends Monsters release deadly volatiles on death. Rare monsters leave larger ones. Volatile Fiends Volatile Fiends Monsters release deadly volatiles on death. Rare monsters leave larger ones. |
Avoid this at all cost in the beginning since you'll be facing hordes of enemies, which will guarantee a volatile per enemy killed. These volatiles track you and are difficult to dodge, as well as deals damage, which could mean death if a number of them simultaneously explode. You can consider picking this one when facing the final boss on the 10th floor, since you'll just have one volatile spawning after defeating the boss. |
||||
|
Stormcaller Runes Runes will appear that will call deadly lightning storms if you remain in them. Stormcaller Runes Stormcaller Runes Runes will appear that will call deadly lightning storms if you remain in them. |
Stormcaller Runes are an okay pick during their first and second rank, but avoid pick it's third rank since it becomes more dangerous. | ||||
|
Impending Doom Rings of Doom appear on the ground which grow over time, exploding for physical damage once they reach a maximum area. Impending Doom Impending Doom Rings of Doom appear on the ground which grow over time, exploding for physical damage once they reach a maximum area. |
Impending Doom is another decent pick but only for its first rank, as there’s a safe spot in the middle of the explosion where you won’t take damage. Its second rank is somewhat unpredictable, as the safe spot may shift locations or may not exist at all. | ||||
|
Blood Globules Globules of blood manifest nearby, tracking you. When above you they will fall, dealing physical damage. Blood Globules Blood Globules Globules of blood manifest nearby, tracking you. When above you they will fall, dealing physical damage. |
Blood Globules I is okay to pick since you can easily dodge the falling blood. Avoid picking Blood Globules II though, since the dropped blood creates a pool of blood on the ground that acts like Bleed when walked on. | ||||
|
Resistant Monsters Monsters have +40% to all resistances. Resistant Monsters Resistant Monsters Monsters have +40% to all resistances. |
This can be troubling for classes focusing on pure magic due to the +40% to all resistances. However, if you're on pure physical, pick this tribulation. | ||||
The table above lists the best tribuilations to pick or avoid, and tribulations worth considering depending on the situation.
All Trial of Chaos Challenges
These are all of the challenges you'll be facing in the Trial of Chaos. The challenges you face per room are fixed:
Defeat All the Monsters

This challenge requires you to defeat all the enemies in the room. Take your time defeating a group before engaging another to avoid aggroing more enemies.
As tribulations stack, it might be more difficult to clear groups of mobs, so it's a good idea not to rush the challenge.
Survive Until the Timer Expires
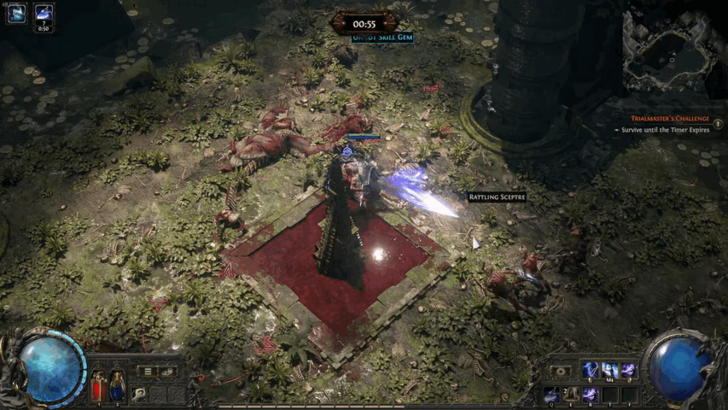
Interact with the Corruption Dias to begin the timer, and waves of enemies will start spawning around you. Defeat each wave as quickly as possible to give yourself time to breathe before the next wave arrives.
Failing to defeat a wave before a new one spawns can restrict your movement, since the area is already small, and more enemies means less ground to traverse.
Escort the Statue
The statue will start moving once you get close to it. Stay near the statue until it reaches its destination. Don't hesitate to move away from the statue to avoid certain attacks that could result in your death, causing you to fail the trial.
You can also clear the path of enemies before escorting the statue for a smoother operation. However, enemies will still spawn from the descending pillars as the statue passes them.
Collect all the Soul Cores

This challenge requires you to collect Vaal Soul Cores in the area. You'll need to interact with switches to open new paths leading to the Soul Cores.
Once you've collected a Soul Core, bring it immediately to the Stone Altar, since having one afflicts you with a damage over time (DOT) that increases the damage you take the longer you hold it.
Sacrifice Monsters to the Altar by slaying them in the Blood Circles
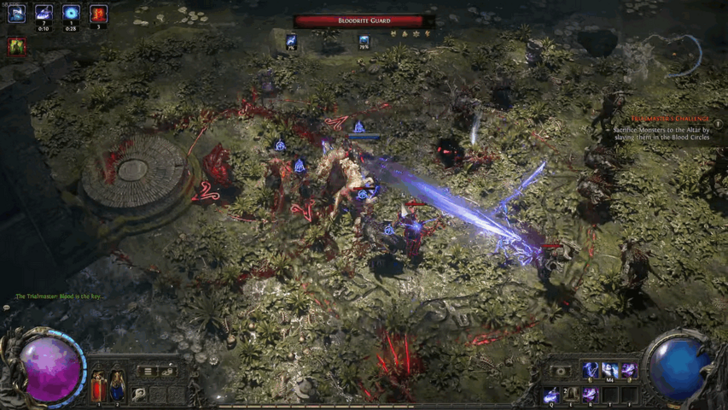
Faint blood circles are placed at fixed locations in the area, and you'll need to lure and defeat mobs inside these circles to fill the altar with their blood.
After baiting enemies into the blood circles, you can move around the circles to maintain your mobility and avoid taking damage. Dealing AoE damage helps clear mobs faster and prevents groups from leaving the blood circle before you have a chance to kill them.
Defeat the Boss
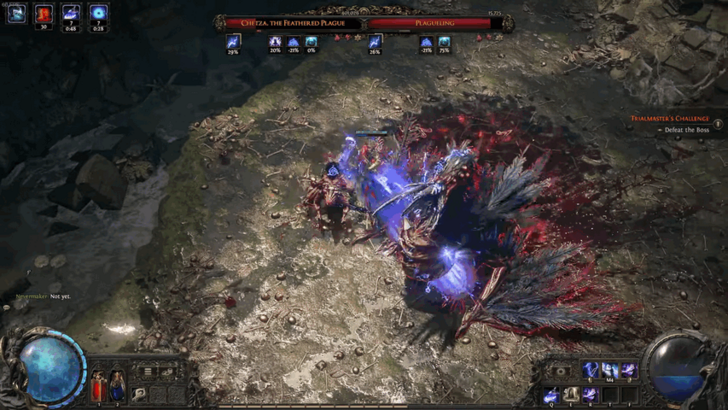
The 4th, 7th, and 10th rooms are always boss rooms, where you'll simply need to defeat the current boss to proceed to the next room. The order of the bosses you face is randomized, so make sure you're prepared for anything.
Wells are present before entering boss rooms so you can replenish your life and mana flasks before fighting the boss.
Trial of Chaos Tips and Tricks
Follow a Build Guide for a Guaranteed Clear
 Mercenary Mercenary |
 Monk Monk |
 Witch Witch |
 Sorceress Sorceress |
 Warrior Warrior |
 Ranger Ranger |
Following a build guide will help min-max your character to deal high damage and clear challenges in the Trial of Chaos faster. Build guides can ensure a smoother and easier run in a trial or elsewhere, since you'll have a reference for which passives to pick, which support gems to apply on your skill gems, and more!
Avoid Choosing Bad Tribulations
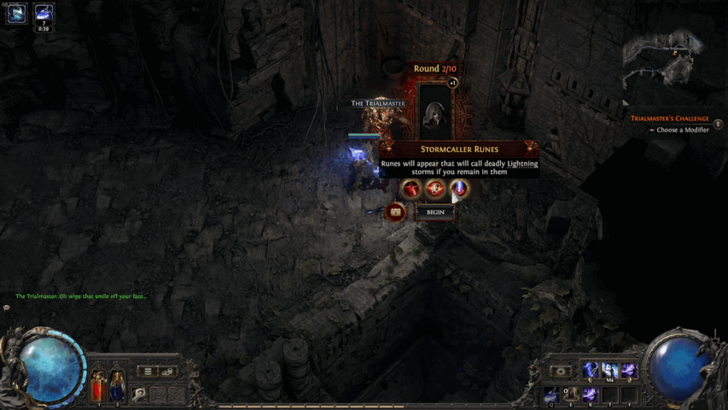
Tribulations that hinder your movement or apply Damage Over Time (DOT), such as Poison or Bleed, can make clearing rooms harder compared to picking other tribulations.
make sure to avoid choosing tribulations that apply crowd control debuffs, since you'll need to keep moving to avoid getting hit by enemies during the trial.
Don't Forget to Replenish at Wells
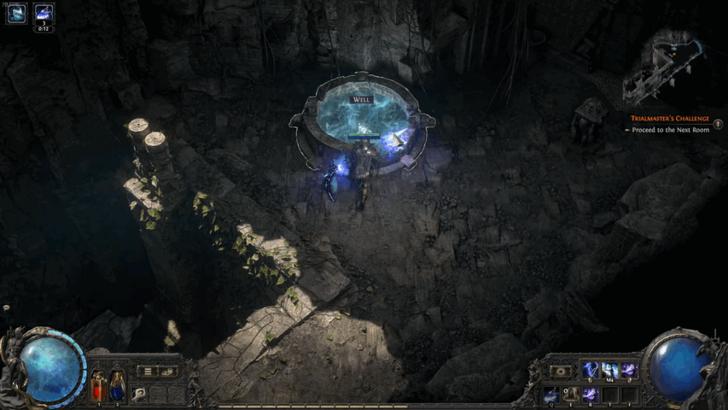
Wells that replenish flasks are available before entering boss rooms. You'll find wells after finishing floors 3, 6, and 9. With this information, you can consider picking the Drought tribulation, since you'll be able to replenish your flasks anyway. However, you'll have to survive the floors in between without relying too much on your Life and Mana flasks.
Farm Ultimatums with 10 Rooms
Farm the Trial of Chaos using Inscribed Ultimatums that have 10 rooms to clear. This is essential if you're planning on getting your last two ascendancy skill points, since you'll need to collect Fates, which can drop on the 10th room after defeating the last boss, in order to reach the Pinnacle Boss of the Trial of Chaos, the Trialmaster.
All Trial of Chaos Bosses
Bahlak, The Sky Seer
| Boss | Overview |
|---|---|
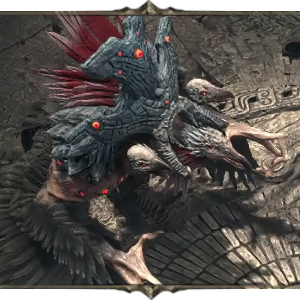 Bahlak, the Sky Seer Bahlak, the Sky Seer
|
Rewards: Trial of Chaos progression
Damage Types: Physical, Lightning Resistances: Lightning Weakness: Fire |
Perhaps the harder moves to dodge and certainly ones that can hit pretty hard are Bahlak's two unblockable attacks. Learn to dodge these moves with our simple guide below:
Bahlak, the Sky Seer Boss Guide
Uxmal, The Beastlord
| Boss | Overview |
|---|---|
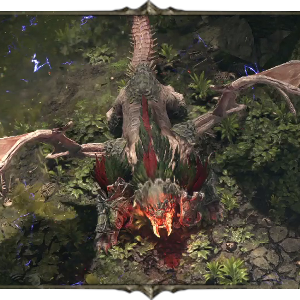 Uxmal, the Beastlord Uxmal, the Beastlord
|
Rewards: Trial of Chaos progression
Damage Types: Physical, Fire, Cold, Lightning, Chaos Resistances: Fire, Cold, Lightning Weakness: None |
Uxmal has three special moves, each tied to one of the three levels of the arena. These moves leave distinct ground effects, so adapt your strategy and gameplay based on the section of the arena you’re in.
Uxmal, the Beastlord Boss Guide
Chetza, The Feathered Plague
| Boss | Overview |
|---|---|
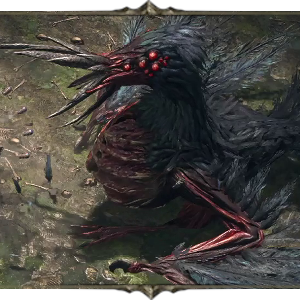 Chetza, the Feathered Plague Chetza, the Feathered Plague
|
Rewards: Trial of Chaos progression
Damage Types: Physical Resistances: Cold Weakness: Fire |
Chetza's deadliest attack occurs when it screeches and summons bird corpses to rain down on your location for approximately 5 seconds. Without sufficient movement speed, or if you've been slowed by the Maim debuff caused by its spiral spike attack, this move can deal massive and potentially lethal damage.
Chetza, the Feathered Plague Boss Guide
Trial of Chaos Walkthrough
Step-by-Step Guide
| # | The Trial of Chaos |
|---|---|
| 1 |
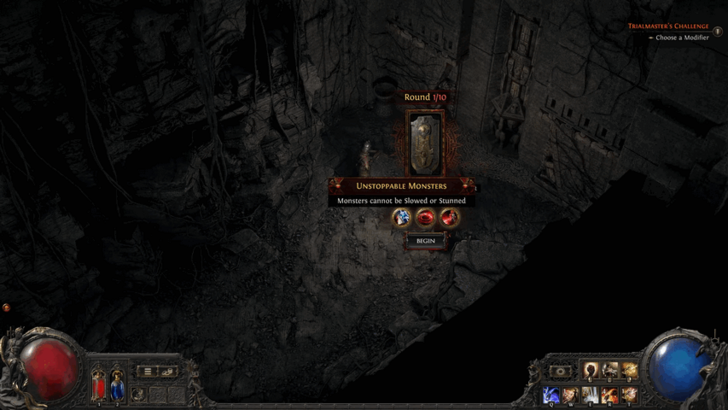 Choose a Tribulation Before beginning each chamber, you'll receive a reward and you'll have to pick one modifier that buffs the monsters or adds hazards until the end of the trial. All Trial of Chaos Tribulations ▲ |
| 2 |
 Complete Challenges Each room in the Trial of Chaos have different challenges you'll have to overcome to proceed to the next room. After completing a room, make a choice to receive all rewards so far, or continue to the next room to get more rewards, but increases the difficulty by choosing another tribulation. All Trial of Chaos Challenges ▲ |
| 3 |
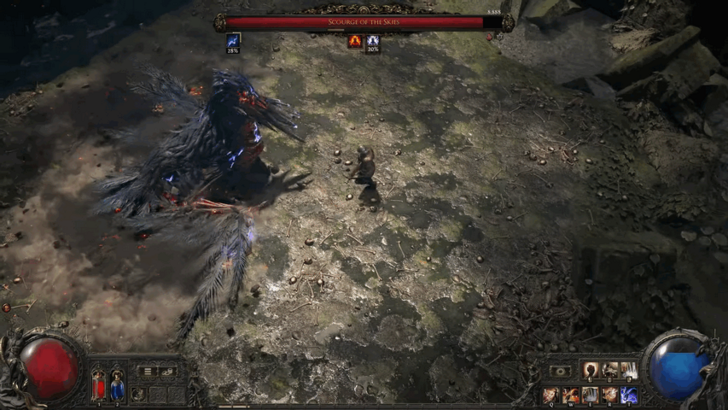 Defeat the Boss After the Challenges You'll encounter your first boss in the Trial of Chaos after completing three rooms. The order of the boss is random, but it cycles between Bahlak, Uxmal, or Chetza. Once you have an Inscribed Ultimatum that allows you to reach the 10th room in the trial, you'll face bosses on the 4th, 7th, and 10th rooms. All Trial of Chaos Bosses ▲ |
| 4 |
 Claim Rewards and Ascendancy After defeating the boss, claim the rewards you've accumulated, as well as the Ascendancy class of your choosing. |
Temple of Chaos Location
Located in the Chimeral Wastelands
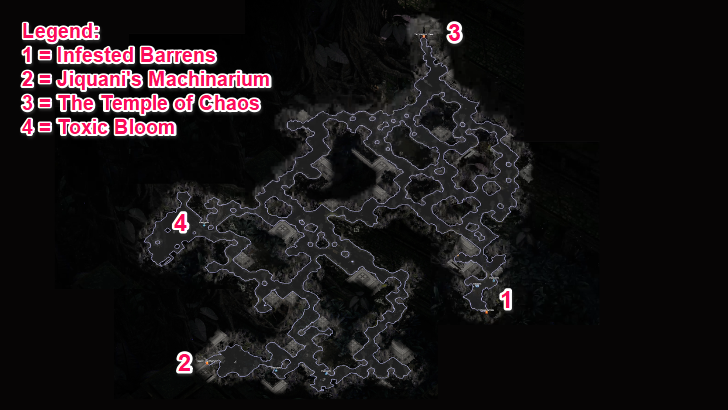
Note that maps are randomly generated and the layout here is only meant as a general guide.
The Temple of Chaos, although random, is usually found on the opposite side of where you fought Xyclucian in the Chimeral Wastelands.
Defeat Xyclucian and Collect its Inscribed Ultimatum
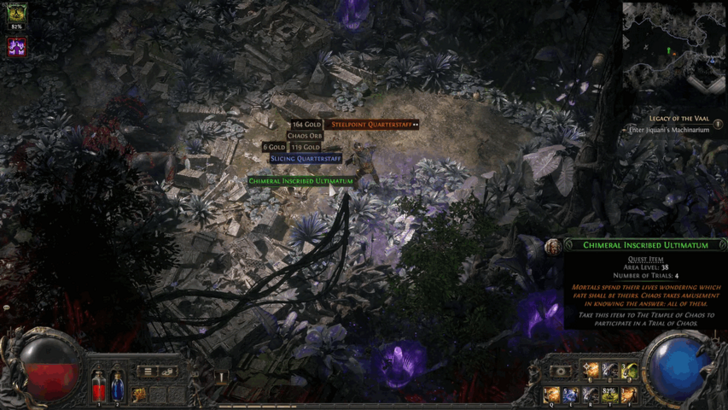
To access the temple, you need to defeat Xyclucian during the Legacy of the Vaal quest, and collect the Chimeral Inscribed Ultimatum it dropped to obtain a new objective where you're tasked to go to the Temple of Chaos to begin the trial.
Legacy of the Vaal Quest Walkthrough
Trial of Chaos Rewards
Ascendancy Points

Completing the Trial of Chaos earns you Ascendancy Skill Points for character Ascension. These Ascendancy points are used to further improve your character class, giving them powerful specialization skills.
List of Classes and Ascendancies
Soul Cores
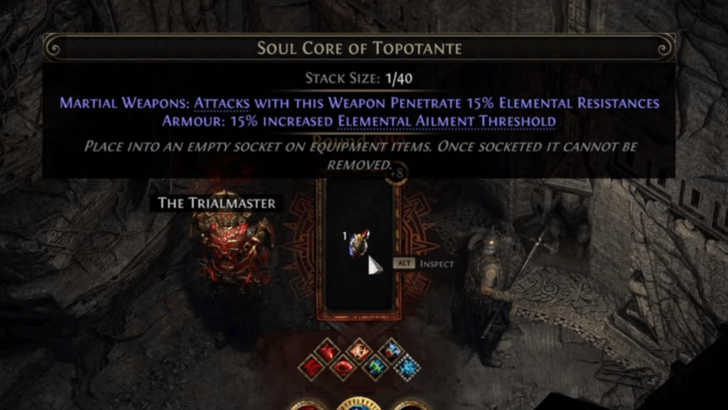
Soul Cores are powerful socketable items with mods that cannot be obtained from regular runes. The mod that you can utilize from a Soul Core will depend on the item you slot it in.
Fates
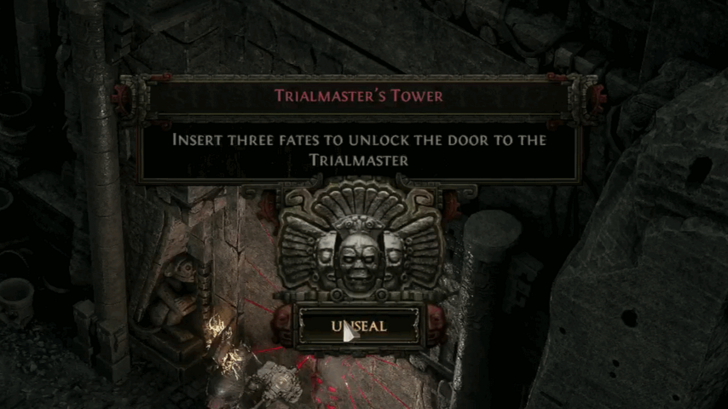
Fates are dropped after defeating the last boss on the 10th room. There are three different Fates you'll need to collect in order to face the Trialmaster, the Pinnacle Boss of the Trial of Chaos.
Corrupted Equipment
The equipment you earn by completing a room are all corrupted, meaning that the stats and modifiers are permanent. These corrupted items can only be obtained at the end of the trial, after defeating the final boss. If you fail the run, all your accumulated rewards will be lost.
Corrupted Items Explained and How to Fix
Vaal Orbs
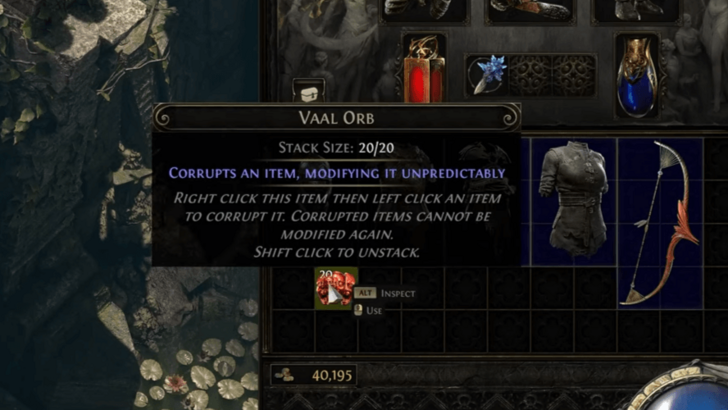
Vaal Orbs can be used to corrupt items, causing that item to change its effects randomly to either provide new enchantments or reroll up to half of an item's modifiers, even adding more sockets to maxed out equipment! Do note that corruption will prevent an item from being modified further.
Path of Exile 2 Related Guides

All Ascension Trials
| All Ascension Trials | |
|---|---|
| Trial of the Sekhemas | The Trial of Chaos |
Comment
Yes, as long you do not make a selection from the 3 bad debuffs, you can teleport out sell you stuff, come back and just enter again to continue
Author
Trial of Chaos Guide
Rankings
- We could not find the message board you were looking for.
Gaming News
Popular Games

Genshin Impact Walkthrough & Guides Wiki

Umamusume: Pretty Derby Walkthrough & Guides Wiki

Pokemon Pokopia Walkthrough & Guides Wiki

Honkai: Star Rail Walkthrough & Guides Wiki

Monster Hunter Stories 3: Twisted Reflection Walkthrough & Guides Wiki

Arknights: Endfield Walkthrough & Guides Wiki

Wuthering Waves Walkthrough & Guides Wiki

Zenless Zone Zero Walkthrough & Guides Wiki

Pokemon TCG Pocket (PTCGP) Strategies & Guides Wiki

Monster Hunter Wilds Walkthrough & Guides Wiki
Recommended Games

Fire Emblem Heroes (FEH) Walkthrough & Guides Wiki

Diablo 4: Vessel of Hatred Walkthrough & Guides Wiki

Cyberpunk 2077: Ultimate Edition Walkthrough & Guides Wiki

Yu-Gi-Oh! Master Duel Walkthrough & Guides Wiki

Super Smash Bros. Ultimate Walkthrough & Guides Wiki

Pokemon Brilliant Diamond and Shining Pearl (BDSP) Walkthrough & Guides Wiki

Elden Ring Shadow of the Erdtree Walkthrough & Guides Wiki

Monster Hunter World Walkthrough & Guides Wiki

The Legend of Zelda: Tears of the Kingdom Walkthrough & Guides Wiki

Persona 3 Reload Walkthrough & Guides Wiki
All rights reserved
© 2010 - 2024 Grinding Gear Games
The copyrights of videos of games used in our content and other intellectual property rights belong to the provider of the game.
The contents we provide on this site were created personally by members of the Game8 editorial department.
We refuse the right to reuse or repost content taken without our permission such as data or images to other sites.


![The Liar Princess and the Blind Prince Review [PC] | Lovely to Look at but Tedious to Play](https://img.game8.co/4442586/8d95f5faf05780f1765ce7e0938bd825.jpeg/show)

![Monster Hunter Stories 3 Review [First Impressions] | Simply Rejuvenating](https://img.game8.co/4438641/2a31b7702bd70e78ec8efd24661dacda.jpeg/thumb)
![The Seven Deadly Sins: Origin Review [First Impressions] | A Promising Start](https://img.game8.co/4440581/584e0bfb87908f12c4eab6e846eb1afd.png/thumb)


Great bit of info in here especially the advice on debuffs to avoid and considering others if you're ranged.