PoE 2 0.2 Warrior Build - Flaming Tank Smith of Kitava
Latest: 0.5.0 Release Date
☆ Fate of the Vaal ▶︎ The Last of the Druids
┗ Bonded Mods | 0.4 Mystery Box
★ Druid: Class Overview | Builds
☆ NEW: Disciple of Varashta Ascendancy!
★ Best Class | Best Builds | Leveling Builds
This is a Flaming Tank Smith of Kitava Warrior build for Path of Exile 2 (PoE 2)'s Dawn of the Hunt Update. Check out the Flaming Tank Smith of Kitava Warrior build, including its gear, socketables, skills, and playstyle!
 Attention! Attention! |
This build was last updated for patch 0.2.1 and may be outdated for the recent patches. For more up-to-date builds, please refer to our list of latest builds! |
|---|
List of Contents
Flaming Tank Smith of Kitava Build Summary
Flaming Tank Smith of Kitava Build
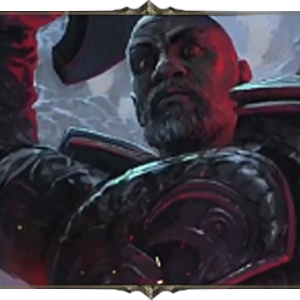
The Smith of Kitava Class introduces the unkillable version of the Strike Warrior. Having all the benefits of damage from a regular Warrior and incredibly high resistances, the Flaming Tank Smith of Kitava goes into enemy packs without fear and leaves only ashes behind.
During the endgame, this build makes use of the Ascendency Skill Fire Spell on Hit, which makes use of the spells Flame Wall, Solar Orb, and Flammability to really lean into AoE Fire Damage.
| Date | Changes Made |
|---|---|
| 04/08/2025 | ・ Tweaked title to Flaming Tank of Kitava to accommodate changes in the endgame skills. |
| 04/06/2025 | ・ Created Tank Smith of Kitava build for Cruel difficulty. |
| 04/14/2025 | ・ Tweaked Passive Skill Tree and stat prioritization in writeups. |
Flaming Tank Smith of Kitava Equipment
Weapons
Two-Handed Mace, One-Handed Mace, and a Shield
Though this may vary depending on the player's preference, Warriors will most commonly use a Two-Handed Mace as the main source of damage. The One-Handed Mace and Shield in the second weapon loadout will mostly be used specifically for Shield Charge, which can be used to engage enemies or as an escape tool.
Armor
Use Normal Armour Upon Ascending
Assuming you have ascended to Smith of Kitava in Act 2 after the Trial of The Sekhemas, you can use the Ascendency skill Smith's Masterwork to apply modifiers to your own body armour.
Once you get more Ascendency points in Act 3 after the Trial of Chaos, you will unlock the passive Coal Stoker, which gives your Cold and Lightning Resistance 50% of your Fire Resistance modifiers.
Use Armour with Fire Resistance and Maximum Life
Once you obtain equipment with enough modifiers to max out your resistances even without Smith's Masterwork, you may now Respec out of it and allot your Ascendency points into Heat of the Forge for more AoE Fire Damage. Look for Armour that provides both Fire Resistance and Maximum Life to maximize tankiness especially in the higher tier maps.
Accessories
Use an Amethyst Ring and Another Elemental Resistance Ring
In general, use rings that have the most elemental resistances, armour, or damage modifiers. However, having at least one Amethyst Ring will boost chaos resistance, which you cannot get as easily. For the second ring, a great option would be a Prismatic Ring to boost all elemental resistances.
In the early to mid game, you may opt to switch out your rings to increase resistances depending on the boss or enemy you are fighting.
List of Rings
Use an Armour-based Amulet Early on Then Switch to Mana and Spell Damage
|
|
・Increased Armour
・Increased Elemental Resistance ・Increased Attributes ・X to Level of all Melee Skills |
|---|---|
|
|
・Increased Mana Regeneration Rate
・Increased Spell Damage ・Increased Cast Speed ・Increased Elemental Resistances ・Increased Intelligence ・X to Level of all Melee Skills |
From Act 1 to the end of Cruel Mode or even in the early tiers of the endgame, use an Amulet that focuses mainly on improving your defenses. The skills and passive tree you use at that point does not need Mana and Spell Damage yet.
For Mapping, however, you will adjust your setup to accomodate Fire Spell on Hit, one of the Smith of Kitava's Ascendency Passives. Using this Ascendency Passive requires you to have some Intelligence invested in order to use fire spells.
Socketables
| ・X% increased Fire Damage ・X% increased Armour ・X% increased Attack Damage |
It is recommended to equip Ruby Jewels to further boost your damage or defenses.
Runes and Soul Cores
| Equipment | Sockets |
|---|---|
| Weapon | |
| Armor |
In general, using two Iron Runes to get a 40% Physical Damage boost for you Weapon will help greatly. As for your Armor Runes, slot in Desert Runes only if you are no longer using Smith's Masterwork and need more Fire Resistance. Other good options would be Body Runes for more health or Rebirth Runes for life regeneration for more survivability.
| All Runes and Soul Cores | |
|---|---|
| List of Runes | List of Soul Cores |
Charms
 Antidote Charm Antidote Charm |
・Increased Duration
・Increased Charges ・Recover Life when Used |
|---|
The Antidote Charm is the build's primary charm, as many enemies use in the endgame use Poison and you have capped out resistances for Fire, Cold, and Lightning damage.
Flaming Tank Smith of Kitava Skills
※ The Support Gems' priority are arranged in a descending order. The first one being the most important and the last being the least crucial.
 Boneshatter Boneshatter Boneshatter Attacks enemies with a melee Strike. The Strike will cause a Heavy Stun on enemies that are Primed for Stun. Upon causing a Heavy Stun it will also create a Shockwave, dealing a large amount of damage in an area. | Impact Shockwave Supports Melee Strike skills, causing them to create an Aftershock that damages enemies around the target when they Heavy Stun an enemy. Rapid Attacks II Supports Attacks, causing them to Attack faster. Volcanic Eruption Supports Melee Strike Skills you use yourself. Supported Skills trigger Volcanic Eruption on Hit against Ignited Enemies. Execute III Supports any skill that Hits enemies, causing it to deal more damage against enemies on Low Life, as well as dealing more damage while you are on Low Life. |
|---|---|
 Perfect Strike Perfect Strike Perfect Strike Charge up your weapon while channelling. Releasing the moment you ECT STRIKE fully charge will release a wave of Fire. | Window of Opportunity II Supports Channelling skills that have special effects if released with Perfect Timing, causing them to deal much more damage and grant Perfect Deflection if released with Perfect Timing but reducing the Perfect Timing window. Concentrated Area Supports any skill with an area of effect, causing that area to be smaller but any area damage it deals to be higher. Close Combat II Supports Attacks, causing them to deal more damage to enemies based on how close they are to you. |
 Leap Slam Leap Slam Leap Slam Jump into the air, damaging and Knocking Back enemies with your mace where you land. Enemies you would land on are pushed out of the way. | Stun III Supports any skill that Hits Enemies, causing it to build up Stun significantly more quickly, at the cost of Damage. Brink II Supports Melee Attack Skills. Supported Skills build up Stun more quickly, but cannot themselves Stun. |
 Herald of Ash Herald of Ash Herald of Ash While active, enemies you sufficiently Overkill with attacks will cause an explosion that ignites nearby enemies based on the Overkill damage dealt. | Magnified Area II Supports any skill with an area of effect, making it larger at the cost of damage. Deadly Herald Supports Herald Skills, making their triggered effectsn deal more damage at the expense of higher spirit cost. Cannibalism II Supports Persistent Buff Skills, causing you to recover Life on kill while the skill is active. |
 Fire Spell on Hit Fire Spell on Hit Fire Spell on Hit Gains X Energy per Power of enemies you Hit with Melee Attacks, modified by the percentage of the enemy's Ailment;Threshold the Hit will deal X% increased Energy gain;Can only socket Fire Spells;Triggers all socketed Spells and loses all Energy on reaching maximum Energy | Boundless Energy II Supports Meta Skills. Supported Skills generate Energy significantly faster. Flame Wall Creates a wall of fire in front of the character, which ignites everything within its area. Any projectiles fired through the wall by you and allies deal added fire damage and inflict ignite on hit. Solar Orb Creates a fiery Orb that periodically releases fiery pulses. Enemies that are very close to the Orb are Ignited. Flammability Curses all targets in an area after a short delay, lowering their Fire Resistance. |
 Time of Need Time of Need Time of Need Invokes divine blessings, periodically healing you and removing Curses and Elemental Ailments from you. | Compressed Duration II Supports any skill that has a duration, making that duration shorter. |
 Shield Charge Shield Charge Shield Charge Channel to charge in the target direction. You will crash into enemies on your path, stopping your charge and dealing damage to enemies in an area, and extra damage to the enemies you collided with. While charging, your Shield is raised and you will Block all incoming Blockable hits. | Stomping Ground Supports Travel Skills, causing your footsteps to crack the earth and emit damaging shockwaves while using the skill. |
 Boneshatter Boneshatter Boneshatter Attacks enemies with a melee Strike. The Strike will cause a Heavy Stun on enemies that are Primed for Stun. Upon causing a Heavy Stun it will also create a Shockwave, dealing a large amount of damage in an area. | Impact Shockwave Supports Melee Strike skills, causing them to create an Aftershock that damages enemies around the target when they Heavy Stun an enemy. Rapid Attacks II Supports Attacks, causing them to Attack faster. |
|---|---|
 Perfect Strike Perfect Strike Perfect Strike Charge up your weapon while channelling. Releasing the moment you ECT STRIKE fully charge will release a wave of Fire. | Window of Opportunity II Supports Channelling skills that have special effects if released with Perfect Timing, causing them to deal much more damage and grant Perfect Deflection if released with Perfect Timing but reducing the Perfect Timing window. Concentrated Area Supports any skill with an area of effect, causing that area to be smaller but any area damage it deals to be higher. Close Combat II Supports Attacks, causing them to deal more damage to enemies based on how close they are to you. |
 Leap Slam Leap Slam Leap Slam Jump into the air, damaging and Knocking Back enemies with your mace where you land. Enemies you would land on are pushed out of the way. | Stun III Supports any skill that Hits Enemies, causing it to build up Stun significantly more quickly, at the cost of Damage. Brink II Supports Melee Attack Skills. Supported Skills build up Stun more quickly, but cannot themselves Stun. |
 Time of Need Time of Need Time of Need Invokes divine blessings, periodically healing you and removing Curses and Elemental Ailments from you. | Compressed Duration II Supports any skill that has a duration, making that duration shorter. |
 Herald of Ash Herald of Ash Herald of Ash While active, enemies you sufficiently Overkill with attacks will cause an explosion that ignites nearby enemies based on the Overkill damage dealt. | Magnified Area II Supports any skill with an area of effect, making it larger at the cost of damage. |
 Shield Charge Shield Charge Shield Charge Channel to charge in the target direction. You will crash into enemies on your path, stopping your charge and dealing damage to enemies in an area, and extra damage to the enemies you collided with. While charging, your Shield is raised and you will Block all incoming Blockable hits. | Stomping Ground Supports Travel Skills, causing your footsteps to crack the earth and emit damaging shockwaves while using the skill. |
Flaming Tank Smith of Kitava Passive Tree
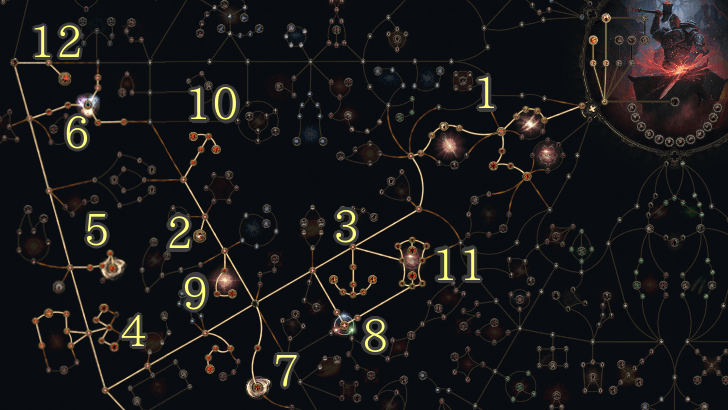
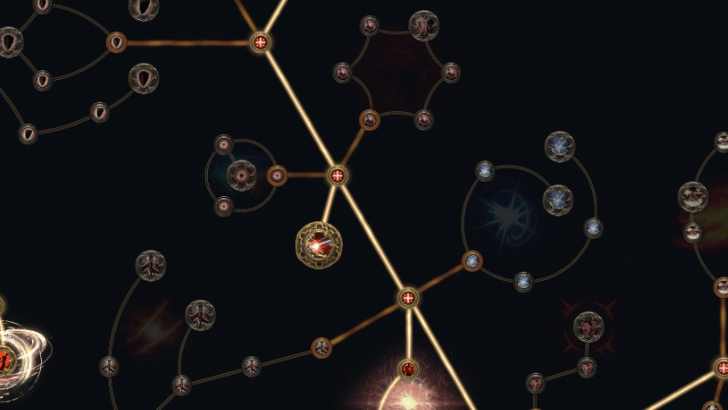
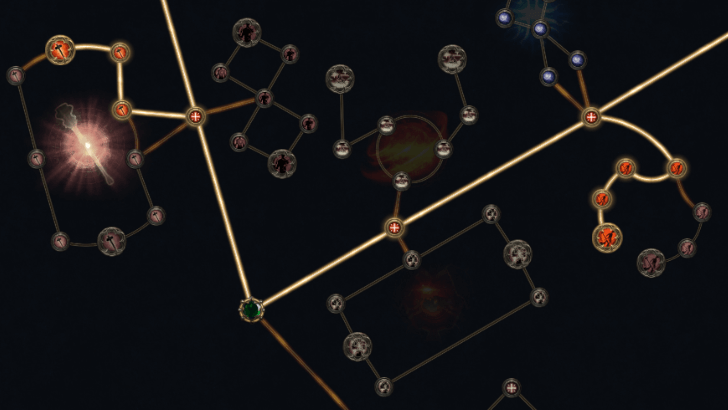
Passive Tree Progression
| Ascendency Passive Nodes | |||
|---|---|---|---|
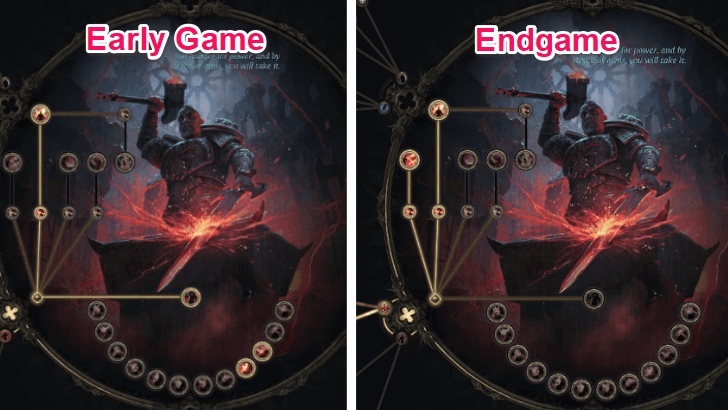 Mapping: Coal Stoker and Fire Spell on Hit |
|||
| Passive Nodes | |||
| 1. | 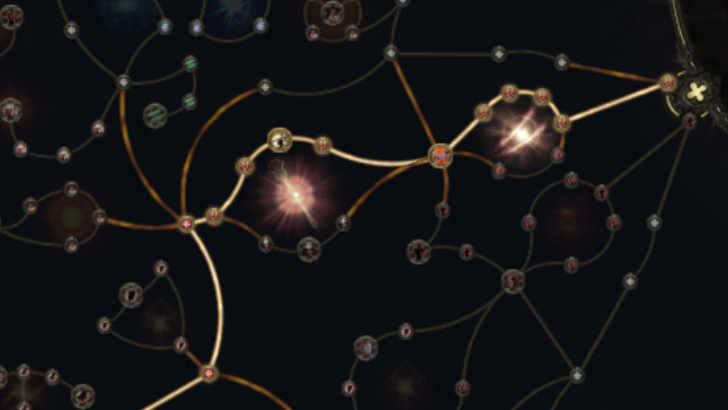 |
2. |  |
| 3. | 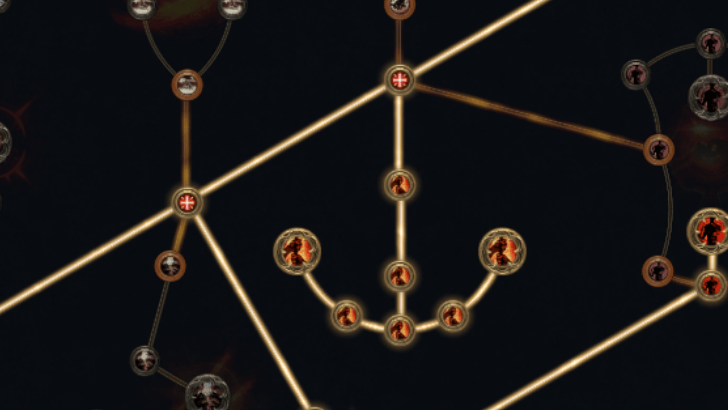 |
4. |  |
| 5. | 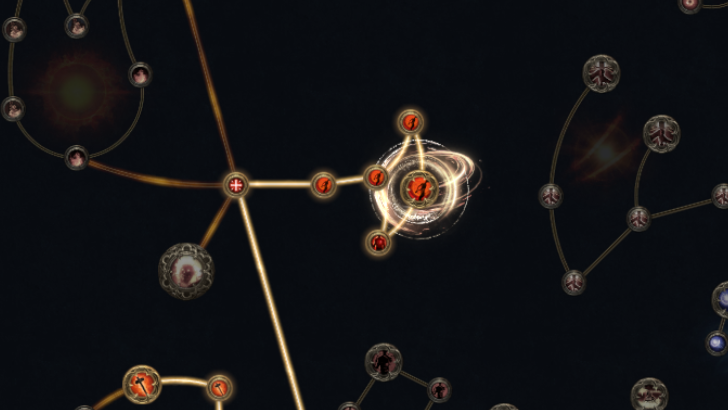 |
6. | 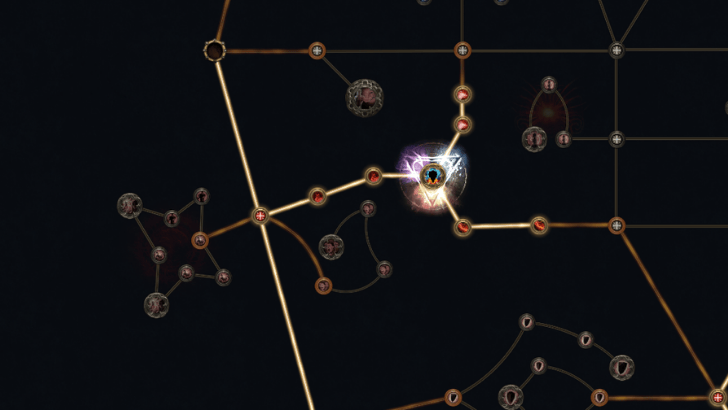 |
| 7. | 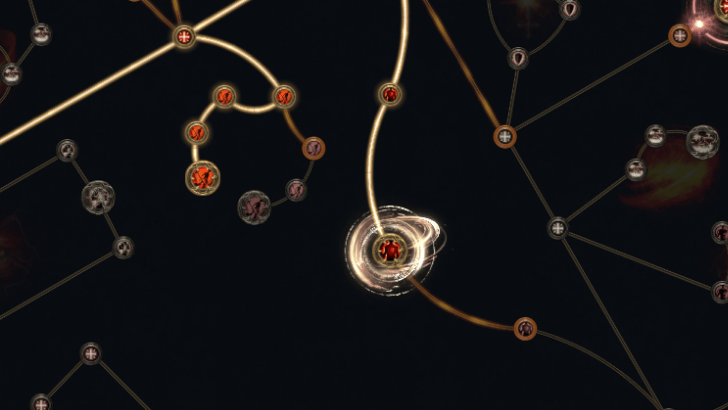 |
8. | 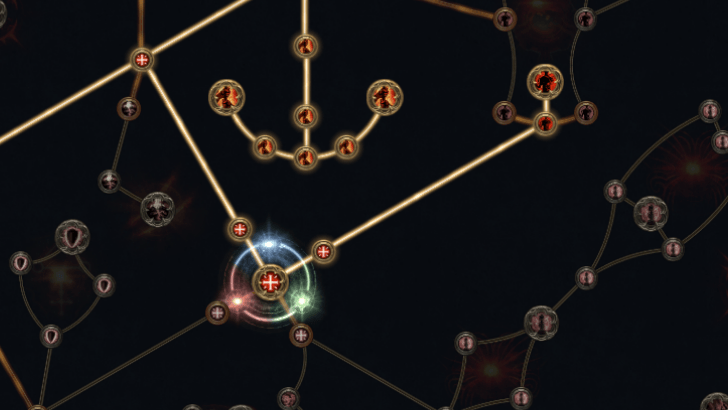 |
| 9. | 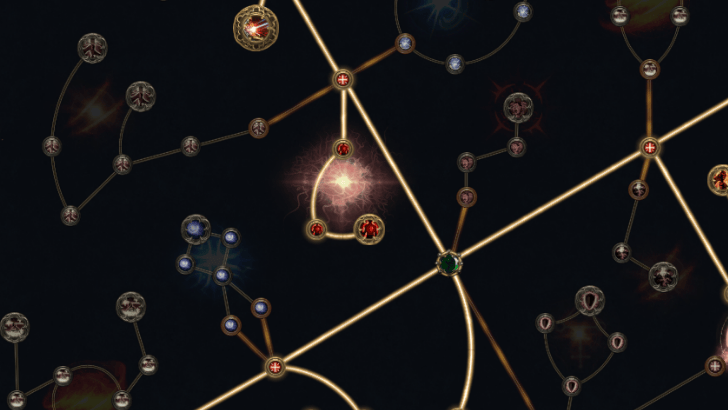 |
10. | 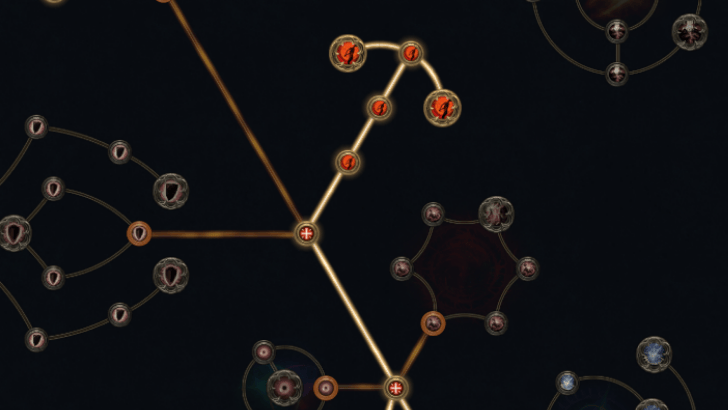 |
| 11. | 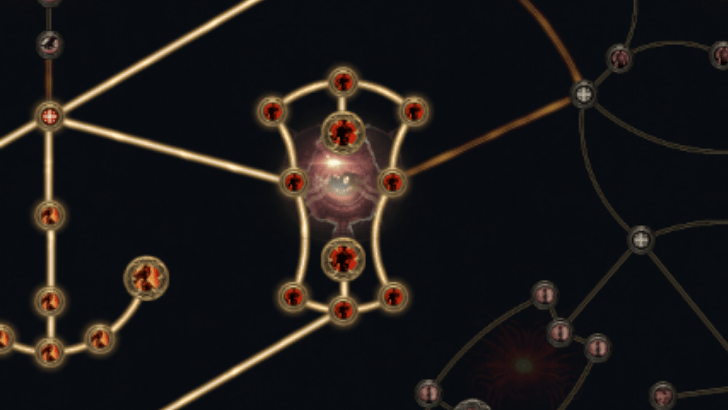 |
12. | 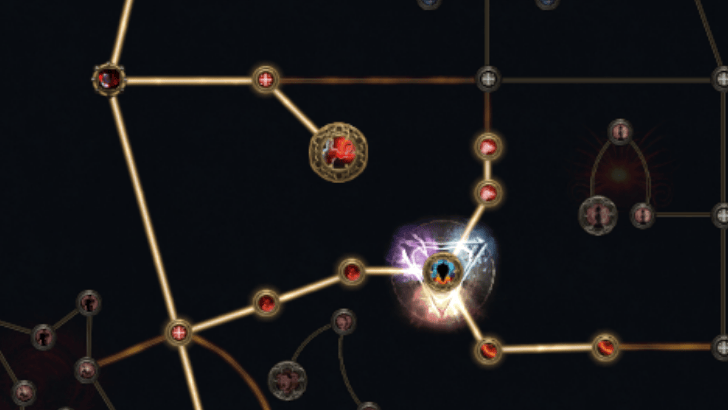 |
In the endgame, focus on further improving your defenses, maximum life, stun buildup and damage. With enough resistances and stun build up, bosses will quickly get stunned before they execute many of their attacks.
Passive Skill Tree Guide and List of Passives
Flaming Tank Smith of Kitava Playstyle
Skill Rotations
※ Press on what type you are fighting for a more detailed explanation on the playstyle and skill rotation.
| Type | Skill Rotation |
|---|---|
| Mobbing |  Leap Slam Jump into the air, damaging and Knocking Back enemies with your mace where you land. Enemies you would land on are pushed out of the way.
▶
 Boneshatter Attacks enemies with a melee Strike. The Strike will cause a Heavy Stun on enemies that are Primed for Stun. Upon causing a Heavy Stun it will also create a Shockwave, dealing a large amount of damage in an area.
|
| Bossing |  Perfect Strike Charge up your weapon while channelling. Releasing the moment you ECT STRIKE fully charge will release a wave of Fire.
▶
 Boneshatter Attacks enemies with a melee Strike. The Strike will cause a Heavy Stun on enemies that are Primed for Stun. Upon causing a Heavy Stun it will also create a Shockwave, dealing a large amount of damage in an area.
▶
 Perfect Strike Charge up your weapon while channelling. Releasing the moment you ECT STRIKE fully charge will release a wave of Fire.
With Glory:  Perfect Strike Charge up your weapon while channelling. Releasing the moment you ECT STRIKE fully charge will release a wave of Fire.
▶
 Hammer of the Gods Entreats the Ancestors to crush your enemies, manifesting a massive hammer that falls from the sky of your target, Slamming into the ground after a short duration and dealing immense damage based on your weapon.
▶
 Perfect Strike Charge up your weapon while channelling. Releasing the moment you ECT STRIKE fully charge will release a wave of Fire.
|
Mobbing
For general mobbing, you will spam Leap Slam into or nearby enemy packs with the goal of having as many enemies primed for stunning as possible. Once enemies can be stunned, you can use Boneshatter to deal massive AoE damage.
Bossing
For bossing, you will rely almost entirely on Perfect Strike to defeat bosses and rare enemies throughout the endgame. Spamming Perfect Strike and using Boneshatter when bosses are primed for stun is more than enough to clear maps. Once Glory from heavy stunning enemies has been built up, make sure to weave in Hammer of the Gods for massive additional damage.
Path of Exile 2 (PoE 2) Related Guides

0.4 Best Endgame Builds
| Rank | Build |
|---|---|
 |
|
 |
|
 |
|
 |
0.4 Leveling Builds
All Build Guides
| List of Builds by Class | |||||||||||
|---|---|---|---|---|---|---|---|---|---|---|---|
 Huntress Huntress |
 Mercenary Mercenary |
 Monk Monk |
|||||||||
 Witch Witch |
 Sorceress Sorceress |
 Warrior Warrior |
|||||||||
 Ranger Ranger |
 Druid Druid |
- | |||||||||
| Other Build Guides | 0.3 Leveling Builds | How to Make a Good Build | |||||||||
Warrior Leveling Builds
UP |
Rolling Slam Slam the ground to Stun enemies and knock them away, then continue forward and perform a devastating second Slam. holding down the skill input allows you to change direction as you move.
Boneshatter Attacks enemies with a melee Strike. The Strike will cause a Heavy Stun on enemies that are Primed for Stun. Upon causing a Heavy Stun it will also create a Shockwave, dealing a large amount of damage in an area.
Infernal Cry Performs a warcry, Empowering subsequent Attacks. Consumes all Endurance Charges to Empower additional attacks. Enemies in the warcry's area are destabilised and will Combust on death.
Herald of Ash While active, enemies you sufficiently Overkill with attacks will cause an explosion that ignites nearby enemies based on the Overkill damage dealt.
Leap Slam Jump into the air, damaging and Knocking Back enemies with your mace where you land. Enemies you would land on are pushed out of the way.
Volcanic Fissure Slam the ground, creating a fissure that deals damage as it travels and remains for a duration. Using a different Slam on a fissure will cause an aftershock, which spreads to all connected fissures.
Forge Hammer Hurl a fiery hammer that slams into the ground and lodges there. While the hammer is lodged in the ground, reusing the Skill recalls the hammer and resets the Skill's cooldown. Alternatively, using a Warcry near the lodged hammer causes it to shatter, releasing a number of Molten Fissures in a spiral.
Focus: High AoE Damage, Physical |
Warrior Endgame Builds
Boneshatter Attacks enemies with a melee Strike. The Strike will cause a Heavy Stun on enemies that are Primed for Stun. Upon causing a Heavy Stun it will also create a Shockwave, dealing a large amount of damage in an area.
Infernal Cry Performs a warcry, Empowering subsequent Attacks. Consumes all Endurance Charges to Empower additional attacks. Enemies in the warcry's area are destabilised and will Combust on death.
Herald of Ash While active, enemies you sufficiently Overkill with attacks will cause an explosion that ignites nearby enemies based on the Overkill damage dealt.
Leap Slam Jump into the air, damaging and Knocking Back enemies with your mace where you land. Enemies you would land on are pushed out of the way.
Overwhelming Presence While active, enemies in your Presence are easier to Stun and inflict Elemental Ailments upon.
Shield Charge Channel to charge in the target direction. You will crash into enemies on your path, stopping your charge and dealing damage to enemies in an area, and extra damage to the enemies you collided with. While charging, your Shield is raised and you will Block all incoming Blockable hits.
Earthshatter Slam the ground, sending out a fissure that deals area damage to enemies it passess under and thrusts a spike from the ground when it ends. Warcries performed near the spike will cause it to shatter, damaging surrounding enemies.
Seismic Cry Performs a damaging Warcry, knocking Back enemies. If a Heavy Stunned enemy is hit, your next Slam is empowered to perform an additional aftershock. If not, this skills cooldown is reset. Only counts Heavily Stunned enemies for purpose of counting Power gained.
Hammer of the Gods Entreats the Ancestors to crush your enemies, manifesting a massive hammer that falls from the sky of your target, Slamming into the ground after a short duration and dealing immense damage based on your weapon.
Focus: Burst, AoE, DoT, Stun |
|
Infernal Cry Performs a warcry, Empowering subsequent Attacks. Consumes all Endurance Charges to Empower additional attacks. Enemies in the warcry's area are destabilised and will Combust on death.
Leap Slam Jump into the air, damaging and Knocking Back enemies with your mace where you land. Enemies you would land on are pushed out of the way.
Overwhelming Presence While active, enemies in your Presence are easier to Stun and inflict Elemental Ailments upon.
Earthquake Smashes the ground, dealing damage in an area and leaving behind Jagged Ground that slow enemies. The Jagged Ground erupts in a powerful Aftershock after a duration. Cannot create Jagged Ground on top of an existing patch, or if you already have the maximum number of active patches.
Seismic Cry Performs a damaging Warcry, knocking Back enemies. If a Heavy Stunned enemy is hit, your next Slam is empowered to perform an additional aftershock. If not, this skills cooldown is reset. Only counts Heavily Stunned enemies for purpose of counting Power gained.
Stampede Charges forward, cracking the earth and leaving a patch of Jagged Ground with every footstep. At the end of your charge, a massive leaping Slam damages enemies and causes all nearby patches of Jagged Ground to explode, damaging enemies standing on them.
Hammer of the Gods Entreats the Ancestors to crush your enemies, manifesting a massive hammer that falls from the sky of your target, Slamming into the ground after a short duration and dealing immense damage based on your weapon.
Time of Need Invokes divine blessings, periodically healing you and removing Curses and Elemental Ailments from you.
Berserk While active, strengthens your Rage and grants you Life Leech based on your Rage, but causes you to lose Life while Raging.
Focus: Aftershocks, Stun, Bleed |
|
Solar Orb Creates a fiery Orb that periodically releases fiery pulses. Enemies that are very close to the Orb are Ignited.
Infernal Cry Performs a warcry, Empowering subsequent Attacks. Consumes all Endurance Charges to Empower additional attacks. Enemies in the warcry's area are destabilised and will Combust on death.
Leap Slam Jump into the air, damaging and Knocking Back enemies with your mace where you land. Enemies you would land on are pushed out of the way.
Overwhelming Presence While active, enemies in your Presence are easier to Stun and inflict Elemental Ailments upon.
Shockwave Totem Raises a Totem that Slams the ground around it, repeatedly damaging nearby enemies. Jagged Ground erupts when hit by this Slam, damaging enemies standing on it.
Seismic Cry Performs a damaging Warcry, knocking Back enemies. If a Heavy Stunned enemy is hit, your next Slam is empowered to perform an additional aftershock. If not, this skills cooldown is reset. Only counts Heavily Stunned enemies for purpose of counting Power gained.
Hammer of the Gods Entreats the Ancestors to crush your enemies, manifesting a massive hammer that falls from the sky of your target, Slamming into the ground after a short duration and dealing immense damage based on your weapon.
Time of Need Invokes divine blessings, periodically healing you and removing Curses and Elemental Ailments from you.
Berserk While active, strengthens your Rage and grants you Life Leech based on your Rage, but causes you to lose Life while Raging.
Focus: AoE, Mobbing, Stun, Fast Clear |
|
Rolling Slam Slam the ground to Stun enemies and knock them away, then continue forward and perform a devastating second Slam. holding down the skill input allows you to change direction as you move.
Boneshatter Attacks enemies with a melee Strike. The Strike will cause a Heavy Stun on enemies that are Primed for Stun. Upon causing a Heavy Stun it will also create a Shockwave, dealing a large amount of damage in an area.
Herald of Ash While active, enemies you sufficiently Overkill with attacks will cause an explosion that ignites nearby enemies based on the Overkill damage dealt.
Perfect Strike Charge up your weapon while channelling. Releasing the moment you ECT STRIKE fully charge will release a wave of Fire.
Leap Slam Jump into the air, damaging and Knocking Back enemies with your mace where you land. Enemies you would land on are pushed out of the way.
Time of Need Invokes divine blessings, periodically healing you and removing Curses and Elemental Ailments from you.
Fire Spell on Hit Gains X Energy per Power of enemies you Hit with Melee Attacks, modified by the percentage of the enemy's Ailment;Threshold the Hit will deal X% increased Energy gain;Can only socket Fire Spells;Triggers all socketed Spells and loses all Energy on reaching maximum Energy
Focus: AoE, High Single Target Damage, Physical, Tank |
|
Infernal Cry Performs a warcry, Empowering subsequent Attacks. Consumes all Endurance Charges to Empower additional attacks. Enemies in the warcry's area are destabilised and will Combust on death.
Perfect Strike Charge up your weapon while channelling. Releasing the moment you ECT STRIKE fully charge will release a wave of Fire.
Leap Slam Jump into the air, damaging and Knocking Back enemies with your mace where you land. Enemies you would land on are pushed out of the way.
Overwhelming Presence While active, enemies in your Presence are easier to Stun and inflict Elemental Ailments upon.
Shield Charge Channel to charge in the target direction. You will crash into enemies on your path, stopping your charge and dealing damage to enemies in an area, and extra damage to the enemies you collided with. While charging, your Shield is raised and you will Block all incoming Blockable hits.
Earthshatter Slam the ground, sending out a fissure that deals area damage to enemies it passess under and thrusts a spike from the ground when it ends. Warcries performed near the spike will cause it to shatter, damaging surrounding enemies.
Seismic Cry Performs a damaging Warcry, knocking Back enemies. If a Heavy Stunned enemy is hit, your next Slam is empowered to perform an additional aftershock. If not, this skills cooldown is reset. Only counts Heavily Stunned enemies for purpose of counting Power gained.
Time of Need Invokes divine blessings, periodically healing you and removing Curses and Elemental Ailments from you.
Focus: AoE, Ignite, Stun |
|
Ancestral Warrior Totem Raises a Totem that uses socketed Mace skills.
Scavenged Plating Uses fragments of armour scavenged from enemies to bolster your own. Fully Breaking an enemy's Armour grants you a stack of Scavenged Plating for a duration, and you gain Armour and Thorns per stack.
Enfeeble Curses all targets in an area after a short delay, making them deal less damage.
Leap Slam Jump into the air, damaging and Knocking Back enemies with your mace where you land. Enemies you would land on are pushed out of the way.
Armour Breaker Strike with a forceful blow, knocking enemies back and weakening their Armour.
Attrition While active, causes you to deal more Hit damage to Rare and Unique enemies the longer you've been fighting them, and gain Culling Strike against them once you've been fighting them for long enough.
Shield Charge Channel to charge in the target direction. You will crash into enemies on your path, stopping your charge and dealing damage to enemies in an area, and extra damage to the enemies you collided with. While charging, your Shield is raised and you will Block all incoming Blockable hits.
Herald of Blood While active, killing an enemy with Blood Loss will cause a bloody explosion that deals Physical Attack damage to surrounding enemies based off the life of the exploded enemy, destroying their Corpse in the process. The explosion also has a chance to aggravate Bleeding.
Focus: Thorns, Critical Hit, Physical Damage |
|
NEW |
Herald of Ash While active, enemies you sufficiently Overkill with attacks will cause an explosion that ignites nearby enemies based on the Overkill damage dealt.
Scavenged Plating Uses fragments of armour scavenged from enemies to bolster your own. Fully Breaking an enemy's Armour grants you a stack of Scavenged Plating for a duration, and you gain Armour and Thorns per stack.
Wind Dancer Grants a buff that gives you more Evasion per stage. Being Hit by a Melee Attack while you have this buff consumes all stages to damage and Knock Back enemies around you.
Vaulting Impact Leaps forward and Slams the ground, sending out a Stunning shockwave that is especially potent against Dazed enemies.
Wind Blast Strike enemies at range by generating a gust of wind as you swing. Enemies will be Knocked Back based on how close they are to you.
Hammer of the Gods Entreats the Ancestors to crush your enemies, manifesting a massive hammer that falls from the sky of your target, Slamming into the ground after a short duration and dealing immense damage based on your weapon.
Focus: Armour Break, Physical Damage, Burst Damage |
NEW |
Infernal Cry Performs a warcry, Empowering subsequent Attacks. Consumes all Endurance Charges to Empower additional attacks. Enemies in the warcry's area are destabilised and will Combust on death.
Herald of Ash While active, enemies you sufficiently Overkill with attacks will cause an explosion that ignites nearby enemies based on the Overkill damage dealt.
Scavenged Plating Uses fragments of armour scavenged from enemies to bolster your own. Fully Breaking an enemy's Armour grants you a stack of Scavenged Plating for a duration, and you gain Armour and Thorns per stack.
Earthquake Smashes the ground, dealing damage in an area and leaving behind Jagged Ground that slow enemies. The Jagged Ground erupts in a powerful Aftershock after a duration. Cannot create Jagged Ground on top of an existing patch, or if you already have the maximum number of active patches.
Shockwave Totem Raises a Totem that Slams the ground around it, repeatedly damaging nearby enemies. Jagged Ground erupts when hit by this Slam, damaging enemies standing on it.
Volcanic Fissure Slam the ground, creating a fissure that deals damage as it travels and remains for a duration. Using a different Slam on a fissure will cause an aftershock, which spreads to all connected fissures.
Forge Hammer Hurl a fiery hammer that slams into the ground and lodges there. While the hammer is lodged in the ground, reusing the Skill recalls the hammer and resets the Skill's cooldown. Alternatively, using a Warcry near the lodged hammer causes it to shatter, releasing a number of Molten Fissures in a spiral.
Ancestral Cry Perform a Warcry using Glory gained by Igniting enemies to turn you into an embodiement of Kaom. While embodying Kaom, your footsteps Trigger Volcanic Steps, Melee Strikes and Slams are Ancestrally Boosted, and your Melee Strikes Trigger Volcanic Eruption.
Focus: Totem, Fissure, Fire |
Warrior Class and Ascendancy Guides
| Base Class | ||
|---|---|---|
| Ascendancies | ||
Comment
Author
PoE 2 0.2 Warrior Build - Flaming Tank Smith of Kitava
improvement survey
04/2026
improving Game8's site?

Your answers will help us to improve our website.
Note: Please be sure not to enter any kind of personal information into your response.

We hope you continue to make use of Game8.
Rankings
- We could not find the message board you were looking for.
Gaming News
Popular Games

Genshin Impact Walkthrough & Guides Wiki

Crimson Desert Walkthrough & Guides Wiki

Umamusume: Pretty Derby Walkthrough & Guides Wiki

Honkai: Star Rail Walkthrough & Guides Wiki

Monster Hunter Stories 3: Twisted Reflection Walkthrough & Guides Wiki

Wuthering Waves Walkthrough & Guides Wiki

The Seven Deadly Sins: Origin Walkthrough & Guides Wiki

Pokemon TCG Pocket (PTCGP) Strategies & Guides Wiki

Pokemon Pokopia Walkthrough & Guides Wiki

Zenless Zone Zero Walkthrough & Guides Wiki
Recommended Games

Monster Hunter World Walkthrough & Guides Wiki

Fire Emblem Heroes (FEH) Walkthrough & Guides Wiki

Pokemon Brilliant Diamond and Shining Pearl (BDSP) Walkthrough & Guides Wiki

Super Smash Bros. Ultimate Walkthrough & Guides Wiki

Diablo 4: Vessel of Hatred Walkthrough & Guides Wiki

Cyberpunk 2077: Ultimate Edition Walkthrough & Guides Wiki

Yu-Gi-Oh! Master Duel Walkthrough & Guides Wiki

Elden Ring Shadow of the Erdtree Walkthrough & Guides Wiki

The Legend of Zelda: Tears of the Kingdom Walkthrough & Guides Wiki

Persona 3 Reload Walkthrough & Guides Wiki
All rights reserved
© 2010 - 2024 Grinding Gear Games
The copyrights of videos of games used in our content and other intellectual property rights belong to the provider of the game.
The contents we provide on this site were created personally by members of the Game8 editorial department.
We refuse the right to reuse or repost content taken without our permission such as data or images to other sites.
 Flaming Tank Smith of Kitava






![Forza Horizon 6 Review [Preview] | Beautiful Roads With a Whole Lot of Oversteer](https://img.game8.co/4460981/a7254c24945c43fbdf6ad9bea52b5ce9.png/thumb)


