This survey will take about 1 minute.
Your answers will help us to improve our website.
Path of Exile 2 (PoE 2)
PoE2 0.4 Warrior Build - Supercharged Slam Smith of Kitava
Latest: 0.5.0 Release Date
☆ Fate of the Vaal ▶︎ The Last of the Druids
┗ Bonded Mods | 0.4 Mystery Box
★ Druid: Class Overview | Builds
☆ NEW: Disciple of Varashta Ascendancy!
★ Best Class | Best Builds | Leveling Builds
This is a Supercharged Slam Smith of Kitava Warrior endgame build for mapping and pinnacle bosses in Path of Exile 2 (PoE 2)'s The Last of the Druids Update. Check out the Supercharged Slam Smith of Kitava Warrior endgame build, including its gear, socketables, skills, and playstyle!
List of Contents
Supercharged Slam Smith of Kitava Build Summary
Jorgen's Supercharged Slam Smith of Kitava Build
This is a Supercharged Slam Smith of Kitava build for 0.4.0 created by Jorgen. The video above features a full rundown, explanation, and demonstration of the build.
Make sure to check out Jorgen's official Youtube Channel for more builds and content! You can interact with Jorgen and his community over on his Discord or watch him play live through his Twitch channel!
Supercharged Slam Smith of Kitava Warrior Build
 Supercharged Slam Smith of Kitava Supercharged Slam Smith of Kitava |
 Infernal Cry Performs a warcry, Empowering subsequent Melee Attacks if there are enemies nearby. Enemies in the Warcry's area are destabilised and will Combust on death. This Skill's a cooldown can be bypassed by expending an Endurance Charge.
 Herald of Ice While active, Shattering an enemy with an Attack Hit will cause an icy explosion that deals Attack damage to surrounding enemies.
 Overwhelming Presence While active, enemies in your Presence are easier to Stun and inflict Elemental Ailments upon.
 Sunder Slams the ground, creating a roiling fissure that damages enemies in a sequence of areas in front of you. A number of enemies hit by the wave will release a shockwave, damaging other enemies.
 Supercharged Slam Channel to charge up a heavy swing, drawing earth from the ground to enlarge your mace. Release to Slam the ground, dealing damage in an area around the impact, followed by Aftershocks dealing damage in larger area.
 Time of Need Invokes divine blessings, periodically healing you and removing Curses and Elemental Ailments from you.
 Forge Hammer Hurl a fiery hammer that slams into the ground and lodges there. While the hammer is lodged in the ground, reusing the Skill recalls the hammer and resets the Skill's cooldown. Alternatively, using a Warcry near the lodged hammer causes it to shatter, releasing a number of Molten Fissures in a spiral.
|
|
|
|
The Supercharged Slam Smith of Kitava focuses on continuously executing Supercharged Slam to deal high Damage against bosses. Aside from its high single-target damage, it is also highly effective for mapping due to Sunder and Herald of Ice.
| Date | Changes |
|---|---|
| 01-09-2026 | Created Supercharged Slam Smith of Kitava build for endgame. |
Supercharged Slam Smith of Kitava Equipment
| Gear | Modifiers |
|---|---|
 Ironwood Greathammer Ironwood Greathammer Ironwood Greathammer Stats:
Damage - 105-196 Critical Chance - 5.00% Attacks Per Second - 1.00 Requirements: Level - 77 Strength - 163 Implicit Skill: Causes 20-40% increased Stun Buildup (Weapon) |
・Increased Physical Damage
・Added Physical Damage ・Added Cold Damage ・+ to Level of All Attack Skills ・Gain % of Damage as Extra Physical Damage ・Increased Attack Speed |
 Tawhoan Tower Shield Tawhoan Tower Shield Tawhoan Tower Shield Stats:
Armor - 192 Requirements: Level - 80 Strength - 115 (Shield) |
・Armor
・Maximum Life ・Cold Resistance ・Fire Resistance ・Chaos Resistance |
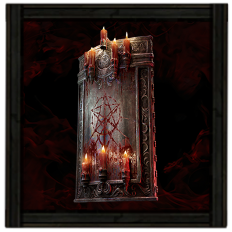 Chernobog's Pillar Blacksteel Tower Shield Chernobog's Pillar Blacksteel Tower Shield Chernobog's Pillar Blacksteel Tower Shield Stats:
Armor - 182 Block Chance - 26% Requirements: Level - 65 Strength - 91 Implicit Skill: Raise Shield Fixed Modifiers: ・ 100-150% Increased Armour ・ +30-40% to Fire Resistance ・ +23-29% to Chaos Resistance ・ +150-200 to Stun Threshold ・ Gain 1% of Damage as Fire Damage per 1% Chance to Block (Shield) |
・Increased Armor
・Fire Resistance ・Chaos Resistance ・Stun Threshold ・Gain 1% of damage as Fire Damage per 1% Chance to Block |
 Constricting Command Viper Cap Constricting Command Viper Cap Constricting Command Viper Cap Stats:
Evasion - 136 Requirements: Level - 38 Dexterity - 54 Fixed Modifiers: ・ (80–120) to maximum Life ・ (10–15) to all Attributes ・ (8–12) Life Regeneration per second ・ Pin Enemies which are Primed for Pinning (Helm) |
・Maximum Life
・All Attributes ・Life Regeneration per Second ・Require 4 fewer enemies to be Surrounded |
 Ornate Plate Ornate Plate Ornate Plate Stats:
Armor - 445 Requirements: Level - 70 Strength - 121 Implicit : Regenerate 1.5-2.5% of maximum Life per second (Body Armor) |
・Maximum Life
・Increased Maximum Life ・Increased Armor ・Regenerate % of Maximum Life Per Second |
 Ornate Mitts Ornate Mitts Ornate Mitts Stats:
Armor - 134 Requirements: Level - 70 Strength - 87 (Gloves) |
・Armour also applies to Fire Damage
・Added Fire Damage to Attacks ・Maximum Mana ・+ to All Melee Skills ・Increased Attack Speed ・% of Armor also applies to Elemental Damage |
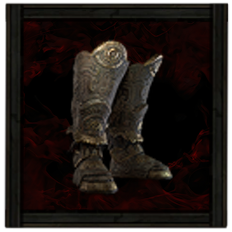 Vaal Greaves Vaal Greaves Vaal Greaves Stats:
Armor - 219 Requirements: Level - 75 Strength - 101 (Boots) |
・Increased Movement Speed
・Increased Armour ・Increased Maximum Mana ・Lightning Resistance ・Reduced Shock Duration on you |
 Rondel of Fragility Lunar Amulet Rondel of Fragility Lunar Amulet Rondel of Fragility Lunar Amulet Requirements:
Level - 14 Implicit:+20-30 to maximum Energy Shield Fixed Modifiers: ・ 15-30% increased Skill Speed ・ 20-30% increased Critical Hit Chance ・ -30% to all Elemental Resistances ・ 30-50% increased Damage (Amulet) |
・Increased Skill Speed
・Increased Critical Hit Chance ・Elemental Resistance ・Increased Damage |
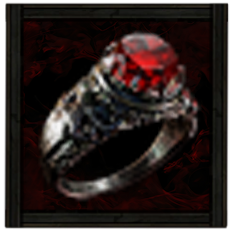 Ruby Ring Ruby Ring Ruby Ring Requirements:
Level - 8 Implicit:+20-30% to Fire Resistance (Ring 1) |
・Added Cold Damage to Attacks
・Evasion Rating ・Maximum Life ・Strength ・Intelligence ・Fire Resistances |
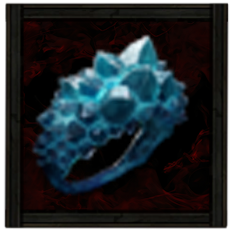 Polcirkeln Sapphire Ring Polcirkeln Sapphire Ring Polcirkeln Sapphire Ring Requirements:
Level - 12 Implicit:+20-30% to Cold Resistance Fixed Modifiers: ・ 20-30% increased Cold Damage ・ +40-60 to maximum Mana ・ +10-15 to Strength ・ Enemies Chilled by your Hits can be Shattered as though Frozen (Ring 2) |
・Increased Cold Damage
・Maximum Mana ・Strength ・Enemies Chilled by your hits can be shattered as though Frozen |
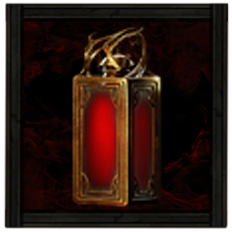 Ultimate Life Flask Ultimate Life Flask Ultimate Life Flask Stats:
Flask Type - Life Recovered Life - 920 Charge Per Use - 10 Total Charges - 75 Duration - 3 sec. (Life Flask) |
・Increased Life Recovered
・Recover Charges per Second |
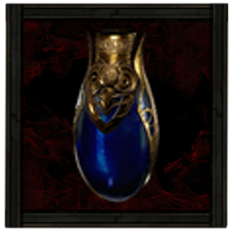 Ultimate Mana Flask Ultimate Mana Flask Ultimate Mana Flask Stats:
Flask Type - Mana Recovered Mana - 310 Charge Per Use - 10 Total Charges - 75 Duration - 3 sec. (Mana Flask) |
・Increased Mana Recovered
・Increased Charges Gained |
Weapons
This build specifically uses a Great Hammer to increase the build's stun capabilities. Level to All Attack Skills and Increased Effect to Broken Armor are also bonded modifiers to the weapon. Focus on getting as much Physical and Cold Damage as possible to maximize your DPS, then Stun Buildup to continuously stun bosses with every Slam.
Armor and Accessories
You will want % of Max Life Regenerates per Second top-tier survivability with the build. You'll also want to keep your chest armor at normal rarity to utilize the Smith of Kitava ascendancy nodes. It's also ideal to gain as many sockets in your armor to deal with your resistances.
For your accessories, the Rondel of Fragility is equipped for the attack speed of your slam, while the Polcirkeln makes it easier to shatter enemy packs while mapping. Lastly, you'll need two different shields for weapon swapping.
| List of Armors | List of Accessories |
Runes and Soul Cores
| Equipment | Sockets |
|---|---|
| Weapon | |
| Armor |
Slot in Greater Iron Runes on your Hammer to increase your Physical Damage. For your armour, you can use Soul Core of Tacati for Chaos Resistance since it is the most difficult resistance to cap out.
The Estazunti's Soul Core of Convalescence is used to regain life when taking damage, while the Topotante's Soul Core of Dampening increases your Fire damage based on your armor. Finally, Ox idols are used to increase your Block Chance when swapping to the Chernobog's Pillar Blacksteel Tower Shield.
| List of Runes | List of Soul Cores |
Belts and Charms
| Belt Modifiers | |||||
|---|---|---|---|---|---|
 Ryslatha's Coil Ornate Belt Ryslatha's Coil Ornate Belt Ryslatha's Coil Ornate Belt Requirements:
Level - 31 Implicit:1-2 Charm slots;10-15% reduced Charm Charges used Fixed Modifiers: ・ + 80-100 to maximum Life ・ 30-50% increased Flask Life Recovery rate ・ 30-40% more maximum Physical Attack Damage ・ 30-40% less minimum Physical Attack Damage |
・Maximum Life
・Increased Flask Life Recovery Rate ・More Maximum Physical Attack Damage ・Less Minimum Physical Attack Damage |
||||
| Charm Options | |||||
 Amethyst Charm Amethyst Charm
|
 The Fall of the Axe Silver Charm The Fall of the Axe Silver Charm
|
 Sanguis Heroum Staunching Charm Sanguis Heroum Staunching Charm
|
|||
Equipping the Ryslatha's Coil increases your Physical Attack Damage range and also grants survivability options like Maximum Life and Flask Recovery Rate.
Make sure to equip all three charms listed above to increase your Chaos Resistance, mitigate Slows, and grant Onslaught, as well as grant immunity to Bleeding. For their modifiers, it's best to gain Increased Duration and Increased Charges for prolonged bonuses.
| List of Belts | List of Charms |
Supercharged Slam Smith of Kitava Skills
All Active and Persistent Skills
| Skill | Support Gems |
|---|---|
 Mace Strike Mace Strike Mace Strike |
Rage III Supports Melee Attacks, causing them to grant Rage on Hit. Supported Skills have signficantly higher Attack speed while you are not at maximum Rage.
Heft Supports Skills which deal damage, increasing the maximum Physical Damage of their Hits.
Heavy Swing Supports Melee Attacks, boosting their Physical damage at the cost of Attack Speed.
Rapid Attacks II Supports Attacks, causing them to Attack faster.
Cold Attunement Supports attacks, causing them to gain Cold Damage but deal less Fire and Lightning Damage.
|
 Raise Shield Raise Shield Raise Shield |
- |
|
Supercharged Slam Supercharged Slam Channel to charge up a heavy swing, drawing earth from the ground to enlarge your mace. Release to Slam the ground, dealing damage in an area around the impact, followed by Aftershocks dealing damage in larger area.
|
Fist of War II Supports Slams you use yourself, providing a powerful Ancestral Boost every few seconds.
Heavy Swing Supports Melee Attacks, boosting their Physical damage at the cost of Attack Speed.
Burgeon II Supports Channelling Skills you use yourself, causing them to deal more damage the longer they have been Channelled.
Heft Supports Skills which deal damage, increasing the maximum Physical Damage of their Hits.
Close Combat II Supports Attacks, causing them to deal more damage to enemies based on how close they are to you.
|
|
Sunder Sunder Slams the ground, creating a roiling fissure that damages enemies in a sequence of areas in front of you. A number of enemies hit by the wave will release a shockwave, damaging other enemies.
|
Cold Attunement Supports attacks, causing them to gain Cold Damage but deal less Fire and Lightning Damage.
Heft Supports Skills which deal damage, increasing the maximum Physical Damage of their Hits.
Close Combat II Supports Attacks, causing them to deal more damage to enemies based on how close they are to you.
Fist of War II Supports Slams you use yourself, providing a powerful Ancestral Boost every few seconds.
Kaom's Madness Supports Melee Attacks which create fissures in the ground, causing them to create many additional fissures at the cost of damage, attack speed, and area of effect.
|
|
Forge Hammer Forge Hammer Hurl a fiery hammer that slams into the ground and lodges there. While the hammer is lodged in the ground, reusing the Skill recalls the hammer and resets the Skill's cooldown. Alternatively, using a Warcry near the lodged hammer causes it to shatter, releasing a number of Molten Fissures in a spiral.
|
Rapid Attacks II Supports Attacks, causing them to Attack faster.
Jagged Ground II Supports Slam Skills. Aftershocks caused by supported Slam Skills always create patches of Jagged Ground.
Close Combat II Supports Attacks, causing them to deal more damage to enemies based on how close they are to you.
Fist of War II Supports Slams you use yourself, providing a powerful Ancestral Boost every few seconds.
Heft Supports Skills which deal damage, increasing the maximum Physical Damage of their Hits.
|
|
Infernal Cry Infernal Cry Performs a warcry, Empowering subsequent Melee Attacks if there are enemies nearby. Enemies in the Warcry's area are destabilised and will Combust on death. This Skill's a cooldown can be bypassed by expending an Endurance Charge.
|
Magnified Area II Supports any skill with an area of effect, making it larger at the cost of damage.
Enraged Warcry II Supports Warcries, causing them to expend Rage to bypass their usual Cooldown.
Heft Supports Skills which deal damage, increasing the maximum Physical Damage of their Hits.
|
|
Herald of Ice Herald of Ice While active, Shattering an enemy with an Attack Hit will cause an icy explosion that deals Attack damage to surrounding enemies.
|
Magnified Area II Supports any skill with an area of effect, making it larger at the cost of damage.
Cold Attunement Supports attacks, causing them to gain Cold Damage but deal less Fire and Lightning Damage.
Elemental Armament II Supports Attacks, causing them to deal more Elemental damage.
Frozen Spite Supports Attack Skills, causing them to create Ice Fragments on killing Frozen Enemies. Cannot Support Totem Skills and does not modify Skills used by Minions.
Elemental Focus Supports any skill that hits enemies, causing it to deal more Elemental Damage but be unable to inflict Elemental Ailments.
|
|
Time of Need Time of Need Invokes divine blessings, periodically healing you and removing Curses and Elemental Ailments from you.
|
Vitality II Supports Persistent Buff Skills, causing you to gain Life Regeneration while the Skill is active.
Compressed Duration II Supports any skill that has a duration, making that duration shorter.
|
|
Overwhelming Presence Overwhelming Presence While active, enemies in your Presence are easier to Stun and inflict Elemental Ailments upon.
|
- |
This build focuses on boosting your damage with Supercharged Slam for Bosses, and Sunder for Mapping. Mace Strike is set up to be your main source of Stun for all activities. Supercharged Slam is the main DPS dealer for bosses; the support gems slotted grant increased damage to the skill, making it more effective.
Sunder with Cold Attunement will be your skill for mapping; it's meant to trigger Herald of Ice, which should shatter enemies and deliver projectiles all over your screen. Infernal Cry will be your buff source and support for Forge Hammer as an additional map-clearing skill.
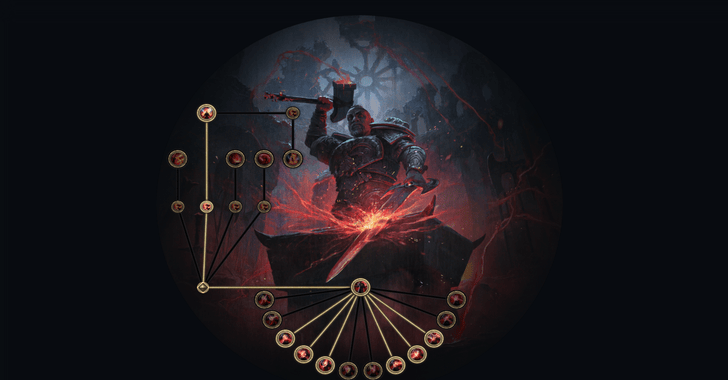
Supercharged Slam Smith of Kitava Passive Tree
Passive Tree Progression
| Ascendency Passive Nodes | |||
|---|---|---|---|
 |
|||
| Passive Nodes | |||
| Screenshot and video taken from Path of Building | |||
※ Legend: Red = Weapon Set I | Green = Weapon Set II
For damage, focus on allotting nodes that provide Melee Damage and Stun Buildup. This ensures that your Attacks can reliably defeat or stun all enemies within your wide range.
For defense, invest into Block Chance nodes such as Vigilance and Favourable Odds. By also stacking Armour and having it apply to Elemental Damage with armour modifiers, you can easily become extremely tanky.
Passive Skill Tree Guide and List of Passives
Jewels
Note: The modifiers listed are arranged according to priority.
 Prism of Belief Diamond Prism of Belief Diamond
|
・Levels to All Supercharged Slam Skills |
|---|---|
 Ruby Ruby
|
・Increased Armor
・Increased Life Regeneration Rate ・Increased Damage with Maces ・Increased Stun Threshold ・Gain Rage on Melee Hit |
The Prism of Belief simply increases your Supercharged Slam damage. The rest of the jewels are mostly Rubies as additions to your Armor and Life Regeneration, overall survivability measures.
As a bonus you can also get Damage with Maces, Increased Stun Threshold, and Rage on Melee Hit, these modifiers allow you to prolong your stunlock on bosses and deal more damage on top of your support and equipment bonuses.
Supercharged Slam Smith of Kitava Playstyle and Skill Rotation
Mobbing and Bossing Rotation
Your skill rotation revolves around using Supercharged Slam as your main source of damage. The rotation is as follows:
- Use Forge Hammer and Infernal Cry for buffs and damage.
- Use Supercharged Slam to generate stun and deal massive damage.
- Use Sunder against mob packs.
Path of Exile 2 Related Guides

0.4 Best Endgame Builds
| Rank | Build |
|---|---|
 |
|
 |
|
 |
|
 |
|
0.4 Leveling Builds
All Build Guides
| List of Builds by Class | |||||||||||
|---|---|---|---|---|---|---|---|---|---|---|---|
 Huntress Huntress |
 Mercenary Mercenary |
 Monk Monk |
|||||||||
 Witch Witch |
 Sorceress Sorceress |
 Warrior Warrior |
|||||||||
 Ranger Ranger |
 Druid Druid |
- | |||||||||
| Other Build Guides | 0.3 Leveling Builds | How to Make a Good Build | |||||||||
Comment
Author

PoE2 0.4 Warrior Build - Supercharged Slam Smith of Kitava
Please participate in our site
improvement survey
03/2026
improvement survey
03/2026
Would you assist in
improving Game8's site?
improving Game8's site?

×
We are listening to our users' valuable opinions and discussing how to act on them.
The information collected through this survey will be used for the purpose of improving our services. In addition, the information will only be disclosed a part of a statistic in a format that will not allow identification of personal information.
Begin Survey
Not Now
×
Please rate each item regarding Game8.co's Advertisements.
Amount of Ads
Very Dissatisfied
Somewhat Dissatisfied
Fine
Somewhat Satisfied
Highly Satisfied
Placement of Ads
Timing of Ad Display
Ad Loading Speed
Safeness of Ads
Content of Ads
×
Please rate each item regarding Game8.co's Quality of Articles.
Amount of information
Very Dissatisfied
Somewhat Dissatisfied
Fine
Somewhat Satisfied
Highly Satisfied
Frequency of updates
Speed of new information
Accuracy of articles
Understandibility of articles
Readability of sentences
×
Please rate each item regarding Game8.co's Usability of the Site.
Ease of finding information
Very Dissatisfied
Somewhat Dissatisfied
Fine
Somewhat Satisfied
Highly Satisfied
Loading Speed
Use of Color
Font Size
Visibility of Images
Easy to Understand Layout
×
Please rate each item regarding Game8.co's Message Boards, Comments.
Ease of Writing
Very Dissatisfied
Somewhat Dissatisfied
Fine
Somewhat Satisfied
Highly Satisfied
Readability
Ease in Finding Information
Comment Quality
Comment Quantity
Admin Response
×
Please rate each item regarding Game8.co's Site's new design.
Please rate our site's new design
Very Dissatisfied
Somewhat Dissatisfied
Fine
Somewhat Satisfied
Highly Satisfied
Do you think that the website's design change makes the site easier to use?
Has the new design made it easier for you to find information on the site?
Has the new design improved the overall visual appeal of the site?
How would you rate your overall satisfaction with the new design of the site?
×
How likely are you to recommend Game8 to someone you know?
Very Unlikely
0
1
2
3
4
5
6
7
8
9
10
Very Likely
If you have other opinions regarding potential improvement to the website, please share them with us. We would appreciate your honest opinion.
Note: This is a free response section, so you can proceed without entering anything.
Note: Please be sure not to enter any kind of personal information into your response.
Note: Please be sure not to enter any kind of personal information into your response.
×
Thank You
×
Thank you for participating in our survey! Your answers will help us to improve the quality of our website and services.
We hope you continue to make use of Game8.
We hope you continue to make use of Game8.
Close
Rankings
- We could not find the message board you were looking for.
Gaming News


![Slay the Spire 2 Review [Early Access] | Still the Deckbuilder to Beat](https://img.game8.co/4433115/44e19e1fb0b4755466b9e516ec7ffb1e.png/thumb)

![Resident Evil Village Review [Switch 2] | Almost Flawless Port](https://img.game8.co/4432790/e1859f64830960ce4248d898f8cd38d9.jpeg/thumb)
Popular Games

Genshin Impact Walkthrough & Guides Wiki
Honkai: Star Rail Walkthrough & Guides Wiki
Umamusume: Pretty Derby Walkthrough & Guides Wiki
Pokemon Pokopia Walkthrough & Guides Wiki
Resident Evil Requiem (RE9) Walkthrough & Guides Wiki
Monster Hunter Wilds Walkthrough & Guides Wiki
Wuthering Waves Walkthrough & Guides Wiki
Arknights: Endfield Walkthrough & Guides Wiki
Pokemon FireRed and LeafGreen (FRLG) Walkthrough & Guides Wiki
Pokemon TCG Pocket (PTCGP) Strategies & Guides Wiki


Recommended Games
Fire Emblem Heroes (FEH) Walkthrough & Guides Wiki
Diablo 4: Vessel of Hatred Walkthrough & Guides Wiki
Yu-Gi-Oh! Master Duel Walkthrough & Guides Wiki
Super Smash Bros. Ultimate Walkthrough & Guides Wiki
Pokemon Brilliant Diamond and Shining Pearl (BDSP) Walkthrough & Guides Wiki
Elden Ring Shadow of the Erdtree Walkthrough & Guides Wiki
Monster Hunter World Walkthrough & Guides Wiki
The Legend of Zelda: Tears of the Kingdom Walkthrough & Guides Wiki
Persona 3 Reload Walkthrough & Guides Wiki
Cyberpunk 2077: Ultimate Edition Walkthrough & Guides Wiki


All rights reserved
© 2010 - 2024 Grinding Gear Games
The copyrights of videos of games used in our content and other intellectual property rights belong to the provider of the game.
The contents we provide on this site were created personally by members of the Game8 editorial department.
We refuse the right to reuse or repost content taken without our permission such as data or images to other sites.