PoE 2 0.4 Druid Build - AutoBomber Oracle
Latest: 0.5.0 Release Date
☆ Fate of the Vaal ▶︎ The Last of the Druids
┗ Bonded Mods | 0.4 Mystery Box
★ Druid: Class Overview | Builds
☆ NEW: Disciple of Varashta Ascendancy!
★ Best Class | Best Builds | Leveling Builds
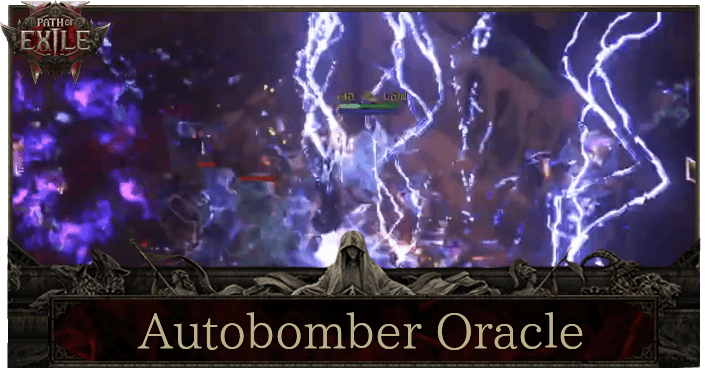
This is a Autobomber Oracle endgame build for mapping in Path of Exile 2 (PoE 2)'s The Last of the Druids Update. Check out the Autobomber Oracle endgame build, including its gear, socketables, skills, and playstyle!
List of Contents
Autobomber Oracle Build Summary
Mist's Autobomber Oracle Build
This Oracle has been created by MIst, made for Patch 0.4, The Last of the Druids Update. For more detailed Path of Exile 2 build guides, head on over at Mist's Youtube or check out his community at Discord.
You can also catch Mist and his community live on Twitch!
Autobomber Oracle Build
 Autobomber Oracle |
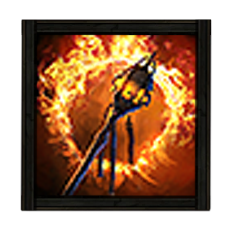

 Spark Launches a spray of sparking projectiles that travel erratically along the ground until they hit an enemy or expire.
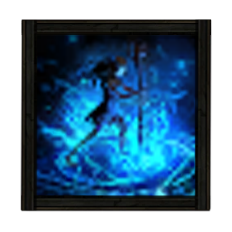
 Orb of Storms Creates an Orb of electricity that fires Chaining Lightning bolts at nearby enemies.
 Mana Remnants Conjures surging lightning to restore your Mana. While active, Shocked enemies you kill have a chance to spawn a Mana Remnant, and Critically Hitting a Shocked target spawns a Mana Remnant every few seconds. Picking up a Mana Remnant grants you Mana which can Overflow maximum Mana.
 Blink Replaces your dodge roll with a short-cooldown Spell that allows you to tunnel through space, instantly reappearing a medium distance away.
 Charge Regulation While active, you gain powerful Buffs based on your active Charges. However, maintaining the Buff consumes Charges every few seconds.
 Elemental Conflux Tap into a current of raw and unpredictable Elemental Power, causing you to deal greatly more damage of a randomly chosen Element. The Element affected changes frequently, though the same Element can be affected multiple times in succession.
 Trinity Become attuned to all Elements building up Fire, Cold, and Lightning Resonance based off the highest Elemental Damage type dealt by your Attack Hits. Your Elemental Damage with Attacks is greatly enhanced the more Resonance of any type you have.
 Elemental Weakness Curse all targets in an area after a short delay, lowering their Elemental Resistances.
|
|
|
|
The Autobomber is a critical-focused, spellslinging caster build that relies on procs from Spellslinger and Lightning Bolt to deal massive amounts of damage to multiple targets.
It shines on snaking Vaal Temple runs but will be able to clear maps comfortably with no issues.
| Date | Changes |
|---|---|
| 02-19-2026 | Created Autobomber Oracle build for endgame. |
Autobomber Equipment
| Gear | Modifiers | |
|---|---|---|
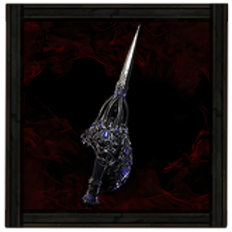 Dueling Wand Dueling Wand Dueling Wand Stats:
Requirements: Level - 65 Intelligence - 103 (Weapon Set 1) |
・+3 To Level of All Spell Skills
・% Increased Critical Chance for Spells ・% Increased Cast Speed ・Gain % of Damage As Extra Fire Damage ・Gain % of Damage As Extra Lightning Damage |
|
 Chiming Staff Chiming Staff Chiming Staff Stats:
Requirements: Level - 25 Intelligence - 41 (Weapon Set 2) |
・+ To Level of All Spell Skills
・% Increased Cast Speed |
|
 Sacred Flame Shrine Sceptre Sacred Flame Shrine Sceptre Sacred Flame Shrine Sceptre Stats:
Spirit - 100 Requirements: Level - 78 Strength - 78 Intelligence - 106 (Offhand Set 1) |
・% Increased Spirit
・Gain % of Damage as Extra Fire Damage ・Enemies in Your Presence Resist Elemental Damage Based on Their Lowest Resistance | |
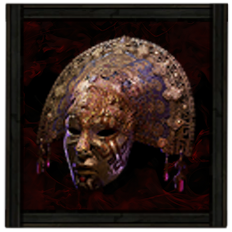 The Vertex Tribal Mask The Vertex Tribal Mask The Vertex Tribal Mask Stats:
Evasion - 66 Energy Shield - 28 Requirements: Level - 33 Dexterity - 27 Intelligence - 27 Fixed Modifiers: ・ 100-150% increased Evasion and Energy Shield ・ 20-30% increased Critical Hit Chance ・ +13-17% to Chaos Resistance ・ Equipment and Skill Gems have 50% reduced Attribute Requirements (Helm) |
・% Increased Critical Hit Chance
・% Increased Cooldown Recovery Rate + To Any Elemental Resistance ・Skill Gems Have No Attribute Requirements ・+ To Level of All Skills |
|
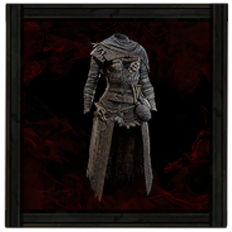 Vile Robe Vile Robe Vile Robe Stats:
Energy Shield - 184 Requirements: Level - 65 Intelligence - 121 (Body Armor) |
・Increased Armour, Evasion and Energy Shield
・+ To Maximum Energy Shield ・$ Increased Energy Shield ・+ To Spirit ・Any Elemental Resistance |
|
 Grim Gloves Grim Gloves Grim Gloves Stats:
Energy Shield - 42 Requirements: Level - 65 Intelligence - 80 (Gloves) |
・Any Elemental Resistance
・+ To Maximum Energy Shield ・Maximum Life Desecrated: ・Increased Critical Damage Bonus |
|
 Sekhema Sandals Sekhema Sandals Sekhema Sandals Stats:
Energy Shield - 82 Requirements: Level - 80 Intelligence - 108 (Boots) |
・% Increased Movement Speed
・% Increased Energy Shield ・+To Maximum Life ・Any Elemental Resistance Desecrated: ・+To Maximum Energy Shield |
|
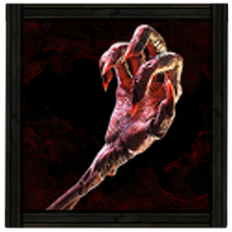
 Choir of the Storm Jade Amulet Choir of the Storm Jade Amulet Choir of the Storm Jade Amulet Requirements:
Level - 78 Implicit:+10-15 to Dexterity;Grants Skill: Level X Lightning Bolt Fixed Modifiers: ・ +20-30% to Lightning Resistance ・ Critical Hits Ignore Enemy Monster Lightning Resistance ・ Trigger Lightning Bolt Skill on Critical Hit (Amulet) |
・+ To Dexterity
・+ Lightning Resistance ・Critical Hits Ignore Enemy Monster Lightning Resistance ・Trigger Lightning Bolt Skill on Critical Hit |
|
 Breach Ring Breach Ring Breach Ring Requirements:
Level - 40 Implicit:Maximum Quality is 40% (Ring 1) |
・+ To Maximum Mana
・% Increased Maximum Mana ・% Increased Cast Speed ・+To Any Attribute Desecrated: ・% Increased Cooldown Recovery Rate |
|
 Kalandra's Touch Ring Kalandra's Touch Ring Kalandra's Touch Ring Requirements:
None Implicit:Reflects your other Ring Fixed Modifiers: ・ Mirrored (Ring 2) |
・Reflects Your Other Ring | |
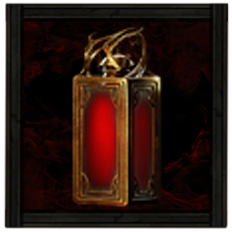 Ultimate Life Flask Ultimate Life Flask Ultimate Life Flask Stats:
Flask Type - Life Recovered Life - 920 Charge Per Use - 10 Total Charges - 75 Duration - 3 sec. (Life Flask) |
・% Increased Amount Recovered
・Reduced Charges Per Use |
|
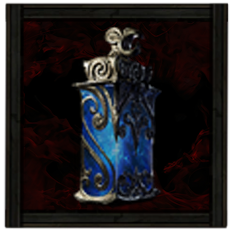 Lavianga's Spirits Gargantuan Mana Flask Lavianga's Spirits Gargantuan Mana Flask Lavianga's Spirits Gargantuan Mana Flask Stats:
Flask Type - Mana Recovered Mana - 185 Charge Per Use - 10 Total Charges - 75 Duration - 2 sec. (Mana Flask) |
・This Flask Cannot Be Used but Applies Its Effect Constantly
・% Reduced Amount Recovered |
Weapons
For our build, we will use a Dueling Wand because we need access to its unique Spellslinger skill. We will primarily use this to generate power charges to increase our critical hit chance with Charge Regulation.
We will be pairing it with a Sacred Flame Shrine Sceptre for increased Spirit, as we will be needing plenty to socket our persistent support gems, as well as lowering our enemy's total resistance to their lowest resistance.
Armor and Accessories
With the build's reliance on criticals, we will be utilizing The Vertex Tribal Mask to increase our Critical Hit Chance, as well as lower the stat requirements for our skill gems. Get as much elemental resistance as you can, as well as energy shield for survivability.
A key component of this build is the Choir of the Storm Amulet, which triggers Lightning Bolt on a successful crit, while simultaneously making critical hits ignore lightning resistance.
| List of Armors | List of Accessories |
Runes and Soul Cores
| Equipment | Sockets |
|---|---|
| Weapon | |
| Armor |
For our wand, we will socket a Hedgewitch Assandra's Rune of Wisdom, which increases the level of all our spells by one. We will pair it with a Saqawal's Rune of the Sky, which increases our elemental damage.
We will be socketing a Rabbit Idol on our Sceptre for more Spirit, and Farrul's Rune of the Chase for more movement speed for easier farming. You can use the rest of the socket slots to top off the elemental resistance needed, otherwise get greater iron runes for increased survivability.
| List of Runes | List of Soul Cores |
Belts and Charms
| Belt Modifiers | |||||
|---|---|---|---|---|---|
 Headhunter Heavy Belt Headhunter Heavy Belt Headhunter Heavy Belt Requirements:
Level - 50 Implicit:1-2 Charm slots;20-30% increased Stun Threshold Fixed Modifiers: ・ +40-60 to maximum Life ・ +20-40 to Strength ・ +20-40 to Dexterity ・ When you Kill a Rare monster, you gain its Modifiers for 60 seconds |
・+To Maximum Life
・+To Strength ・+ To Dexterity ・When You Kill a Rare Monster, You Gain Its Modifiers for 20 Seconds |
||||
| Charm Options | |||||
 The Fall of the Axe Silver Charm The Fall of the Axe Silver Charm
|
 Nascent Hope Thawing Charm Nascent Hope Thawing Charm
|
 Dousing Charm Dousing Charm
|
|||
With the build's ability to clear rooms fast, we will be utilizing the Headhunter Heavy Belt as it has the unique ability to gain modifiers from rare monsters.
To prevent us from getting slowed or frozen, we will use the The Fall of the Axe and the Nascent Hope charms.
Lastly, we will be using the Dousing Charm to provide immunity to Ignite, as getting Ignited prevents our Energy Shields from recovering.
| List of Belts | List of Charms |
Autobomber Skills
All Active and Persistent Skills
| Skill | Support Gems |
|---|---|
|
Sigil of Power Sigil of Power |
Prolonged Duration II Supports any skill that has a duration, making that duration longer.
Magnified Area II Supports any skill with an area of effect, making it larger at the cost of damage.
|
|
Spellslinger Spellslinger |
Profane Ritual Marks a Corpse with a profane rune, dealing Chaos damage over time to nearby enemies. When the ritual is complete the corpse is consumed and you gain a power charge.
Magnified Area II Supports any skill with an area of effect, making it larger at the cost of damage.
Charge Profusion II Supports skills that can generate Charges, giving them a chance to generate an additional Charge when they do so, as well as a chance to generate an additional Charge of a random type.
Energy Retention Supports Meta skills. Supported skills gain a chance to partially refund a portion of energy cost when triggering or invoking other skills.
Compressed Duration II Supports any skill that has a duration, making that duration shorter.
|
|
Purity of Fire Purity of Fire |
Coolheaded Supports Persistent Buff Skills, causing Ignite applied to you to last for a shorter duration while the Supported Skill is active.
Clarity II Supports Persistent Buff Skills, causing you to gain increased Mana Regeneration while the Skill is active.
Mysticism II Supports Persistent Buff Skills, causing you to deal increased Spell Damage while on full Energy Shield while the Supported Skill is active.
Vitality II Supports Persistent Buff Skills, causing you to gain Life Regeneration while the Skill is active.
|
|
Spark Spark Launches a spray of sparking projectiles that travel erratically along the ground until they hit an enemy or expire.
|
Pierce III Supports Projectile skills, making their Projectiles Pierce an unlimited number of enemies, losing damage as they do so.
Projectile Acceleration II Supports Projectile skills, making those Projectiles travel faster, and granting them a chance to Pierce Enemies.
Blind II Supports any skill that Hits enemies, causing them to Blind on Hit with increased effect.
Efficiency II Supports any skill, making it cost less to use. Cannot support skills which reserve Spirit.
Zenith II Supports Spell Skills. Supported Skills deal more damage while you are above 90% of your Maximum Mana, and Recoup a portion of Skill costs as Mana. Does not modify Skills used by Minions.
|
|
Orb of Storms Orb of Storms Creates an Orb of electricity that fires Chaining Lightning bolts at nearby enemies.
|
Lightning Mastery Supports Lightning skills, granting them an additional level.
Magnified Area II Supports any skill with an area of effect, making it larger at the cost of damage.
Chain III Supports Projectile skills and any other skills that Chain, causing them to Chain additional times.
Overabundance II Supports skills which can have a Limited number of effects active at once, increasing that Limit at the cost of their duration. Only applies to restrictions that use the word "Limit".
Neural Overload Supports any skill that hits enemies. Nearby enemies are marked when they are Primed for Electrocution, and hitting a marked enemy with a supported skill will Electrocute them.
|
|
Elemental Weakness Elemental Weakness Curse all targets in an area after a short delay, lowering their Elemental Resistances.
|
Heightened Curse Supports curse skills, magnifying their power.
Ritualistic Curse Supports Curse skills, causing them to cover a larger area but take longer to curse enemies
Focused Curse Supports Curse skills, causing them to Curse enemies more quickly after being cast.
Doedre's Undoing Supports Curse Skills. Supported Curse Skills create Hazardous areas which explode when Enemies enter them, Cursing Enemies and dealing Chaos Damage based on your Intelligence.
Magnified Area II Supports any skill with an area of effect, making it larger at the cost of damage.
|
|
Blink Blink Replaces your dodge roll with a short-cooldown Spell that allows you to tunnel through space, instantly reappearing a medium distance away.
|
Atziri's Impatience Supports Skills with Cooldowns, dramatically increasing the rate at which those Cooldowns Recover, but causing you to lose Life, Mana, and Energy Shield when they are used. Cannot Support Meta Skills or modify the Skills of Minions.
Rapid Casting II Supports Spells, causing them to cast faster.
Mobility Supports skills that can be used while moving, allowing you to move faster while using them.
|
|
Mana Remnants Mana Remnants Conjures surging lightning to restore your Mana. While active, Shocked enemies you kill have a chance to spawn a Mana Remnant, and Critically Hitting a Shocked target spawns a Mana Remnant every few seconds. Picking up a Mana Remnant grants you Mana which can Overflow maximum Mana.
|
Harmonic Remnants II Supports Skills which create Remnants, allowing those Remnants to be collected from further away, with a chance to create an additional Remnant.
Remnant Potency I Supports Skills that generate Remnants, making those Remnants to be more powerful.
Khatal's Rejuvenation Supports Skills that generate Remnants. Picking up Remnants from Supported Skills grants Khatal's Rejuvenation.
|
|
Elemental Conflux Elemental Conflux Tap into a current of raw and unpredictable Elemental Power, causing you to deal greatly more damage of a randomly chosen Element. The Element affected changes frequently, though the same Element can be affected multiple times in succession.
|
Lightning Mastery Supports Lightning skills, granting them an additional level.
Dialla's Desire Supports any Skill which has levels, increasing the level and Quality, while reducing the cost and Reservation.
|
|
Trinity Trinity Become attuned to all Elements building up Fire, Cold, and Lightning Resonance based off the highest Elemental Damage type dealt by your Attack Hits. Your Elemental Damage with Attacks is greatly enhanced the more Resonance of any type you have.
|
Uhtred's Exodus Supports Skills which can gain levels, granting them many additional levels provided no other supports are used with the supported Skill. Does not support skills which do not have levels.
|
|
Charge Regulation Charge Regulation While active, you gain powerful Buffs based on your active Charges. However, maintaining the Buff consumes Charges every few seconds.
|
- |
The build relies on critical hits to trigger additional Lightning Bolt spellcasts, so we will be socketing Profane Ritual on Spellslinger to generate power charges, which in turn increases critical hit chance via Charge Regulation.
Since both Spark and Lightning Bolt deal Lightning Damage, we will be utilizing Elemental Conflux and Trinity to further enhance our elemental damage, with the occasional Elemental Weakness cast thrown in for any targets.
As we clear rooms of enemies, we can pick up Mana Remnants that are left behind in order to sustain continued spellcasting across maps without stopping.
Autobomber Passive Tree
Passive Tree Progression
| Ascendency Passive Nodes | |||
|---|---|---|---|
 |
|||
| Passive Nodes | |||
| Screenshots and Footage taken from Path of Building | |||
※ Legend: Red = Weapon Set I | Green = Weapon Set II
The Oracle ascendancy has a strong suite of strong passives, most notably The Unseen Path and Entwined Realities, which are used in tandem to obtain passives that will otherwise be unattainable.
With our focus on crit, we will be taking the Ascendancy passive, Forced Outcome, and taking other passives such as Empowering Infusions, Calculated Hunter, and Controlling Magic to further bolster our critical hit chance and critical damage.
Passive Skill Tree Guide and List of Passives
Jewels
Note: The modifiers listed are arranged according to priority.
| |
・Notable Passive Skills in the Radius Grants % Increased Critical Damage Bonus
・Notable Passive Skills in the Radius Also Grants % Increased Critical Spell Damage Bonus ・Notable Passive Skills in the Radius Also Grants % Increased Critical Damage Bonus ・Notable Passive Skills in the Radius Also Grants % Faster Start of Energy Shield Recharge ・ % Increased Cooldown Recovery Rate Desecrated: ・Upgrades Radius to Large |
|---|---|
| |
・% Increased Cooldown Recovery Rate
・% Increased Movement Speed |
| |
・Notable Passive Skills in the Radius Grants % Increased Cooldown Recovery Rate
・% Increased Cooldown Recovery Rat Desecrated: ・Upgrades Radius to Medium |
| |
・% Increased Cooldown Recovery Rate
・% Increased Movement Speed ・% Increased Elemental Damage |
| |
・% Increased Movement Speed
・Gain % of Damage as Extra Fire Damage ・% Increased Critical Hit Chance ・% Increased Coolwon Recovery Rate |
To augment our build, we will use a combination of normal and time-lost variants of Sapphires and Emeralds. We will take advantage of the additional bonuses of the time-lost jewels for increased cooldown recovery and critical stats.
The rest of our jewel modifiers are pretty straightforward. As we are focused primarily on farming, we will take as much movement speed, additional criticals, and elemental damage wherever we can.
Autobomber Playstyle and Skill Rotation
Mobbing Rotation
The gameplay is quite simple for maps, realistically, we will only be using Spark to clear rooms with ease. The rotation is as follows:
- Cast Spark, Triggering Lightning Bolt and Profane Ritual Casts.
- Pick up Mana Remnants to regain lost mana.
- Use Blink to help you move through the area while you look for the next pack.
- Rinse and Repeat.
Bossing Rotation
Bosses and tanky elites will require us to use the full extent of our skills. The rotation is as follows:
- Cast Sigil of Triumph for the buff.
- Cast Elemental Weakness to further lower enemy elemental resistance.
- Cast Orb of Storms on the target.
- Cast Spark to deal damage, and trigger Lightning Bolt procs.
Path of Exile 2 Related Guides

0.4 Best Endgame Builds
| Rank | Build |
|---|---|
 |
|
 |
|
 |
|
 |
0.4 Leveling Builds
All Build Guides
| List of Builds by Class | |||||||||||
|---|---|---|---|---|---|---|---|---|---|---|---|
 Huntress Huntress |
 Mercenary Mercenary |
 Monk Monk |
|||||||||
 Witch Witch |
 Sorceress Sorceress |
 Warrior Warrior |
|||||||||
 Ranger Ranger |
 Druid Druid |
- | |||||||||
| Other Build Guides | 0.3 Leveling Builds | How to Make a Good Build | |||||||||
Comment
Author

PoE 2 0.4 Druid Build - AutoBomber Oracle
Rankings
- We could not find the message board you were looking for.

Gaming News


![Monster Hunter Stories 3 Review [First Impressions] | Simply Rejuvenating](https://img.game8.co/4438641/2a31b7702bd70e78ec8efd24661dacda.jpeg/thumb)
Popular Games

Genshin Impact Walkthrough & Guides Wiki
Honkai: Star Rail Walkthrough & Guides Wiki
Umamusume: Pretty Derby Walkthrough & Guides Wiki
Pokemon Pokopia Walkthrough & Guides Wiki
Resident Evil Requiem (RE9) Walkthrough & Guides Wiki
Monster Hunter Wilds Walkthrough & Guides Wiki
Wuthering Waves Walkthrough & Guides Wiki
Arknights: Endfield Walkthrough & Guides Wiki
Pokemon FireRed and LeafGreen (FRLG) Walkthrough & Guides Wiki
Pokemon TCG Pocket (PTCGP) Strategies & Guides Wiki


Recommended Games
Diablo 4: Vessel of Hatred Walkthrough & Guides Wiki
Cyberpunk 2077: Ultimate Edition Walkthrough & Guides Wiki
Fire Emblem Heroes (FEH) Walkthrough & Guides Wiki
Yu-Gi-Oh! Master Duel Walkthrough & Guides Wiki
Super Smash Bros. Ultimate Walkthrough & Guides Wiki
Pokemon Brilliant Diamond and Shining Pearl (BDSP) Walkthrough & Guides Wiki
Elden Ring Shadow of the Erdtree Walkthrough & Guides Wiki
Monster Hunter World Walkthrough & Guides Wiki
The Legend of Zelda: Tears of the Kingdom Walkthrough & Guides Wiki
Persona 3 Reload Walkthrough & Guides Wiki


All rights reserved
© 2010 - 2024 Grinding Gear Games
The copyrights of videos of games used in our content and other intellectual property rights belong to the provider of the game.
The contents we provide on this site were created personally by members of the Game8 editorial department.
We refuse the right to reuse or repost content taken without our permission such as data or images to other sites.