This survey will take about 1 minute.
Your answers will help us to improve our website.
Path of Exile 2 (PoE 2)
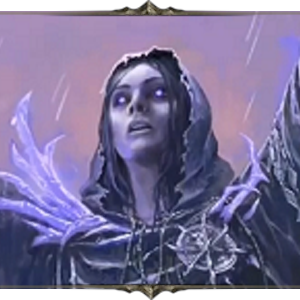
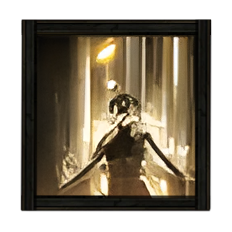
PoE 2 0.3 Witch Build - Blackflame Covenant Bloodmage
Latest: 0.5.0 Release Date
☆ Fate of the Vaal ▶︎ The Last of the Druids
┗ Bonded Mods | 0.4 Mystery Box
★ Druid: Class Overview | Builds
☆ NEW: Disciple of Varashta Ascendancy!
★ Best Class | Best Builds | Leveling Builds
This is a Blackflame Covenant Bloodmage endgame build for Path of Exile 2 (PoE 2). Check out the Blackflame Covenant endgame build, including its gear, socketables, skills, and playstyle!
List of Contents
Blackflame Covenant Bloodmage Build Summary
DestroyerOfBubbas' Blackflame Covenant Bloodmage Witch Build
This Blackflame Covenant Bloodmage Palm Of The Dreamer Bloodmage build, featured in the PoE forum's Build of the Week, is brought to you by DestroyerOfBubbas.
Check out more of DestroyerOfBubbas builds and content on YouTube! The video explains the build in full detail, including the gear, passives, and skill usage.
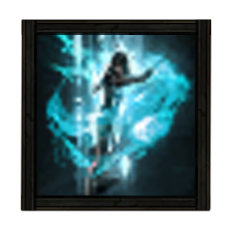
Blackflame Covenant Bloodmage Build
| Build Setup | |
|---|---|
 Blackflame Covenant Bloodmage |
 Life Remnants 25% chance to spawn a Remnant on killing an enemy;Spawn a Remnant on Critically Hitting a target, no more than once every 2 seconds;Each Remnant grants X Life

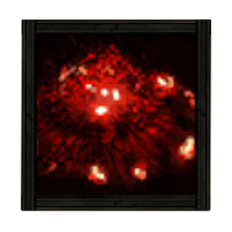
 Ember Fusillade Conjures a blazing Ember that hovers around you. After a short duration, the Ember launches at the enemy, dealing fire damage in an area on impact. Recasting the spess resets the duration for all active Embers. Multiple Embers fired in the same Fusillade will attempt to target different enemies.
 Fireball Launches a large ball of Fire which explodes on impact, creating a nova of smaller firebolts.
 Despair Curses all targets in an area after a short delay, lowering their Chaos Resistance.
 Withering Presence While active, periodically Withers enemies in your Presence.
 Time of Need Invokes divine blessings, periodically healing you and removing Curses and Elemental Ailments from you.
 Cast on Critical While active, gains energy when you Critically Hit enemies and triggers socketed spells on reaching maximum energy.
 Convalescence While active, grants a skill that you can use to instantly begin Recharging Energy Shield and gain Buff for a duration that prevents Recharge being interrupted. The Buff is removed at maximum Energy Shield and the skill cannot be used while Energy Shield is full.
 Siphon Elements While active, has a chance to create an Infusion Remnant when you Freeze, Shock, or Ignite a target.
 Living Bomb Plant a seed of Fire inside an enemy. Dealing enough damage to the enemy, or killing it outright, causes the seed to explode, dealing damage in an area and leaving behind a Fire Infusion Remnant.
|
|
|
|
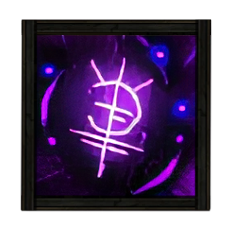
The build utilizes the new keystone passive Blackflame Covenant, converting all of our Fire damage into Chaos damage. This is used in conjunction with the unique scepter Palm of the Dreamer, resulting in incredible clearing speed.
| Date | Changes Made |
|---|---|
| 09/12/2025 | ・ Created Blackflame Covenant Bloodmage build page. |
Blackflame Covenant Bloodmage Equipment
| Gear | Modifiers | |
|---|---|---|
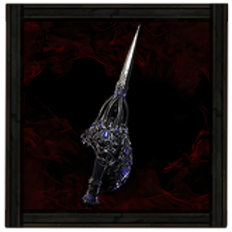 Dueling Wand Dueling Wand Dueling Wand Stats:
Requirements: Level - 65 Intelligence - 103 (Weapon) |
・+ Level to All Fire Skills
・Increased Critical Hit chance for Spells ・Increased Flammability Magnitutde |
|
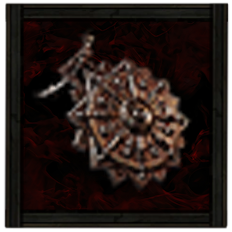
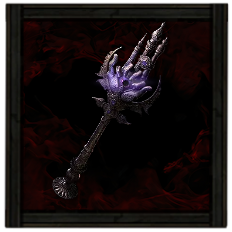 Palm of the Dreamer Shrine Sceptre Palm of the Dreamer Shrine Sceptre Palm of the Dreamer Shrine Sceptre Stats:
Spirit - 100 Requirements: Level - 65 Strength - 32 Intelligence - 80 (Offhand) |
・Grants Skill: Impurity
・+ All Attributes ・Gain % of damage as extra Chaos Damage ・Grants Effect of Dreaming Gloom Shrine | |
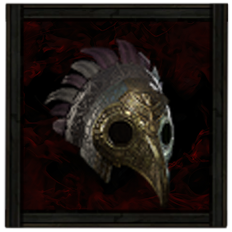 Soaring Mask Soaring Mask Soaring Mask Stats:
Evasion - 146 Energy Shield - 55 Requirements: Level - 75 Dexterity - 59 Intelligence - 59 (Helm) |
・Life
・Increased Evasion and Energy Shield ・Any Elemental Resistance ・Increased Cost Efficiency |
|
 Flowing Raiment Flowing Raiment Flowing Raiment Stats:
Energy Shield - 153 Requirements: Level - 70 Intelligence - 121 Implicit : 40-50% increased Mana Regeneration Rate (Body Armor) |
・Life
・Energy Shield ・Elemental Resistance ・Spirit |
|
 Adorned Wraps Adorned Wraps Adorned Wraps Stats:
Evasion - 56 Energy Shield - 21 Requirements: Level - 59 Dexterity - 41 Intelligence - 41 (Gloves) |
・Life
・Increased Evasion and Energy Shield ・Elemental Resistance ・Attributes |
|
 Sandsworn Sandals Sandsworn Sandals Sandsworn Sandals Stats:
Energy Shield - 75 Requirements: Level - 75 Intelligence - 101 (Boots) |
・Increased Movement Speed
・Life ・Any Elemental Resistance ・Increased Energy Shield |
|
 Solar Amulet Solar Amulet Solar Amulet Requirements:
Level - 30 Implicit:+10-15 to Spirit (Amulet) |
・+ Levels to All Spell Skills
・Life ・Spirit ・Increased Spell Damage ・Any Elemental Resistance ・Increased Energy Shield ・Attributes Annointment: Pure Chaos ・Gain 11% of Damage as Extra Chaos Damage |
|
 Snakepit Pearl Ring Snakepit Pearl Ring Snakepit Pearl Ring Requirements:
Level - 32 Implicit:7-10% increased Cast Speed Fixed Modifiers: ・ 20-30% increased Spell Damage ・ 10-15% increased Cast Speed ・ Left ring slot: Projectiles from Spells cannot Chain ・ Left ring slot: Projectiles from Spells Fork ・ Right ring slot: Projectiles from Spells Chain +1 times ・ Right ring slot: Projectiles from Spells cannot Fork (Ring 1) |
・% increased Spell Damage
・% increased Cast Speed ・Left ring slot: Projectiles from Spells cannot Chain ・Left ring slot: Projectiles from Spells Fork |
|
 Breach Ring Breach Ring Breach Ring Requirements:
Level - 40 Implicit:Maximum Quality is 40% (Ring 2) |
・Increased Chaos Damage
・Life ・Elemental Resistance |
|
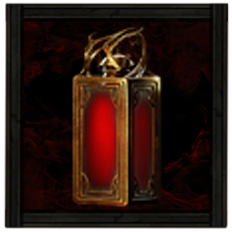 Ultimate Life Flask Ultimate Life Flask Ultimate Life Flask Stats:
Flask Type - Life Recovered Life - 920 Charge Per Use - 10 Total Charges - 75 Duration - 3 sec. (Life Flask) |
・Increased Recovery Rate
・Increased Charges Gained |
|
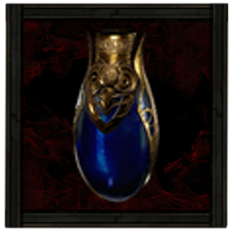 Ultimate Mana Flask Ultimate Mana Flask Ultimate Mana Flask Stats:
Flask Type - Mana Recovered Mana - 310 Charge Per Use - 10 Total Charges - 75 Duration - 3 sec. (Mana Flask) |
・% of Recovery Applied Instantly
・Increased Charges Gained |
Weapons
The build's mapping capabilities are centered around the Palm of the Dreamer scepter, which enhances our mapping abilities in two primary ways.
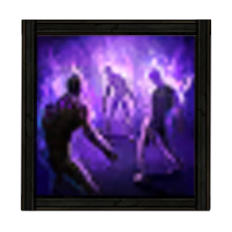
This unique item has the implicit stat of increasing our Chaos damage, as well as granting the passive effect Dreaming Gloom Shrine, which makes enemies explode for Chaos damage upon death, dealing a percentage of their HP in an AoE.
Armor and Accessories
Try to get as much life as you can on all your armor pieces, and make sure you have the necessary resistances capped, because this build doesn't have many options for survivability.
In order to increase the number of projectiles after a target is hit, equip Snakepit ring on the left ring slot to make your fireballs fork. This passive enables the build's exceptional mapping potential, when used in conjunction with Palm of the Dreamer.
Ensure that your other accessories have the correct modifiers, and anoint Pure Chaos into your amulet for additional damage.
| List of Armors | List of Accessories | |
Runes and Soul Cores
| Equipment | Sockets |
|---|---|
| Weapon | |
| Armor |
|
Thane Girt's Rune of Wildness is a valuable addition to this build, offering a 25% chance to increase projectiles when using skills. This rune effect is applicable to both your mapping and bossing capabilities, as it benefits both Ember Fusilade and Fireball.
Farrul's Rune of Grace keeps you mobile while casting, and the Talisman of Eeshta reduces your skill costs. Fill the rest of your armor socket slots with Greater Iron Runes.
You may need to use some elemental runes to maximize your resistances but ideally, your resistances would come mostly from your gear so you can use more sockets for Greater Iron Runes.
| List of Runes | List of Soul Cores |
Belts and Charms
| Belt Modifiers | |||||
|---|---|---|---|---|---|
 Ornate Belt Ornate Belt Ornate Belt Requirements:
Level - 31 Implicit:1-2 Charm slots;10-15% reduced Charm Charges used |
・Has 3 Charm Slots
・Charms gain Charges per second ・Maximum Life ・Any Elemental Resistance |
||||
| Charm Options | |||||
 Rite of Passage Rite of Passage |
 Fall of the Axe Fall of the Axe |
 Nascent Hope Nascent Hope |
|||
Your belt will need three total charm slots and the ability to gain charges per second on its own because we will be slotting three Unique charms into it.
Rite of Passage increases your damage output when you are possessed by the spirit of the serpent, and the same goes for Fall of the Axe when Onslaught triggers.
Nascent Hope is one of our few defensive options. It enables Energy Shields to immediately start recharging when the charm's effect is triggered.
| List of Belts | List of Charms |
Blackflame Covenant Bloodmage Skills
All Active and Persistent Skills
| Skill | Support Gems |
|---|---|
|
Fireball Fireball Launches a large ball of Fire which explodes on impact, creating a nova of smaller firebolts.
|
Unleash Supports Spells you cast yourself, making their effect reoccur when cast. Cannot support Channelling Skills or Skills with a Cooldown.
Efficiency II Supports any skill, making it cost less to use. Cannot support skills which reserve Spirit.
Fire Mastery Supports Fire skills, granting them an additional level.
Sione's Temper Supports Projectile Spells. Supported Spells have an increasingly higher chance to fire many additional Projectiles in a circle, resetting when they do.
Xoph's Pyre Supports Skills that can cause Damaging Hits, granting extra Chaos damage and causing Chaos damage to Contribute to Ignites.
|
|
Ember Fusillade Ember Fusillade Conjures a blazing Ember that hovers around you. After a short duration, the Ember launches at the enemy, dealing fire damage in an area on impact. Recasting the spess resets the duration for all active Embers. Multiple Embers fired in the same Fusillade will attempt to target different enemies.
|
Wildshards II Supports Projectile Spells. Supported Spells have a chance to fire many additional Projectiles in a circle.
Fire Mastery Supports Fire skills, granting them an additional level.
Considered Casting Supports Spell skills that Hit Enemies, boosting Damage at the cost of Cast Speed.
Compressed Duration II Supports any skill that has a duration, making that duration shorter.
|
|
Despair Despair Curses all targets in an area after a short delay, lowering their Chaos Resistance.
|
Heightened Curse Supports curse skills, magnifying their power.
Prolonged Duration II Supports any skill that has a duration, making that duration longer.
Efficiency II Supports any skill, making it cost less to use. Cannot support skills which reserve Spirit.
Focused Curse Supports Curse skills, causing them to Curse enemies more quickly after being cast.
Impending Doom Supports Curse skills you cast yourself, causing them to trigger Doom Blast on Cursed enemies when the Curse expires.
|
|
Living Bomb Living Bomb Plant a seed of Fire inside an enemy. Dealing enough damage to the enemy, or killing it outright, causes the seed to explode, dealing damage in an area and leaving behind a Fire Infusion Remnant.
|
Overabundance I Supports skills which can have a Limited number of effects active at once, increasing that Limit at the cost of their duration. Only applies to restrictions that use the word “Limit”.
Harmonic Remnants II Supports Skills which create Remnants, allowing those Remnants to be collected from further away, with a chance to create an additional Remnant.
Magnified Area II Supports any skill with an area of effect, making it larger at the cost of damage.
Mobility Supports skills that can be used while moving, allowing you to move faster while using them.
Fire Mastery Supports Fire skills, granting them an additional level.
|
|
Life Remnants Life Remnants 25% chance to spawn a Remnant on killing an enemy;Spawn a Remnant on Critically Hitting a target, no more than once every 2 seconds;Each Remnant grants X Life
|
Harmonic Remnants II Supports Skills which create Remnants, allowing those Remnants to be collected from further away, with a chance to create an additional Remnant.
Remnant Potency II Supports Skills which create Remnants, making those Remnants more powerful, but delaying their effect.
Vitality II Supports Persistent Buff Skills, causing you to gain Life Regeneration while the Skill is active.
Clarity II Supports Persistent Buff Skills, causing you to gain increased Mana Regeneration while the Skill is active.
|
|
Cast on Critical Cast on Critical While active, gains energy when you Critically Hit enemies and triggers socketed spells on reaching maximum energy.
|
Snap Shatters the frost on a Frozen enemy, Consuming the freese to deal a large amount of Cold Damage to enemies caught in the blast. Can also be cast on a Frostbolt to cause it to explode immediately. Any Frozen enemies hit by the Frostbolt's explosion will be dealt Cold Snap's damage and have their freeze consumed.
Boundless Energy II Supports Meta Skills. Supported Skills generate Energy significantly faster.
Efficiency II Supports any skill, making it cost less to use. Cannot support skills which reserve Spirit.
Harmonic Remnants II Supports Skills which create Remnants, allowing those Remnants to be collected from further away, with a chance to create an additional Remnant.
|
|
Convalescence Convalescence While active, grants a skill that you can use to instantly begin Recharging Energy Shield and gain Buff for a duration that prevents Recharge being interrupted. The Buff is removed at maximum Energy Shield and the skill cannot be used while Energy Shield is full.
|
Second Wind III Supports skills with cooldowns, giving them extra uses of that cooldown and causing them to restore Life on use. Cannot support instant or triggered skills, or modify the skills of minions.
Cooldown Recovery II Supports skills with Cooldowns, increasing the rate at which those Cooldowns Recover. Cannot modify the skills of minions.
Prolonged Duration II Supports any skill that has a duration, making that duration longer.
|
|
Siphon Elements Siphon Elements While active, has a chance to create an Infusion Remnant when you Freeze, Shock, or Ignite a target.
|
Harmonic Remnants II Supports Skills which create Remnants, allowing those Remnants to be collected from further away, with a chance to create an additional Remnant.
Remnant Potency III Supports Skills which create Remnants, making those Remnants more powerful, but delaying their effect.
|
|
Impurity Impurity |
Chaos Mastery Supports Chaos skills, granting them an additional level.
|
|
Time of Need Time of Need Invokes divine blessings, periodically healing you and removing Curses and Elemental Ailments from you.
|
Compressed Duration II Supports any skill that has a duration, making that duration shorter.
|
|
Withering Presence Withering Presence While active, periodically Withers enemies in your Presence.
|
- |
In most cases, Fireball will be your primary damaging skill, capable of clearing the entire screen with a single cast. We will be socketing Unleash to it to increase the overall damage, as well as the two new lineage support gems, Sione's Temper and Xoph's Pyre.
Sione's Temper has the potential to significantly enhance our projectiles, eliminating the need for repeated casting against multiple targets.
We will be socketing Snap to Cast on Critical and taking SIphon Elements to generate elemental infusions. Fireballs infused with an elemental infusion will increase their projectiles and significantly boosting their damage.
While its impact on Ember Fusilade is minimal, given its restricted use in this build to single targets, the additional projectiles provided by infusions make elemental infusions worth getting.
The remaining skills complete the build, primarily by increasing damage dealt to enemies via debuffs and auras, as well as enhancing survivability.
List of Skills
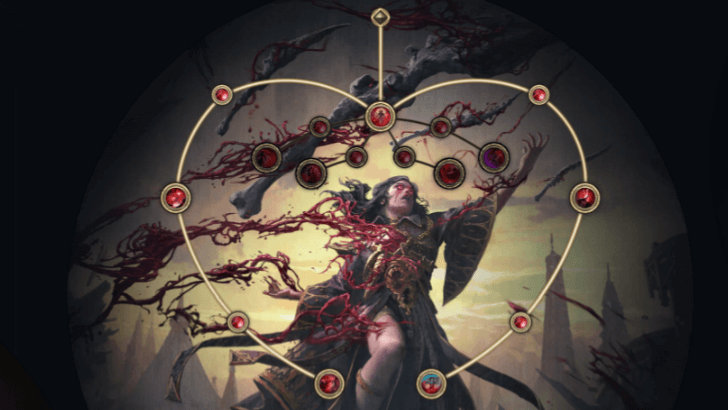
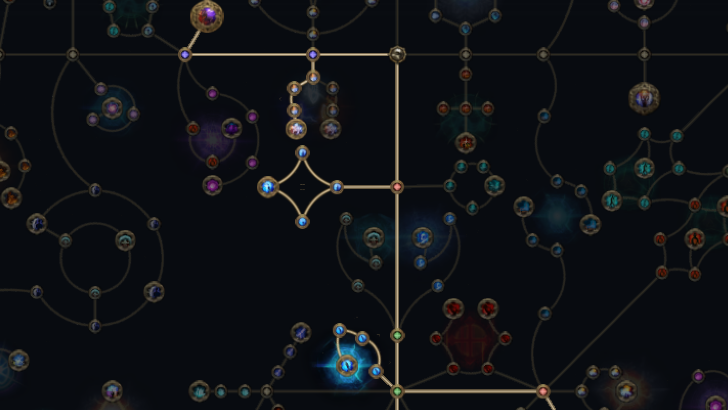
Blackflame Covenant Bloodmage Passive Tree
Passive Tree Progression
| Ascendency Passive Nodes | |||
|---|---|---|---|
 |
|||
| Passive Nodes | |||
| 1. |  |
2. |  Blackflame Covenant and Empowering Infusions Blackflame Covenant and Empowering Infusions |
| 3. | 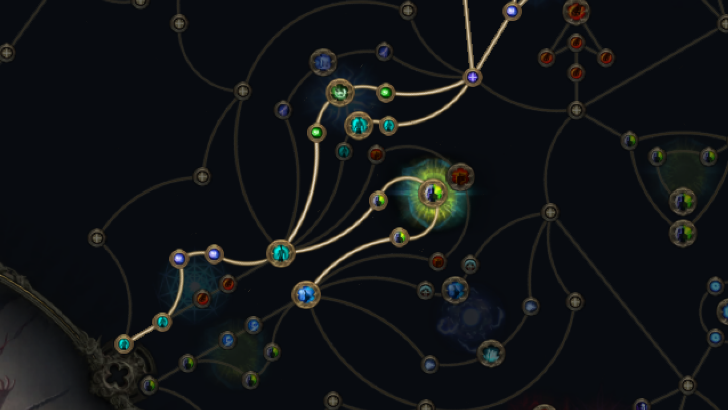 |
4. |  |
| 5. |  |
6. | - |
| Screenshots taken from Path of Building | |||
The build revolves around the new keystone passive, Blackflame Covenant, which converts all our fire damage into chaos damage. To supplement this, we will take nodes that increase chaos damage, such as Event Horizon, Spaghettification, and Entropy.
The remaining passive nodes, such as Critical Overload and Melding, will prioritize critical hits and energy shield nodes to enhance both damage and survivability.
Passive Skill Tree Guide and List of Passives
Jewels
Note: The modifiers listed are arranged according to priority.
| |
・Increased Skill Speed
・Recover Mana on kill ・Recover Max Health on Kill ・Gain % of Damage As Extra Chaos Damage |
|---|
The Heart of the Well Diamond offers an excellent selection of Abyssal modifiers that complement this build. These modifiers allow us to recover resources when we kill an enemy. This mapping runs smoothly; we only need to wait for Unleash to come off cooldown between casts.
Blackflame Covenant Bloodmage Playstyle and Skill Rotation
Mobbing Rotation
For mobbing, the build focuses on spam Fireball to generate Living Bomb and autocast Snap with the Cast of Critical persistent skill. The rotation is as follows:
- Cast Living Bomb on any enemy.
- Spam Fireball to deal damage and generate additional projectiles.
- Rinse and repeat.
Bossing Rotation
For bossing, you will opt for a one-button playstyle that make use of Ember Fusillade to deal huge burst damage. The rotation is as follows:
- Charge Ember Fusillade until you get 10 Embers.
- Cast Despair to debuff the Boss with lower Chaos resistance.
- Wait for Ember Fusillade unleash its projectiles for huge burst damage.
Path of Exile 2 Related Guides

0.4 Best Endgame Builds
| Rank | Build |
|---|---|
 |
|
 |
|
 |
|
 |
0.4 Leveling Builds
All Build Guides
| List of Builds by Class | |||||||||||
|---|---|---|---|---|---|---|---|---|---|---|---|
 Huntress Huntress |
 Mercenary Mercenary |
 Monk Monk |
|||||||||
 Witch Witch |
 Sorceress Sorceress |
 Warrior Warrior |
|||||||||
 Ranger Ranger |
 Druid Druid |
- | |||||||||
| Other Build Guides | 0.3 Leveling Builds | How to Make a Good Build | |||||||||
Comment
Author

PoE 2 0.3 Witch Build - Blackflame Covenant Bloodmage
Please participate in our site
improvement survey
04/2026
improvement survey
04/2026
Would you assist in
improving Game8's site?
improving Game8's site?

×
We are listening to our users' valuable opinions and discussing how to act on them.
The information collected through this survey will be used for the purpose of improving our services. In addition, the information will only be disclosed a part of a statistic in a format that will not allow identification of personal information.
Begin Survey
Not Now
×
Please rate each item regarding Game8.co's Advertisements.
Amount of Ads
Very Dissatisfied
Somewhat Dissatisfied
Fine
Somewhat Satisfied
Highly Satisfied
Placement of Ads
Timing of Ad Display
Ad Loading Speed
Safeness of Ads
Content of Ads
×
Please rate each item regarding Game8.co's Quality of Articles.
Amount of information
Very Dissatisfied
Somewhat Dissatisfied
Fine
Somewhat Satisfied
Highly Satisfied
Frequency of updates
Speed of new information
Accuracy of articles
Understandibility of articles
Readability of sentences
×
Please rate each item regarding Game8.co's Usability of the Site.
Ease of finding information
Very Dissatisfied
Somewhat Dissatisfied
Fine
Somewhat Satisfied
Highly Satisfied
Loading Speed
Use of Color
Font Size
Visibility of Images
Easy to Understand Layout
×
Please rate each item regarding Game8.co's Message Boards, Comments.
Ease of Writing
Very Dissatisfied
Somewhat Dissatisfied
Fine
Somewhat Satisfied
Highly Satisfied
Readability
Ease in Finding Information
Comment Quality
Comment Quantity
Admin Response
×
Please rate each item regarding Game8.co's Site's new design.
Please rate our site's new design
Very Dissatisfied
Somewhat Dissatisfied
Fine
Somewhat Satisfied
Highly Satisfied
Do you think that the website's design change makes the site easier to use?
Has the new design made it easier for you to find information on the site?
Has the new design improved the overall visual appeal of the site?
How would you rate your overall satisfaction with the new design of the site?
×
How likely are you to recommend Game8 to someone you know?
Very Unlikely
0
1
2
3
4
5
6
7
8
9
10
Very Likely
If you have other opinions regarding potential improvement to the website, please share them with us. We would appreciate your honest opinion.
Note: This is a free response section, so you can proceed without entering anything.
Note: Please be sure not to enter any kind of personal information into your response.
Note: Please be sure not to enter any kind of personal information into your response.
×
Thank You
×
Thank you for participating in our survey! Your answers will help us to improve the quality of our website and services.
We hope you continue to make use of Game8.
We hope you continue to make use of Game8.
Close
Rankings
- We could not find the message board you were looking for.

Gaming News

![Forza Horizon 6 Review [Preview] | Beautiful Roads With a Whole Lot of Oversteer](https://img.game8.co/4460981/a7254c24945c43fbdf6ad9bea52b5ce9.png/show)


![Forza Horizon 6 Review [Preview] | Beautiful Roads With a Whole Lot of Oversteer](https://img.game8.co/4460981/a7254c24945c43fbdf6ad9bea52b5ce9.png/thumb)
Popular Games

Genshin Impact Walkthrough & Guides Wiki
Crimson Desert Walkthrough & Guides Wiki
Umamusume: Pretty Derby Walkthrough & Guides Wiki
Honkai: Star Rail Walkthrough & Guides Wiki
Monster Hunter Stories 3: Twisted Reflection Walkthrough & Guides Wiki
Wuthering Waves Walkthrough & Guides Wiki
The Seven Deadly Sins: Origin Walkthrough & Guides Wiki
Pokemon TCG Pocket (PTCGP) Strategies & Guides Wiki
Pokemon Pokopia Walkthrough & Guides Wiki
Zenless Zone Zero Walkthrough & Guides Wiki


Recommended Games
Monster Hunter World Walkthrough & Guides Wiki
Fire Emblem Heroes (FEH) Walkthrough & Guides Wiki
Pokemon Brilliant Diamond and Shining Pearl (BDSP) Walkthrough & Guides Wiki
Super Smash Bros. Ultimate Walkthrough & Guides Wiki
Diablo 4: Vessel of Hatred Walkthrough & Guides Wiki
Cyberpunk 2077: Ultimate Edition Walkthrough & Guides Wiki
Yu-Gi-Oh! Master Duel Walkthrough & Guides Wiki
Elden Ring Shadow of the Erdtree Walkthrough & Guides Wiki
The Legend of Zelda: Tears of the Kingdom Walkthrough & Guides Wiki
Persona 3 Reload Walkthrough & Guides Wiki


All rights reserved
© 2010 - 2024 Grinding Gear Games
The copyrights of videos of games used in our content and other intellectual property rights belong to the provider of the game.
The contents we provide on this site were created personally by members of the Game8 editorial department.
We refuse the right to reuse or repost content taken without our permission such as data or images to other sites.