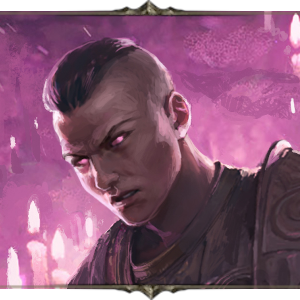
PoE 2 0.3 Monk Build - Powerwasher Acolyte of Chayula
Latest: 0.5.0 Release Date
☆ Fate of the Vaal ▶︎ The Last of the Druids
┗ Bonded Mods | 0.4 Mystery Box
★ Druid: Class Overview | Builds
☆ NEW: Disciple of Varashta Ascendancy!
★ Best Class | Best Builds | Leveling Builds
This is a Powerwasher Acolyte of Chayula endgame build for mapping in Path of Exile 2 (PoE 2)'s The Third Edict Update. Check out the Powerwasher Acolyte of Chayula endgame build, including its gear, socketables, skills, and playstyle!
List of Contents
Powerwasher Acolyte of Chayula Build Summary
Toastji's Powerwasher Acolyte of Chayula Build
The Powerwasher Acolyte of Chayula Build is made by Toastji, who recently won Build of the Week on the PoE 2 Forums. The video linked above showcases the build in all its purple glory. Check out Toasti's Youtube channel for any questions and updates to the build!
Powerwasher Acolyte of Chayula Build
| Build Setup | |
|---|---|
 Powerwasher Acolyte of Chayula |
 Into the Breach A Flame of Chayula manifests nearby every X seconds;Flames of Chayula fade after 25 seconds if not picked up
 Ember Fusillade Conjures a blazing Ember that hovers around you. After a short duration, the Ember launches at the enemy, dealing fire damage in an area on impact. Recasting the spess resets the duration for all active Embers. Multiple Embers fired in the same Fusillade will attempt to target different enemies.
 Incinerate Conjures a torrent of flames from your hand, Igniting enemies in front of you. The flames grow stronger the longer you Channel for, and at maximum strength also apply stacking Fire Exposure and creating Ignited Ground.
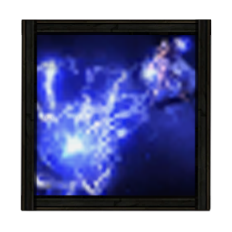 Ball Lightning Fires a slow-moving projectile that repeatedly shoots bolts of lightning at nearby enemies.
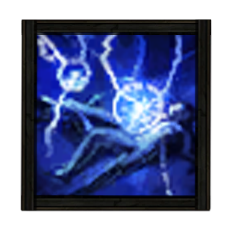 Mana Remnants Conjures surging lightning to restore your Mana. While active, Shocked enemies you kill have a chance to spawn a Mana Remnant, and Critically Hitting a Shocked target spawns a Mana Remnant every few seconds. Picking up a Mana Remnant grants you Mana which can Overflow maximum Mana.
 Cast on Elemental Ailment While active, gains Energy when you Freeze, Shock, or Ignite enemies, and triggers socketed spells on reaching Maximum Energy.
 Living Bomb Plant a seed of Fire inside an enemy. Dealing enough damage to the enemy, or killing it outright, causes the seed to explode, dealing damage in an area and leaving behind a Fire Infusion Remnant.
|
|
|
|
The Powerwasher Acolyte of Chayula relies heavily on gaining fuel for Incinerate to burn down every enemy in your path. Stack up Volatility with your beam of purple fire to scale your damage up to its limits.
| Date | Changes |
|---|---|
| 09-12-2025 | ・Created Powerwasher Acolyte of Chayula build page. |
Powerwasher Acolyte of Chayula Equipment
| Gear | Modifiers | |
|---|---|---|
 Attuned Wand Attuned Wand Attuned Wand Stats:
Requirements: None (Weapon Set 1) 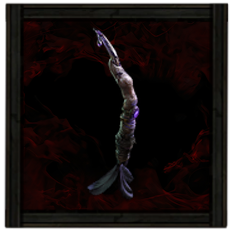 The Wicked Quill Withered Wand The Wicked Quill Withered Wand The Wicked Quill Withered Wand Stats:
Requirements: Level - 3 Intelligence - 9 (Weapon Set 2) |
・Increased Critical Spell Damage Bonus
・Gain % of Damage as Extra Elemental Damage ・Increased Spell Damage ・Maximum Mana ・+ Level of All Fire Spell Skills ・Increased Flammability Magnitude ・Increased Spell Damage ・Maximum Mana ・Chaos Resistance |
|
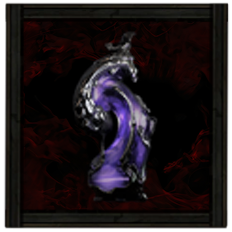
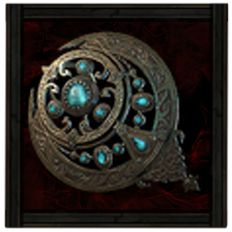 Leyline Focus Leyline Focus Leyline Focus Stats:
Energy Shield - 58 Requirements: Level - 70 Intelligence - 99 (Offhand Set 1) 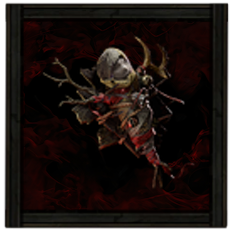 Effigy of Cruelty Antler Focus Effigy of Cruelty Antler Focus Effigy of Cruelty Antler Focus Stats:
Energy Shield - 17 Requirements: Level - 10 Intelligence - 17 Fixed Modifiers: ・ +20-30 maximum Energy Shield ・ 60-80% increased Spell Damage ・ +10 to Intelligence ・ +7-13% to Chaos Resistance ・ Critical Hits with Spells apply 3-5 Stacks of Critical Weakness (Offhand Set 2) |
・Increased Energy Shield
・Increased Spell Damage ・Increased Chaos Damage ・+ Level of All Spell Skills ・Elemental Resistances ・Maximum Energy Shield ・Increased Spell Damage ・Chaos Resistance | |
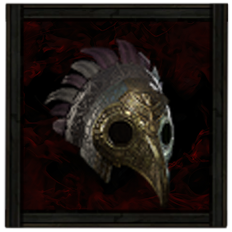 Soaring Mask Soaring Mask Soaring Mask Stats:
Evasion - 146 Energy Shield - 55 Requirements: Level - 75 Dexterity - 59 Intelligence - 59 (Helm) |
・Increased Evasion and Energy Shield
・Maximum Life ・Maximum Mana ・Elemental Resistances ・Gain Deflection Rating based on Evasion Rating |
|
 Sleek Jacket Sleek Jacket Sleek Jacket Stats:
Evasion - 268 Energy Shield - 101 Requirements: Level - 65 Dexterity - 67 Intelligence - 67 (Body Armor) |
・Increased Evasion Rating
・Increased Energy Shield ・Increased Evasion and Energy Shield ・Spirit ・Elemental Resistances ・Gain Deflection Rating based on Evasion Rating |
|
 Barbed Bracers Barbed Bracers Barbed Bracers Stats:
Evasion - 133 Requirements: Level - 75 Dexterity - 94 (Gloves) |
・Increased Evasion Rating
・Maximum Life ・Elemental Resistances ・Gain Deflection Rating based on Evasion Rating |
|
 Cavalry Boots Cavalry Boots Cavalry Boots Stats:
Evasion - 183 Requirements: Level - 70 Dexterity - 93 (Boots) |
・Increased Movement Speed
・Elemental Resistances ・Increased Evasion Rating ・Increased Effect of Socketed Items |
|
 Lunar Amulet Lunar Amulet Lunar Amulet Requirements:
Level - 14 Implicit:+20-30 to maximum Energy Shield (Amulet) |
・Increased Energy Shield
・Elemental Resistances ・Increased Evasion Rating ・+ Level to All Spell Skills ・Increased Global Defences |
|
 Breach Ring Breach Ring Breach Ring Requirements:
Level - 40 Implicit:Maximum Quality is 40% (Ring 1) |
・Increased Chaos Damage
・Increased Evasion Rating ・Maximum Life ・Elemental Resistances ・Attributes |
|
 Prismatic Ring Prismatic Ring Prismatic Ring Requirements:
Level - 35 Implicit:7-10% to all Elemental Resistances (Ring 2) |
・Increased Chaos Damage
・Elemental Resistances ・Increased Evasion Rating ・Increased Accuracy Rating ・Attributes |
|
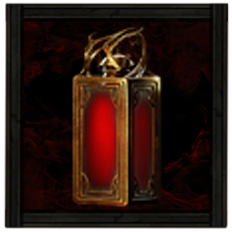 Ultimate Life Flask Ultimate Life Flask Ultimate Life Flask Stats:
Flask Type - Life Recovered Life - 920 Charge Per Use - 10 Total Charges - 75 Duration - 3 sec. (Life Flask) |
・Increased Recovery Rate
・Increased Charges |
|
 Melting Maelstrom Ultimate Mana Flask Melting Maelstrom Ultimate Mana Flask Melting Maelstrom Ultimate Mana Flask Stats:
Flask Type - Mana Recovered Mana - 310 Charge Per Use - 10 Total Charges - 75 Duration - 3 sec. (Mana Flask) |
・Increased Duration |
Weapons
Your Weapon Set 1, which has your non-Unique Wand and Focus, will be your central skillcasting set for Incinerate. It is important to set The Wicked Quill Withered Wand and Effigy of Cruelty Antler Focus in Weapon Set 2, as it is your main debuffer set with Ball Lightning, Despair, and Critical Weakness.
Look for modifiers that boost damage, specifically increased Spell Damage, additional Level to Spell Skills, and increased Chaos Damage.
List of Weapons
Armor and Accessories
In general, you are looking for as much Evasion, Energy Shield, and Deflection as possible. Since this build does not need Unique armor pieces, you can craft or trade for your preferred modifiers fairly easily.
| List of Armors | List of Accessories |
Runes and Soul Cores
| Equipment | Sockets |
|---|---|
| Weapon | |
| Armor |
As for your Runes, make sure to equip the Fenumus' Rune of Agony for your Wand and Greater Body Rune on your Shield to help you gain more Chaos damage and Physical damage as Life leech for survivability respectively.
Furthermore, slot in a Greater Iron Rune on your Helm and Body Armor for the added Evasion Rating and Energy Shield. Use the Courtesan Mannan's Rune of Cruelty for more Ailment Magnitude and Farrul's Rune of Grace to help combat the movement speed penalty when using Incinerate.
| List of Runes | List of Soul Cores |
Belts and Charms
| Belt Modifiers | |||||
|---|---|---|---|---|---|
 Headhunter Heavy Belt Headhunter Heavy Belt Headhunter Heavy Belt |
・Has 3 Charm Slots
・Maximum Life ・Attributes |
||||
| Charm Options | |||||
 Stone Charm Stone Charm |
 Thawing Charm Thawing Charm |
 Staunching Charm Staunching Charm |
|||
We will be taking the Headhunter Heavy Belt to take the enemy elite's modifiers when they are slain. The effects may vary, but generally, enhancing their passive skills can significantly boost our damage output for a brief period.
For our charms, we will be taking defensive options in order to maintain our incinerate cast. Ideally, we would take charms with the modifier that provides Guard Chance when activated to further boost survivability when channeling our skill.
| List of Belts | List of Charms |
Powerwasher Acolyte of Chayula Skills
All Active and Persistent Skills
| Skill | Support Gems |
|---|---|
|
Cast on Elemental Ailment Cast on Elemental Ailment While active, gains Energy when you Freeze, Shock, or Ignite enemies, and triggers socketed spells on reaching Maximum Energy.
|
Living Bomb Plant a seed of Fire inside an enemy. Dealing enough damage to the enemy, or killing it outright, causes the seed to explode, dealing damage in an area and leaving behind a Fire Infusion Remnant.
Zenith II Supports Spell Skills. Supported Skills deal more damage while you are above 90% of your Maximum Mana, and Recoup a portion of Skill costs as Mana. Does not modify Skills used by Minions.
Energy Retention Supports Meta skills. Supported skills gain a chance to partially refund a portion of energy cost when triggering or invoking other skills.
Considered Casting Supports Spell skills that Hit Enemies, boosting Damage at the cost of Cast Speed.
Boundless Energy II Supports Meta Skills. Supported Skills generate Energy significantly faster.
|
|
Incinerate Incinerate Conjures a torrent of flames from your hand, Igniting enemies in front of you. The flames grow stronger the longer you Channel for, and at maximum strength also apply stacking Fire Exposure and creating Ignited Ground.
|
Fiery Death Supports any skill that Hits enemies, causing explosions on killing Ignited enemies.
Burgeon II Supports Channelling Skills you use yourself, causing them to deal more damage the longer they have been Channelled.
Ignite III Supports any skill that Hits enemies, making it more likely to Ignite and causing inflicted Ignites to deal their damage more quickly.
Considered Casting Supports Spell skills that Hit Enemies, boosting Damage at the cost of Cast Speed.
Boundless Energy II Supports Meta Skills. Supported Skills generate Energy significantly faster.
Mobility Supports skills that can be used while moving, allowing you to move faster while using them.
|
|
Living Bomb Living Bomb Plant a seed of Fire inside an enemy. Dealing enough damage to the enemy, or killing it outright, causes the seed to explode, dealing damage in an area and leaving behind a Fire Infusion Remnant.
|
Overabundance I Supports skills which can have a Limited number of effects active at once, increasing that Limit at the cost of their duration. Only applies to restrictions that use the word “Limit”.
Magnified Area I Supports any skill with an area of effect, making it larger.
Harmonic Remnants II Supports Skills which create Remnants, allowing those Remnants to be collected from further away, with a chance to create an additional Remnant.
Zenith II Supports Spell Skills. Supported Skills deal more damage while you are above 90% of your Maximum Mana, and Recoup a portion of Skill costs as Mana. Does not modify Skills used by Minions.
|
 Flameblast Flameblast Flameblast Channels to build destructive energy around you or a targeted Solar Orb. Releasing the energy causes a devastating explosion that is larger and more intense the longer you channelled for.
|
Considered Casting Supports Spell skills that Hit Enemies, boosting Damage at the cost of Cast Speed.
Burgeon II Supports Channelling Skills you use yourself, causing them to deal more damage the longer they have been Channelled.
Searing Flame II Supports any skill that hits enemies, causing inflicted Ignites to deal more damage but its hits to deal less damage.
Eternal Flame I Supports any skill that hits enemies, causing its ignites to be inflicted less often but last longer.
Inevitable Critical Supports any skill you use yourself that Hits enemies, causing it to accumulate Critical hit chance over time.
|
|
Ember Fusillade Ember Fusillade Conjures a blazing Ember that hovers around you. After a short duration, the Ember launches at the enemy, dealing fire damage in an area on impact. Recasting the spess resets the duration for all active Embers. Multiple Embers fired in the same Fusillade will attempt to target different enemies.
|
Catharsis Supports and Skill you use yourself, causing supported Skill to detonate Volatility that is present on you. Supported Skill can only be used while you have a certain amount of Volatility and cannot support Skills which already have another Condition. Does not support Triggered Skills.
Considered Casting Supports Spell skills that Hit Enemies, boosting Damage at the cost of Cast Speed.
Fork Supports Projectile Skills, making their Projectiles Fork.
Sione's Temper Supports Projectile Spells. Supported Spells have an increasingly higher chance to fire many additional Projectiles in a circle, resetting when they do.
|
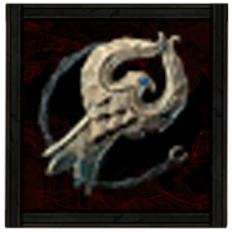
 Despair Despair Despair Curses all targets in an area after a short delay, lowering their Chaos Resistance.
|
Prolonged Duration II Supports any skill that has a duration, making that duration longer.
Heightened Curse Supports curse skills, magnifying their power.
Efficiency II Supports any skill, making it cost less to use. Cannot support skills which reserve Spirit.
Ritualistic Curse Supports Curse skills, causing them to cover a larger area but take longer to curse enemies
|
|
Ball Lightning Ball Lightning Fires a slow-moving projectile that repeatedly shoots bolts of lightning at nearby enemies.
|
Pinpoint Critical Supports any skill that Hits Enemies, causing it to Critically Hit more often but deal less damage with Critical Hits
Inevitable Critical Supports any skill you use yourself that Hits enemies, causing it to accumulate Critical hit chance over time.
Multishot II Supports Projectile skills, making them fire extra Projectiles. Also lowers Attack and Cast speed of supported skills, as well as lessening their damage.
Unleash Supports Spells you cast yourself, making their effect reoccur when cast. Cannot support Channelling Skills or Skills with a Cooldown.
|
|
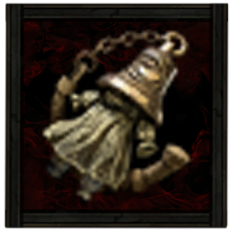
Into the Breach Into the Breach A Flame of Chayula manifests nearby every X seconds;Flames of Chayula fade after 25 seconds if not picked up
|
Harmonic Remnants II Supports Skills which create Remnants, allowing those Remnants to be collected from further away, with a chance to create an additional Remnant.
Remnant Potency III Supports Skills which create Remnants, making those Remnants more powerful, but delaying their effect.
Clarity II Supports Persistent Buff Skills, causing you to gain increased Mana Regeneration while the Skill is active.
|
|
Mana Remnants Mana Remnants Conjures surging lightning to restore your Mana. While active, Shocked enemies you kill have a chance to spawn a Mana Remnant, and Critically Hitting a Shocked target spawns a Mana Remnant every few seconds. Picking up a Mana Remnant grants you Mana which can Overflow maximum Mana.
|
Harmonic Remnants II Supports Skills which create Remnants, allowing those Remnants to be collected from further away, with a chance to create an additional Remnant.
Remnant Potency III Supports Skills which create Remnants, making those Remnants more powerful, but delaying their effect.
|
 Ghost Dance Ghost Dance Ghost Dance Periodically Gain Ghost Shrouds. If you are Hit while you have a Ghost Shroud, it is immediately consumed to recover Energy Shield based on your Evasion.
|
Compressed Duration I Supports any skill that has a duration, making that duration shorter.
|
The build is centered around the reworked skill Incinerate, used alongside the new keystone passive Blackflame Covenant. This is used in conjunction with the new Elemental Infusion mechanic, which enables the incinerate to set the ground aflame, thereby dealing increased ignite damage to enemies that walk through it.
To increase the effectiveness of our attacks on multiple targets, we will be utilizing the Cast on Elemental Ailment Skill gem to inflict Living Bomb on targets during mapping. Due to the Acolyte of Chayula's Ascension node Volatility, the damage dealt to other targets when an enemy dies is magnified, thereby increasing mapping speed.
To sustain the prolonged incinarate casts, we will be taking Mana Remnants to sustain our mana costs. Due to the fact that mobility is restricted during the casting of Incinerate, we take Ghost Dance to enhance survivability. This approach enables us to effectively absorb damage and sustain the Incinerate cast.
Finally, we will be using Despair and Ball lightning for our debuffs. Despair significantly enhances our chaos damage, while Ball Lightning is used to trigger Effigy of Cruelty, which in turn inflicts critical weakness on targets.
Powerwasher Acolyte of Chayula Passive Tree
Passive Tree Progression
| Ascendency Passive Nodes | |||
|---|---|---|---|
 |
|||
| Passive Nodes | |||
| 1. |  |
2. |  |
| 3. |  |
4. |  |
| 5. |  |
6. | - |
| Screenshots taken from Path of Building | |||
※ Legend: Red = Weapon Set I | Green = Weapon Set II
Your Ascendancy passives for the Powerwasher Acolyte of Chayula build should prioritize getting Waking Dream to consistently spawn Remnants that can benefit your main skills, and Chayula's Gift to help reach the 75% resistance cap. Unravelling is used for gaining more Ignite and Flammibility magnititudes with all your skills.
The rest of your passive nodes should give you damage boosts with Critical hits and Ailment Magnitudes, while your survivability focuses on stacking Evasion Rating and Energy Shields.
Passive Skill Tree Guide and List of Passives
Jewels
Note: The modifiers listed are arranged according to priority.
| |
・Increased Critical Damage Bonus
・Increased Cast Speed ・Increased Ignite Magnitude ・Increased Magnitude of Ailments you Inflict |
|---|---|
| |
・Increased Lightning Damage
・Chance to Poison on Hit ・Increased Chance to Inflict Ailments ・Increased Magnitude of Ailments you Inflict |
| |
・Increased Maximum Energy Shield
・Increased Critical Damage Bonus ・Increased Chance to Inflict Ailments ・Increased Magnitude of Ailments you Inflict |
| |
・Increased Critical Damage Bonus
・Increased Ignite Magnitude ・Increased Curse Duration ・Increased Magnitude of Ailments you Inflict |
Your Jewels should focus on stacking more Critical Damage and Ignite magnitude as this directly affects your damage output with most of your skills. Do note that you can also equip a Heart of the Well Diamond unique jewel with Ailment Magnitude stats if you have the currency for it.
Powerwasher Acolyte of Chayula Playstyle and Skill Rotation
Mobbing Rotation
For mobbing, you will mainly just be spamming Incinerate to clear large packs of mobs throughout the map. The rotation is as follows:
- Cast Living Bomb on an enemy in the middle of a pack.
- Spam Incinerate for huge Ignite and Chaos damage.
Bossing Rotation
For bossing, you will need to start casting Despair and Ball Lightning for applying critical weakness and spam Incinerate for consistent damage. The rotation is as follows:
- Cast Ball Lightning to trigger critical weakness.
- Use Despair and Living Bomb for reduce their chaos resistance and apply an explosion on hit.
- Spam Incinerate for huge Ignite and Chaos damage.
Path of Exile 2 Related Guides

0.4 Best Endgame Builds
| Rank | Build |
|---|---|
 |
|
 |
|
 |
|
 |
0.4 Leveling Builds
All Build Guides
| List of Builds by Class | |||||||||||
|---|---|---|---|---|---|---|---|---|---|---|---|
 Huntress Huntress |
 Mercenary Mercenary |
 Monk Monk |
|||||||||
 Witch Witch |
 Sorceress Sorceress |
 Warrior Warrior |
|||||||||
 Ranger Ranger |
 Druid Druid |
- | |||||||||
| Other Build Guides | 0.3 Leveling Builds | How to Make a Good Build | |||||||||
Comment
Author

PoE 2 0.3 Monk Build - Powerwasher Acolyte of Chayula
Rankings
- We could not find the message board you were looking for.

Gaming News

![The Seven Deadly Sins: Origin Review [First Impressions] | A Promising Start](https://img.game8.co/4440581/584e0bfb87908f12c4eab6e846eb1afd.png/show)

![Monster Hunter Stories 3 Review [First Impressions] | Simply Rejuvenating](https://img.game8.co/4438641/2a31b7702bd70e78ec8efd24661dacda.jpeg/thumb)
![The Seven Deadly Sins: Origin Review [First Impressions] | A Promising Start](https://img.game8.co/4440581/584e0bfb87908f12c4eab6e846eb1afd.png/thumb)
Popular Games

Genshin Impact Walkthrough & Guides Wiki
Umamusume: Pretty Derby Walkthrough & Guides Wiki
Pokemon Pokopia Walkthrough & Guides Wiki
Honkai: Star Rail Walkthrough & Guides Wiki
Monster Hunter Stories 3: Twisted Reflection Walkthrough & Guides Wiki
Arknights: Endfield Walkthrough & Guides Wiki
Wuthering Waves Walkthrough & Guides Wiki
Zenless Zone Zero Walkthrough & Guides Wiki
Pokemon TCG Pocket (PTCGP) Strategies & Guides Wiki
Monster Hunter Wilds Walkthrough & Guides Wiki


Recommended Games
Fire Emblem Heroes (FEH) Walkthrough & Guides Wiki
Diablo 4: Vessel of Hatred Walkthrough & Guides Wiki
Cyberpunk 2077: Ultimate Edition Walkthrough & Guides Wiki
Yu-Gi-Oh! Master Duel Walkthrough & Guides Wiki
Super Smash Bros. Ultimate Walkthrough & Guides Wiki
Pokemon Brilliant Diamond and Shining Pearl (BDSP) Walkthrough & Guides Wiki
Elden Ring Shadow of the Erdtree Walkthrough & Guides Wiki
Monster Hunter World Walkthrough & Guides Wiki
The Legend of Zelda: Tears of the Kingdom Walkthrough & Guides Wiki
Persona 3 Reload Walkthrough & Guides Wiki


All rights reserved
© 2010 - 2024 Grinding Gear Games
The copyrights of videos of games used in our content and other intellectual property rights belong to the provider of the game.
The contents we provide on this site were created personally by members of the Game8 editorial department.
We refuse the right to reuse or repost content taken without our permission such as data or images to other sites.