PoE 2 0.4 Warrior Leveling Build - Shield Wall Warcry
Latest: 0.5.0 Release Date
☆ Fate of the Vaal ▶︎ The Last of the Druids
┗ Bonded Mods | 0.4 Mystery Box
★ Druid: Class Overview | Builds
☆ NEW: Disciple of Varashta Ascendancy!
★ Best Class | Best Builds | Leveling Builds
This is a leveling build for the Warrior in Path of Exile 2 (PoE 2)'s The Last of the Warriors update that uses Shield Wall and Warcries to deal explosive physical and fire damage. Check out this Warrior leveling build, including its progression, equipment, socketables, skills, and playstyle!
 Attention! Attention! |
This 0.4.0 leveling build is only up until Interludes and ends at Level 65. If you want to see a build for mapping and Atlas, check out our Endgame Builds! |
|---|
Shield Wall Warcry Warrior Build Summary
Warrior Leveling Build Overview
The Shield Wall Warcry Warrior is one of the strongest leveling builds, capable of dealing massive AoE burst damage while remaining extremely tanky due to high armor and decent block chance. The build revolves around repeatedly exploding Shield Wall with Warcries to deal physical and fire damage through empowering. There is no wall you cannot overcome with this explosive build!
| Date | Changes Made |
|---|---|
| 1/2/2025 | ・Shield Wall Warcry build created. |
Shield Wall Warcry Warrior Equipment
※ The affixes shown below are arranged based on descending priority.
| Gear | Affixes |
|---|---|
| Any Mace |
・+ Level of Melee Skills
・+ Strength |
 Crucible Tower Shield Crucible Tower Shield Crucible Tower Shield Stats:
Armor - 112 Requirements: Level - 46 Strength - 66 Implicit Skill: Raise Shield |
・+ to Armour
・Increased Armour ・Armour Also Applies to Elemental Damage ・Any Resistances |
 Warrior Greathelm Warrior Greathelm Warrior Greathelm Stats:
Armor - 146 Requirements: Level - 36 Strength - 52 |
・Any Resistances
・Increased Armour ・Maximum Life ・Armour Also Applies to Elemental Damage |
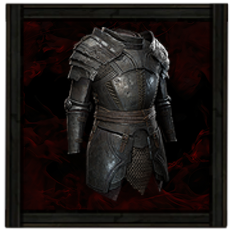 Full Plate Full Plate Full Plate Stats:
Armor - 208 Requirements: Level - 33 Strength - 54 |
・+ Spirit
・Any Resistances ・Increased Armour ・Maximum Life ・Armour Also Applies to Elemental Damage |
 Bolstered Mitts Bolstered Mitts Bolstered Mitts Stats:
Armor - 58 Requirements: Level - 27 Strength - 35 |
・Attack Speed
・+ Level of Melee Skills ・Additional Lightning Damage ・Any Resistances ・Increased Armour |
 Stone Greaves Stone Greaves Stone Greaves Stats:
Armor - 102 Requirements: Level - 33 Strength - 45 |
・Movement Speed
・Any Resistances ・Increased Armour ・+ Maximum Life |
 Linen Belt Linen Belt Linen Belt Requirements:
None Implicit:20-30% increased Mana Recovery from Flasks |
・Any Resistances
・+ Maximum Life ・+ Maximum Mana |
 Gold Amulet Gold Amulet Gold Amulet Requirements:
Level - 35 Implicit:12-20% increased Rarity of Items found |
・+ Spirit
・+ Level of Melee Skills ・+ Mana Regeneration ・Any Resistances ・+ Increased Rarity of Items Found |
 Gold Ring Gold Ring Gold Ring Requirements:
Level - 40 Implicit:6-15% increased Rarity of Items found |
・Any Resistances
・+ Increased Rarity of Items Found ・+ Strength ・+ Mana Regeneration ・+ Maximum Life ・Additional Physical Damage |
 Prismatic Ring Prismatic Ring Prismatic Ring Requirements:
Level - 35 Implicit:7-10% to all Elemental Resistances |
・Any Resistances
・+ Increased Rarity of Items Found ・+ Strength ・+ Mana Regeneration ・+ Maximum Life ・Additional Physical Damage |
 Gargantuan Life Flask Gargantuan Life Flask Gargantuan Life Flask Stats:
Flask Type - Life Recovered Life - 710 Charge Per Use - 10 Total Charges - 75 Duration - 5 sec. |
・Increased Amount Recovered
・Increased Charges |
 Gargantuan Mana Flask Gargantuan Mana Flask Gargantuan Mana Flask Stats:
Flask Type - Mana Recovered Mana - 185 Charge Per Use - 10 Total Charges - 75 Duration - 2 sec. |
・Increased Amount Recovered
・Increased Charges |
Weapons (One Handed Mace and Shield)
Prioritize a shield with the highest Armour possible, as this is the primary multiplier for Shield Wall damage. Do not invest heavily in a mace; simply equip one with + Level to Melee Skills, as this is the only early modifier that benefits Shield Wall.
Use Two-Handed Maces as Weapon Set 2 Prior to Obtaining Shield Wall
| Gear | Affixes |
|---|---|
 Slim Mace Slim Mace Slim Mace Stats:
Damage - 11-17 Critical Chance - 5.00% Attacks Per Second - 1.55 Requirements: Level - 10 Strength - 21 (Weapon Set 1) |
・Added Physical Damage
・Increased Physical Damage ・+ Melee Skills ・Attack Speed |
 Painted Tower Shield Painted Tower Shield Painted Tower Shield Stats:
Armor - 29 Block Chance - 26% Requirements: Level - 6 Strength - 11 Implicit Skill: Raise Shield |
・+ to Armour
・Increased Armour ・Armour Also Applies to Elemental Damage ・Any Resistances |
 Forge Maul Forge Maul Forge Maul Stats:
Damage - 29-39 Critical Chance - 5.00% Attacks Per Second - 1.05 Requirements: Level - 11 Strength - 23 (Weapon Set 2) |
・Added Physical Damage
・Increased Physical Damage ・Added Lightning Damage ・+ Melee Skills ・Attack Speed |
You will not obtain Shield Wall until after a few quests in Act 2, so for Act 1, you would want to stick with a Rolling Slam and Boneshatter setup on Weapon Set 1. You should also have a Two-Handed Mace you can swap to cast Mace Strike or Perfect Strike when bossing.
Armor and Accessories
For your armor, wear pieces that offer high Armour and Armour Also Applies to Elemental Damage to get a huge boost to both Physical and Elemental Damage Reduction. One of the most important modifiers to aim for while leveling is Movement Speed on your boots, so try to find higher rolls as you progress. You should also aim to obtain + Level to Melee Skills, Attack Speed, and Lightning Damage on your gloves, as these modifiers will increase your Shield Wall damage.
As for your accessories, get at least 50% Mana Regeneration Rate to solve your Mana issues. Once your mana is stable, you can aim for Resistances or other defensive stats for even more survivability. Additionally, try to find Increased Rarity of Items Found to improve the quality of your loot drops.
Also aim for + to Spirit on both your Chest Piece and Amulet. This ensures you can activate all your Persistent Skills and equip Support Gems that require Spirit.
| List of Rings | List of Amulets |
| List of Armors | |
Runes and Soul Cores
| Equipment | Sockets |
|---|---|
| Weapon | |
| Armor | • Elemental Resistance Runes |
Runes are not a priority in earlier Acts since you will most likely switch around equipment often and would not be able to fully benefit from them. However, you may consider using Runes if you find yourself stuck in a certain area or a certain boss encounter.
For your weapon, only socket an Iron Rune on your Shield because the added damage multiplier on your mace will not affect your Shield Wall damage. As for your Armor Runes, slot in Iron Runes for more Armour or use any runes that provide elemental resistances.
| List of Runes | List of Soul Cores |
Belt and Charms
| Belt Modifiers | |||||
|---|---|---|---|---|---|
 Linen Belt Linen Belt Linen Belt Requirements:
None Implicit:20-30% increased Mana Recovery from Flasks |
・Any Resistances
・Maximum Life ・Maximum Mana |
||||
| Charm Options | |||||
 Thawing Charm Thawing Charm Thawing Charm Stats:
Flask Type - Charm Charge Per Use - 40 Total Charges - 40 Duration - 3 sec. |
- | - | |||
For this build, we recommend equipping the Linen Belt to get more mana from your flasks. However, any belt providing high Resistances and Maximum Life is a strong alternative.
For Charms, we recommend equipping a Thawing Charm to prevent being Frozen, which can lead to certain death. Otherwise, feel free to equip any Charms you find useful. While most modifiers work, prioritize Increased Duration, Increased Charges, and Recover Life When Used.
Alternatively, you can slot in a Sapphire Charm for Cold Resistance to help defeat Count Geonor in Act 1, or a Topaz Charm for Lightning Resistance against Jamanra in Act 2. You should also consider an Antidote Charm to ignore poison from Act 3 enemies or difficult bosses, such as the Viper Napuatzi..
| List of Belts | List of Charms |
Shield Wall Warcry Warrior Skills
All Active and Persistent Skills
※ The Support Gems' priority are arranged in a descending order. The first one being the most important and the last being the least crucial.
| Skill | Support Gems |
|---|---|
 Shield Wall Shield Wall Shield Wall Ram you Shield into the ground, throwing up a semi-circular wall of earth. Enemies can attack the walls and your Slams will instantly destroy them. Each wall segment explodes when destroyed, damaging enemies around it.
|
Rapid Attacks II Supports Attacks, causing them to Attack faster.
Magnified Area II Supports any skill with an area of effect, making it larger at the cost of damage.
Heavy Swing Supports Melee Attacks, boosting their Physical damage at the cost of Attack Speed.
Concentrated Area Supports any skill with an area of effect, causing that area to be smaller but any area damage it deals to be higher.
(Alternative to Magnified Area II when Bossing)Armour Break I Supports Skills that Hit Enemies, causing those Hits to Break Armour based on a portion of Physical Damage dealt.
(Alternative to Heavy Swing before obtaining Anvil's Weight) |
 Infernal Cry Infernal Cry Infernal Cry Performs a warcry, Empowering subsequent Melee Attacks if there are enemies nearby. Enemies in the Warcry's area are destabilised and will Combust on death. This Skill's a cooldown can be bypassed by expending an Endurance Charge.
|
Efficiency I Supports any skill, making it cost less to use. Cannot support skills which reserve Spirit.
Raging Cry Supports Warcry skills, causing them to grant you Rage on use depending on counted monster Power.
Tireless Supports Warcry Skills. Attacks Empowered by supported skills have a chance not to lower the Empowerment count of supported skills when they are used.
|
 Fortifying Cry Fortifying Cry Fortifying Cry Perform a Warcry that grants Guard and Triggers Shield Wave when subsequent Shield Attacks deal damage. The Skill's cooldown can be bypassed by expending an Endurance Charge.
|
Brutality II Supports any skill that deals damage, boosting its physical damage at the expense of all other damage types.
Heavy Swing Supports Melee Attacks, boosting their Physical damage at the cost of Attack Speed.
Raging Cry Supports Warcry skills, causing them to grant you Rage on use depending on counted monster Power.
|
 Herald of Ash Herald of Ash Herald of Ash While active, enemies you sufficiently Overkill with attacks will cause an explosion that ignites nearby enemies based on the Overkill damage dealt.
|
Magnified Area II Supports any skill with an area of effect, making it larger at the cost of damage.
Herbalism II Supports Persistent Buff skills, causing you to gain increased Life recovery from Flasks while the skill is active.
Clarity II Supports Persistent Buff Skills, causing you to gain increased Mana Regeneration while the Skill is active.
|
 Scavenged Plating Scavenged Plating Scavenged Plating Uses fragments of armour scavenged from enemies to bolster your own. Fully Breaking an enemy's Armour grants you a stack of Scavenged Plating for a duration, and you gain Armour and Thorns per stack.
|
Prolonged Duration II Supports any skill that has a duration, making that duration longer.
Cannibalism II Supports Persistent Buff Skills, causing you to recover Life on kill while the skill is active.
|
 War Banner War Banner War Banner While active, killing enemies with attacks or standing near a Unique enemy generates Valour. using this skill consumes Valour to place an inspiring Banner with an Aura that grants you and nearby allies Attack damage and accuracy while Banner lasts. The Banner cannot gain Valour while placed, and you cannot place a Banner while you already have a Banner placed.
|
Magnified Area II Supports any skill with an area of effect, making it larger at the cost of damage.
Prolonged Duration II Supports any skill that has a duration, making that duration longer.
|
Shield Wall and Fortifying Cry are the primary damage sources in this build, so their Support Gems focus on maximizing damage output. If you lack damage against bosses, we recommend substituting Magnified Area II with Concentrated Area.
Infernal Cry is also essential as it could generate Rage, trigger Shield Wall, and Empower it with Extra Fire Damage. Since you rely on this fire damage, it is crucial that you do not use Brutality on Shield Wall, as it prevents you from utilizing the benefit.
Herald of Ash significantly improves clear speed, while Scavenged Plating increases survivability and returns damage through Thorns. You are guaranteed to maximize this effect through the Armour Break I Support Gem or the Anvil's Weight Ascendancy Passive.
Once you obtain Spirit on your chest or amulet, War Banner becomes a decent option to increase burst damage against bosses. Link these skills with Support Gems that prioritize utility, such as Increased Area of Effect, Increased Duration, and Increased Mana Regeneration.
Delay Leveling Warcries If You Struggle with Mana Regeneration
If you struggle with Mana Regeneration, we recommend temporarily avoiding leveling up your Warcries, as they significantly increase the mana requirement per rotation. While this slightly affects your overall damage, it should still be enough to deal with all enemies during the campaign.
Act 1 and 2 Alternative Skills
| Skill | Support Gems |
|---|---|
 Mace Strike Mace Strike Mace Strike |
Rapid Attacks I Supports Attacks, causing them to Attack faster.
Rage I Supports Melee Attacks, causing them to grant Rage on Hit.
|
 Rolling Slam Rolling Slam Rolling Slam Slam the ground to Stun enemies and knock them away, then continue forward and perform a devastating second Slam. holding down the skill input allows you to change direction as you move.
|
Rapid Attacks I Supports Attacks, causing them to Attack faster.
Brutality I Supports any skill that deals damage, boosting its physical damage at the expense of all other damage types.
|
 Boneshatter Boneshatter Boneshatter Attacks enemies with a melee Strike. The Strike will cause a Heavy Stun on enemies that are Primed for Stun. Upon causing a Heavy Stun it will also create a Shockwave, dealing a large amount of damage in an area.
|
Impact Shockwave Supports Melee Strike skills, causing them to create an Aftershock that damages enemies around the target when they Heavy Stun an enemy.
Magnified Area I Supports any skill with an area of effect, making it larger.
|
 Perfect Strike Perfect Strike Perfect Strike Charge up your weapon while channelling. Releasing the moment you ECT STRIKE fully charge will release a wave of Fire.
|
Window of Opportunity I Supports Channelling skills that have special effects if released with Perfect Timing, causing them to deal much more damage if released with Perfect Timing but reducing the Perfect Timing window.
Rapid Attacks I Supports Attacks, causing them to Attack faster.
|
 Herald of Ash Herald of Ash Herald of Ash While active, enemies you sufficiently Overkill with attacks will cause an explosion that ignites nearby enemies based on the Overkill damage dealt.
|
Magnified Area I Supports any skill with an area of effect, making it larger.
|
Since Shield Wall is unavailable in Act 1, we recommend this early setup. Acquire Rolling Slam and Boneshatter immediately and link them with the recommended Support Gems, as they serve as your primary damage sources when mobbing.
For bossing, you can stick to Mace Strike on your Two-Handed Mace, or switch to Perfect Strike once you obtain a Level 5 Skill Gem. Additionally, equip Herald of Ash to significantly improve clear speed with its AoE burst. This setup should be enough to reach Act 2 and obtain Shield Wall.
Shield Wall Warcry Warrior Passive Tree
Passive Tree Progression
| Passive Skill Tree | Ascendancy Passives |
|---|---|
 |
 |
| Screenshots taken from Path of Building. | |
In the Passive Skill Tree, focus on damage modifiers that scale Shield Wall, such as Attack Damage, Melee Damage, Area Damage, Attack Speed, and damage modifiers related to equipping shields. Prioritizing these stats is key to maximizing your burst damage.
To further boost your output, utilize the Weapon Specialization mechanics: place Armor Break and Fire Damage passives on Weapon Set 1, and Warcry nodes on Weapon Set 2. Thanks to recent updates, you can now lock the same weapon setup to both sets by clicking the Weapon Set icon above your gear menu. Just remember to assign the correct skills to each set to fully benefit from this feature.
After securing your attack-boosting passives, dedicate the remaining points to survivability by stacking as much Armor as possible. For stat passives, we recommend obtaining as much Strength as you can, while picking up just enough Intelligence and Agility to meet gem requirements.
For your Ascendancy Passives, obtain Warcaller's Bellow first to ignore Warcry cooldowns, making your rotation much smoother. Next, aim for Anvil's Weight to break enemy armor without relying on the Armour Break I Support Gem. Lastly, secure Jade Heritage for a huge boost to Physical Damage Reduction.
Socketed Jewels
 Ruby Ruby
|
・Increased Attack Damage
・Empowered Attacks Deal Increased Damage ・Life Regeneration Rate ・Rage on Melee Hit |
|---|
For your Jewel slots, prioritize Ruby Jewels with modifiers that increase Attack and Empower Damage, along with utility mods such as Life Regeneration or Rage on Melee Hit.
Shield Wall Warcry Warrior Playstyle
Recommended Skill Rotation
The rotation for both mobbing and fighting bosses is as follows:
- Place down your War Banner.
- Cast Infernal Cry to Empower your Shield Wall.
- Use Shield Wall then detonate it using Fortifying Cry. If you are fighting a boss, you can cast Shield Wall twice before detonating them.
- Repeat until enemy is defeated.
Skill Rotation for Act 1 Setup
The rotation for mobbing during Act 1 is as follows:
- Cast Rolling Slam then immediately cancel the skill after the first hit by moving away or by dodging.
- Use Boneshatter on the enemy that is Primed for Stun.
- Sprint towards the next group of enemies.
Spam Mace Strike or Perfect Strike when Bossing
For bosses during Act 1, the only viable strategy is to spam Mace Strike using your Two-Handed Mace, or Perfect Strike if you have it. Spamming either of these skills is more than enough to take enemies down. You can also use Boneshatter when the boss or its minions are Primed for Stun to deal significant burst damage.
If you find you are lacking damage, take it as a sign to obtain a better weapon immediately. Just make sure to focus on dodging enemy attacks as you cast these skills.
Shield Wall Warcry Warrior Progression
| Jump to an Act! | |||||
|---|---|---|---|---|---|
| Act 1 | Act 2 | Act 3 | |||
| Act 4 | Interludes | ||||
Act 1 Progression
To progress through Act 1 and beat Count Geonor using the Fire Bear leveling build, follow these steps:
| # | Step by Step Guide to Act 1 Leveling |
|---|---|
| 1 | Equip
|
| 2 | Head for the Mysterious Campsite at Clearfell to get a Level 1
|
| 3 | Defeat
|
| 4 | Complete Treacherous Ground to get a Level 1
|
| 5 | Proceed to Grelwood and defeat Areagne, Forgotten Witch to get another Level 1 Uncut Support Gem to equip
Note: Make sure to loot the Witch Hut to get Medium Flasks. |
| 6 | Defeat
|
| 7 | Progress to The Grim Tangle and defeat
to obtain another Level 1 Uncut Support Gem. Use it to slot in
|
| 8 | Look for the Haunted Treasure Inside the Tomb of the Consort and defeat the rare enemy to acquire a Level 1 Uncut Support Gem and slot in
Note: Once you find a Level 3 Uncut Skill Gem, use it to level up your Rolling Slam. |
| 9 | Defeat
|
| 10 | Search and complete your first Ritual in the same area to get a Level 1 Uncut Support Gem and use this to get
|
| 11 | Start looking for the Dryadic Ritual in the same area to get an extra Level 1 Uncut Support Gem . Use it to slot in
|
| 12 | Enter Freythorn to defeat
|
| 13 | Complete The Lost Lute at the Ogham Farmlands to obtain a Book of Specialisation for more passive points.
|
| 14 | Search for the Crop Circle in the same area to defeat
|
| 15 | Proceed to Ogham Village and defeat
|
| 16 | Head for The Manor Ramparts and look for The Gallows to get a free Level 1 Uncut Support Gem you can use to get
|
| 17 | Search and defeat the
|
| 18 | Continue and defeat
Note: Make sure you have Medium Flasks since this boss fight has 2 Phases so you will be spending a good amount of time learning and surviving the mechanics. |
Act 2 Progression
To progress through Act 2 and beat Jamanra, the Abomination using the Shield Wall Warcry Warrior leveling build, follow these steps:
| # | Steps |
|---|---|
| 1 | |
| 2 | Defeat
Ascendancy: You can attempt to finish the Sekhema's Trial to get your first set of Ascendancy Skills. For this build, we recommend choosing |
| 3 | Clear Mobs in Keth until you get the
|
| 4 | Defeat
|
| 5 | Defeat
|
| 6 | Open the Guarded Sarcophagus for an
|
| 7 | Three Elemental Offering Ring choices: Ruby Ring, Sapphire Ring, and Topaz Ring for flame, cold, and lightning resistance respectively. It is recommended to choose the Topaz Ring to prepare for
|
| 8 | Clear The City of Seven Waters for an Uncut Support Gem 2. You can reserve this for when you transition into the Shield Wall build later on. |
| 9 | Destroy the Effigy located in the Shrine of Bones for an Uncut Support Gem Level 2. You can use this to get
|
| 10 | Clear Mobs in The Bone Pits until you get the
|
| 11 | Complete A Theft of Ivory quest for an Uncut Support Gem Level 2. You can use this for any missing support gems in the build. |
| 12 | At some point while clearing Keth and The Bone Pits, you should have obtained a Level 7 Uncut Skill Gem. Use this to unlock
|
| 13 | Place both Relics in the Valley of Titans to complete the Ancient Vows quest. Choose the Sun Clan Relic for more Mana Flask Recovery.
|
| 14 | Complete A Crown of Stone quest for an Uncut Support Gem Level 2. You can use this for any missing support gems in the build. |
| 15 | Complete the Tradition's Toll quest to get a
|
| 16 | Defeat the Watchful Twins for a
|
| 17 | Activate the Sisters of Garukhan in Deshar to get a permanent 10% Lightning Resistance. |
Act 3 Progression
To progress through Act 3 and beat Doryani using the Warrior leveling build, follow these steps:
| # | Steps |
|---|---|
| 1 | Defeat
|
| 2 | Loot the basket found in the Orok Campfire to get a
|
| 3 | Defeat the
|
| 4 | Complete The Slithering Dead to get the
|
| 5 | Interact with the Ravaged Corpse in the Jungle Grave to get a rare Belt. Take the Linen Belt for more Mana Recovery from Flasks. |
| 6 | Defeat
|
| 7 | Submit the Tribal Vengeance to get a charm. Choose the
|
| 8 | Complete the Trial of Chaos for more Ascendancy Points. Upon completion, obtain the Anvil's Weight passive to gain the ability to break enemy Armour without
|
| 9 | |
| 10 |
Obtain an
|
| 11 | |
| 12 |
Use the
|
Act 4 Progression
To progress through Act 4 and beat Tavakai using the Shield Wall Warcry Warrior build, follow these steps:
| # | Steps |
|---|---|
| 1 | Get Shark's Fin in Whakapanu Island and submit it to Kaimana in the Tavakai's Ship to get a
|
| 2 | Defeat
|
| 3 |
Find the Barnacle before the Beckoning Clam event to get
|
| 4 |
Get the Humming Pearl from the Beckoning Clam and exchange it for a
|
| 5 |
Find the Chapel Key and interact with the Goddess of Justice and choose to get +30% life regeneration from flasks. |
| 6 |
Complete Dark Mists to gain a Book of Specialization and a
|
| 7 |
Get a
|
| 8 | Defeat
|
| 9 | Release the Beast from its pen in the Isle of Kin and defeat it to gain
|
| 10 |
Complete the Trial of the Ancestors to obtain the following:
・See Navali's Rest to gain a random rune and 5% Increased Maximum Mana ・Pass Ngamahu's Test to get 5% Fire Resistance ・Pass Tawhoa's Test to get 5% Lightning Resistance ・Pass Tasalio's Test to get 5% Cold Resistance ・Gain 2 Weapon Specialization points by talking to The Mother. |
| 11 | Ring the Morning and Evening Bell in Arastas to receive three
Note: You can use these to either craft a weapon, or trade for solid equipment! |
| 12 | Get a random Greater Rune in the Meeting House. |
Interludes Progression
To progress through Interludes and set yourself up for mapping using the Lightning Wyvern Warrior build, follow these steps:
| # | Steps |
|---|---|
| 1 | Get a Level 13
|
| 2 | Buy Greater Runes from the Ferryman in Holten. |
| 3 | Defeat
|
| 4 | |
| 5 | Get the Molten One's Gift in Skullmaw Stairway to get a +5% to your Maximum Life. |
| 6 |
Slot in both
|
| 7 | Defeat
Note: If you were able to succeed, it is recommended to get Jade Heritage to get an additional 10% Physical Damage Reduction. |
| 8 | Activate one out of Seven Pillars in Qimah based on what you need, you can change this any time. We recommend getting Movement Speed to increase mobbing speed. |
| 9 |
Fill the two Sacred Wells in Qimah Reservoir to get 1
Note: You can use these to either craft a weapon, or trade for solid equipment! |
| 10 | Interact with the Ancient Monument in Ashen Forest for a Level 14
|
| 11 | Defeat
|
| 12 | Defeat
|
| 13 | Get a free Unique Equipment of your choice from a randomized table from Elder Madox in Kriar Peaks. |
| 14 | After finishing all three regions, talk to The Hooded One in Kingsmarch to gain another
|
Path of Exile 2 (PoE 2) Related Guides

0.4 Best Endgame Builds
| Rank | Build |
|---|---|
 |
|
 |
|
 |
|
 |
0.4 Leveling Builds
NEW |
NEW |
NEW |
NEW |
NEW |
NEW |
NEW |
NEW |
NEW |
NEW |
- | - |
All Build Guides
| List of Builds by Class | |||||||||||
|---|---|---|---|---|---|---|---|---|---|---|---|
 Huntress Huntress |
 Mercenary Mercenary |
 Monk Monk |
|||||||||
 Witch Witch |
 Sorceress Sorceress |
 Warrior Warrior |
|||||||||
 Ranger Ranger |
 Druid Druid |
- | |||||||||
| Other Build Guides | 0.3 Leveling Builds | How to Make a Good Build | |||||||||
Warrior Leveling Builds
Rolling Slam Slam the ground to Stun enemies and knock them away, then continue forward and perform a devastating second Slam. holding down the skill input allows you to change direction as you move.
Boneshatter Attacks enemies with a melee Strike. The Strike will cause a Heavy Stun on enemies that are Primed for Stun. Upon causing a Heavy Stun it will also create a Shockwave, dealing a large amount of damage in an area.
Infernal Cry Performs a warcry, Empowering subsequent Melee Attacks if there are enemies nearby. Enemies in the Warcry's area are destabilised and will Combust on death. This Skill's a cooldown can be bypassed by expending an Endurance Charge.
Herald of Ash While active, enemies you sufficiently Overkill with attacks will cause an explosion that ignites nearby enemies based on the Overkill damage dealt.
Leap Slam Jump into the air, damaging and Knocking Back enemies with your mace where you land. Enemies you would land on are pushed out of the way.
Volcanic Fissure Slam the ground, creating a fissure that deals damage as it travels and remains for a duration. Using a different Slam on a fissure will cause an aftershock, which spreads to all connected fissures.
Forge Hammer Hurl a fiery hammer that slams into the ground and lodges there. While the hammer is lodged in the ground, reusing the Skill recalls the hammer and resets the Skill's cooldown. Alternatively, using a Warcry near the lodged hammer causes it to shatter, releasing a number of Molten Fissures in a spiral.
Focus: High AoE Damage, Physical |
|
NEW |
Infernal Cry Performs a warcry, Empowering subsequent Melee Attacks if there are enemies nearby. Enemies in the Warcry's area are destabilised and will Combust on death. This Skill's a cooldown can be bypassed by expending an Endurance Charge.
Herald of Ash While active, enemies you sufficiently Overkill with attacks will cause an explosion that ignites nearby enemies based on the Overkill damage dealt.
Scavenged Plating Uses fragments of armour scavenged from enemies to bolster your own. Fully Breaking an enemy's Armour grants you a stack of Scavenged Plating for a duration, and you gain Armour and Thorns per stack.
Shield Wall Ram you Shield into the ground, throwing up a semi-circular wall of earth. Enemies can attack the walls and your Slams will instantly destroy them. Each wall segment explodes when destroyed, damaging enemies around it.
War Banner While active, killing enemies with attacks or standing near a Unique enemy generates Valour. using this skill consumes Valour to place an inspiring Banner with an Aura that grants you and nearby allies Attack damage and accuracy while Banner lasts. The Banner cannot gain Valour while placed, and you cannot place a Banner while you already have a Banner placed.
Fortifying Cry Perform a Warcry that grants Guard and Triggers Shield Wave when subsequent Shield Attacks deal damage. The Skill's cooldown can be bypassed by expending an Endurance Charge.
Focus: Physical, Fire, Burst, AoE |
Warrior Class and Ascendancy Guides
| Base Class | ||
|---|---|---|
| Ascendancies | ||
Comment
Author
PoE 2 0.4 Warrior Leveling Build - Shield Wall Warcry
improvement survey
03/2026
improving Game8's site?

Your answers will help us to improve our website.
Note: Please be sure not to enter any kind of personal information into your response.

We hope you continue to make use of Game8.
Rankings
- We could not find the message board you were looking for.
Gaming News
Popular Games

Genshin Impact Walkthrough & Guides Wiki

Honkai: Star Rail Walkthrough & Guides Wiki

Umamusume: Pretty Derby Walkthrough & Guides Wiki

Pokemon Pokopia Walkthrough & Guides Wiki

Resident Evil Requiem (RE9) Walkthrough & Guides Wiki

Monster Hunter Wilds Walkthrough & Guides Wiki

Wuthering Waves Walkthrough & Guides Wiki

Arknights: Endfield Walkthrough & Guides Wiki

Pokemon FireRed and LeafGreen (FRLG) Walkthrough & Guides Wiki

Pokemon TCG Pocket (PTCGP) Strategies & Guides Wiki
Recommended Games

Fire Emblem Heroes (FEH) Walkthrough & Guides Wiki

Diablo 4: Vessel of Hatred Walkthrough & Guides Wiki

Yu-Gi-Oh! Master Duel Walkthrough & Guides Wiki

Super Smash Bros. Ultimate Walkthrough & Guides Wiki

Pokemon Brilliant Diamond and Shining Pearl (BDSP) Walkthrough & Guides Wiki

Elden Ring Shadow of the Erdtree Walkthrough & Guides Wiki

Monster Hunter World Walkthrough & Guides Wiki

The Legend of Zelda: Tears of the Kingdom Walkthrough & Guides Wiki

Persona 3 Reload Walkthrough & Guides Wiki

Cyberpunk 2077: Ultimate Edition Walkthrough & Guides Wiki
All rights reserved
© 2010 - 2024 Grinding Gear Games
The copyrights of videos of games used in our content and other intellectual property rights belong to the provider of the game.
The contents we provide on this site were created personally by members of the Game8 editorial department.
We refuse the right to reuse or repost content taken without our permission such as data or images to other sites.
 Shield Wall Warcry Warrior


![Marathon Review [First Impressions] | Playing The Long Game](https://img.game8.co/4435736/b9b1ec1e9219416dfc2599f85295d6ef.png/thumb)
