PoE 2 0.3 Warrior Build - Armour Stacking Titan
Latest: 0.5.0 Release Date
☆ Fate of the Vaal ▶︎ The Last of the Druids
┗ Bonded Mods | 0.4 Mystery Box
★ Druid: Class Overview | Builds
☆ NEW: Disciple of Varashta Ascendancy!
★ Best Class | Best Builds | Leveling Builds
This is an Armour Stacking Titan Warrior build for endgame in Path of Exile 2 (PoE 2)'s The Third Edict Update. Check out the Armour Stacking Titan Warrior build, including its gear, socketables, skills, and playstyle!
List of Contents
Armour Stacking Titan Build Summary
Carnarius' Armour Stacking Titan Build
This Armour Stacking Titan Build is made by Carnarius. Make sure to check out Carnarius' Youtube Channel for more builds and content!
You can watch Carnarius stream his gameplay live on Twitch, or join his official Discord for announcements and updates.
Armour Stacking Titan Build
| Build Setup | |
|---|---|
 Armour Stacking Titan |
 Boneshatter Attacks enemies with a melee Strike. The Strike will cause a Heavy Stun on enemies that are Primed for Stun. Upon causing a Heavy Stun it will also create a Shockwave, dealing a large amount of damage in an area.
 Scavenged Plating Uses fragments of armour scavenged from enemies to bolster your own. Fully Breaking an enemy's Armour grants you a stack of Scavenged Plating for a duration, and you gain Armour and Thorns per stack.
 Perfect Strike Charge up your weapon while channelling. Releasing the moment you ECT STRIKE fully charge will release a wave of Fire.
 Leap Slam Jump into the air, damaging and Knocking Back enemies with your mace where you land. Enemies you would land on are pushed out of the way.
 Armour Breaker Strike with a forceful blow, knocking enemies back and weakening their Armour.
 Shield Wall Ram you Shield into the ground, throwing up a semi-circular wall of earth. Enemies can attack the walls and your Slams will instantly destroy them. Each wall segment explodes when destroyed, damaging enemies around it.
 Berserk While active, strengthens your Rage and grants you Life Leech based on your Rage, but causes you to lose Life while Raging.
 Fortifying Cry Perform a Warcry that grants Guard and Triggers Shield Wave when subsequent Shield Attacks deal damage. The Skill's cooldown can be bypassed by expending an Endurance Charge.
|
|
|
|
This build utilizes the Titan Ascendency Class to make your character an unstoppable tank. Use Leap Slam and Boneshatter to easily clear maps, then use Shield Wall for high single-target damage.
| Date | Changes |
|---|---|
| 09-08-2025 | Created endgame build page. |
Armour Stacking Titan Equipment
| Gear | Modifiers | |
|---|---|---|
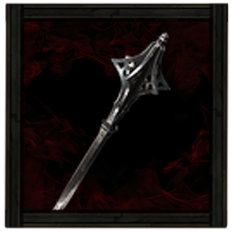 Flanged Mace Flanged Mace Flanged Mace Stats:
Damage - 45-67 Critical Chance - 5% Attacks Per Second - 1.55 Requirements: Level - 67 Strength - 134 (Weapon Set 1) |
・Increased Physical Damage
・+ Level of All Melee Skills ・Increased Attack Speed |
|
|
Flanged Mace Flanged Mace Stats:
Damage - 45-67 Critical Chance - 5% Attacks Per Second - 1.55 Requirements: Level - 67 Strength - 134 (Weapon Set 1) |
・Increased Physical Damage
・+ Level of All Melee Skills ・Increased Attack Speed |
|
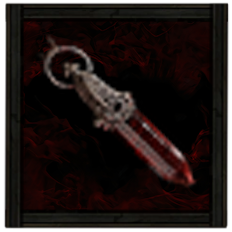
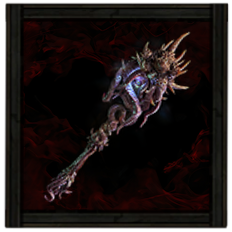 Nebuloch Execratus Hammer Nebuloch Execratus Hammer Nebuloch Execratus Hammer Stats:
Damage - 40-60 Critical Chance - 5.00% Attacks Per Second - 1.45 Requirements: Level - 55 Strength - 97 (Weapon Set 2) |
・Increased Physical Damage
・Increased Critical Damage Bonus |
|
 Vaal Tower Shield Vaal Tower Shield Vaal Tower Shield Stats:
Armor - 182 Block Chance - 26% Requirements: Level - 75 Strength - 107 Implicit Skill: Raise Shield (Offhand Set 2) |
・Increased Armour
・Elemental Resistances ・Additional Physical Damage Reduction | |
 Paragon Greathelm Paragon Greathelm Paragon Greathelm Stats:
Armor - 292 Requirements: Level - 75 Strength - 107 (Helm) |
・Increased Armour
・Maximum Life ・Armour also applies to Elemental Damage ・Elemental Resistances |
|
 Ornate Plate Ornate Plate Ornate Plate Stats:
Armor - 445 Requirements: Level - 70 Strength - 121 Implicit : Regenerate 1.5-2.5% of maximum Life per second (Body Armor) |
・Regenerate % of Maximum Life per Second
・Increased Armour ・Maximum Life ・Armour also applies to Elemental Damage ・Elemental Resistances |
|
 Vaal Mitts Vaal Mitts Vaal Mitts Stats:
Armor - 146 Requirements: Level - 75 Strength - 94 (Gloves) |
・Increased Armour
・Maximum Life ・Elemental Resistances ・+ Level of All Melee Skills ・+ Atttributes |
|
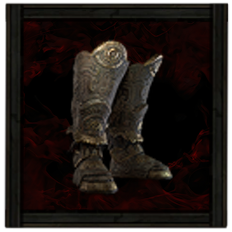 Vaal Greaves Vaal Greaves Vaal Greaves Stats:
Armor - 219 Requirements: Level - 75 Strength - 101 (Boots) |
・Increased Armour
・Maximum Life ・Armour also applies to Elemental Damage ・Elemental Resistances |
|
 Bloodstone Amulet Bloodstone Amulet Bloodstone Amulet Requirements:
Level - 18 Implicit:+30-40 to maximum Life (Amulet) |
・Allocates Throatseeker
・Increased Armour ・Maximum Life ・Increased Evasion Rating ・Elemental Resistances ・+ Level of All Melee Skills |
|
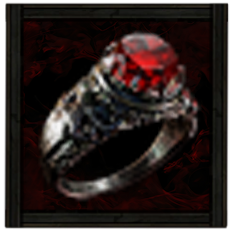 Ruby Ring Ruby Ring Ruby Ring Requirements:
Level - 8 Implicit:+20-30% to Fire Resistance (Ring 1) |
・Maximum Life
・Elemental Resistances ・Increased Evasion Rating |
|
 Topaz Ring Topaz Ring Topaz Ring Requirements:
Level - 16 Implicit:+20-30% to Lightning Resistance (Ring 2) |
・Maximum Life
・Elemental Resistances ・Increased Evasion Rating |
|
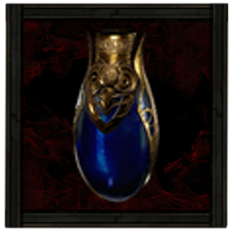
 Ultimate Life Flask Ultimate Life Flask Ultimate Life Flask Stats:
Flask Type - Life Recovered Life - 920 Charge Per Use - 10 Total Charges - 75 Duration - 3 sec. (Life Flask) |
・Increased Recovery Rate
・Increased Charges |
|
 Ultimate Mana Flask Ultimate Mana Flask Ultimate Mana Flask Stats:
Flask Type - Mana Recovered Mana - 310 Charge Per Use - 10 Total Charges - 75 Duration - 3 sec. (Mana Flask) |
・% of Recovery applied instantly
・Increased Charges |
Weapons
For your Weapon Set 1, you will be dual wielding two One-Handed Maces. Aside from Level to All Melee Skills and Additional Physical Damage modifiers, it is recommended to also get Attack Speed. Aim for at least 1.6 Attacks per Second because this significantly improves the performance of Leap Slam.
For Weapon Set 2, this will be set up exclusively for Shield Wall. Nebuloch Execratus Hammer is used specifically because its passive will make Shield Wall crit, which is important for dealing damage. For your Shield, look for as much Armour as you can to further increase Shield Wall's damage.
Armor and Accessories
You generally focus on stacking as much Armour as you can with all of your gear. Elemental Resistances are also very important since this build is relatively weak against damage over time attacks.
Note that you also do not need movement speed on your Boots since you will be using Leap Slam most of the time anyway.
Runes and Soul Cores
| Equipment | Sockets |
|---|---|
| Weapon | |
| Armor |
For your weapons, use Soul Core of Quipolatl on Nebuloch to increase its Atack Speed. Use Greater Rune of Alacrity on Weapon Set 1 to increase Skill Speed, which is useful for your Leap Slam and Boneshatter combo. Lastly, use Greater Iron Rune on your shield to generally boost your damage.
You will want to use Greater Iron Runes for all your Armor pieces to continue stacking as much Armour as you can.
Belts and Charms
| Charms | |||||
|---|---|---|---|---|---|
 Heavy Belt Heavy Belt Heavy Belt Requirements:
Level - 50 Implicit:1-2 Charm slots;20-30% increased Stun Threshold` ・Increased Armour
・Maximum Life ・Elemental Resistances |
|||||
 Sanguis Heroum Sanguis Heroum |
 Antidote Charm Antidote Charm |
 Grounding Charm Grounding Charm |
|||
For your belt, you are also looking for Armour, Maximum Life, and Elemental Resistances, similar to the rest of your gear.
Use charms that help deal with damage over time, such as Sanguis Heroum and Antidote Charm. Lastly, Grounding Charm is useful to avoid Shock, which can be problematic when a lot of enemies use lightning-based attacks.
| List of Belts | List of Charms |
Armour Stacking Titan Skills
All Active and Persistent Skills
| Skill | Support Gems |
|---|---|
 Mace Strike Mace Strike Mace Strike |
Heft Supports Skills which deal damage, increasing the maximum Physical Damage of their Hits.
Heavy Swing Supports Melee Attacks, boosting their Physical damage at the cost of Attack Speed.
Concentrated Area Supports any skill with an area of effect, causing that area to be smaller but any area damage it deals to be higher.
Close Combat II Supports Attacks, causing them to deal more damage to enemies based on how close they are to you.
Brutality III Supports any skill that deals damage, boosting its physical damage at the expense of all other damage types, as well as giving Hits from that skill a chance to ignore Physical Damage reduction.
|
|
Leap Slam Leap Slam Jump into the air, damaging and Knocking Back enemies with your mace where you land. Enemies you would land on are pushed out of the way.
|
Holy Descent Supports skills that leap into the air, causing them to create Consecrated ground when you land.
Rapid Attacks III Supports Attacks, causing them to Attack faster at the cost of Damage.
Magnified Area I Supports any skill with an area of effect, making it larger.
Stun III Supports any skill that Hits Enemies, causing it to build up Stun significantly more quickly, at the cost of Damage.
Brink II Supports Melee Attack Skills. Supported Skills build up Stun more quickly, but cannot themselves Stun.
|
|
Boneshatter Boneshatter Attacks enemies with a melee Strike. The Strike will cause a Heavy Stun on enemies that are Primed for Stun. Upon causing a Heavy Stun it will also create a Shockwave, dealing a large amount of damage in an area.
|
Heavy Swing Supports Melee Attacks, boosting their Physical damage at the cost of Attack Speed.
Impact Shockwave Supports Melee Strike skills, causing them to create an Aftershock that damages enemies around the target when they Heavy Stun an enemy.
Ancestral Call II Supports Strikes you use yourself, providing a powerful Ancestral Boost every few seconds. Cannot Support Channelled Skills and does not modify Skills used by Minions.
Armour Break III Supports Skills that Hit Enemies, causing those Hits to Break Armour based on a portion of Physical Damage dealt. On Fully Breaking Armour with Supported Skills, you gain an Endurance Charge.
Magnified Area I Supports any skill with an area of effect, making it larger.
|
|
Shield Wall Shield Wall Ram you Shield into the ground, throwing up a semi-circular wall of earth. Enemies can attack the walls and your Slams will instantly destroy them. Each wall segment explodes when destroyed, damaging enemies around it.
|
Atalui's Bloodletting Supports any Skill, turning a portion of its Mana cost into a Life cost. Does not support Skills which reserve Spirit. Supported Skills Gain a portion of their Life cost as extra Physical Damage.
Close Combat II Supports Attacks, causing them to deal more damage to enemies based on how close they are to you.
Overextend Supports Attack Skills you use yourself. Supported Skills deal more Damage with Critical Hits, but Critically Hitting an Enemy with them will Daze you for a short time.
Brutality III Supports any skill that deals damage, boosting its physical damage at the expense of all other damage types, as well as giving Hits from that skill a chance to ignore Physical Damage reduction.
Heft Supports Skills which deal damage, increasing the maximum Physical Damage of their Hits.
|
|
Armour Breaker Armour Breaker Strike with a forceful blow, knocking enemies back and weakening their Armour.
|
Uruk's Smelting Supports any skill, causing Armour Break it inflicts to be stronger. Fully Breaking Armour with Supported Skills permanently increases the Physical Damage taken by those affected, up to a cap.
Rage III Supports Melee Attacks, causing them to grant Rage on Hit. Supported Skills have signficantly higher Attack speed while you are not at maximum Rage.
Rapid Attacks III Supports Attacks, causing them to Attack faster at the cost of Damage.
Physical Mastery Supports Physical skills, granting them an additional level.
|
|
Perfect Strike Perfect Strike Charge up your weapon while channelling. Releasing the moment you ECT STRIKE fully charge will release a wave of Fire.
|
Perfected Endurance Supports Skills which have a benefit for Perfect Timing. Supported Skills grant at least one Endurance Charge when Hitting an enemy ith Perfect Timing.
Rapid Attacks III Supports Attacks, causing them to Attack faster at the cost of Damage.
Perfection Supports skills which have a benefit for Perfectly Timing their use. On successfully executing Perfect Timing with Supported Skills, gain Perfection, which is a powerful damage buff. However, failing to execute any Perfect Timing (even with skills not supported by Perfection) will remove all Perfection on you.
Rigwald's Ferocity Supports Attack skills, granting them Attack Speed at the cost of Damage or Damage at the cost of Attack Speed depending on Weapon Set they are used in. Does not modify skills used by Minions.
|
|
Fortifying Cry Fortifying Cry Perform a Warcry that grants Guard and Triggers Shield Wave when subsequent Shield Attacks deal damage. The Skill's cooldown can be bypassed by expending an Endurance Charge.
|
Raging Cry Supports Warcry skills, causing them to grant you Rage on use depending on counted monster Power.
Cooldown Recovery II Supports skills with Cooldowns, increasing the rate at which those Cooldowns Recover. Cannot modify the skills of minions.
Tireless Supports Warcry Skills. Attacks Empowered by supported skills have a chance not to lower the Empowerment count of supported skills when they are used.
|
|
Scavenged Plating Scavenged Plating Uses fragments of armour scavenged from enemies to bolster your own. Fully Breaking an enemy's Armour grants you a stack of Scavenged Plating for a duration, and you gain Armour and Thorns per stack.
|
Prolonged Duration II Supports any skill that has a duration, making that duration longer.
Vitality II Supports Persistent Buff Skills, causing you to gain Life Regeneration while the Skill is active.
|
|
Berserk Berserk While active, strengthens your Rage and grants you Life Leech based on your Rage, but causes you to lose Life while Raging.
|
- |
This build maximizes Leap Slam, Boneshatter, and Shield Wall as your main sources of damage. All other active skills are set up in such a way to boost your Shield Wall damage and deal a decent amount of damage.
Scavenged Plating is an essential part of the build since it significantly increases your Armour, then Berserk gives you a nice damage boost.
List of Skills
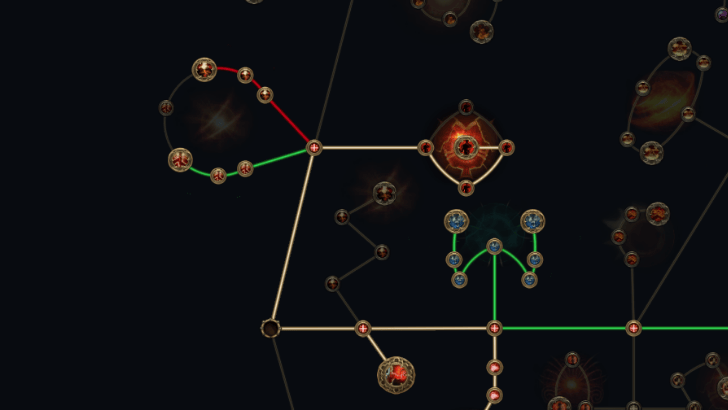
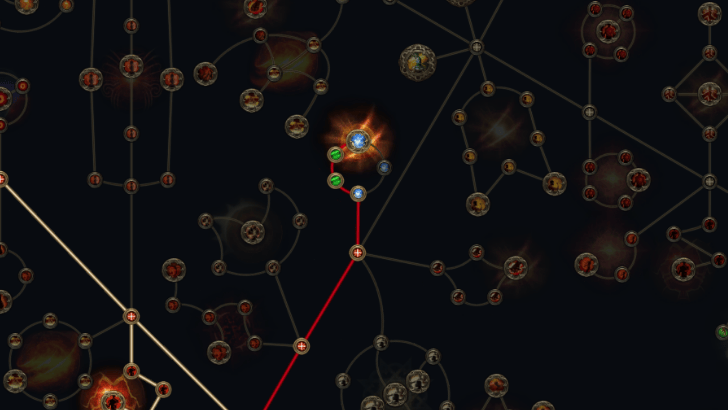
Armour Stacking Titan Passive Tree
| Ascendency Passive Nodes | |||
|---|---|---|---|
 |
|||
| Passive Nodes | |||
| 1. | 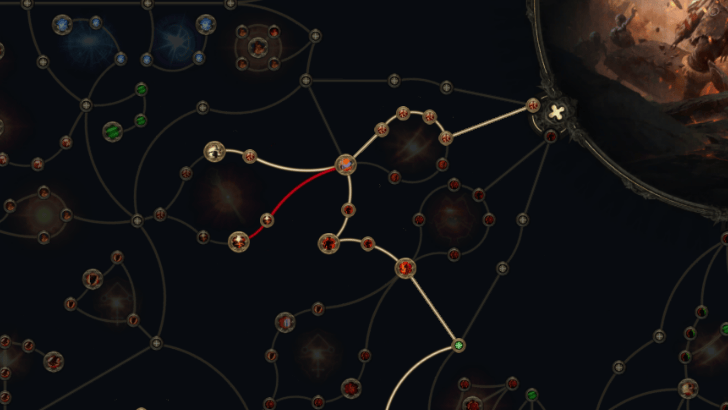 |
2. |  |
| 3. | 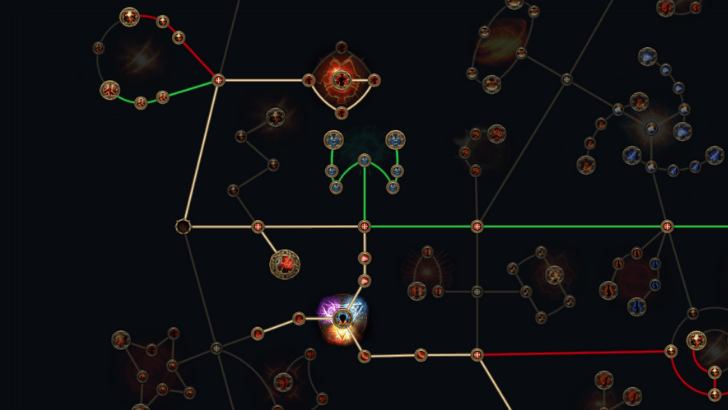 |
4. |  |
| 5. |  |
6. |  |
| 7. | 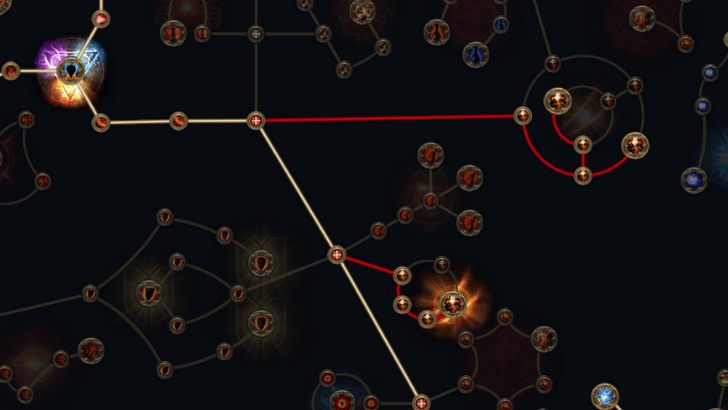 |
8. |  |
| 9. | 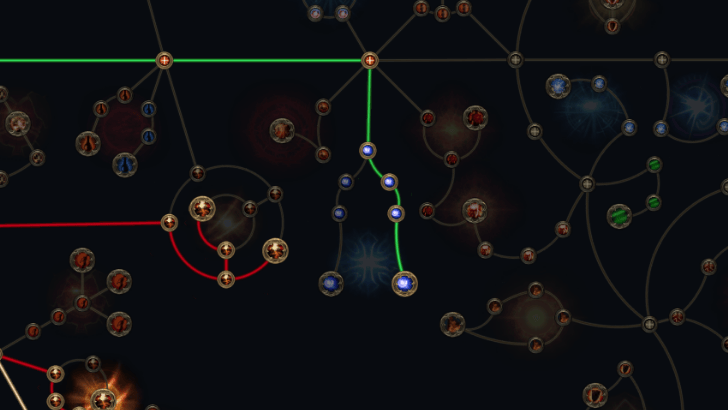 |
10. |  |
| 11. | 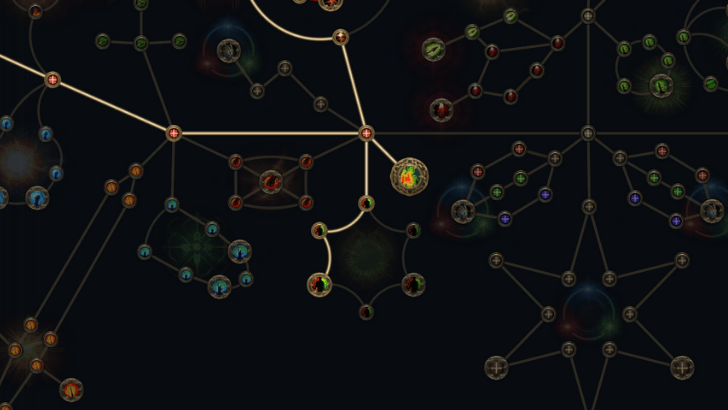 |
12. | 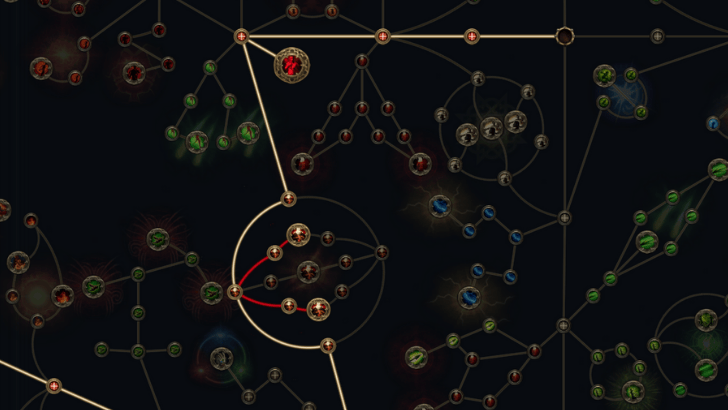 |
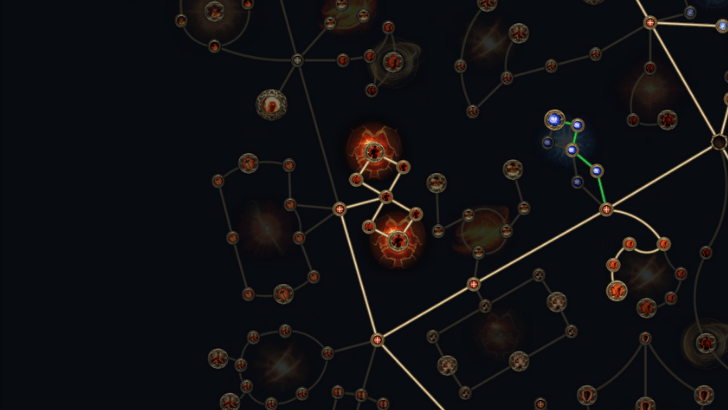
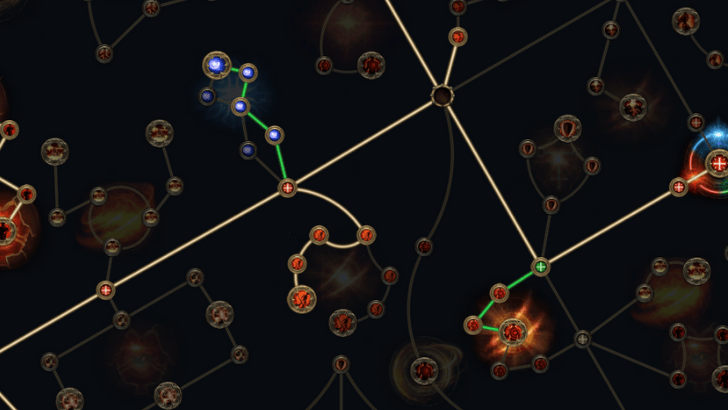
| Screenshots taken from Path of Building | |||
※ Legend: Red = Weapon Set I | Green = Weapon Set II
This build generally increases Melee Damage, Elemental Resistance, and Armour. Weapon Set 1, which would be your double One-Handed Maces, focus on Area Damage, AoE, and Mace Damage. Weapon Set 2, which is your Nebuloch and Shield combo, boost Attack Damage and Critical Damage since this improves your Shield Wall damage.
Passive Skill Tree Guide and List of Passives
Jewels
Note: The modifiers listed are arranged according to priority.
| ・Glorifying the defilement of X souls in tribute to Tecrod
・Passives in radius are Conquered by the Abyssals Historic |
|
| ・+X% increased Armour
・+X% increased Stun Buildup ・Gain Rage on Melee Hit |
|
| ・Recover X% of Maximum Life on Kill
・X% increased Armour from Equipped Armour |
The main focus would be the Undying Hate Timeless Jewel that is specifically in tribute to Tecrod. Slotting this nearby the Vaal Pact Passive will turn it into Sacrifice of Blood, which increases your Life Regeneration based on your life lost.
This synergizes well with the Atalui's Bloodletting lineage support gem since it converts your mana costs into life costs. Thus, constantly using skills will grant you higher and higher Life Regeneration, allowing you to sustain constant skill use.
The Time-Lost Rubies and Heart of the Well Diamond are there to give you additional Armour.
Armour Stacking Titan Playstyle and Skill Rotation
Mobbing Rotation
The build focuses heavily on priming enemy packs for stun with Leap Slam then finishing them off with Boneshatter. The rotation is as follows:
- Charge into enemy packs with Leap Slam to prime them for stun.
- Hit any stun-primed enemy with Boneshatter.
- Repeat these two skills.
Bossing Rotation
Your goal would be to break the enemy boss' Armour, produce an Endurance Charge, use Nebuloch passive, then set up your Shield Wall damage. The rotation is as follows:
- Spam Armour Breaker to fully break the enemy's Armour.
- Execute a perfectly-timed Pefect Strike to produce an Endurance Charge.
- Put down Shield Wall, which will consume the Endurance Charge due to Nebuloch passive.
- Destroy the wall with Fortifying Cry for high single-target damage.
Path of Exile 2 (PoE 2) Related Guides

0.4 Best Endgame Builds
| Rank | Build |
|---|---|
 |
|
 |
|
 |
|
 |
0.4 Leveling Builds
All Build Guides
| List of Builds by Class | |||||||||||
|---|---|---|---|---|---|---|---|---|---|---|---|
 Huntress Huntress |
 Mercenary Mercenary |
 Monk Monk |
|||||||||
 Witch Witch |
 Sorceress Sorceress |
 Warrior Warrior |
|||||||||
 Ranger Ranger |
 Druid Druid |
- | |||||||||
| Other Build Guides | 0.3 Leveling Builds | How to Make a Good Build | |||||||||
Warrior Leveling Builds
Rolling Slam Slam the ground to Stun enemies and knock them away, then continue forward and perform a devastating second Slam. holding down the skill input allows you to change direction as you move.
Boneshatter Attacks enemies with a melee Strike. The Strike will cause a Heavy Stun on enemies that are Primed for Stun. Upon causing a Heavy Stun it will also create a Shockwave, dealing a large amount of damage in an area.
Infernal Cry Performs a warcry, Empowering subsequent Attacks. Consumes all Endurance Charges to Empower additional attacks. Enemies in the warcry's area are destabilised and will Combust on death.
Herald of Ash While active, enemies you sufficiently Overkill with attacks will cause an explosion that ignites nearby enemies based on the Overkill damage dealt.
Leap Slam Jump into the air, damaging and Knocking Back enemies with your mace where you land. Enemies you would land on are pushed out of the way.
Volcanic Fissure Slam the ground, creating a fissure that deals damage as it travels and remains for a duration. Using a different Slam on a fissure will cause an aftershock, which spreads to all connected fissures.
Forge Hammer Hurl a fiery hammer that slams into the ground and lodges there. While the hammer is lodged in the ground, reusing the Skill recalls the hammer and resets the Skill's cooldown. Alternatively, using a Warcry near the lodged hammer causes it to shatter, releasing a number of Molten Fissures in a spiral.
Focus: High AoE Damage, Physical |
Warrior Endgame Builds
Boneshatter Attacks enemies with a melee Strike. The Strike will cause a Heavy Stun on enemies that are Primed for Stun. Upon causing a Heavy Stun it will also create a Shockwave, dealing a large amount of damage in an area.
Infernal Cry Performs a warcry, Empowering subsequent Attacks. Consumes all Endurance Charges to Empower additional attacks. Enemies in the warcry's area are destabilised and will Combust on death.
Herald of Ash While active, enemies you sufficiently Overkill with attacks will cause an explosion that ignites nearby enemies based on the Overkill damage dealt.
Leap Slam Jump into the air, damaging and Knocking Back enemies with your mace where you land. Enemies you would land on are pushed out of the way.
Overwhelming Presence While active, enemies in your Presence are easier to Stun and inflict Elemental Ailments upon.
Shield Charge Channel to charge in the target direction. You will crash into enemies on your path, stopping your charge and dealing damage to enemies in an area, and extra damage to the enemies you collided with. While charging, your Shield is raised and you will Block all incoming Blockable hits.
Earthshatter Slam the ground, sending out a fissure that deals area damage to enemies it passess under and thrusts a spike from the ground when it ends. Warcries performed near the spike will cause it to shatter, damaging surrounding enemies.
Seismic Cry Performs a damaging Warcry, knocking Back enemies. If a Heavy Stunned enemy is hit, your next Slam is empowered to perform an additional aftershock. If not, this skills cooldown is reset. Only counts Heavily Stunned enemies for purpose of counting Power gained.
Hammer of the Gods Entreats the Ancestors to crush your enemies, manifesting a massive hammer that falls from the sky of your target, Slamming into the ground after a short duration and dealing immense damage based on your weapon.
Focus: Burst, AoE, DoT, Stun |
|
Infernal Cry Performs a warcry, Empowering subsequent Attacks. Consumes all Endurance Charges to Empower additional attacks. Enemies in the warcry's area are destabilised and will Combust on death.
Leap Slam Jump into the air, damaging and Knocking Back enemies with your mace where you land. Enemies you would land on are pushed out of the way.
Overwhelming Presence While active, enemies in your Presence are easier to Stun and inflict Elemental Ailments upon.
Earthquake Smashes the ground, dealing damage in an area and leaving behind Jagged Ground that slow enemies. The Jagged Ground erupts in a powerful Aftershock after a duration. Cannot create Jagged Ground on top of an existing patch, or if you already have the maximum number of active patches.
Seismic Cry Performs a damaging Warcry, knocking Back enemies. If a Heavy Stunned enemy is hit, your next Slam is empowered to perform an additional aftershock. If not, this skills cooldown is reset. Only counts Heavily Stunned enemies for purpose of counting Power gained.
Stampede Charges forward, cracking the earth and leaving a patch of Jagged Ground with every footstep. At the end of your charge, a massive leaping Slam damages enemies and causes all nearby patches of Jagged Ground to explode, damaging enemies standing on them.
Hammer of the Gods Entreats the Ancestors to crush your enemies, manifesting a massive hammer that falls from the sky of your target, Slamming into the ground after a short duration and dealing immense damage based on your weapon.
Time of Need Invokes divine blessings, periodically healing you and removing Curses and Elemental Ailments from you.
Berserk While active, strengthens your Rage and grants you Life Leech based on your Rage, but causes you to lose Life while Raging.
Focus: Aftershocks, Stun, Bleed |
|
Solar Orb Creates a fiery Orb that periodically releases fiery pulses. Enemies that are very close to the Orb are Ignited.
Infernal Cry Performs a warcry, Empowering subsequent Attacks. Consumes all Endurance Charges to Empower additional attacks. Enemies in the warcry's area are destabilised and will Combust on death.
Leap Slam Jump into the air, damaging and Knocking Back enemies with your mace where you land. Enemies you would land on are pushed out of the way.
Overwhelming Presence While active, enemies in your Presence are easier to Stun and inflict Elemental Ailments upon.
Shockwave Totem Raises a Totem that Slams the ground around it, repeatedly damaging nearby enemies. Jagged Ground erupts when hit by this Slam, damaging enemies standing on it.
Seismic Cry Performs a damaging Warcry, knocking Back enemies. If a Heavy Stunned enemy is hit, your next Slam is empowered to perform an additional aftershock. If not, this skills cooldown is reset. Only counts Heavily Stunned enemies for purpose of counting Power gained.
Hammer of the Gods Entreats the Ancestors to crush your enemies, manifesting a massive hammer that falls from the sky of your target, Slamming into the ground after a short duration and dealing immense damage based on your weapon.
Time of Need Invokes divine blessings, periodically healing you and removing Curses and Elemental Ailments from you.
Berserk While active, strengthens your Rage and grants you Life Leech based on your Rage, but causes you to lose Life while Raging.
Focus: AoE, Mobbing, Stun, Fast Clear |
|
Rolling Slam Slam the ground to Stun enemies and knock them away, then continue forward and perform a devastating second Slam. holding down the skill input allows you to change direction as you move.
Boneshatter Attacks enemies with a melee Strike. The Strike will cause a Heavy Stun on enemies that are Primed for Stun. Upon causing a Heavy Stun it will also create a Shockwave, dealing a large amount of damage in an area.
Herald of Ash While active, enemies you sufficiently Overkill with attacks will cause an explosion that ignites nearby enemies based on the Overkill damage dealt.
Perfect Strike Charge up your weapon while channelling. Releasing the moment you ECT STRIKE fully charge will release a wave of Fire.
Leap Slam Jump into the air, damaging and Knocking Back enemies with your mace where you land. Enemies you would land on are pushed out of the way.
Time of Need Invokes divine blessings, periodically healing you and removing Curses and Elemental Ailments from you.
Fire Spell on Hit Gains X Energy per Power of enemies you Hit with Melee Attacks, modified by the percentage of the enemy's Ailment;Threshold the Hit will deal X% increased Energy gain;Can only socket Fire Spells;Triggers all socketed Spells and loses all Energy on reaching maximum Energy
Focus: AoE, High Single Target Damage, Physical, Tank |
|
Infernal Cry Performs a warcry, Empowering subsequent Attacks. Consumes all Endurance Charges to Empower additional attacks. Enemies in the warcry's area are destabilised and will Combust on death.
Perfect Strike Charge up your weapon while channelling. Releasing the moment you ECT STRIKE fully charge will release a wave of Fire.
Leap Slam Jump into the air, damaging and Knocking Back enemies with your mace where you land. Enemies you would land on are pushed out of the way.
Overwhelming Presence While active, enemies in your Presence are easier to Stun and inflict Elemental Ailments upon.
Shield Charge Channel to charge in the target direction. You will crash into enemies on your path, stopping your charge and dealing damage to enemies in an area, and extra damage to the enemies you collided with. While charging, your Shield is raised and you will Block all incoming Blockable hits.
Earthshatter Slam the ground, sending out a fissure that deals area damage to enemies it passess under and thrusts a spike from the ground when it ends. Warcries performed near the spike will cause it to shatter, damaging surrounding enemies.
Seismic Cry Performs a damaging Warcry, knocking Back enemies. If a Heavy Stunned enemy is hit, your next Slam is empowered to perform an additional aftershock. If not, this skills cooldown is reset. Only counts Heavily Stunned enemies for purpose of counting Power gained.
Time of Need Invokes divine blessings, periodically healing you and removing Curses and Elemental Ailments from you.
Focus: AoE, Ignite, Stun |
|
Ancestral Warrior Totem Raises a Totem that uses socketed Mace skills.
Scavenged Plating Uses fragments of armour scavenged from enemies to bolster your own. Fully Breaking an enemy's Armour grants you a stack of Scavenged Plating for a duration, and you gain Armour and Thorns per stack.
Enfeeble Curses all targets in an area after a short delay, making them deal less damage.
Leap Slam Jump into the air, damaging and Knocking Back enemies with your mace where you land. Enemies you would land on are pushed out of the way.
Armour Breaker Strike with a forceful blow, knocking enemies back and weakening their Armour.
Attrition While active, causes you to deal more Hit damage to Rare and Unique enemies the longer you've been fighting them, and gain Culling Strike against them once you've been fighting them for long enough.
Shield Charge Channel to charge in the target direction. You will crash into enemies on your path, stopping your charge and dealing damage to enemies in an area, and extra damage to the enemies you collided with. While charging, your Shield is raised and you will Block all incoming Blockable hits.
Herald of Blood While active, killing an enemy with Blood Loss will cause a bloody explosion that deals Physical Attack damage to surrounding enemies based off the life of the exploded enemy, destroying their Corpse in the process. The explosion also has a chance to aggravate Bleeding.
Focus: Thorns, Critical Hit, Physical Damage |
|
Herald of Ash While active, enemies you sufficiently Overkill with attacks will cause an explosion that ignites nearby enemies based on the Overkill damage dealt.
Scavenged Plating Uses fragments of armour scavenged from enemies to bolster your own. Fully Breaking an enemy's Armour grants you a stack of Scavenged Plating for a duration, and you gain Armour and Thorns per stack.
Wind Dancer Grants a buff that gives you more Evasion per stage. Being Hit by a Melee Attack while you have this buff consumes all stages to damage and Knock Back enemies around you.
Vaulting Impact Leaps forward and Slams the ground, sending out a Stunning shockwave that is especially potent against Dazed enemies.
Wind Blast Strike enemies at range by generating a gust of wind as you swing. Enemies will be Knocked Back based on how close they are to you.
Hammer of the Gods Entreats the Ancestors to crush your enemies, manifesting a massive hammer that falls from the sky of your target, Slamming into the ground after a short duration and dealing immense damage based on your weapon.
Focus: Armour Break, Physical Damage, Burst Damage |
|
Infernal Cry Performs a warcry, Empowering subsequent Attacks. Consumes all Endurance Charges to Empower additional attacks. Enemies in the warcry's area are destabilised and will Combust on death.
Herald of Ash While active, enemies you sufficiently Overkill with attacks will cause an explosion that ignites nearby enemies based on the Overkill damage dealt.
Scavenged Plating Uses fragments of armour scavenged from enemies to bolster your own. Fully Breaking an enemy's Armour grants you a stack of Scavenged Plating for a duration, and you gain Armour and Thorns per stack.
Earthquake Smashes the ground, dealing damage in an area and leaving behind Jagged Ground that slow enemies. The Jagged Ground erupts in a powerful Aftershock after a duration. Cannot create Jagged Ground on top of an existing patch, or if you already have the maximum number of active patches.
Shockwave Totem Raises a Totem that Slams the ground around it, repeatedly damaging nearby enemies. Jagged Ground erupts when hit by this Slam, damaging enemies standing on it.
Volcanic Fissure Slam the ground, creating a fissure that deals damage as it travels and remains for a duration. Using a different Slam on a fissure will cause an aftershock, which spreads to all connected fissures.
Forge Hammer Hurl a fiery hammer that slams into the ground and lodges there. While the hammer is lodged in the ground, reusing the Skill recalls the hammer and resets the Skill's cooldown. Alternatively, using a Warcry near the lodged hammer causes it to shatter, releasing a number of Molten Fissures in a spiral.
Ancestral Cry Perform a Warcry using Glory gained by Igniting enemies to turn you into an embodiement of Kaom. While embodying Kaom, your footsteps Trigger Volcanic Steps, Melee Strikes and Slams are Ancestrally Boosted, and your Melee Strikes Trigger Volcanic Eruption.
Focus: Totem, Fissure, Fire |
|
Boneshatter Attacks enemies with a melee Strike. The Strike will cause a Heavy Stun on enemies that are Primed for Stun. Upon causing a Heavy Stun it will also create a Shockwave, dealing a large amount of damage in an area.
Scavenged Plating Uses fragments of armour scavenged from enemies to bolster your own. Fully Breaking an enemy's Armour grants you a stack of Scavenged Plating for a duration, and you gain Armour and Thorns per stack.
Perfect Strike Charge up your weapon while channelling. Releasing the moment you ECT STRIKE fully charge will release a wave of Fire.
Leap Slam Jump into the air, damaging and Knocking Back enemies with your mace where you land. Enemies you would land on are pushed out of the way.
Armour Breaker Strike with a forceful blow, knocking enemies back and weakening their Armour.
Shield Wall Ram you Shield into the ground, throwing up a semi-circular wall of earth. Enemies can attack the walls and your Slams will instantly destroy them. Each wall segment explodes when destroyed, damaging enemies around it.
Berserk While active, strengthens your Rage and grants you Life Leech based on your Rage, but causes you to lose Life while Raging.
Fortifying Cry Perform a Warcry that grants Guard and Triggers Shield Wave when subsequent Shield Attacks deal damage. The Skill's cooldown can be bypassed by expending an Endurance Charge.
Focus: Armour, Physical Damage, Burst Damage |
|
Infernal Cry Performs a warcry, Empowering subsequent Attacks. Consumes all Endurance Charges to Empower additional attacks. Enemies in the warcry's area are destabilised and will Combust on death.
Herald of Ash While active, enemies you sufficiently Overkill with attacks will cause an explosion that ignites nearby enemies based on the Overkill damage dealt.
Perfect Strike Charge up your weapon while channelling. Releasing the moment you ECT STRIKE fully charge will release a wave of Fire.
Shield Charge Channel to charge in the target direction. You will crash into enemies on your path, stopping your charge and dealing damage to enemies in an area, and extra damage to the enemies you collided with. While charging, your Shield is raised and you will Block all incoming Blockable hits.
Resonating Shield Repeatedly strike your Shield with your weapon causing damaging shockwaves in an area around you. Enemies hit by the shockwave lose Armour for a duration. While using Resonating Shield, your shield is raised and you will Block all incoming Blockable hits.
Shield Wall Ram you Shield into the ground, throwing up a semi-circular wall of earth. Enemies can attack the walls and your Slams will instantly destroy them. Each wall segment explodes when destroyed, damaging enemies around it.
Sunder Slams the ground, creating a roiling fissure that damages enemies in a sequence of areas in front of you. A number of enemies hit by the wave will release a shockwave, damaging other enemies.
Berserk While active, strengthens your Rage and grants you Life Leech based on your Rage, but causes you to lose Life while Raging.
Fortifying Cry Perform a Warcry that grants Guard and Triggers Shield Wave when subsequent Shield Attacks deal damage. The Skill's cooldown can be bypassed by expending an Endurance Charge.
Focus: Shield, Single-Target Burst, Physical Damage |
Warrior Class and Ascendancy Guides
| Base Class | ||
|---|---|---|
| Ascendancies | ||
Comment
Author

PoE 2 0.3 Warrior Build - Armour Stacking Titan
Rankings
- We could not find the message board you were looking for.

Gaming News


![Star Savior Review [First Impressions] | Engaging, Entertaining, and Expensive](https://img.game8.co/4447603/8f500e9bf666bdb8adb1af478e9dfdbd.png/thumb)
![Death Stranding 2: On The Beach [PC] Review | A Port That Delivers](https://img.game8.co/4447392/15310a0c9aa1b6843bb713b2ea216930.jpeg/thumb)
Popular Games

Genshin Impact Walkthrough & Guides Wiki
Umamusume: Pretty Derby Walkthrough & Guides Wiki
Pokemon Pokopia Walkthrough & Guides Wiki
Honkai: Star Rail Walkthrough & Guides Wiki
Monster Hunter Stories 3: Twisted Reflection Walkthrough & Guides Wiki
Arknights: Endfield Walkthrough & Guides Wiki
Wuthering Waves Walkthrough & Guides Wiki
Zenless Zone Zero Walkthrough & Guides Wiki
Pokemon TCG Pocket (PTCGP) Strategies & Guides Wiki
Monster Hunter Wilds Walkthrough & Guides Wiki


Recommended Games
Fire Emblem Heroes (FEH) Walkthrough & Guides Wiki
Diablo 4: Vessel of Hatred Walkthrough & Guides Wiki
Cyberpunk 2077: Ultimate Edition Walkthrough & Guides Wiki
Yu-Gi-Oh! Master Duel Walkthrough & Guides Wiki
Super Smash Bros. Ultimate Walkthrough & Guides Wiki
Pokemon Brilliant Diamond and Shining Pearl (BDSP) Walkthrough & Guides Wiki
Elden Ring Shadow of the Erdtree Walkthrough & Guides Wiki
Monster Hunter World Walkthrough & Guides Wiki
The Legend of Zelda: Tears of the Kingdom Walkthrough & Guides Wiki
Persona 3 Reload Walkthrough & Guides Wiki


All rights reserved
© 2010 - 2024 Grinding Gear Games
The copyrights of videos of games used in our content and other intellectual property rights belong to the provider of the game.
The contents we provide on this site were created personally by members of the Game8 editorial department.
We refuse the right to reuse or repost content taken without our permission such as data or images to other sites.