PoE 2 0.4 Druid Build - Scattering Calamity Oracle
Latest: 0.5.0 Release Date
☆ Fate of the Vaal ▶︎ The Last of the Druids
┗ Bonded Mods | 0.4 Mystery Box
★ Druid: Class Overview | Builds
☆ NEW: Disciple of Varashta Ascendancy!
★ Best Class | Best Builds | Leveling Builds
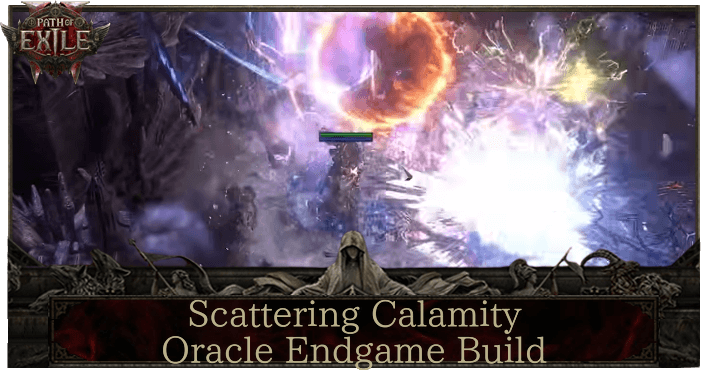
This is a Scattering Calamity Oracle Druid build for endgame in Path of Exile 2 (PoE 2)'s The Last of the Druids Update. Check out the Scattering Calamity Oracle endgame build, including its gear, socketables, skills, and playstyle!
 Attention! Attention! |
This 0.4.0 endgame build starts from Level 65 and above. If you want to see a build for leveling, check out our Leveling Builds! |
|---|
List of Contents
Scattering Calamity Oracle Build Summary
NickZiri's Scattering Calamity Oracle Build
This Scattering Calamity Oracle endgame build is based on a build by NickZiri over at NickZiri (Youtube). The video includes details on how to gear up to get the build online. Check out Thor's YouTube channel for more Path of Exile 2 content and ask questions about the build!
Scattering Calamity Oracle Build
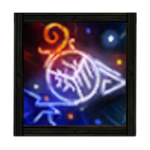
 Scattering Calamity Oracle Scattering Calamity Oracle |
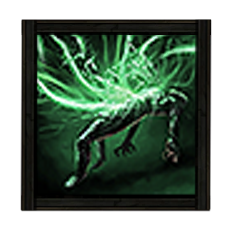
 Mana Remnants Conjures surging lightning to restore your Mana. While active, Shocked enemies you kill have a chance to spawn a Mana Remnant, and Critically Hitting a Shocked target spawns a Mana Remnant every few seconds. Picking up a Mana Remnant grants you Mana which can Overflow maximum Mana.
 Archmage While Active, causes your Non-Channelling Spells to cost additional mana and deal extra lightning damage, both based on your maximum mana.
 Cast on Critical While active, gains energy when you Critically Hit enemies and triggers socketed spells on reaching maximum energy.
 Siphon Elements While active, has a chance to create an Infusion Remnant when you Freeze, Shock, or Ignite a target.
 Elemental Weakness Curse all targets in an area after a short delay, lowering their Elemental Resistances.
|
|
|
|
This Oracle build focuses on simply spamming His Scattering Calamity from The Unborn Lich unique staff to deal critical hits and proc Cast on Critical for casting Comet and Arc repeatedly.
Take note that this build requires you to have at least 228 Spirit to equip all the necessary Persistent skills and Support gems to bring the build online.
| Date | Changes Made |
|---|---|
| 01/16/26 | ・Scattering Calamity Oracle endgame build was created. |
Scattering Calamity Oracle Equipment
※ The affixes shown below are arranged based on descending priority.
| Gear | Affixes |
|---|---|
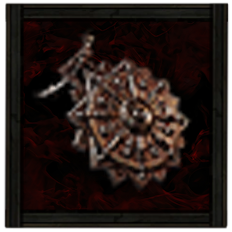
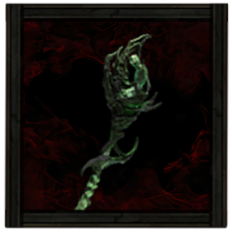 The Unborn Lich Ravenous Staff The Unborn Lich Ravenous Staff The Unborn Lich Ravenous Staff Stats:
Requirements: Level - 84 Intelligence - 147 (Weapon Set 1) |
・Increased Desecrated Modifier Magnitudes Desecrated: ・Increased Duration of Elemntal Ailments ・Increased Elemental Damage ・Increased Spell Damage per 100 Maximum Mana ・Chance for Spell Skills to Fire 2 Additional Projectiles |
 Chiming Staff Chiming Staff Chiming Staff Stats:
Requirements: Level - 25 Intelligence - 41 (Weapon Set 2) |
・Gain % of Damage as Extra Lightning Damage
・Increased Chaos Damage ・Maximum Mana ・Level of All Spell Skills ・Increased Cast Speed ・Gain Life per Enemy Killed |
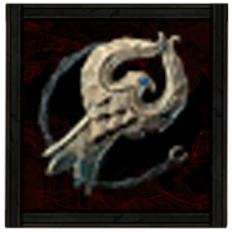
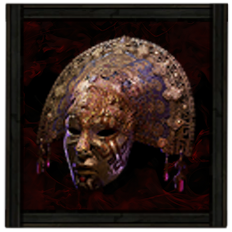 The Vertex Tribal Mask The Vertex Tribal Mask The Vertex Tribal Mask Stats:
Evasion - 66 Energy Shield - 28 Requirements: Level - 33 Dexterity - 27 Intelligence - 27 Fixed Modifiers: ・ 100-150% increased Evasion and Energy Shield ・ 20-30% increased Critical Hit Chance ・ +13-17% to Chaos Resistance ・ Equipment and Skill Gems have 50% reduced Attribute Requirements |
・Has No Attribute Requirements
・Increased Evasion and Energy Shield ・Increased Critical Hit Chance ・Chaos Resistance Corruption: ・Level of All Skills |
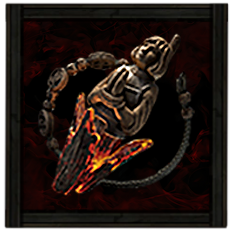
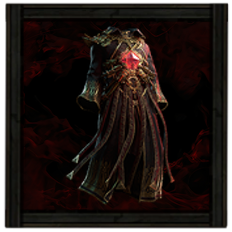 The Covenant Altar Robe The Covenant Altar Robe The Covenant Altar Robe Stats:
Energy Shield - 89 Requirements: Level - 40 Intelligence - 65 Fixed Modifiers: ・ 100-150% increased Energy Shield ・ +100-150 to maximum Life ・ 5% of Spell Damage Leeched as Life ・ Skills gain a Base Life Cost equal to 50% of Base Mana Cost |
・Grants Skill:
・Increased Energy Shield
・Maximum Life ・Spell Damage Leeched as Life Corruption: ・Increased Life Cost Efficiency |
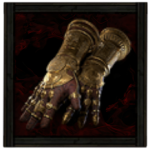 Vaal Gloves Vaal Gloves Vaal Gloves Stats:
Energy Shield - 50 Requirements: Level - 75 Intelligence - 94 |
・Increased Energy Shield
・Adds Fire Damage ・Maximum Life ・Increased Critical Damage Bonus ・Increased Effect of Socketed Items Desecrated: ・Lightning and Chaos Resistance |
 Sekhema Sandals Sekhema Sandals Sekhema Sandals Stats:
Energy Shield - 82 Requirements: Level - 80 Intelligence - 108 |
・Increased Movement Speed
・Increased Energy Shield ・Lightning Resistance ・Fire Resistance ・Stun Threshold Desecrated: ・Chaos Resistance |
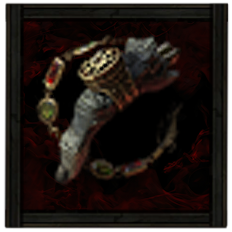
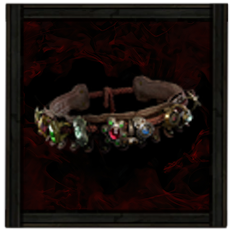 Ingenuity Utility Belt Ingenuity Utility Belt Ingenuity Utility Belt Requirements:
Level - 55 Implicit:1-2 Charm slots;20% of Flask Recovery applied Instantly Fixed Modifiers: ・ 40-80% increased bonuses gained from Equipped Rings |
・Increased Charm Charges Gained
・Reduced Charm Charges Used ・Increased Bonuses Gained from Left Equipped Ring ・Increased Bonuses Gained from Right Equipped Ring |
 Solar Amulet Solar Amulet Solar Amulet Requirements:
Level - 30 Implicit:+10-15 to Spirit |
・Allocates Fast Metabolism
・Spirit ・Maximum Mana ・Level of All Spell Skills ・Increased Cast Speed ・Intelligence Desecrated: ・Maximum Life |
 Kalandra's Touch Ring Kalandra's Touch Ring Kalandra's Touch Ring Requirements:
None Implicit:Reflects your other Ring Fixed Modifiers: ・ Mirrored |
・Reflects Opposite Ring |
 Breach Ring Breach Ring Breach Ring Requirements:
Level - 40 Implicit:Maximum Quality is 40% |
・Maximum Mana
・Maximum Life ・Increased Maximum Mana ・Increased Cast Speed ・Cold Resistance Desecrated: ・All Elemental Resistances |
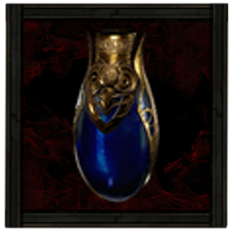
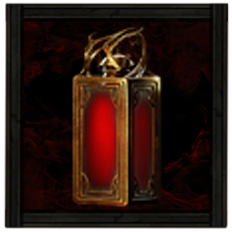 Ultimate Life Flask Ultimate Life Flask Ultimate Life Flask Stats:
Flask Type - Life Recovered Life - 920 Charge Per Use - 10 Total Charges - 75 Duration - 3 sec. |
・% of Recovery Applied Instantly
・Reduced Charges per Use |
 Ultimate Mana Flask Ultimate Mana Flask Ultimate Mana Flask Stats:
Flask Type - Mana Recovered Mana - 310 Charge Per Use - 10 Total Charges - 75 Duration - 3 sec. |
・Increased Mana Recovered
・Increased Charges |
Weapons
This Oracle build makes use of The Unborn Lich unique staff to provide you with the His Scattering Calamity skill for enabling the build. Keep in mind that we want to get the skill to Level 20 so you can have 5 Support Gem slots to equip all the necessary support gems. You can also opt to get a Level 19 His Scattering Calamity but it requires you to sacrifice either Zenith II or Swift Affliction III due to the limited Support Gem slots.
Armor and Accessories
This build also makes use of The Vertex and The Covenant unique equipment to further boost your damage output and life sustainability respectively to take on high tier maps. Take note that you are required to have Spell Damage Leeched as Life and increased Life Cost Efficiency affixes on The Covenant to maintain your health and scale up your damage.
As for your Accessories, we recommend a Breach Ring with Maximum Mana since we will be using Archmage to scale our damage further. We also want a Solar Amulet with at least a T1 Spirit affix to help equip all our Persistent skills, while allocating Fast Metabolism allows us to overleech our life sustain for better survivability.
| List of Rings | List of Amulets |
| List of Armors | |
Runes, Idols, and Soul Cores
| Equipment | Sockets |
|---|---|
| Weapon | |
| Armor |
We recommend equipping a Hedgewitch Assandra's Rune of Wisdom and Saqawal's Rune of the Sky on The Unborn Lich unique staff to maximize our damage output through Extra Elemental Damage and Level of All Spell Skills. As for our Chiming Staff, slot in two Greater Glacial Runes for that Extra Cold Damage to further boost our damage.
As for our Armor Runes, slot in a Greater Mind Rune and Greater Desert Rune on our Body Armor to maximize our mana which also boosts our damage output and provide us with more Fire Resistance. For our Gloves, slot in two Greater Mind Runes and Tecord's Gaze to also provide us with more damage and survivability respectively. Use the Soul Core of Zalatl on our Helmet for more mana and damage, while our Boots should have a Greater Storm Rune and Farrul's Rune of Chase to max out our resistances and give us more movement speed.
| List of Runes | List of Soul Cores |
Belts and Charms
| Belt Modifiers | |||||
|---|---|---|---|---|---|
|
Ingenuity Utility Belt Ingenuity Utility Belt Requirements:
Level - 55 Implicit:1-2 Charm slots;20% of Flask Recovery applied Instantly Fixed Modifiers: ・ 40-80% increased bonuses gained from Equipped Rings |
・Increased Charm Charges Gained
・Reduced Charm Charges Used ・Increased Bonuses Gained from Left Equipped Ring ・Increased Bonuses Gained from Right Equipped Ring |
||||
| Charm Options | |||||
 Sanguis Heroum Staunching Charm Sanguis Heroum Staunching Charm Sanguis Heroum Staunching Charm Stats:
Flask Type - Charm Charge Per Use - 30 Total Charges - 40 Duration - 3 sec. |
 Thawing Charm Thawing Charm Thawing Charm Stats:
Flask Type - Charm Charge Per Use - 40 Total Charges - 40 Duration - 3 sec. |
 Beira's Anguish Dousing Charm Beira's Anguish Dousing Charm Beira's Anguish Dousing Charm Stats:
Flask Type - Charm Charge Per Use - 30 Total Charges - 40 Duration - 3 sec. |
|||
Equip the Ingenuity unique belt to maximize our Ring bonuses for more damage and survivability. Make sure to get one that has 3 Charm slots so you can equip all the necessary charms for the build.
For your Charms, we recommend the Sanguis Heroum for bleed immunity and Consecrated Ground, Beria's Anguish for fire immunity and Ignited Ground, and a Thawing Charm with increased Duration and Chance to Gain Charge when you Kill an Enemy affixes to help keep your freeze immunity consistent.
| List of Belts | List of Charms |
Scattering Calamity Oracle Skills
All Active and Persistent Skills
| Skill | Support Gems |
|---|---|
|
Feast of Flesh Feast of Flesh |
Rapid Casting II Supports Spells, causing them to cast faster.
|
|
His Scattering Calamity His Scattering Calamity |
Swift Affliction III Supports any skill that deals damage, causing effects with a duration of one second or less to deal more non-Ailment damage over time.
Zenith II Supports Spell Skills. Supported Skills deal more damage while you are above 90% of your Maximum Mana, and Recoup a portion of Skill costs as Mana. Does not modify Skills used by Minions.
Compressed Duration II Supports any skill that has a duration, making that duration shorter.
Lifetap Supports any skill, turning a portion of its Mana cost into a Life cost. Does not support skills which reserve spirit.
Rakiata's Flow Supports Skills that can cause Damaging Hits, causing those Hits to treat Enemy Elemental Resistances as inverted.
|
|
Sigil of Power Sigil of Power |
Magnified Area II Supports any skill with an area of effect, making it larger at the cost of damage.
Prolonged Duration II Supports any skill that has a duration, making that duration longer.
Rapid Casting II Supports Spells, causing them to cast faster.
|
|
Elemental Weakness Elemental Weakness Curse all targets in an area after a short delay, lowering their Elemental Resistances.
|
Ritualistic Curse Supports Curse skills, causing them to cover a larger area but take longer to curse enemies
Spell Cascade Supports Spells that affect an area around you or a target location, causing those spells to also target additional areas on either side of the target area, along a randomly chosen axis. Cannot support Channelling skills or Remote skills.
Hayoxi's Fulmination Supports Curse Skills. Supported Curse Skills create areas which Curse enemies so long as they are within them. Cursed areas from Supported Skills gather power before erupting in a column of annihilating light after a moderate delay.
Lifetap Supports any skill, turning a portion of its Mana cost into a Life cost. Does not support skills which reserve spirit.
|
 Life Remnants Life Remnants Life Remnants 25% chance to spawn a Remnant on killing an enemy;Spawn a Remnant on Critically Hitting a target, no more than once every 2 seconds;Each Remnant grants X Life
|
Remnant Potency II Supports Skills which create Remnants, making those Remnants more powerful, but delaying their effect.
Harmonic Remnants II Supports Skills which create Remnants, allowing those Remnants to be collected from further away, with a chance to create an additional Remnant.
Khatal's Rejuvenation Supports Skills that generate Remnants. Picking up Remnants from Supported Skills grants Khatal's Rejuvenation.
|
|
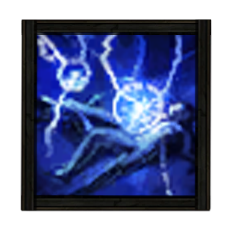
Cast on Critical Cast on Critical While active, gains energy when you Critically Hit enemies and triggers socketed spells on reaching maximum energy.
|
Comet Calls down a mass of ice from the sky, dealing high damage at the targeted location. Targeting close to you will cause you to jump back as you cast.
Arc An arc of Lightning stretches from the caster to a targeted enemy and Chains on to other nearby enemies. Shocked enemies Hit release damaging pulses.
Atalui's Bloodletting Supports any Skill, turning a portion of its Mana cost into a Life cost. Does not support Skills which reserve Spirit. Supported Skills Gain a portion of their Life cost as extra Physical Damage.
Zenith II Supports Spell Skills. Supported Skills deal more damage while you are above 90% of your Maximum Mana, and Recoup a portion of Skill costs as Mana. Does not modify Skills used by Minions.
Boundless Energy II Supports Meta Skills. Supported Skills generate Energy significantly faster.
|
|
Siphon Elements Siphon Elements While active, has a chance to create an Infusion Remnant when you Freeze, Shock, or Ignite a target.
|
Harmonic Remnants II Supports Skills which create Remnants, allowing those Remnants to be collected from further away, with a chance to create an additional Remnant.
Remnant Potency I Supports Skills that generate Remnants, making those Remnants to be more powerful.
Fire Mastery Supports Fire skills, granting them an additional level.
|
|
Mana Remnants Mana Remnants Conjures surging lightning to restore your Mana. While active, Shocked enemies you kill have a chance to spawn a Mana Remnant, and Critically Hitting a Shocked target spawns a Mana Remnant every few seconds. Picking up a Mana Remnant grants you Mana which can Overflow maximum Mana.
|
Harmonic Remnants II Supports Skills which create Remnants, allowing those Remnants to be collected from further away, with a chance to create an additional Remnant.
Remnant Potency III Supports Skills which create Remnants, making those Remnants more powerful, but delaying their effect.
|
|
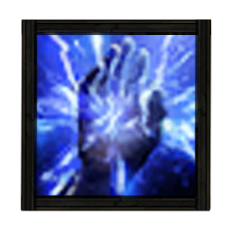
Archmage Archmage While Active, causes your Non-Channelling Spells to cost additional mana and deal extra lightning damage, both based on your maximum mana.
|
Dialla's Desire Supports any Skill which has levels, increasing the level and Quality, while reducing the cost and Reservation.
Lightning Mastery Supports Lightning skills, granting them an additional level.
|
Your main damage skill will only consist of spamming His Scattering Calamity to deal huge bursts of damage and critical hits for procing Cast on Critical. Swift Affliction III and Compressed Duration II allows us to rapidly fire off His Scattering Calamity due to our extremely low Hover Duration and Wellsprite Launch Duration.
As for our Persistent skills, we want to use Cast on Critical with Comet and Arc slotted in for better map clearing and AoE damage. Archmage is used to scale up our damage based on our maximum mana, while Siphon Elements allows us to pick up Fire, Cold, and Lightning remnants to infuse our Comet procs with more damage.
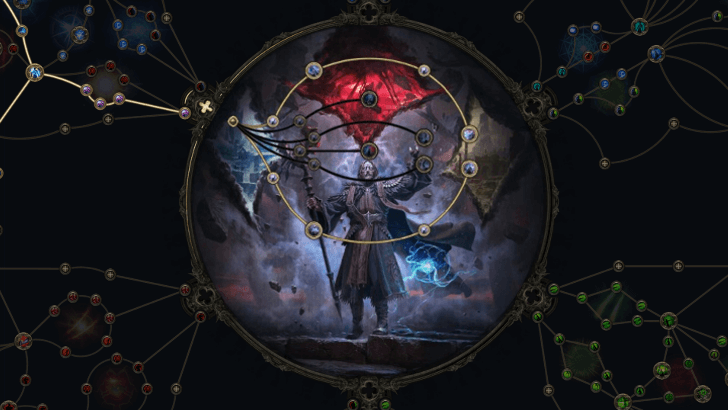
Scattering Calamity Oracle Passive Tree
Passive Tree Progression
| Ascendancy Passive Nodes | |||
|---|---|---|---|
 |
|||
| Passive Nodes | |||
| Footage taken from Path of Building. |
※ Legend: Red = Weapon Set I | Green = Weapon Set II
It is important to get The Unseen Path ascendancy node so we can allocate Power of the Storm and Calculated Hunter to further boost our damage output. Entwined Realities is also extremely useful so we can allocate various Notable passives near Wildsurge Incantation, Mind Over Matter, Blackflame Covenant, Eldritch Battery, and Conduit.
For our Passive tree nodes, we will mostly focus on stacking Skill Effect Duration, Critical Hit Chance and Damage Bonus, Elemental Damage, and Maximum Mana to enable the build for high tier maps. Keep in mind that Cast Speed is also important so you can comfortably spam your Scattering Calamity for both damage and life sustain.
Passive Skill Tree Guide and List of Passives
Jewels
 Heart of the Well Diamond Heart of the Well Diamond
|
Desecrated:
・Increased Critical Hit Chance for Spells ・Increased Critical Spell Damage Bonus ・Gain % of Damage as Extra Chaos Damage ・% of Leech is Instant |
|---|---|
 Against the Darkness Time-Lost Diamond Against the Darkness Time-Lost Diamond
|
・Notable Passive Skills in Radius also Grant + to Spirit
・Small Passive Skills in Radius also Grant + to Maximum Mana |
 Sapphire Sapphire
|
・Increased Spell Damage
・Increased Critical Damage Bonus ・Increased Critical Spell Damage Bonus ・Recover % of Maximum Mana on Kill ・Recover % of Maximum Life on Kill ・Increased Elemental Damage ・Increased Intelligence |
Our most important Jewel would be the Heart of the Well Diamond as you need Instant Leech to sustain our health and keep us from dying. Against the Darkness is also useful for maxing out our Spirit and Mana to help us equip all the necessary Persistent skills and give us a damage boost based on our maximum mana.
Additionally, equip 3 Sapphire Jewels that focuses on Spell Damage, Critical Hits, and Elemental Damage to bolster our damage output. Make sure to have Recover % of Maximum Life and Mana on Kill affixes to help with your sustainability for fast clearing maps.
Scattering Calamity Oracle Playstyle
Mobbing and Bossing Skill Rotation
In general, the playstyle for the Scattering Calamity Oracle build requires the use of only one skill, His Scattering Calamity. The rotation is as follows:
- Cast Elemental Weakness when against Bosses to maximize damage.
- Spam His Scattering Calamity to deal critical hits and proc Cast on Critical.
- Rinse and repeat.
Path of Exile 2 (PoE 2) Related Guides

0.4 Best Endgame Builds
| Rank | Build |
|---|---|
 |
|
 |
|
 |
|
 |
0.4 Leveling Builds
All Build Guides
| List of Builds by Class | |||||||||||
|---|---|---|---|---|---|---|---|---|---|---|---|
 Huntress Huntress |
 Mercenary Mercenary |
 Monk Monk |
|||||||||
 Witch Witch |
 Sorceress Sorceress |
 Warrior Warrior |
|||||||||
 Ranger Ranger |
 Druid Druid |
- | |||||||||
| Other Build Guides | 0.3 Leveling Builds | How to Make a Good Build | |||||||||
Druid Leveling Builds
NEW |
Herald of Thunder While active, killing Shocked enemies with Attack damage, will cause subsequent Attack hits to release lightning bolts which deals Attack damage to all surrounding enemies.
Lingering Illusion Creates a short-lived illusory copy of yourself whenever you dodge roll. The copy can be damaged by enemies, and copies that are destroyed by an enemy will grant you a Power Charge.
Elemental Weakness Curse all targets in an area after a short delay, lowering their Elemental Resistances.
Oil Barrage Shapeshift into a Wyvern and spit Oil at enemies, creating Oil Ground where the Projectiles land. Consumes Power Charges if possible to instead Channel a sustained barrage of electrified Oil that does not create Oil Ground. Projectiles are fired in sequence, allowing multiple Projectiles to Hit the same target.
Thunderstorm Conjure a thunderstorm which causes lightning strikes and torrential rain in an area. Enemies in the area are Drenched, causing them to become Shocked or Frozen more easily. Plants in the area become Overgrown.
Barkskin While active, taking Hit damage from enemies to your Energy Shield causes you to gain Armour for a short duration. Armour gained from multiple Hits can stack. The total Armour gained from this Skill cannot exceed the Item Armour on your Equipped Armour Items.
Focus: Dragon, Lightning, Shock |
UP |
Herald of Ash While active, enemies you sufficiently Overkill with attacks will cause an explosion that ignites nearby enemies based on the Overkill damage dealt.
Furious Slam Shapeshift into a Bear and Slam the ground with great force, causing a pair of shockwaves. Can spend Rage to create larger shockwaves that leave behind Jagged Ground.
Volcano Uplift a volcano from the earth, damaging enemies standing on it and releasing a spray of molten Projectiles. While the volcano persists, Slamming it will cause another Projectile spray. Channelling this Skill for longer makes the initial eruption more violent, but does not affect subsequent Projectile sprays.
Fury of the Mountain Shapeshift into a Bear and repeatedly pound the ground, creating Molten Fissures that travel randomly in a wide arc in front of you.
Focus: Bear, Fire, Slam |
NEW |
Frost Bomb Creates a pulsing Orb of Frost. Each pulse inflicts Cold Exposure on nearby Enemies. When the Orb's duration ends, it explodes, dealing Cold damage to surrounding Enemies.
Herald of Ice While active, Shattering an enemy with an Attack Hit will cause an icy explosion that deals Attack damage to surrounding enemies.
Overwhelming Presence While active, enemies in your Presence are easier to Stun and inflict Elemental Ailments upon.
Lunar Assault Shapeshift into a Werewolf and swipe with your claws, projecting an arc of moonlight and ice forward in a crescent.
Lunar Blessing Shapeshift into a Werewolf and offer your Rage to the moon to receive a blessing, gaining bonus Cold damage, Attack speed and movement speed for yourself and any Wolf Minions you have from Wolf Pack or Predator's Mark. Spends all Rage to extend the Buff's duration. While the Buff is active, your WerewolfAttacks call down Moonbeams on Hit.
Cross Slash Shapeshift into a Werewolf and leap backwards as you gouge the ground with both claws. Hitting a Marked enemy with both gouges will Activate the Mark and cause an additional shockwave. Ice Fragments will be pulled into the location where the gouges cross and explode immediately. This skill can be used while using other skills to interrupt them.
Thunderstorm Conjure a thunderstorm which causes lightning strikes and torrential rain in an area. Enemies in the area are Drenched, causing them to become Shocked or Frozen more easily. Plants in the area become Overgrown.
Pounce Shapeshift into a Werewolf and leap to a target location, damaging enemies in an area around where you land. Predator's Mark will be Triggered targetting the highest Rarity enemie Hit, or if a Mark gem is socketed into this Skill, that Mark will be Triggered instead. Using this skill allows any Wolf Minions you have to leap immediately.
Focus: Wolf, Cold, Crowd Control |
Druid Endgame Builds
NEW |
Herald of Ice While active, Shattering an enemy with an Attack Hit will cause an icy explosion that deals Attack damage to surrounding enemies.
Lunar Assault Shapeshift into a Werewolf and swipe with your claws, projecting an arc of moonlight and ice forward in a crescent.
Lunar Blessing Shapeshift into a Werewolf and offer your Rage to the moon to receive a blessing, gaining bonus Cold damage, Attack speed and movement speed for yourself and any Wolf Minions you have from Wolf Pack or Predator's Mark. Spends all Rage to extend the Buff's duration. While the Buff is active, your WerewolfAttacks call down Moonbeams on Hit.
Cross Slash Shapeshift into a Werewolf and leap backwards as you gouge the ground with both claws. Hitting a Marked enemy with both gouges will Activate the Mark and cause an additional shockwave. Ice Fragments will be pulled into the location where the gouges cross and explode immediately. This skill can be used while using other skills to interrupt them.
Thunderstorm Conjure a thunderstorm which causes lightning strikes and torrential rain in an area. Enemies in the area are Drenched, causing them to become Shocked or Frozen more easily. Plants in the area become Overgrown.
Pounce Shapeshift into a Werewolf and leap to a target location, damaging enemies in an area around where you land. Predator's Mark will be Triggered targetting the highest Rarity enemie Hit, or if a Mark gem is socketed into this Skill, that Mark will be Triggered instead. Using this skill allows any Wolf Minions you have to leap immediately.
Arctic Howl Shapeshift into a Werewolf and let out an icy howl that damages enemies and Freezes Primed enemies. If an enemy is Frozen or a Frozen enemy is Hit, this Skill Empowers your attacks with added Cold damage, causes Empowered Slams to create Chilled Ground, and grants your Allies added Cold damage. This Skill's cooldown can be bypassed by expending an Endurance Charge.
Barkskin While active, taking Hit damage from enemies to your Energy Shield causes you to gain Armour for a short duration. Armour gained from multiple Hits can stack. The total Armour gained from this Skill cannot exceed the Item Armour on your Equipped Armour Items.
Savage Fury While active, your Fury builds from Attacking enemies. Using this Skill releases your Fury to send you into a bestial frenzy, gaining damage and Onslaught but constantly losing life and forcing you into animal form. The frenzy ends immediately if you return to human form. You cannot fain Fury while in a frenzy.
Focus: Wolf, Cold, Burst, Crowd Control, Tanky |
NEW |
Herald of Ash While active, enemies you sufficiently Overkill with attacks will cause an explosion that ignites nearby enemies based on the Overkill damage dealt.
Berserk While active, strengthens your Rage and grants you Life Leech based on your Rage, but causes you to lose Life while Raging.
Charge Regulation While active, you gain powerful Buffs based on your active Charges. However, maintaining the Buff consumes Charges every few seconds.
Furious Slam Shapeshift into a Bear and Slam the ground with great force, causing a pair of shockwaves. Can spend Rage to create larger shockwaves that leave behind Jagged Ground.
Ferocious Roar Shapeshift into a Bear and roar in defiance, immediately gaining Rage if there are enemies nearby and Empowering subsequent Attacks to Break Armour. Alternatively, socketing a human-form Warcry into this Skill triggers that Warcry instead, and augments its damage and area. This Skill's cooldown can be bypassed by expending an Endurance Charge.
Walking Calamity While in Bear form, build Glory by gaining Rage while already at maximum Rage. When you have maximum Glory, roar to the heavens to bring them down upon your enemies. For the duration of the Skill and as long as you remain in Bear form, meteors rain down around you and you Gain Fire damage and Rage regeneration.
Pounce Shapeshift into a Werewolf and leap to a target location, damaging enemies in an area around where you land. Predator's Mark will be Triggered targetting the highest Rarity enemie Hit, or if a Mark gem is socketed into this Skill, that Mark will be Triggered instead. Using this skill allows any Wolf Minions you have to leap immediately.
Rampage Shapeshift into a Bear and charge forward, Slamming the ground as you run. Channelling ends after a short amount of time but can be prolonged by spending Rage.
Savage Fury While active, your Fury builds from Attacking enemies. Using this Skill releases your Fury to send you into a bestial frenzy, gaining damage and Onslaught but constantly losing life and forcing you into animal form. The frenzy ends immediately if you return to human form. You cannot fain Fury while in a frenzy.
Focus: Fire, Tanky, Bear, Burst, Slam |
NEW |
Mana Remnants Conjures surging lightning to restore your Mana. While active, Shocked enemies you kill have a chance to spawn a Mana Remnant, and Critically Hitting a Shocked target spawns a Mana Remnant every few seconds. Picking up a Mana Remnant grants you Mana which can Overflow maximum Mana.
Archmage While Active, causes your Non-Channelling Spells to cost additional mana and deal extra lightning damage, both based on your maximum mana.
Cast on Critical While active, gains energy when you Critically Hit enemies and triggers socketed spells on reaching maximum energy.
Siphon Elements While active, has a chance to create an Infusion Remnant when you Freeze, Shock, or Ignite a target.
Elemental Weakness Curse all targets in an area after a short delay, lowering their Elemental Resistances.
Focus: Critical, Cold, Fire, Ice, Chaos, Burst, Remnants |
Druid Class and Ascendancy Guides
| Base Class | |
|---|---|
| Ascendancies | |
Comment
Author

PoE 2 0.4 Druid Build - Scattering Calamity Oracle
Rankings
- We could not find the message board you were looking for.

Gaming News


![Monster Hunter Stories 3 Review [First Impressions] | Simply Rejuvenating](https://img.game8.co/4438641/2a31b7702bd70e78ec8efd24661dacda.jpeg/thumb)
![The Seven Deadly Sins: Origin [First Impressions] | A Promising Start](https://img.game8.co/4440581/584e0bfb87908f12c4eab6e846eb1afd.png/thumb)

Popular Games

Genshin Impact Walkthrough & Guides Wiki
Umamusume: Pretty Derby Walkthrough & Guides Wiki
Pokemon Pokopia Walkthrough & Guides Wiki
Honkai: Star Rail Walkthrough & Guides Wiki
Monster Hunter Stories 3: Twisted Reflection Walkthrough & Guides Wiki
Arknights: Endfield Walkthrough & Guides Wiki
Wuthering Waves Walkthrough & Guides Wiki
Zenless Zone Zero Walkthrough & Guides Wiki
Pokemon TCG Pocket (PTCGP) Strategies & Guides Wiki
Monster Hunter Wilds Walkthrough & Guides Wiki


Recommended Games
Diablo 4: Vessel of Hatred Walkthrough & Guides Wiki
Cyberpunk 2077: Ultimate Edition Walkthrough & Guides Wiki
Fire Emblem Heroes (FEH) Walkthrough & Guides Wiki
Yu-Gi-Oh! Master Duel Walkthrough & Guides Wiki
Super Smash Bros. Ultimate Walkthrough & Guides Wiki
Pokemon Brilliant Diamond and Shining Pearl (BDSP) Walkthrough & Guides Wiki
Elden Ring Shadow of the Erdtree Walkthrough & Guides Wiki
Monster Hunter World Walkthrough & Guides Wiki
The Legend of Zelda: Tears of the Kingdom Walkthrough & Guides Wiki
Persona 3 Reload Walkthrough & Guides Wiki


All rights reserved
© 2010 - 2024 Grinding Gear Games
The copyrights of videos of games used in our content and other intellectual property rights belong to the provider of the game.
The contents we provide on this site were created personally by members of the Game8 editorial department.
We refuse the right to reuse or repost content taken without our permission such as data or images to other sites.