PoE 2 0.3 Monk Build - Hollow Palm Invoker
Latest: 0.5.0 Release Date
☆ Fate of the Vaal ▶︎ The Last of the Druids
┗ Bonded Mods | 0.4 Mystery Box
★ Druid: Class Overview | Builds
☆ NEW: Disciple of Varashta Ascendancy!
★ Best Class | Best Builds | Leveling Builds
This is a Hollow Palm Invoker Monk build for endgame in Path of Exile 2 (PoE 2)'s The Third Edict Update. Check out the Hollow Palm Invoker Monk endgame build, including its gear, socketables, skills, and playstyle!
List of Contents
Hollow Palm Invoker Build Summary
FGKorbyn21's Hollow Palm Invoker Build
This Hollow Palm Invoker Build is from FGKorbyn21's YouTube guide. The video includes details on how to gear up to get the build online. Be sure to check more of FGKorbyn21's Path of Exile 2 content by subscribing to his Youtube and Twitch to ask any questions you have about the build!
Hollow Palm Invoker Monk Build
| Build Setup | |
|---|---|
 Hollow Palm Invoker |
 Falling Thunder Infuses your Quarter staff with electrical energies, then slams the ground to deal damage in a large cone in front of you. Consumes your Power Charges to fire Lightning Projectiles forwards from the impact.
 Ghost Dance Periodically Gain Ghost Shrouds. If you are Hit while you have a Ghost Shroud, it is immediately consumed to recover Energy Shield based on your Evasion.
 Herald of Ash While active, enemies you sufficiently Overkill with attacks will cause an explosion that ignites nearby enemies based on the Overkill damage dealt.
 Herald of Ice While active, Shattering an enemy with an Attack Hit will cause an icy explosion that deals Attack damage to surrounding enemies.
 Ice Strike Perform a fast icy Strike, Using this Attack three times in quick succession causes a final strike that is slower and more powerful.
 Wind Dancer Grants a buff that gives you more Evasion per stage. Being Hit by a Melee Attack while you have this buff consumes all stages to damage and Knock Back enemies around you.
 Hand of Chayula Dash to an enemy and Strike them with an Unarmed Attack, applying socketed Curses and Marks with reduced effect. This skill always Strikes with your bare fist, even if you have a Quarterstaff equipped.
 Mantra of Destruction Build Combo by successfully striking enemies with other skills. After reaching maximum Combo, use this skill to Empower your next Quarterstaff attack, causing it to deal Chaos damage. Each kill with the Empowered attack grants Purple Flame of Chayula for a duration.
 Shattering Palm Dash to an enemy and strike them with an unarmed attack that manifests a wave of cold, coating nearby enemies in shards of Ice. Dealing enough damage to these enemies will shatter the shards, causing an icy explosion that deals Attack Damage. This skill always strikes with your bare fist, even if you have a quarterstaff equipped.
 Elemental Conflux Tap into a current of raw and unpredictable Elemental Power, causing you to deal greatly more damage of a randomly chosen Element. The Element affected changes frequently, though the same Element can be affected multiple times in succession.
|
|
|
|
The Hollow Palm Invoker Monk build makes use of the new Hollow Palm Technique, together with Ice Strike and Falling Thunder to fast clear maps and burst down Bosses with ease. This build also focuses on various Persistent skills that requires you to have at least 220 Spirit that you can get from your Invoker Ascendancy node.
| Date | Changes |
|---|---|
| 09-12-2025 | Created Hollow Palm Invoker build for endgame. |
Hollow Palm Invoker Equipment
| Gear | Modifiers |
|---|---|
 Ancestral Tiara Ancestral Tiara Ancestral Tiara Stats:
Energy Shield - 109 Requirements: Level - 80 Intelligence - 115 (Helm) |
・Maximum Energy Shield
・Increased Energy Shield ・Maximum Mana ・Increased Armor ・Increased Critical Hit Chance ・Lightning Resistance ・Strength |
 Sleek Jacket Sleek Jacket Sleek Jacket Stats:
Evasion - 268 Energy Shield - 101 Requirements: Level - 65 Dexterity - 67 Intelligence - 67 (Body Armor) |
・Increased Evasion and Energy Shield
・Evasion Rating ・Maximum Energy Shield ・Maximum Life ・Cold Resistance ・Chaos Resistance Desecrated Modifier: ・Increased Spirit Reservation Efficiency of Skills |
 Vaal Wraps Vaal Wraps Vaal Wraps Stats:
Evasion - 73 Energy Shield - 28 Requirements: Level - 75 Dexterity - 52 Intelligence - 52 (Gloves) |
・Adds Cold Damage to Attacks
・Adds Lightning Damage to Attacks ・Maximum Mana ・Level of All Melee Skills ・Chaos Resistance ・Leech Physical Attack Damage as Mana |
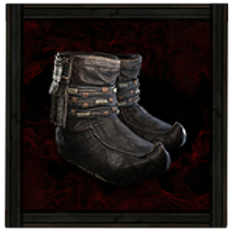 Quickslip Shoes Quickslip Shoes Quickslip Shoes Stats:
Evasion - 110 Energy Shield - 42 Requirements: Level - 75 Dexterity - 56 Intelligence - 56 (Boots) |
・Increased Movement Speed
・Evasion Rating ・Maximum Energy Shield ・Increased Evasion and Energy Shield ・Lightning Resistance ・Cold Resistance ・Gain Deflection Equal to Evasion Rating ・Fire and Chaos Resistances |
 Amber Amulet Amber Amulet Amber Amulet Requirements:
Level - 8 Implicit:+10-15 to Strength (Amulet) |
・Strength
・Increased Evasion Rating ・Maximum Life ・Level of All Melee Skills ・Intelligence ・Increased Critical Hit Chance |
 Prismatic Ring Prismatic Ring Prismatic Ring Requirements:
Level - 35 Implicit:7-10% to all Elemental Resistances (Ring 1) |
・Adds Fire Damage to Attacks
・Evasion Rating ・Increased Cold Damage ・Fire Resistance ・Chaos Resistance ・All Elemental Resistances |
 Topaz Ring Topaz Ring Topaz Ring Requirements:
Level - 16 Implicit:+20-30% to Lightning Resistance (Ring 2) |
・Adds Physical Damage to Attacks
・Adds Fire Damage to Attacks ・Increased Lightning Damage ・Fire Resistance ・Cold Resistance ・All Elemental Resistances |
 Ultimate Life Flask Ultimate Life Flask Ultimate Life Flask Stats:
Flask Type - Life Recovered Life - 920 Charge Per Use - 10 Total Charges - 75 Duration - 3 sec. (Life Flask) |
・% of Recovery Applied Instantly
・Chance to Gain a Charge when you Kill an Enemy |
 Ultimate Mana Flask Ultimate Mana Flask Ultimate Mana Flask Stats:
Flask Type - Mana Recovered Mana - 310 Charge Per Use - 10 Total Charges - 75 Duration - 3 sec. (Mana Flask) |
・% of Recovery Applied Instantly
・Increased Charges Gained |
Weapons
This build does not use any weapons as it requires you to make full use of the Hollow Palm Technique, which allows you to scale your unarmed damage as if you are equipping a Quarterstaff.
Armor and Accessories
Your equipment should consist of stacking Evasion Rating and Energy Shield for survivability, while also keeping in mind your elemental damage between Physical, Cold, Fire, and Lightning damage to maximize your damage output.
Try to get a Leech Physical Damage as Mana modifier on your Gloves since you will be making use of the Walker of the Wilds keystone passive to help maintain your mana throughout fights.
Lastly, this build also requires you to have at least 220 Spirit so you can run Elemental Conflux and all your other persistent skills. You can achieve this by getting around 1340 Evasion Rating and 424 Energy Shield that scales your Spirit with the Lead me through Grace ascendancy passive node.
| List of Armors | List of Accessories |
Runes and Soul Cores
| Equipment | Sockets |
|---|---|
| Armor |
|
As for your Runes, focus on equipping a Greater Iron Rune for your Helm and Body Armor for the increased Evasion Rating and Energy Shields. Slot in Greater Storm Rune on your Boots to help you reach the 75% Resistance cap and a Talisman of Sirrius on your Gloves for the added Attack Speed.
| List of Runes | List of Soul Cores |
Belts and Charms
| Belt Modifiers | |||||
|---|---|---|---|---|---|
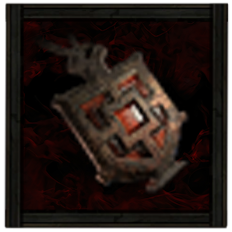
 Darkness Enthroned Darkness Enthroned Darkness Enthroned Requirements:
Level - 62 Implicit:Has 1–3 Charm Slot;Flasks gain 0.17 charges per Second Fixed Modifiers: ・ This item gains bonuses from Socketed Item as though it was a Random socketable equipment type ・ +50-100% increased effect of Socketed Items ・ Has 2 Rune Sockets |
・Flasks Gain Charges per Second
・Charm Slot ・This item gains bonuses from Socketed items as though it was Gloves ・Increased Effect of Socketed Items Runes:
x2
|
||||
| Charm Options | |||||
 Stone Charm Stone Charm |
 Golden Charm Golden Charm |
 Nascent Hope Thawing Charm Nascent Hope Thawing Charm |
|||
We highly recommend getting the Darkness Enthroned unique belt as it allows you to socket Runes on your belt and benefit from the bonus stats. Just make sure the unique belt modifier has Gloves listed down for the socketed item bonuses so you can slot in the required Runes.
As for Charms, equip a Stone Charm with the Also Grants Guard modifier to provide you with a free overshield when you do get stunned, and a Golden Charm for the added Rarity of Items found while mapping. We also recommend a Thawing Charm to help you combat against Freeze ailments that hinder you and ruin your runs.
| List of Belts | List of Charms |
Hollow Palm Invoker Skills
All Active and Persistent Skills
| Skill | Support Gems |
|---|---|
 Elemental Expression Elemental Expression Elemental Expression Creates a fiery explosion, an arcing bolt of lightning, or an icy wave of projectiles. The chance for an explosion is proportional to your Strength, for a bolt proportional to your Dexterity, and for a wave proportional to your Intelligence.
|
Nova Projectiles Supports Projectile Skills, making them fire extra Projectiles in a circle, at the cost of Damage. Does not support Skills which rain down Projectiles from above.
Blind II Supports any skill that Hits enemies, causing them to Blind on Hit with increased effect.
Efficiency II Supports any skill, making it cost less to use. Cannot support skills which reserve Spirit.
Cooldown Recovery II Supports skills with Cooldowns, increasing the rate at which those Cooldowns Recover. Cannot modify the skills of minions.
Freeze Supports any skill that hits enemies, makit it more effective at Freezing enemies.
|
|
Ice Strike Ice Strike Perform a fast icy Strike, Using this Attack three times in quick succession causes a final strike that is slower and more powerful.
|
Concentrated Area Supports any skill with an area of effect, causing that area to be smaller but any area damage it deals to be higher.
Rapid Attacks II Supports Attacks, causing them to Attack faster.
Rage II Supports Melee Attacks, causing them to grant Rage on Hit.
Pinpoint Critical Supports any skill that Hits Enemies, causing it to Critically Hit more often but deal less damage with Critical Hits
Practiced Combo Supports Strike skills. Supported skills have a chance to build additional Combo on hit. Cannot support skills used by minions.
|
|
Falling Thunder Falling Thunder Infuses your Quarter staff with electrical energies, then slams the ground to deal damage in a large cone in front of you. Consumes your Power Charges to fire Lightning Projectiles forwards from the impact.
|
Culmination II Supports Melee Attack Skills. Supported Skills gain Combo when you successfully Strike Enemies with other Melee Attacks. Supported Skills reset their Combo on use, dealing more Damage the higher Combo you had on use. Cannot support skills which already gain Combo. Does not modify Skills used by Minions.
Excise Supports any damaging skill that you can use yourself, granting it significantly higher chance to Critically Hit, but causing it to gain a long cooldown. Cannot support skills which already have a cooldown.
Inevitable Critical Supports any skill you use yourself that Hits enemies, causing it to accumulate Critical hit chance over time.
Ambrosia Supports Skills you can use yourself which Damage enemies with Hits. Supported Skills consume a percentage of your maximum Mana Flash charges, Gaining a percentage of Damage as extra Lightning Damage per Mana Flask charge consumed.
Overextend Supports Attack Skills you use yourself. Supported Skills deal more Damage with Critical Hits, but Critically Hitting an Enemy with them will Daze you for a short time.
|
|
Shattering Palm Shattering Palm Dash to an enemy and strike them with an unarmed attack that manifests a wave of cold, coating nearby enemies in shards of Ice. Dealing enough damage to these enemies will shatter the shards, causing an icy explosion that deals Attack Damage. This skill always strikes with your bare fist, even if you have a quarterstaff equipped.
|
Magnified Area II Supports any skill with an area of effect, making it larger at the cost of damage.
Ancestral Call II Supports Strikes you use yourself, providing a powerful Ancestral Boost every few seconds. Cannot Support Channelled Skills and does not modify Skills used by Minions.
Elemental Armament II Supports Attacks, causing them to deal more Elemental damage.
Rageforged I Supports any damaging skill that you use or trigger yourself, causing it to consume Rage to deal more damage. If you don't have enough Rage to consume, the damage bonus will not apply.
Rapid Attacks II Supports Attacks, causing them to Attack faster.
|
|
Hand of Chayula Hand of Chayula Dash to an enemy and Strike them with an Unarmed Attack, applying socketed Curses and Marks with reduced effect. This skill always Strikes with your bare fist, even if you have a Quarterstaff equipped.
|
Sniper's Mark Marks a target. The next Critical Hit the target receives consumes the Mark to deal extra damage and grant you a Frenzy Charge.
Blind II Supports any skill that Hits enemies, causing them to Blind on Hit with increased effect.
Culmination II Supports Melee Attack Skills. Supported Skills gain Combo when you successfully Strike Enemies with other Melee Attacks. Supported Skills reset their Combo on use, dealing more Damage the higher Combo you had on use. Cannot support skills which already gain Combo. Does not modify Skills used by Minions.
Ailith's Chimes Supports Skills which can expend Combo. On expending Combo with Supported Skills, you have a chance to gain Power Charges based on the amount of Combo expended.
Rapid Attacks II Supports Attacks, causing them to Attack faster.
|
|
Mantra of Destruction Mantra of Destruction Build Combo by successfully striking enemies with other skills. After reaching maximum Combo, use this skill to Empower your next Quarterstaff attack, causing it to deal Chaos damage. Each kill with the Empowered attack grants Purple Flame of Chayula for a duration.
|
Chaos Mastery Supports Chaos skills, granting them an additional level.
Prolonged Duration II Supports any skill that has a duration, making that duration longer.
|
|
Elemental Conflux Elemental Conflux Tap into a current of raw and unpredictable Elemental Power, causing you to deal greatly more damage of a randomly chosen Element. The Element affected changes frequently, though the same Element can be affected multiple times in succession.
|
Fire Mastery Supports Fire skills, granting them an additional level.
Uhtred's Omen Supports Skills which can gain levels, granting them many additional levels provided exactly two other supports are used with the supported Skill. Does not support skills which do not have levels.
|
|
Herald of Ice Herald of Ice While active, Shattering an enemy with an Attack Hit will cause an icy explosion that deals Attack damage to surrounding enemies.
|
Magnified Area II Supports any skill with an area of effect, making it larger at the cost of damage.
Elemental Armament II Supports Attacks, causing them to deal more Elemental damage.
Elemental Focus Supports any skill that hits enemies, causing it to deal more Elemental Damage but be unable to inflict Elemental Ailments.
Cold Mastery Supports Cold skills, granting then an additional level.
Deadly Herald Supports Herald Skills, making their triggered effectsn deal more damage at the expense of higher spirit cost.
|
|
Herald of Ash Herald of Ash While active, enemies you sufficiently Overkill with attacks will cause an explosion that ignites nearby enemies based on the Overkill damage dealt.
|
Magnified Area II Supports any skill with an area of effect, making it larger at the cost of damage.
Fire Mastery Supports Fire skills, granting them an additional level.
|
|
Wind Dancer Wind Dancer Grants a buff that gives you more Evasion per stage. Being Hit by a Melee Attack while you have this buff consumes all stages to damage and Knock Back enemies around you.
|
Pin I Supports any skill that hits enemies, allowing its Physical damage to Pin enemies but making it unable to Stun.
Maim Supports Attacks causing them to Maim enemies.
Blind II Supports any skill that Hits enemies, causing them to Blind on Hit with increased effect.
Magnified Area II Supports any skill with an area of effect, making it larger at the cost of damage.
|
|
Ghost Dance Ghost Dance Periodically Gain Ghost Shrouds. If you are Hit while you have a Ghost Shroud, it is immediately consumed to recover Energy Shield based on your Evasion.
|
Compressed Duration II Supports any skill that has a duration, making that duration shorter.
Precision I Supports Persistent Buff Skills, causing you to gain increased Accuracy while the skill is active.
|
First of all, in order to get all 5 support gem slots for Elemental Expression, you will have to reach level 90. Your main skills should consist of Ice Strike and Shattering Palm for dealing with large packs of mobs and clearing maps, and Hand of Chayula to buildup Power Charges and expend them with Falling Thunder to deal huge burst damage against Bosses.
As for your Persistent skills, focus on maxing out the Herald of Ice support gem slots so you can slot in the Deadly Herald support gem for more damage. If you do not have Spirit for it yet, you can always swap the support gem out with Cold Mastery as a temporary replacement.
Since we are using all types of elements anyway, Elemental Conflux should consistently provide you with a 70% damage boost no matter the rotation of the active element. Take Wind Dancer and Ghost Dance as your failsafes which give you more Evasion Rating and Energy Shields to help you survive through endgame content.
Hollow Palm Invoker Passive Tree
Passive Tree Progression
| Ascendency Passive Nodes | |||
|---|---|---|---|
 |
|||
| Passive Nodes | |||
| 1. |  |
2. |  |
| 3. |  |
4. |  |
| 5. |  |
6. | - |
| Screenshots taken from Path of Building | |||
※ Legend: Red = Weapon Set I | Green = Weapon Set II
The Ascendancy passives for the Hollow Palm Invoker Monk build focuses on scaling your Spirit with Evasion and Energy Shields to help you equip all the required Persistent skills. Take Sunder my Enemies to ignore enemy resistances, and Scatter them to the Winds to enable Elemental Expression. Lastly, I am the Blizzard is used for boosting our Cold damage since we no longer using Herald of Thunder.
The rest of your passive tree nodes should prioritize on getting more damage, attack speed, and Critical hits such as Concussive Attack, Moment of Truth, and Deadly Force. Hollow Palm Technique is the core keystone passive for this build as it allows you scale your Unarmed damage as if you have Quarterstaff equipped.
Keep in mind to increase the limit your Power Charges up to 7 stacks by getting Lust for Power, The Power Within, and Overflowing Power.
Passive Skill Tree Guide and List of Passives
Jewels
| |
・Gain Damage as Extra Cold Damage
・Gain Damage as Extra Lightning Damage ・Chance to Inflict Bleeding on Hit ・Reduced Slowing Potency of Debuffs on You |
|---|---|
| |
Allocates: Pocket Sand
・Increased Blind Effect Allocates: Wasting ・Increased Duration of Damaging Ailments on Enemies ・Increased Damage with Hits against Enemies affected by Ailments |
The Heart of the Well Diamond will be the first jewel you need to slot in since this provides a great boost of Cold and Lightning damage for this build. As for Megalomaniac, make sure you have at least the Pocket Sand allocation so you can completely benefit from the Blind effects you inflict for survivability.
Hollow Palm Invoker Playstyle and Skill Rotation
Mobbing Rotation
For mobbing, your skill priority should involve using Ice Strike and Shattering Palm to deal huge AoE damage across the map. The rotation is as follows:
- Use Shatter Palm to close gaps and dash around.
- Spam Ice Strike to buildup Combo for more damage.
- Execute Falling Thunder to deal huge burst damage and clear mobs.
- Rinse and repeat.
Bossing Rotation
For bossing, we will mainly be using Hand of Chayula to stack Combos and Charges while using Falling Thunder to expend them for burst damage. The rotation is as follows:
- Spam Ice Strike to buildup Combo.
- Once you have around 90 Combo, dash in and use Hand of Chayula to expend its Combos and gain 7 Power Charges.
- With 90 Combo and 7 Power Charges, execute Falling Thunder to deal extremely high burst damage.
Path of Exile 2 Related Guides

0.4 Best Endgame Builds
| Rank | Build |
|---|---|
 |
|
 |
|
 |
|
 |
0.4 Leveling Builds
All Build Guides
| List of Builds by Class | |||||||||||
|---|---|---|---|---|---|---|---|---|---|---|---|
 Huntress Huntress |
 Mercenary Mercenary |
 Monk Monk |
|||||||||
 Witch Witch |
 Sorceress Sorceress |
 Warrior Warrior |
|||||||||
 Ranger Ranger |
 Druid Druid |
- | |||||||||
| Other Build Guides | 0.3 Leveling Builds | How to Make a Good Build | |||||||||
Comment
Author

PoE 2 0.3 Monk Build - Hollow Palm Invoker
Rankings
- We could not find the message board you were looking for.

Gaming News

![Monster Hunter Stories 3 Review [First Impressions] | Simply Rejuvenating](https://img.game8.co/4438641/2a31b7702bd70e78ec8efd24661dacda.jpeg/show)

![Monster Hunter Stories 3 Review [First Impressions] | Simply Rejuvenating](https://img.game8.co/4438641/2a31b7702bd70e78ec8efd24661dacda.jpeg/thumb)
![The Seven Deadly Sins: Origin Review [First Impressions] | A Promising Start](https://img.game8.co/4440581/584e0bfb87908f12c4eab6e846eb1afd.png/thumb)
Popular Games

Genshin Impact Walkthrough & Guides Wiki
Umamusume: Pretty Derby Walkthrough & Guides Wiki
Pokemon Pokopia Walkthrough & Guides Wiki
Honkai: Star Rail Walkthrough & Guides Wiki
Monster Hunter Stories 3: Twisted Reflection Walkthrough & Guides Wiki
Arknights: Endfield Walkthrough & Guides Wiki
Wuthering Waves Walkthrough & Guides Wiki
Zenless Zone Zero Walkthrough & Guides Wiki
Pokemon TCG Pocket (PTCGP) Strategies & Guides Wiki
Monster Hunter Wilds Walkthrough & Guides Wiki


Recommended Games
Fire Emblem Heroes (FEH) Walkthrough & Guides Wiki
Diablo 4: Vessel of Hatred Walkthrough & Guides Wiki
Cyberpunk 2077: Ultimate Edition Walkthrough & Guides Wiki
Yu-Gi-Oh! Master Duel Walkthrough & Guides Wiki
Super Smash Bros. Ultimate Walkthrough & Guides Wiki
Pokemon Brilliant Diamond and Shining Pearl (BDSP) Walkthrough & Guides Wiki
Elden Ring Shadow of the Erdtree Walkthrough & Guides Wiki
Monster Hunter World Walkthrough & Guides Wiki
The Legend of Zelda: Tears of the Kingdom Walkthrough & Guides Wiki
Persona 3 Reload Walkthrough & Guides Wiki


All rights reserved
© 2010 - 2024 Grinding Gear Games
The copyrights of videos of games used in our content and other intellectual property rights belong to the provider of the game.
The contents we provide on this site were created personally by members of the Game8 editorial department.
We refuse the right to reuse or repost content taken without our permission such as data or images to other sites.