This survey will take about 1 minute.
Your answers will help us to improve our website.
Path of Exile 2 (PoE 2)
PoE 2 0.4 Monk Build - Chaos Caster Acolyte of Chayula
Latest: 0.5.0 Release Date
☆ Fate of the Vaal ▶︎ The Last of the Druids
┗ Bonded Mods | 0.4 Mystery Box
★ Druid: Class Overview | Builds
☆ NEW: Disciple of Varashta Ascendancy!
★ Best Class | Best Builds | Leveling Builds
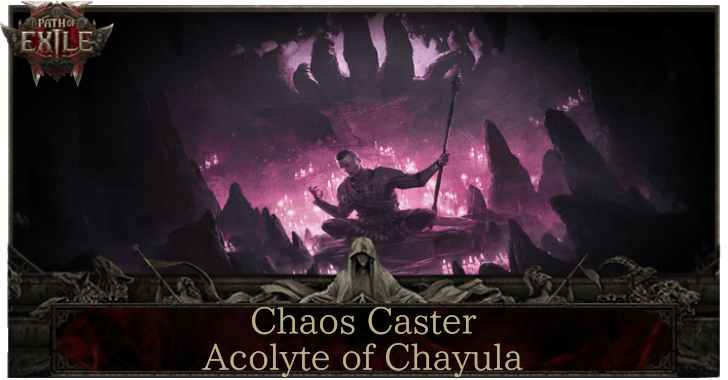
This is a Chaos Caster Acolyte of Chayula Monk endgame build for mapping in Path of Exile 2 (PoE 2)'s The Last of the Druids Update. Check out the Chaos Caster Acolyte of Chayula Monk endgame build, including its gear, socketables, skills, and playstyle!
List of Contents
Chaos Caster Acolyte Build Summary
Korihor's Chaos Caster Acolyte Build
This is a Chaos Caster Acolyte build for 0.4.0 created by Korihor. The video linked above shows a full rundown, explanation, and demonstration of the build.
Interact with Korihor and his community through his Discord and YouTube. For more builds and content, interact with him live through his streams on Twitch.
Chaos Caster Acolyte Monk Build
 Chaos Caster Acolyte |
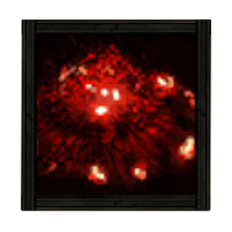
 Frost Bomb Creates a pulsing Orb of Frost. Each pulse inflicts Cold Exposure on nearby Enemies. When the Orb's duration ends, it explodes, dealing Cold damage to surrounding Enemies.
 Ice Nova A nova of ice expands from you, Knocking Back enemies based on how close they are to you. Casting Ice Nova targeting near a Frostbolt Projectile will cause it to originate from the Frostbolt insead of you, and cause more Freeze buildup.
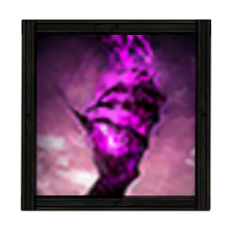
 Despair Curses all targets in an area after a short delay, lowering their Chaos Resistance.
 Blink Replaces your dodge roll with a short-cooldown Spell that allows you to tunnel through space, instantly reappearing a medium distance away.
 Cast on Critical While active, gains energy when you Critically Hit enemies and triggers socketed spells on reaching maximum energy.
 Siphon Elements While active, has a chance to create an Infusion Remnant when you Freeze, Shock, or Ignite a target.
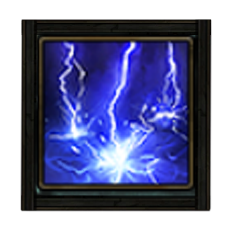 Thunderstorm Conjure a thunderstorm which causes lightning strikes and torrential rain in an area. Enemies in the area are Drenched, causing them to become Shocked or Frozen more easily. Plants in the area become Overgrown.
 Life Remnants 25% chance to spawn a Remnant on killing an enemy;Spawn a Remnant on Critically Hitting a target, no more than once every 2 seconds;Each Remnant grants X Life
 Into the Breach A Flame of Chayula manifests nearby every X seconds;Flames of Chayula fade after 25 seconds if not picked up
|
|
|
|
This Chaos Caster Acolyte build focuses on Spell Casting with pure chaos damage conversion and critical strike amplification to utilize Cast on Critical. The build requires at least 150 Spirit to function with the Meta skills and Persistent skills.
| Date | Changes |
|---|---|
| 01-13-2026 | Created Chaos Caster Acolyte build page for endgame. |
Chaos Caster Acolyte Equipment
| Gear | Modifiers |
|---|---|
 Chiming Staff Chiming Staff Chiming Staff Stats:
Requirements: Level - 25 Intelligence - 41 (Weapon Set 1) |
・Increased Critical Chance for Spells
・Increased Spell Damage ・Increased Chaos Damage ・Maximum Mana ・Level to All Spell Skills |
 Volatile Wand Volatile Wand Volatile Wand Stats:
Requirements: Level - 16 Intelligence - 28 (Weapon Set 2) |
・% of Damage as Cold Damage
・Increased Spell Damage ・Increased Critical Strike Chance for Spells ・Maximum Mana ・Increased Cast Speed ・Life per Enemy Killed |
 Rattling Sceptre Rattling Sceptre Rattling Sceptre Stats:
Spirit - 100 Requirements: None (Weapon Set 2) |
・Increased Spirit
・Maximum Mana ・Allies in your presence deal increased Damage ・Allies in your presence have increased Cast Speed ・Allies in your presence have +% to all Elemental Resistances ・Minions gain Maximum Life |
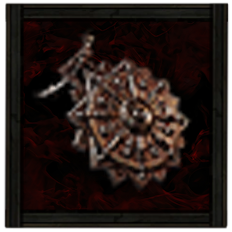
 Ancestral Tiara Ancestral Tiara Ancestral Tiara Stats:
Energy Shield - 109 Requirements: Level - 80 Intelligence - 115 (Helm) |
・Increased Energy Shield
・Maximum ・Fire Resistance ・Cold Resistance ・Lightning Resistance ・Increased Rarity of Items Found |
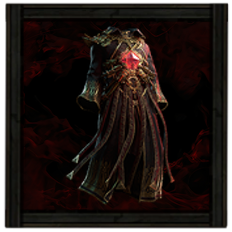 The Covenant Altar Robe The Covenant Altar Robe The Covenant Altar Robe Stats:
Energy Shield - 89 Requirements: Level - 40 Intelligence - 65 Fixed Modifiers: ・ 100-150% increased Energy Shield ・ +100-150 to maximum Life ・ 5% of Spell Damage Leeched as Life ・ Skills gain a Base Life Cost equal to 50% of Base Mana Cost (Body Armor) |
・Increased Energy Shield
・Maximum Life ・Spell Damage Leeched as Life ・Increased Life Cost Efficiency |
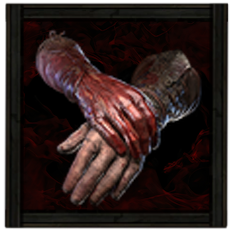 Maligaro's Virtuosity Fine Bracers Maligaro's Virtuosity Fine Bracers Maligaro's Virtuosity Fine Bracers Stats:
Evasion - 81 Requirements: Level - 45 Dexterity - 57 Fixed Modifiers: ・ 60-80% increased Evasion Rating ・ 20-30% increased Critical Hit Chance ・ 5% increased Attack Speed ・ +10-20 to Dexterity ・ Your Critical Damage Bonus is 300% (Gloves) |
・Increased Evasion Rating
・Increased Critical Strike Chance ・Increased Attack Speed ・Dexterity ・Your Critical Hit Chance cannot be Rerolled ・Critical Damage Bonus is 250% |
 Sekhema Sandals Sekhema Sandals Sekhema Sandals Stats:
Energy Shield - 82 Requirements: Level - 80 Intelligence - 108 (Boots) |
・Lightning Resistance
・Increased Movement Speed ・Increased Energy Shield ・Maximum Energy Shield ・Increased Rarity of Items Found ・Increased effect of Socketed Items |
 Solar Amulet Solar Amulet Solar Amulet Requirements:
Level - 30 Implicit:+10-15 to Spirit (Amulet) |
・Level to All Spell Skills
・Increased Cast Speed ・Increased Maximum Energy Shield ・Spirit ・Increased Rarity of Items Found |
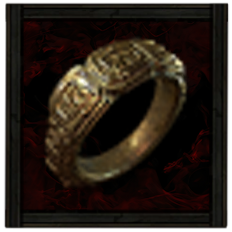 Gold Ring Gold Ring Gold Ring Requirements:
Level - 40 Implicit:6-15% increased Rarity of Items found (Ring 1) |
・Remnants have increased effect
・Increased Chaos Damage ・Elemental Resistances ・Fire Resistance ・Increased Rarity of Items Found |
 Original Sin Amethyst Ring Original Sin Amethyst Ring Original Sin Amethyst Ring Requirements:
Level - 20 Implicit:+7-13% to Chaos Resistance Fixed Modifiers: ・ 100% of Elemental Damage Converted to Chaos Damage ・ +17-23% to Chaos Resistance (Ring 2) |
・Chaos Resistance
・Elemental Damage Converted to Chaos Damage |
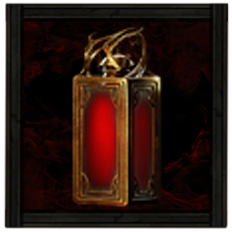 Ultimate Life Flask Ultimate Life Flask Ultimate Life Flask Stats:
Flask Type - Life Recovered Life - 920 Charge Per Use - 10 Total Charges - 75 Duration - 3 sec. (Life Flask) |
・Reduced Ammount Recovered
・Instant Recovery ・Increased Charges |
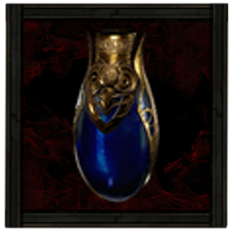 Ultimate Mana Flask Ultimate Mana Flask Ultimate Mana Flask Stats:
Flask Type - Mana Recovered Mana - 310 Charge Per Use - 10 Total Charges - 75 Duration - 3 sec. (Mana Flask) |
・Reduced Ammount Recovered
・Instant Recovery ・Increased Charges |
Weapons
For your weapon, you will want to use a Staff to gain modifiers for spell casting. Make sure to have Chaos Damage, Spell Damage, and increased level to all Spell skills to maximize your damage. Lastly, get Critical Strike Chance to support the Cast on Critical Gem.
Armor and Accessories
Focus on getting as much Energy Shield as possible on all of your armour pieces for primary defense. For your gloves, you will want the Maligaro's Virtuosity to support your Critical Hit Chance and Cast on Critical. Lastly, make sure to get Movement Speed and Elemental Resistances to round out your build.
| List of Armors | List of Accessories |
Runes and Soul Cores
| Equipment | Sockets |
|---|---|
| Weapon | |
| Armor |
For your Staff, use Greater Vision Runes to increase the Critical Strike Chance for your spells. You will also want the Hedgewitch Assandra's Rune of Wisdom to add levels to your spell skills.
For your helmet, gloves, and boots, use Greater Iron, Storm, and Glacial Runes to increase your Energy Shield and elemental resistances. The Soul Core of Tacati is used for Chaos Resistance, while Fenumus' Rune of Draining is slotted in the gloves to increase the magnitude of Wither. Lastly, Tecrod's Gaze is used for Life Cost Efficiency.
For your body Armor, you'll want to stack Rabbit Idols on it for increased Rarity of Items found to help with farming.
| List of Runes | List of Soul Cores |
Belts and Charms
| Belt Modifiers | |||||
|---|---|---|---|---|---|
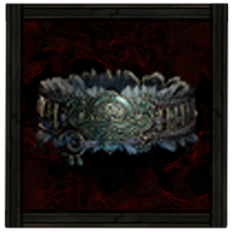 Soul Tether Long Belt Soul Tether Long Belt Soul Tether Long Belt Requirements:
Level - 20 Implicit:15-20% increased Charm Effect Duration Fixed Modifiers: ・ +40-60 to maximum Energy Shield ・ +20-30 to Intelligence ・ You lose 5% of Energy Shield per second ・ Excess Life Recovery from Leech is applied to Energy Shield |
・Maximum Energy Shield
・Intelligence ・Excess Life Recovery from Leech is applied to Energy Shield ・Increased Energy Shield Recovery Rate |
||||
| Charm Options | |||||
 Rite of Passage Golden Charm Rite of Passage Golden Charm
|
Rite of Passage Golden Charm
|
 Nascent Hope Thawing Charm Nascent Hope Thawing Charm
|
|||
The Soul Tether unique belt is used to constantly keep your Energy Shield up, offering more defenses.
For your charms, two Rites of Passage Golden Charms are used for increased Rarity of Items found, but also to gain possession from the Spirit of the Bear and Spirit of the Primate. Lastly, the Nascent Hope Thawing Charm is used to gain charges when killing an enemy.
| List of Belts | List of Charms |
Chaos Caster Acolyte Skills
All Active and Persistent Skills
| Skill | Support Gems |
|---|---|
|
Frost Bomb Frost Bomb Creates a pulsing Orb of Frost. Each pulse inflicts Cold Exposure on nearby Enemies. When the Orb's duration ends, it explodes, dealing Cold damage to surrounding Enemies.
|
Harmonic Remnants II Supports Skills which create Remnants, allowing those Remnants to be collected from further away, with a chance to create an additional Remnant.
Short Fuse II Supports Skills which Detonate after some amount of time has elapsed, massively shortening the time before Detonation at the cost of Damage.
Spell Echo Supports Spells that affect an area around you or a target location. Supported Spells echo, causing their effects to happen again after a short delay. Cannot support Channelling skills or Remote skills.
Overabundance I Supports skills which can have a Limited number of effects active at once, increasing that Limit at the cost of their duration. Only applies to restrictions that use the word “Limit”.
Cooldown Recovery II Supports skills with Cooldowns, increasing the rate at which those Cooldowns Recover. Cannot modify the skills of minions.
|
|
Thunderstorm Thunderstorm Conjure a thunderstorm which causes lightning strikes and torrential rain in an area. Enemies in the area are Drenched, causing them to become Shocked or Frozen more easily. Plants in the area become Overgrown.
|
Shock Conduction II Supports any skill that Hits enemies, giving it a chance to also Shock nearby enemies when you Shock an enemy. Always Shocks enemies which are Drenched.
Efficiency II Supports any skill, making it cost less to use. Cannot support skills which reserve Spirit.
Rapid Casting II Supports Spells, causing them to cast faster.
Prolonged Duration II Supports any skill that has a duration, making that duration longer.
Magnified Area II Supports any skill with an area of effect, making it larger at the cost of damage.
|
|
Despair Despair Curses all targets in an area after a short delay, lowering their Chaos Resistance.
|
Heightened Curse Supports curse skills, magnifying their power.
Decaying Hex Supports Curse skills. Cursed enemies' bodies decay, taking chaos damage over time.
Chaotic Freeze Supports Spells that deal non-Ailment Chaos damage over time. Enemies taking damage over time from Debuffs caused by supported skills will suffer Freeze build up from Chaos damage Hits from any source.
Magnified Area II Supports any skill with an area of effect, making it larger at the cost of damage.
Cursed Ground Supports Curse skills. supported skills no longer have an activation delay, instead creating areas which Curse enemies so long as they are within them.
|
|
Cast on Critical Cast on Critical While active, gains energy when you Critically Hit enemies and triggers socketed spells on reaching maximum energy.
|
Uhtred's Augury Supports Skills which can gain levels, granting them many additional levels provided exactly two other supports are used with the supported Skill. Does not support skills which do not have levels.
Comet Calls down a mass of ice from the sky, dealing high damage at the targeted location. Targeting close to you will cause you to jump back as you cast.
Living Bomb Plant a seed of Fire inside an enemy. Dealing enough damage to the enemy, or killing it outright, causes the seed to explode, dealing damage in an area and leaving behind a Fire Infusion Remnant.
Boundless Energy II Supports Meta Skills. Supported Skills generate Energy significantly faster.
Atalui's Bloodletting Supports any Skill, turning a portion of its Mana cost into a Life cost. Does not support Skills which reserve Spirit. Supported Skills Gain a portion of their Life cost as extra Physical Damage.
|
|
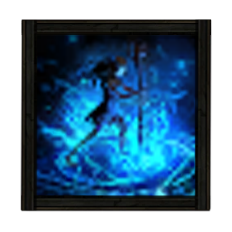
Ice Nova Ice Nova A nova of ice expands from you, Knocking Back enemies based on how close they are to you. Casting Ice Nova targeting near a Frostbolt Projectile will cause it to originate from the Frostbolt insead of you, and cause more Freeze buildup.
|
Tul's Stillness Supports Skills that can cause Damaging Hits, granting extra Chaos damage and causing Chaos damage to Contribute to Freeze Buildup.
Withering Touch Supports any skill that hits enemies, giving it a chance to Wither enemies on hit.
Lifetap Supports any skill, turning a portion of its Mana cost into a Life cost. Does not support skills which reserve spirit.
Magnified Area II Supports any skill with an area of effect, making it larger at the cost of damage.
Unleash Supports Spells you cast yourself, making their effect reoccur when cast. Cannot support Channelling Skills or Skills with a Cooldown.
|
|
Into the Breach Into the Breach A Flame of Chayula manifests nearby every X seconds;Flames of Chayula fade after 25 seconds if not picked up
|
Remnant Potency III Supports Skills which create Remnants, making those Remnants more powerful, but delaying their effect.
Harmonic Remnants II Supports Skills which create Remnants, allowing those Remnants to be collected from further away, with a chance to create an additional Remnant.
Khatal's Rejuvenation Supports Skills that generate Remnants. Picking up Remnants from Supported Skills grants Khatal's Rejuvenation.
|
 Volatile Dead Volatile Dead Volatile Dead |
Rapid Casting II Supports Spells, causing them to cast faster.
Unleash Supports Spells you cast yourself, making their effect reoccur when cast. Cannot support Channelling Skills or Skills with a Cooldown.
Minion Pact II Supports damaging skills you use yourself, draining the life from one of your Minions on use in order to boost the skill's damage. Only takes effect if you have a Minion with enough life to drain the full amount.
|
|
Blink Blink Replaces your dodge roll with a short-cooldown Spell that allows you to tunnel through space, instantly reappearing a medium distance away.
|
Dialla's Desire Supports any Skill which has levels, increasing the level and Quality, while reducing the cost and Reservation.
Rapid Casting II Supports Spells, causing them to cast faster.
Atziri's Impatience Supports Skills with Cooldowns, dramatically increasing the rate at which those Cooldowns Recover, but causing you to lose Life, Mana, and Energy Shield when they are used. Cannot Support Meta Skills or modify the Skills of Minions.
|
|
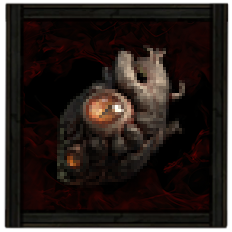
Life Remnants Life Remnants 25% chance to spawn a Remnant on killing an enemy;Spawn a Remnant on Critically Hitting a target, no more than once every 2 seconds;Each Remnant grants X Life
|
Remnant Potency I Supports Skills that generate Remnants, making those Remnants to be more powerful.
Harmonic Remnants II Supports Skills which create Remnants, allowing those Remnants to be collected from further away, with a chance to create an additional Remnant.
|
 Skeletal Warrior Skeletal Warrior Skeletal Warrior Summons reviving Skeletal Warriors.
|
Essence Harvest Supports Skills which create Reviving Persistent Minions. When those Minions die, you restore a percentage of your maximum Mana.
|
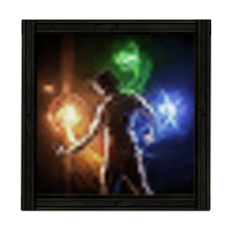 Charge Regulation Charge Regulation Charge Regulation While active, you gain powerful Buffs based on your active Charges. However, maintaining the Buff consumes Charges every few seconds.
|
Uhtred's Exodus Supports Skills which can gain levels, granting them many additional levels provided no other supports are used with the supported Skill. Does not support skills which do not have levels.
|
|
Siphon Elements Siphon Elements While active, has a chance to create an Infusion Remnant when you Freeze, Shock, or Ignite a target.
|
Harmonic Remnants II Supports Skills which create Remnants, allowing those Remnants to be collected from further away, with a chance to create an additional Remnant.
|
 Sacrifice Sacrifice Sacrifice While active, your undead Reviving Minions can be used in place of Corpses by your skills, but your Minions Revive more slowly.
|
Minion Mastery Supports Minion skills, granting them an additional level.
|
 Sigil of Power Sigil of Power Sigil of Power |
- |
Into the Breach is an important skill that allows you to gain the Flames of Chayula. The slotted support skills on the skill allow you to increase their effectiveness and collect them from further away. Volatile Dead and Skeletal Warriors are gained from the Weapon Set 2 which allows you to gain volatility out of combat to prepare it for bosses.
Ice Nova is your main spell, along with Frost Bomb to trigger Cast on Critical, which houses Comet to provide an additional DPS spell. Thunderstorm will be your source of Shock to gain more damage.
Life Remnants are obtained through the Covenant Altar Robe. This skill allows you to regain life after killing an enemy.
Chaos Caster Acolyte Passive Tree
Passive Tree Progression
| Ascendency Passive Nodes |
|---|
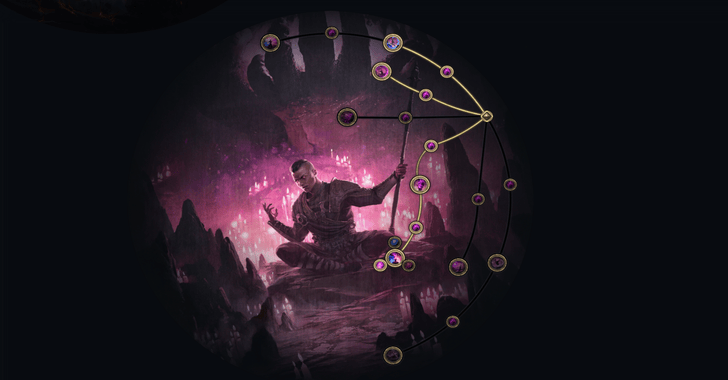 |
| Passive Nodes |
| Screenshot and video taken from Path of Building |
※ Legend: Red = Weapon Set I | Green = Weapon Set II
When starting out the Tree, take the Energy Shield and obtain nodes related to increased Remnant Effect for damage from the Flames of Chayula. You also aim to build as much Critical Hit Chance as possible, specifically for Cast on Critical.
You will also want to invest in nodes that grant Skill Effect Duration as well as Chaos Damage. For your second weapon set, make sure to invest points into Unstable Bond for Volatility and nodes that grant Curse Magnitude to help against bosses.
To increase the damage of Comet from Cast on Critical, be sure to take Dynamism and Invocated Efficiency for damage scaling.
Passive Skill Tree Guide and List of Passives
Jewels
Note: The modifiers listed are arranged according to priority.
 Heart of the Well Diamond Heart of the Well Diamond
|
・Increased Critical Hit Chance
・Increased Critical Hit Chance for Spells ・Gain 13% of Damage as extra Chaos Damage ・15% of Leech is Instant |
|---|---|
 From Nothing Diamond From Nothing Diamond
|
・Passives in Radius of Resonance can be allocated without being connected to your Tree. |
 Time-Lost Sapphire Time-Lost Sapphire
|
・Notable Passive Skills in Radius also grant increased Critical Hit Chance
・Notable Passive Skills in Radius also grant increased Critical Hit Chance for Spells ・Notable Passive Skills in Radius also grant increased Withered Magnitude ・Small Passive Skills in Radius also grant increased Damage. |
The From Nothing Diamond allows you to take Event Horizon and Spaghettification for chaos damage with a bonus of Critical Hit nodes. The Heart of the Well Diamond is important for the instant Life Leech modifier, which allows you to sustain your resource for the build.
Finally, the Time-Lost Sapphire grants Seeing Stars, Stylebender, Spell Haste, and Spellblade with bonuses from the jewel's modifiers for an additional push in damage.
Chaos Caster Acolyte Playstyle and Skill Rotation
Chaos Caster Skill Rotation
The playstyle for the Chaos Caster Acolyte relies on preparing your Volatility and dropping buffs before casting your main spell. The rotation is as follows:
- Cast Volatile Dead to stack Volatility.
- Cast Sigil of Power, Despair, and Thunderstorm for damage buffs.
- Cast Frost Bomb and Ice Nova to trigger Cast on Critical for raining Comets.
Path of Exile 2 Related Guides

0.4 Best Endgame Builds
| Rank | Build |
|---|---|
 |
|
 |
|
 |
|
 |
0.4 Leveling Builds
All Build Guides
| List of Builds by Class | |||||||||||
|---|---|---|---|---|---|---|---|---|---|---|---|
 Huntress Huntress |
 Mercenary Mercenary |
 Monk Monk |
|||||||||
 Witch Witch |
 Sorceress Sorceress |
 Warrior Warrior |
|||||||||
 Ranger Ranger |
 Druid Druid |
- | |||||||||
| Other Build Guides | 0.3 Leveling Builds | How to Make a Good Build | |||||||||
Comment
Author

PoE 2 0.4 Monk Build - Chaos Caster Acolyte of Chayula
Please participate in our site
improvement survey
03/2026
improvement survey
03/2026
Would you assist in
improving Game8's site?
improving Game8's site?

×
We are listening to our users' valuable opinions and discussing how to act on them.
The information collected through this survey will be used for the purpose of improving our services. In addition, the information will only be disclosed a part of a statistic in a format that will not allow identification of personal information.
Begin Survey
Not Now
×
Please rate each item regarding Game8.co's Advertisements.
Amount of Ads
Very Dissatisfied
Somewhat Dissatisfied
Fine
Somewhat Satisfied
Highly Satisfied
Placement of Ads
Timing of Ad Display
Ad Loading Speed
Safeness of Ads
Content of Ads
×
Please rate each item regarding Game8.co's Quality of Articles.
Amount of information
Very Dissatisfied
Somewhat Dissatisfied
Fine
Somewhat Satisfied
Highly Satisfied
Frequency of updates
Speed of new information
Accuracy of articles
Understandibility of articles
Readability of sentences
×
Please rate each item regarding Game8.co's Usability of the Site.
Ease of finding information
Very Dissatisfied
Somewhat Dissatisfied
Fine
Somewhat Satisfied
Highly Satisfied
Loading Speed
Use of Color
Font Size
Visibility of Images
Easy to Understand Layout
×
Please rate each item regarding Game8.co's Message Boards, Comments.
Ease of Writing
Very Dissatisfied
Somewhat Dissatisfied
Fine
Somewhat Satisfied
Highly Satisfied
Readability
Ease in Finding Information
Comment Quality
Comment Quantity
Admin Response
×
Please rate each item regarding Game8.co's Site's new design.
Please rate our site's new design
Very Dissatisfied
Somewhat Dissatisfied
Fine
Somewhat Satisfied
Highly Satisfied
Do you think that the website's design change makes the site easier to use?
Has the new design made it easier for you to find information on the site?
Has the new design improved the overall visual appeal of the site?
How would you rate your overall satisfaction with the new design of the site?
×
How likely are you to recommend Game8 to someone you know?
Very Unlikely
0
1
2
3
4
5
6
7
8
9
10
Very Likely
If you have other opinions regarding potential improvement to the website, please share them with us. We would appreciate your honest opinion.
Note: This is a free response section, so you can proceed without entering anything.
Note: Please be sure not to enter any kind of personal information into your response.
Note: Please be sure not to enter any kind of personal information into your response.
×
Thank You
×
Thank you for participating in our survey! Your answers will help us to improve the quality of our website and services.
We hope you continue to make use of Game8.
We hope you continue to make use of Game8.
Close
Rankings
- We could not find the message board you were looking for.

Gaming News


![Monster Hunter Stories 3 Review [First Impressions] | Simply Rejuvenating](https://img.game8.co/4438641/2a31b7702bd70e78ec8efd24661dacda.jpeg/thumb)
Popular Games

Genshin Impact Walkthrough & Guides Wiki
Honkai: Star Rail Walkthrough & Guides Wiki
Umamusume: Pretty Derby Walkthrough & Guides Wiki
Pokemon Pokopia Walkthrough & Guides Wiki
Resident Evil Requiem (RE9) Walkthrough & Guides Wiki
Monster Hunter Wilds Walkthrough & Guides Wiki
Wuthering Waves Walkthrough & Guides Wiki
Arknights: Endfield Walkthrough & Guides Wiki
Pokemon FireRed and LeafGreen (FRLG) Walkthrough & Guides Wiki
Pokemon TCG Pocket (PTCGP) Strategies & Guides Wiki


Recommended Games
Diablo 4: Vessel of Hatred Walkthrough & Guides Wiki
Cyberpunk 2077: Ultimate Edition Walkthrough & Guides Wiki
Fire Emblem Heroes (FEH) Walkthrough & Guides Wiki
Yu-Gi-Oh! Master Duel Walkthrough & Guides Wiki
Super Smash Bros. Ultimate Walkthrough & Guides Wiki
Pokemon Brilliant Diamond and Shining Pearl (BDSP) Walkthrough & Guides Wiki
Elden Ring Shadow of the Erdtree Walkthrough & Guides Wiki
Monster Hunter World Walkthrough & Guides Wiki
The Legend of Zelda: Tears of the Kingdom Walkthrough & Guides Wiki
Persona 3 Reload Walkthrough & Guides Wiki


All rights reserved
© 2010 - 2024 Grinding Gear Games
The copyrights of videos of games used in our content and other intellectual property rights belong to the provider of the game.
The contents we provide on this site were created personally by members of the Game8 editorial department.
We refuse the right to reuse or repost content taken without our permission such as data or images to other sites.