PoE 2 0.3 Sorceress Leveling Build - Fireball
Latest: 0.5.0 Release Date
☆ Fate of the Vaal ▶︎ The Last of the Druids
┗ Bonded Mods | 0.4 Mystery Box
★ Druid: Class Overview | Builds
☆ NEW: Disciple of Varashta Ascendancy!
★ Best Class | Best Builds | Leveling Builds
This is a leveling build for the Sorceress in Path of Exile 2 (PoE 2)'s The Third Edict Update that focuses on the Fireball skill and fire elemental infusions. Check out this Sorceress levelling build, including its progression, equipment, socketables, skills, playstyle, and recommended builds!
 Attention! Attention! |
The build is updated for Act 2 of Patch 0.3.0: The Third Edict. |
|---|
List of Contents
Fireball Sorceress Build Summary
Sorceress Leveling Build Overview
This is a fire elemental infusion focused Sorceress build that maximizes the capabilities of enhanced fireballs to deal enormous burst and AoE damage. Set up flame walls while gathering infusions either by executing living bombs or snapping ignites from enemies than empowering your Fireballs for the full screen clears.
Fireball Sorceress Equipment
※ The affixes shown below are arranged based on descending priority.
| Gear | Affixes |
|---|---|
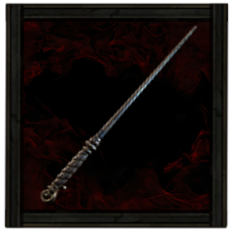 Attuned Wand Attuned Wand Attuned Wand Stats:
Requirements: None |
・ + Level to Projectile Skills
・ + Level to Fire Spells ・ +% increased Fire Damage |
 Antler Focus Antler Focus Antler Focus Stats:
Energy Shield - 17 Requirements: Level - 10 Intelligence - 17 |
・ + Maximum Energy Shield ・ +% increased Energy Shield ・ +% Increased Fire Damage |
 Felt Cap Felt Cap Felt Cap Stats:
Evasion - 48 Requirements: Level - 10 Dexterity - 17 |
・ + Maximum Energy Shield ・ +% increased Energy Shield |
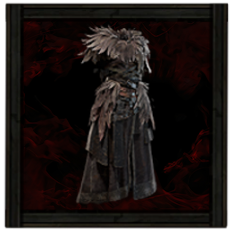 Feathered Robe Feathered Robe Feathered Robe Stats:
Energy Shield - 35 Requirements: Intelligence - 13 |
・ + Maximum Life ・ + Maximum Energy Shield ・ +% increased Energy Shield |
 Rope Cuffs Rope Cuffs Rope Cuffs Stats:
Armor - 12 Energy Shield - 6 Requirements: Level - 5 |
・ + Maximum Energy Shield ・ +% increased Energy Shield ・ +% increased Attack Speed |
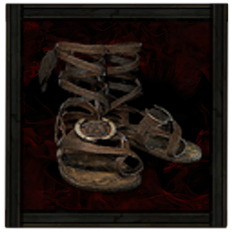 Wrapped Sandals Wrapped Sandals Wrapped Sandals Stats:
Energy Shield - 22 Requirements: Level - 11 Intelligence - 17 |
・ + Movement Speed ・ + Maximum Energy Shield ・ +% increased Energy Shield |
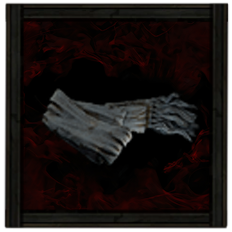 Linen Belt Linen Belt Linen Belt Requirements:
None Implicit:20-30% increased Mana Recovery from Flasks |
・ Increased Flask Charges Gained
・ + Armor ・ + Resistances |
 Lunar Amulet Lunar Amulet Lunar Amulet Requirements:
Level - 14 Implicit:+20-30 to maximum Energy Shield |
・ + Mana Regeneration |
 Lazuli Ring Lazuli Ring Lazuli Ring Requirements:
None Implicit:+20-30 to Maximum Mana |
・ + Maximum Mana |
 Lazuli Ring Lazuli Ring Lazuli Ring Requirements:
None Implicit:+20-30 to Maximum Mana |
・ + Maximum Mana |
 Colossal Life Flask Colossal Life Flask Colossal Life Flask Stats:
Flask Type - Life Recovered Life - 450 Charge Per Use - 10 Total Charges - 75 Duration - 4 sec. |
・Increased Amount Recovered
・Increased Charges |
 Colossal Mana Flask Colossal Mana Flask Colossal Mana Flask Stats:
Flask Type - Mana Recovered Mana - 165 Charge Per Use - 10 Total Charges - 75 Duration - 2.5 sec. |
・Increased Amount Recovered
・Increased Charges |
Weapons
You'll primarily want two things from your gear. Fire and Spell damage for offensive gear slots. The more spell and fire spell modifiers you have, the more consistent the build will be due to its focus of getting fire infusions from enemies.
Armor and Accessories
For defensive armor pieces, we want as much energy shield as possible. This lets us avoid getting immediately killed by mob groups and strong boss attacks. You also want to get attack speed from your gloves to make our combos much faster to execute and movement speed from your boots to make it easier to go from mob group to another.
| List of Rings | List of Amulets |
| List of Armors | |
Belts and Charms
 Sapphire Charm Sapphire Charm
|
・Increased Duration
・Increased Charges ・Gain Charges Per Second |
|---|
Charms are not mandatory at this point in the game, especially with our limited selection. However, you can choose to equip the Sapphire Charm to itemize against Count Geonor's freezes at the end of Act 1.
| List of Belts | List of Charms |
Runes and Soul Cores
| Equipment | Sockets |
|---|---|
| Weapon | |
| Armor |
Fire damage is the name of the game so slotting in Desert Runes is recommended for our weapon slots. For armor pieces, we want Iron Runes to further enhance our energy shield limit.
| List of Runes | List of Soul Cores |
Fireball Sorceress Skills
※ The Support Gems' priorities are arranged in descending order. The first one being the most important and the last being the least crucial.
| Skill | Support Gems |
|---|---|
 Fireball Fireball Fireball Launches a large ball of Fire which explodes on impact, creating a nova of smaller firebolts.
|
Unleash Supports Spells you cast yourself, making their effect reoccur when cast. Cannot support Channelling Skills or Skills with a Cooldown.
Fire Penetration I Supports any skill that Hits enemies, making those hits penetrate enemy Fire resistances.
Multishot II Supports Projectile skills, making them fire extra Projectiles. Also lowers Attack and Cast speed of supported skills, as well as lessening their damage.
|
 Living Bomb Living Bomb Living Bomb Plant a seed of Fire inside an enemy. Dealing enough damage to the enemy, or killing it outright, causes the seed to explode, dealing damage in an area and leaving behind a Fire Infusion Remnant.
|
Overabundance I Supports skills which can have a Limited number of effects active at once, increasing that Limit at the cost of their duration. Only applies to restrictions that use the word “Limit”.
|
 Flame Wall Flame Wall Flame Wall Creates a wall of fire in front of the character, which ignites everything within its area. Any projectiles fired through the wall by you and allies deal added fire damage and inflict ignite on hit.
|
Prolonged Duration I Supports any skill that has a duration, making that duration longer.
Considered Casting Supports Spell skills that Hit Enemies, boosting Damage at the cost of Cast Speed.
|
 Snap Snap Snap Shatters the frost on a Frozen enemy, Consuming the freese to deal a large amount of Cold Damage to enemies caught in the blast. Can also be cast on a Frostbolt to cause it to explode immediately. Any Frozen enemies hit by the Frostbolt's explosion will be dealt Cold Snap's damage and have their freeze consumed.
|
Harmonic Remnants I Supports Skills which create Remnants, allowing those Remnants to be collected from further away.
|
|
Freeze Supports any skill that hits enemies, makit it more effective at Freezing enemies.
|
This skill build focuses on getting Elemental Infusions to activate Fireball's mini shrapnel effects for consistent screen-wide clears. The build's main difficulty is securing your first Elemental Infusion which involves killing or igniting an enemy that's afflicted with Living Bombs.
Once you get Multishot, the build's consistency with mobbing increases due to how Fireball's infusion casting interacts with Projectiles. Unleash allows you to cast a copy of the skill which causes it to cost double the Infusions you normally would. However, with Multishot II, you are able to launch 3 powered projectiles.
With Unleash and Multishot, you're able to launch 6 powered fireballs which is generally enough to clear most mob groups while granting enough Ignite for Snap to refill your Infusion costs.
Fireball Sorceress Passive Tree
Passive Tree Progression
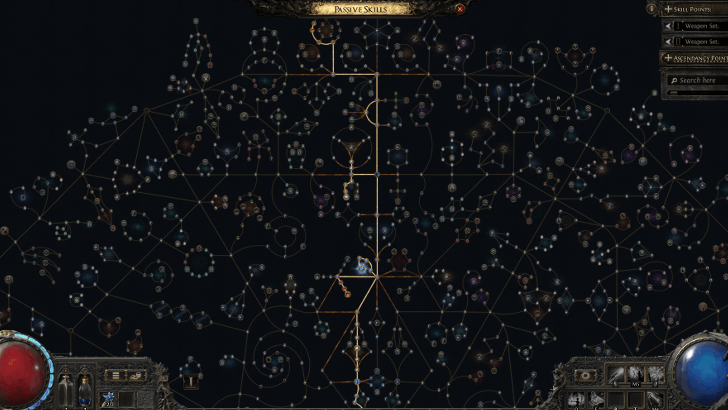
Prioritize spell damage as much as possible. Fire elemental damage and elemental penetration are also good choices and no other stats come close to priority compared to these at the early stages. If we fail to clear the mob group with our first infusion-powered fireball, our whole damage output suffers so its imperative that we get the damage we need to continue our Livingbomb Fireball sequence going.
Do not avoid Elemental Infusion damage buffs as well. We have enough range and consistency to regain infusions but make sure to take damage buffs on infusion pick ups. Embracing the Sorceress' infusion playstyle is the recommended setup to make the fireball's DPS topped up.
Passive Skill Tree Guide and List of Passives
Build Progression
| Jump to an Act! | |
|---|---|
| Act 1 | Act 2 |
Act 1 Progression
To progress through Act 1 and beat Count Geonor using the Spark Sorceress leveling build, follow these steps:
| # | Step by Step Guide to Act 1 Leveling |
|---|---|
| 1 | Equip
|
| 2 | Head for the Mysterious Campsite at Clearfell to get an extra Level 1
|
| 3 | Defeat
|
| 4 | Complete Treacherous Ground to get a Level 1
|
| 5 | Proceed to Grelwood and defeat
Note: Make sure to loot the Witch Hut to get Medium Flasks. |
| 6 | Defeat
|
| 7 | Progress to The Grim Tangle and defeat
|
| 8 | Look for the Haunted Treasure Inside the Tomb of the Consort and defeat the rare enemy to acquire a Level 1 Uncut Support Gemand slot in
to your staff's base weapon skill (if it does damage). We need a single target tool to deal with rares and elites and this will do for now.
|
| 9 | Defeat
|
| 10 | Search and complete your first Ritual in the same area.
|
| 11 | Start looking for the Dryadic Ritual in the same area to get an extra Level 1 Uncut Support Gem.
|
| 12 | Enter Freythorn to defeat
|
| 13 | Complete The Lost Lute at the Ogham Farmlands to obtain a Book of Specialisation for more passive points.
|
| 14 | Search for the Crop Circle in the same area to defeat
|
| 15 | Proceed to Ogham Village and defeat
|
| 16 | Head for The Manor Ramparts and look for The Gallows to get a free Level 1 Uncut Support Gem.
|
| 17 | Search and defeat the
|
| 18 | Continue and defeat
Note: Make sure you have Medium Flasks since this boss fight has 2 Phases so you will be spending a good amount of time learning and surviving the mechanics. |
Act 2 Progression
To progress through Act 2 and beat Jamanra, the Abomination using the Warrior leveling build, follow these steps:
| # | Steps |
|---|---|
| 1 | |
| 2 | Defeat
Ascendancy: You can attempt to finish the Sekhema's Trial to get your first Ascendancy Skill: |
| 3 | Clear Mobs in Keth until you get the
|
| 4 | Defeat
|
| 5 | Defeat
|
| 6 | Open the Guarded Sarcophagus for an
|
| 7 | Three Elemental Offering Ring choices: Ruby Ring, Sapphire Ring, and Topaz Ring for flame, cold, and lightning resistance respectively. It is recommended to choose the Topaz Ring to prepare for
|
| 8 | Clear The City of Seven Waters for an Uncut Support Gem 2. You can use this to get
|
| 9 | Destroy the Effigy located in the Shrine of Bones for an Uncut Support Gem Level 2. You can use this to get
for your Snap. This is not mandatory but it improves the consistency of the build and can be swapped with other offensive gems. |
| 10 | Clear Mobs in The Bone Pits until you get the
|
| 11 | Complete A Theft of Ivory quest for an Uncut Support Gem Level 2. You can use this for any missing support gems in the build. |
| 12 | Place both Relics in the Valley of Titans to complete the Ancient Vows quest. Choose the Sun Clan Relic for more Mana Flask Recovery.
|
| 13 | Complete A Crown of Stone quest for an Uncut Support Gem Level 2. You can use this for any missing support gems in the build. |
| 14 | Complete the Tradition's Toll quest to get a
|
| 15 | Defeat the
|
| 16 | Activate the
|
Fireball Sorceress Playstyle
Mobbing Rotation
For our mobbing, you'll want to get your first Infusion against the first mob group. Latch a Living Bomb to an enemy and set up a flame wall. This will let your unleash-powered Fireball to execute your target.
Use Snap as a follow up for more damage or get the infusion from the enemy's body if it from the initial fireball. This will let you start the fight against the next mob group with an infusion. From there, just use Living Bomb and Snap to continue securing more infusions as you go through the level.
Bossing Rotation
For bosses, nothing changes much except the way you obtain Infusions from Living Bomb but your main combo remains true. Set up a Living Bomb and Flame Wall and use Fireball. Once the boss is ignite, use Snap and pick up the infusion to get a huge burst of damage for your next fireball.
Path of Exile 2 (PoE 2) Related Guides

0.4 Best Endgame Builds
| Rank | Build |
|---|---|
 |
|
 |
|
 |
|
 |
0.4 Leveling Builds
All Build Guides
| List of Builds by Class | |||||||||||
|---|---|---|---|---|---|---|---|---|---|---|---|
 Huntress Huntress |
 Mercenary Mercenary |
 Monk Monk |
|||||||||
 Witch Witch |
 Sorceress Sorceress |
 Warrior Warrior |
|||||||||
 Ranger Ranger |
 Druid Druid |
- | |||||||||
| Other Build Guides | 0.3 Leveling Builds | How to Make a Good Build | |||||||||
Sorceress Leveling Builds
Arctic Armour Conjures an icy barrier that gains stages overtime. While the barrier has stages, Melee Attacks that hit you will remove a stage to cause a burst of ice that deals Cold Spell damage to the attacker.
Spark Launches a spray of sparking projectiles that travel erratically along the ground until they hit an enemy or expire.
Flame Wall Creates a wall of fire in front of the character, which ignites everything within its area. Any projectiles fired through the wall by you and allies deal added fire damage and inflict ignite on hit.
Orb of Storms Creates an Orb of electricity that fires Chaining Lightning bolts at nearby enemies.
Conductivity Curses all targets in an area after a short delay, lowering their Lightning Resistance.
Mana Tempest Creates a storm of arcane energies that Empowers your Mana-costing Spells while you remain inside it. Maintaining the Storm constantly drains your Mana, and each spell you cast causes it to drain faster. The storm will dissipate when you exit it or run out of mana.
Lightning Warp Teleports you inside the target's body, causing it to violently explode. Highlights enemies that can be culled, and can only be used on these enemies or Ball Lightning projectiles. The target is destroyed, and the explosion deals Lightning Damage to surrounding enemies and creates Shocked Ground.
Mana Remnants Conjures surging lightning to restore your Mana. While active, Shocked enemies you kill have a chance to spawn a Mana Remnant, and Critically Hitting a Shocked target spawns a Mana Remnant every few seconds. Picking up a Mana Remnant grants you Mana which can Overflow maximum Mana.
Focus: Mobbing, AoE, Lightning, Fast Clear |
|
Flame Wall Creates a wall of fire in front of the character, which ignites everything within its area. Any projectiles fired through the wall by you and allies deal added fire damage and inflict ignite on hit.
Snap Shatters the frost on a Frozen enemy, Consuming the freese to deal a large amount of Cold Damage to enemies caught in the blast. Can also be cast on a Frostbolt to cause it to explode immediately. Any Frozen enemies hit by the Frostbolt's explosion will be dealt Cold Snap's damage and have their freeze consumed.
Fireball Launches a large ball of Fire which explodes on impact, creating a nova of smaller firebolts.
Raging Spirits While active, your Fire Spells will also summon Raging Spirits, which are short-lived flaming skulls that rush at nearby enemies and rapidly Attack them. Enemies will not directly engage these Minions, and can pass through them.
Living Bomb Plant a seed of Fire inside an enemy. Dealing enough damage to the enemy, or killing it outright, causes the seed to explode, dealing damage in an area and leaving behind a Fire Infusion Remnant.
Focus: AoE, Mobbing |
|
NEW |
Frost Bomb Creates a pulsing Orb of Frost. Each pulse inflicts Cold Exposure on nearby Enemies. When the Orb's duration ends, it explodes, dealing Cold damage to surrounding Enemies.
Flame Wall Creates a wall of fire in front of the character, which ignites everything within its area. Any projectiles fired through the wall by you and allies deal added fire damage and inflict ignite on hit.
Ice Nova A nova of ice expands from you, Knocking Back enemies based on how close they are to you. Casting Ice Nova targeting near a Frostbolt Projectile will cause it to originate from the Frostbolt insead of you, and cause more Freeze buildup.
Orb of Storms Creates an Orb of electricity that fires Chaining Lightning bolts at nearby enemies.
Snap Shatters the frost on a Frozen enemy, Consuming the freese to deal a large amount of Cold Damage to enemies caught in the blast. Can also be cast on a Frostbolt to cause it to explode immediately. Any Frozen enemies hit by the Frostbolt's explosion will be dealt Cold Snap's damage and have their freeze consumed.
Frost Darts Conjures a number of Icy Projectiles that launch towards a target. Projectiles that Hit a Chilled or Frozen target create chunks of ice that deal additional damage on impacting the ground. Consumes a Cold Infusion if possible to cause each Projectile to lodge into the enemy then explode.
Focus: Elements, Cold, AoE, Infusions |
Sorceress Endgame Builds
Flame Wall Creates a wall of fire in front of the character, which ignites everything within its area. Any projectiles fired through the wall by you and allies deal added fire damage and inflict ignite on hit.
Solar Orb Creates a fiery Orb that periodically releases fiery pulses. Enemies that are very close to the Orb are Ignited.
Flammability Curses all targets in an area after a short delay, lowering their Fire Resistance.
Fireball Launches a large ball of Fire which explodes on impact, creating a nova of smaller firebolts.
Focus: DoT, Mobbing |
|
Frost Bomb Creates a pulsing Orb of Frost. Each pulse inflicts Cold Exposure on nearby Enemies. When the Orb's duration ends, it explodes, dealing Cold damage to surrounding Enemies.
Frostbolt Fires a slow-moving projectile that leaves a wake of Chilled Ground, deals Cold Damage and explodes on colliding with terrain.
Hypothermia Curses all targets in an area after a short delay, lowering their Cold Resistance.
Frost Wall Creates a Wall of Ice Crystals which holds back enemies. The Crystals explode if sufficiently damaged, orif pushed hard enough, damaging nearby enemies..
Lightning Warp Teleports you inside the target's body, causing it to violently explode. Highlights enemies that can be culled, and can only be used on these enemies or Ball Lightning projectiles. The target is destroyed, and the explosion deals Lightning Damage to surrounding enemies and creates Shocked Ground.
Comet Calls down a mass of ice from the sky, dealing high damage at the targeted location. Targeting close to you will cause you to jump back as you cast.
Cast on Freeze While active, gains Energy when you Freeze enemies and triggers socketed spells on reaching maximum Energy.
Blink Replaces your dodge roll with a short-cooldown Spell that allows you to tunnel through space, instantly reappearing a medium distance away.
Focus: Burst Damage, Crowd Control |
|
Spark Launches a spray of sparking projectiles that travel erratically along the ground until they hit an enemy or expire.
Flame Wall Creates a wall of fire in front of the character, which ignites everything within its area. Any projectiles fired through the wall by you and allies deal added fire damage and inflict ignite on hit.
Orb of Storms Creates an Orb of electricity that fires Chaining Lightning bolts at nearby enemies.
Conductivity Curses all targets in an area after a short delay, lowering their Lightning Resistance.
Lightning Warp Teleports you inside the target's body, causing it to violently explode. Highlights enemies that can be culled, and can only be used on these enemies or Ball Lightning projectiles. The target is destroyed, and the explosion deals Lightning Damage to surrounding enemies and creates Shocked Ground.
Mana Remnants Conjures surging lightning to restore your Mana. While active, Shocked enemies you kill have a chance to spawn a Mana Remnant, and Critically Hitting a Shocked target spawns a Mana Remnant every few seconds. Picking up a Mana Remnant grants you Mana which can Overflow maximum Mana.
Archmage While Active, causes your Non-Channelling Spells to cost additional mana and deal extra lightning damage, both based on your maximum mana.
Focus: Mobbing, AoE, Lightning, Fast Clear |
|
Frost Bomb Creates a pulsing Orb of Frost. Each pulse inflicts Cold Exposure on nearby Enemies. When the Orb's duration ends, it explodes, dealing Cold damage to surrounding Enemies.
Flame Wall Creates a wall of fire in front of the character, which ignites everything within its area. Any projectiles fired through the wall by you and allies deal added fire damage and inflict ignite on hit.
Ice Nova A nova of ice expands from you, Knocking Back enemies based on how close they are to you. Casting Ice Nova targeting near a Frostbolt Projectile will cause it to originate from the Frostbolt insead of you, and cause more Freeze buildup.
Snap Shatters the frost on a Frozen enemy, Consuming the freese to deal a large amount of Cold Damage to enemies caught in the blast. Can also be cast on a Frostbolt to cause it to explode immediately. Any Frozen enemies hit by the Frostbolt's explosion will be dealt Cold Snap's damage and have their freeze consumed.
Comet Calls down a mass of ice from the sky, dealing high damage at the targeted location. Targeting close to you will cause you to jump back as you cast.
Cast on Elemental Ailment While active, gains Energy when you Freeze, Shock, or Ignite enemies, and triggers socketed spells on reaching Maximum Energy.
Siphon Elements While active, has a chance to create an Infusion Remnant when you Freeze, Shock, or Ignite a target.
Frost Darts Conjures a number of Icy Projectiles that launch towards a target. Projectiles that Hit a Chilled or Frozen target create chunks of ice that deal additional damage on impacting the ground. Consumes a Cold Infusion if possible to cause each Projectile to lodge into the enemy then explode.
Elemental Weakness Curse all targets in an area after a short delay, lowering their Elemental Resistances.
Temporal Rift This Spell's Cast Speed cannot be modified;Maximum 16 afterimages;Creates an afterimage every 0.25 seconds
Focus: Crowd Control, Burst Damage, Cold |
|
Arc An arc of Lightning stretches from the caster to a targeted enemy and Chains on to other nearby enemies. Shocked enemies Hit release damaging pulses.
Frost Bomb Creates a pulsing Orb of Frost. Each pulse inflicts Cold Exposure on nearby Enemies. When the Orb's duration ends, it explodes, dealing Cold damage to surrounding Enemies.
Orb of Storms Creates an Orb of electricity that fires Chaining Lightning bolts at nearby enemies.
Blink Replaces your dodge roll with a short-cooldown Spell that allows you to tunnel through space, instantly reappearing a medium distance away.
Archmage While Active, causes your Non-Channelling Spells to cost additional mana and deal extra lightning damage, both based on your maximum mana.
Cast on Elemental Ailment While active, gains Energy when you Freeze, Shock, or Ignite enemies, and triggers socketed spells on reaching Maximum Energy.
Siphon Elements While active, has a chance to create an Infusion Remnant when you Freeze, Shock, or Ignite a target.
Elemental Weakness Curse all targets in an area after a short delay, lowering their Elemental Resistances.
Focus: Lightning, Cast on Elemental Ailment, Mobbing |
|
Frost Bomb Creates a pulsing Orb of Frost. Each pulse inflicts Cold Exposure on nearby Enemies. When the Orb's duration ends, it explodes, dealing Cold damage to surrounding Enemies.
Ember Fusillade Conjures a blazing Ember that hovers around you. After a short duration, the Ember launches at the enemy, dealing fire damage in an area on impact. Recasting the spess resets the duration for all active Embers. Multiple Embers fired in the same Fusillade will attempt to target different enemies.
Orb of Storms Creates an Orb of electricity that fires Chaining Lightning bolts at nearby enemies.
Ball Lightning Fires a slow-moving projectile that repeatedly shoots bolts of lightning at nearby enemies.
Trinity Become attuned to all Elements building up Fire, Cold, and Lightning Resonance based off the highest Elemental Damage type dealt by your Attack Hits. Your Elemental Damage with Attacks is greatly enhanced the more Resonance of any type you have.
Siphon Elements While active, has a chance to create an Infusion Remnant when you Freeze, Shock, or Ignite a target.
Frost Darts Conjures a number of Icy Projectiles that launch towards a target. Projectiles that Hit a Chilled or Frozen target create chunks of ice that deal additional damage on impacting the ground. Consumes a Cold Infusion if possible to cause each Projectile to lodge into the enemy then explode.
Elemental Weakness Curse all targets in an area after a short delay, lowering their Elemental Resistances.
Living Bomb Plant a seed of Fire inside an enemy. Dealing enough damage to the enemy, or killing it outright, causes the seed to explode, dealing damage in an area and leaving behind a Fire Infusion Remnant.
Elemental Storm Cannot deal Critical Hits;Deals Damage every 0.25 seconds;Storm radius is 1.8 metres;Storm duration is 5 seconds;Enemies inside the storm are Hindered
Focus: Elements, Shock, Chill, Ignite |
|
NEW |
Frost Bomb Creates a pulsing Orb of Frost. Each pulse inflicts Cold Exposure on nearby Enemies. When the Orb's duration ends, it explodes, dealing Cold damage to surrounding Enemies.
Ice Nova A nova of ice expands from you, Knocking Back enemies based on how close they are to you. Casting Ice Nova targeting near a Frostbolt Projectile will cause it to originate from the Frostbolt insead of you, and cause more Freeze buildup.
Snap Shatters the frost on a Frozen enemy, Consuming the freese to deal a large amount of Cold Damage to enemies caught in the blast. Can also be cast on a Frostbolt to cause it to explode immediately. Any Frozen enemies hit by the Frostbolt's explosion will be dealt Cold Snap's damage and have their freeze consumed.
Blasphemy Turns socketed Curse skills into vile Auras, applying their effects to all nearby enemies.
Barkskin While active, taking Hit damage from enemies to your Energy Shield causes you to gain Armour for a short duration. Armour gained from multiple Hits can stack. The total Armour gained from this Skill cannot exceed the Item Armour on your Equipped Armour Items.
Focus: Minion, Cold, Burst, Slow Magnitude, Crowd Control, Djinns |
Sorceress Class and Ascendancy Guides
| Base Class | |
|---|---|
| Ascendancies | |
Author
PoE 2 0.3 Sorceress Leveling Build - Fireball
improvement survey
03/2026
improving Game8's site?

Your answers will help us to improve our website.
Note: Please be sure not to enter any kind of personal information into your response.

We hope you continue to make use of Game8.
Rankings
- We could not find the message board you were looking for.
Gaming News
Popular Games

Genshin Impact Walkthrough & Guides Wiki

Honkai: Star Rail Walkthrough & Guides Wiki

Umamusume: Pretty Derby Walkthrough & Guides Wiki

Pokemon Pokopia Walkthrough & Guides Wiki

Resident Evil Requiem (RE9) Walkthrough & Guides Wiki

Monster Hunter Wilds Walkthrough & Guides Wiki

Wuthering Waves Walkthrough & Guides Wiki

Arknights: Endfield Walkthrough & Guides Wiki

Pokemon FireRed and LeafGreen (FRLG) Walkthrough & Guides Wiki

Pokemon TCG Pocket (PTCGP) Strategies & Guides Wiki
Recommended Games

Diablo 4: Vessel of Hatred Walkthrough & Guides Wiki

Cyberpunk 2077: Ultimate Edition Walkthrough & Guides Wiki

Fire Emblem Heroes (FEH) Walkthrough & Guides Wiki

Yu-Gi-Oh! Master Duel Walkthrough & Guides Wiki

Super Smash Bros. Ultimate Walkthrough & Guides Wiki

Pokemon Brilliant Diamond and Shining Pearl (BDSP) Walkthrough & Guides Wiki

Elden Ring Shadow of the Erdtree Walkthrough & Guides Wiki

Monster Hunter World Walkthrough & Guides Wiki

The Legend of Zelda: Tears of the Kingdom Walkthrough & Guides Wiki

Persona 3 Reload Walkthrough & Guides Wiki
All rights reserved
© 2010 - 2024 Grinding Gear Games
The copyrights of videos of games used in our content and other intellectual property rights belong to the provider of the game.
The contents we provide on this site were created personally by members of the Game8 editorial department.
We refuse the right to reuse or repost content taken without our permission such as data or images to other sites.
 under the page's title to be notified of any updates!
 Fireball Sorceress


![Monster Hunter Stories 3 Review [First Impressions] | Simply Rejuvenating](https://img.game8.co/4438641/2a31b7702bd70e78ec8efd24661dacda.jpeg/thumb)


Information on the passive tree is really lacking for this build.