This survey will take about 1 minute.
Your answers will help us to improve our website.
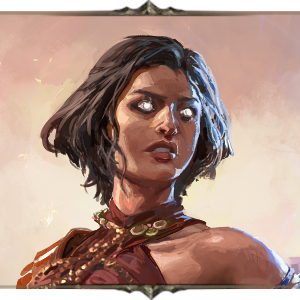
Path of Exile 2 (PoE 2)
PoE 2 0.2.0 Spark Sorceress Leveling Build
Latest: 0.5.0 Release Date
☆ Fate of the Vaal ▶︎ The Last of the Druids
┗ Bonded Mods | 0.4 Mystery Box
★ Druid: Class Overview | Builds
☆ NEW: Disciple of Varashta Ascendancy!
★ Best Class | Best Builds | Leveling Builds
Spark Sorceress is a leveling build for the Sorceress in Path of Exile 2 (PoE 2)'s Dawn of the Hunt Update that uses Spark, Firewall, and Orb of Storms to finish Act 3. Check out this Sorceress levelling build, including its progression, equipment, socketables, skills, playstyle, and recommended builds!
 Attention! Attention! |
This build was last updated for patch 0.2.1 and may be outdated for the recent patches. For more up-to-date builds, please refer to our list of latest builds! |
|---|
List of Contents
Spark Sorceress Build Summary
Spark Sorceress Leveling Build
Act 1
Act 2
Act 3
| Build Setup | |
|---|---|
 Spark Sorceress Leveling Build Spark Sorceress Leveling Build |  Spark Launches a spray of sparking projectiles that travel erratically along the ground until they hit an enemy or expire. 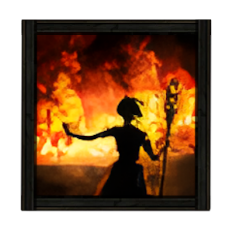 Flame Wall Creates a wall of fire in front of the character, which ignites everything within its area. Any projectiles fired through the wall by you and allies deal added fire damage and inflict ignite on hit. 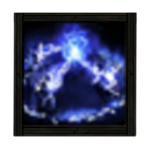 Orb of Storms Creates an Orb of electricity that fires Chaining Lightning bolts at nearby enemies. 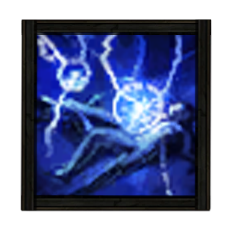 Mana Remnants Conjures surging lightning to restore your Mana. While active, Shocked enemies you kill have a chance to spawn a Mana Remnant, and Critically Hitting a Shocked target spawns a Mana Remnant every few seconds. Picking up a Mana Remnant grants you Mana which can Overflow maximum Mana. |
| | |
| Build Setup | |
|---|---|
| Spark Sorceress Leveling Build | Spark Launches a spray of sparking projectiles that travel erratically along the ground until they hit an enemy or expire. Flame Wall Creates a wall of fire in front of the character, which ignites everything within its area. Any projectiles fired through the wall by you and allies deal added fire damage and inflict ignite on hit. Orb of Storms Creates an Orb of electricity that fires Chaining Lightning bolts at nearby enemies.  Conductivity Curses all targets in an area after a short delay, lowering their Lightning Resistance. Mana Remnants Conjures surging lightning to restore your Mana. While active, Shocked enemies you kill have a chance to spawn a Mana Remnant, and Critically Hitting a Shocked target spawns a Mana Remnant every few seconds. Picking up a Mana Remnant grants you Mana which can Overflow maximum Mana. |
| | |
| Build Setup | |
|---|---|
| Spark Sorceress Leveling Build |  Arctic Armour Conjures an icy barrier that gains stages overtime. While the barrier has stages, Melee Attacks that hit you will remove a stage to cause a burst of ice that deals Cold Spell damage to the attacker. Spark Launches a spray of sparking projectiles that travel erratically along the ground until they hit an enemy or expire. Flame Wall Creates a wall of fire in front of the character, which ignites everything within its area. Any projectiles fired through the wall by you and allies deal added fire damage and inflict ignite on hit. Orb of Storms Creates an Orb of electricity that fires Chaining Lightning bolts at nearby enemies. Conductivity Curses all targets in an area after a short delay, lowering their Lightning Resistance.  Mana Tempest Creates a storm of arcane energies that Empowers your Mana-costing Spells while you remain inside it. Maintaining the Storm constantly drains your Mana, and each spell you cast causes it to drain faster. The storm will dissipate when you exit it or run out of mana.  Lightning Warp Teleports you inside the target's body, causing it to violently explode. Highlights enemies that can be culled, and can only be used on these enemies or Ball Lightning projectiles. The target is destroyed, and the explosion deals Lightning Damage to surrounding enemies and creates Shocked Ground. Mana Remnants Conjures surging lightning to restore your Mana. While active, Shocked enemies you kill have a chance to spawn a Mana Remnant, and Critically Hitting a Shocked target spawns a Mana Remnant every few seconds. Picking up a Mana Remnant grants you Mana which can Overflow maximum Mana. |
| | |
| Date | Changes Made |
|---|---|
| 04/05/2025 | ・ Leveling Build Act 1-3 Created. |
This Spark leveling build outputs high AoE damage and mob clear using Spark as its main damage tool and enhancing it with other skills such as Flame Wall and Mana Tempest.
Act 1 to 2 will mainly focus on Spark and Flame Wall to push through mobs and bosses. In Act 3, Spark will get more offensive support with Mana Tempest, increasing the damage output at the cost of more mana.
Spark Sorceress FAQs
| Build Notes |
|---|
Is Spark Still Viable?
Spark builds are still one of the more reliable builds in the game even after the nerfs from the 0.2.0 patch. Despite the damage nerfs, its DPS and mob clear remains reliable and the scalability is still high.
Spark Sorceress Equipment
| Equipment | |||||||||||||||
|---|---|---|---|---|---|---|---|---|---|---|---|---|---|---|---|
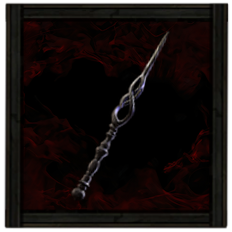 Siphoning Wand Siphoning Wand Stats: Requirements: Level - 11 Intelligence - 25 Modifiers: ・X% increased Spell Damage ・X% increased Lightning Damage ・X to Level of all Lightning Spell Skills ・X% increased Cast Speed ・Gain X Mana per Enemy Killed Weapon |
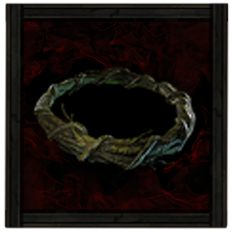 Twig Circlet Twig Circlet Stats: Energy Shield - 19 Requirements: None Modifiers: ・X to Maximum Mana ・Any Element Resistance ・Any Energy Shield Modifier ・X% increased Rarity of Items found Helmet |
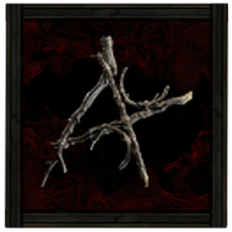 Twig Focus Twig Focus Stats: Energy Shield - 12 Requirements: None Modifiers: ・X% increased Lightning Damage ・X% increased Spell Damage ・Any Mana Modifiers ・X to Level of all Spell Skills ・X% increased Cast Speed Offhand Set 2 |
|||||||||||||
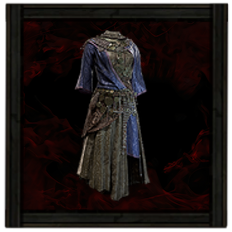 Silk Robe Silk Robe Stats: Energy Shield - 61 Requirements: Level - 22 Intelligence - 47 Modifiers: ・X to Maximum Life ・Any Element Resistance ・Any Energy Shield Modifier ・X to Intelligence Body Armour |
|||||||||||||||
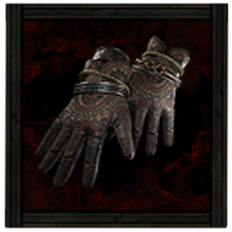 Stitched Gloves Stitched Gloves Stats: Energy Shield - 17 Requirements: Level - 16 Intelligence - 27 Modifiers: ・X% increased Rarity of Items found ・Gain X Mana per Enemy Killed ・Any Element Resistance ・Any Energy Shield Modifier Gloves |
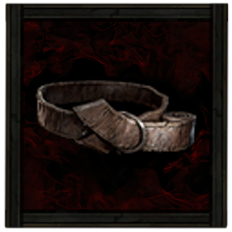 Rawhide Belt Rawhide Belt Requirements: None Implicit: ・Increased Life Recovery from Flasks Modifier: ・X to Maximum Life ・X to Maximum Mana ・Any Element Resistance ・X% increased Flask Mana Recovery rate ・Any Charm Modifier Belt |
 Silk Slippers Silk Slippers Stats: Energy Shield - 34 Requirements: Level - 27 Intelligence - 47 Modifiers: ・X% increased Movement Speed ・X% increased Rarity of Items Found ・X to Intelligence ・Any Element Resistance ・Any Energy Shield Modifier Boots |
|||||||||||||
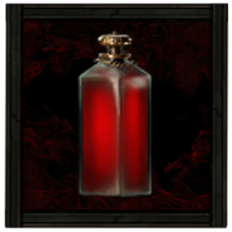 Colossal Life Flask Colossal Life Flask Stats: Flask Type - Life Recovered Life - 450 Charge Per Use - 10 Total Charges - 75 Duration - 4 sec. Modifier: ・X% increased Recovery rate ・X% of Recovery applied Instantly Health Flask |
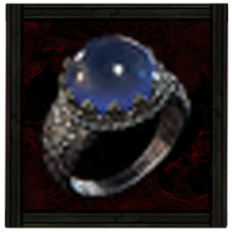 Lazuli Ring Lazuli Ring Requirements: None Implicit: ・X to Maximum Mana Modifier: ・+% Increased Rarity of Items Found ・X to Intelligence ・X% increased Lightning Damage ・X% increased Cast Speed ・Any Mana Modifier ・Any Element Resistance Ring 1 |
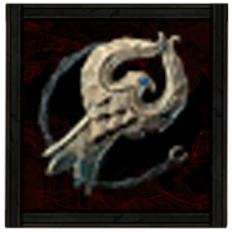
 Lunar Amulet Lunar Amulet Requirements: Level - 14 Implicit: ・X to maximum Energy Shield Modifier: ・+% Increased Rarity of Items Found ・X to Level of all Spell Skills ・X% increased Spell Damage ・X% increased Cast Speed ・Any Mana Modifier ・Any Element Resistance ・Any Energy Shield Modifier Amulet |
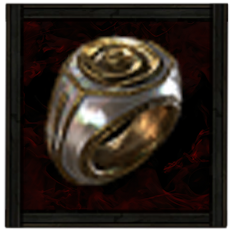 Pearl Ring Pearl Ring Requirements: Level - 32 Implicit: ・X% increased Cast Speed Modifier: ・+% Increased Rarity of Items Found ・X to Intelligence ・X% increased Lightning Damage ・X% increased Cast Speed ・Any Mana Modifier ・Any Element Resistance Ring 2 |
 Colossal Mana Flask Colossal Mana Flask Stats: Flask Type - Mana Recovered Mana - 165 Charge Per Use - 10 Total Charges - 75 Duration - 2.5 sec. Modifier: ・X% increased Recovery rate ・X% of Recovery applied Instantly Mana Flask |
|||||||||||
Weapons
During Act 1 to 3, it is recommended to equip a Wand and a Focus instead of a Staff to maximize modifiers on both weapons. Prioritize getting damage, level, and cast speed modifiers to boost Spark's damage output.
Armor
It is recommended to prioritize Increased Rarity of Items Found on equipment to increase the chances of looting better items while you are progressing through the Campaign. Movement Speed is also highly important as this builds mobility is low and it would also speed up map exploration. Elemental Resistances and Energy Shield modifiers are needed to build up survivability.
Accessories
Lazuli Ring, Pearl Ring, and Lunar Amulet increase mana, cast speed, and energy shield respectively. For its modifiers, it is still recommended to prioritize Increased Rarity of Items Found to increase the chance of better loot to prepare for the endgame. Increasing damage and mana modifiers also improve Spark's offensive output.
Runes and Soul Cores
| Equipment | Sockets |
|---|---|
| Focus and Armor | |
Equip Iron, Mind, or Inspiration Rune to increase your character's Energy Shield, Mana, or Mana Regeneration respectively as all three are important in the Spark Sorceress's survivability.
| All Runes and Soul Cores | |
|---|---|
| List of Runes | List of Soul Cores |
Charms
 Thawing Charm Thawing Charm |
・X% increased Duration
・X% increased Charges ・Recover X Life when Used |
|---|---|
 Sapphire Charm Sapphire Charm |
・X% increased Duration
・X% increased Charges ・Recover X Mana when Used |
 Grounding Charm Grounding Charm |
・X% increased Duration
・Gains X Charges per Second ・Recover X Life when Used |
It is recommended to equip a Thawing Charm and Sapphire Charm when facing Count Geonor since it negates Freezing and offers Cold Resistance from his Chill attacks.
In Act 2 and Act 3, replace Thawing Charm with a Grounding Charm as it helps negate both Jamanra, the Abomination and Doryani's Shock from their attacks. Keep Sapphire Charm as it still helps against Chill attacks from Doryani in Act 3.
Spark Sorceress Skills
※ The Support Gems' priority are arranged in a descending order. The first one being the most important and the last being the least crucial.
Act 1
Act 2
Act 3
| Skill | Support Gems |
|---|---|
| Spark Spark Launches a spray of sparking projectiles that travel erratically along the ground until they hit an enemy or expire. | Controlled Destruction Supports spells that hit enemies, boosting their damage but preventing them from dealing Critical hits. |
| Flame Wall Flame Wall Creates a wall of fire in front of the character, which ignites everything within its area. Any projectiles fired through the wall by you and allies deal added fire damage and inflict ignite on hit. | Spell Cascade Supports Spells that affect an area around you or a target location, causing those spells to also target additional areas on either side of the target area, along a randomly chosen axis. Cannot support Channelling skills or Remote skills. |
| Orb of Storms Orb of Storms Creates an Orb of electricity that fires Chaining Lightning bolts at nearby enemies. | |
| Mana Remnants Mana Remnants Conjures surging lightning to restore your Mana. While active, Shocked enemies you kill have a chance to spawn a Mana Remnant, and Critically Hitting a Shocked target spawns a Mana Remnant every few seconds. Picking up a Mana Remnant grants you Mana which can Overflow maximum Mana. |
| Skill | Support Gems |
|---|---|
| Spark Spark Launches a spray of sparking projectiles that travel erratically along the ground until they hit an enemy or expire. | Controlled Destruction Supports spells that hit enemies, boosting their damage but preventing them from dealing Critical hits. |
| Flame Wall Flame Wall Creates a wall of fire in front of the character, which ignites everything within its area. Any projectiles fired through the wall by you and allies deal added fire damage and inflict ignite on hit. | Spell Cascade Supports Spells that affect an area around you or a target location, causing those spells to also target additional areas on either side of the target area, along a randomly chosen axis. Cannot support Channelling skills or Remote skills. |
| Orb of Storms Orb of Storms Creates an Orb of electricity that fires Chaining Lightning bolts at nearby enemies. | |
| Conductivity Conductivity Curses all targets in an area after a short delay, lowering their Lightning Resistance. | Heightened Curse Supports curse skills, magnifying their power. Expanse Supports any skill that you use yourself, granting it significantly higher Area of Effect but causing it to gain a long cooldown. Cannot support skills which already have a cooldown. |
| Mana Remnants Mana Remnants Conjures surging lightning to restore your Mana. While active, Shocked enemies you kill have a chance to spawn a Mana Remnant, and Critically Hitting a Shocked target spawns a Mana Remnant every few seconds. Picking up a Mana Remnant grants you Mana which can Overflow maximum Mana. |
| Skill | Support Gems |
|---|---|
| Spark Spark Launches a spray of sparking projectiles that travel erratically along the ground until they hit an enemy or expire. | Controlled Destruction Supports spells that hit enemies, boosting their damage but preventing them from dealing Critical hits. Considered Casting Supports Spell skills that Hit Enemies, boosting Damage at the cost of Cast Speed. |
| Flame Wall Flame Wall Creates a wall of fire in front of the character, which ignites everything within its area. Any projectiles fired through the wall by you and allies deal added fire damage and inflict ignite on hit. | Spell Cascade Supports Spells that affect an area around you or a target location, causing those spells to also target additional areas on either side of the target area, along a randomly chosen axis. Cannot support Channelling skills or Remote skills. |
| Orb of Storms Orb of Storms Creates an Orb of electricity that fires Chaining Lightning bolts at nearby enemies. | Font of Mana Supports skills which create stationary objects. Objects created by supported skills generate a Font of Mana, creating an Aura which grants Mana regeneration. |
| Conductivity Conductivity Curses all targets in an area after a short delay, lowering their Lightning Resistance. | Heightened Curse Supports curse skills, magnifying their power. Expanse Supports any skill that you use yourself, granting it significantly higher Area of Effect but causing it to gain a long cooldown. Cannot support skills which already have a cooldown. |
| Lightning Warp Lightning Warp Teleports you inside the target's body, causing it to violently explode. Highlights enemies that can be culled, and can only be used on these enemies or Ball Lightning projectiles. The target is destroyed, and the explosion deals Lightning Damage to surrounding enemies and creates Shocked Ground. | Life Drain Supports any skill that Hits enemies, causing you to recover Life when it Culls an enemy |
| Mana Tempest Mana Tempest Creates a storm of arcane energies that Empowers your Mana-costing Spells while you remain inside it. Maintaining the Storm constantly drains your Mana, and each spell you cast causes it to drain faster. The storm will dissipate when you exit it or run out of mana. | Premeditation Supports skills that can Empower skills other than themselves, causing skills they Empower to deal more damage. |
| Mana Remnants Mana Remnants Conjures surging lightning to restore your Mana. While active, Shocked enemies you kill have a chance to spawn a Mana Remnant, and Critically Hitting a Shocked target spawns a Mana Remnant every few seconds. Picking up a Mana Remnant grants you Mana which can Overflow maximum Mana. | |
| Arctic Armour Arctic Armour Conjures an icy barrier that gains stages overtime. While the barrier has stages, Melee Attacks that hit you will remove a stage to cause a burst of ice that deals Cold Spell damage to the attacker. |
Spark Sorceress Passive Tree
| Passive Nodes | |||
|---|---|---|---|
| 1. |  |
2. |  |
| 3. |  |
4. | - |
The Spark Sorceress leveling build will focus on offensive passive skills to boost its damage output. During Act 1, acquire Raw Power and Path of Storms as it is a direct increase to Spark's damage. Exploit the Elements will take advantage of Shock and Ignite from Spark and Flame Wall respectively.
Act 2 and Act 3 sees an increase with cast speed from Potent Incantation and Lightning Quick along with projectile speed from Turn the Clock Forward, further enhancing Spark's DPS. It is also recommended to take the very top branch of Lightning passive nodes to improve Spark's damage.
Passive Skill Tree Guide and List of Passives
Spark Sorceress Progression
| Jump to an Act! | ||
|---|---|---|
| Act 1 | Act 2 | Act 3 |
Act 1 Progression
To progress through Act 1 and beat Count Geonor using the Spark Sorceress leveling build, follow these steps:
| # | Step by Step Guide to Act 1 Leveling |
|---|---|
| 1 | Equip
|
| 2 | Head for the Mysterious Campsite at Clearfell to get an extra Level 1
|
| 3 | Defeat
|
| 4 | Complete Treacherous Ground to get a Level 1
|
| 5 | Proceed to Grelwood and defeat
to get another Level 1 Uncut Support Gem and slot in
in Spark. Note: Make sure to loot the Witch Hut to get Medium Flasks. |
| 6 | Defeat
|
| 7 | Progress to The Grim Tangle and defeat
|
| 8 | Look for the Haunted Treasure Inside the Tomb of the Consort and defeat the rare enemy to acquire a Level 1 Uncut Support Gemand slot in
in Flame Wall.
|
| 9 | Defeat
|
| 10 | Search and complete your first Ritual in the same area to get a Level 4 Uncut Support Gem.
|
| 11 | Search and complete your first Ritual in the same area to get a Level 4 Uncut Support Gem and use this to upgrade your Fragmentation Rounds.
|
| 12 | Start looking for the Dryadic Ritual in the same area to get an extra Level 1 Uncut Support Gem.
|
| 13 | Enter Freythorn to defeat
|
| 14 | Complete The Lost Lute at the Ogham Farmlands to obtain a Book of Specialisation for more passive points.
|
| 15 | Search for the Crop Circle in the same area to defeat
and obtain a Level 4 Uncut Skill Gem.
|
| 16 | Proceed to Ogham Village and defeat
|
| 17 | Head for The Manor Ramparts and look for The Gallows to get a free Level 1 Uncut Support Gem.
|
| 18 | Search and defeat the
|
| 19 | Continue and defeat
Note: Make sure you have Medium Flasks since this boss fight has 2 Phases so you will be spending a good amount of time learning and surviving the mechanics. |
Act 2 Progression
To progress through Act 2 and beat Jamanra, the Abomination using the Spark Sorceress leveling build, follow these steps:
| # | Steps |
|---|---|
| 1 | Complete the Earning Passage quest for an
|
| 2 | Defeat
Ascendancy: You can attempt to finish the Sekhema's Trial to get your first Ascendancy Skill: ┣
┗
|
| 3 | You can exploit an exp farming hack in Halani Gates before you face
|
| 4 | Clear Mobs in Keth until you get the
|
| 5 | Defeat
|
| 6 | Defeat
in the Galleria for a random Jewel.
|
| 7 | Locate the Golden Tomb for an
|
| 8 | Open the Guarded Sarcophagus for an
|
| 9 | Three Elemental Offering Ring choices: Ruby Ring, Sapphire Ring, and Topaz Ring for flame, cold, and lightning resistance respectively. It is recommended to choose the Topaz Ring to prepare for
|
| 10 | Clear The City of Seven Waters for an Uncut Support Gem.
|
| 11 | Destroy the Effigy located in the Shrine of Bones for an Uncut Support Gem Level 1.
|
| 12 | Clear Mobs in The Bone Pits until you get the
|
| 13 | Complete A Theft of Ivory quest for an Uncut Support Gem Level 1.
|
| 14 | Place both Relics in the Valley of Titans to complete the Ancient Vows quest. It is recommended to choose the Mana Buff to sustain your Spark usage.
|
| 15 | Complete A Crown of Stone quest for an Uncut Support Gem Level 1.
|
| 16 | Complete the Tradition's Toll quest to get a
|
| 17 | Defeat the
for a
|
| 18 | You can do the same exp exploit in The Dreadnought before facing
|
Act 3 Progression
To progress through Act 3 and beat Doryani using the Spark Sorceress leveling build, follow these steps:
| # | Steps |
|---|---|
| 1 | |
| 2 |
Loot the basket found in the Orok Campfire to get a
|
| 3 |
Loot the Hanging Tree for a random Ring. |
| 4 |
Defeat the
|
| 5 |
Complete The Slithering Dead to get the
|
| 6 |
Interact with the Ravaged Corpse in the Jungle Grave to get a rare Belt. Take the Rawhide Belt for more Life Recovery Flasks. |
| 7 | |
| 8 |
Submit the Tribal Vengeance to get a charm. Choose the
for increased defenses against Poison. |
| 9 | |
| 10 |
Use the Paquate's Mechanism to Corrupt gear. We suggest corrupting the
|
| 11 |
Obtain an
|
| 12 | |
| 13 |
Interact with the Chaos Statue to get an
Ascendancy: By this time, you can complete the Trial of Chaos to get your third and fourth Ascendancy Point. ┣
┗
|
| 14 |
Use the
|
Spark Sorceress Playstyle
Skill Rotations
※ Press on what type you are fighting for a more detailed explanation on the playstyle and skill rotation.
| Type | Skill Rotation |
|---|---|
| Mobbing | Mana Tempest Creates a storm of arcane energies that Empowers your Mana-costing Spells while you remain inside it. Maintaining the Storm constantly drains your Mana, and each spell you cast causes it to drain faster. The storm will dissipate when you exit it or run out of mana.
▶
Conductivity Curses all targets in an area after a short delay, lowering their Lightning Resistance.
▶
Orb of Storms Creates an Orb of electricity that fires Chaining Lightning bolts at nearby enemies.
▶
Flame Wall Creates a wall of fire in front of the character, which ignites everything within its area. Any projectiles fired through the wall by you and allies deal added fire damage and inflict ignite on hit.
▶
Spark Launches a spray of sparking projectiles that travel erratically along the ground until they hit an enemy or expire.
▶
Lightning Warp Teleports you inside the target's body, causing it to violently explode. Highlights enemies that can be culled, and can only be used on these enemies or Ball Lightning projectiles. The target is destroyed, and the explosion deals Lightning Damage to surrounding enemies and creates Shocked Ground.
|
| Bossing | Mana Tempest Creates a storm of arcane energies that Empowers your Mana-costing Spells while you remain inside it. Maintaining the Storm constantly drains your Mana, and each spell you cast causes it to drain faster. The storm will dissipate when you exit it or run out of mana.
▶
Conductivity Curses all targets in an area after a short delay, lowering their Lightning Resistance.
▶
Orb of Storms Creates an Orb of electricity that fires Chaining Lightning bolts at nearby enemies.
▶
Flame Wall Creates a wall of fire in front of the character, which ignites everything within its area. Any projectiles fired through the wall by you and allies deal added fire damage and inflict ignite on hit.
▶
Spark Launches a spray of sparking projectiles that travel erratically along the ground until they hit an enemy or expire.
|
Mobbing
Spark will be your main skill to use in clearing mobs. Enhance its damage by combining it with other Elemental skills such as Mana Tempest and Flame Wall. Lightning Warp will mostly be used as a way to cull enemies and avoid being surrounded. The rotation is as follows:
- Deploy a Mana Tempest zone.
- Use Conductivity to debuff enemies.
- Deploy an Orb of Storms to deal damage and sustain your mana.
- Use Flame Wall as often as possible to enchance Spark's damage output.
- Spam Spark.
- Use Lightning Warp to teleport around and instantly kill enemies once they are below HP threshold.
Bossing
The skill rotation is simply the same with mobbing minus the usage of Lightning Warp since you are mostly targeting the Boss.
- Deploy a Mana Tempest zone.
- Use Conductivity to debuff enemies.
- Use Orb of Storms for bosses to increase Shock buildup and deal constant damage. Stay near it to sustain mana.
- Use Flame Wall as often as possible to enchance Spark's damage output.
- Spam Spark.
Spark Sorceress Recommended Builds
After completing Act 3, these are the recommended build options that will allow you to progress through the Cruel Mode and clear the Endgame pinnacle content:
Cold Comet Chronomancer
The Cold Comet Chronomancer build is when you want the Sorceress to fully control the tides of war with time-stopping spells and relentless frost. This Ascendancy build fully hones in on Crowd Control and ending an opponent's life before they begin to fathom the damage they took.
Spark Stormweaver
Spark Launches a spray of sparking projectiles that travel erratically along the ground until they hit an enemy or expire.
Flame Wall Creates a wall of fire in front of the character, which ignites everything within its area. Any projectiles fired through the wall by you and allies deal added fire damage and inflict ignite on hit.
Orb of Storms Creates an Orb of electricity that fires Chaining Lightning bolts at nearby enemies.
Conductivity Curses all targets in an area after a short delay, lowering their Lightning Resistance.
Lightning Warp Teleports you inside the target's body, causing it to violently explode. Highlights enemies that can be culled, and can only be used on these enemies or Ball Lightning projectiles. The target is destroyed, and the explosion deals Lightning Damage to surrounding enemies and creates Shocked Ground.
Mana Remnants Conjures surging lightning to restore your Mana. While active, Shocked enemies you kill have a chance to spawn a Mana Remnant, and Critically Hitting a Shocked target spawns a Mana Remnant every few seconds. Picking up a Mana Remnant grants you Mana which can Overflow maximum Mana.
Archmage While Active, causes your Non-Channelling Spells to cost additional mana and deal extra lightning damage, both based on your maximum mana.
Focus: Mobbing, AoE, Lightning, Fast Clear |
The Spark Stormweaver build is the optimized version of the Spark Sorceress leveling build. This Ascendancy build further enhances Spark's damage and fully takes advantage of its scaling by supporting it with the Archmage Spirit Gem.
Path of Exile 2 (PoE 2) Related Guides

0.4 Best Endgame Builds
| Rank | Build |
|---|---|
 |
|
 |
|
 |
|
 |
0.4 Leveling Builds
All Build Guides
| List of Builds by Class | |||||||||||
|---|---|---|---|---|---|---|---|---|---|---|---|
 Huntress Huntress |
 Mercenary Mercenary |
 Monk Monk |
|||||||||
 Witch Witch |
 Sorceress Sorceress |
 Warrior Warrior |
|||||||||
 Ranger Ranger |
 Druid Druid |
- | |||||||||
| Other Build Guides | 0.3 Leveling Builds | How to Make a Good Build | |||||||||
Sorceress Leveling Builds
Arctic Armour Conjures an icy barrier that gains stages overtime. While the barrier has stages, Melee Attacks that hit you will remove a stage to cause a burst of ice that deals Cold Spell damage to the attacker.
Spark Launches a spray of sparking projectiles that travel erratically along the ground until they hit an enemy or expire.
Flame Wall Creates a wall of fire in front of the character, which ignites everything within its area. Any projectiles fired through the wall by you and allies deal added fire damage and inflict ignite on hit.
Orb of Storms Creates an Orb of electricity that fires Chaining Lightning bolts at nearby enemies.
Conductivity Curses all targets in an area after a short delay, lowering their Lightning Resistance.
Mana Tempest Creates a storm of arcane energies that Empowers your Mana-costing Spells while you remain inside it. Maintaining the Storm constantly drains your Mana, and each spell you cast causes it to drain faster. The storm will dissipate when you exit it or run out of mana.
Lightning Warp Teleports you inside the target's body, causing it to violently explode. Highlights enemies that can be culled, and can only be used on these enemies or Ball Lightning projectiles. The target is destroyed, and the explosion deals Lightning Damage to surrounding enemies and creates Shocked Ground.
Mana Remnants Conjures surging lightning to restore your Mana. While active, Shocked enemies you kill have a chance to spawn a Mana Remnant, and Critically Hitting a Shocked target spawns a Mana Remnant every few seconds. Picking up a Mana Remnant grants you Mana which can Overflow maximum Mana.
Focus: Mobbing, AoE, Lightning, Fast Clear |
|
UP |
Flame Wall Creates a wall of fire in front of the character, which ignites everything within its area. Any projectiles fired through the wall by you and allies deal added fire damage and inflict ignite on hit.
Snap Shatters the frost on a Frozen enemy, Consuming the freese to deal a large amount of Cold Damage to enemies caught in the blast. Can also be cast on a Frostbolt to cause it to explode immediately. Any Frozen enemies hit by the Frostbolt's explosion will be dealt Cold Snap's damage and have their freeze consumed.
Fireball Launches a large ball of Fire which explodes on impact, creating a nova of smaller firebolts.
Raging Spirits While active, your Fire Spells will also summon Raging Spirits, which are short-lived flaming skulls that rush at nearby enemies and rapidly Attack them. Enemies will not directly engage these Minions, and can pass through them.
Living Bomb
Focus: AoE, Mobbing |
Sorceress Endgame Builds
Flame Wall Creates a wall of fire in front of the character, which ignites everything within its area. Any projectiles fired through the wall by you and allies deal added fire damage and inflict ignite on hit.
Solar Orb Creates a fiery Orb that periodically releases fiery pulses. Enemies that are very close to the Orb are Ignited.
Flammability Curses all targets in an area after a short delay, lowering their Fire Resistance.
Fireball Launches a large ball of Fire which explodes on impact, creating a nova of smaller firebolts.
Focus: DoT, Mobbing |
|
Frost Bomb Creates a pulsing Orb of Frost. Each pulse inflicts Cold Exposure on nearby Enemies. When the Orb's duration ends, it explodes, dealing Cold damage to surrounding Enemies.
Frostbolt Fires a slow-moving projectile that leaves a wake of Chilled Ground, deals Cold Damage and explodes on colliding with terrain.
Hypothermia Curses all targets in an area after a short delay, lowering their Cold Resistance.
Frost Wall Creates a Wall of Ice Crystals which holds back enemies. The Crystals explode if sufficiently damaged, orif pushed hard enough, damaging nearby enemies..
Lightning Warp Teleports you inside the target's body, causing it to violently explode. Highlights enemies that can be culled, and can only be used on these enemies or Ball Lightning projectiles. The target is destroyed, and the explosion deals Lightning Damage to surrounding enemies and creates Shocked Ground.
Comet Calls down a mass of ice from the sky, dealing high damage at the targeted location. Targeting close to you will cause you to jump back as you cast.
Cast on Freeze While active, gains Energy when you Freeze enemies and triggers socketed spells on reaching maximum Energy.
Blink Replaces your dodge roll with a short-cooldown Spell that allows you to tunnel through space, instantly reappearing a medium distance away.
Focus: Burst Damage, Crowd Control |
|
Spark Launches a spray of sparking projectiles that travel erratically along the ground until they hit an enemy or expire.
Flame Wall Creates a wall of fire in front of the character, which ignites everything within its area. Any projectiles fired through the wall by you and allies deal added fire damage and inflict ignite on hit.
Orb of Storms Creates an Orb of electricity that fires Chaining Lightning bolts at nearby enemies.
Conductivity Curses all targets in an area after a short delay, lowering their Lightning Resistance.
Lightning Warp Teleports you inside the target's body, causing it to violently explode. Highlights enemies that can be culled, and can only be used on these enemies or Ball Lightning projectiles. The target is destroyed, and the explosion deals Lightning Damage to surrounding enemies and creates Shocked Ground.
Mana Remnants Conjures surging lightning to restore your Mana. While active, Shocked enemies you kill have a chance to spawn a Mana Remnant, and Critically Hitting a Shocked target spawns a Mana Remnant every few seconds. Picking up a Mana Remnant grants you Mana which can Overflow maximum Mana.
Archmage While Active, causes your Non-Channelling Spells to cost additional mana and deal extra lightning damage, both based on your maximum mana.
Focus: Mobbing, AoE, Lightning, Fast Clear |
|
UP |
Arctic Armour Conjures an icy barrier that gains stages overtime. While the barrier has stages, Melee Attacks that hit you will remove a stage to cause a burst of ice that deals Cold Spell damage to the attacker.
Frost Bomb Creates a pulsing Orb of Frost. Each pulse inflicts Cold Exposure on nearby Enemies. When the Orb's duration ends, it explodes, dealing Cold damage to surrounding Enemies.
Flame Wall Creates a wall of fire in front of the character, which ignites everything within its area. Any projectiles fired through the wall by you and allies deal added fire damage and inflict ignite on hit.
Ice Nova A nova of ice expands from you, Knocking Back enemies based on how close they are to you. Casting Ice Nova targeting near a Frostbolt Projectile will cause it to originate from the Frostbolt insead of you, and cause more Freeze buildup.
Orb of Storms Creates an Orb of electricity that fires Chaining Lightning bolts at nearby enemies.
Snap Shatters the frost on a Frozen enemy, Consuming the freese to deal a large amount of Cold Damage to enemies caught in the blast. Can also be cast on a Frostbolt to cause it to explode immediately. Any Frozen enemies hit by the Frostbolt's explosion will be dealt Cold Snap's damage and have their freeze consumed.
Siphon Elements While active, has a chance to create an Infusion Remnant when you Freeze, Shock, or Ignite a target.
Frost Darts Conjures a number of Icy Projectiles that launch towards a target. Projectiles that Hit a Chilled or Frozen target create chunks of ice that deal additional damage on impacting the ground. Consumes a Cold Infusion if possible to cause each Projectile to lodge into the enemy then explode.
Elemental Weakness Curse all targets in an area after a short delay, lowering their Elemental Resistances.
Focus: Crowd Control, Burst Damage, Cold |
Sorceress Class and Ascendancy Guides
| Base Class | |
|---|---|
| Ascendancies | |
Comment
Author

PoE 2 0.2.0 Spark Sorceress Leveling Build
Please participate in our site
improvement survey
03/2026
improvement survey
03/2026
Would you assist in
improving Game8's site?
improving Game8's site?

×
We are listening to our users' valuable opinions and discussing how to act on them.
The information collected through this survey will be used for the purpose of improving our services. In addition, the information will only be disclosed a part of a statistic in a format that will not allow identification of personal information.
Begin Survey
Not Now
×
Please rate each item regarding Game8.co's Advertisements.
Amount of Ads
Very Dissatisfied
Somewhat Dissatisfied
Fine
Somewhat Satisfied
Highly Satisfied
Placement of Ads
Timing of Ad Display
Ad Loading Speed
Safeness of Ads
Content of Ads
×
Please rate each item regarding Game8.co's Quality of Articles.
Amount of information
Very Dissatisfied
Somewhat Dissatisfied
Fine
Somewhat Satisfied
Highly Satisfied
Frequency of updates
Speed of new information
Accuracy of articles
Understandibility of articles
Readability of sentences
×
Please rate each item regarding Game8.co's Usability of the Site.
Ease of finding information
Very Dissatisfied
Somewhat Dissatisfied
Fine
Somewhat Satisfied
Highly Satisfied
Loading Speed
Use of Color
Font Size
Visibility of Images
Easy to Understand Layout
×
Please rate each item regarding Game8.co's Message Boards, Comments.
Ease of Writing
Very Dissatisfied
Somewhat Dissatisfied
Fine
Somewhat Satisfied
Highly Satisfied
Readability
Ease in Finding Information
Comment Quality
Comment Quantity
Admin Response
×
Please rate each item regarding Game8.co's Site's new design.
Please rate our site's new design
Very Dissatisfied
Somewhat Dissatisfied
Fine
Somewhat Satisfied
Highly Satisfied
Do you think that the website's design change makes the site easier to use?
Has the new design made it easier for you to find information on the site?
Has the new design improved the overall visual appeal of the site?
How would you rate your overall satisfaction with the new design of the site?
×
How likely are you to recommend Game8 to someone you know?
Very Unlikely
0
1
2
3
4
5
6
7
8
9
10
Very Likely
If you have other opinions regarding potential improvement to the website, please share them with us. We would appreciate your honest opinion.
Note: This is a free response section, so you can proceed without entering anything.
Note: Please be sure not to enter any kind of personal information into your response.
Note: Please be sure not to enter any kind of personal information into your response.
×
Thank You
×
Thank you for participating in our survey! Your answers will help us to improve the quality of our website and services.
We hope you continue to make use of Game8.
We hope you continue to make use of Game8.
Close
Rankings
- We could not find the message board you were looking for.

Gaming News


![Monster Hunter Stories 3 Review [First Impressions] | Simply Rejuvenating](https://img.game8.co/4438641/2a31b7702bd70e78ec8efd24661dacda.jpeg/thumb)
Popular Games

Genshin Impact Walkthrough & Guides Wiki
Honkai: Star Rail Walkthrough & Guides Wiki
Umamusume: Pretty Derby Walkthrough & Guides Wiki
Pokemon Pokopia Walkthrough & Guides Wiki
Resident Evil Requiem (RE9) Walkthrough & Guides Wiki
Monster Hunter Wilds Walkthrough & Guides Wiki
Wuthering Waves Walkthrough & Guides Wiki
Arknights: Endfield Walkthrough & Guides Wiki
Pokemon FireRed and LeafGreen (FRLG) Walkthrough & Guides Wiki
Pokemon TCG Pocket (PTCGP) Strategies & Guides Wiki


Recommended Games
Diablo 4: Vessel of Hatred Walkthrough & Guides Wiki
Cyberpunk 2077: Ultimate Edition Walkthrough & Guides Wiki
Fire Emblem Heroes (FEH) Walkthrough & Guides Wiki
Yu-Gi-Oh! Master Duel Walkthrough & Guides Wiki
Super Smash Bros. Ultimate Walkthrough & Guides Wiki
Pokemon Brilliant Diamond and Shining Pearl (BDSP) Walkthrough & Guides Wiki
Elden Ring Shadow of the Erdtree Walkthrough & Guides Wiki
Monster Hunter World Walkthrough & Guides Wiki
The Legend of Zelda: Tears of the Kingdom Walkthrough & Guides Wiki
Persona 3 Reload Walkthrough & Guides Wiki


All rights reserved
© 2010 - 2024 Grinding Gear Games
The copyrights of videos of games used in our content and other intellectual property rights belong to the provider of the game.
The contents we provide on this site were created personally by members of the Game8 editorial department.
We refuse the right to reuse or repost content taken without our permission such as data or images to other sites.