This survey will take about 1 minute.
Your answers will help us to improve our website.
Path of Exile 2 (PoE 2)
Totem Explained
Latest: 0.5.0 Release Date
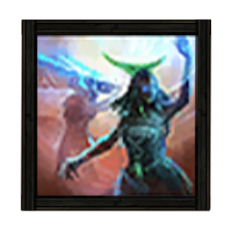
☆ Fate of the Vaal ▶︎ The Last of the Druids
┗ Bonded Mods | 0.4 Mystery Box
★ Druid: Class Overview | Builds
☆ NEW: Disciple of Varashta Ascendancy!
★ Best Class | Best Builds | Leveling Builds
Totem is a Skill Tag in Path of Exile 2 (PoE 2). Read on to learn what skills and gems that have the Totem tag, the Modifiers, Uniques, and what Totem is!
List of Contents
What is Totem?
Totem In-Game Description
Totems are allied constructs which uses skills for you. Totems are not minions and their skills benefit from your stats, though they have their own defensive stats and can be damaged or killed.
Totem Limit is shared between different types of Totem by default.
Totem Modifiers
All Modifiers with Totem
|
• X% increased Totem Placement speed • X% increased Totem Life • X% increased Totem Damage |
Totem Skills
Totem in Ascendancy Skills
| Skill | Effect |
|---|---|
 Ancestral Spirits Ancestral Spirits |
Each of your Totems will summon an Ancestral Spirit Minion to fight for you. If the Totem that summoned the Minion dies then the Ancestral Spirit will too. |
 Wooden Wall Wooden Wall |
20% of Damage from Hits is taken from your nearest Totem's Life before you/ |
| Totem Life |
20% increased Totem Life |
| Answered Call |
Grants Skill: Ancestral Spirits;+1 to maximum number of Summoned Totems;Trigger Ancestral Spirits when you Summon a Totem |
| Totem Damage |
20% increased Totem Damage |
| Cannons, Ready! |
+1 to maximum number of Summoned Totems;Skills used by Totems have 30% more Skill Speed;Totems only use Skills when you fire an Attack Projectile |
| Strategic Embankments |
Totems you place grant Embankment Auras |
Totem in Passives
| Skill | Effect |
|---|---|
 Ancestral Bond Ancestral Bond |
・Unlimited number of Summoned Totems ・Totems reserve 75 Spirit each |
 Watchtowers Watchtowers |
・Recoup 5% of damage taken by your Totems as Life ・Each Totem applies 2% Increased Damage taken to Enemies in their Presence |
 Ancestral Reach Ancestral Reach |
・25% increased Totem Placement Speed ・50% increased Totem Placement Range |
| Supportive Ancestors |
・25% increased Damage while you have a Totem ・Spells Cast by Totems have 3% increased Cast Speed per Summoned Totem ・Attacks used by Totems have 3% increased Attack Speed per Summoned Totem |
| Ancestral Conduits |
・12% increased Attack and Cast Speed if you've summoned a Totem Recently |
 Carved Earth Carved Earth |
・20% increased Totem Damage ・6% increased Attack and Cast Speed if you've summoned a Totem Recently |
 Hardened Wood Hardened Wood |
・Totems gain +20% to all Elemental Resistances ・Totems have 20% additional Physical Damage Reduction |
 Ancestral Alacrity Ancestral Alacrity |
・30% increased Totam Placement speed ・8% increased Attack and Cast Sped if you've summoned a Totem Recently |
 Ancestral Mending Ancestral Mending |
・Regenerate 1% of Life per second while you have a Totem ・Totems Regenerate 3% of Life per second |
 Ancestral Artifice Ancestral Artifice |
・Attack Skills have +1 to maximum number of Summoned Totems ・20% increased Totem Placement range |
 Ancestral Unity Ancestral Unity |
・Totems have 4% increased Attack Speed per Summoned Totem |
| Totem Life | ・X% increased Totem Life |
| Totem Cast Speed | ・Spell Cast by Totems have X% increased Cast Speed |
| Totem Damage | ・X% increased Totem Damage |
| Totem Placement Speed | ・X% increased Totem Placement speed |
| Totem Elemental Resistance | ・Totems gain +X% to all Elemental Resistances |
| Totem Physical Damage Reduction | ・Totems have additional X% Physical Damage Reduction |
Passive Skill Tree Guide and List of Passives
Totem Gems
All Totem Skill Gems
| Gem | Effects |
|---|---|
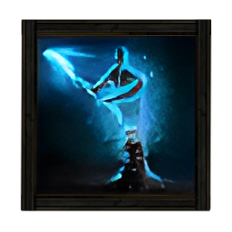 Ancestral Warrior Totem Ancestral Warrior Totem
|
・Totem duration is 8 seconds ・Limit 1 Totem ・Totem base attack time is 1 second ・Totem Base Critical Hit Chance is 5% ・Totem uses its own Two Handed Mace, dealing 87-130 base Physical Damage |
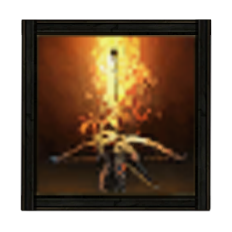 Artillery Ballista Artillery Ballista
|
Ballista: ・+16 sec. to Totem Duration ・ Limit 1 Totem ・ Totem Base Attack Time is 2.5 sec. ・Totem Base Critical Hit chance is 5% ・Totem uses its own weapon, dealing 54 to 81 Nase Physical Damage Artillery: ・Converts 60% of Physical damage to Fire damage ・Fires 3 Projectiles ・Bolt explosion radius is 0.5 metres. |
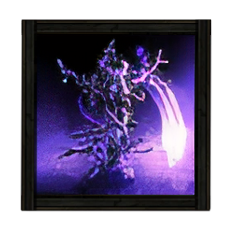 Dark Effigy Dark Effigy
|
Dark Effigy: ・+8 seconds to Totem Duration ・Limit 1 Totem Vile Effusion: ・Deals 15 to 28 Chaos Damage ・Impact Radius is 1.2 metres |
 Ripwire Ballista Ripwire Ballista
|
Ballista: ・Totem duration is 16 seconds ・Limit 1 Totem ・Totem base Attack Time is 1.6 seconds ・Totem uses its own weapon dealing 24 to 36 Base Physical Damage Bolts: ・Hits are Pinning ・Pins enemies as though dealing 600% more damage,Fires 5 Projectiles,Maim on hit |
 Shockwave Totem Shockwave Totem
|
Totem: ・Totem duration is 12s ・Limit of 1 Totem ・Totem Base Attack Time is 3s ・Totem uses its own weapon dealing 10 to 16 base Physical Damage Slam: ・Shockwave radius is 3 metres |
 Spell Totem Spell Totem
|
・Totem Duration Is 8 Seconds ・ Limit 1 Totem ・ Socketed Skills Deal 10% More ・ Damage per Power Charge Consumed ・ 20% More Totem Life per Endurance Charge Consumed ・ 20% More Totem Duration per Endurance Charge Consumed ・ Socketed Skills Deal 13% Less Damage ・ Socketed Skills Have 25% Less Cast Speed |
All Totem Support Gems
| Gem | Effects |
|---|---|
 Font of Blood Font of Blood
|
・Fonts of Blood from supported skills grant 2% Life Regeneration per second to you and your allies ・Objects created by supported skills create a Font of Blood with a 3 metre radius |
 Font of Mana Font of Mana
|
・Fonts of Mana supported skills grant 40% increased mana Regeneration Rate to you and your allies ・Objects created by Supported Skills Create a Font of Mana with a 3 metre radius |
 Font of Rage Font of Rage
|
・Objects created by Supported Skills create a Font of Rage with a 3 Metre Radius ・Fonts of Rage from Supported Skills grant 2 Rage Regeneration per second to you and your allies |
 Greatwood II Greatwood II
|
・Supported Skills can only have one active Totem ・Totem Limit instead grants 5% increased Area of Effect for Totems per Limit to Supported Skills, up to 20% ・Totem Limit instead grants 15% more Totem Damage per Limit to Supported Skills, up to 60% ・Totem Limit instead grants 15% more Totem Life per limit to Supported Skills, up to 60%. |
 Hardy Totems I Hardy Totems I
|
・Totems created by Supported Skills have 40% more Maximum Life. |
|
Hardy Totems II
|
・Totems created by Supported Skills have 50% more Maximum Life. |
 Reinforced Totems I Reinforced Totems I
|
・Totems summoned by supported skills have +40% to all Elemental Resistances. |
|
Reinforced Totems II
|
・Totems Summoned by Supported Skills have +10% to all Maximum Elemental Resistances ・Totems Summoned by Supported Skills have +40% to All Elemental Resistances. |
 Splinter Totem I Splinter Totem I
|
Support: ・Supported skills can only have one active totem ・ Totems created by supported skills can splinter up to 2 times ・ Totems created by supported skills have 20% less Area of effect, deal 20% less damage, have 20% less maximum life, and have 10% less skill speed for each time they have splintered ・ Totems created by supported skills splinter after performing 1 action |
|
Splinter Totem II
|
Support: ・Supported skills can only have one active totem ・ Totems created by supported skills can splinter up to 2 times ・ Totems created by supported skills have 15% less Area of effect, deal 15% less damage, have 15% less maximum life, and have 7% less skill speed for each time they have splintered ・ Totems created by supported skills splinter after performing 1 action |
 Urgent Totems I Urgent Totems I
|
・Supported skills have 80% increased Totem placement speed |
|
Urgent Totems II
|
・Supported Skills have 100% increased Totem Placement speed. |
|
Urgent Totems III
|
・Spells cast by Totems created by Supported Skills have 20% increased Cast Speed ・Attacks used by Totems created by Supported Skills have 20% increased Attack Speed ・Supported Skills have 100% increased Totem Placement speed. |
Path of Exile 2 Related Guides

Glossary and Basic Game Mechanics
All Glossary Guides
Comment
Author

Totem Explained
Please participate in our site
improvement survey
04/2026
improvement survey
04/2026
Would you assist in
improving Game8's site?
improving Game8's site?

×
We are listening to our users' valuable opinions and discussing how to act on them.
The information collected through this survey will be used for the purpose of improving our services. In addition, the information will only be disclosed a part of a statistic in a format that will not allow identification of personal information.
Begin Survey
Not Now
×
Please rate each item regarding Game8.co's Advertisements.
Amount of Ads
Very Dissatisfied
Somewhat Dissatisfied
Fine
Somewhat Satisfied
Highly Satisfied
Placement of Ads
Timing of Ad Display
Ad Loading Speed
Safeness of Ads
Content of Ads
×
Please rate each item regarding Game8.co's Quality of Articles.
Amount of information
Very Dissatisfied
Somewhat Dissatisfied
Fine
Somewhat Satisfied
Highly Satisfied
Frequency of updates
Speed of new information
Accuracy of articles
Understandibility of articles
Readability of sentences
×
Please rate each item regarding Game8.co's Usability of the Site.
Ease of finding information
Very Dissatisfied
Somewhat Dissatisfied
Fine
Somewhat Satisfied
Highly Satisfied
Loading Speed
Use of Color
Font Size
Visibility of Images
Easy to Understand Layout
×
Please rate each item regarding Game8.co's Message Boards, Comments.
Ease of Writing
Very Dissatisfied
Somewhat Dissatisfied
Fine
Somewhat Satisfied
Highly Satisfied
Readability
Ease in Finding Information
Comment Quality
Comment Quantity
Admin Response
×
Please rate each item regarding Game8.co's Site's new design.
Please rate our site's new design
Very Dissatisfied
Somewhat Dissatisfied
Fine
Somewhat Satisfied
Highly Satisfied
Do you think that the website's design change makes the site easier to use?
Has the new design made it easier for you to find information on the site?
Has the new design improved the overall visual appeal of the site?
How would you rate your overall satisfaction with the new design of the site?
×
How likely are you to recommend Game8 to someone you know?
Very Unlikely
0
1
2
3
4
5
6
7
8
9
10
Very Likely
If you have other opinions regarding potential improvement to the website, please share them with us. We would appreciate your honest opinion.
Note: This is a free response section, so you can proceed without entering anything.
Note: Please be sure not to enter any kind of personal information into your response.
Note: Please be sure not to enter any kind of personal information into your response.
×
Thank You
×
Thank you for participating in our survey! Your answers will help us to improve the quality of our website and services.
We hope you continue to make use of Game8.
We hope you continue to make use of Game8.
Close
Rankings
- We could not find the message board you were looking for.

Gaming News


![Forza Horizon 6 Review [Preview] | Beautiful Roads With a Whole Lot of Oversteer](https://img.game8.co/4460981/a7254c24945c43fbdf6ad9bea52b5ce9.png/thumb)
![Borderlands Mobile Review [Playtest] | The Same Borderlands Made Easy](https://img.game8.co/4465500/aac0c880a39ec5cd46073e49d18f3ed5.png/thumb)
Popular Games

Genshin Impact Walkthrough & Guides Wiki
Crimson Desert Walkthrough & Guides Wiki
Umamusume: Pretty Derby Walkthrough & Guides Wiki
Honkai: Star Rail Walkthrough & Guides Wiki
Monster Hunter Stories 3: Twisted Reflection Walkthrough & Guides Wiki
Wuthering Waves Walkthrough & Guides Wiki
The Seven Deadly Sins: Origin Walkthrough & Guides Wiki
Pokemon TCG Pocket (PTCGP) Strategies & Guides Wiki
Pokemon Pokopia Walkthrough & Guides Wiki
Zenless Zone Zero Walkthrough & Guides Wiki


Recommended Games
Fire Emblem Heroes (FEH) Walkthrough & Guides Wiki
Pokemon Brilliant Diamond and Shining Pearl (BDSP) Walkthrough & Guides Wiki
Super Smash Bros. Ultimate Walkthrough & Guides Wiki
Diablo 4: Vessel of Hatred Walkthrough & Guides Wiki
Cyberpunk 2077: Ultimate Edition Walkthrough & Guides Wiki
Yu-Gi-Oh! Master Duel Walkthrough & Guides Wiki
Elden Ring Shadow of the Erdtree Walkthrough & Guides Wiki
Monster Hunter World Walkthrough & Guides Wiki
The Legend of Zelda: Tears of the Kingdom Walkthrough & Guides Wiki
Persona 3 Reload Walkthrough & Guides Wiki


All rights reserved
© 2010 - 2024 Grinding Gear Games
The copyrights of videos of games used in our content and other intellectual property rights belong to the provider of the game.
The contents we provide on this site were created personally by members of the Game8 editorial department.
We refuse the right to reuse or repost content taken without our permission such as data or images to other sites.