Melee Explained
Latest: 0.5.0 Release Date
☆ Fate of the Vaal ▶︎ The Last of the Druids
┗ Bonded Mods | 0.4 Mystery Box
★ Druid: Class Overview | Builds
☆ NEW: Disciple of Varashta Ascendancy!
★ Best Class | Best Builds | Leveling Builds
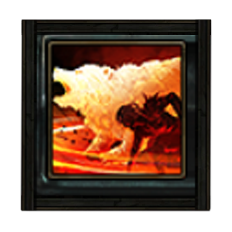
Melee is a Skill Tag in Path of Exile 2 (PoE 2). Read on to learn what skills and gems that have the Melee tag, the modifiers, Uniques, and what Melee is!
List of Contents
What is Melee?
Melee In-Game Description
An attack or an attack range that requires a character to be up close to deal damage.
Melee Uniques
Unique Gear with Melee
| Name | Implicit and Modifiers |
|---|---|
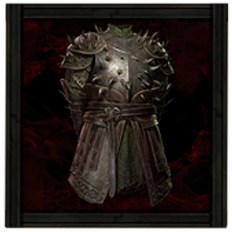 Bramblejack Rusted Cuirass Bramblejack Rusted Cuirass Body Armour |
Fixed Modifiers:
・+60-100 to maximum Life ・+60-100 to Stun Threshold ・250% of Melee Physical Damage taken and reflected the attacker ・Cannot Evade Enemy Attacks ・Regenerate 5% of Life per second while Surrounded |
 Jarngreipr Ringmail Gauntlets Jarngreipr Ringmail Gauntlets Gloves |
Fixed Modifiers:
・Adds 2-3 to 5-6 Physical Damage to Attacks ・+30-50 to maximum Life ・4-8% increased Attack Speed ・Strength can satisfy other Attribute Requirements of Melee Weapons and Melee Skills ・50% increased Armour and Evasion |
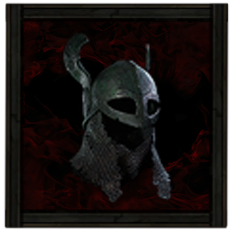 Wings of Caelyn Rusted Greathelm Wings of Caelyn Rusted Greathelm Helmet |
Fixed Modifiers:
・+20% increased Rarity of Items found ・+30 to Dexterity ・Gain 1 Rage on Melee Hit ・Every Rage also grants 1% increased Stun Threshold ・+20 to Armour |
 Horns of Bynden Rusted Greathelm Horns of Bynden Rusted Greathelm Helmet |
Fixed Modifiers:
・5-15% increased Rarity of Items found ・+20-30 to Strength ・Gain 1 Rage on Melee Hit ・Every Rage also grants 1% increased Armour ・+20 to Armour |
Melee Modifiers
All Modifiers with Melee
|
• X to Level of all Melee Skills • X% increased Melee Damage • Gain X Rage on Melee Hit • X% of Melee Physical Damage taken reflected to Attacker |
Melee Skills
Melee in Passives
| Skill | Effect |
|---|---|
 Heavy Weaponry Heavy Weaponry |
・15% increased Melee Damage ・15% increased Stun Buildup with Melee Damage ・+15 to Strength |
 Unerring Impact Unerring Impact |
・16% increased Accuracy Rating with One Handed Melee Weapons ・16% increased Accuracy Rating with Two Handed Melee Weapons ・+2 to Melee Strike Range |
 Afterimage Afterimage |
・60% Increased Evasion Rating if you have Hit an Enemy Recently |
 Deadly Flourish Deadly Flourish |
・20% increased Melee Critical Hit Chance |
 Initiative Initiative |
・30% increased Melee Damage when on Full Life ・16% increased Attack Speed if you haven't Attacked Recently |
 Push the Advantage Push the Advantage |
・40% increased Critical Damage Bonus with One Handed Melee Weapons |
 Reaching Strike Reaching Strike |
・25% increased Melee Damage ・+2 to Melee Strike Range |
 Rapid Strike Rapid Strike |
・+30 to Accuracy Rating ・8% increased Melee Attack Speed |
 Versatile Arms Versatile Arms |
・6% increased Attack Speed with One Handed Melee Weapons ・15% increased Accuracy Rating with One Handed Melee Weapons ・+10 to Strength and Dexterity |
 Viciousness Viciousness |
・8% increased Melee Attack Speed ・+10 to Dexterity |
| Personal Touch |
・20% increased Melee Damage ・25% Melee Damage against Immobilised Enemies |
| In Your Face |
・40% increased Melee damage with Hits at Close Range |
 Spellblade Spellblade |
・32% increased Spell Damage while wielding a Melee Weapon ・+10 to Dexterity |
 Brutal Brutal |
・10% increased Stun Buildup ・16% increased Melee Damage ・+10 to Strength |
 Smash Smash |
・20% increased Melee Damage ・40% increased Damage against Heavy Stunned enemies |
 Shockwaves Shockwaves |
・25% increased Area of Efefct if you've Stunned an Enemy with a Two Handed Melee Weapon Recently |
 Honourless Honourless |
・25% increased Armour if you've Hit an Enemy with a Melee Attack Recently ・50% increased Melee Damage against Immobilised Enemies |
| Melee Damage |
・X% increased Melee Damage ・X% increased Melee Damage with Hits at Close Range ・8% Increased Accuracy Rating with One Handed Melee Weapons ・X% Increased Accuracy Rating with Two Handed Melee Weapons |
| Melee Attack Speed | ・X% increased Melee Attack Speed |
| Rage on Hit | ・Gain X Rage on Melee Hit |
| Axe Rage on Hit | ・Gain X Rage on Melee Axe Hit |
| Melee Critical Chance | ・X% increased Melee Critical Chance |
| One Handed Attack Speed | ・X% increased Attack Speed with One Handed Melee Weapons |
| One Handed Accuracy | ・X% increased Accuracy Rating with One Handed Melee Weapons |
Passive Skill Tree Guide and List of Passives
Melee in Equipment Skills
| Skill | Details |
|---|---|
 Mace Strike Mace Strike
|
Effects: None Equipment: • Wooden Club • Oak Greathammer • Smithing Hammer • Slim Mace • Forge Maul • Studded Greatclub • Spiked Club |
 Quarterstaff Strike Quarterstaff Strike
|
Effects: None Equipment: • Wrapped Quarterstaff • Long Quarterstaff • Gothic Quarterstaff • Crescent Quarterstaff |
Melee Gems
All Melee Skill Gems
| Gem | Effects |
|---|---|
 Ancestral Cry Ancestral Cry
|
Warcry: ・Requires 100 Glory to Use ・Generates 100% of Monster Power as Glory for this Skill on Igniting an Enemy ・Warcry radius is 4 metres ・Warcry duration is 8 seconds ・Knocks back and interrupts enemies in a smaller area ・Consumed all Endurance Charges to increase Warcry Duration by 50% per Charge ・Converts 100% of Physical Damage to Fire Damage with Boosted Attacks. Volcanic Steps: ・Attack Damage: 149% ・Slam Radius is 1.2 metres ・Converts 100% of Physical Damage to Fire Damage. Volcanic Eruption: ・Cooldown Time: 0.40s ・Attack Damage: 82% ・Converts 100% of Physical Damage to Fire Damage ・Impact radius is 0.8 metres ・Fires 3 Molten Projectiles. |
 Ancestral Warrior Totem Ancestral Warrior Totem
|
・Totem duration is 8 seconds ・Limit 1 Totem ・Totem base attack time is 1 second ・Totem Base Critical Hit Chance is 5% ・Totem uses its own Two Handed Mace, dealing 87-130 base Physical Damage |
 Armour Breaker Armour Breaker
|
・Hits Break 15 Armour ・+2 to melee strike range ・Knock enemies back on hit ・40% more Attack Speed while Dual Wielding |
 Blood Hunt Blood Hunt
|
Dash: ・+0.15 seconds to Total Attack Time Explosion: ・Explosion Radius is 1.3 metres ・Deals 25% of Consumed Blood Loss as additional unscalable Physical Attack Damage ・10% more Area of Effect per 18 Blood Loss Consumed, up to 500% ・ Additional Effects from Quality: +0(0-0.4) metres to explosion radius |
 Boneshatter Boneshatter
|
・+2 Melee strike range ・While Dual Wielding, both weapons hit with 30% less damage ・Cannot cause Stun Buildup |
 Cross Slash Cross Slash
|
Cross Slash: ・Gouge Length Is 4.7 ・Metres Gouge Width is 1.6 ・Metres Flings Ice Fragments Within 7 Metres Shockwave: ・Gouge Length is 2.4 metres gouge width is 1.6 metres flings ice fragments within 7 metres |
 Cull the Weak Cull the Weak
|
None |
 Devour Devour
|
・Up to +0.5 Seconds to Total ・ Attack Time Based on Distance Travelled ・ Knocks Back Enemies ・ Impact Radius Is 1.8 Metres ・ Regenerates 39 Life per Enemy Or Corpse Consumed Over 1 Second ・ Consumes up to 2 Additional Corpses Near the Target |
 Disengage Disengage
|
Initial Strike: ・+0.2 seconds to Total Attack Time ・+25 to Melee Strike Range ・Additional Effects from Quality: 0(0-20)% Increased Cooldown Recovery Rate Shockwave: ・Shockwave Radius is 2 Metres |
 Earthquake Earthquake
|
Impact: ・100% Increased Magnitude of Jagged Ground ・When Dual Wielding weapons hit with 30% less damage ・Impact Radius is 1.8M ・Jagged Ground radius is 2.2M ・maximum 2 Jagged Ground Patches ・Jagged Ground duration is 4s Aftershock: ・Aftershock radius is 3.4M |
 Earthshatter Earthshatter
|
Slam: ・While Dual Wielding both weapons hit with 30% less attack speed ・Maximum of 6 Spikes ・Deals damage along the fissure's path and in a 1M Radius around the emerging spike ・Spike duration is 6s Explosion: ・Explosion Radius is 2 Metres |
 Elemental Sundering Elemental Sundering
|
Pulse: ・Pulse radius is 5 metres ・Consumes up to 9 Ailments Cold: ・Converts 100% of Physical Damage to Cold Damage ・Cannot inflict Freeze, Shock, or Ignite ・Explosion radius is 1.6 metres ・Additional Effects from Quality: +0(0-0.2) metres to Explosion radius Fire: ・Converts 100% of Physical Damage to Fire Damage ・Cannot inflict Freeze, Shock, or Ignite ・Explosion radius is 1.6 metres ・Additional Effects from Quality: +0(0-0.2) metres to Explosion radius Lightning: ・Converts 100% of Physical Damage to Lightning Damage ・Cannot inflict Freeze, Shock, or Ignite ・Explosion radius is 1.6 metres ・Additional Effects from Quality: +0(0-0.2) metres to Explosion radius |
 Falling Thunder Falling Thunder
|
Melee: ・Converts 60% of Physical Damage to Lightning Damage ・Cone Length is 4 Metres Projectile: ・Converts 100% of Physical Damage to Lightning Damage ・Pierces all targets ・50% more damage per Power Charge consumed ・100% more damage if a Power Charge was consumed ・Fires 3 Projectiles per Power Charge consumed |
 Fangs of Frost Fangs of Frost
|
Stab: ・Converts 80% of Physical Damage to Cold Damage ・+4 to Melee Strike range ・56% more Freeze Buildup ・Additional Effects from Quality: +0(0-4) to Melee Strike range Nova: ・Converts 100% of Physical Damage to Cold Damage ・168% more Freeze Buildup ・Explosion and Chilled Ground radius are 2.2 metres |
 Flicker Strike Flicker Strike
|
・Teleports and strikes two additional times per power Charge with 285% more attack speed. You cannot gain power charges while using this skill |
 Forge Hammer Forge Hammer
|
Impact: ・Converts 30% of Physical Damage to Fire Damage ・While Dual Wielding, both weapons hit with 30% less damage ・Impact radius is 1.8 metres ・Hammer duration is 12 seconds ・Cooldown does not recover while the Hammer is lodged. Fissures: ・Attack Damage: 132% ・Converts 100% of Physical Damage to Fire Damage ・While Dual Wielding, both weapons hit with 30% less damage ・Fissure duration is 8 seconds. |
 Fortifying Cry Fortifying Cry
|
Fortifying Cry: ・Warcry Radius is 4 metres ・Guard duration is 4 seconds ・Can Trigger Shield Wave once per 5 Enemy Power in range, counting up to 50 Power ・Grants 30 Guard for every 5 Enemy Power in range, counting up to 20 Power Shield Wave: ・Crit Hit Chance: 5.00% ・Attack Damage: 97% ・29 to 43 Base Off Hand Physical Damage ・6 to 8 added Physical Damage per 15 Armour on Shield ・This attack is Triggered by Fortifying Cry and counts as Empowered by it ・Shockwave Radius is 2 metres ・Modifiers to Damage with Warcries affect this skill. |
 Frozen Locus Frozen Locus
|
・6 to 9 Base Cold Damage ・13% to Critical Hit chance ・50% more Freeze buildup ・Explosion radius is 2 Metres |
 Furious Slam Furious Slam
|
Base: ・60% More Stun Buildup ・ +0.4 Seconds to Base Attack Time if Not Standing ・ +0.4 Seconds to Base Use Time When Shapeshifting ・ Shockwave Radius Is 2 Metres ・ Spends 10 Rage to Perform Enraged Slam if Possible Enraged: ・Attack Damage: 110% ・ 60% More Stun Buildup ・ +0.4 Seconds to Base Attack Time if Not Standing ・ +0.4 Seconds to Base Use Time When Shapeshifting ・ Shockwave Radius Is 3 Metres ・ Jagged Ground Duration Is 4 Seconds |
 Fury of the Mountain Fury of the Mountain
|
・Converts 80% of physical damage to fire damage ・ Modifers to attack speed also affect this skill's cost ・ Gain 3 rage on hit ・ Fissure duration is 12 seconds ・ Limit 12 fissures |
 Gathering Storm Gathering Storm
|
Normal Dash: ・Converts 25% of Physical Damage to Lightning Damage ・0.8 seconds to Total Attack Time ・10 to Melee strike range Perfect Dash: ・Converts 70% of Physical Damage to Lightning Damage ・10 to Melee strike range ・Shocked Ground width is 1.8 metres Shockwave: ・Converts 100% of Physical Damage to Lightning Damage ・10 to Melee Strike range ・Shockwave Radius is 2.2 metres ・maximum 8 Shockwaves per use |
 Glacial Cascade Glacial Cascade
|
Wave: ・Converts 60% of Physical Damage to Cold Damage ・Burst Radius is 0.5 Metres ・Wave Length is 4.8 Metres ・Causes 8 Bursts Final Burst: ・Attack Damage: 158% ・Converts 60% of Physical Damage to Cold Damage ・Consumes Freeze on enemies to deal 350% more Damage ・Cannot Knock Enemies Back ・Burst radius is .7 metres |
 Hammer of the Gods Hammer of the Gods
|
・Requires 20 Glory to use ・Can't be Evaded ・While Dual Wielding both weapons hit with 30% less damage ・Impact Radius is 2.4 metres ・Hammerfall duration is 2.5 seconds |
 Hand of Chayula Hand of Chayula
|
・47-88 added Chaos damage ・Can't be Evaded ・+9% to Critical hit chance ・Supported Curses have 36% reduced Magnitudes ・36% reduced effect of Socketed marks |
 Ice Strike Ice Strike
|
Normal Strikes: ・Converts 80% of Physical Damage to Cold Damage Third Strike: ・50% Less Attack Speed ・Converts 80% of Physical Damage to Cold Damage ・+7 to Melee Strike Range |
 Killing Palm Killing Palm
|
・24 to 36 Added Attack Physical Damage ・Culling Strike ・Can't be Evaded ・7% to Critical Hit Chance |
 Leap Slam Leap Slam
|
・+0.65 seconds to Total Attack Time, plus up to +0.5% seconds based on distance travelled ・While Dual Wielding, both weapons hit with 30% less damage ・62% more Stun buildup ・Impact radius is 2.5 metres ・Consumes fully broken armour on enemies to cause 500% more Stun buildup |
 Lunar Assault Lunar Assault
|
・Converts 80% of Physical Damage to Cold Damage ・ 240% More Magnitude of Chill Inflicted ・240% More Freeze Buildup |
 Lunar Blessing Lunar Blessing
|
Lunar Blessing: ・Cooldown does not recover during buff effect Knocks back enemies Buff duration is 5 seconds, plus 0.2 seconds per rage spent Buff grants 52% of damage gained as cold damage Moonbeam: ・Cooldown time: I.00s Attack damage: 149% Converts 100% of physical damage to cold damage Impact radius is 1.6 metres |
 Perfect Strike Perfect Strike
|
Normal Strikes: ・Converts 40% of Physical Damage to Fire Damage ・While Dual Wielding, both weapons hit with 30% less damage Perfect Strike: ・Converts 80% of Physical Damage to Fire Damage ・+14 to Melee Strike Range ・While Dual Wielding, both weapons hit with 30% less damage ・0-20% increased Magnitude of Ignite you inflict (from Quality) |
 Pounce Pounce
|
Pounce: ・+0.2 Seconds to Total Attack Time Predator's Mark: ・Use Time: Instant ・Mark a target, causing it to take increased damage based on how many of the target's enemies are near to it. If the target dies, the Mark will Activate to Trigger the Summon Wolf skill and Consume the Mark. ・Limit 1 Marked Target ・Mark Duration is 8 Seconds ・Marked Target Takes 3% Increased Damage for Each of Its Enemies Within 6 Metres of it, up to 45% Summon Wolf: ・This skill is Triggered when Predator's Mark Activates to Summon a Wolf Minion that follows you as long as it lives. ・ Limit 6 Summoned Wolves ・Summons +1 Wolf if Marked Target is Unique |
 Primal Strikes Primal Strikes
|
Normal Strikes: ・Converts 40% of Physical Damage to Lightning Damage ・+5 to Melee Strike range ・Additional Effects from Quality: 0(0-25)% increased Critical Damage bonus Final Strike: ・35% less Attack Speed ・Converts 60% of Physical Damage to Lightning Damage ・+5 to Melee Strike Range ・Consume Shock on Hit ・Inflict Lightning Exposure on Hit ・Additional Effects from Quality: 0(0-25)% Increased Critical Damage bonus Spirits: ・Converts 100% of Physical Damage to Lightning Damage ・Charge Length is 8.6 metres ・Charge Width is 1.6 metres ・Additional Effects from Quality: 0(0-25)% Increased Critical Damage bonus |
 Rake Rake
|
・+0.4 seconds to Total Attack Time ・+2 to Melee Strike Range ・100% more Magnitude of Bleeding inflicted ・Deals up to 100% more damage, based on the distance travelled ・Inflicts Bleeding on Hit ・Additional Effects from Quality: Deals up to an additional +0(0-30)% more damage, based on the distance travelled |
 Rampage Rampage
|
・+0.5 Seconds to Base Attack Time if not Standing ・ Rage Cost is Ignored for First 2.5 Seconds of Channelling ・ Run Speed is Affected by Movement Speed Modifiers Instead of Attack Speed Modifiers ・ Cannot Gain Rage while using this Skill ・ Impact Radius is 2.2 Metres |
 Rapid Assault Rapid Assault
|
Normal Strikes: ・+6 to Melee Strike Range Final Strike: ・Limit 5 Spearheads stuck in each target ・+12 to Melee Strike Range ・Inflicts Bleeding on Hit ・Knocks Back enemies ・Spearhead duration is 10 seconds ・Additional Effects from Quality: 0(0-20)% chance to leave an additional Spearhead in the target Explosion: ・Inflicts Bleeding on hit ・Explosion Radius is 2.4 metres |
 Resonating Shield Resonating Shield
|
・Hits Break 14 Armour ・10 to 16 Base Off Hand Physical damage ・2 to 3 added Physical damage per 15 Armour on Shield ・Cannot be Empowered by Warcries ・Shockwave Radius 1.8 Metres |
 Rolling Slam Rolling Slam
|
Rolling Slam: ・1 second to Total Attack Time ・While Dual Wielding, both weapons hit with 30% less damage First Slam: ・Attack Damage: 88% ・50% more Stun buildup ・Impact radius is 1.4 metres ・Causes Daze buildup equal to 0-50% of Physical Damage dealt (from Quality) Second Slam: ・Attack Damage: 176% ・Impact radius is 1.8 metres ・Causes Daze buildup equal to 0-50% of Physical Damage dealt (from Quality) |
 Shattering Palm Shattering Palm
|
Melee: ・45 to 68 added Cold damage ・Can't be Evaded ・9% to Critical Hit chance ・Attaches shards to enemies within a 3.8 metre radius Explosion: ・24 to 36 added Cold damage ・11% to Critical Hit chance ・100% more Freeze buildup ・Explosion radius is 1.6 metres |
 Shield Charge Shield Charge
|
Area of Effect: ・7 to 10 Base Off Hand Physical damage ・2 to 3 added Physical Damage per Armour on Shield ・Impact Radius is 2.4 metres Collision: ・7 to 10 Base Hand Physical Damage ・Knock Back enemies ・2 to 3 added Physical damage per 15 Armour on Shield ・50% more Stun Buildup ・Impact Radius is 2.4 Metres |
 Shockwave Totem Shockwave Totem
|
Totem: ・Totem duration is 12s ・Limit of 1 Totem ・Totem Base Attack Time is 3s ・Totem uses its own weapon dealing 10 to 16 base Physical Damage Slam: ・Shockwave radius is 3 metres |
 Siphoning Strike Siphoning Strike
|
Dash: ・6 to Melee Strike Range ・50% more Stun Buildup ・Knock enemies back on Hit Shockwave: ・Converts 100% of Physical Damage to Lightning Damage,50% more Stun Buildup ・Shockwave radius is 2 meters |
 Spearfield Spearfield
|
Spearfield: ・Creates 1 Spear per 0.2 metres of Radius:Spears emerge within a 4.6 metre length cone ・Spear duration is 10 seconds ・Maximum 70 active Spears ・Additional Effects from Quality: Hazards created by this skill have 0(0-10)% chance to rearm after they are triggered Explosion: ・Maim on Hit ・Maims from this skill Slow an additional 10% ・Explosion Radius is 0.6 metres ・Spears that have existed for at least 0.5 seconds deal 300% more damage ・Additional effects from Quality: Hazards created by this skill have 0(0-10)% chance to rearm after they are triggered |
 Staggering Palm Staggering Palm
|
Staggering Palm: ・10 to 16 added Attack Physical Damage ・Can't be Evaded ・+7% to Critical Hit chance ・Buff Duration is 6s Projectile (Quarterstaff): ・Projectiles Pierce all targets Projectile (Unarmed): ・Projectiles pierce all targets ・10 to 16 added Physical damage ・+7% to Critical Hit chance |
 Stampede Stampede
|
Footsteps: ・While Dual Wielding both weapons hit with 30% less damage ・Jagged Ground duration is 6 seconds ・Impact and Jagged Ground radius are 1.2 metres Slam: ・While Dual Wielding both weapons hit with 30% less damage ・the impact radius is 3.2 metres Explosion: ・While Dual Wielding both weapons hit with 30% less damage ・Detonates Jagged Ground within 3.2 metres radius of slam and each patch of Jagged Ground detonated. |
 Storm Wave Storm Wave
|
・Converts 80% of Physical Damage to Lightning Damage ・Wave Length is 8 Metres ・Wave Width is 1 Metre |
 Sunder Sunder
|
Wave: ・1s to total Attack Time ・0.2M to Wave Length for each wave in sequence ・100% increased Critical Damage bonus ・While Dual Wielding both weapons hit with 30% less damage ・Consumes Fully Broken Armour on enemies to guarantee a Critical hit ・Wave length is 0.9M ・Wave causes shockwaves from up to 5 enemies in each area Shockwave: ・100% increased critical Damage bonus ・While Dual Wielding ・both weapons hit with 30% less damage,Consumes fully broken armour on enemies to guarantee a Critical Hit,Shockwave radius is 1.2M |
 Supercharged Slam Supercharged Slam
|
Impact: ・Impact Radius is 1.6M ・20% more Damage with Hits for Each Stage ・Maximum of 3 Stages ・Channelling ends 1s after reaching maximum stages ・Releases 1 Aftershock per Stage. Aftershock: ・Aftershock Radius is 2.8M ・Each successive Aftershock gains 0.5M to radius |
 Tempest Bell Tempest Bell
|
Tempest Bell: ・Requires 4 Combo to Use ・Lose Combo if you Generate No Combo for 8 Seconds ・Limit 1 Bell ・Bell Duration is 6 Seconds ・Bell is Destroyed after 11 Hits Impact: ・Impact Radius is 1.8 Metres Shockwave: ・30% More AoE per .1 Metres of Knockback the Triggering Hit would have caused ・Deals 30% more Damage per Elemental Ailment Afflicting the Bell ・Gains 30% of Physical Damage as extra Damage of each Type matching an Elemental Ailment on the Bell ・Shockwave Radius is 2.4 Metres |
 Tempest Flurry Tempest Flurry
|
Normal Strikes: ・Converts 60% of Physical Damage to Lightning Damage ・+4 to Melee Strike Range Third Strike: ・35% Less Attack Speed Fourth Strike: ・45% Less Attack Speed ・Converts 100% of Physical Damage to Lightning Damage ・+6 to Melee Strike Range ・100% more Chance to Shock |
 Thunderous Leap Thunderous Leap
|
・Converts 70% of Physical Damage to Lightning Damage ・+1.1 seconds to Total Attack Time ・Shockwave radius is 2.5 metres ・Additional Effects from Quality: +0(0-0.5) metres to Shockwave radius |
 Vaulting Impact Vaulting Impact
|
・1 Second to total Attack Time ・30% more Stun Buildup ・Consume Daze on Enemies to Cause 300% more Stun Buildup ・Impact Radius is 2.4 Metres |
 Volcanic Fissure Volcanic Fissure
|
・Converts 60% of Physical Damage to Fire Damage ・While Dual Wielding both weapons hit with 30% less attack speed ・Fissure duration is 12 seconds |
 Wave of Frost Wave of Frost
|
・Converts 80% of Physical Damage to Cold Damage ・390% More Freeze Buildup ・Wave Length is 6 Metres |
 Whirling Assault Whirling Assault
|
・1.4 seconds to Total Attack time |
 Whirling Slash Whirling Slash
|
Melee: ・Knocks Back Enemies Whirlwind: ・Knocks Back Enemies ・Slows enemy movement speed by 30% ・Maximum 3 Stages ・Collapse deals 150% more damage per additional Stage ・+3 to Radius per additional Stage ・10% more Knockback distance per Stage ・Whirlind Radius is 1.8 Metres ・Additional Effects From Quality: Collapse deals +0(0-40)% more damage per additional Stage |
 Wind Blast Wind Blast
|
・150% more Stun Buildup ・Knock enemies back on hit ・Causes Daze Buildup equal to 532% of Physical damage dealt ・Cone Length is 6 metres |
 Wind Serpent's Fury Wind Serpent's Fury
|
Thrust: ・200% more Knockback distance against Unique enemies ・Knocks Back enemies ・Thrust length is 10 metres ・Thrust width is 1.7 metres ・Requires 1 Frenzy Charge to use ・Additional Effects from Quality: 0(0-30)% increased Knockback distance Serpent: ・200% more Knockback distance against Unique enemies ・Knocks Back enemies ・Thrust length is 10 metres ・Thrust width is 1.7 metres ・Requires 1 Frenzy Charge to use ・Additional Effects from Quality: 0(0-30)% increased Knockback distance Shockwave: ・200% more Knockback distance against Unique enemies ・Cannot Knock enemies back ・Shockwave radius is 2 metres |
 Wing Blast Wing Blast
|
Wing Blast: ・0.3 Seconds to Total Attack Time Cannot ・ Cause Stun Buildup Knocks Back ・ Enemies Blast Length Is 6 Metres ・ 10%Surpassing Chance to Grant a Power Charge on Heavy Stun, Modified by Monster Power Shockwave: |
All Melee Support Gems
| Gem | Effects |
|---|---|
 Aftershock I Aftershock I
|
・Supported skills have 25% chance to cause an Aftershock |
|
Aftershock II
|
・Supported skills have 35% chance to cause an Aftershock |
 Ancestral Aid Ancestral Aid
|
・Supported Strikes area Ancestrally Boosted ・Supported Skills cannot be used until you have Blocked 3 Hits |
 Ancestral Call I Ancestral Call I
|
・Supported Strike skills are Ancestrally Boosted once every 5 seconds |
|
Ancestral Call II
|
・Supported Strike Skills are Ancestrally Boosted once every 3 seconds. |
 Barbs I Barbs I
|
・Supported Skills deal your Thorns Damage on their next 4 hits after you Retaliate with Thorns |
|
Barbs II
|
・Supported Skills deal yout Thorns Damage on their next 6 Hits after you Retaliate with Thorns |
|
Barbs III
|
・Supported Skills deal yout Thorns Damage twice on their next 6 Hits after you Retaliate with Thorns |
 Behead I Behead I
|
・Killing Blows from Supported Strike Skills against Rare Monsters grant one of their Modifiers for 20 Seconds. |
|
Behead II
|
・Killing Blows from Supported Strike Skills against Rare Monsters grant one of their Modifiers for 20 Seconds. |
 Bidding II Bidding II
|
・Supported Minions have 30% increased Cooldown Recovery Rate for Command Skills ・Supported Minion's Command Skills deal 30% more damage. |
|
Bidding III
|
・Supported Minions have 80% increased Cooldown Recovery Rate for Command Skills. |
 Bloodlust Bloodlust
|
・Supported skills deal 30% more Melee Physical Damage against bleeding enemies ・Supported attacks cannot cause bleeding |
 Brambleslam Brambleslam
|
Support: ・Supported Slams create 3 Brambles Brambles: ・Cooldown Time: 0.15s (6 Uses) ・Hazardous thorns damage and Main enemies with which they come in contact. ・ Attack Damage of this skill is 35% of Default Attack Damage ・ Increases and Reductions to Thorns Damage apply to Hit Damage with this skill ・ Maim on Hit ・ 80% less damage if destroyed within 0.5s by something other than you ・ 50% more damage when Overgrown ・ Bramble Radius is 1 Metre and its Duration is 8s |
 Branching Fissures I Branching Fissures I
|
・Supported Skills' Fissures Branch 2 Times ・Supported Skills' Branched Fissures Deal 40% Less Damage ・Supported Skills' Branched Fissures have 35% less Area of Effect. |
|
Branching Fissures II
|
・Supported Skills' Fissures Branch 2 Times ・Supported Skills' Branched Fissures Deal 30% Less Damage ・Supported Skills' Branched Fissures have 35% less Area of Effect. |
 Brink I Brink I
|
・Stun buildup caused by Supported Skills cannot reach 100% ・Hits with Supported Skills cause 30% more Stun Buildup |
|
Brink II
|
・Stun Buildup caused by Supported Skills cannot reach 100% ・Hits with Supported Skills cause 50% more Stun buildup. |
 Clash Clash
|
・Supported Skills deal 40% more Melee Damage against enemies with a higher percentage of their life remaining than you, but deal 20% less Melee Damage against enemies with a lower percentage of their life remaining than you |
 Crater Crater
|
Support: ・Supported Skills create 3 Fissures on Landing Fissures: ・Converts 80% of Physical Damage to Fire Damage ・Attack Damage of this Skill is 35% of Default Attack Damage ・Fissure Length is 1.5 metres ・Fissure duration is 6 seconds ・Limit 9 Fissures allowed. |
 Crescendo I Crescendo I
|
・Final Strike of supported skills can be performed twice in succession |
|
Crescendo II
|
・Final Strike of Supported Skills can be performed twice in succession ・Attacks with Supported Skills that are not Final Strikes have 15% more Attack Speed |
|
Crescendo III
|
・Final Strike of Supported Skill is Ancestrally Boosted |
 Culmination I Culmination I
|
・Supported skills can gain Combo ・Supported skills lose all Combo on use ・Supported skills lose Combo if you generate no Combo for 4s ・Supported skills deal 3% more damage per combo |
|
Culmination II
|
・Supported Skills can gain Combo ・Supported Skills lose all Combo on use ・Supported Skills lose Combo if you generate no Combo for 4 seconds ・Combo Count loss for Supported Skills occurs 50% slower ・Supported Skills deal 3% more damage per Combo. |
 Desperation Desperation
|
・Insufficient Mana doesn't prevent the use of Supported Skills while Surrounded |
 Excoriate Excoriate
|
・Supported Skills cannot inflict elemental ailments ・Supported Skills deal 10% more melee damage for each elemental ailment on enemies they hit |
 Fist of War I Fist of War I
|
・Attacks with Supported Skill are Ancestrally Boosted, no more than once every 6 seconds |
|
Fist of War II
|
・Attacks with Supported Skill are Ancestrally Boosted, no more than once every 4 seconds |
|
Fist of War III
|
・Attacks with Supported Skill are Ancestrally Boosted, no more than once every 14 seconds ・Ancestral Boost has double effect on Supported Skills |
 Heavy Swing Heavy Swing
|
・Supported Skills deal 35% more Melee Physical Damage ・Supported Skills have 10% less Attack Speed. |
 Impact Shockwave Impact Shockwave
|
・Supported skills create an Aftershock when they Heavy Stun an enemy, dealing the same damage to enemies within 1.8 metres |
 Jagged Ground I Jagged Ground I
|
・Jagged Ground lasts 4 seconds ・Supported Skills consume an Endurance Charge on Use ・Supported Skills create Jagged Ground when consuming an Endurance Charge |
|
Jagged Ground II
|
・Aftershocks caused by Supported Skills create Jagged Ground |
 Practiced Combo Practiced Combo
|
・Supported Strike skills have a 40% chance to build an additional Combo on hit |
 Punch Through Punch Through
|
・Supported Skills apply Easy Target on Knockback ・Easy Target applied this way has a magnitude of 3% per metre of Expected Knockback distance |
 Pursuit I Pursuit I
|
・Supported Skills deal 20% more melee damage if you have damaged an enemy with a projectile attack hit in the last eight second ・Supported Skills deal no projectile damage |
|
Pursuit II
|
・Supported Skills deal 25% more Melee Damage if you have damaged an Enemy with a Projectile Attack Hit in the last eight seconds ・Supported Skills deal no Projectile Damage. |
|
Pursuit III
|
・Supported Skills deal 30% more Melee Damage if you have damaged an Enemy with a Projectile Attack Hit in the last two seconds ・Supported Skills deal no Projectile Damage. |
 Quill Burst Quill Burst
|
Support: ・Supported Skills trigger quill burst on their next 3 hits after you retaliate with thorns Quill Burst: ・Explosion radius is 1.5 metres. Deals thorns damage to other targets in an area around the triggering target. |
 Rage I Rage I
|
・Supported skills grant 3 Rage on Melee Hit |
|
Rage II
|
・Supported Skills grant 5 Rage on Melee Hit |
|
Rage III
|
・Supported Skills grant 5 Rage on Melee Hit ・Supported Skills have 15% more Attack speed while you are not at maximum Rage |
 Rally Rally
|
・Supported Skills Consume all Endurance Charges on use ・Supported Skills restore 10% of your Maximum Life on use per Endurance Charge Consumed this way ・Supported Skills cannot generate Endurance Charges |
 Rending Apex Rending Apex
|
Support: ・Final strikes of supported skills break armour equal to 75% of attack damage dealt |
 Retaliate I Retaliate I
|
・Supported Skills deal up to 40% more attack damage, scaling up as your stun bar increases |
|
Retaliate II
|
・Hits from Supported Skills Stun enemies as though dealing more damage equivalent to the current percentage of your Stun Bar ・Supported Skills deal up to 40% more Attack Damge, scaling up as your Stun Bar increases. |
 Reverberate Reverberate
|
・Supported Skills have 15% increased chance to cause aftershocks for every quarter second of attack time |
 Rip Rip
|
・Remnants created by Supported Skills last for 8 seconds ・Supported Skills create a blood remnant when dealing a killing blow to a bleeding enemy ・Remnants created this way increase life regeneration rate by 10% for 5 seconds when collected, up to a maximum of 100% remnants are created within a 1.5 metre radius of the slain enemy |
 Spar Spar
|
・Hits from Supported Skills Stun enemies as though dealing more damage equivalent to the current percentage of your stun bar |
 Syzygy Syzygy
|
・Hits from Supported Skills are considered Crushing Blows against ignited and fully armour broken enemies heavily stunning enemies which are ignited and fully armour broken with supported skills will permanently intimidate them |
 Tear Tear
|
・50% chance for on-kill effects caused by killing blows on bleeding enemies with supported skills to occur twice |
 Tectonic Slams Tectonic Slams
|
Support: ・Supported Skills Have 30% Less Aftershock Area of Effect ・ Supported Skills Deal 45% Less Damage With Aftershocks ・ Supported Skills Cause 1 Additional Aftershock Ahead And To Each Side of the Initial Area ・ Supported Skills Have 15% Less Attack Speed |
 Tremors Tremors
|
・Supported Skills have 30% chance to cause an additional Aftershock ・Supported Skills have 15% chance to cause 2 additional Aftershocks ・Supported Skills have 10% chance to cause 3 additional Aftershocks ・Supported Skills deal 35% less damage |
 Unsteady Tempo Unsteady Tempo
|
・First attack in sequence with supported skill inflicts hobble on you equal to 40% of your life ・Second attack in sequence with Supported Skill has 30% more chance to critically hit ・Third attack in sequence with Supported Skill deals 20% more damage. |
 Unyielding Unyielding
|
・8% of Damage taken while using Supported Skills is Recouped as Life per quarter second of Attack time of Supported Skill |
 Upheaval I Upheaval I
|
・Supported skills create an additional fissures ・Supported skills have 20% less attack speed ・Supported skills deal 20% less damage |
|
Upheaval II
|
・Supported Skills create 2 Additional Fissures ・Supported Skills have 20% less Attack Speed ・Supported Skills deal 40% less damage. |
 Volcanic Eruption Volcanic Eruption
|
・Supported strikes trigger volcanic eruption on hitting ignited enemies. |
All Melee Spirit Gems
| Gem | Effects |
|---|---|
 Magma Barrier Magma Barrier
|
Buff: ・Raising your shield infuses it with magma for 0.5 seconds ・Cannot perform a magma infused block for 0.75 seconds after magma dissipates Magma Spray: ・6 to 8 Added Fire Damage per 15 Armour on Shield ・140 to 210 Base Offhand Fire Damage |
 Wind Dancer Wind Dancer
|
Buff: ・3 Maximum Stacks ・Gain a Stage every 1.44 seconds ・10% more Evasion Rating per Stage ・On being Hit by a Melee Attack, consume all stages to trigger Gale Force. Gale Force: ・Attack Damage: (27%-82%) ・Knocks back Enemies ・Explosion Radius is 1.6 meters ・100% more area of effect per stage ・50% more Damage per stage ・25% more Knockback Distance per stage |
Path of Exile 2 Related Guides

Glossary and Basic Game Mechanics
All Glossary Guides
Comment
Author

Melee Explained
Rankings
- We could not find the message board you were looking for.

Gaming News

![The Liar Princess and the Blind Prince Review [PC] | Lovely to Look at but Tedious to Play](https://img.game8.co/4442586/8d95f5faf05780f1765ce7e0938bd825.jpeg/show)
![The Liar Princess and the Blind Prince Review [PC] | Lovely to Look at but Tedious to Play](https://img.game8.co/4442586/8d95f5faf05780f1765ce7e0938bd825.jpeg/thumb)
![Marathon Cryo Archive Map Teased as [REDACTED] on Selection Screen](https://img.game8.co/4442236/6357203e58172f6de57f1991e7c39b22.png/thumb)

Popular Games

Genshin Impact Walkthrough & Guides Wiki
Umamusume: Pretty Derby Walkthrough & Guides Wiki
Pokemon Pokopia Walkthrough & Guides Wiki
Honkai: Star Rail Walkthrough & Guides Wiki
Monster Hunter Stories 3: Twisted Reflection Walkthrough & Guides Wiki
Arknights: Endfield Walkthrough & Guides Wiki
Wuthering Waves Walkthrough & Guides Wiki
Zenless Zone Zero Walkthrough & Guides Wiki
Pokemon TCG Pocket (PTCGP) Strategies & Guides Wiki
Monster Hunter Wilds Walkthrough & Guides Wiki


Recommended Games
Diablo 4: Vessel of Hatred Walkthrough & Guides Wiki
Cyberpunk 2077: Ultimate Edition Walkthrough & Guides Wiki
Fire Emblem Heroes (FEH) Walkthrough & Guides Wiki
Yu-Gi-Oh! Master Duel Walkthrough & Guides Wiki
Super Smash Bros. Ultimate Walkthrough & Guides Wiki
Pokemon Brilliant Diamond and Shining Pearl (BDSP) Walkthrough & Guides Wiki
Elden Ring Shadow of the Erdtree Walkthrough & Guides Wiki
Monster Hunter World Walkthrough & Guides Wiki
The Legend of Zelda: Tears of the Kingdom Walkthrough & Guides Wiki
Persona 3 Reload Walkthrough & Guides Wiki


All rights reserved
© 2010 - 2024 Grinding Gear Games
The copyrights of videos of games used in our content and other intellectual property rights belong to the provider of the game.
The contents we provide on this site were created personally by members of the Game8 editorial department.
We refuse the right to reuse or repost content taken without our permission such as data or images to other sites.