PoE 2 0.2.0 Bleed Huntress Leveling Build
Latest: 0.5.0 Release Date
☆ Fate of the Vaal ▶︎ The Last of the Druids
┗ Bonded Mods | 0.4 Mystery Box
★ Druid: Class Overview | Builds
☆ NEW: Disciple of Varashta Ascendancy!
★ Best Class | Best Builds | Leveling Builds
This is a leveling build for the Huntress in Path of Exile 2 (PoE 2)'s Dawn of the Hunt update that uses Disengage, Rake, and Herald of Blood to finish Act 3. Check out this Huntress levelling build, including its progression, equipment, socketables, skills, playstyle, and recommended builds!
 Attention! Attention! |
This build was last updated for patch 0.2.1 and may be outdated for the recent patches. For more up-to-date builds, please refer to our list of latest builds! |
|---|
List of Contents
Bleed Huntress Build Summary
Bleed Huntress Leveling Build
The Bleed Huntress aims to capitalize on bleed to dish out huge amounts of DoT to enemies and detonating all the bleed damage you deal for huge bursts of damage. The build also excels really well against mobbing thanks to the new Herald of Ash persistent skill that detonates enemies based on the bleed damage you deal.
| Date | Changes Made |
|---|---|
| 04/05/25 | ・ Leveling Build Act 1 Created. |
| 04/06/25 | ・ Leveling Build Act 2 Created. |
Bleed Huntress Equipment
Weapons
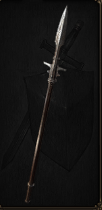
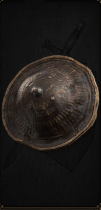
The Huntress has a low amount of damage output against elites so we severely want bonus damage on your weapon. Our main source of damage aside from our hits and bleed will also be Martial Stomp so we'll want to increase our Strength stat. However, we're also a Dexterity class as our skills require Dexterity to equip so we'll want to increase our Dexterity alongside Strength.
Once we get the Amazon Class, we'll want to start focusing on Accuracy rating for our main weapon too as it allows the weapon to get extra damage based on its local Accuracy stat
Armor
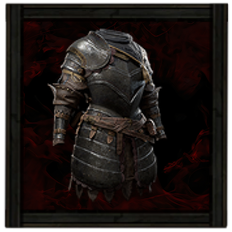
For the Armor's attributes, focus on getting both Strength and Dexterity. Strength to increase our survivability and Dexterity to equip our skills.
As you start progressing through the later acts, you'll want to also start transitioning and start investing in evasion rating as we'll want it to be at the highest possible rating later in the endgame. Try to aim for at least 70% as it's ideal for survivability.
Accessories
For accessories, we want it to focus physical damage and attributes, mostly the latter. Elemental Resistances are also desired to increase our character's survivability.
Runes and Soul Cores
| Equipment | Sockets |
|---|---|
| Weapon | |
| Armor |
We want to get a Vision Rune to get more accuracy rating for our spear to synergize with our Amazon's Penetrate Ascendancy skill. The Penetrate skill converts 25% of the Accuracy rating on the spear into physical damage so slotting in Vision Runes allows us to get more damage (and it scales better than Iron Runes).
For our armor, we want to get the necessary resistance from runes to our armor pieces. Getting near max value to resistances is key to survival in the latter parts of the game.
| All Runes and Soul Cores | |
|---|---|
| List of Runes | List of Soul Cores |
Bleed Huntress Skills
※ The Support Gems' priority are arranged in a descending order. The first one being the most important and the last being the least crucial.
| Skill | Support Gems |
|---|---|
 Parry Parry Parry Ready your Buckler to parry the next Strike or Projectile that would Hit you, Blocking the Hit and retaliating with a quick sweep that leaves enemies off balance, casuing them to take increased Attack damage. | Rage I Supports Melee Attacks, causing them to grant Rage on Hit. |
 Whirling Slash Whirling Slash Whirling Slash Perform a circular slash that kicks up a Whirlwind around you, Slowing enemies and Blinding them in its area of effect. Leaving the area collapses the storm, dealing damage and causing Knockback. | - |
 Twister Twister Twister Whip up a twister with a flick of your Spear. The twister moves forward erratically, Blinding and repeatedly Hitting enemies within. If a twister touches a Whirlwind from your other skills, it Consumes the Whirlwind to create additional twisters that deal more damage. Passing over Elemental Ground Surfaces or Consuming an elemental Whirlsind will grant twisters extra damage of that element. | Multishot I Supports Projectile skills, making them fire extra Projectiles. Also lowers Attack and Cast speed of supported skills, as well as lessening their damage. Bleed I Supports any skill that hits enemies, giving it a chance to inflict Bleeding. |
 Rapid Assault Rapid Assault Rapid Assault Perform a series of six rapid stabs. The final stab inflicts Bleeding and leaves a spearhead stuck in the target, Maiming them for a duration. Detonator Skills will cause the stuck spearheads to explode, dealing further damage to the target and other nearby enemies. | Rapid Attacks I Supports Attacks, causing them to Attack faster. |
 Rake Rake Rake Dash towards an enemy and perform a lacerating slash, inflicting Bleeding on all enemies struck. | - |
 Disengage Disengage Disengage Jump back as you rupture the earth in front of you with spearpoints, damaging enemies. Consumes the Parried Debuff on Hitting enemies to release a shockwave and grant you a Frenzy Charge. This skill can be used while using other skills, and causes Strikes and Projectiles to miss you while jumping. This skill cannot be Ancestrally Boosted. | Outmaneuver Supports skills you use yourself which can cause Damaging Hits. Supported Skills Break Armour agaiinst Parried Enemies. |
 Explosive Spear Explosive Spear Explosive Spear Hurl a single payload Spear that pierces through enemies and lodges in terrain where it lands. The Spear will explode at the end of its Detonation Time or if Detonated. Consumes a Frenzy Charge if you have one to explode immediately, dealing more damage in a cross-shaped area and creating Ignited Ground. | Overabundance I Supports skills which can have a Limited number of effects active at once, increasing that Limit at the cost of their duration. Only applies to restrictions that use the word “Limit”. |
 Herald of Blood Herald of Blood Herald of Blood While active, killing an enemy with Blood Loss will cause a bloody explosion that deals Physical Attack damage to surrounding enemies based off the life of the exploded enemy, destroying their Corpse in the process. The explosion also has a chance to aggravate Bleeding. | Brutality I Supports any skill that deals damage, boosting its physical damage at the expense of all other damage types. |
Whirling Slash generates a Whirlwind that we can consume with Twister to unleash multiple Twisters to clear out mobs. Rapid Assault and Explosive Spear is great for rares as Rapid Assault is both a strong single-target skill that leaves a spearhead that Explosive Spear can detonate for big damage.
| Skill | Support Gems |
|---|---|
 Parry Parry Parry Ready your Buckler to parry the next Strike or Projectile that would Hit you, Blocking the Hit and retaliating with a quick sweep that leaves enemies off balance, casuing them to take increased Attack damage. | - |
 Rapid Assault Rapid Assault Rapid Assault Perform a series of six rapid stabs. The final stab inflicts Bleeding and leaves a spearhead stuck in the target, Maiming them for a duration. Detonator Skills will cause the stuck spearheads to explode, dealing further damage to the target and other nearby enemies. | Rapid Attacks I Supports Attacks, causing them to Attack faster. Rage I Supports Melee Attacks, causing them to grant Rage on Hit. |
 Rake Rake Rake Dash towards an enemy and perform a lacerating slash, inflicting Bleeding on all enemies struck. | Stomping Ground Supports Travel Skills, causing your footsteps to crack the earth and emit damaging shockwaves while using the skill. Execute I Supports any skill that hits enemies, causing it to deal more damage against enemies on low life. |
 Blood Hunt Blood Hunt Blood Hunt Lunge at a target and skewers them. Hitting an enemy that has suffered Blood Loss will cause a blood explosion and also Consume Bleeding. This skill cannot be Ancestrally Boosted. | Combo Finisher I Supports melee attacks you use yourself. Supported skills cannot be used until enough combo has been built up, but deal massively more damage. Cannot support skills which already combo or triggered skills. Bloodlust Supports Melee Attacks, causing them to deal more damage against Bleeding enemies, but preventing them from inflicting bleeding. |
 Disengage Disengage Disengage Jump back as you rupture the earth in front of you with spearpoints, damaging enemies. Consumes the Parried Debuff on Hitting enemies to release a shockwave and grant you a Frenzy Charge. This skill can be used while using other skills, and causes Strikes and Projectiles to miss you while jumping. This skill cannot be Ancestrally Boosted. | Outmaneuver Supports skills you use yourself which can cause Damaging Hits. Supported Skills Break Armour agaiinst Parried Enemies. Stun I Supports any skill that hits enemies, causing it to build up Stun more quickly. |
 Bloodhound's Mark Bloodhound's Mark Bloodhound's Mark Mark a target, making them suffer Heavy Stun build up from Blood Loss. If they suffer enough Blood Loss while Marked, the Mark is consumed and they will release an explosion of blood when killed or Heavy Stunned.The duration doesn't tick while the target is suffering Blood Loss. | - |
 Herald of Blood Herald of Blood Herald of Blood While active, killing an enemy with Blood Loss will cause a bloody explosion that deals Physical Attack damage to surrounding enemies based off the life of the exploded enemy, destroying their Corpse in the process. The explosion also has a chance to aggravate Bleeding. | Brutality I Supports any skill that deals damage, boosting its physical damage at the expense of all other damage types. |
Rake with the Stomping Ground support gem is our main DPS skill as it gives the highest amount of bleed damag while also capable of clearing mob groups thank to Stomping Ground's AoE damage.
Blood Hunt is a perfect tool fur bursting rares and uniques as its damage is based on the total bleed damage you deal and Blood Hound's Mark is a great utility skill to heavy stun unique monsters. Rapid Assault is simply a supporting skill at this point in the game and can be removed but can still be strong when you don't have Stomping Ground yet for Rake.
| Skill | Support Gems |
|---|---|
 Parry Parry Parry Ready your Buckler to parry the next Strike or Projectile that would Hit you, Blocking the Hit and retaliating with a quick sweep that leaves enemies off balance, casuing them to take increased Attack damage. | - |
 Whirlwind Lance Whirlwind Lance Whirlwind Lance Throw a Spear with enough force to kick up a Whirlwind where it lands, Slowing enemies and Blinding them in its area of effect. Entering the Whirlwind collapses it, dealing damage and causing Knockback. Consumes a Frenzy Charge if possible to create the Whirlwind with one more than its normal maximum number of stages. | Rapid Attacks I Supports Attacks, causing them to Attack faster. Bleed I Supports any skill that hits enemies, giving it a chance to inflict Bleeding. Multishot I Supports Projectile skills, making them fire extra Projectiles. Also lowers Attack and Cast speed of supported skills, as well as lessening their damage. |
 Rake Rake Rake Dash towards an enemy and perform a lacerating slash, inflicting Bleeding on all enemies struck. | Stomping Ground Supports Travel Skills, causing your footsteps to crack the earth and emit damaging shockwaves while using the skill. Ancestral Call I Supports Strikes you use yourself, providing a powerful Ancestral Boost everyfew seconds. Cannot support Channelled Skills and does not modify Skills used by Minions.. |
 Blood Hunt Blood Hunt Blood Hunt Lunge at a target and skewers them. Hitting an enemy that has suffered Blood Loss will cause a blood explosion and also Consume Bleeding. This skill cannot be Ancestrally Boosted. | Combo Finisher I Supports melee attacks you use yourself. Supported skills cannot be used until enough combo has been built up, but deal massively more damage. Cannot support skills which already combo or triggered skills. Bloodlust Supports Melee Attacks, causing them to deal more damage against Bleeding enemies, but preventing them from inflicting bleeding. |
 Disengage Disengage Disengage Jump back as you rupture the earth in front of you with spearpoints, damaging enemies. Consumes the Parried Debuff on Hitting enemies to release a shockwave and grant you a Frenzy Charge. This skill can be used while using other skills, and causes Strikes and Projectiles to miss you while jumping. This skill cannot be Ancestrally Boosted. | Outmaneuver Supports skills you use yourself which can cause Damaging Hits. Supported Skills Break Armour agaiinst Parried Enemies. Stun I Supports any skill that hits enemies, causing it to build up Stun more quickly. |
 Bloodhound's Mark Bloodhound's Mark Bloodhound's Mark Mark a target, making them suffer Heavy Stun build up from Blood Loss. If they suffer enough Blood Loss while Marked, the Mark is consumed and they will release an explosion of blood when killed or Heavy Stunned.The duration doesn't tick while the target is suffering Blood Loss. | - |
 Herald of Blood Herald of Blood Herald of Blood While active, killing an enemy with Blood Loss will cause a bloody explosion that deals Physical Attack damage to surrounding enemies based off the life of the exploded enemy, destroying their Corpse in the process. The explosion also has a chance to aggravate Bleeding. | Brutality I Supports any skill that deals damage, boosting its physical damage at the expense of all other damage types. |
This allows us to start fights with Tornadoes on enemies which we can detonate for a good amount of burst damage for mobbing. It's weak against rares and uniques however and its better to just straight up spam Rake for DPS.
Bleed Huntress Passive Tree
Passive Tree Progression
| Passive Nodes | |||
|---|---|---|---|
| 1. | 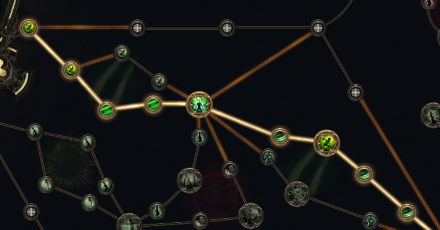 Primal Instict + Stalk and Leap Primal Instict + Stalk and Leap |
2. | 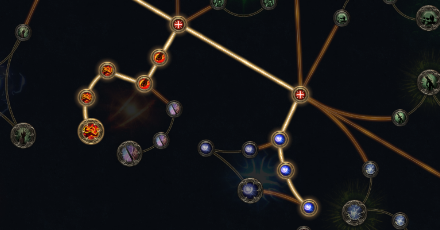 Splinters + Cooked Splinters + Cooked |
| 3. | 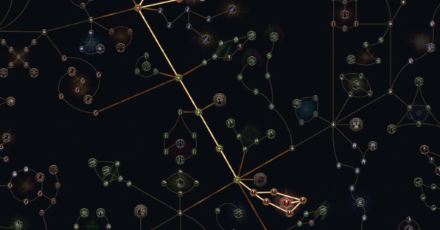 Perfectly Placed Knife Perfectly Placed Knife |
4. | 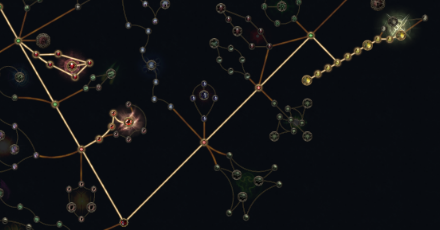 Focused Thrust + Versatile Arms Focused Thrust + Versatile Arms |
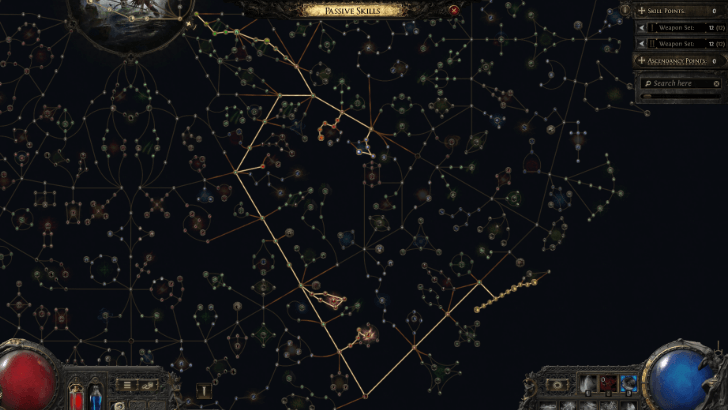
For our Passive Tree, we want to get as much damage and critical hit chance. Bleed's damage scales depending on the hit that triggers the bleed so increasing our damage it the easiest way to scale our bleed DoT.
Attack Speed is also a great optoin due to the Huntress' poor attack speed scaling attacks from the Spear.
Passive Skill Tree Guide and List of Passives
Bleed Huntress Progression
| Jump to an Act! | ||
|---|---|---|
| Act 1 | Act 2 | Act 3 |
Act 1 Progression
To progress through Act 1 and beat Count Geonor using the Bleed Huntress leveling build, follow these steps:
| # | Steps |
|---|---|
| 1 | After beating the
|
| 2 | Head for the Mysterious Campsite at Clearfell to get an extra Level 1
|
| 3 | Complete
Treacherous Ground
and get the
Support Gem for
|
| 4 | Defeat
|
| 5 | |
| 6 | Defeat
Note: By now, if you have not gotten a Spear and Buckler drop, you should have enough Gold to buy or gamble for both to access Parry and Disengage! |
| 7 | Progress to The Grim Tangle and defeat
|
| 8 | Look for the Haunted Treasure Inside the Tomb of the Consort and defeat the rare enemy to acquire a Level 1 Uncut Support Gem and slot in Outmanuever to Disengage. Note: Once you find a Level 3 Uncut Skill Gem, use it to equip |
| 9 | Defeat
|
| 10 | Start looking for the Dryadic Ritual in the same area to get an extra Level 1 Uncut Support Gem (to be used later).
|
| 11 | Defeat the
|
| 12 | Complete The Lost Lute at the Ogham Farmlands to obtain a Book of Specialisation for more passive points.
|
| 13 | Search for the Crop Circle in the same area to defeat
and obtain a Level 4 Uncut Skill Gem and use it to upgrade Twister.
|
| 14 | Proceed to Ogham Village and defeat
Note: Use the Uncut Skill Gem to get |
| 15 | Search and defeat the
|
| 16 | Continue and defeat
Note: Make sure you have Medium Flasks since this boss fight has 2 Phases so you will be spending a good amount of time learning and surviving the mechanics. |
Act 2 Progression
To progress through Act 2 and beat Jamanra, the Abomination using the Bleed leveling build, follow these steps:
| # | Steps |
|---|---|
| 1 | |
| 2 | Defeat
Ascendancy: You can attempt to finish the Sekhema's Trial to get your first Ascendancy Skill: ┣
┗
|
| 3 | Clear Mobs in Keth until you get the
|
| 4 | Defeat
|
| 5 | Defeat
in the Galleria for a random Jewel. Note: Make sure to slot in this Jewel in your passive tree as you progress. |
| 6 | Open the Guarded Sarcophagus for an
|
| 7 | Three Elemental Offering Ring choices: Ruby Ring, Sapphire Ring, and Topaz Ring for flame, cold, and lightning resistance respectively. It is recommended to choose the Topaz Ring to prepare for
|
| 8 | Clear The City of Seven Waters for an Uncut Support Gem and slot in
on
|
| 9 | Destroy the Effigy located in the Shrine of Bones for an Uncut Support Gem Level 1. |
| 10 | align]Clear Mobs in [The Bone Pits until you get the
|
| 11 | Complete A Theft of Ivory quest for an Uncut Support Gem Level 1.
|
| 12 | Place both Relics in the Valley of Titans to complete the Ancient Vows quest. Choose the Sun Clan Relic for more Mana Flask Recovery.
|
| 13 | Complete A Crown of Stone quest for an Uncut Support Gem Level 1 (To be used later).
|
| 14 | Complete the Tradition's Toll quest to get a
|
| 15 | Defeat the
for an additional
|
Act 3 Progression
To progress through Act 3 and beat Doryani using the Bleed Huntress leveling build, follow these steps:
| # | Step by Step Guide to Act 3 Leveling |
|---|---|
| 1 |
Defeat
|
| 2 |
Loot the basket found in the Orok Campfire at Sandswept Marsh to get a
Note: Avoid using this right now as we'll want to use it for our |
| 3 | |
| 4 |
Complete The Slithering Dead to get the
|
| 5 |
Look for the Jungle Grave and interact with the Ravaged Corpse to summon Servi and get a rare Belt. We recommend taking Rawhide Belt for better survivability. |
| 6 |
Defeat
|
| 7 |
Submit the Tribal Vengeance to get a charm. Choose the Antidote Charm for increased defenses against Poison. |
| 8 |
Defeat
|
| 9 |
Use the Paquate's Mechanism to Corrupt gear. Feel free to corrupt your chosen gear but your weapon is the best choice for a chance for extra slots. |
| 10 | Obtain an
|
| 11 | |
| 12 |
Ascendancy: By this time, you can complete the Trial of Chaos to get your third and fourth Ascendancy Point.
┣
┗
|
| 13 |
Use the
|
Bleed Huntress Playstyle
Skill Rotations
※ Press on what type you are fighting for a more detailed explanation on the playstyle and skill rotation.
| Type | Skill Rotation |
|---|---|
| Mobbing |
Act 1:
 Whirling Slash Perform a circular slash that kicks up a Whirlwind around you, Slowing enemies and Blinding them in its area of effect. Leaving the area collapses the storm, dealing damage and causing Knockback.
▶
 Whirling Slash Perform a circular slash that kicks up a Whirlwind around you, Slowing enemies and Blinding them in its area of effect. Leaving the area collapses the storm, dealing damage and causing Knockback.
▶
 Whirling Slash Perform a circular slash that kicks up a Whirlwind around you, Slowing enemies and Blinding them in its area of effect. Leaving the area collapses the storm, dealing damage and causing Knockback.
▶
 Twister Whip up a twister with a flick of your Spear. The twister moves forward erratically, Blinding and repeatedly Hitting enemies within. If a twister touches a Whirlwind from your other skills, it Consumes the Whirlwind to create additional twisters that deal more damage. Passing over Elemental Ground Surfaces or Consuming an elemental Whirlsind will grant twisters extra damage of that element.
Act 2 & 3:
 Rake Dash towards an enemy and perform a lacerating slash, inflicting Bleeding on all enemies struck.
▶
 Rake Dash towards an enemy and perform a lacerating slash, inflicting Bleeding on all enemies struck.
▶
 Disengage Jump back as you rupture the earth in front of you with spearpoints, damaging enemies. Consumes the Parried Debuff on Hitting enemies to release a shockwave and grant you a Frenzy Charge. This skill can be used while using other skills, and causes Strikes and Projectiles to miss you while jumping. This skill cannot be Ancestrally Boosted.
|
| Bossing |
Act 1:
 Rapid Assault Perform a series of six rapid stabs. The final stab inflicts Bleeding and leaves a spearhead stuck in the target, Maiming them for a duration. Detonator Skills will cause the stuck spearheads to explode, dealing further damage to the target and other nearby enemies.
▶
 Rapid Assault Perform a series of six rapid stabs. The final stab inflicts Bleeding and leaves a spearhead stuck in the target, Maiming them for a duration. Detonator Skills will cause the stuck spearheads to explode, dealing further damage to the target and other nearby enemies.
▶
 Disengage Jump back as you rupture the earth in front of you with spearpoints, damaging enemies. Consumes the Parried Debuff on Hitting enemies to release a shockwave and grant you a Frenzy Charge. This skill can be used while using other skills, and causes Strikes and Projectiles to miss you while jumping. This skill cannot be Ancestrally Boosted.
▶
 Explosive Spear Hurl a single payload Spear that pierces through enemies and lodges in terrain where it lands. The Spear will explode at the end of its Detonation Time or if Detonated. Consumes a Frenzy Charge if you have one to explode immediately, dealing more damage in a cross-shaped area and creating Ignited Ground.
Act 2 & 3:
 Bloodhound's Mark Mark a target, making them suffer Heavy Stun build up from Blood Loss. If they suffer enough Blood Loss while Marked, the Mark is consumed and they will release an explosion of blood when killed or Heavy Stunned.The duration doesn't tick while the target is suffering Blood Loss.
▶
 Rake Dash towards an enemy and perform a lacerating slash, inflicting Bleeding on all enemies struck.
▶
 Rake Dash towards an enemy and perform a lacerating slash, inflicting Bleeding on all enemies struck.
▶
 Disengage Jump back as you rupture the earth in front of you with spearpoints, damaging enemies. Consumes the Parried Debuff on Hitting enemies to release a shockwave and grant you a Frenzy Charge. This skill can be used while using other skills, and causes Strikes and Projectiles to miss you while jumping. This skill cannot be Ancestrally Boosted.
▶
 Rake Dash towards an enemy and perform a lacerating slash, inflicting Bleeding on all enemies struck.
▶
 Rake Dash towards an enemy and perform a lacerating slash, inflicting Bleeding on all enemies struck.
▶
 Blood Hunt Lunge at a target and skewers them. Hitting an enemy that has suffered Blood Loss will cause a blood explosion and also Consume Bleeding. This skill cannot be Ancestrally Boosted.
|
Mobbing
For general mobbing, you'll be focusing on causing as much AoE havoc with your combo.
- Use Rake to initiate the fight and inflict bleed.
- Parry and Disengage to create some distance.
- Use Blood Hunt to detonate Blood Loss against high HP mobs.
Bossing
For bosses, the focus changes from AoE to single target which causes our
- Use Bloodhound's Mark to initiate the fight.
- Use Whirlwind Lance to spread out Whirlwinds.
- Use Rake to inflict bleed and deal damage.
- Use Disengage and Parry (if applicable) to create distance.
- Only trigger Blood Hunt once you stack up a huge amount of blood loss to your target.
This is how your main bossing rotation goes. Once you've spent the Arrowheads from Rapid Assault, you'll want to begin your full combo again to take down your foes.
Bleed Huntress Recommended Builds
After completing Act 3, these are the recommended build options that will allow you to progress through the Cruel Mode and clear the Endgame pinnacle content:
Poison Bleed Rapid Assault Ritualist
Wind Dancer Grants a buff that gives you more Evasion per stage. Being Hit by a Melee Attack while you have this buff consumes all stages to damage and Knock Back enemies around you.
Disengage Jump back as you rupture the earth in front of you with spearpoints, damaging enemies. Consumes the Parried Debuff on Hitting enemies to release a shockwave and grant you a Frenzy Charge. This skill can be used while using other skills, and causes Strikes and Projectiles to miss you while jumping. This skill cannot be Ancestrally Boosted.
Spearfield Stab the ground causing multiple spears to burst out of the ground in front of you in a large area. The spears remain for a duration, or explode when enemies touch them, damaging and Maiming them,
Rapid Assault Perform a series of six rapid stabs. The final stab inflicts Bleeding and leaves a spearhead stuck in the target, Maiming them for a duration. Detonator Skills will cause the stuck spearheads to explode, dealing further damage to the target and other nearby enemies.
Thunderous Leap Leap into the air and plunge your Spear into the ground at the target location, emitting a Lightning-charged shockwave.
Bloodhound's Mark Mark a target, making them suffer Heavy Stun build up from Blood Loss. If they suffer enough Blood Loss while Marked, the Mark is consumed and they will release an explosion of blood when killed or Heavy Stunned.The duration doesn't tick while the target is suffering Blood Loss.
Herald of Blood While active, killing an enemy with Blood Loss will cause a bloody explosion that deals Physical Attack damage to surrounding enemies based off the life of the exploded enemy, destroying their Corpse in the process. The explosion also has a chance to aggravate Bleeding.
Blood Boil Corrupted Blood deals X% of slain enemy's maximum Life as Physical DMG per Sec;Blood Boil applies to Non-Unique enemies in your Presence every X sec.;X% more Corrupted Blood on slain enemy;Inflicts a stack of Corrupted Blood on targets within X metres per Blood Boil on slain enemy;Corrupted Blood duration is X sec.
Focus: Poison, Bleed, Burst |
If you would prefer to fully hone in on the build's original concept of DoTs and are leaning towards the Ritualist ascendancy, the Rapid Assault Ritualist that focuses on both Poison and Bleed will be a great build to transition to.
Poison Bleed Rapid Ritualist Build
Build Recommendation #2
Herald of Thunder While active, killing Shocked enemies with Attack damage, will cause subsequent Attack hits to release lightning bolts which deals Attack damage to all surrounding enemies.
Barrage Ready a volley of arrows or spears, Empowering your next Bow or Projectile Spear Attack to repeat multiple times. Consumes your Frenzy Charges on use to add additional repeats.
Sniper's Mark Marks a target. The next Critical Hit the target receives consumes the Mark to deal extra damage and grant you a Frenzy Charge.
Combat Frenzy While active, grants you a Frenzy Charge when you Freeze, Electrocute, or Pin an enemy. This can only occur once every few seconds.
Wind Dancer Grants a buff that gives you more Evasion per stage. Being Hit by a Melee Attack while you have this buff consumes all stages to damage and Knock Back enemies around you.
Lightning Spear Throw a single copy of your spear. When it hits an enemy it bursts, firing secondary lightning bolt Projectiles at multiple other enemies within a large area around it. Consumes a Frenzy Charge if possible to cause the main spear to split into multiple copies on impact, each of which then bursts.
Storm Lance Throw an electrified that lodges in the ground and periodically zaps nearby enemies with Lightning bolts. If the Spear is Detonated by another Skill, it immediately unleashes a volley of bolts and expires. Consumes a Frenzy Charge if possible to fire bolts more frequently for a shorter duration, automatically Detonate at the end of its duration, and create Shocked Ground on Detonation.
Thunderous Leap Leap into the air and plunge your Spear into the ground at the target location, emitting a Lightning-charged shockwave.
Rhoa Mount Harnesses a Companion Rhoa that you can ride. While you're mounted on the Rhoa, you can only use Bow, thrown Spear and Mark Skills, you run at full speed when attackin, and Hits against you cause Heavy Stun buildup. While you aren't mounted, the Rhoa attacks your enemies alongside you with its beak, but can be damaged.
Focus: Mobbing, AoE, Lightning, Fast Clear |
On the other hand, if you would prefer to try a different build that focuses more on pure elemental damage and are leaning more towards the Amazon ascendancy, the Lightning Spear Amazon is the better option!
Path of Exile 2 (PoE 2) Related Guides

0.4 Best Endgame Builds
| Rank | Build |
|---|---|
 |
|
 |
|
 |
|
 |
0.4 Leveling Builds
All Build Guides
| List of Builds by Class | |||||||||||
|---|---|---|---|---|---|---|---|---|---|---|---|
 Huntress Huntress |
 Mercenary Mercenary |
 Monk Monk |
|||||||||
 Witch Witch |
 Sorceress Sorceress |
 Warrior Warrior |
|||||||||
 Ranger Ranger |
 Druid Druid |
- | |||||||||
| Other Build Guides | 0.3 Leveling Builds | How to Make a Good Build | |||||||||
Huntress Leveling Builds
Disengage Jump back as you rupture the earth in front of you with spearpoints, damaging enemies. Consumes the Parried Debuff on Hitting enemies to release a shockwave and grant you a Frenzy Charge. This skill can be used while using other skills, and causes Strikes and Projectiles to miss you while jumping. This skill cannot be Ancestrally Boosted.
Whirling Slash Perform a circular slash that kicks up a Whirlwind around you, Slowing enemies and Blinding them in its area of effect. Leaving the area collapses the storm, dealing damage and causing Knockback.
Twister Whip up a twister with a flick of your Spear. The twister moves forward erratically, Blinding and repeatedly Hitting enemies within. If a twister touches a Whirlwind from your other skills, it Consumes the Whirlwind to create additional twisters that deal more damage. Passing over Elemental Ground Surfaces or Consuming an elemental Whirlsind will grant twisters extra damage of that element.
Explosive Spear Hurl a single payload Spear that pierces through enemies and lodges in terrain where it lands. The Spear will explode at the end of its Detonation Time or if Detonated. Consumes a Frenzy Charge if you have one to explode immediately, dealing more damage in a cross-shaped area and creating Ignited Ground.
Rake Dash towards an enemy and perform a lacerating slash, inflicting Bleeding on all enemies struck.
Rapid Assault Perform a series of six rapid stabs. The final stab inflicts Bleeding and leaves a spearhead stuck in the target, Maiming them for a duration. Detonator Skills will cause the stuck spearheads to explode, dealing further damage to the target and other nearby enemies.
Herald of Blood While active, killing an enemy with Blood Loss will cause a bloody explosion that deals Physical Attack damage to surrounding enemies based off the life of the exploded enemy, destroying their Corpse in the process. The explosion also has a chance to aggravate Bleeding.
Focus: AoE, DoT, Bleed |
|
UP |
Herald of Thunder While active, killing Shocked enemies with Attack damage, will cause subsequent Attack hits to release lightning bolts which deals Attack damage to all surrounding enemies.
Barrage Ready a volley of arrows or spears, Empowering your next Bow or Projectile Spear Attack to repeat multiple times. Consumes your Frenzy Charges on use to add additional repeats.
Disengage Jump back as you rupture the earth in front of you with spearpoints, damaging enemies. Consumes the Parried Debuff on Hitting enemies to release a shockwave and grant you a Frenzy Charge. This skill can be used while using other skills, and causes Strikes and Projectiles to miss you while jumping. This skill cannot be Ancestrally Boosted.
Lightning Spear Throw a single copy of your spear. When it hits an enemy it bursts, firing secondary lightning bolt Projectiles at multiple other enemies within a large area around it. Consumes a Frenzy Charge if possible to cause the main spear to split into multiple copies on impact, each of which then bursts.
Focus: Burst Damage, Mobbing, AoE |
Huntress Endgame Builds
Herald of Thunder While active, killing Shocked enemies with Attack damage, will cause subsequent Attack hits to release lightning bolts which deals Attack damage to all surrounding enemies.
Barrage Ready a volley of arrows or spears, Empowering your next Bow or Projectile Spear Attack to repeat multiple times. Consumes your Frenzy Charges on use to add additional repeats.
Sniper's Mark Marks a target. The next Critical Hit the target receives consumes the Mark to deal extra damage and grant you a Frenzy Charge.
Combat Frenzy While active, grants you a Frenzy Charge when you Freeze, Electrocute, or Pin an enemy. This can only occur once every few seconds.
Wind Dancer Grants a buff that gives you more Evasion per stage. Being Hit by a Melee Attack while you have this buff consumes all stages to damage and Knock Back enemies around you.
Lightning Spear Throw a single copy of your spear. When it hits an enemy it bursts, firing secondary lightning bolt Projectiles at multiple other enemies within a large area around it. Consumes a Frenzy Charge if possible to cause the main spear to split into multiple copies on impact, each of which then bursts.
Storm Lance Throw an electrified that lodges in the ground and periodically zaps nearby enemies with Lightning bolts. If the Spear is Detonated by another Skill, it immediately unleashes a volley of bolts and expires. Consumes a Frenzy Charge if possible to fire bolts more frequently for a shorter duration, automatically Detonate at the end of its duration, and create Shocked Ground on Detonation.
Thunderous Leap Leap into the air and plunge your Spear into the ground at the target location, emitting a Lightning-charged shockwave.
Rhoa Mount Harnesses a Companion Rhoa that you can ride. While you're mounted on the Rhoa, you can only use Bow, thrown Spear and Mark Skills, you run at full speed when attackin, and Hits against you cause Heavy Stun buildup. While you aren't mounted, the Rhoa attacks your enemies alongside you with its beak, but can be damaged.
Focus: Mobbing, AoE, Lightning, Fast Clear |
|
Barrage Ready a volley of arrows or spears, Empowering your next Bow or Projectile Spear Attack to repeat multiple times. Consumes your Frenzy Charges on use to add additional repeats.
Wind Dancer Grants a buff that gives you more Evasion per stage. Being Hit by a Melee Attack while you have this buff consumes all stages to damage and Knock Back enemies around you.
Vulnerability Curses all targets in an area after a short delay, making Hits against them ignore a portion of their Armour.
Disengage Jump back as you rupture the earth in front of you with spearpoints, damaging enemies. Consumes the Parried Debuff on Hitting enemies to release a shockwave and grant you a Frenzy Charge. This skill can be used while using other skills, and causes Strikes and Projectiles to miss you while jumping. This skill cannot be Ancestrally Boosted.
Twister Whip up a twister with a flick of your Spear. The twister moves forward erratically, Blinding and repeatedly Hitting enemies within. If a twister touches a Whirlwind from your other skills, it Consumes the Whirlwind to create additional twisters that deal more damage. Passing over Elemental Ground Surfaces or Consuming an elemental Whirlsind will grant twisters extra damage of that element.
Bloodhound's Mark Mark a target, making them suffer Heavy Stun build up from Blood Loss. If they suffer enough Blood Loss while Marked, the Mark is consumed and they will release an explosion of blood when killed or Heavy Stunned.The duration doesn't tick while the target is suffering Blood Loss.
Tame Beast Conjure Azmeri wisps to engulf a Rare Beast for a duration, Hindering them. If you defeat the Beast while it is engulfed in wisps, it will be captured by this gem, transforming the gem to instead allow you to summon the Beast as a Reviving Companion.
Whirlwind Lance Throw a Spear with enough force to kick up a Whirlwind where it lands, Slowing enemies and Blinding them in its area of effect. Entering the Whirlwind collapses it, dealing damage and causing Knockback. Consumes a Frenzy Charge if possible to create the Whirlwind with one more than its normal maximum number of stages.
Focus: Mobbing, Single Target, DoT, AoE, Bossing |
|
Wind Dancer Grants a buff that gives you more Evasion per stage. Being Hit by a Melee Attack while you have this buff consumes all stages to damage and Knock Back enemies around you.
Disengage Jump back as you rupture the earth in front of you with spearpoints, damaging enemies. Consumes the Parried Debuff on Hitting enemies to release a shockwave and grant you a Frenzy Charge. This skill can be used while using other skills, and causes Strikes and Projectiles to miss you while jumping. This skill cannot be Ancestrally Boosted.
Spearfield Stab the ground causing multiple spears to burst out of the ground in front of you in a large area. The spears remain for a duration, or explode when enemies touch them, damaging and Maiming them,
Rapid Assault Perform a series of six rapid stabs. The final stab inflicts Bleeding and leaves a spearhead stuck in the target, Maiming them for a duration. Detonator Skills will cause the stuck spearheads to explode, dealing further damage to the target and other nearby enemies.
Thunderous Leap Leap into the air and plunge your Spear into the ground at the target location, emitting a Lightning-charged shockwave.
Bloodhound's Mark Mark a target, making them suffer Heavy Stun build up from Blood Loss. If they suffer enough Blood Loss while Marked, the Mark is consumed and they will release an explosion of blood when killed or Heavy Stunned.The duration doesn't tick while the target is suffering Blood Loss.
Herald of Blood While active, killing an enemy with Blood Loss will cause a bloody explosion that deals Physical Attack damage to surrounding enemies based off the life of the exploded enemy, destroying their Corpse in the process. The explosion also has a chance to aggravate Bleeding.
Blood Boil Corrupted Blood deals X% of slain enemy's maximum Life as Physical DMG per Sec;Blood Boil applies to Non-Unique enemies in your Presence every X sec.;X% more Corrupted Blood on slain enemy;Inflicts a stack of Corrupted Blood on targets within X metres per Blood Boil on slain enemy;Corrupted Blood duration is X sec.
Focus: Poison, Bleed, Burst |
|
NEW |
Tempest Flurry Perform a series of aggressive Strikes. When used in quick succession, the third use Strikes three times, and the fourth performs a Final strike that calls down a powerful Shocking bolt.
Tempest Bell Build Combo by successfully Striking Enemies with other skills. After reaching maximum Combo, use this skill to cause the Bell on your staff to grow to massive size as you drop it on the ground. The Bell damages enemies on impact and can be Hit by your skills, creating a damaging shockwave. Elemental Ailments applied to the Bell cause its shockwaves to deal extra damage of the corresponding type, and Hits which would have caused Knockback increase the area of effect of the shockwaves.
Wind Dancer Grants a buff that gives you more Evasion per stage. Being Hit by a Melee Attack while you have this buff consumes all stages to damage and Knock Back enemies around you.
Staggering Palm Dash to an enemy and Strike them with an Unarmed Strike, Heavy Stunning an enemy with this Skill grants you a Buff, that causes your Quarterstaff and Unarmed attacks to also fire Projectiles for a short duration. Enemies which are Primed for Stun will instantly be Heavily Stunned. This skill always Strikes with your bare fist, even if you have a Quarterstaff equipped.
Wind Blast Strike enemies at range by generating a gust of wind as you swing. Enemies will be Knocked Back based on how close they are to you.
Berserk While active, strengthens your Rage and grants you Life Leech based on your Rage, but causes you to lose Life while Raging.
War Banner While active, killing enemies with attacks or standing near a Unique enemy generates Valour. using this skill consumes Valour to place an inspiring Banner with an Aura that grants you and nearby allies Attack damage and accuracy while Banner lasts. The Banner cannot gain Valour while placed, and you cannot place a Banner while you already have a Banner placed.
Focus: Attack Speed, Mobility, Wind, Physical, Critical Hit |
NEW |
Wind Dancer Grants a buff that gives you more Evasion per stage. Being Hit by a Melee Attack while you have this buff consumes all stages to damage and Knock Back enemies around you.
Disengage Jump back as you rupture the earth in front of you with spearpoints, damaging enemies. Consumes the Parried Debuff on Hitting enemies to release a shockwave and grant you a Frenzy Charge. This skill can be used while using other skills, and causes Strikes and Projectiles to miss you while jumping. This skill cannot be Ancestrally Boosted.
Rake Dash towards an enemy and perform a lacerating slash, inflicting Bleeding on all enemies struck.
Blood Hunt Lunge at a target and skewers them. Hitting an enemy that has suffered Blood Loss will cause a blood explosion and also Consume Bleeding. This skill cannot be Ancestrally Boosted.
Bloodhound's Mark Mark a target, making them suffer Heavy Stun build up from Blood Loss. If they suffer enough Blood Loss while Marked, the Mark is consumed and they will release an explosion of blood when killed or Heavy Stunned.The duration doesn't tick while the target is suffering Blood Loss.
Herald of Blood While active, killing an enemy with Blood Loss will cause a bloody explosion that deals Physical Attack damage to surrounding enemies based off the life of the exploded enemy, destroying their Corpse in the process. The explosion also has a chance to aggravate Bleeding.
Bind Spectre Capture the spirit of a defeated monster, transforming this gem to instead allow you to summon the monster's ghost as a Reviving Minion.
Focus: Bleed, Burst, Physical Damage |
Huntress Class and Ascendancy Guides
| Base Class | |
|---|---|
| Ascendancies | |
Comment
Author
PoE 2 0.2.0 Bleed Huntress Leveling Build
Rankings
- We could not find the message board you were looking for.
Gaming News
Popular Games

Genshin Impact Walkthrough & Guides Wiki

Umamusume: Pretty Derby Walkthrough & Guides Wiki

Pokemon Pokopia Walkthrough & Guides Wiki

Honkai: Star Rail Walkthrough & Guides Wiki

Monster Hunter Stories 3: Twisted Reflection Walkthrough & Guides Wiki

Arknights: Endfield Walkthrough & Guides Wiki

Wuthering Waves Walkthrough & Guides Wiki

Zenless Zone Zero Walkthrough & Guides Wiki

Pokemon TCG Pocket (PTCGP) Strategies & Guides Wiki

Monster Hunter Wilds Walkthrough & Guides Wiki
Recommended Games

Fire Emblem Heroes (FEH) Walkthrough & Guides Wiki

Diablo 4: Vessel of Hatred Walkthrough & Guides Wiki

Cyberpunk 2077: Ultimate Edition Walkthrough & Guides Wiki

Yu-Gi-Oh! Master Duel Walkthrough & Guides Wiki

Super Smash Bros. Ultimate Walkthrough & Guides Wiki

Pokemon Brilliant Diamond and Shining Pearl (BDSP) Walkthrough & Guides Wiki

Elden Ring Shadow of the Erdtree Walkthrough & Guides Wiki

Monster Hunter World Walkthrough & Guides Wiki

The Legend of Zelda: Tears of the Kingdom Walkthrough & Guides Wiki

Persona 3 Reload Walkthrough & Guides Wiki
All rights reserved
© 2010 - 2024 Grinding Gear Games
The copyrights of videos of games used in our content and other intellectual property rights belong to the provider of the game.
The contents we provide on this site were created personally by members of the Game8 editorial department.
We refuse the right to reuse or repost content taken without our permission such as data or images to other sites.
 Bleed Huntress
 Modifiers:
 Modifiers:


![Monster Hunter Stories 3 Review [First Impressions] | Simply Rejuvenating](https://img.game8.co/4438641/2a31b7702bd70e78ec8efd24661dacda.jpeg/show)

![Monster Hunter Stories 3 Review [First Impressions] | Simply Rejuvenating](https://img.game8.co/4438641/2a31b7702bd70e78ec8efd24661dacda.jpeg/thumb)
![The Seven Deadly Sins: Origin Review [First Impressions] | A Promising Start](https://img.game8.co/4440581/584e0bfb87908f12c4eab6e846eb1afd.png/thumb)


