How to Get Guide Crystals
★ Version 3.2 Banners → Livestream Codes
┣ Sigrika → Materials, Weapon, Banner
┣ Qiuyuan → Builds, Materials, Weapon
┗ Phase 2 → Lynae, Zani, Phoebe
★ Tapes of Last Words | Soliskin | 3.1 Trophies
★ Exclusives: Tier Maker | State of the Meta
Guide Crystals are an in-game item used in an overworld puzzle in Wuthering Waves. Find out how to get Guide Crystals, and how to use them in this article!
List of Contents
How to Get Guide Crystals
| Guide Crystal Puzzle Locations |
|---|
|
|
To get Guide Crystals, players will need to solve two different puzzles near the Court of Savantae Ruins.
Solve the Pressure Plate Puzzle
- Pressure Plate Puzzle Location
- Pressure Plate and Weight Blocks Puzzle
- Free the Locked Weight Block
- Follow the Second Circle to Unlock the Door
- Pressure Plate Puzzle Rewards
This Pressure Plate Puzzle is one of the two puzzles that provide the player with a Guide Crystal.
Pressure Plate and Weight Block Guide
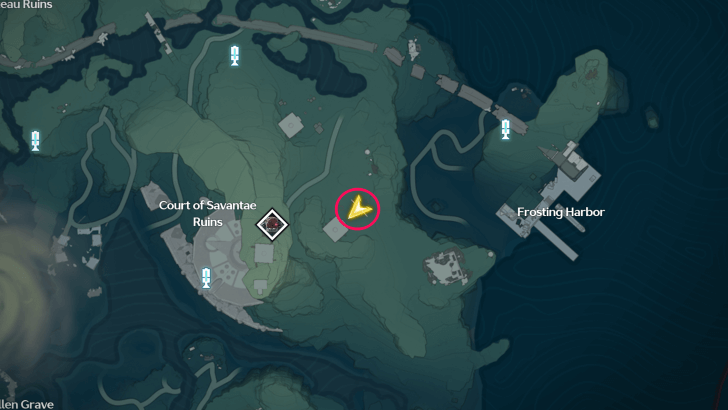
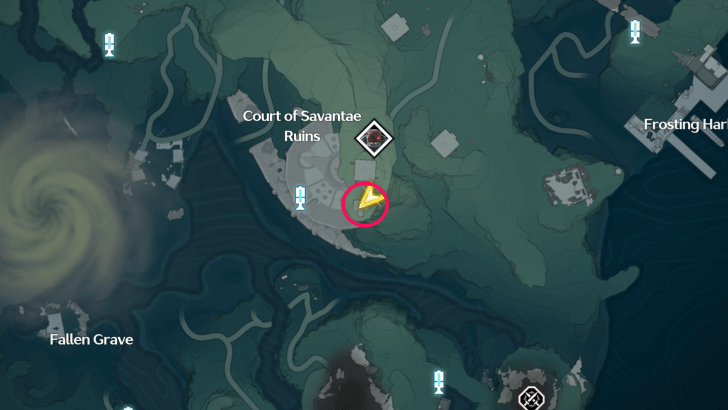
Pressure Plate Puzzle Location
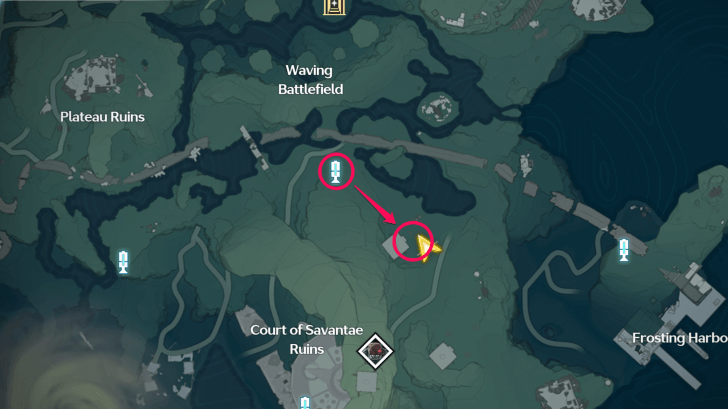
The Pressure Plate and Weight Block Puzzle can be found in this area. Use the highlighted Resonance Beacon and head southeast to find the puzzle.
Pressure Plate and Weight Blocks Puzzle
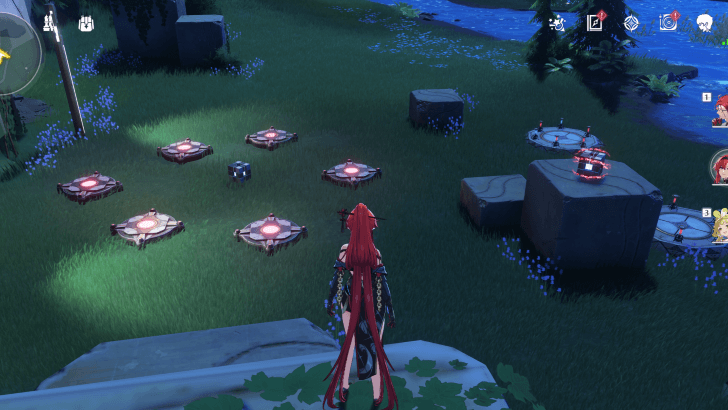
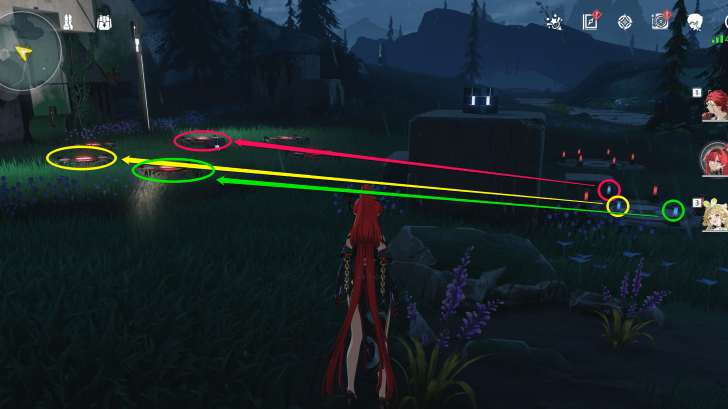
Upon arriving at the puzzle's location, the six Pressure Plates will look like this. There will be two Weight Blocks (one which will be locked), and one of the circles with lights will have two blue and four red lights on it.
Free the Locked Weight Block
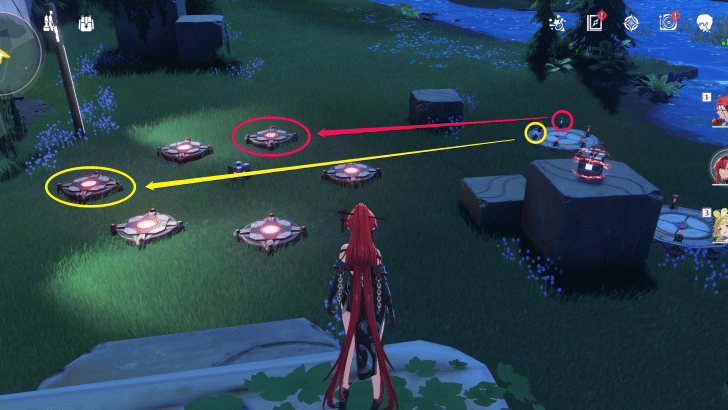
The orientation of these lights match that of the Pressure Plates. Activate the two Pressure Plates that correspond to a blue light on the circle using a Weight Block and the Player Character.
Once this part of the puzzle is completed, the locked Weight Block will be unlocked for use.
Follow the Second Circle to Unlock the Door
When the locked Weight Block is freed, the second circle with lights will also change. This time, use both Weight Blocks and the Player Character to activate the three correct Pressure Plates.
Once the correct weight blocks have been activated, the door to the nearby building will open.
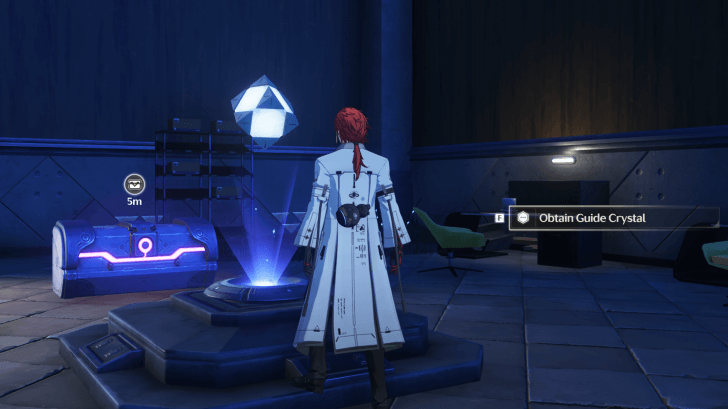
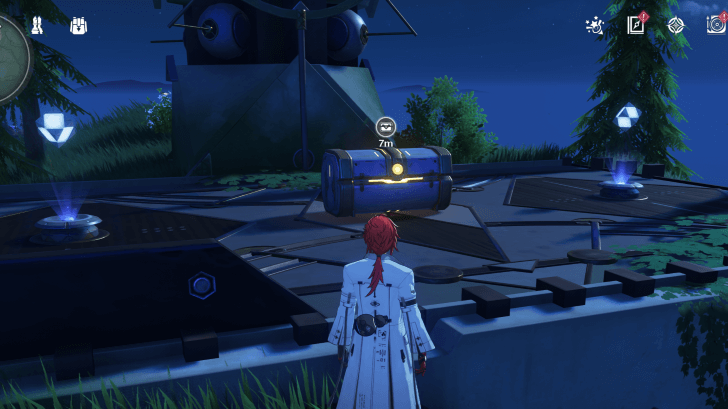
Pressure Plate Puzzle Rewards
In the building, there will be an Advanced Supply Chest, as well as the Guide Crystal, which the player can interact with to obtain.
Solve the Energy Matrix Puzzle
- Energy Matrix Puzzle Location
- Energy Matrix and Components
- Locate an Energy Matrix Component
- Remove the Vines Trapping a Component
- Find the Component Under the Vines
- Solve the Energy Matrix to Unlock the Door
- Energy Matrix Puzzle Rewards
The player can choose to solve either this Energy Matrix Puzzle or the Pressure Plate Puzzle in any order.
Energy Matrix Puzzle Location
This puzzle is further south from the Pressure Plate and Weight Block Puzzle. Be careful when approaching the area, as there are Exiles investigating the Energy Matrix.
Energy Matrix and Components
The area will look like this after defeating the Exiles. There is the Energy Matrix Puzzle, a long trail of Vines that go from one side of the building to the other, and a nearby Explosive Charge.
Locate an Energy Matrix Component

Examining the Energy Matrix puzzle, there are two Components at its base. Facing the building, turn around to find a third Component near some rocks.
Remove the Vines Trapping a Component
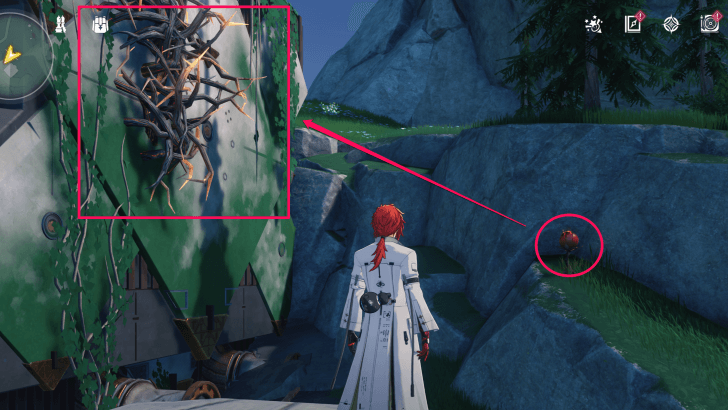
There is a set of Vines that go from one side of the building to the other. Use the Explosive Charge on a nearby ledge to set fire to the Vines, and it will clear across the building.
Find the Component Under the Vines
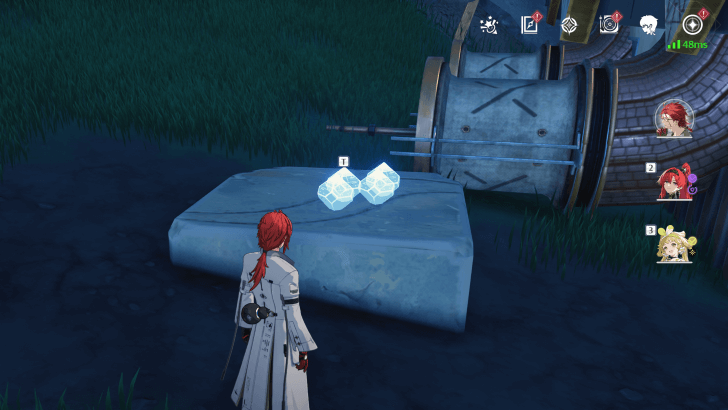
On the side of the building opposite the Explosive Charge, there is a Component. Burning the Vines will grant access to it.
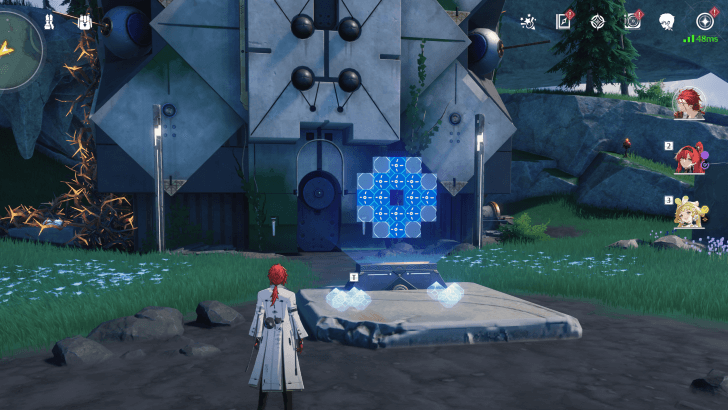
Solve the Energy Matrix to Unlock the Door
| Component | Position |
|---|---|
| L Piece 1 |  |
| Z Piece | 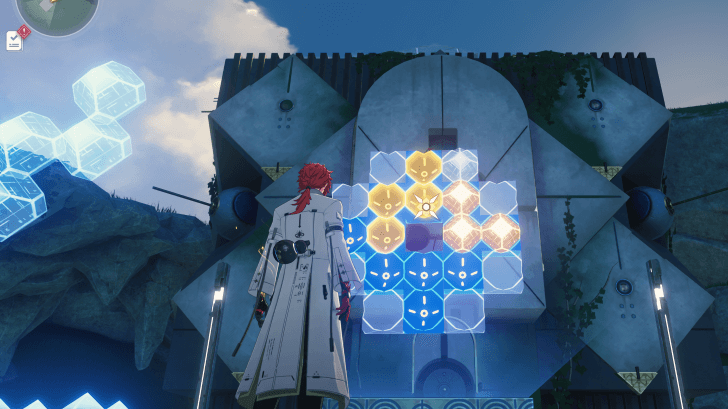 |
| L Piece 2 | 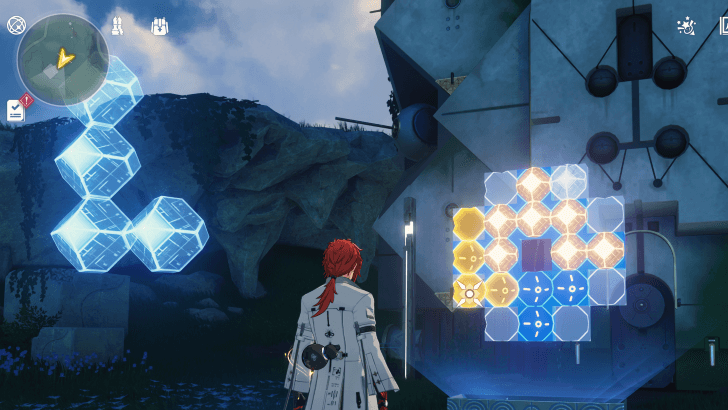 |
| Square Piece | 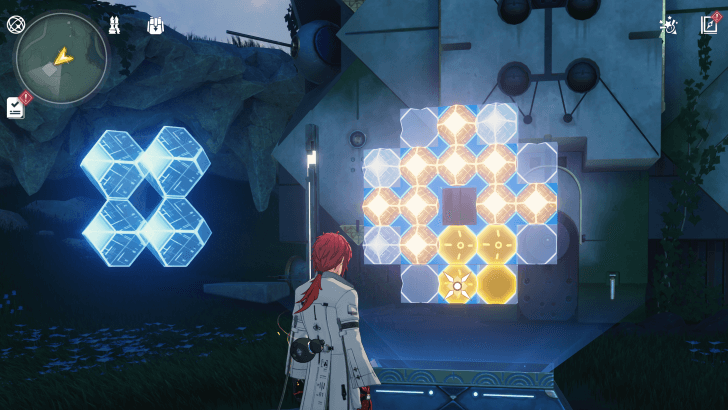 |
To solve the puzzle and open the door, all of the dark blue squares need to be covered. Follow the placements of the Components above for a solution to the puzzle.
Energy Matrix Puzzle Rewards
Upon completing the Energy Matrix Puzzle, the door to the building will open. Inside is another Advanced Supply Chest, and a second Guide Crystal.
How to Use Guide Crystals
Go to Court of Savantae Ruins
After obtaining both Guide Crystals, head to this area. Note that this area is elevated, and is located at the mountain top.
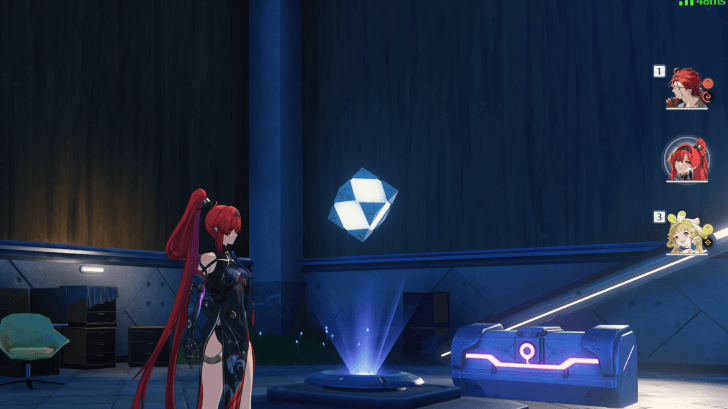
Find the Glowing Pedestals
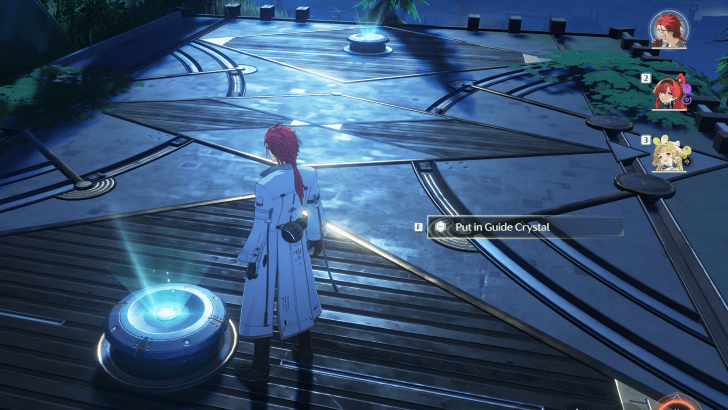
Upon arriving, there will be two Glowing Pedestals in the area. Approach them and place a Guide Crystal inside each one.
Claim The Chest Reward
Once both Guide Crystals have been submitted, a Premium Supply Chest will appear. The chest will contain Astrite and other resources, to reward the player for their efforts.
Wuthering Waves Related Guides

Beginner's Guide: Tips and Tricks
Tips and Tricks
Echo Guides
Puzzle Guides
Utilities
| Utilities | |
|---|---|
| All Utilities | Grappling Hook |
| Sensor | Waypoint |
| Casket Sonar | Levitator |
| Projector | Lootmapper |
| Camera | Ultrasonic Pulse Chip |
| New Flight Mechanics | Expedition Motorbike |
Unmarked Challenges
| Unmarked Challenges | |
|---|---|
| Unmarked Challenge Locations | How to Complete the Backflip Challenge |
| Travel in Jinzhou Gulpuff Challenge | Mingming and Doudou Hide And Seek |
FAQs
Comment
Author

How to Get Guide Crystals
Premium Articles

Rankings

Gaming News


![Monster Hunter Stories 3 Review [First Impressions] | Simply Rejuvenating](https://img.game8.co/4438641/2a31b7702bd70e78ec8efd24661dacda.jpeg/thumb)
Popular Games

Genshin Impact Walkthrough & Guides Wiki
Honkai: Star Rail Walkthrough & Guides Wiki
Umamusume: Pretty Derby Walkthrough & Guides Wiki
Pokemon Pokopia Walkthrough & Guides Wiki
Resident Evil Requiem (RE9) Walkthrough & Guides Wiki
Monster Hunter Wilds Walkthrough & Guides Wiki
Wuthering Waves Walkthrough & Guides Wiki
Arknights: Endfield Walkthrough & Guides Wiki
Pokemon FireRed and LeafGreen (FRLG) Walkthrough & Guides Wiki
Pokemon TCG Pocket (PTCGP) Strategies & Guides Wiki


Recommended Games
Diablo 4: Vessel of Hatred Walkthrough & Guides Wiki
Cyberpunk 2077: Ultimate Edition Walkthrough & Guides Wiki
Fire Emblem Heroes (FEH) Walkthrough & Guides Wiki
Yu-Gi-Oh! Master Duel Walkthrough & Guides Wiki
Super Smash Bros. Ultimate Walkthrough & Guides Wiki
Pokemon Brilliant Diamond and Shining Pearl (BDSP) Walkthrough & Guides Wiki
Elden Ring Shadow of the Erdtree Walkthrough & Guides Wiki
Monster Hunter World Walkthrough & Guides Wiki
The Legend of Zelda: Tears of the Kingdom Walkthrough & Guides Wiki
Persona 3 Reload Walkthrough & Guides Wiki


All rights reserved
Copyright© 2024-2025 Kuro Games. All Rights Reserved.
The copyrights of videos of games used in our content and other intellectual property rights belong to the provider of the game.
The contents we provide on this site were created personally by members of the Game8 editorial department.
We refuse the right to reuse or repost content taken without our permission such as data or images to other sites.