Chapter 2 Act 4 The Maiden, The Defier, The Death Crier Quest Guide
★ Version 3.2 Banners → Livestream Codes
┣ Sigrika → Materials, Weapon, Banner
┣ Qiuyuan → Builds, Materials, Weapon
┗ Phase 2 → Lynae, Zani, Phoebe
★ Tapes of Last Words | Soliskin | 3.1 Trophies
★ Exclusives: Tier Maker | State of the Meta
Chapter 2 Act 4: The Maiden, The Defier, The Death Crier is the fourth Act in Chapter 2 of Wuthering Waves' main story quest. Learn its release date and details about the main story quest here!
How to Unlock The Maiden, The Defier, The Death Crier
Complete What Yesterday Wept, Today Doth Sing
The Maiden, The Defier, The Death Crier automatically unlocks after completing the previous main quest, What Yesterday Wept, Today Doth Sing.
What Yesterday Wept, Today Doth Sing Guide
The Maiden, The Defier, The Death Crier Walkthrough
Meet Ciaccona and Cantarella
| 1 | How to Meet Ciaccona and Cantarella |
|---|---|
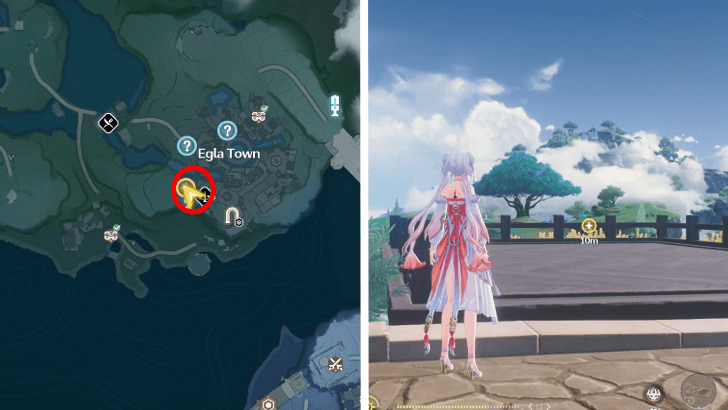 To start the quest, you must go to Egla Town, and head to the empty platform. A cutscene will automatically play that'll explain Rover and Abby's next plans. |
|
| 2 |  Afterwards, you must go to a high place to meet Carlotta's acquaintance, Ciaccona. You will talk to Cartethyia once more. After everything is done, you must accept the Fisalia's invitation and head to their castle. |
| 3 |  Head to Porto-Veno to meet up with Cantarella. After the exchange of pleasantries, you must follow Cantarella to her study. |
Cantarella Ascension Materials Guide
Board the Train Echo

After the long talk, Cantarella will open a deeper part of the castle, revealing a train echo. Ride this train echo to arrive at the Beohr Water. Once you do Tacet Discords will jump at you. Get ready to defeat them using Cantarella.
Cantarella Builds and Best Teams
Place Tyrvine on the Pedestal
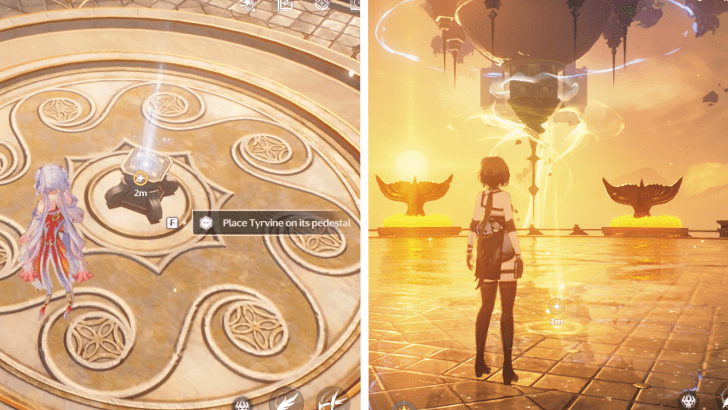
Once you emerge out of the ruins in Beohr Waters, use the Wingray to fly towards the building in the cliff. After the cutscene, you must place Tyrvine on the pedestal. This will cause the tower to rise toward the skies, and gravity to shift.
After everything, you must leave the traction tower, and activate the Pool of Rising. Once you reach the top, summon Phaom, the Gondola. At this point, you will be prompted to choose between Cartethyia and Cantarella, but this choice does not affect the outcome, and you will ultimately go with Cartethyia.
Clear the Dark Tide Remnants
| 1 | How to Solve the Statue's Dark Tide Puzzle |
|---|---|
 Ride your Gondola until you can reach an area with three tainted statues. After the cutscene, approach the huge statue to the left, and it'll automatically be solved through another cutscene. |
|
| 2 |  Interact with the statue on the right to have Cartethyia purify the remnants. |
| 3 | 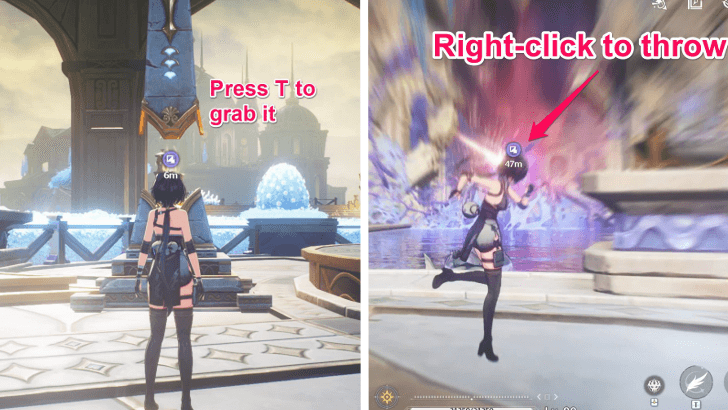 Use the Levitator to lift the Remnant Spark from its pedestal and throw it at the vines. Note that you only need to have the vines in your line of sight to successfully aim the Remnant Spark. Board your Gondola once more toward the next puzzle! |
Solve the Next Dark Tide Puzzle
| 1 | How to Solve the Next Dark Tide Puzzle |
|---|---|
 Head to the Gravity Calibrator. Make sure that the lit part of the Calibrator is colored yellow and pointing at the opposite direction before exiting. |
|
| 2 | 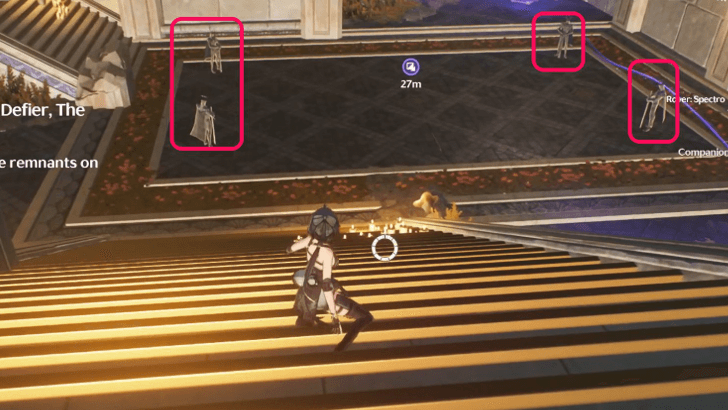
Continue onward until you find four suspicious statues. They will eventually turn into Tacet Discords that you must defeat as Spectro Rover. |
| 3 | 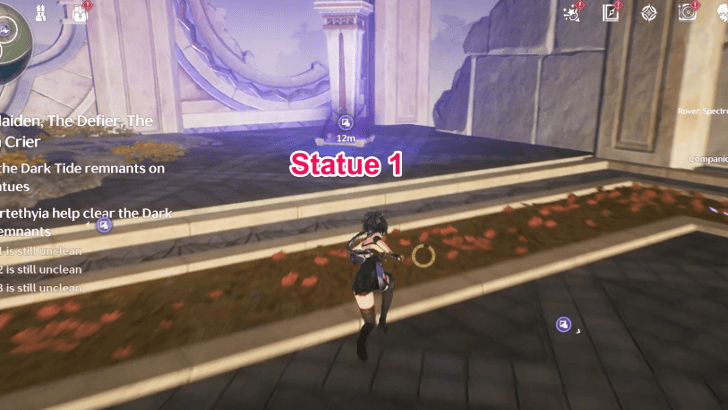
Head to the first statue and interact with it to have Cartethyia purify the remnants. Note that you can run to the other statues while Cartethyia is still purifying. This is useful as you only have 30 seconds before the statues become corrupted again. |
| 4 |  Look for the second and third statues and interact with them as soon as possible so they would be purified in time. |
| 5 | 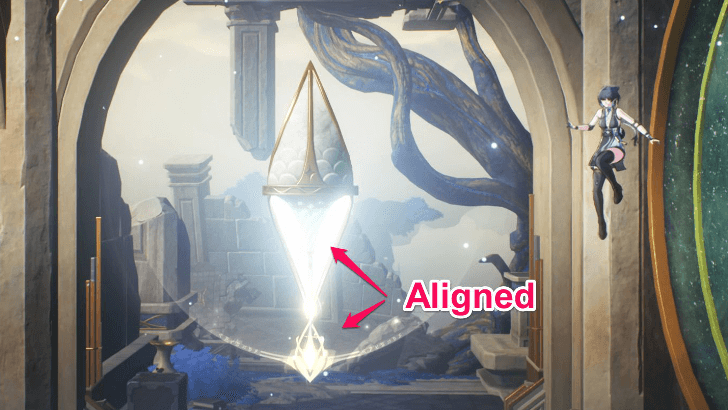
Head back to the Gravity Calibrator and turn it to its original orientation, making sure that the light's color is blue. |
| 6 |
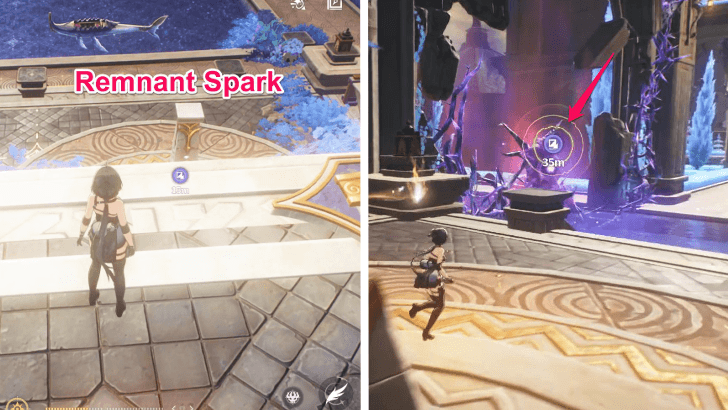 Use the Levitator to lift the Remnant Spark from its pedestal and throw it at the vines |
Clear All the Dark Tides on the Statue at Once
| 1 | How to Cleanse All the Dark Tides |
|---|---|
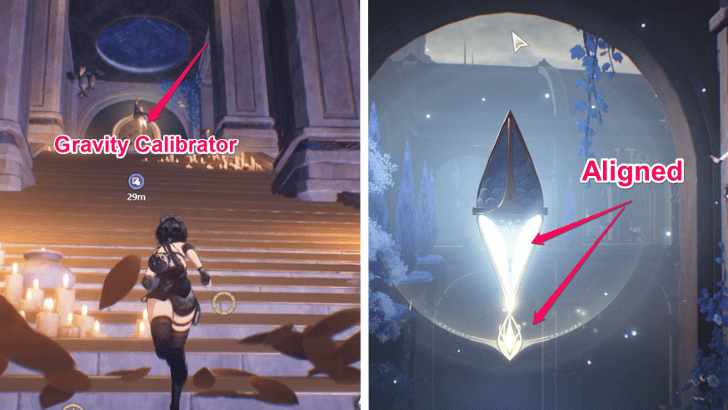 Ride your Gondola to the next destination. After the cutscene, head to the Gravity Calibrator and orient it to the way Cartethyia has requested, making sure that the light turns blue. |
|
| 2 | 
Defeat the two enemies. Head to the Tacetite device afterwards. |
| 3 | Once you interact with the Tacetite device, two waves of enemies will spawn with two enemies per wave. Defeat them to proceed. |
| 4 | Head back to the Gravity Calibrator and turn it to its original orientation, with the light colored yellow. |
| 5 |  Rush to the quest marker and Cartethyia will automatically clear all the Dark Tide. Afterwards, use the Levitator to lift the Remnant Spark from its pedestal and throw it at the vines. You can now go back to Phaom and use it to reach the Tower of Salvation. |
Place Tyrvine in the Tower of Unity
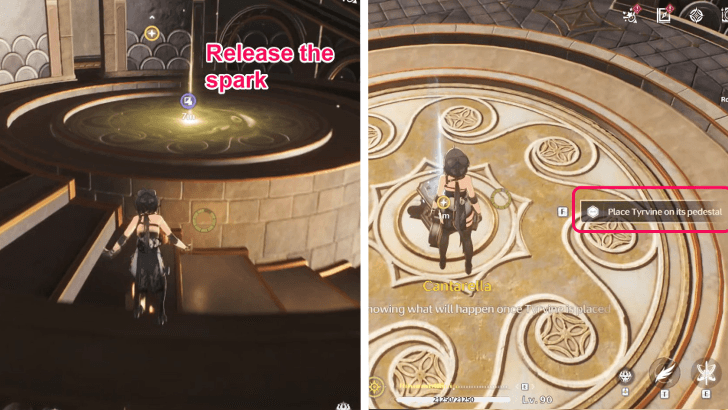
Climb up using the golden shelves and grapple on the way. When you go through the Door of Utility, head to the center to release the peculiar spark. Place Tyrvine on the pedestal inside the Tower of Unity. The day ends with everyone needing to rest.
The next day, Cantarella hears something suspicious outside. Defeat all the Tacet Discords using Cantarella and Havoc Rover.
Head to the Zargon Garden
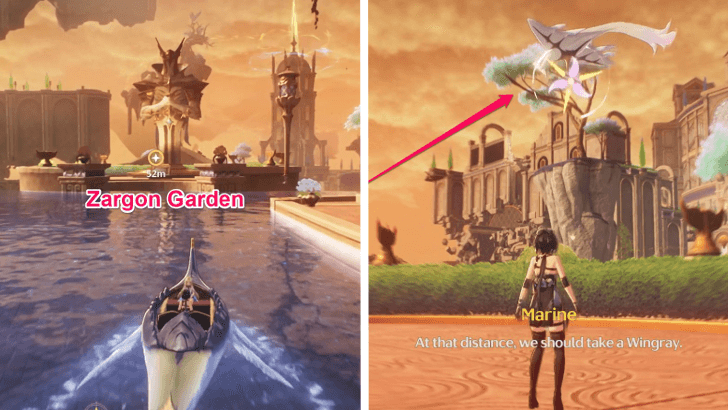
Head to the Zargon Garden using Phaom. Unfortunately, the next sword, Hognis, is nowhere to be found. By this time, Cartethyia realizes that the geography of the area isn't what it used to be. The two decide to move the waterways around before getting Hognis. Use the Wingray to go to the next objective.
Fix the Statue of Divine Justice
Jump to the Gravity Calibrator and change its orientation. Follow the quest marker using the Wingray and grapple on top of the Statue of the Divine Justice. Initiate a Plunge attack on it to put it back in its rightful place.
Cleanse the Dark Tide Remnants
| How to Cleanse the Dark Tide Remnants | |
|---|---|
| 1 |
Defeat the little draconic Tacet Discords that appear, then jump to the corrupted statue. Note that you have to transform back to Rover so you can call Cartethyia to purify it. |
| 2 |
Jump to the next corrupted statue, and cleanse it. Note that you only have 30 seconds before the first statue becomes corrupted again. |
| 3 |
Jump to the Remnant Spark. Lift it with the Levitator and throw it at the corrupted vines. |
| 4 | 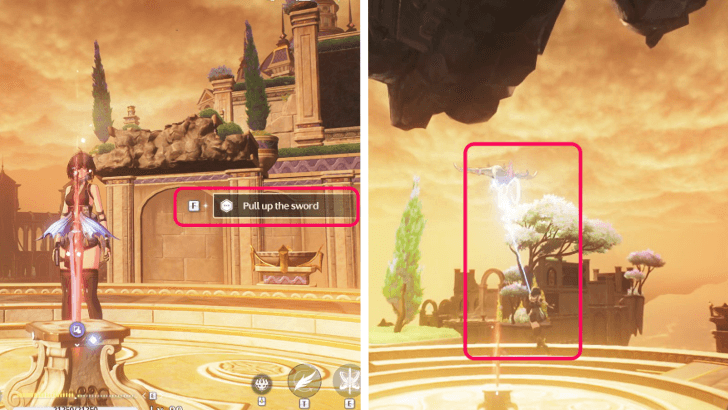 Use the newly unlocked Gravity Calibrator and change the orientation of its gravity. Afterwards, head back to Hognis and try to pull it out. Unfortunately the sword is stuck for now. You must fix more of the waterways which you can start by using the Wingray to proceed to the next area. |
Fix the Second Statue of Divine Justice
| 1 | How to Fix the Second Statue of Divine Justice |
|---|---|
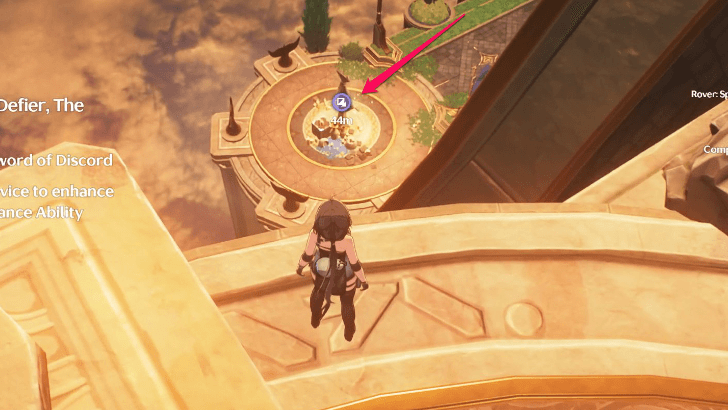
Go to the Tacetite device to enhance Cartethyia's abilities. |
|
| 2 | 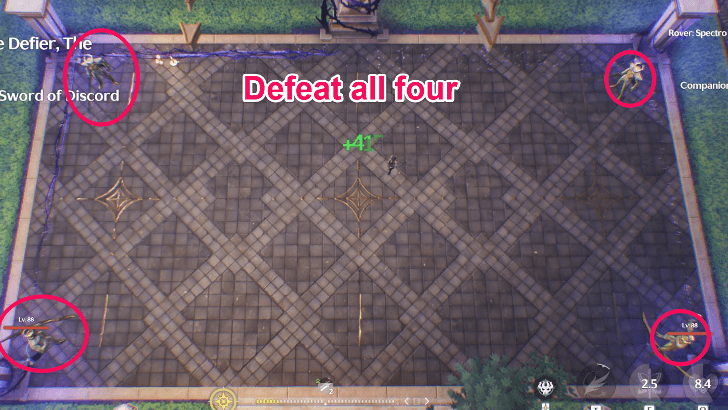 Afterwards, you must defeat all four of the Tacet Discords so Cartethyia could purify the statues. |
| 3 | 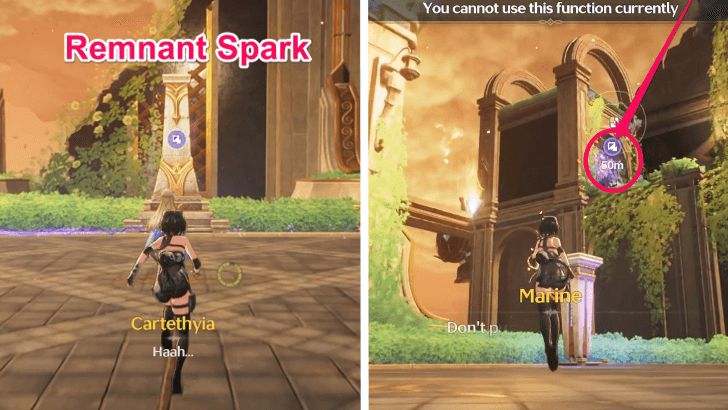 Use the Levitator to lift the Remnant Spark from its pedestal and throw it at the vines. |
| 4 | 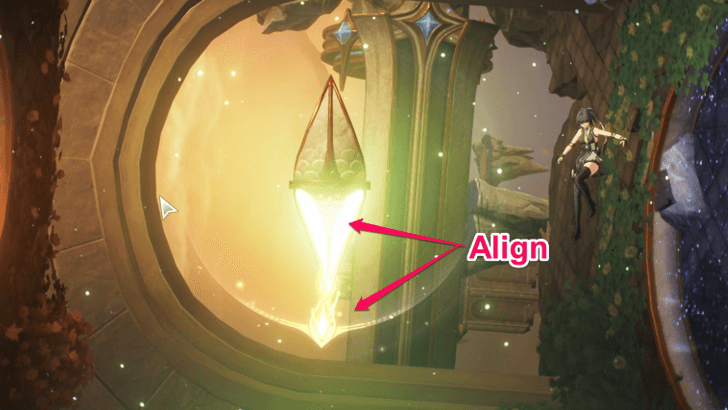 Jump to the newly unlocked Gravity Calibrator and change the orientation of its gravity. |
| 5 | 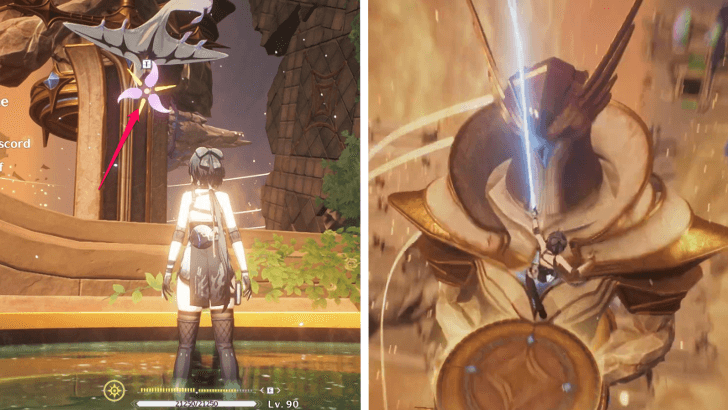 Reach the top of the Statue of the Divine Justice using the Wingray. Unfortunately, the location is too high for the Wingray which is why you must fly. Be sure to grapple at the end to plunge at the statue! |
Fix the Third Statue of Divine Justice
| 1 | How to Fix the Third Statue of Divine Justice |
|---|---|
 Use the Wingray and fly to the next destination. Defeat the Tacet Discords. |
|
| 2 | 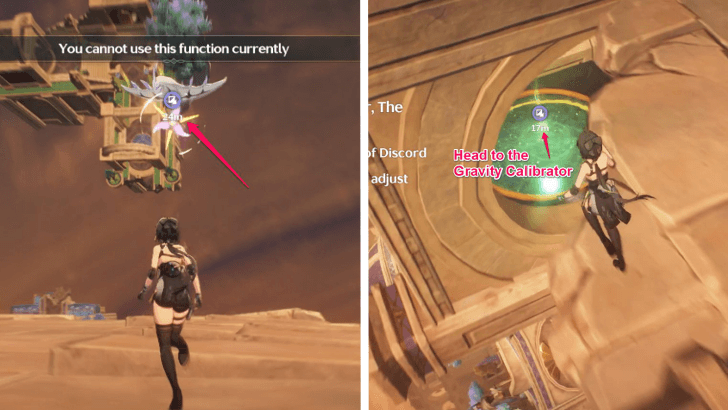 Head to the next Gravity Calibrator using the Wingray. Make sure to align the lighted portion with the yellow indicator. |
| 3 | 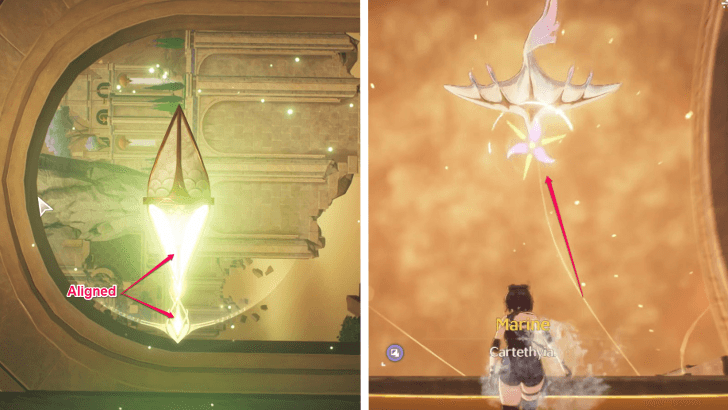 Head to another Gravity Calibrator nearby and change the gravity orientation. Use the Wingray afterwards. |
| 4 | 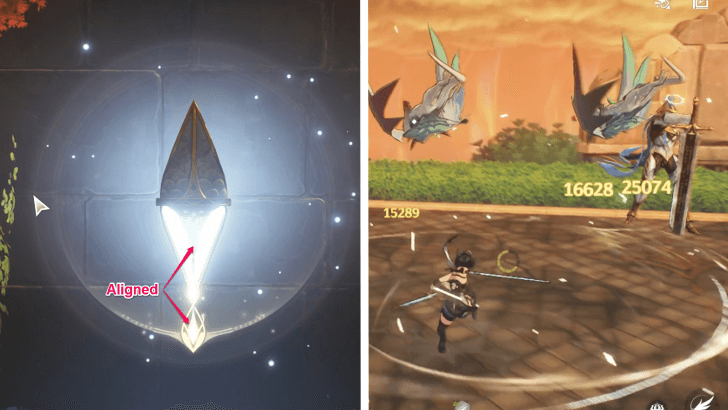 Head to another Gravity Calibrator nearby and change the gravity orientation. Defeat the Tacet Discords ahead to proceed. |
| 5 |  Fly towards the statue and enjoy the view. Grapple to the statue as this'll automatically trigger the plunge attack animation from Rover. Once everything is done head to Hognis, and pull it together with Cartethyia. |
Head Back to the Tower of Unity and Rest

Head back to the Tower of Unity by boarding your Gondola. When you arrive, place Hognis, the sword, on the pedestal. Afterwards, you must rest once more due to the long journey.
You will be awoken by a singing voice. Use the Wingray to find its source, where you meet Cartethyia once again. A long and emotional cutscene will play afterwards.
Pull The Sword: Haultir
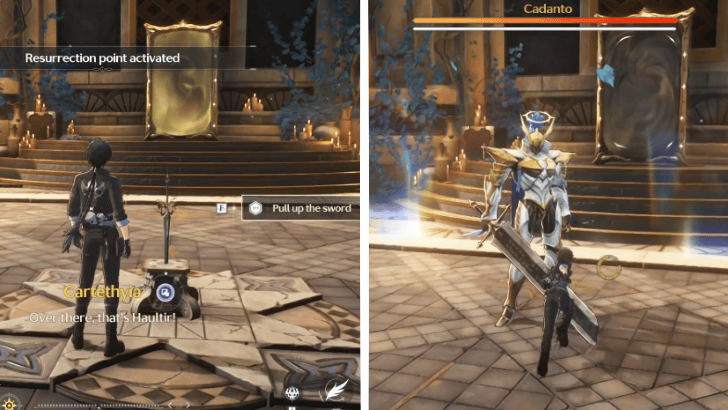
Once you wake up, use the Wingray to fly back to your Gondola and sail through the Knight's Waterways toward the Hall of Swordsmanship: Ruins.
When you arrive, pull out the sword Haultir from its pedestal. An enemy named Cadanto will emerge, taking the form of a Capitaneus Echo. Defeat him and teleport using the Door of Utility afterwards.
Complete the Last Trial
| 1 | How to Complete the Last Trial |
|---|---|
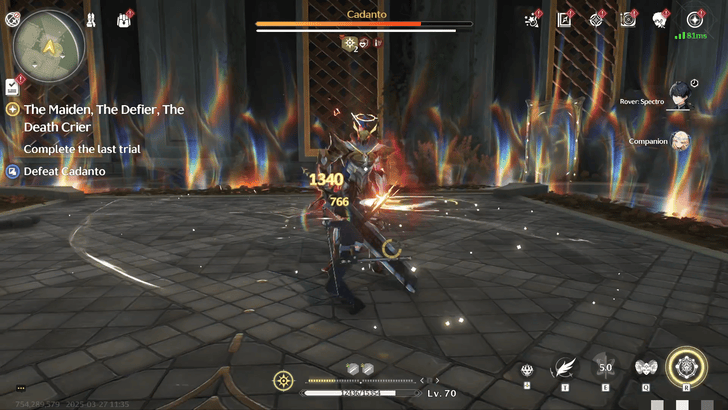 Use the Wingray to reach the Door of Utility. Once you cross through it, you have to defeat Cadanto again. Note that this version of his has two buffs. |
|
| 2 |  Smash the first obelisk by hitting it with a Basic Attack until purple cracks start to form. Head back to the Door of Utility afterwards. |
| 3 |  Same as the first area, defeat Cadanto and two other Tacet Discords. Unfortunately, this Cadanto has four buffs so stay vigilant. Once defeated, you can smash the second obelisk. Reach the third obelisk, by using the Wingray |
| 4 | 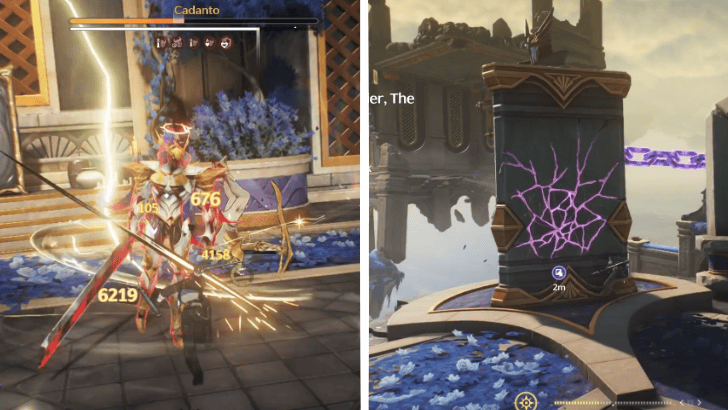 You must defeat Cadanto again, as well as his four Tacet Discord allies. Cadanto is stronger this time around, with his five buffs. After the battle, smash the third obelisk. |
| 5 |  Go through the Door of Utility where you'll face Cadanto with eight buffs. This version has a third of health left paired with a thick shield. Once defeated, smash the fourth and last obelisk. |
| 6 |  Head through the Door of Utility once more where a cutscene will play. Afterwards, you must ride your Gondola to face Cadanto one last time. He is now at full health and equipped with six buffs. Once the battle is over, head through the Door of Utility and place Haultir on the pedestal. |
Battle With and Defeat Fleurdelys

Go back through the Door of Utility and ride your Gondola to reach the Path of Bestowal. After the cutscene that'll play you must face Fleurdelys behind the huge door.
Her movements will be quick, though don't worry if your Rover's health drops down to zero, as they are meant to be knocked out. A cutscene will play afterwards, where the Rover emerges with a new elemental attunement. With this newfound power, use all of your might to defeat Fleurdelys once and for all!
Fleurdelys Location and How to Beat
Talk to Cartethyia and Cantarella
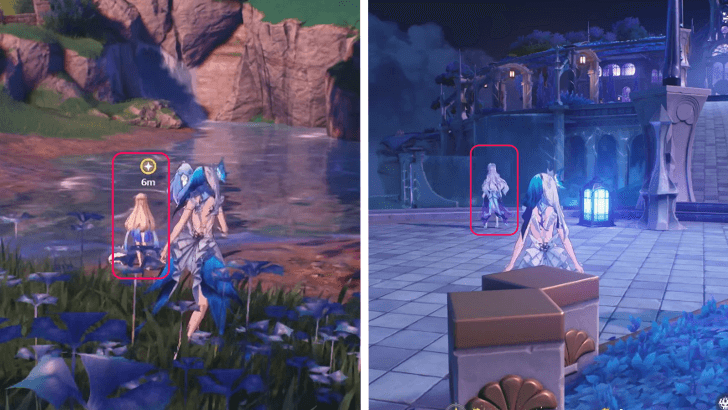
You must talk to Cartethyia after emerging victorious from your battle. Head to Porto-Veno castle one last time and share everything that happened to Cantarella. The quest officially ends after your conversation, giving this quest its rightful conclusion, and allowing you to claim your rewards!
The Maiden, The Defier, The Death Crier Information
| The Maiden, The Defier, The Death Crier Quest Information | |
|---|---|
| Questline | Chapter 2: Even When Divinity Remains Silent |
| Required Union Lvl | None |
| Quest Location | Porto - Veno Castle |
| Version Release | 2.2 |
The Maiden, The Defier, The Death Crier Rewards
Total Quest Rewards
| The Maiden, The Defier, The Death Crier Quest Rewards |
|---|
|
|
Unlocks the Death & Rebirth Trophy
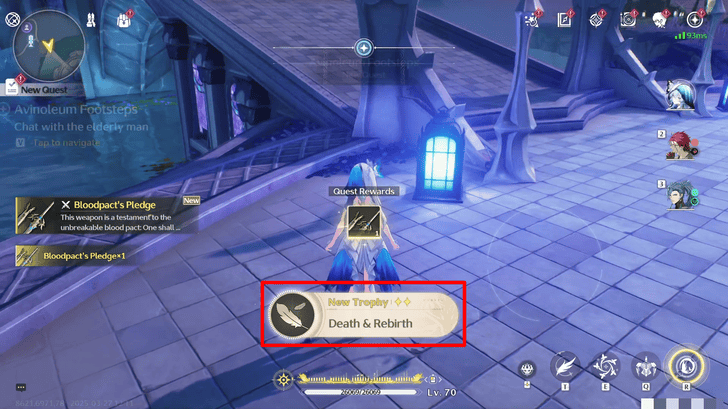
Completing The Maiden, The Defier, The Death Crier also unlocks the Death & Rebirth Trophy which allows you to claim 10 Astrites.
Wuthering Waves Related Guides

List of Quest Types
| All Quest Types | |
|---|---|
| Main Quests | Companion Stories |
| Exploration Quests | Side Quests |
| Tutorial Quests | Daily Quests |
| Hidden Quests | - |
Main Quest Walkthrough
Comment
Author
Chapter 2 Act 4 The Maiden, The Defier, The Death Crier Quest Guide
improvement survey
03/2026
improving Game8's site?

Your answers will help us to improve our website.
Note: Please be sure not to enter any kind of personal information into your response.

We hope you continue to make use of Game8.
Premium Articles
Rankings
Gaming News
Popular Games

Genshin Impact Walkthrough & Guides Wiki

Honkai: Star Rail Walkthrough & Guides Wiki

Umamusume: Pretty Derby Walkthrough & Guides Wiki

Pokemon Pokopia Walkthrough & Guides Wiki

Resident Evil Requiem (RE9) Walkthrough & Guides Wiki

Monster Hunter Wilds Walkthrough & Guides Wiki

Wuthering Waves Walkthrough & Guides Wiki

Arknights: Endfield Walkthrough & Guides Wiki

Pokemon FireRed and LeafGreen (FRLG) Walkthrough & Guides Wiki

Pokemon TCG Pocket (PTCGP) Strategies & Guides Wiki
Recommended Games

Diablo 4: Vessel of Hatred Walkthrough & Guides Wiki

Cyberpunk 2077: Ultimate Edition Walkthrough & Guides Wiki

Fire Emblem Heroes (FEH) Walkthrough & Guides Wiki

Yu-Gi-Oh! Master Duel Walkthrough & Guides Wiki

Super Smash Bros. Ultimate Walkthrough & Guides Wiki

Pokemon Brilliant Diamond and Shining Pearl (BDSP) Walkthrough & Guides Wiki

Elden Ring Shadow of the Erdtree Walkthrough & Guides Wiki

Monster Hunter World Walkthrough & Guides Wiki

The Legend of Zelda: Tears of the Kingdom Walkthrough & Guides Wiki

Persona 3 Reload Walkthrough & Guides Wiki
All rights reserved
Copyright© 2024-2025 Kuro Games. All Rights Reserved.
The copyrights of videos of games used in our content and other intellectual property rights belong to the provider of the game.
The contents we provide on this site were created personally by members of the Game8 editorial department.
We refuse the right to reuse or repost content taken without our permission such as data or images to other sites.


![Everwind Review [Early Access] | The Shaky First Step to A Very Long Journey](https://img.game8.co/4440226/ab079b1153298a042633dd1ef51e878e.png/thumb)

![Monster Hunter Stories 3 Review [First Impressions] | Simply Rejuvenating](https://img.game8.co/4438641/2a31b7702bd70e78ec8efd24661dacda.jpeg/thumb)


