 Zani
Zani Brant
Brant Camellya
 Cantarella
 Carlotta
 Changli
 Encore
 Jiyan
Jiyan Lingyang
 Roccia
 Yinlin
 Zhezhi
This survey will take about 1 minute.
Your answers will help us to improve our website.
Wuthering Waves (WuWa)
Cantarella Story Quest Guide - A Fleeting Night's Dream
★ Version 3.2 Banners → Livestream Codes
┣ Sigrika → Materials, Weapon, Banner
┣ Qiuyuan → Builds, Materials, Weapon
┗ Phase 2 → Lynae, Zani, Phoebe
★ Tapes of Last Words | Soliskin | 3.1 Trophies
★ Exclusives: Tier Maker | State of the Meta

A Fleeting Night's Dream is Cantarella's Companion Story in Wuthering Waves. See how to unlock the character story, its walkthrough, and the complete rewards here!
How to Unlock A Fleeting Night's Dream
Complete The Maiden, The Defier, The Death Crier
To begin this quest, you must first complete Chapter 2 Act 4 The Maiden, The Defier, The Death Crier. Afterward, the quest will immediately appear in the quest log, under the Companion Stories tab.
The Maiden, The Defier, The Death Crier
A Fleeting Night's Dream Walkthrough
- Head to Egla Town
- Collect Riddles From Three Stalls
- Talk to the Girl Hiding in the Flower Bushes
- Find Cantarella and Discuss What You Learned
- Use the Lamp to Switch Between Dimensions
- Find All Three Sea Apples
- Observe the Jellyrose Medusa
- Find the Jellyrose Medusa
- Chase the Jellyrose Medusa
- Use the Bouncy Jellyfish to Ascend
- Observe the Doll in the Room
- Talk to the Ballerina Doll
- Catch Up to the Doll
- Find the Right Doll
- Free the Late Head of Fisalia
Head to Egla Town
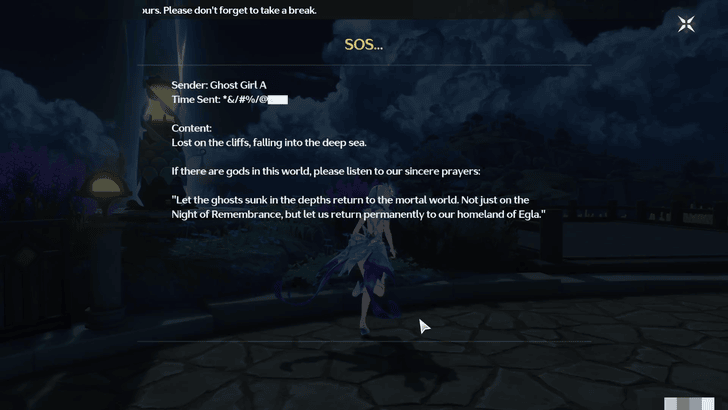
Fast-Travel to Egla Town in Whisperwind Haven, where you will be greeted by a letter from someone called Ghost Girl A. After a small discussion with Abby, walk to the direction of Egla Town and speak with the Night of Remembrance guide to attend the festivities.
The Rover then encounters Cantarella among the crowd who explains the celebration’s premise, and invites them to solve a riddle which grants an elixir of revival when fulfilled.
Collect Riddles From Three Stalls

Talk to all 3 stall keepers who give you a Music Box, Lucky Coin, and Doll With a Red Hat respectively, along with a riddle that corresponds to those items. Discuss the riddles with Cantarella who puts together all three items to create a functional music box.
Once played, the music box projects a ballerina causing the Rover to feel a sharp pain in their head. Cantarella offers to take them under her care in Porto-Veno Castle where the two retreat.
Talk to the Girl Hiding in the Flower Bushes
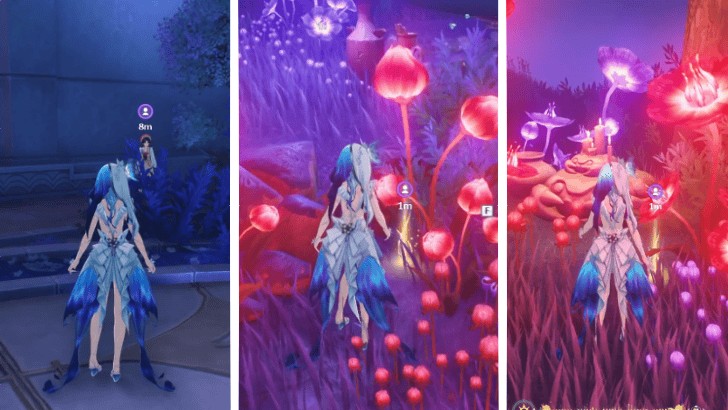
Approach the girl behind the bushes and follow her to a location where an apple-like plant grows. Upon closer inspection, the Rover deduces that they are poisonous Sea Apples which correspond with the Red Apples in the riddle.
Next, the girl takes them to a jellyfish-like plant which also turns out to be a venomous flower called a Jellyrose which answers the riddle of the Red Hat. With these in mind, search for Cantarella who can provide answers.
Find Cantarella and Discuss What You Learned

Upon approaching Cantarella and sharing your findings, she admits that the riddles all pertain to the Fisalia Family's horrendous Divine Trials, and that the Porto-Veno Castle has turned into a Sonoro Sphere called Sea of Ghosts because of it.
Together, the Rover and Cantarella dive into the Sonoro Sphere to break the curse surrounding the haunted landmark.
Use the Lamp to Switch Between Dimensions
Within the Sonoro Sphere, the past and present coexist, and can be shifted at will by activating a Lamp after stepping into a designated jellyfish ring. After Cantarella entrusts you with the Lamp, press the Utility Button to activate it and step into the past.
Enemies will spawn in this dimension which you will have to defeat. Once finished, the pair will examine a notice left on the front desk ordering them to seek the most toxic Red Apple.
Switch Dimensions to Defeat Shadowed Enemies
Enemies shrouded in shadow can appear on the battlefield, making them invulnerable to attacks. To reveal them and make them vulnerable, activate the Lamp while standing inside a jellyfish ring. A good visual cue to remember: an enemy is attackable once its colors return to normal.
Find All Three Sea Apples
Find the First Sea Apple
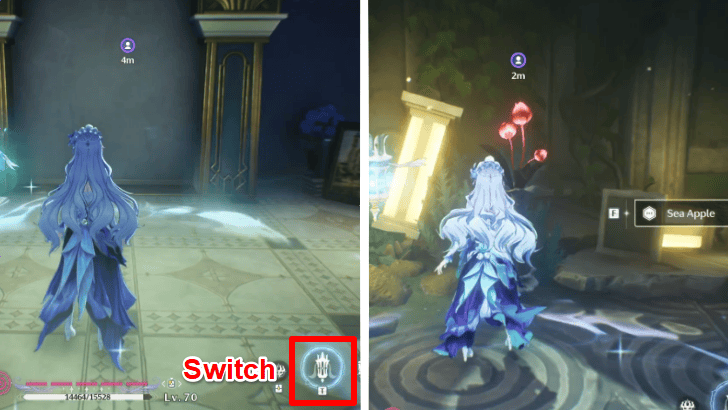
To find the first apple, you must first switch to the past, and walk up the stairs in front of the front desk. Take the Sea Apple from its vase and be greeted by a small note which details an account written by one of the Ghost Girls.
Find the Second Sea Apple
| Objectives | |
|---|---|
| 1 | 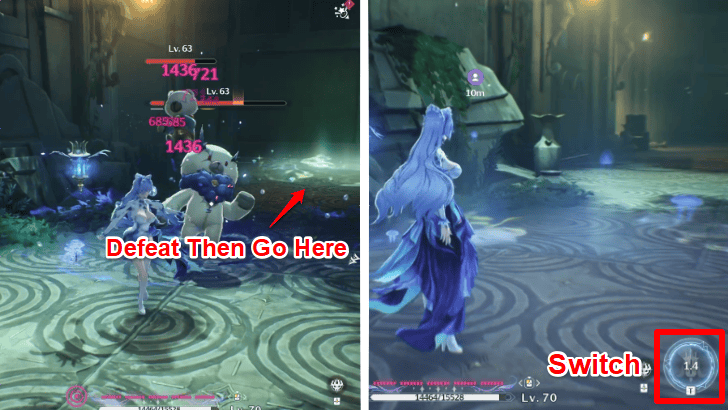 While still in the past, head up to the second floor and defeat all enemies that stand in your way. Step into the jellyfish ring in the hallway and use the Lamp to switch to the present. |
| 2 |  Afterward, stand in front of the glass case, transform into Lottie Lost, clear the contamination by holding down your attack button, and pick up the book. |
| 3 | Return to the previous jellyfish ring and switch back to the past. This creates a hole through the floor which you can drop down from, switch back to the present, and collect another Sea Apple. |
Find the Third Sea Apple
| Objectives | |
|---|---|
| 1 | 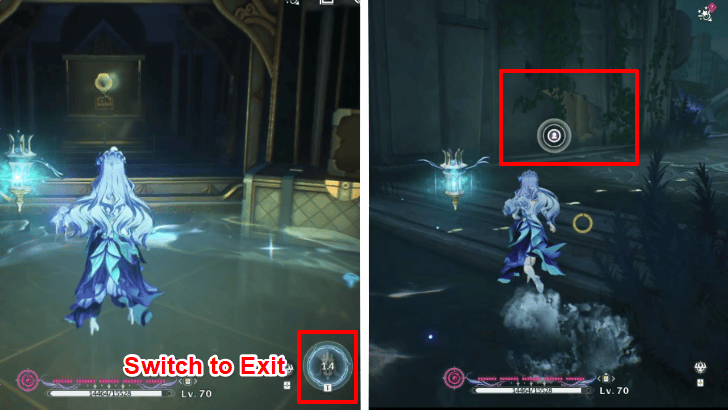 From the room where you find the second Sea Apple, use the Lamp to switch back to the past, and exit. Head toward your left until you see a small crevice in the wall. |
| 2 | 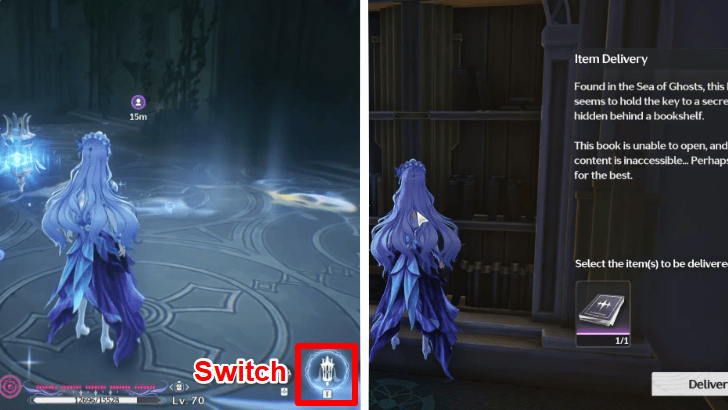 Approach the next jellyfish ring, and switch back to the present to reveal a bookcase. Insert the book you've collected to open a secret room that contains the third Sea Apple, and pick it up. |
| 3 | 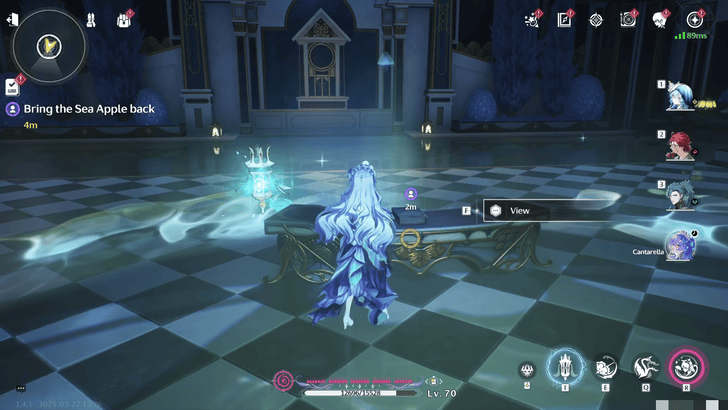 Return to the front desk to submit all three apples which summons more enemies. Once defeated, knock three times on the door that appears to pass through it. |
Observe the Jellyrose Medusa
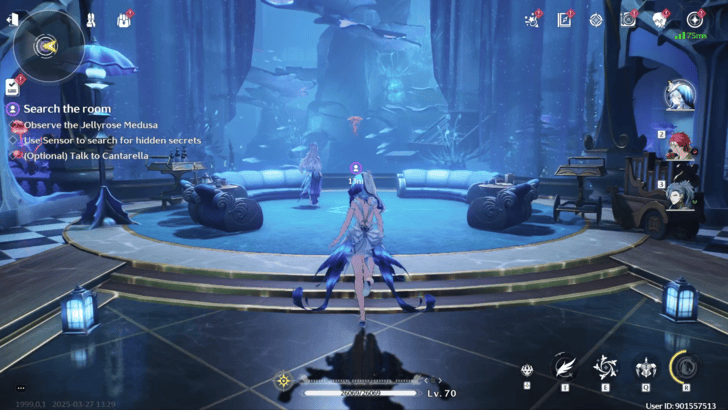
Inside the room, approach the Jellyrose Medusa that Cantarella is observing. After a few moments of dialogue, you may choose to speak to Cantarella again and search the room with your Sensor for any hidden secrets.
Alternatively, you may also leave the room immediately as these actions are optional and will not impact the story in any way.
Find the Jellyrose Medusa
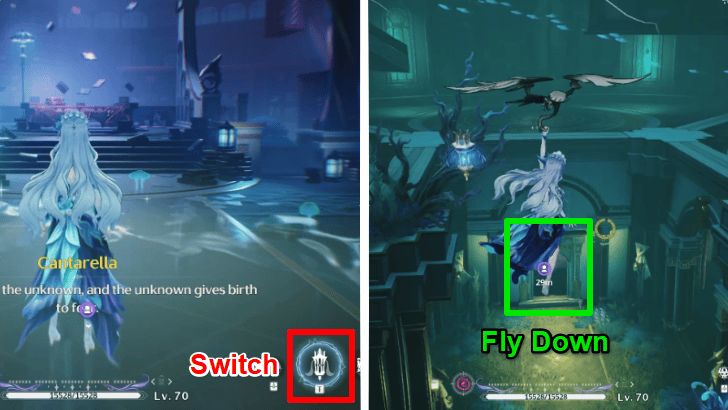
Outside of the room, use the Lamp to switch back to the past and approach the front desk. After a small conversation with Cantarella, jump down to find the Jellyrose Medusa only to be blocked by a bookcase. To open it, you will need two books entitled Past and Present.
Find the Book Titled Past
| Objectives | |
|---|---|
| 1 | 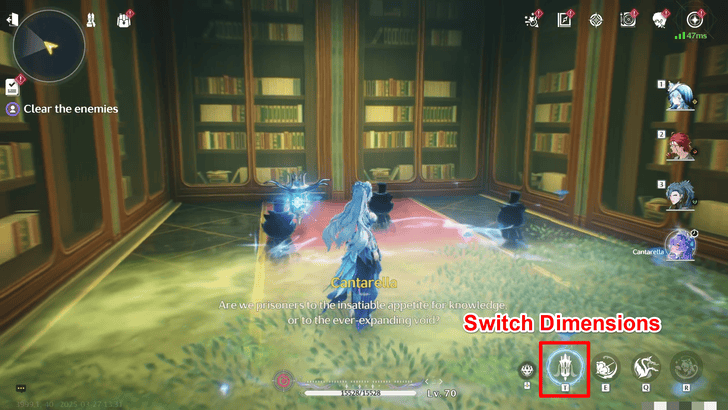 Head south from the bookcase until you reach a jellyfish ring, where shadowed enemies emerge. Switch to the present dimension to defeat them, then move forward. |
| 2 | 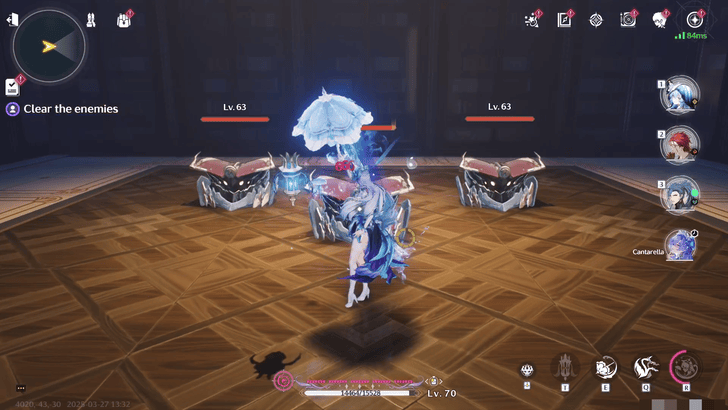 In the next room, interact with a Premium Supply Chest to trigger another enemy encounter. Defeat them all to unlock the path ahead. |
| 3 |  Once the enemies are eliminated, a bookshelf opens, granting access to another jellyfish ring. Use it to switch back to the past and retrieve the book labeled Past from the table. |
Find the Book Titled Present

Head south until you find another bookshelf. Insert the Past Book into one of the slots to open a secret room where the Present Book is located. Pick it up and head back to the main bookshelf to deliver both books.
Chase the Jellyrose Medusa
When found, the Jellyrose Medusa quickly escapes, spawning two enemies each on different dimensions. Switch between past and present to defeat them, then continue forward when the path opens.
Approach another jellyfish ring at the end of the hallway and watch Cantarella rebuild a staircase going upward.
Use the Bouncy Jellyfish to Ascend

With the pieces now in place, ascend the staircase using the Bouncy Jellyfish to aid your climb. Upon reaching the top, switch to the present to summon additional Bouncy Jellyfish and continue your ascent until you reach the summit.
Move to your right and give chase to the Medusa, defeating any enemies that stand in your way. Switch between dimensions whenever a bookshelf obstructs your path, pressing forward until you finally catch the Jellyrose Medusa. Finally, return to the front desk and knock three times on the door that reappears.
Observe the Doll in the Room

Back in the room once more, approach Cantarella as she shares a few words about the music box resting at the center of the table. Afterward, you can choose to speak with her again or use your Sensor to search the room for hidden secrets.
Though entirely optional and without impact on the story, these actions offer additional insight. Alternatively, you may leave immediately to continue your exploration.
Talk to the Ballerina Doll
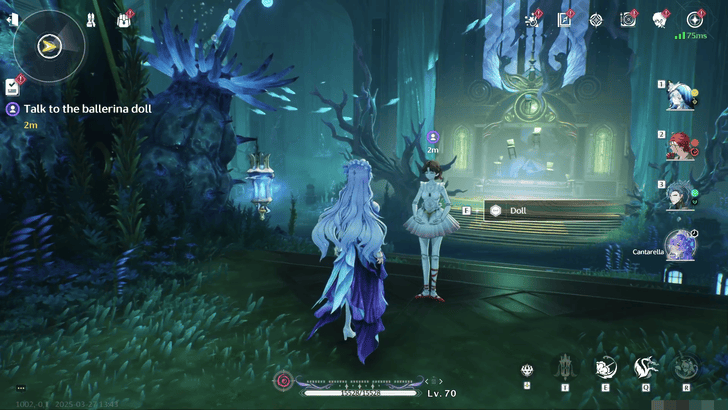
After leaving the room, talk to the Ballerina Doll and help them find their missing round hat. Continue forward until you find another jellyfish ring and use your Lamp. Enemies spawn as the dimensions fail to switch, requiring you to defeat them all.
Once defeated, successfully switch to the present and continue your search for the round hat. After realizing that the hat may not be at the backstage, walk south and approach the Ballerina Doll.
Catch Up to the Doll
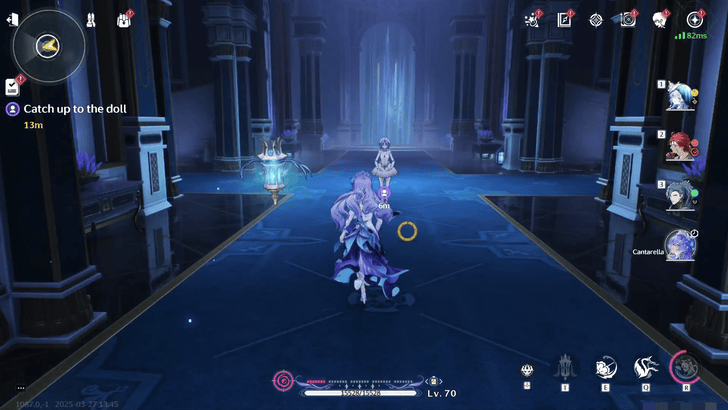
The dimensions will shift each time you approach the Ballerina Doll, summoning enemies along the way which you will have to fight. Keep pressing on until you reach a theater in the past where multiple ballerinas are scattered among the seats.
Find the Right Doll
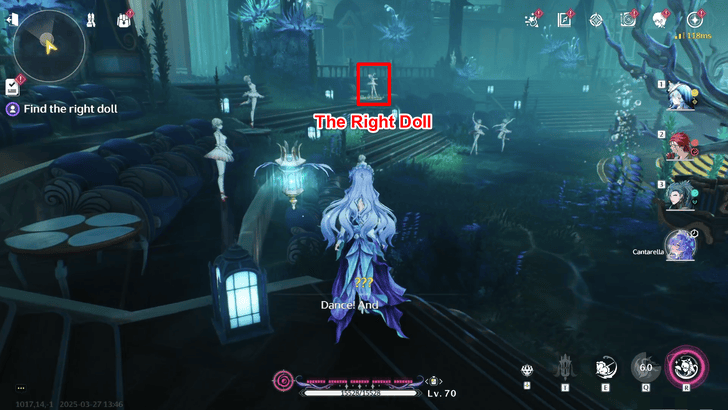
Approach the doll with purple hair, posed beneath a spotlight, and speak with her. She will hand you the Round Hat, which must be delivered to the doll with brown hair.
After completing the exchange, continue toward the stage as the dimensions shift once more. Watch as Cantarella vanishes into thin air, then follow her into the depths, where the remnants of the corrupted Fisalia Family head await your arrival.
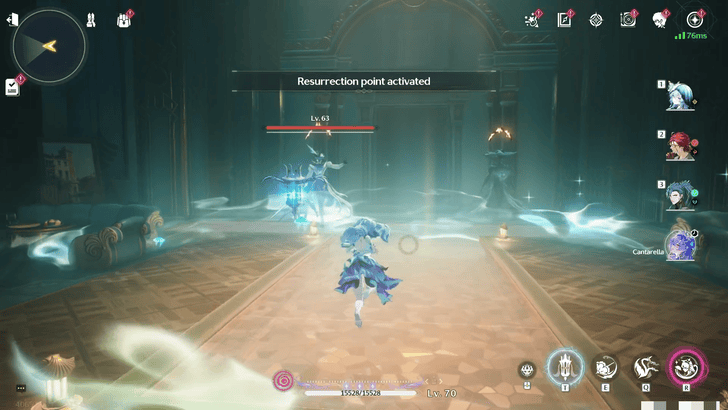
Free the Late Head of Fisalia
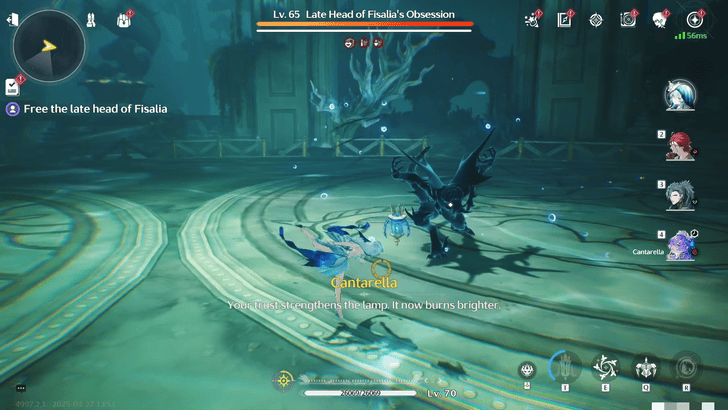
The Late Head of Fisalia will take on the form of a Tempest Mephis. Once its head is reduced to half during the first phase, it will enter the second phase where a second copy of itself is summoned, and their health is back to full.
Once both enemies are vanquished, a series of cutscenes will play in succession that gives this story a fitting conclusion, allowing you to claim your rewards for a job well done in assisting Cantarella!
Perform Dodge and Counterattacks to Remove the Shadows
While the head of Fisalia is shrouded in shadow, it will remain invulnerable to all types of attacks. Perform Dodge maneuvers and Counterattacks against his attacks to charge up your Lamp, and activate its power to render your enemy vulnerable to attacks, and stunned for a period of time.
A Fleeting Night's Dream Information
| A Fleeting Night's Dream Quest Information | |
|---|---|
| Required Union Lvl | None |
| Quest Location | Porto - Veno Castle |
| Version Release | 2.2 |
A Fleeting Night's Dream Rewards
Total Quest Rewards
| A Fleeting Night's Dream Quest Rewards |
|---|
|
|
Unlocks the To Dream's Shores Trophy
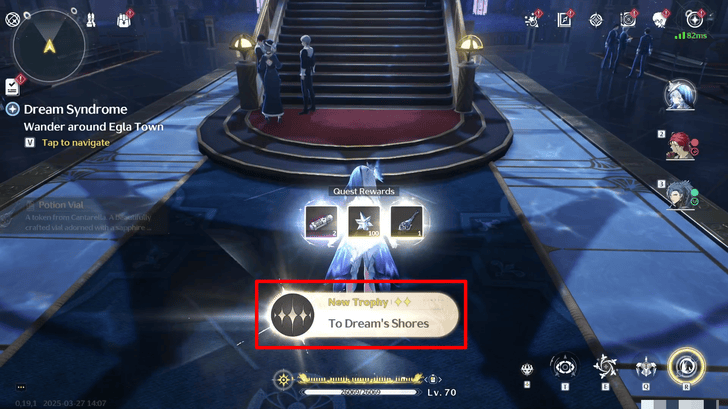
Completing A Fleeting Night's Dream also unlocks the To Dream's Shores Trophy which allows you to claim 10 Astrites.
Wuthering Waves Related Guides

List of Quest Types
| All Quest Types | |
|---|---|
| Main Quests | Companion Stories |
| Exploration Quests | Side Quests |
| Tutorial Quests | Daily Quests |
| Hidden Quests | - |
All Companion Story Guides
Comment
Author

Cantarella Story Quest Guide - A Fleeting Night's Dream
Please participate in our site
improvement survey
03/2026
improvement survey
03/2026
Would you assist in
improving Game8's site?
improving Game8's site?

×
We are listening to our users' valuable opinions and discussing how to act on them.
The information collected through this survey will be used for the purpose of improving our services. In addition, the information will only be disclosed a part of a statistic in a format that will not allow identification of personal information.
Begin Survey
Not Now
×
Please rate each item regarding Game8.co's Advertisements.
Amount of Ads
Very Dissatisfied
Somewhat Dissatisfied
Fine
Somewhat Satisfied
Highly Satisfied
Placement of Ads
Timing of Ad Display
Ad Loading Speed
Safeness of Ads
Content of Ads
×
Please rate each item regarding Game8.co's Quality of Articles.
Amount of information
Very Dissatisfied
Somewhat Dissatisfied
Fine
Somewhat Satisfied
Highly Satisfied
Frequency of updates
Speed of new information
Accuracy of articles
Understandibility of articles
Readability of sentences
×
Please rate each item regarding Game8.co's Usability of the Site.
Ease of finding information
Very Dissatisfied
Somewhat Dissatisfied
Fine
Somewhat Satisfied
Highly Satisfied
Loading Speed
Use of Color
Font Size
Visibility of Images
Easy to Understand Layout
×
Please rate each item regarding Game8.co's Message Boards, Comments.
Ease of Writing
Very Dissatisfied
Somewhat Dissatisfied
Fine
Somewhat Satisfied
Highly Satisfied
Readability
Ease in Finding Information
Comment Quality
Comment Quantity
Admin Response
×
Please rate each item regarding Game8.co's Site's new design.
Please rate our site's new design
Very Dissatisfied
Somewhat Dissatisfied
Fine
Somewhat Satisfied
Highly Satisfied
Do you think that the website's design change makes the site easier to use?
Has the new design made it easier for you to find information on the site?
Has the new design improved the overall visual appeal of the site?
How would you rate your overall satisfaction with the new design of the site?
×
How likely are you to recommend Game8 to someone you know?
Very Unlikely
0
1
2
3
4
5
6
7
8
9
10
Very Likely
If you have other opinions regarding potential improvement to the website, please share them with us. We would appreciate your honest opinion.
Note: This is a free response section, so you can proceed without entering anything.
Note: Please be sure not to enter any kind of personal information into your response.
Note: Please be sure not to enter any kind of personal information into your response.
×
Thank You
×
Thank you for participating in our survey! Your answers will help us to improve the quality of our website and services.
We hope you continue to make use of Game8.
We hope you continue to make use of Game8.
Close
Premium Articles

Rankings
- We could not find the message board you were looking for.

Gaming News


![Everwind Review [Early Access] | The Shaky First Step to A Very Long Journey](https://img.game8.co/4440226/ab079b1153298a042633dd1ef51e878e.png/thumb)

![Monster Hunter Stories 3 Review [First Impressions] | Simply Rejuvenating](https://img.game8.co/4438641/2a31b7702bd70e78ec8efd24661dacda.jpeg/thumb)
Popular Games

Genshin Impact Walkthrough & Guides Wiki
Honkai: Star Rail Walkthrough & Guides Wiki
Umamusume: Pretty Derby Walkthrough & Guides Wiki
Pokemon Pokopia Walkthrough & Guides Wiki
Resident Evil Requiem (RE9) Walkthrough & Guides Wiki
Monster Hunter Wilds Walkthrough & Guides Wiki
Wuthering Waves Walkthrough & Guides Wiki
Arknights: Endfield Walkthrough & Guides Wiki
Pokemon FireRed and LeafGreen (FRLG) Walkthrough & Guides Wiki
Pokemon TCG Pocket (PTCGP) Strategies & Guides Wiki


Recommended Games
Diablo 4: Vessel of Hatred Walkthrough & Guides Wiki
Fire Emblem Heroes (FEH) Walkthrough & Guides Wiki
Yu-Gi-Oh! Master Duel Walkthrough & Guides Wiki
Super Smash Bros. Ultimate Walkthrough & Guides Wiki
Pokemon Brilliant Diamond and Shining Pearl (BDSP) Walkthrough & Guides Wiki
Elden Ring Shadow of the Erdtree Walkthrough & Guides Wiki
Monster Hunter World Walkthrough & Guides Wiki
The Legend of Zelda: Tears of the Kingdom Walkthrough & Guides Wiki
Persona 3 Reload Walkthrough & Guides Wiki
Cyberpunk 2077: Ultimate Edition Walkthrough & Guides Wiki


All rights reserved
Copyright© 2024-2025 Kuro Games. All Rights Reserved.
The copyrights of videos of games used in our content and other intellectual property rights belong to the provider of the game.
The contents we provide on this site were created personally by members of the Game8 editorial department.
We refuse the right to reuse or repost content taken without our permission such as data or images to other sites.