Chapter 3 Act 2 Ode to the Second Sunrise Quest Guide
★ Version 3.2 out now!
┣ Sigrika → Builds, Materials, Weapon
┣ Qiuyuan → Builds, Materials, Weapon
┗ Phase 2 → Lynae, Zani, Phoebe
★ 3.2 Main Story, All Events
★ Exclusives: Tier Maker | State of the Meta
Chapter 3 Act 2: Ode to the Second Sunrise is the second Act in Chapter 3 of the Main Quest in Wuthering Waves. See how to unlock Ode to the Second Sunrise, its walkthrough, and all the rewards of this quest here!
| ◄ Previous Quest | Next Quest ▶ |
|---|---|
| Chapter 3 Act 1: What Burns Beneath Frostlands | Chapter 3 Act 3: The Star That Voyages Far |
How to Unlock Ode to the Second Sunrise
Complete What Burns Beneath Frostlands
Complete the Chapter 3 Act 1 Main Quest What Burns Beneath Frostlands in order to unlock Ode to the Second Sunrise.
What Burns Beneath Frostlands Quest Guide
Ode to the Second Sunrise Walkthrough
Read Mornye's WavesLine Message
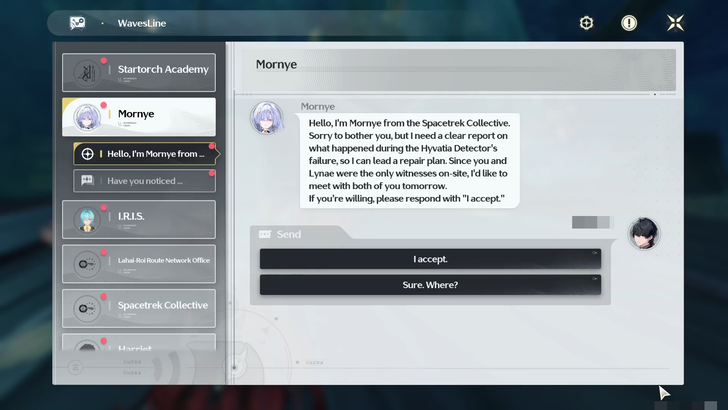
Open the WavesLine messenger app on your phone and agree to meet Mornye at the Startorch Academy dormitories to discuss you and Lynae’s defense against the malfunctioned Hyvatia.
WavesLine Phone Features and Mechanics
Head to the Academy Dormitory
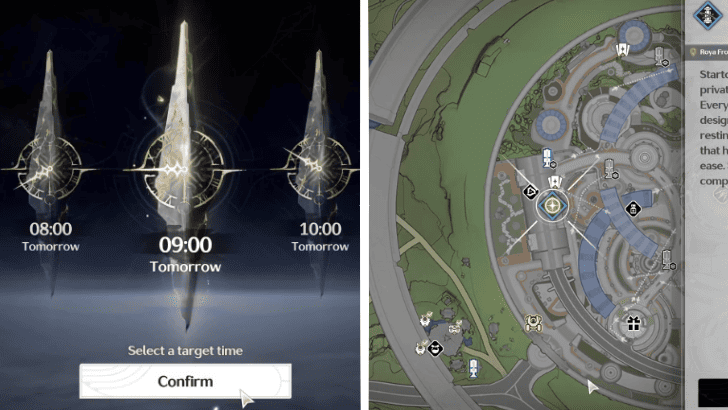
Change the time to 9:00 AM the following day, then Fast Travel to the Academy Dormitory west of Startorch Academy. Upon entering, a cutscene will play where Mornye meets with the Rover and Lynae to discuss recent events.
After the discussion, exit the dormitory and speak with Mornye again. The Rover is then interrupted by a vivid memory of what seems to be a robed Royan man attempting to communicate by sending out a Soliskin.
Startorch Academy 100% Map Guide
Trace the Frequency Back to Its Source
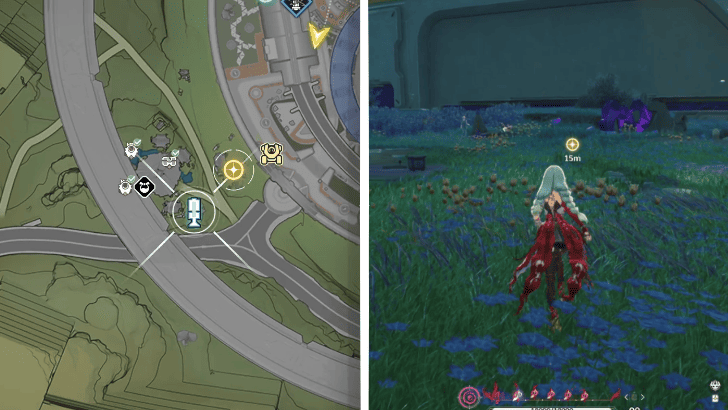
Teleport to the Resonance Beacon near the Royan Market, southwest of Startorch Academy, and follow the frequency back to its source. The Rover soon notes that the frequency has vanished and is interrupted by a student pleading to help their thesis partner, Maja.
Mornye urges the Rover to assist, as the student in danger is a Royan who may help track down the man seen in the Rover’s vision.
Defeat the Malfunctioning Probe Robots
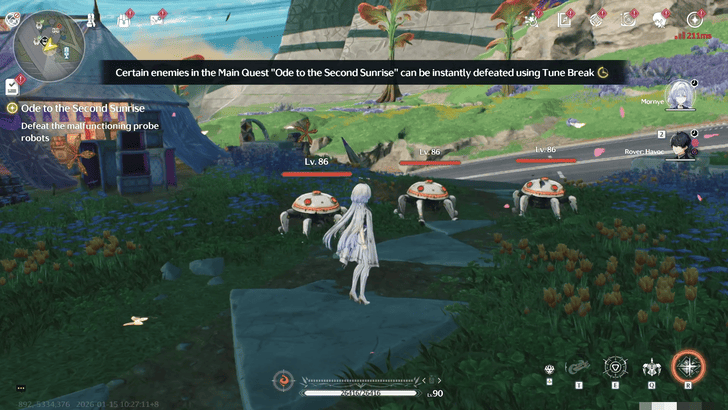
Head toward the Royan Market and approach Maja. Once there, defeat her experimental Probe Robots that have turned hostile, with Mornye joining the fight in your party. You can instantly defeat these enemies, and those that appear after, by utilizing the Tune Break mechanic.
Afterward, Maja explains that the robed man seen in the Rover’s vision may be a member of the Royan Tribe's Heliodic Six. She then mentions a man named Foreseer Yngvar, who may know more, and directs you to her mother to learn his whereabouts.
Head to the Atuja Camp
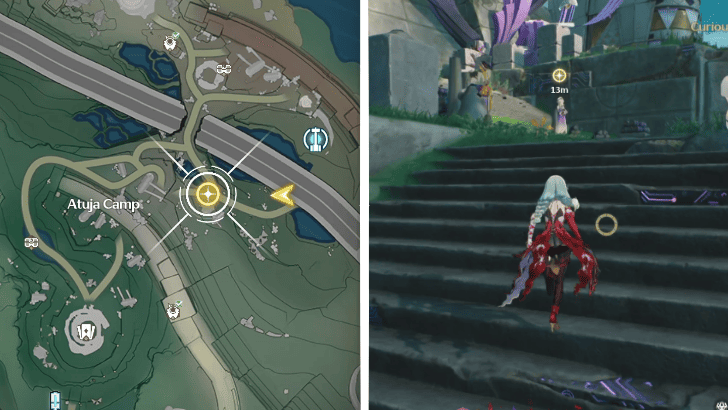
Travel to the Atuja Camp either by speaking with Mornye to Fast Travel or by riding your Motorbike. Upon arriving, approach a woman named Astrid located on top of the staircase leading into the camp, and try to gather information from her.
Unfortunately, the conversation is cut short when a Void Storm suddenly appears in the camp.
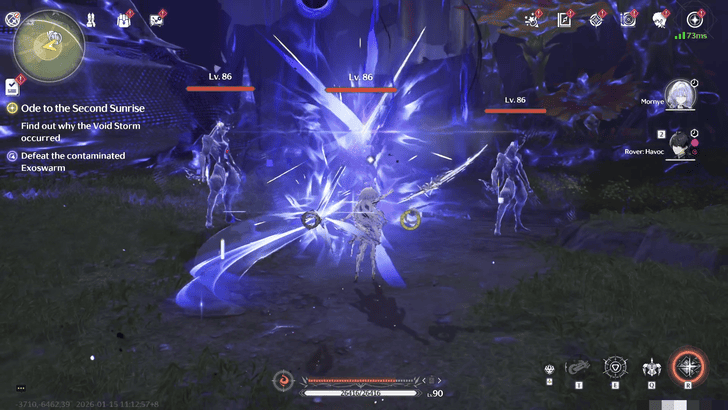
Defeat the Contaminated Exoswarm and Investigate the Void Storm
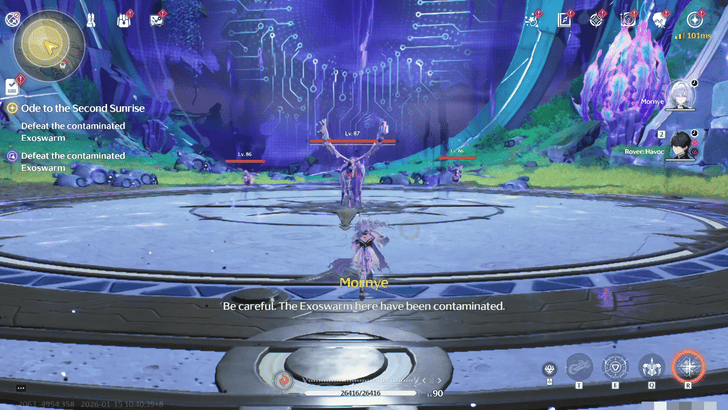
Enter the Void Storm and defeat all contaminated Exoswarm that appear. Once the area is cleared, approach the Voidmatter Contamination device within the zone and wait for Mornye to collect it. She explains how it works to the Rover, but the discussion is interrupted once again by the sound of a Soliskin.
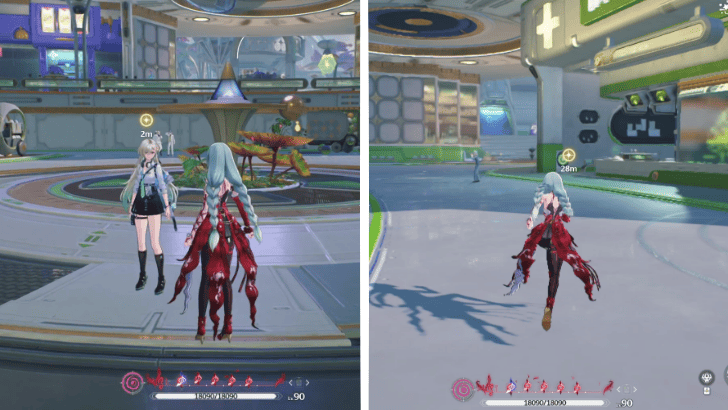
Find Where the Chuu Noises are Coming From
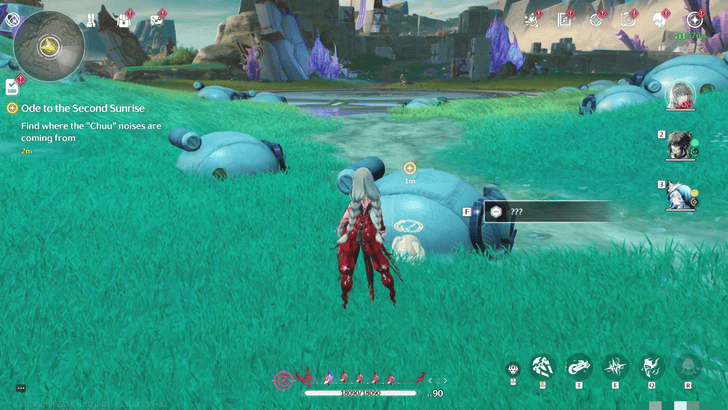
Investigate the Chuu noises behind an Exoswarm part to find a surviving Soliskin. The Rover resonates with its memories, revealing that Astrid planted the Voidmatter device.
Before the Rover can confront her, Astrid approaches and explains that the device actually fell from Yngvar’s possession. She then tells you about the Rite of Return, where you may have a chance to meet Yngvar, and sends you on your way to Bjartr Woods with the rescued Soliskin.
Head to Haldarheim
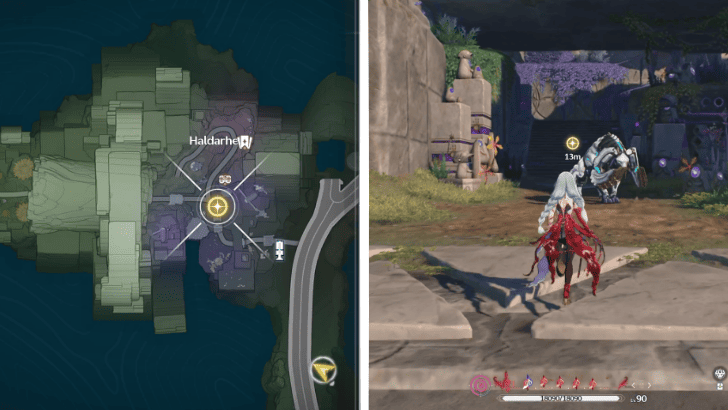
Speak with Mornye to Fast Travel to Haldarheim, or ride your Motorbike there instead. Upon arrival, a Royan at the entrance stops you and questions the purpose of the Rover and Mornye’s visit. After clearing the misunderstanding, he invites them into Haldarheim to join the feast before the Rite of Return.
Join the Feast Held Before the Rite of Return
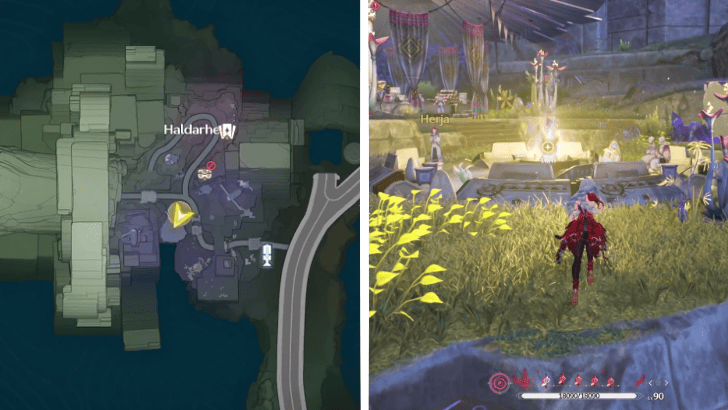
Advance the in-game time to 20:00 PM on the same day. If the current time has already passed, set it to 20:00 PM the following day. Approach the bonfire west of Haldarheim and enjoy the festivities with Mornye.
Afterward, meet Mornye by a cliff northeast of Haldarheim, where she is admiring the stars. Spend time with her until the Rover falls asleep. Upon waking the next day, a Void Storm has appeared in Bjartr Woods, completely halting the Rite of Return for the Soliskins.
Optional: Inquire About Yngvar's Whereabouts
| Royan Villager Locations | |
|---|---|
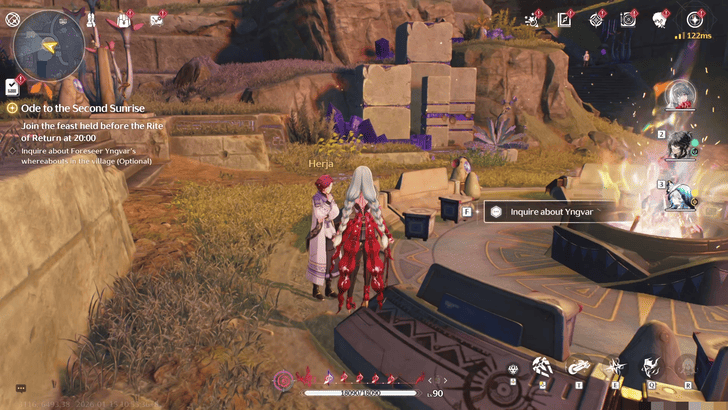 Herjia is located nearest to the bonfire |
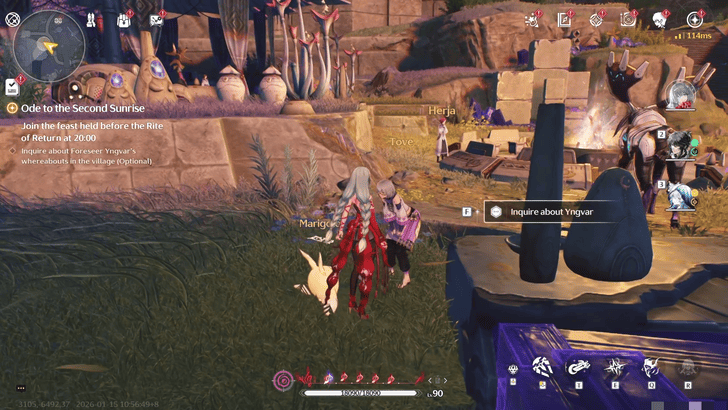 Tove is located farther from the bonfire, near Herjia |
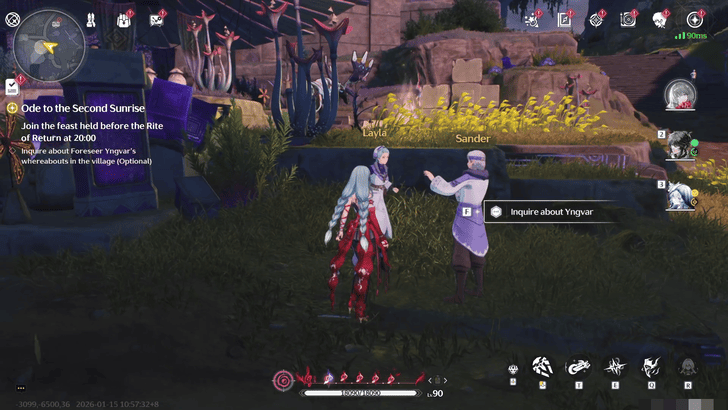 Layla and Sander are located furthest from the bonfire, talking to each other |
|
Before starting the feast, you can choose to speak with Herja, Tove, Layla, and Sander to ask about Yngvar's whereabouts and complete the optional objective. They will be located within three areas around the bonfire west of Haldarheim.
Enter Bjartr Woods and Defeat the Contaminated Exoswarm
Head to the entrance of Bjartr Woods, where distressed Royan villagers greet you, and make your way toward the Void Storm. Defeat all contaminated Exoswarm that appear and clear the storm. Afterwards, an elderly shepherd approaches, revealing a prophecy that will allow the Rover to enter the Solisylum.
Head to the Solisylum and Restart the Heliogyre
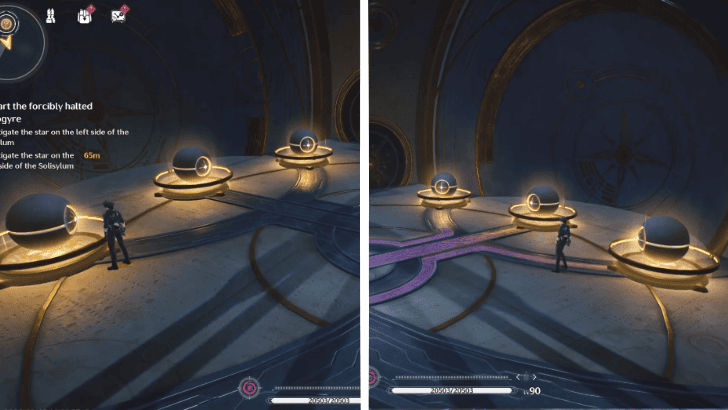
Walk deeper into Bjartr Woods and enter the Solisylum at the top of the staircase east of the woods. Upon entering, restart the forcibly halted Heliogyre by rotating all the star-like objects on the left and right sides of the room to face it.
This will trigger a meeting with The Shaper, who explains the tragedy that befell the other five Heliodic Six members and requests the Rover’s permission, as Arbiter, to take the helm of all six members and interpret the Heliogyre’s calculations alone.
Optional: Talk to the Elderly Shepherd
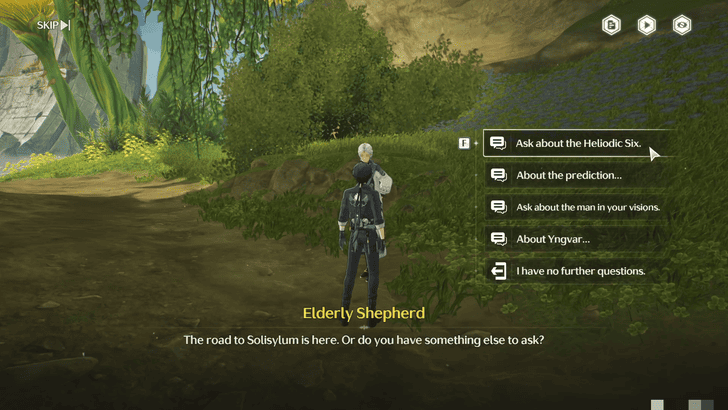
Before heading to the Solisylum, you can speak with the elderly shepherd to learn about the Heliodic Six and information about the Royan Tribe’s esteemed foreseers. This optional objective provides extra lore and can be skipped.
Investigate the Contamination Source
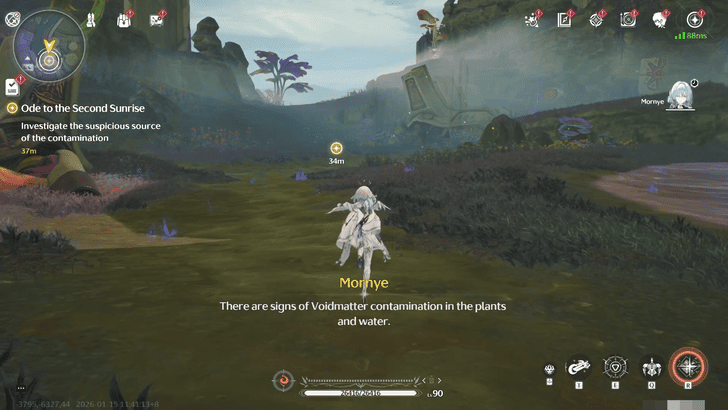
As Mornye, investigate the void contamination source around Bjartr Woods and defeat the contaminated Exoswarm that gets in your way. Use your Forte upon reaching the doors of a facility where the contamination is coming from.
Investigate the Anomaly Behind the Door

Once inside the facility, explore the area or use your Sensor to locate the suspicious object. Interact with the terminal in the lab to decrypt its data, which will trigger the appearance of enemies you must defeat.
After interacting with the terminal a second time, Yngvar approaches Mornye, intending to eliminate her. During their confrontation, it's revealed that he conspired with the Fractsidus to bring down the Reactor Drive, Lahai-Roi’s artificial sun.
Hurry Back to the Research Institute
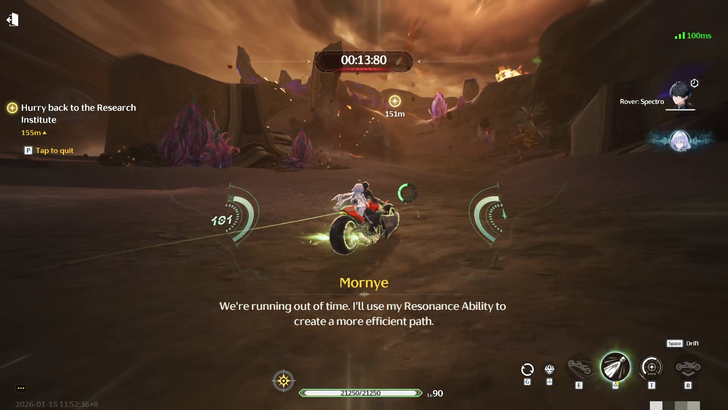
Back in the Rover's perspective, hurriedly drive your Motorbike toward the Research Institute with Mornye. While driving, a countdown timer will appear at the top of the screen. Just keep driving and press quick-time button prompts each time they appear on-screen, since you'll be guided by Mornye to a different route as the timer reaches its end.
Head to the Artificial Sun Lab
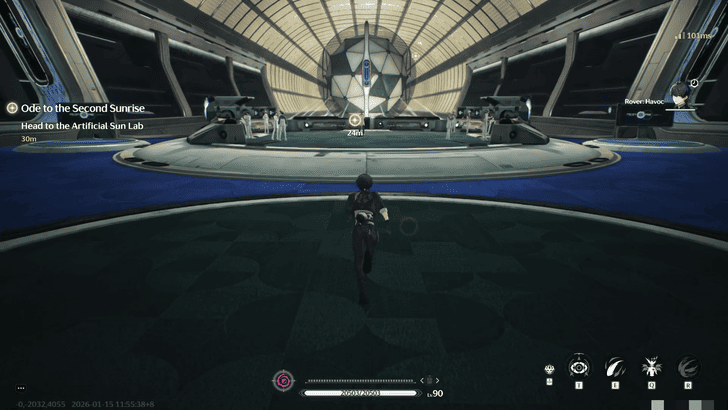
Head inside the Artificial Sun Lab, where Mornye confronts Professor Warren, the main conspirator behind the Fractsidus’ operations in Lahai-Roi, and takes over as supervisor of the New Solar Ceremony.
As the team initiates countermeasures against the Reactor Drive’s premature descent, an error occurs, prompting Mornye and the Rover to personally intervene and approach the Reactor Drive.
Defeat the Reactor Husk
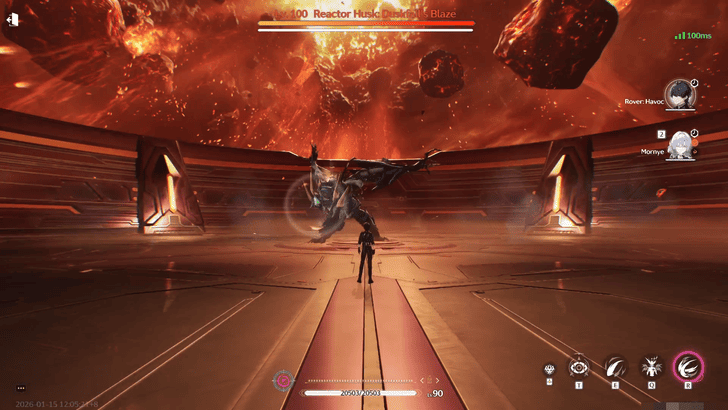
Confront a Level 100 Reactor Husk and defeat it with the help of Mornye and Havoc Rover in your party. This enemy will dish out quick attacks and shroud your view once it hits low HP, so be vigilant with your dodges and counterattacks, then take the opportunity to Tune Break once it enters the Mistuned State.
Reactor Husk Location and Boss Guide
Reach the Reactor Core and Save Mornye
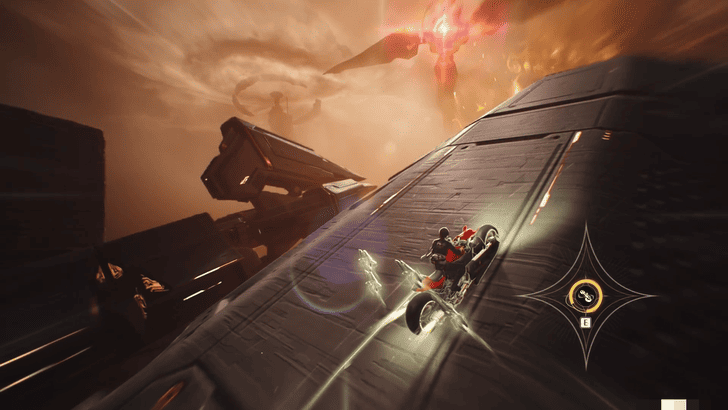
After being separated from Mornye during the fight against the Reactor Husk, ride your Motorbike to save her before she fully overclocks in the Reactor Core.
Keep driving, pressing each quick-time prompt as it appears and shooting down flying rocks with your Motorbike’s laser until you reach the Reactor Core. Doing so triggers a cutscene where Mornye is saved, and Helios, Lahai-Roi’s second sun, successfully mitigates the Reactor Drive’s crash, marking the New Solar Ceremony a success.
Meet Up With Lynae and Mornye
Speak with Lynae southwest of Academy Square to discuss the recent developments. Afterwards, visit Mornye at the Infirmary to check on her condition and regroup. You will then be invited to witness the light of Helios with Mornye and Lynae, with the quest concluding after the three of you take a photo together to commemorate the occasion.
The Grand Architect Makes an Appearance
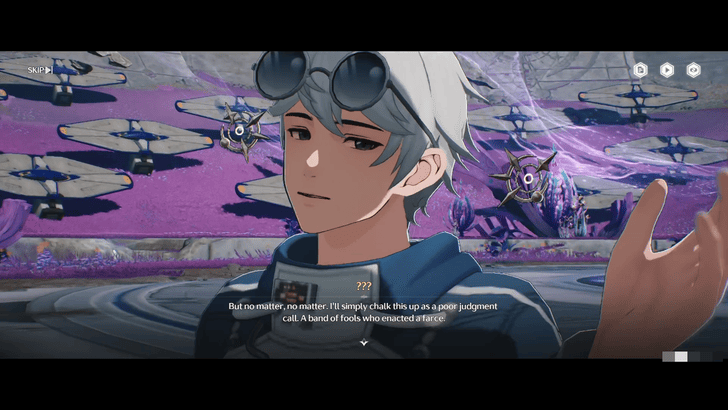
During the quest’s final cutscene, Luuk Herssen and Anslem investigate Hyvatia’s malfunction during the New Solar Ceremony when they are approached by an unnamed researcher.
He is soon implied to be the Fractsidus’ Grand Architect iunder a new guise, and the one responsible for the malfunction. He then begins a monologue outlining plans that suggest he intends to have a Resonator bond with the Threnodian sealed beneath the Roya Frostlands.
Ode to the Second Sunrise Information
| Ode to the Second Sunrise Quest Information | |
|---|---|
| Required Union Lvl | None |
| Quest Location | Academy Dormitory |
| Version Release | 3.0 |
Ode to the Second Sunrise Rewards
Total Quest Rewards
| Ode to the Second Sunrise Quest Rewards |
|---|
|
|
Multiple Trophy Rewards
| Trophy | Objective and Rewards |
|---|---|
 Bright Star Bright Star |
Admire the Starry Sky with Mornye Rewards: |
| Child of Light |
Find the Soliskin who survived the Void Storm at Atuja camp. Rewards: |
| Steady Toward Destiny |
Witness the appearance of Solisylum. Rewards: |
| To the New World |
Complete "Ode to the Second Sunrise" Rewards: |
| Under the Glow |
Witness the Soliskin complete the Rite of Return. Rewards: |
 Under the New Sun Under the New Sun |
Complete the New Solar Ceremony. Rewards: |
You will receive a total of 6 Journey Trophies while progressing through Ode to the Second Sunrise, and after completing it. Claiming all of them will reward you with a total of 35 Astrites!
3.0 Trophy List and Guides
Wuthering Waves Related Guides

List of Quest Types
| All Quest Types | |
|---|---|
| Main Quests | Companion Stories |
| Exploration Quests | Side Quests |
| Tutorial Quests | Daily Quests |
| Hidden Quests | - |
Main Quest Walkthrough
Comment
Author

Chapter 3 Act 2 Ode to the Second Sunrise Quest Guide
Premium Articles

Rankings

Gaming News

![Monster Hunter Stories 3 Review [First Impressions] | Simply Rejuvenating](https://img.game8.co/4438641/2a31b7702bd70e78ec8efd24661dacda.jpeg/show)

![Monster Hunter Stories 3 Review [First Impressions] | Simply Rejuvenating](https://img.game8.co/4438641/2a31b7702bd70e78ec8efd24661dacda.jpeg/thumb)
![The Seven Deadly Sins: Origin Review [First Impressions] | A Promising Start](https://img.game8.co/4440581/584e0bfb87908f12c4eab6e846eb1afd.png/thumb)
Popular Games

Genshin Impact Walkthrough & Guides Wiki
Umamusume: Pretty Derby Walkthrough & Guides Wiki
Pokemon Pokopia Walkthrough & Guides Wiki
Honkai: Star Rail Walkthrough & Guides Wiki
Monster Hunter Stories 3: Twisted Reflection Walkthrough & Guides Wiki
Arknights: Endfield Walkthrough & Guides Wiki
Wuthering Waves Walkthrough & Guides Wiki
Zenless Zone Zero Walkthrough & Guides Wiki
Pokemon TCG Pocket (PTCGP) Strategies & Guides Wiki
Monster Hunter Wilds Walkthrough & Guides Wiki


Recommended Games
Fire Emblem Heroes (FEH) Walkthrough & Guides Wiki
Diablo 4: Vessel of Hatred Walkthrough & Guides Wiki
Cyberpunk 2077: Ultimate Edition Walkthrough & Guides Wiki
Yu-Gi-Oh! Master Duel Walkthrough & Guides Wiki
Super Smash Bros. Ultimate Walkthrough & Guides Wiki
Pokemon Brilliant Diamond and Shining Pearl (BDSP) Walkthrough & Guides Wiki
Elden Ring Shadow of the Erdtree Walkthrough & Guides Wiki
Monster Hunter World Walkthrough & Guides Wiki
The Legend of Zelda: Tears of the Kingdom Walkthrough & Guides Wiki
Persona 3 Reload Walkthrough & Guides Wiki


All rights reserved
Copyright© 2024-2025 Kuro Games. All Rights Reserved.
The copyrights of videos of games used in our content and other intellectual property rights belong to the provider of the game.
The contents we provide on this site were created personally by members of the Game8 editorial department.
We refuse the right to reuse or repost content taken without our permission such as data or images to other sites.