Chapter 3 Act 3 The Star That Voyages Far Quest Guide
★ Version 3.2 out now!
┣ Sigrika → Builds, Materials, Weapon
┣ Qiuyuan → Builds, Materials, Weapon
┗ Phase 2 → Lynae, Zani, Phoebe
★ 3.2 Main Story, All Events
★ Exclusives: Tier Maker | State of the Meta
Chapter 3 Act 3: The Star That Voyages Far is the third Act in Chapter 3 of the Main Quest in Wuthering Waves. See how to unlock The Star That Voyages Far, its walkthrough, and all the rewards of this quest here!
| ◄ Previous Quest | Next Quest ▶ |
|---|---|
| Chapter 3 Act 2: Ode to the Second Sunrise | Chapter 3 Segue: All That Sunlight Touches |
How to Unlock The Star That Voyages Far
Complete Chapter 3 Act 2
To unlock The Star That Voyages Far, players need to complete the previous Main Story Quest, Ode to the Second Sunrise. A WavesLine message will then appear as the prompt to start this quest.
Ode to the Second Sunrise Quest Guide
The Star That Voyages Far Walkthrough
1. Read the Text and Go to Class
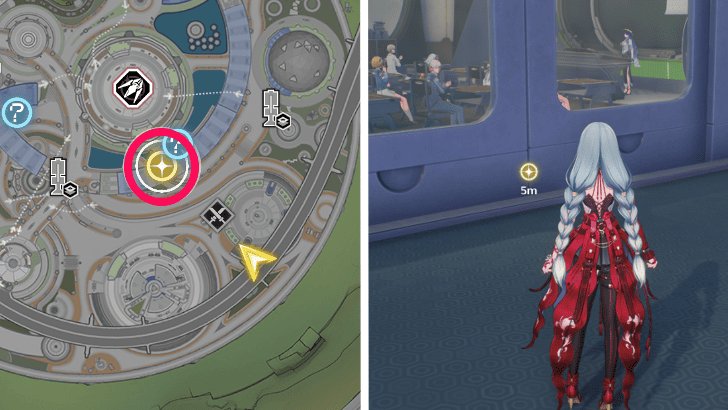
To start this Main Quest, open the Wavesline message about President Lucilla's lecture and proceed to the indicated classroom. Go through the dialogue to reach the next step of the quest.
WavesLine Phone Features and Mechanics
2. Follow the Soliskin Around Campus
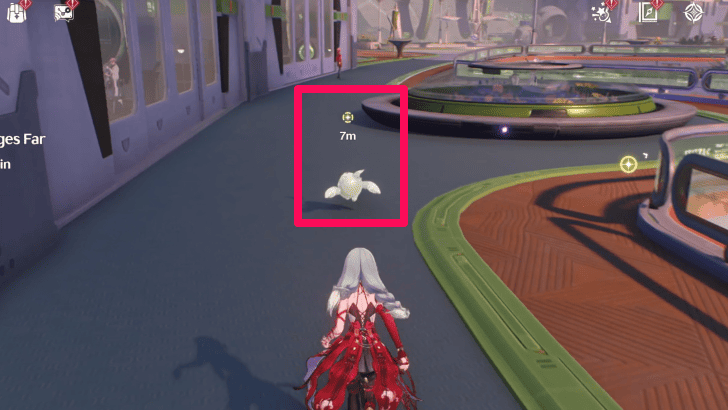
After the scenes, a Soliskin will appear and start walking around campus. Follow it to the Training Grounds and watch a cutscene with Aemeath and Sigillum, then proceed down the elevator.
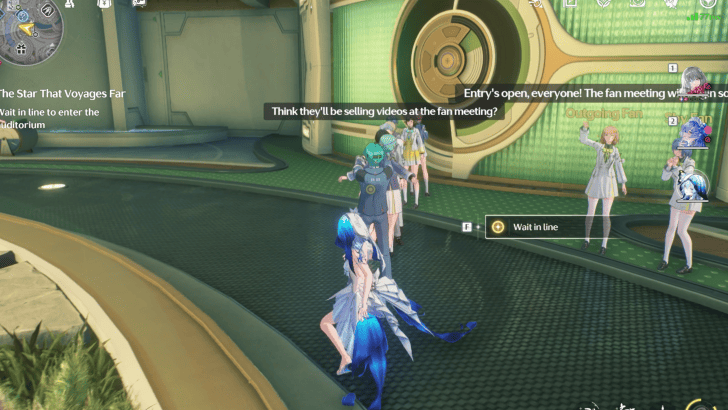
3. Talk to the Students and Enter the Auditorium
Speak with the pair of students in front of the Auditorium, then proceed inside. Listen to Aemeath's dialogue until the Soliskin reveals some Royan Runes in the Auditorium.
4. Use the Royan Runes to See the Past
Repeatedly press the indicated button to activate the Runes. The runes will provide glimpses into the past, furthering the story. Activate all the Runes that the Soliskin shows to move on to the next part of the quest.
5. Take the Train to the Roya Frostlands
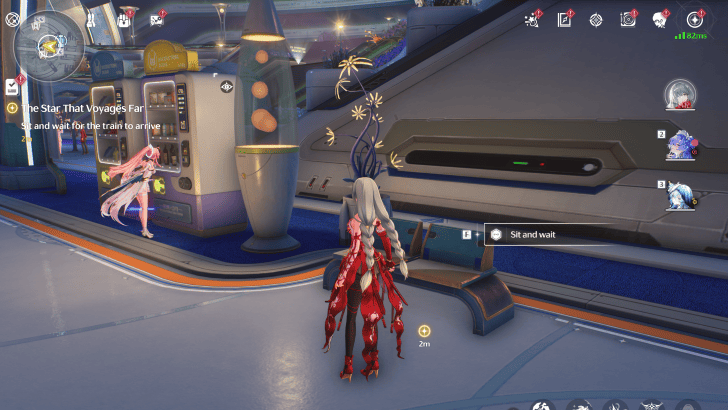
Speak again to Aemeath to be instantly transported to the Starward Riseway. Follow the quest marker to find a bench that you can interact with to wait for the train that will take you to the Roya Frostlands.
Starward Riseway Map and Exploration Guide
6. Ride Into the Frostlands

When you arrive, you will be greeted by Luuk Herssen. After some more dialogue, you will be prompted to drive into the Frostlands on your bike, where you will eventually see Nivora, an NPC from earlier in the quest.
Luuk Herssen Release Date and Attribute
7. Enter the SkyArk Space Station
Proceed through the cutscenes with Nivora until another motorcycle sequence plays out. Drive until you reach the wreck of the SkyArk Space Station, where the party will decide to enter the station.
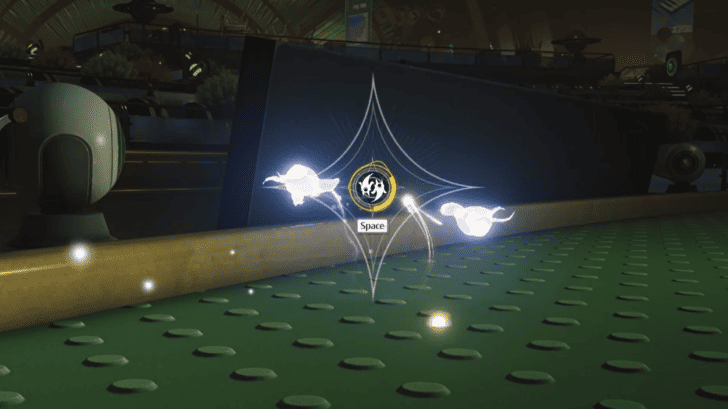
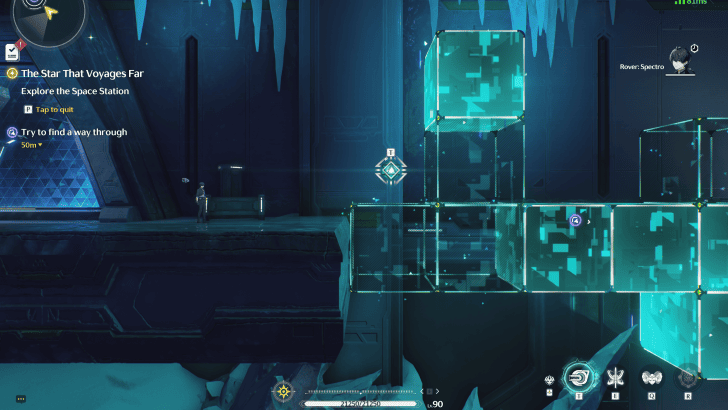
Luuk will instruct you to use the Module Adapter to cross the gap and enter the SkyArk space station. You will have to complete some Quick-Time Events (QTEs) to enter the station.
How to Use the Module Adapter
| # | Guide |
|---|---|
| 1 | 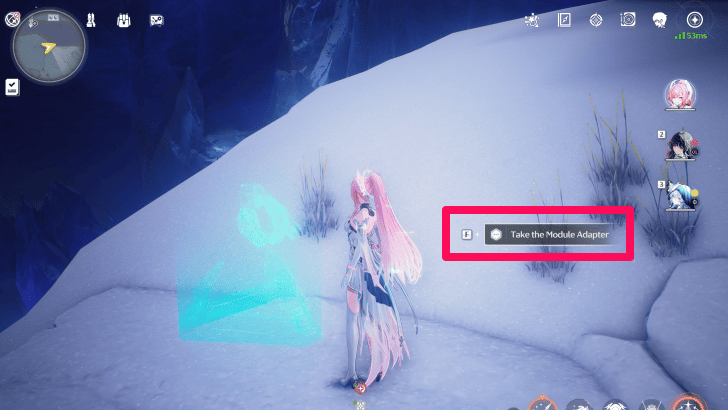 |
| 2 | 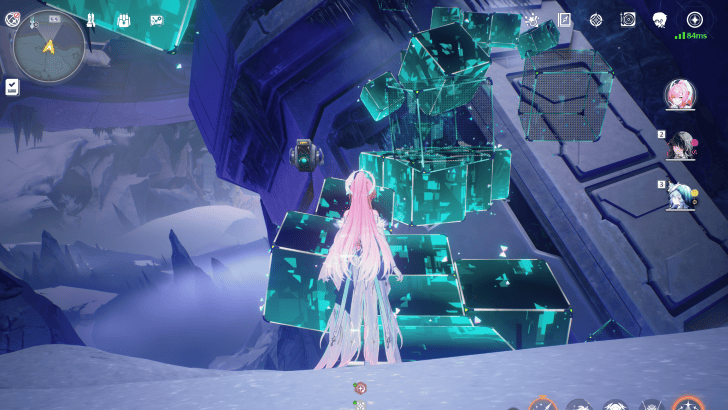 |
| 3 |  |
| 4 | 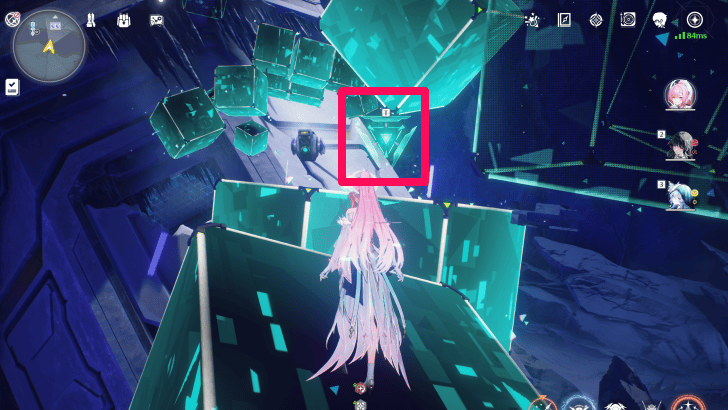 |
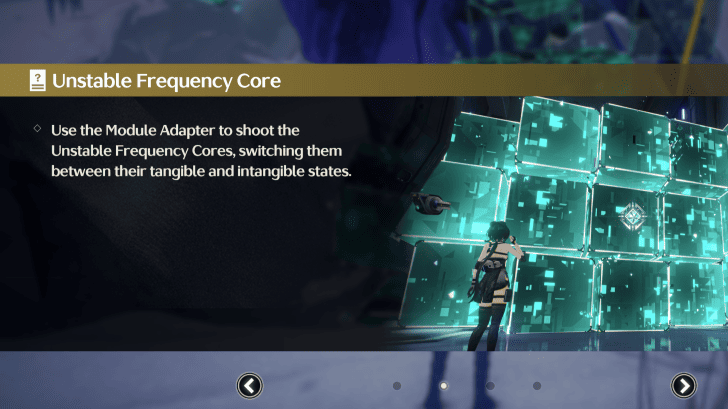
| 5 | The Module Adapter can also shoot certain nodes to disable the data and allow you to pass through. |
| 6 | Placing the Module Adapter back on a pedestal will remove it from your Utility and turn any tangible constructs around you intangible again. |
8. Reach the Mass Relay Device
Once inside, continue forward to find the Wenlu hologram. Get through the dialogue, then proceed further into the station, defeating the Shadow Steppers that spawn, and using the Module Adapter to clear out the path ahead.
Shoot the first two walls with the Module Adapter, then simply return the Module Adapter to the stand in front of the third wall. You will eventually reach the Mass Relay Device, a large central structure in the station.
Shadow Stepper Echo and Skills
9. Proceed Further Into the Station
Interact with the console to turn the Mass Relay Device on again, and use it to reach a new platform. Continue using the Module Adaptor to build a path forwards, eventually running into a 2D Side-Scroller section of the map.
Go as far as you can, before getting help from Aemeath, as she creates a path for you to follow. As you proceed, there will be more QTEs for you to complete, and more obstacles that require the Module Adapter..
10. Use the Mass Relay Device Again
Once you reach far enough, a new hologram called Junxi will provide more exposition about their research. Once the succeeding dialogue is finished, attempting to obtain visitor's clearance will spawn more Shadow Steppers.
Defeat the enemies and follow the quest marker back to the Mass Relay Device, which will lead you to another new area when you use it again. Upon landing, take the nearby Module Adapter and pass through the barrier.
11. Enter the Archive Sector
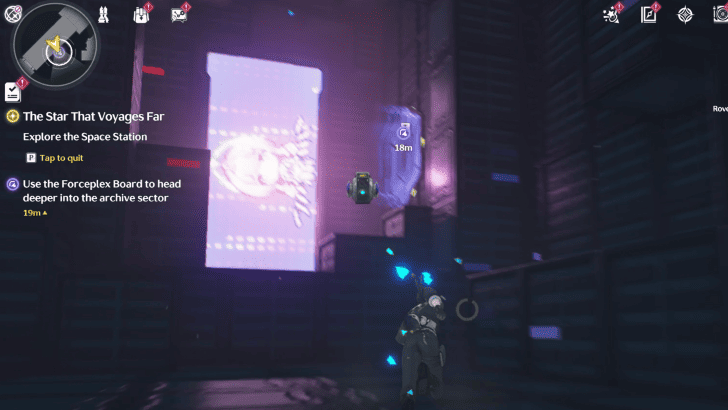
As you follow the quest marker, you will continue to run into enemies and more QTEs. Aemeath will continue to provide support by clearing obstacles and creating paths for you.
Note that you might have to wait for Aemeath to finish her actions, such as moving blocks or defeating enemies, to be able to proceed properly. Eventually, you will exit the Archive Sector and return your visitor's pass.
12. Defeat the Nameless Explorer
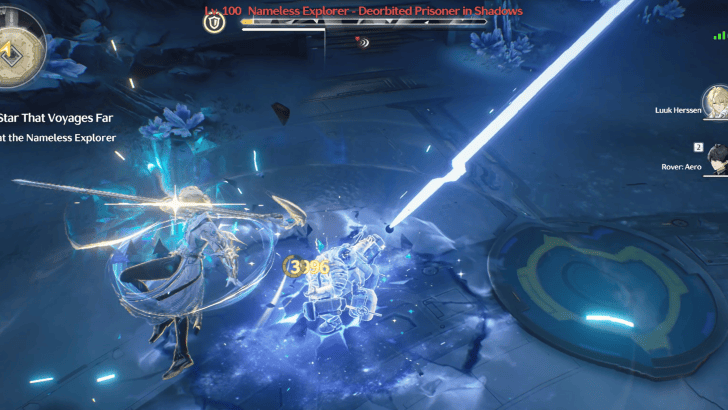
Continue to follow the quest marker to the Mass Relay Device, and interact with the interface to power up the device by pressing the indicated button. Proceed through the following cutscenes, and you will come face-to-face with the Nameless Explorer.
This boss fights in a grappler-like manner, and can take to the skies for its attacks. Use Luuk's aerial combat to keep pace, and bring the boss down!
Nameless Explorer Echo and Skills
13. Continue Onwards With Aemeath
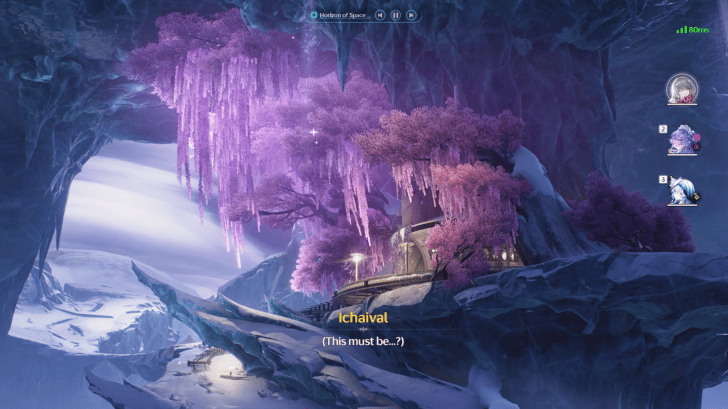
Nivora is injured from the conflict, and Luuk will stay behind to keep watch over her as you and Aemeath go ahead. Continue to follow the quest markers, uncovering more of Aemeath's past with more Royan Runes along the way.
You will eventually reach Ginnungamere, a small lake area with a cabin. Sigillum will appear and attack, and after the cutscenes, follow Aemeath into the nearby cabin to rest.
14. Rest and Explore the Cabin
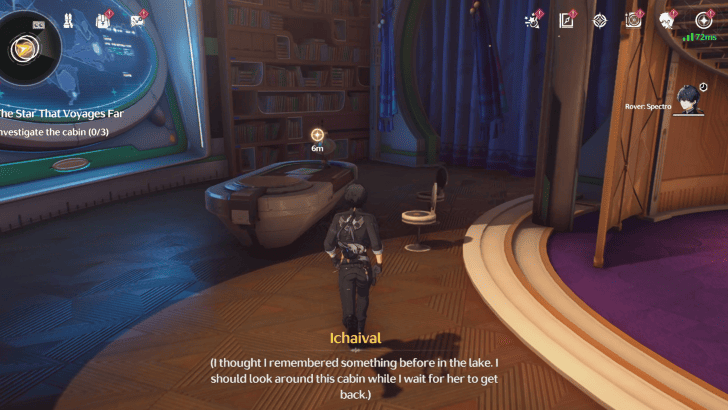
Lay down on the couch, and when you wake up, go to examine the drawings on the desk, the game console near the couch, and the plushie in the second floor to trigger another cutscene.
Afterwards, you will be in control of a Young Aemeath. Examine the same three things, then approach the curtain for more dialogue.
15. Make Your Way to the Exostrider
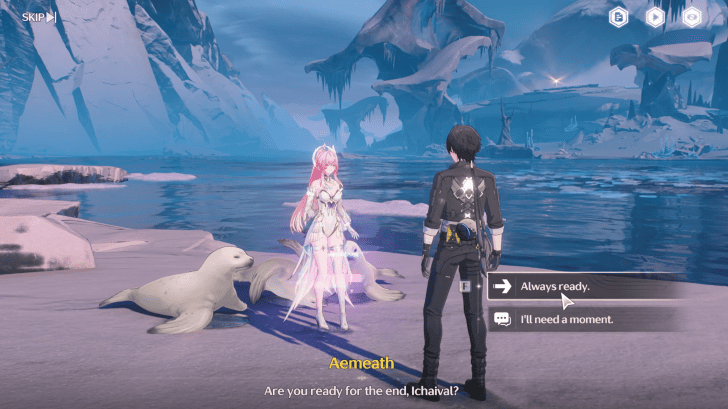
After the cutscenes, follow the quest marker to the shoreline where Aemeath is waiting. Speak with her to head to the Exostrider, and after some brief dialogue mid-way through the journey, Sigillum strikes again.
You will enter another chase sequence, wherein you'll have to complete more QTEs, and swap between the motorcycle and pursuing on foot when necessary. Eventually, more cutscenes will play as you approach the Exostrider.
16. Defeat Sigillum
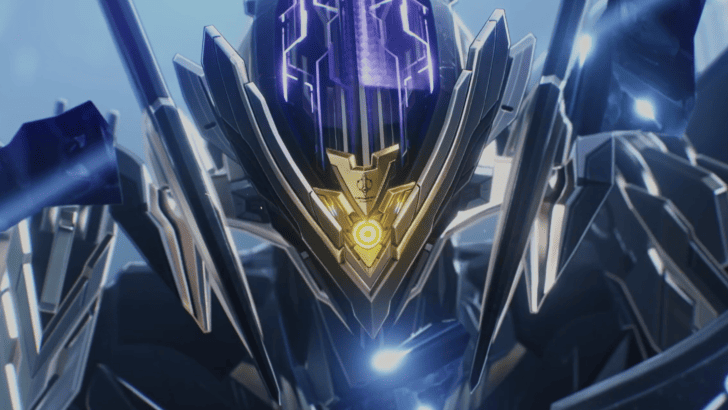
After the Exostrider pulls Sigillum into itself, you will have to face it down with Aemeath. Beware of its large AoE attacks, multiple projectiles, and ability to fly.
As you proceed through combat, you will eventually unlock Aemeath's more powerful mech form. Use it to deal lots of damage to Sigillum!
17. Find Aemeath
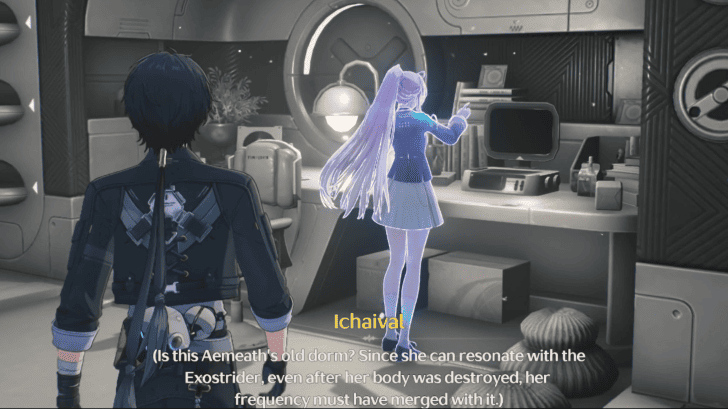
Defeating Sigillum leads to another cutscene, which will drop Rover in an unfamiliar space. Follow the quest markers and find Aemeath to proceed, and you will eventually be prompted to leave the space.
18. Return to the Academy
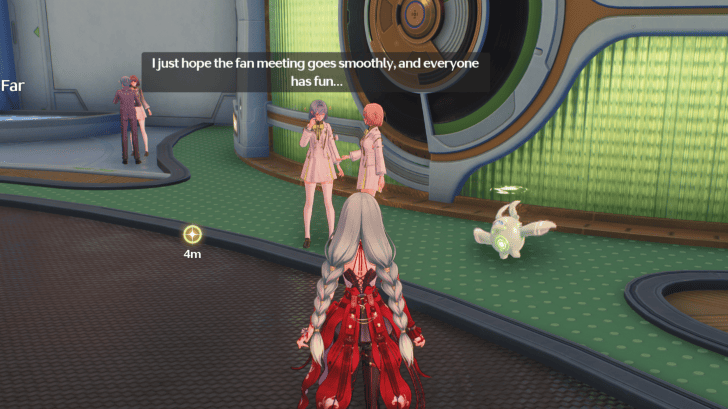
Once the cutscenes are over, you will be returned to Academy proper. Follow the quest markers to receive a message from Luuk, as well as accompany Aemeath to her performance in the Auditorium.
Watch her song, and speak with students in the crowd after the performance. Then, check up on Aemeath afterwards and wait for her to be done with her meet-and-greet.
19. Head to the Rooftop With Aemeath

You'll eventually be prompted to head to the roof, to watch the fireworks and some more cutscenes. When the scenes end, you will be in Sigillum's POV, in Aemeath's mindspace.
Continue forward as Sigillum, and catch up to Aemeath for more cutscenes and dialogue.
20. Speak to “Aemeath” at the Station

After all the cutscenes that play, head up to the train platform and speak with “Aemeath”. The quest will end after the succeeding scenes.
The Star That Voyages Far Information
| The Star That Voyages Far Quest Information | |
|---|---|
| Questline | Chapter 3: To the Stars Yet to Shine |
| Required Union Lvl | None |
| Quest Location | Frostlands Surface |
| Version Release | 3.1 |
The Star That Voyages Far Rewards
Total Quest Rewards
| The Star That Voyages Far Quest Rewards |
|---|
|
|
All Music Box Rewards
| List of Music Box Rewards | A Small Miracle | Voyaging Star's Farewell | Vernal Days Dreamed by the Star (Game Ver.) |
|---|---|---|
| Into Falling Snow | A Silent Watcher | When the Stars Were Reachable |
| What She Longs For | Starlit Lullaby | Vernal Days Dreamed by the Star (Full Ver.) |
Progressing through and completing The Star That Voyages Far will award 9 Music Boxes in total!
Music Box Locations and All BGM
Wuthering Waves Related Guides

List of Quest Types
| All Quest Types | |
|---|---|
| Main Quests | Companion Stories |
| Exploration Quests | Side Quests |
| Tutorial Quests | Daily Quests |
| Hidden Quests | - |
Main Quest Walkthrough
Comment
i dont think ive cried for a wuwa quest, but the latter half of the quest got to me man. so good.
Author

Chapter 3 Act 3 The Star That Voyages Far Quest Guide
Premium Articles

Rankings

Gaming News

![The Liar Princess and the Blind Prince Review [PC] | Lovely to Look at but Tedious to Play](https://img.game8.co/4442586/8d95f5faf05780f1765ce7e0938bd825.jpeg/show)

![Monster Hunter Stories 3 Review [First Impressions] | Simply Rejuvenating](https://img.game8.co/4438641/2a31b7702bd70e78ec8efd24661dacda.jpeg/thumb)
![The Seven Deadly Sins: Origin Review [First Impressions] | A Promising Start](https://img.game8.co/4440581/584e0bfb87908f12c4eab6e846eb1afd.png/thumb)
Popular Games

Genshin Impact Walkthrough & Guides Wiki
Umamusume: Pretty Derby Walkthrough & Guides Wiki
Pokemon Pokopia Walkthrough & Guides Wiki
Honkai: Star Rail Walkthrough & Guides Wiki
Monster Hunter Stories 3: Twisted Reflection Walkthrough & Guides Wiki
Arknights: Endfield Walkthrough & Guides Wiki
Wuthering Waves Walkthrough & Guides Wiki
Zenless Zone Zero Walkthrough & Guides Wiki
Pokemon TCG Pocket (PTCGP) Strategies & Guides Wiki
Monster Hunter Wilds Walkthrough & Guides Wiki


Recommended Games
Fire Emblem Heroes (FEH) Walkthrough & Guides Wiki
Diablo 4: Vessel of Hatred Walkthrough & Guides Wiki
Cyberpunk 2077: Ultimate Edition Walkthrough & Guides Wiki
Yu-Gi-Oh! Master Duel Walkthrough & Guides Wiki
Super Smash Bros. Ultimate Walkthrough & Guides Wiki
Pokemon Brilliant Diamond and Shining Pearl (BDSP) Walkthrough & Guides Wiki
Elden Ring Shadow of the Erdtree Walkthrough & Guides Wiki
Monster Hunter World Walkthrough & Guides Wiki
The Legend of Zelda: Tears of the Kingdom Walkthrough & Guides Wiki
Persona 3 Reload Walkthrough & Guides Wiki


All rights reserved
Copyright© 2024-2025 Kuro Games. All Rights Reserved.
The copyrights of videos of games used in our content and other intellectual property rights belong to the provider of the game.
The contents we provide on this site were created personally by members of the Game8 editorial department.
We refuse the right to reuse or repost content taken without our permission such as data or images to other sites.
The use of the Module Adapter in this quest really needs to be updated. The "tutorial" doesn't explain at all how to use it, and once you have to shoot walls to progress, the marker for it is way high up. I spent 20 minutes trying to figure out where to equip this, find it my backpack, anything. After the first wall, all the others are at eye level. Whoever developed this is a moron.