Starblind Crashsite Map & 100% Exploration Guide
★ Version 3.2 out now!
┣ Sigrika → Builds, Materials, Weapon
┣ Qiuyuan → Builds, Materials, Weapon
┗ Phase 2 → Lynae, Zani, Phoebe
★ 3.2 Main Story, All Events
★ Exclusives: Tier Maker | State of the Meta
This is a location guide for the Starblind Crashsite in the Lahai-Roi region of Wuthering Waves. Check out our interactive map and 100% exploration guide for the Starblind Crashsite, as well as map locations of all Resonance Beacons, Tapes of Lost Words, Treasure Spots, and more!
 Attention! Attention! |
This page is still a work in progress as the team explores Lahai-Roi. More details will be added here soon! Sign in and select  under the page's title to be notified of any updates! under the page's title to be notified of any updates! |
|---|
Starblind Crashsite Interactive Map
| ★ Press the icons on the right side to show collectibles and points of interest on the map. ★ Select a new map from the drop down menu to see Lahai-Roi's sub-levels. ★ Toggle the Full On icon to expand the map. |
The Interactive Map both shows the location of key points on the map, and doubles as a collectible checker.
- Click an icon on the right side to show all the pins of a specific type, or click the magnifying glass button to search for a specific pin by name.
- Click a pin on the map to see its name and description, and a relevant picture or video if available.
- From here, click Mark as Acquired to indicate that you've gotten a collectible already. This will change its icon on the map to show that it has been collected, and add 1 to that pin type's Counter.
- To undo this, click on the same pin and click Restore to unclaimed.
- To check how many pins you have marked so far, check the Counter in the bottom left, and click the icon that looks like a checklist to see counters for all pin types.
- If the collected pins start to get in the way, you can hide them all by clicking the green Show Pins button on the left side.
| Icon | How to Use |
|---|---|
 | Show Names This button reveals the Name of every icon currently shown. |
 | Show Pins This button will toggle between showing and hiding all the pins which you have already marked as acquired. |
 | Fullscreen This button will change the map display to fill the screen. |
 | Search Mode Toggle This button will display a searchbar which you can use to search for an individual pin by its name. |
 | Icon Mode Toggle In Search Mode, this button will toggle you back to Icon Mode, removing the search bar and displaying the icons again. |
 | All Pins This button is shown along with the Icons on the right when there are over 6 types of pins. Click it for a full selection of all available pin types. |
 | Counter Tracks the number of pins you have of a certain type. The pin type shown is set to the page and currently cannot be changed; however, all pin type counters can be viewed by clicking the checklist icon on the right side. |
| View All Counters This icon is found on the right side of the Counter. When a map has more than one pin type, click this icon to see Counters for all pin types. | |
| Zoom In / Zoom Out This icon is found on the top left side of the map. You can press these buttons, or use your scroll wheel while hovering, to Zoom In and Out of the interactive map. |
Map Legend
Starblind Crashsite 100% Exploration Guide
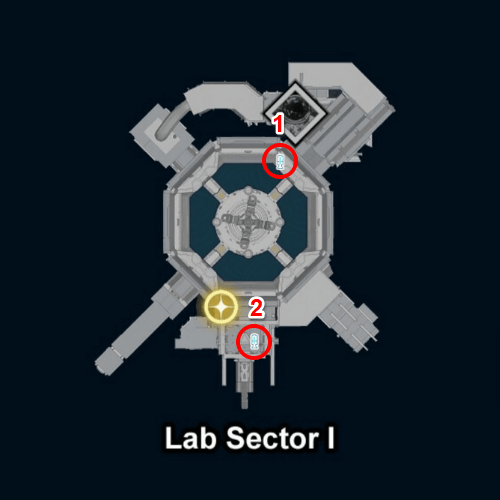
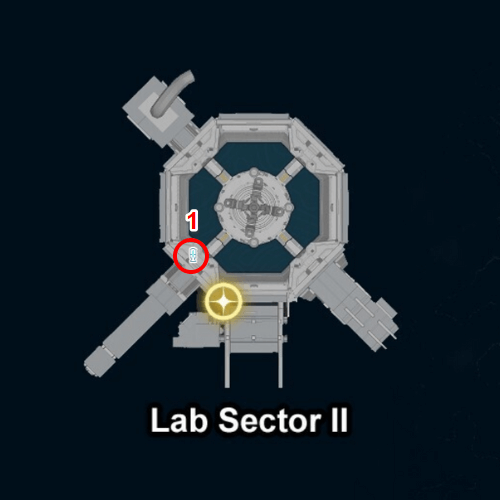
Starblind Crashsite Resonance Beacon Locations
 |
 |
 |
 |
 |
- |
| No. of Resonance Beacons | 10 |
|---|
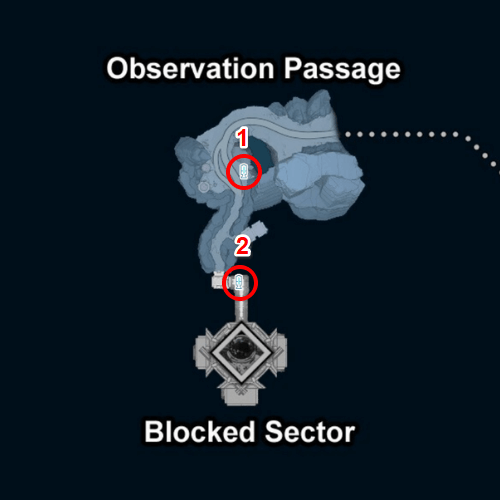
There are 10 Resonance Beacons at the Starblind Crashsite. Many of them are spread across the Lab Sectors, Observation Passage, and Skyark Space Station.
Lahai-Roi Resonance Beacon Locations
Starblind Crashsite Tape of Last Words Locations
There are 12 tapes at the Starblind Crashsite. These can be found throughout the area, so use the Motorbike to get to them faster!
| ✔️ | Overworld View | Details |
|---|---|---|
 |
Region: Starblind Crashsite Type: Tape of Last Words How to Get: Follow the road from the Polar Research Outpost to the north. It will be under an intersecting ice road. |
|
 |
Region: Starblind Crashsite Type: Tape of Last Words How to Get: Accessible while on the bridge that leads to the SkyArk Space Station. |
|
 |
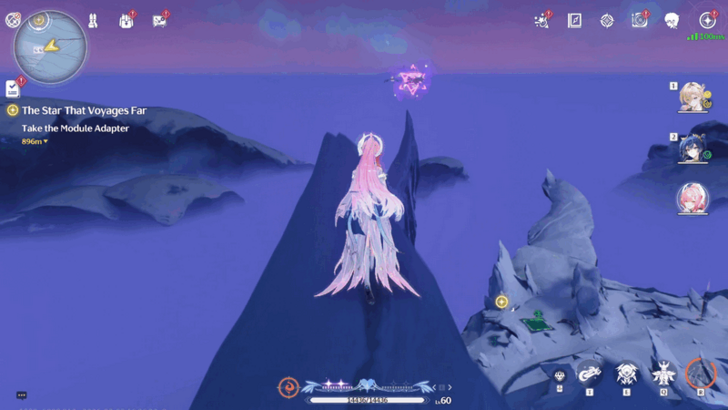
Region: Starblind Crashsite Type: Tape of Last Words How to Get: At Oldfrost Harbor, sea level, head underneath the icy cavern at the side. It should be right above the water, right across a Glommoth on the snow. |
|
 |
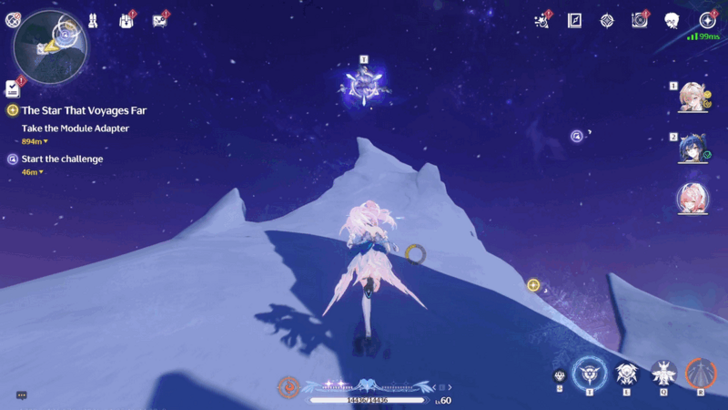
Region: Starblind Crashsite Type: Tape of Last Words How to Get: To the north part of the road that cuts across Mount Gjallar. There's a large shard of ice jutting out pointing to it. The top of the SkyArk Space Station can be seen from here. |
|
 |
Region: Starblind Crashsite Type: Tape of Last Words How to Get: Found at the highest tip of Mount Gjallar, that overlooks the SkyArk. |
|
 |
Region: Starblind Crashsite Type: Tape of Last Words How to Get: Drop down from the top of Mount Gjallar and aim for the thrusters of the SkyArk. It will be in a space in between the thrusters and the ship. |
|
 |
Region: Starblind Crashsite Type: Tape of Last Words How to Get: On the cliff to the left of the road before it heads under Mount Gjallar. |
|
 |
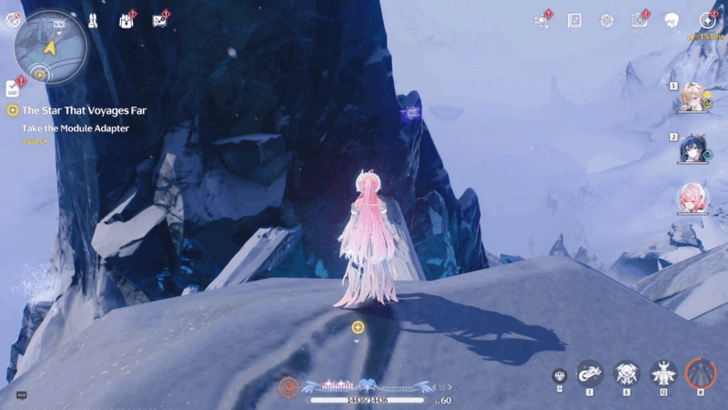
Region: Starblind Crashsite Type: Tape of Last Words How to Get: Just before the road heads to mount Gjallar, turn around and find it in front of blue ice jutting out from the ground. On the map it will look like it is on top of the mountain. |
|
 |
Region: Starblind Crashsite Type: Tape of Last Words How to Get: On the tip of a cliff jutting out to the left. There's a nearby resonance beacon and Smartprint Cube Reboot to the left of the road heading to Mount Gjallar. |
|
 |
Region: Starblind Crashsite Type: Tape of Last Words How to Get: On the tip of a cliff that is to the right of the road headed to Mount Gjallar. It is to the west of the entrance to the Observation Passage. |
|
 |
Region: Starblind Crashsite Type: Tape of Last Words How to Get: Jump down to the north of the road that is exiting the underside of Mount Gjallar and headed to the north east. On the map, it will be above some large spiky icicles. |
|
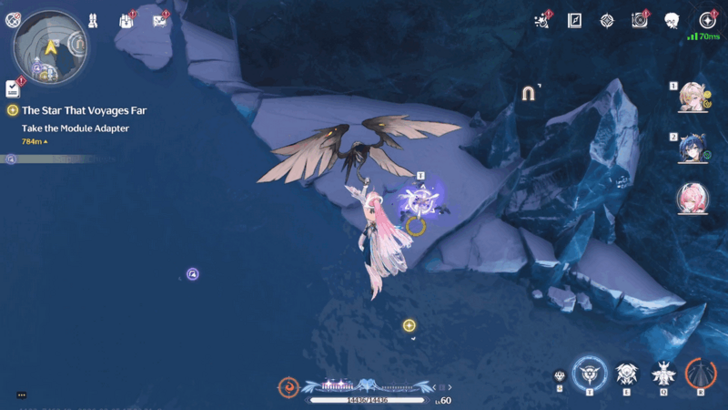 |
Region: Starblind Crashsite Type: Tape of Last Words How to Get: Head to Everfrost Cavern, directly to the north west of SkyArk Space Station. From the Resonance Beacon, jump and glide down into the water. The tape should be just above it. |
All Tape of Last Words: Lahai-Roi Locations
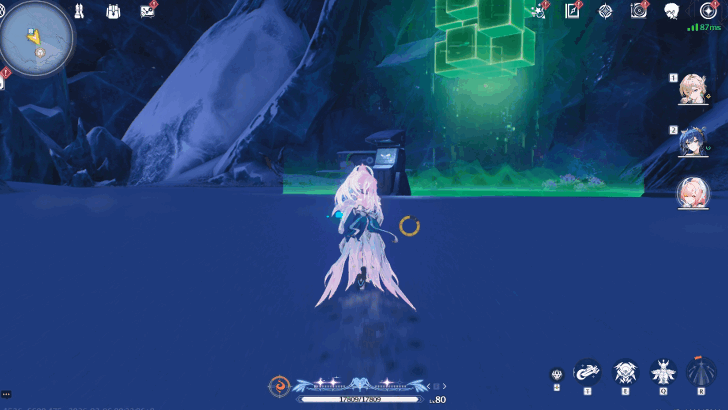
Starblind Crashsite Soliskin Locations
Soliskins are lost creatures spread across the Frostlands. Upon interacting with them, they drop Soliseeds that you can deliver to the Giant Soliskin for rewards.
| ✔️ | Overworld View | Details |
|---|---|---|
 |
Region: Starblind Crashsite Type: Soliskin How to Get: On the tip of the cliff to the west of the SkyArk Space Station. Sit next to the Soliskin. |
|
 |
Region: Starblind Crashsite Type: Soliskin How to Get: Climb up to the top of Mount Gjallar then drop down and guide your character to glide to a space right under the thrusters of the Skyark Space Station. The Soliskin will be right in the center. |
|
 |
Region: Starblind Crashsite Type: Soliskin How to Get: Right above the door to the SkyArk Space Station: Blocked Sector. This door leads to an elevator that leads right to the area of the Nameless Explorer boss. |
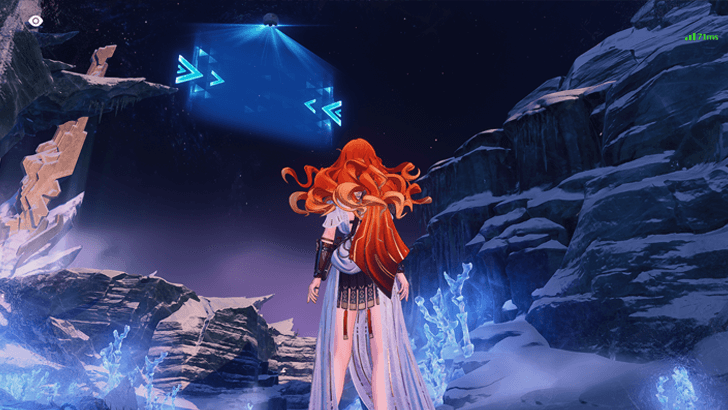
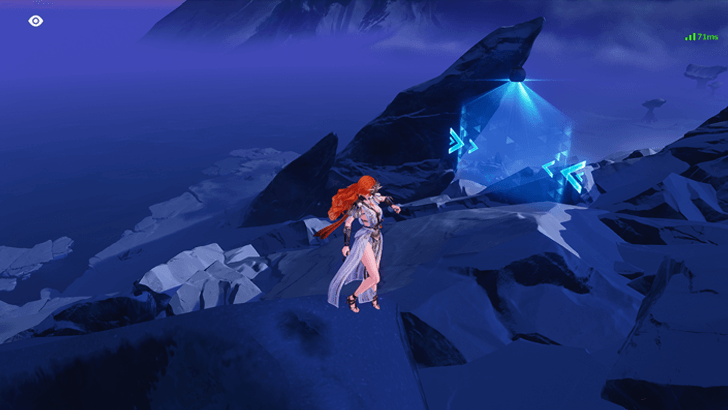
Starblind Crashsite Smartprint Cube Reboot
Smartprint Cube Reboots are puzzles found across the Frostlands for rewards like Astrites. Solve the ones found in Starblind Crashsite to gain premium currencies!
| ✔️ | Overworld View | Details |
|---|---|---|
 |
Region: Starblind Crashsite Type: Smartprint Cube Reboot How to Get: To the south west of Mount Gjallar. It is near a Resonance Beacon and approaching an icy cliff that's pointing towards the water. |
|
 |
Region: Starblind Crashsite Type: Smartprint Cube Reboot How to Get: South of the SkyArk Space Station, it is right beside a Resonance Beacon and against an icy wall. |
All Smartprint Cube Reboot Solutions and Locations
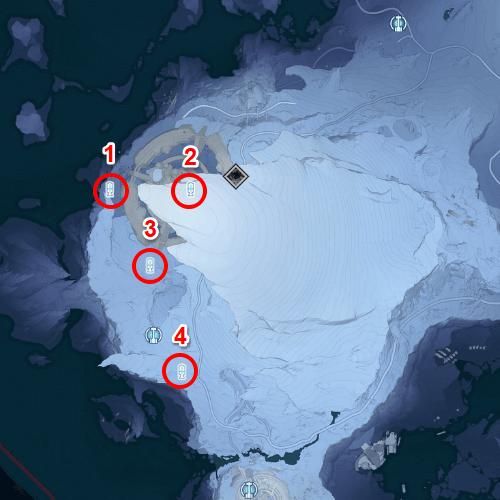
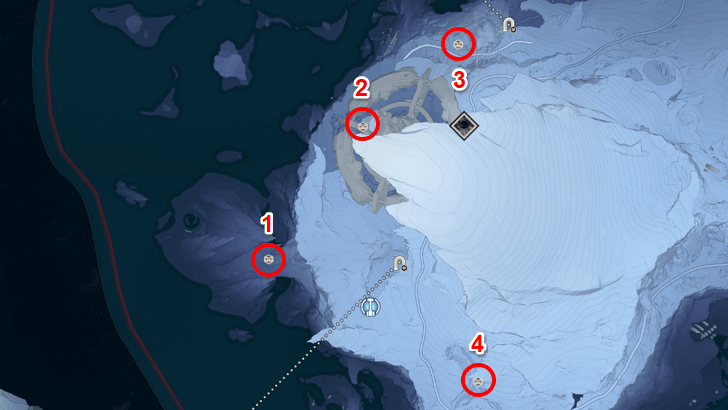
Starblind Crashsite Treasure Spot Locations
 |
|
| No. of Treasure Spots | 4 |
|---|---|
There are various Treasure Spots that can be found in Starblind Crashsite. Use the Motorbike and activate the Owlwatch Scanner to get all of them quickly!
All Treasure Spots
| ✔️ | Overworld View | Details |
|---|---|---|
 |
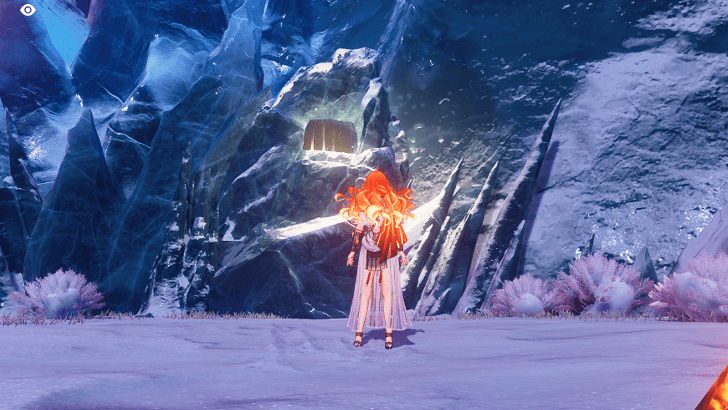
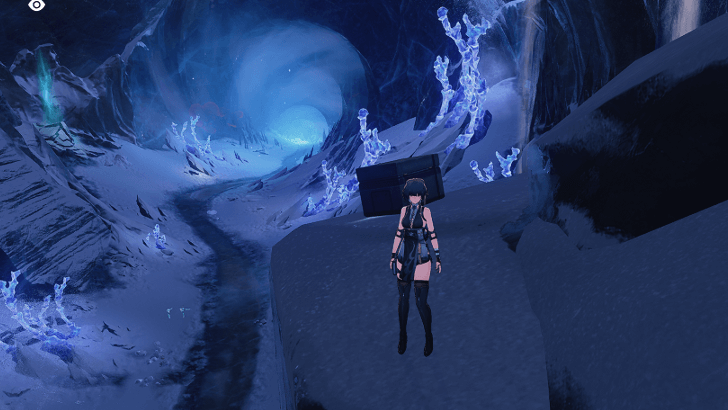
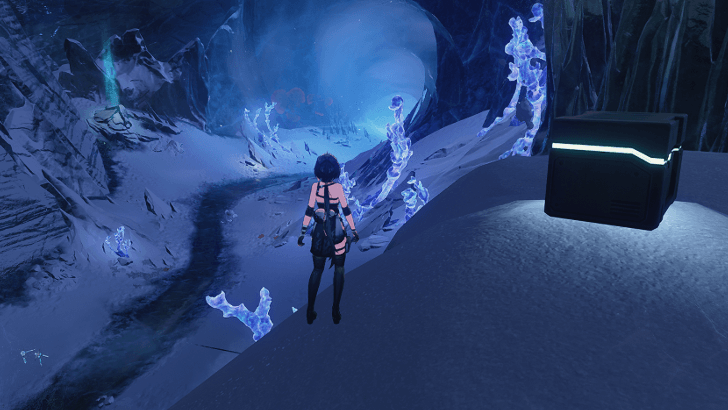
Region: Starblind Crashsite Type: Treasure Spot How to Get: Found just ahead of the cavern that closed when you met Nivora. |
|
 |
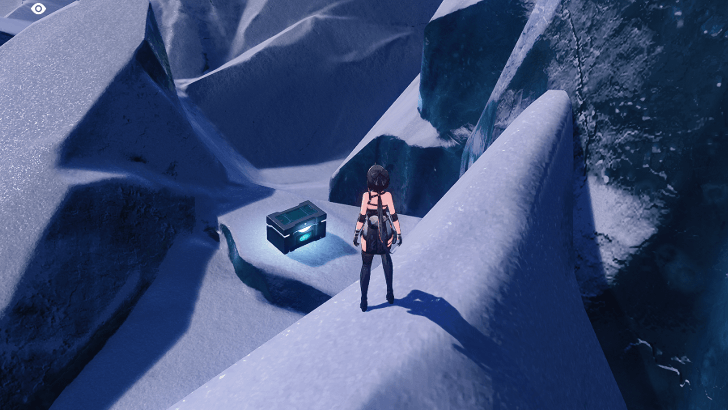
Region: Starblind Crashsite Type: Treasure Spot How to Get: Located in the mountain region of the Oldfrost Harbor area. Reach the area by teleporting to the Starblind Crashsite Resonance Nexus and riding the motorbike to the area. |
|
 |
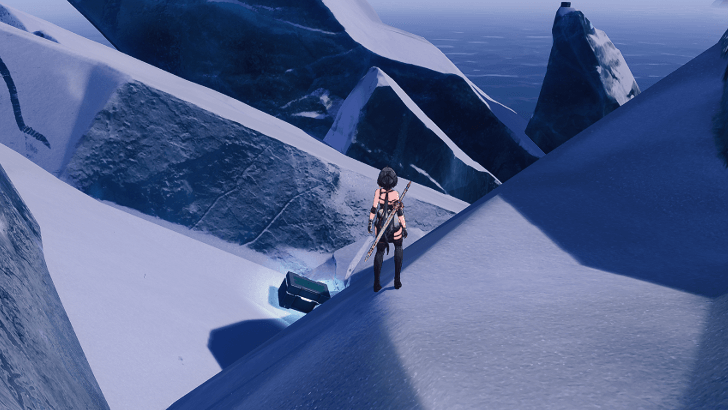
Region: Starblind Crashsite Type: Treasure Spot How to Get: Found above the SkyArk Space Station. Climb aboard the outside ring around it to get to the Treasure Spot. |
|
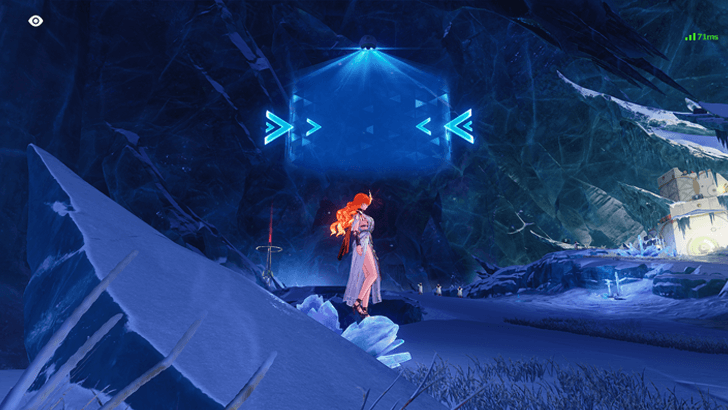 |
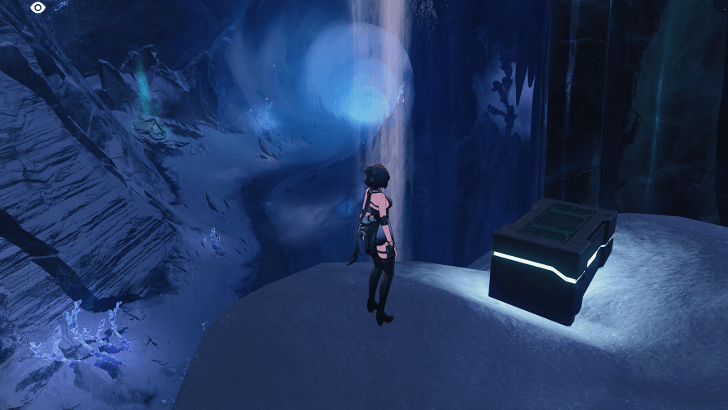
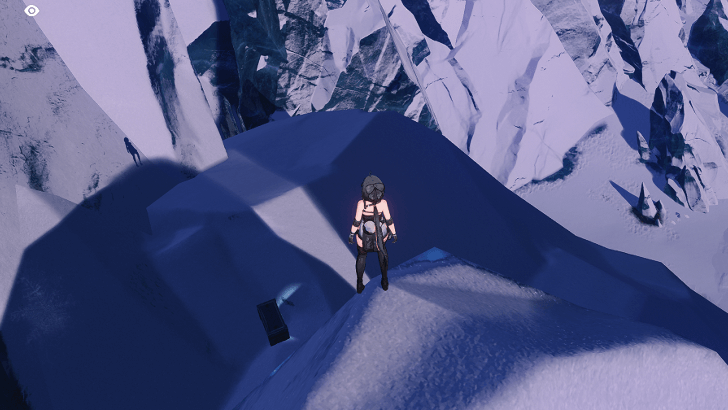
Region: Starblind Crashsite Type: Treasure Spot How to Get: Found inside the Everfrost Cavern. You can head to the area and use the Owlwatch Scanner to get all the Chests. |
Starblind Crashsite Supply Chest Locations
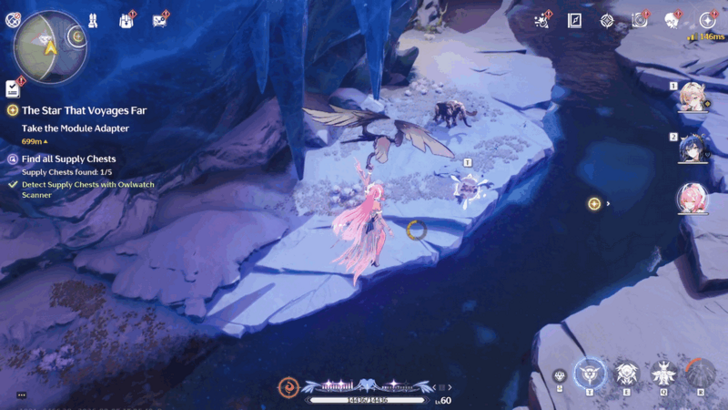
Supply Chests when unlocked drop premium rewards, such as Astrites, depending on their rarity. Some are defended by enemies, while others are simply stationed across the map. See the different chests in this area here!
| ✔️ | Overworld View | Details |
|---|---|---|
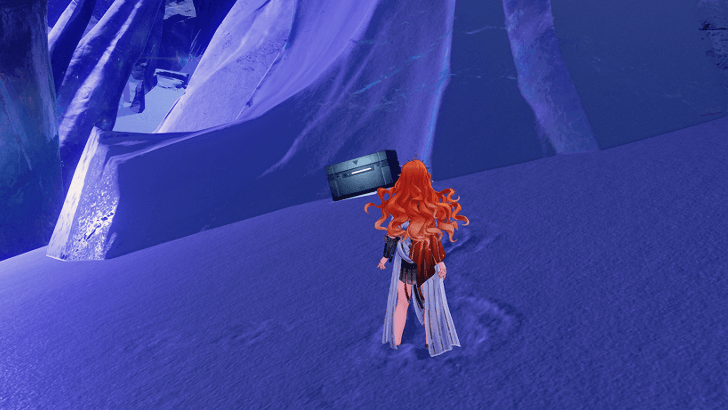 |
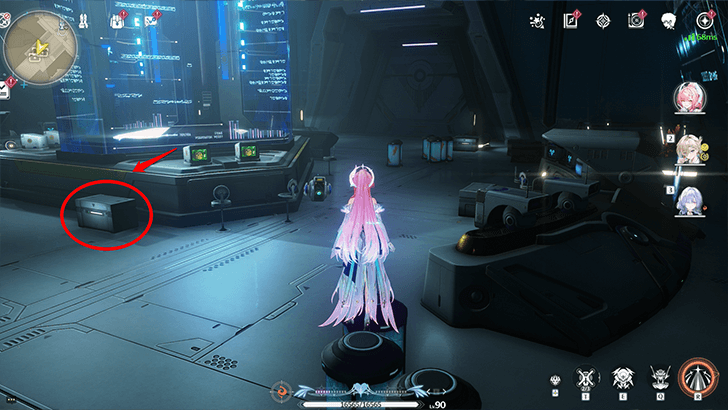
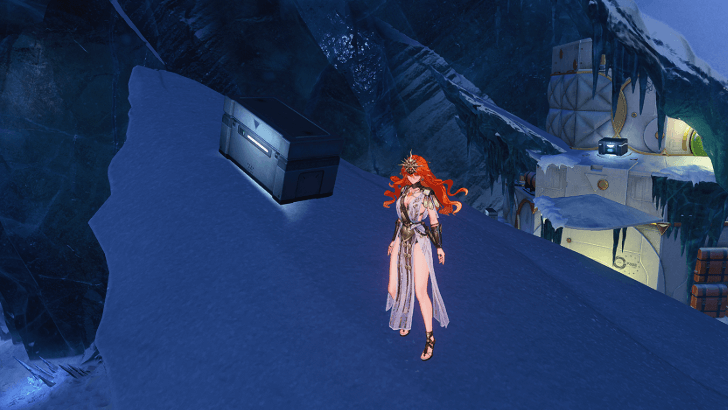
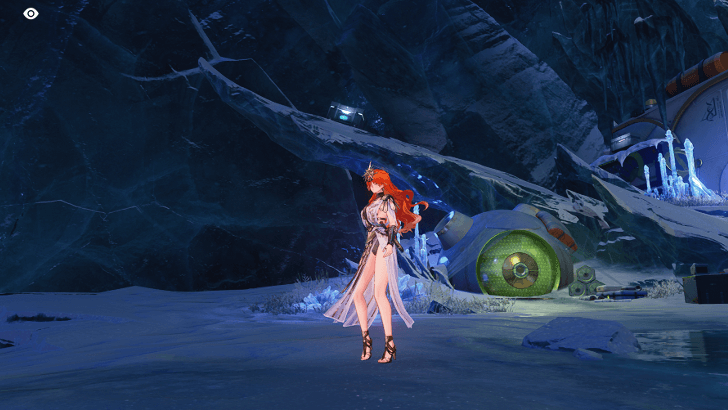
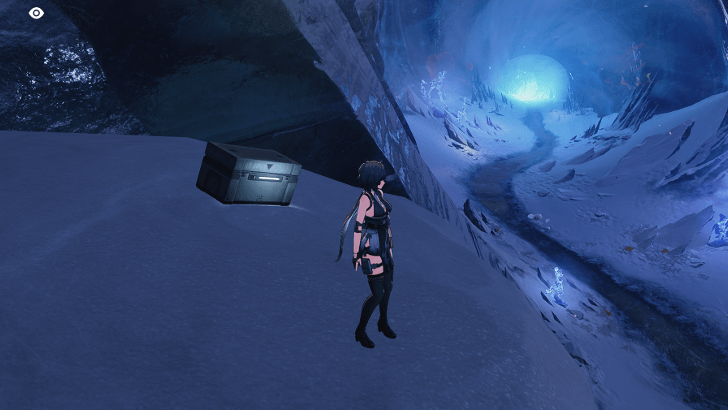
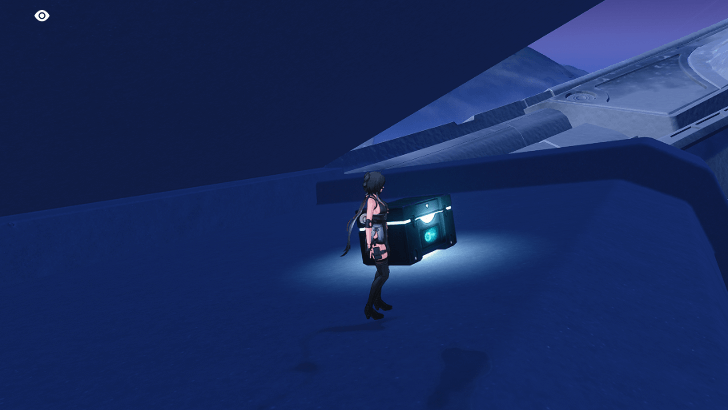
Region: Starblind Crashsite Type: Supply Chest How to Get: Found below the SkyArk Space Station. You can see it on the ground at the base of a large ice crystal shooting upwards. |
|
 |
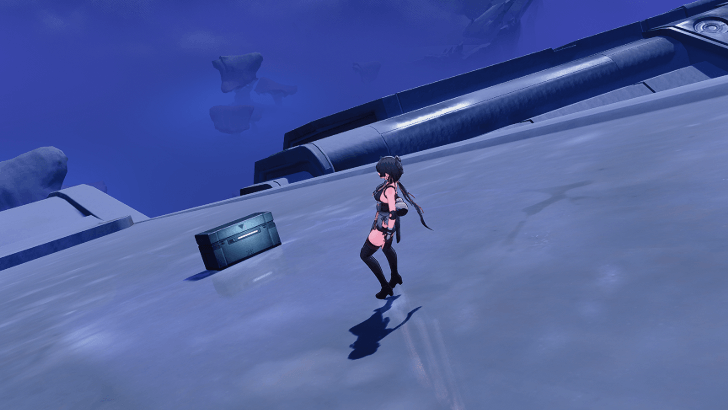
Region: Starblind Crashsite Type: Supply Chest How to Get: Teleport to the nearest Resonance Beacon (that unlocks via the main quest) and get the chests. No special mechanics needed. |
|
|
|
Region: Starblind Crashsite Type: Supply Chest How to Get: Teleport to the nearest Resonance Beacon (that unlocks via the main quest) and get the chests. No special mechanics needed. |
|
 |
Region: Starblind Crashsite Type: Supply Chest How to Get: Teleport to the nearest Beacon and use the Module Adapter to enter the Blue Fence. Get all three Basic Chests in close proximity with each other. |
|
 |
Region: Starblind Crashsite Type: Supply Chest How to Get: Teleport to the nearest Beacon and use the Module Adapter to enter the Blue Fence. Get all three Basic Chests in close proximity with each other. |
|
 |
Region: Starblind Crashsite Type: Supply Chest How to Get: Teleport to the nearest Beacon and use the Module Adapter to enter the Blue Fence. Get all three Basic Chests in close proximity with each other. |
|
 |
Region: Starblind Crashsite Type: Supply Chest How to Get: Inside a Soliskin cave. Summon a Glommoth via the Projector to reveal the Supply Chest. |
|
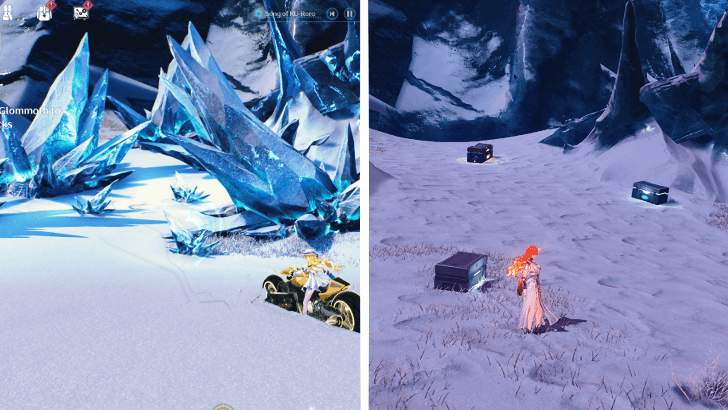 |
Region: Starblind Crashsite Type: Supply Chest How to Get: Tidal Supply Chest. Use Glommoth to break the crystals and reveal three chests. |
|
|
|
Region: Starblind Crashsite Type: Supply Chest How to Get: Use Glommoth to break the crystals and reveal three chests. |
|
|
|
Region: Starblind Crashsite Type: Supply Chest How to Get: Use Glommoth to break the crystals and reveal three chests. |
|
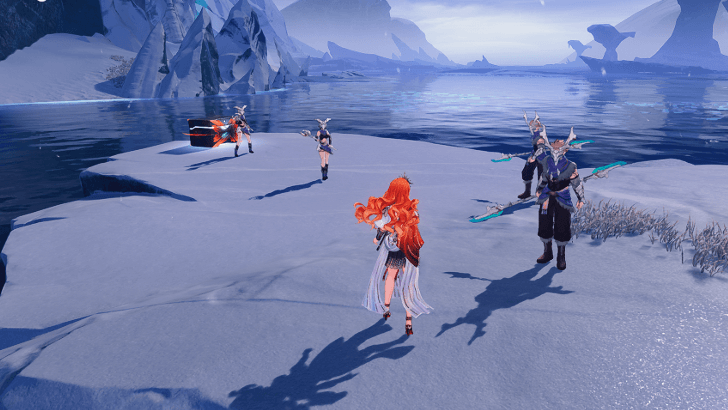 |
Region: Starblind Crashsite Type: Supply Chest How to Get: Defended by Frostland enemies. Defeat them to unlock the chest. |
|
 |
Region: Starblind Crashsite Type: Supply Chest How to Get: Found resting on top of a large ground crystal jutting upwards. Located just above the Spacetrek Collective's resting stations. Part of a Treasure Spot. |
|
 |
Region: Starblind Crashsite Type: Supply Chest How to Get: Found resting on top of a few large crates situated beside the resting station. Part of a Treasure Spot. |
|
 |
Region: Starblind Crashsite Type: Supply Chest How to Get: On the roof of the Spacetrek Collective's resting station. Part of a Treasure Spot. |
|
 |
Region: Starblind Crashsite Type: Supply Chest How to Get: On top of a large crate beside one of the Spacetrek Collective's resting stations. Part of a Treasure Chest. |
|
 |
Region: Starblind Crashsite Type: Supply Chest How to Get: Located on top of a spiky rock shooting diagonally. Head to Everfrost Cavern to find this beside the Collective's resting stations. Part of a Treasure Spot. |
|
 |
Region: Starblind Crashsite Type: Supply Chest How to Get: Located on the very tip of a large rock pointing towards the mountain. Part of a Treasure Spot. |
|
 |
Region: Starblind Crashsite Type: Supply Chest How to Get: Located in a high area to the side of the road going to the SkyArk Space Station. Part of a Treasure Spot. |
|
 |
Region: Starblind Crashsite Type: Supply Chest How to Get: Located by the side of the road on the ledge above. Can be seen while going to the SkyArk Space Station. Part of a Treasure Spot. |
|
 |
Region: Starblind Crashsite Type: Supply Chest How to Get: Located in a higher ledge area by the side of the road while going to the SkyArk Space Station. Part of a Treasure Spot. |
|
 |
Region: Starblind Crashsite Type: Supply Chest How to Get: Positioned on top a snowy platform beside the waterfall. You can find it while taking the road going to the SkyArk Space Station. |
|
 |
Region: Starblind Crashsite Type: Supply Chest How to Get: Found on a snowy platform surrounded by large rocks at the side of the mountain in Oldfrost Harbor. Part of a Treasure Spot. |
|
 |
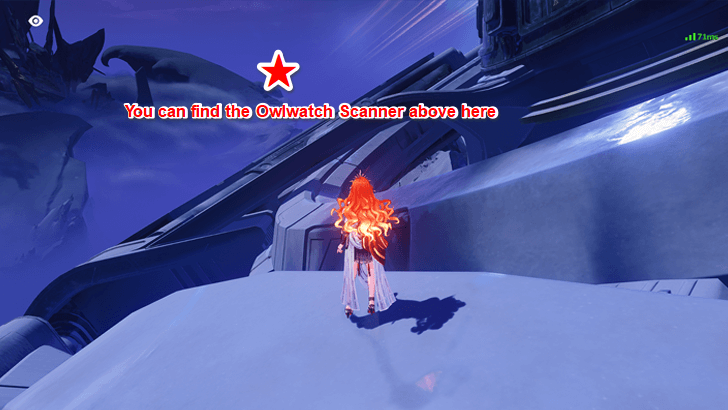
Region: Starblind Crashsite Type: Supply Chest How to Get: Located directly below the Owlwatch Scanner in Oldfrost Harbor. Part of a Treasure Spot. |
|
 |
Region: Starblind Crashsite Type: Supply Chest How to Get: Located on a mountain ledge that directly points toward the sea. Part of a Treasure Spot. |
|
 |
Region: Starblind Crashsite Type: Supply Chest How to Get: Found on top of a high area by the side of the road. It is located in a valley going to the SkyArk Space Station. Part of a Treasure Spot. |
|
 |
Region: Starblind Crashsite Type: Supply Chest How to Get: Located on the slope of the mountain going down to Oldfrost Harbor. Part of a Treasure Spot. |
|
 |
Region: Starblind Crashsite Type: Supply Chest How to Get: Found on one of the legs that hold up the SkyArk Space Station. Found outside and part of a Treasure Spot. |
|
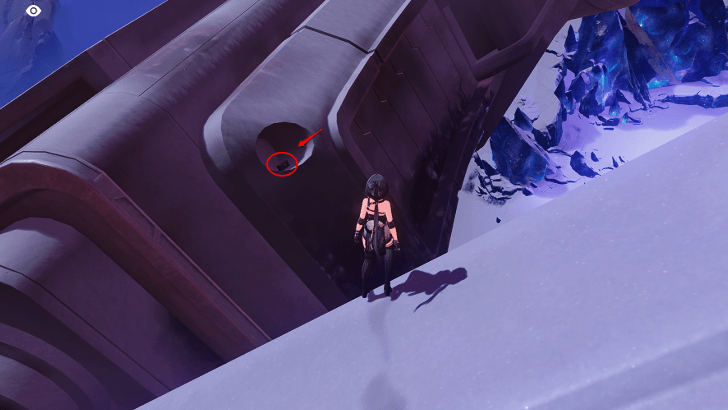 |
Region: Starblind Crashsite Type: Supply Chest How to Get: Located inside a small cavity of the SkyArk Space Station's outer ring. Part of a Treasure Spot. |
|
 |
Region: Starblind Crashsite Type: Supply Chest How to Get: Found slanted at the very end of the SkyArk Space Station's left outer ring. Part of a Treasure Spot. |
|
 |
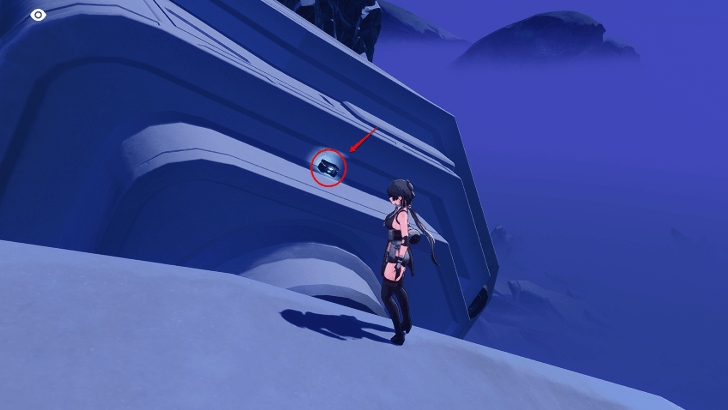
Region: Starblind Crashsite Type: Supply Chest How to Get: Found inside a cavity of the SkyArk Space Station's outer ring by the left side. Part of a Treasure Spot. |
|
 |
Region: Starblind Crashsite Type: Supply Chest How to Get: Found in a hidden area where the SkyArk Space Station's leg joint is positioned. Directly above the Owlwatch Scanner but a level lower. Part of a Treasure Spot. |
|
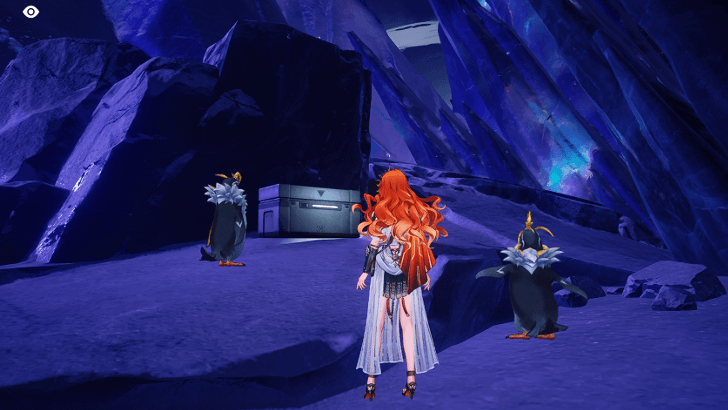 |
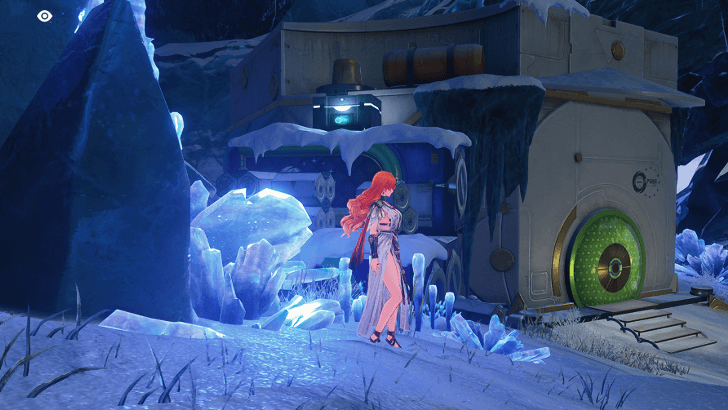
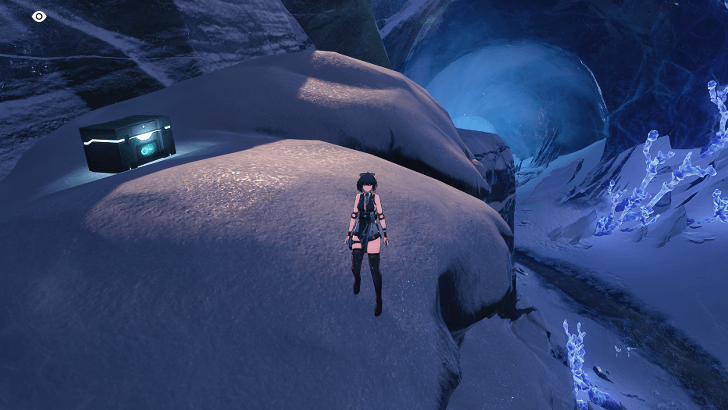
Region: Starblind Crashsite Type: Supply Chest How to Get: Found behind a large rock and some glowing crystals. Located inside the SkyArk Space Station cavern. |
|
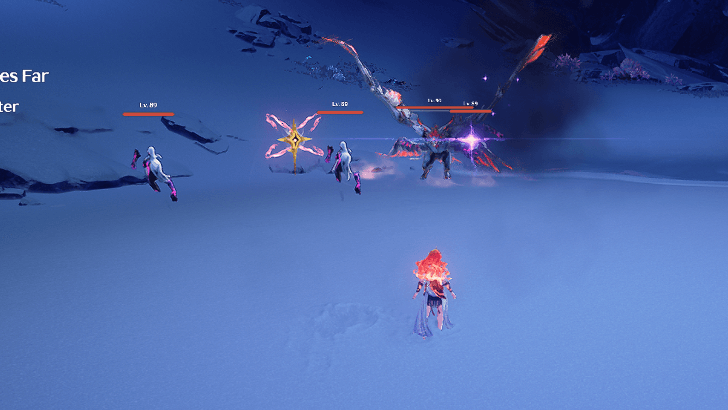 |
Region: Starblind Crashsite Type: Supply Chest How to Get: Defended by enemies in the SkyArk Space Station. Defeat them to receive the rewards. |
All Lahai-Roi Supply Chest Locations
Starblind Crashsite 100% Completion Rewards
| Reward | |
|---|---|
| 25% | |
| 50% | |
| 75% | |
| 100% |
Here are the rewards that you receive when you get 100% map completion at the Starblind Crashsite.
Wuthering Waves Related Guides
Wuthering Waves Interactive Map
Lahai-Roi
| All Lahai-Roi Areas | |||||
|---|---|---|---|---|---|
| Startorch Academy | Rebirth Uplands | Etching Plains | |||
| Mawburrow Desert | Stagnant Run | Bjartr Woods | |||
| Fangspire Chasm | Starward Riseway | Giant's Gaze | |||
| Frostlands Transit Port | Starblind Crashsite | Tidelost Forest | |||
| Upphaf Forest Ruins | Mount Gjallar | - | |||
Lahai-Roi Interactive Map and 100% Guide
Rinascita
Rinascita Interactive Map and 100% Guide
Black Shores
| All Black Shores Areas | |
|---|---|
| Tethys' Deep | Chronorift Metropolis |
Black Shores Map and 100% Exploration Guide
Huanglong
| All Huanglong Areas | |||||
|---|---|---|---|---|---|
| Jinzhou | Central Plains | Dim Forest | |||
| Gorges of Spirits | Desorock Highland | Port City of Guixu | |||
| Wuming Bay | Norfall Barrens | Tiger's Maw | |||
| Whining Aix's Mire | Mt. Firmament | ||||
Huanglong Interactive Map and 100% Guide
All Location Guides
Comment
Author

Starblind Crashsite Map & 100% Exploration Guide
Premium Articles

Rankings

Gaming News

![The Liar Princess and the Blind Prince Review [PC] | Lovely to Look at but Tedious to Play](https://img.game8.co/4442586/8d95f5faf05780f1765ce7e0938bd825.jpeg/show)

![Monster Hunter Stories 3 Review [First Impressions] | Simply Rejuvenating](https://img.game8.co/4438641/2a31b7702bd70e78ec8efd24661dacda.jpeg/thumb)
![The Seven Deadly Sins: Origin Review [First Impressions] | A Promising Start](https://img.game8.co/4440581/584e0bfb87908f12c4eab6e846eb1afd.png/thumb)
Popular Games

Genshin Impact Walkthrough & Guides Wiki
Umamusume: Pretty Derby Walkthrough & Guides Wiki
Pokemon Pokopia Walkthrough & Guides Wiki
Honkai: Star Rail Walkthrough & Guides Wiki
Monster Hunter Stories 3: Twisted Reflection Walkthrough & Guides Wiki
Arknights: Endfield Walkthrough & Guides Wiki
Wuthering Waves Walkthrough & Guides Wiki
Zenless Zone Zero Walkthrough & Guides Wiki
Pokemon TCG Pocket (PTCGP) Strategies & Guides Wiki
Monster Hunter Wilds Walkthrough & Guides Wiki


Recommended Games
Fire Emblem Heroes (FEH) Walkthrough & Guides Wiki
Diablo 4: Vessel of Hatred Walkthrough & Guides Wiki
Cyberpunk 2077: Ultimate Edition Walkthrough & Guides Wiki
Yu-Gi-Oh! Master Duel Walkthrough & Guides Wiki
Super Smash Bros. Ultimate Walkthrough & Guides Wiki
Pokemon Brilliant Diamond and Shining Pearl (BDSP) Walkthrough & Guides Wiki
Elden Ring Shadow of the Erdtree Walkthrough & Guides Wiki
Monster Hunter World Walkthrough & Guides Wiki
The Legend of Zelda: Tears of the Kingdom Walkthrough & Guides Wiki
Persona 3 Reload Walkthrough & Guides Wiki


All rights reserved
Copyright© 2024-2025 Kuro Games. All Rights Reserved.
The copyrights of videos of games used in our content and other intellectual property rights belong to the provider of the game.
The contents we provide on this site were created personally by members of the Game8 editorial department.
We refuse the right to reuse or repost content taken without our permission such as data or images to other sites.