Vigil of Endless Night Quest Guide
★ Version 3.2 Banners → Livestream Codes
┣ Sigrika → Materials, Weapon, Banner
┣ Qiuyuan → Builds, Materials, Weapon
┗ Phase 2 → Lynae, Zani, Phoebe
★ Tapes of Last Words | Soliskin | 3.1 Trophies
★ Exclusives: Tier Maker | State of the Meta
Vigil of Endless Night is an Exploration Quest at the Mt. Firmament region in Wuthering Waves. See how to unlock Vigil of Endless Night, its walkthrough, and all the rewards of this quest here!
How to Unlock Vigil of Endless Night
Complete Ch. 1, Act 7: Thaw of Eons

To unlock Vigil of Endless Night, players must finish the main quest Chapter 1, Act 7: Thaw of Eons. The problems in Mt. Firmament must be solved before Vigil of Endless Night unlocks.
Chapter 1 Act 7 Thaw of Eons Quest Guide
Vigil of Endless Night Walkthrough
- Talk to Chenpi in Jinzhou
- Enter The Cave and Use The Chrono Sign
- Go Down and Avoid the Lasers
- Solve the Laser Puzzle
- Interact With the Prototype Chronosorter
- Go to the First Security Node
- Go to the Second Security Node
- Go to the Third Security Node
- Defend the Third Node!
- Go to the Fourth Node
- Investigate the Info Tablet and Go to the Chronosorter
- Defeat Two Lumiscale Constructs
- Activate the Chronosorter
- Go Back to Chenpi to Finish the Quest
Talk to Chenpi in Jinzhou
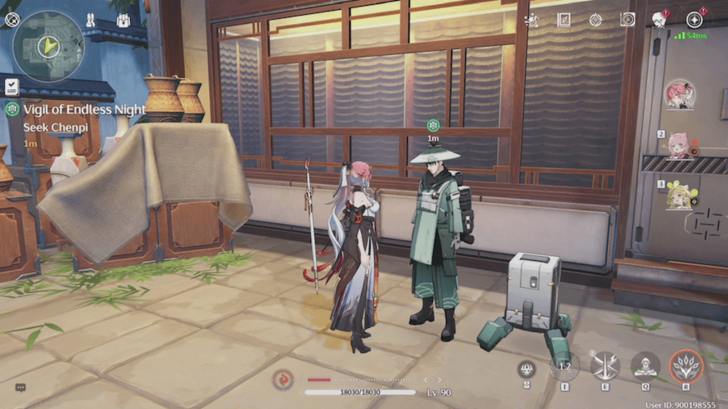
To start the quest, players must talk to Chenpi about a certain key. He will then ask you to go to Woodveil Hall, a new underground area that unlocks in Version 1.2. Enter the cave and go down the slide until the game teaches you about the Chrono Sign.
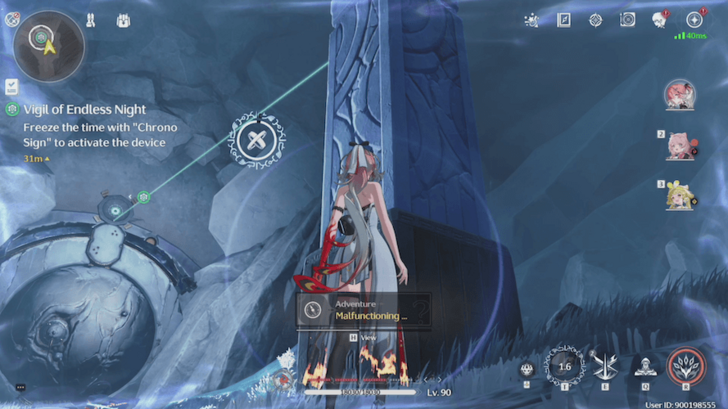
Enter The Cave and Use The Chrono Sign
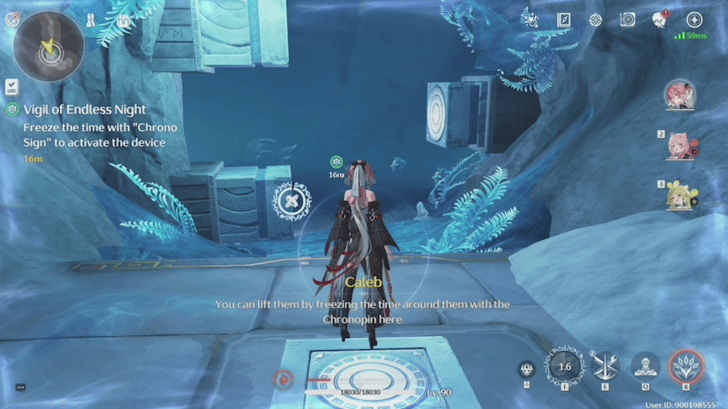
Use the newly obtained device to open the gates. Step on the switch to retract the pillars then use the Chrono Sign to freeze the pillars in time. Enter and defeat all the enemies you see.
Use Chrono Signs to Freeze Objects and Enemies
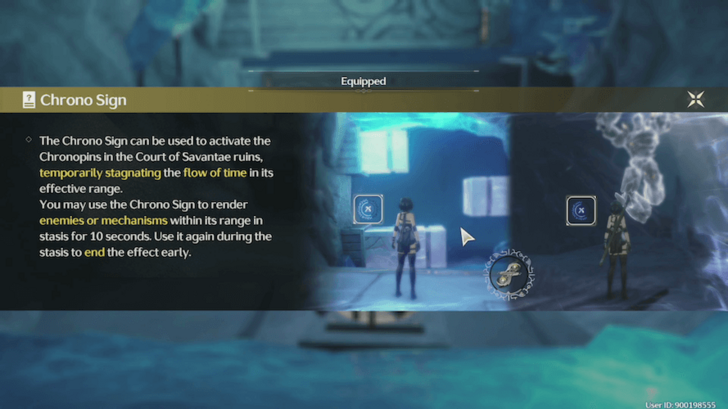
The Chrono Sign is a device that you can use to freeze moving objects and enemies for a while. This is especially useful when solving puzzles and aiding in fights.
Go Down and Avoid the Lasers
Follow the quest marker and open the hole blocked by pillars. Step on the switch and use the Chrono Sign to freeze the retracted pillar and go down.
Take Note of the Clang Bang Puzzle
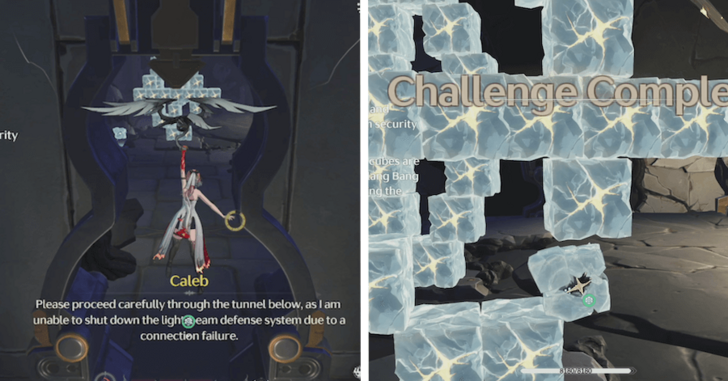
While going down, you will be able to enter a room with an Echo: Clang Bang puzzle. Solve the puzzle by aligning the echo on the lower right of the formation. A sub-room will open containing a purple chest.
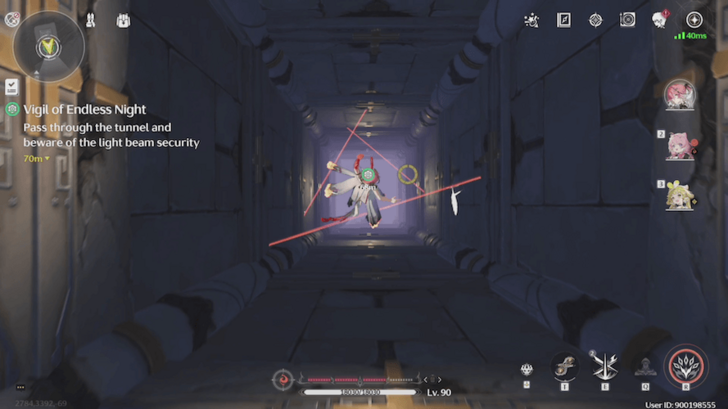
Solve the Laser Puzzle
After reaching the bottom of the hole, you will be greeted with a pillar laser puzzle. Use the Chrono Sign and freeze the Pillar when the Laser is aligned with the receiver on top of the door.
Interact With the Prototype Chronosorter

The quest will ask you to interact with the Prototype Chronosorter. Afterwards, it will be revealed that you need to solve three security node puzzles to activate the Chronosorter.
Go to the First Security Node
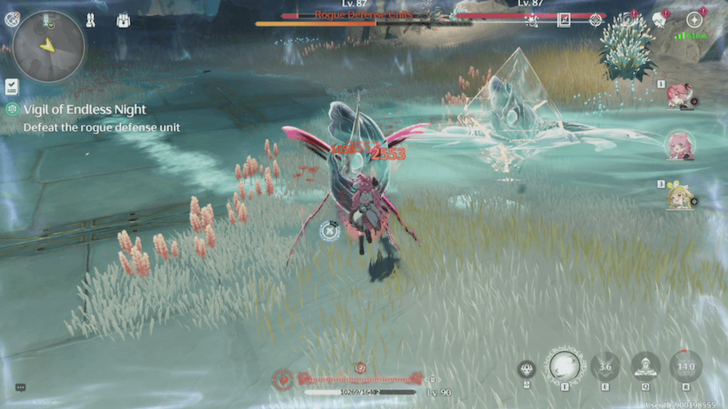
Follow the quest marker and activate the first security node. This will be a defense battle and you have to make sure that the security node's integrity does not fall to 0%. Failing to defend the node will be an automatic failure and you have to repeat the battle again.
The enemies here are pretty hard which includes Havoc, Glacio, and Fusion Dreadmanes as well as two Spearbacks. If you're feeling overwhelmed, remember to use your Chrono Sign to freeze the enemies for a short while and deal as much damage as possible.
How to Defend the Security Nodes
Go to the Second Security Node

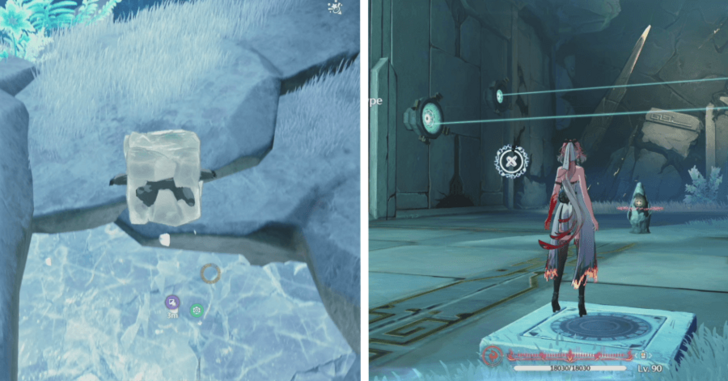
The second security node is easier to finish, as you only need to step on the switch and freeze the pillars so the laser aligns with the receiver. Once frozen, run to the node and activate it to finish this sub-quest.
Go to the Third Security Node
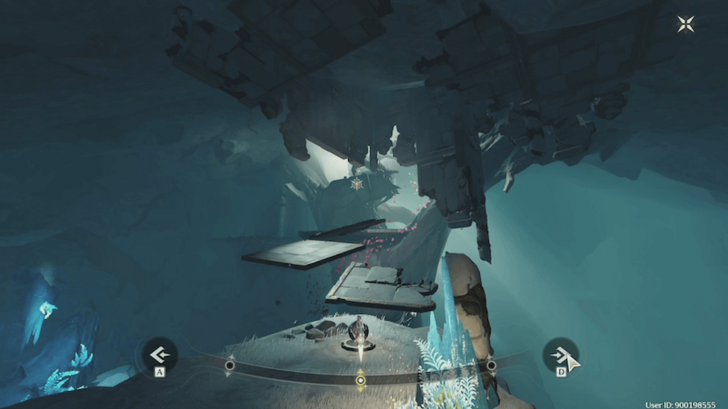
Follow the quest marker to the third security node found high above the ceiling of the cave. To go here, climb up the cliff until you arrive at a Chronosorter. Move the selector to the middle and cross the floating platform. Once across, go inside the room until you reach the third node.
Don't forget to unlock the Resonance Beacon so you can go back to this area again in the future.
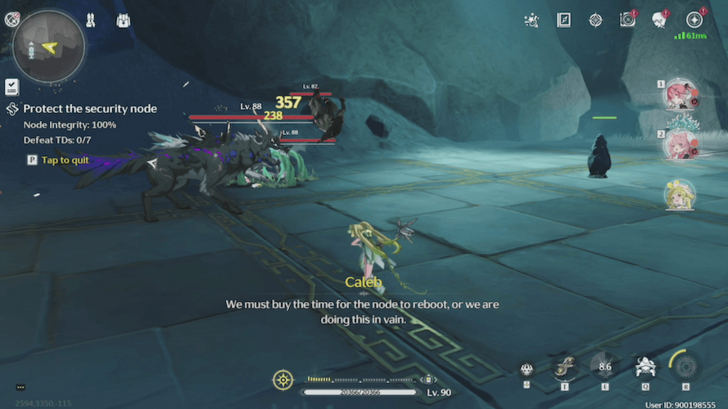
Unlock and Defend the Third Node!

Unlock the third node by shooting the source of the shield enveloping the node. You can use the newly unlocked Hoverdroid: Shooter to shoot them even with a melee character.
The third node is quite similar to the first node - you have to defend the security node to activate it. This time, it will be harder as the enemies that will attack the node are four (4) Glacio Dreadmanes and two (2) Lightcrushers. The enemies can easily overwhelm the node and cause a failure unless you know what to do.
How to Defend the Security Nodes
Use Chrono Signs to Defeat Enemies!

To successfully defend the node, you have to use your Chrono Sign to freeze enemies and defeat them while in this state. Unless you do this, the enemies can deplete the node's integrity within seconds.
Go to the Fourth Node
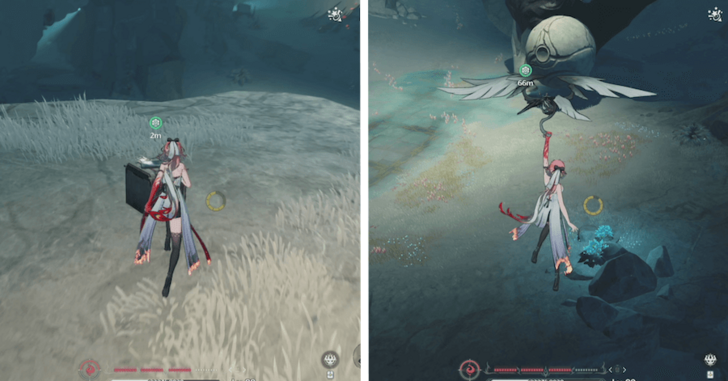
Go to the location marked and go to the fourth node. For this, you have to solve a Clang-Bang puzzle and break the ice floor. After falling down, solve the laser puzzle to unlock the fourth and final node.
Investigate the Info Tablet and Go to the Chronosorter
After defending the third node, follow the quest marker and interact with an info tablet. Afterwards, go to the Chronosorter and interact with it.
Defeat Two Lumiscale Constructs
Before you can interact with the Chronosorter, you will be interrupted by two Lumiscale Constructs. Defeat them with your best team and remember to use your Chrono Sign to freeze them in time for free hits!
Activate the Chronosorter

After defeating the Lumiscale Constructs, activate the Chronosorter to play a cutscene.
Go Back to Chenpi to Finish the Quest
After the cutscene, go back to Chenpi in Jinzhou to finish the quest. You will be able to keep the Chrono Sign, but it can only be used inside Woodveil Hall.
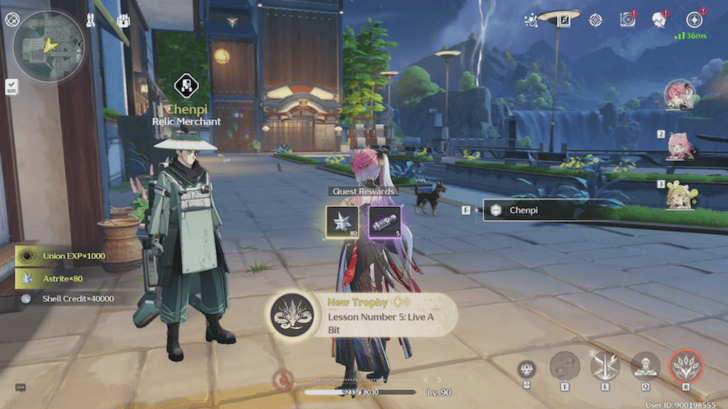
Trophy Unlock - Lesson Number 5: Live A Bit
After the quest, a new trophy will unlock called Lesson Number 5: Live A Bit. This will net you with free 10 Astrites!
Vigil of Endless Night Information
| Vigil of Endless Night Quest Information | |
|---|---|
| Required Union Lvl | None |
| Quest Location | Mt. Firmament |
| Version Release | 1.2 |
Vigil of Endless Night Rewards
Total Quest Rewards
| Vigil of Endless Night Quest Rewards |
|---|
|
|
Wuthering Waves Related Guides

List of Quest Types
| All Quest Types | |
|---|---|
| Main Quests | Companion Stories |
| Exploration Quests | Side Quests |
| Tutorial Quests | Daily Quests |
| Hidden Quests | - |
All Mt. Firmament Exploration Quest Guides
| Mt. Firmament Exploration Quest Guides | Among Shoals and Islands | Boundary of Yellow and White | Glorious Loong's Pearl |
|---|---|---|
| Glorious Loong's Pearl The Last Rite | Mirrored Loong's Pearl | Peak of the Arch-Shaped Rock |
| Vigil of Endless Night | Where the Waterfalls Meet | |
Author

Vigil of Endless Night Quest Guide
Premium Articles

Rankings

Gaming News


![Monster Hunter Stories 3 Review [First Impressions] | Simply Rejuvenating](https://img.game8.co/4438641/2a31b7702bd70e78ec8efd24661dacda.jpeg/thumb)
Popular Games

Genshin Impact Walkthrough & Guides Wiki
Honkai: Star Rail Walkthrough & Guides Wiki
Umamusume: Pretty Derby Walkthrough & Guides Wiki
Pokemon Pokopia Walkthrough & Guides Wiki
Resident Evil Requiem (RE9) Walkthrough & Guides Wiki
Monster Hunter Wilds Walkthrough & Guides Wiki
Wuthering Waves Walkthrough & Guides Wiki
Arknights: Endfield Walkthrough & Guides Wiki
Pokemon FireRed and LeafGreen (FRLG) Walkthrough & Guides Wiki
Pokemon TCG Pocket (PTCGP) Strategies & Guides Wiki


Recommended Games
Diablo 4: Vessel of Hatred Walkthrough & Guides Wiki
Cyberpunk 2077: Ultimate Edition Walkthrough & Guides Wiki
Fire Emblem Heroes (FEH) Walkthrough & Guides Wiki
Yu-Gi-Oh! Master Duel Walkthrough & Guides Wiki
Super Smash Bros. Ultimate Walkthrough & Guides Wiki
Pokemon Brilliant Diamond and Shining Pearl (BDSP) Walkthrough & Guides Wiki
Elden Ring Shadow of the Erdtree Walkthrough & Guides Wiki
Monster Hunter World Walkthrough & Guides Wiki
The Legend of Zelda: Tears of the Kingdom Walkthrough & Guides Wiki
Persona 3 Reload Walkthrough & Guides Wiki


All rights reserved
Copyright© 2024-2025 Kuro Games. All Rights Reserved.
The copyrights of videos of games used in our content and other intellectual property rights belong to the provider of the game.
The contents we provide on this site were created personally by members of the Game8 editorial department.
We refuse the right to reuse or repost content taken without our permission such as data or images to other sites.
Оно просто не даёт мне предмет для остановки времени?