Silent History - Lost History Quest Guide | All Lighthouse Locations
★ Version 3.2 Banners → Livestream Codes
┣ Sigrika → Materials, Weapon, Banner
┣ Qiuyuan → Builds, Materials, Weapon
┗ Phase 2 → Lynae, Zani, Phoebe
★ Tapes of Last Words | Soliskin | 3.1 Trophies
★ Exclusives: Tier Maker | State of the Meta
Lost History, called Silent History in the Trophies screen, is a Side Quest in Wuthering Waves. See all lighthouse locations and how to repair the lighthouses, how to unlock Lost History, how to complete Silent History, its walkthrough, and all the rewards of this quest here!
How to Unlock Lost History
Repair a Lighthouse at Any Location
Lost History, also known as Silent History in the Trophies screen, will automatically unlock after repairing a lighthouse at any of the 5 lighthouse locations.
The easiest lighthouses to find would be the ones at Nameless Bay and Desorock Highland Bay as their quest markers appear once you are within the vicinity.
Lost History Walkthrough
| Lost History Objectives | |
|---|---|
| 1 | Talk to the Historian |
| 2 | Frosting Harbor Lighthouse ┣ Lighthouse Location ┣ Throw an Explosive Charge at Thorns ┣ Hack into the Lighthouse Terminal ┗ Look Afar at the Break of Dawn |
| 3 | Forbidden Forest Lighthouse ┣ Lighthouse Location ┣ Burn Down All the Thorns ┣ Hack into the Lighthouse Terminal ┗ Locate the Treasure |
| 4 | Tiderise Cliff Lighthouse ┣ Lighthouse Location ┣ Insert Induction Cells into Cell Socketes ┣ Hack into the Lighthouse Terminal ┗ Locate the Treasure |
| 5 | Nameless Bay Lighthouse ┣ Lighthouse Location ┣ Activate the Cell Socket and Connect the Pulse Circuit ┣ Hack into the Lighthouse Terminal ┗ Locate the Treasure |
| 6 | Desorock Highland Bay Lighthouse ┣ Lighthouse Location ┣ Talk to the Junior Engineer ┣ Hack into the Lighthouse Terminal ┗ Locate the Treasure |
| 7 | Return to the Historian |
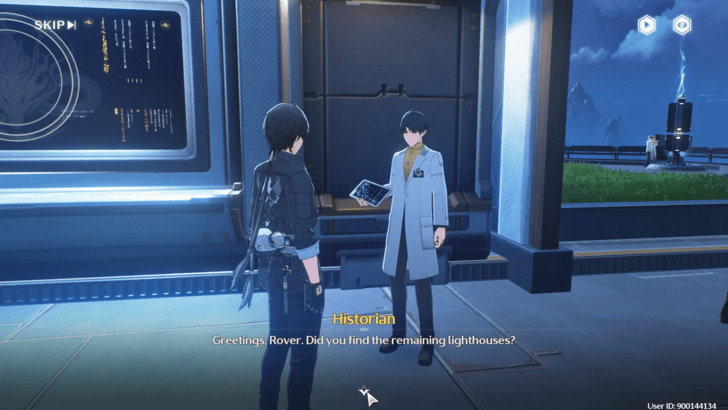
Talk to the Historian
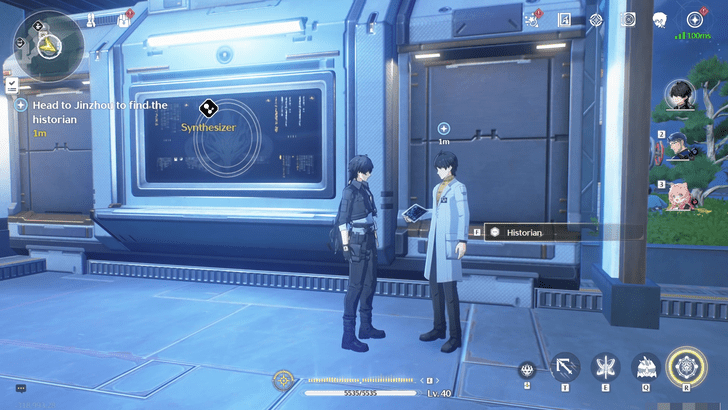
After finding your first lighthouse, The Historian at Jinzhou City will contact and task you with hunting down the location of all 5 lighthouses in Huanglong, all of which can be found and repaired in no particular order.
Repair the Lighthouse at Frosting Harbor
Frosting Harbor Lighthouse Location
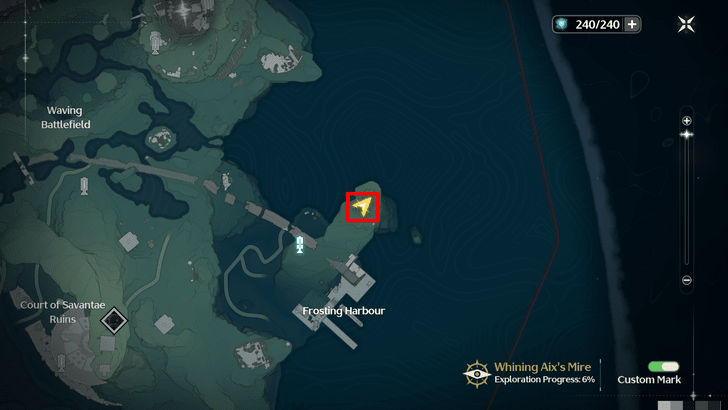
This lighthouse is located by a cliff north of Frosting Harbor and is near the Huanglong-Whining Aix's Mire-Frosting Harbor Resonance Beacon.
Throw an Explosive Charge at Thorns
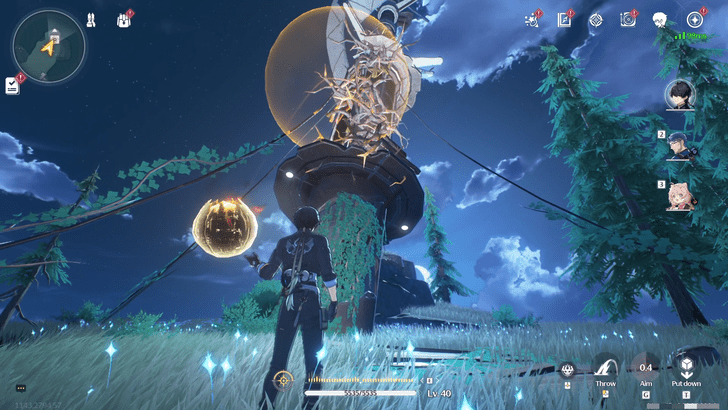
Using the Levitator function in your Utility Wheel, pick up the nearest Explosive Charge and aim it toward the thorns that cover the lighthouse.
After burning the thorns down, proceed to scale the lighthouse and hack into the terminal in order to repair it.
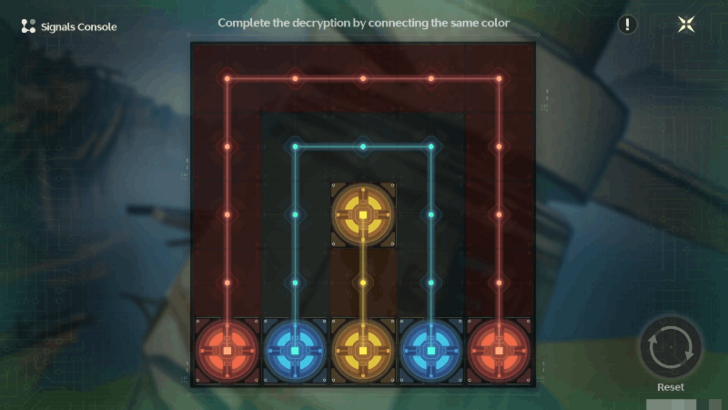
Hack into the Lighthouse Terminal
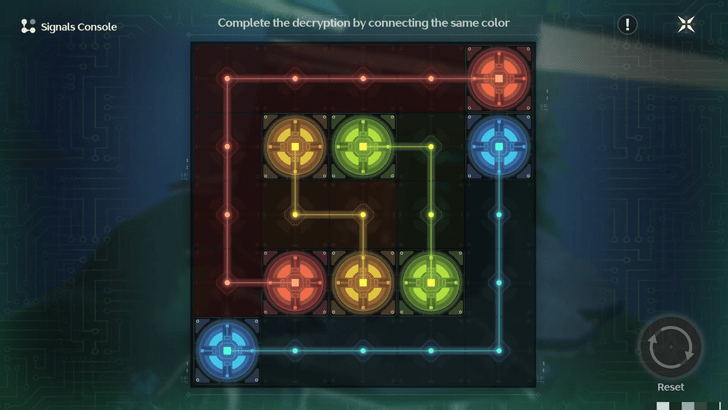
Decrypt the terminal by connecting all of the same colors on the panel.
Look Afar at the Break of Dawn
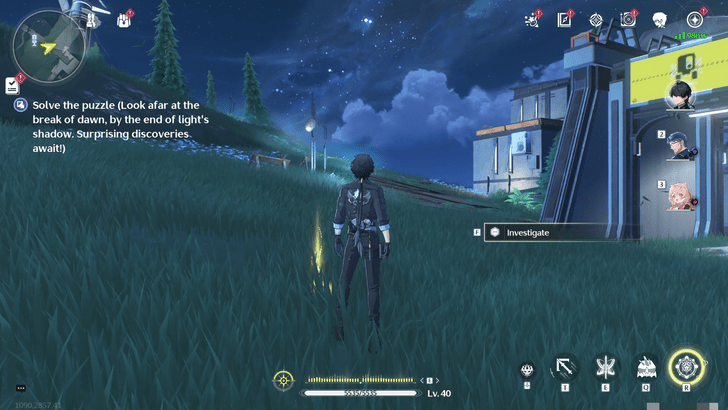
After successfully repairing the lighthouse, a recording will play, and your Rover notes that it ends with a riddle. Contrary to the phrase, you do not have to stand by the lighthouse cliff and set your time to dawn.
Instead, run back near the Frosting Harbor and interact with a golden beacon on the ground. This will spawn a Standard Supply chest and automatically solve the puzzle.
Look Afar at the Break of Dawn Puzzle Guide
Repair the Lighthouse Near Forbidden Forest
Forbidden Forest Lighthouse Location
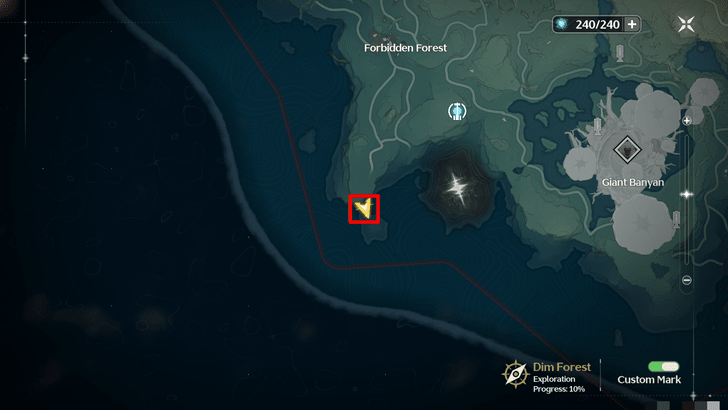
This lighthouse can be found near a cliff located south of the Forbidden Forest. You may fast travel to the Huanglong-Dim Forest-Forbidden Forest Nexus Resonance for a speedy access.
Burn Down All the Thorns
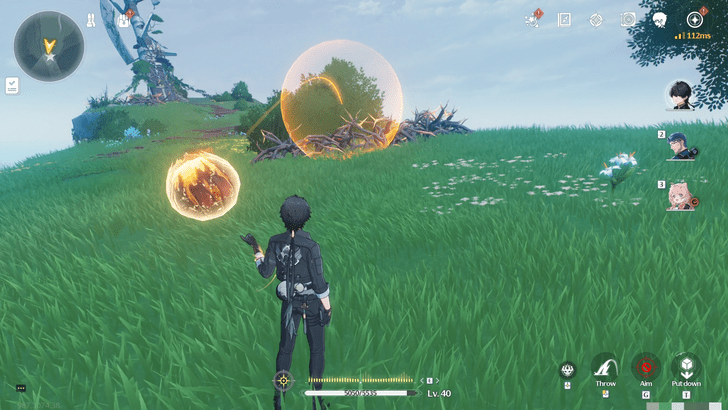
You will need to burn down all the thorns surrounding the lighthouse in order to access the terminal.
Use the first Explosive Charge located underneath a tree, near the farthest thorn cluster, to burn down the first thorn cluster and unlock the next Explosive Charge. Do this sequentially until you get close enough to reach the lighthouse thorns.
Do Note that if you run too far away from the Explosive Charge's stem, it will despawn and return to its original location.
Hack into the Lighthouse Terminal
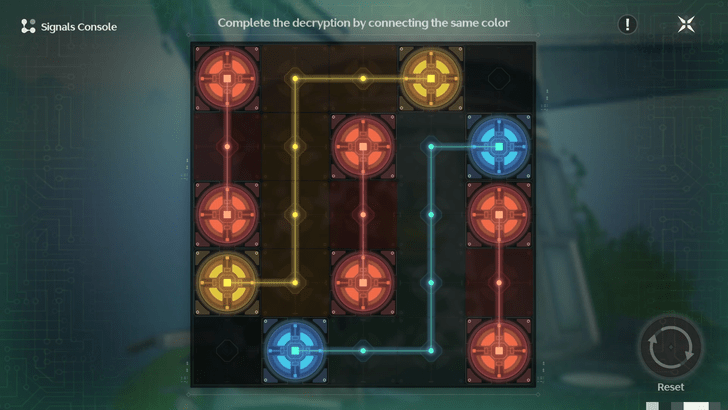
Decrypt the terminal by connecting all of the same colors on the panel.
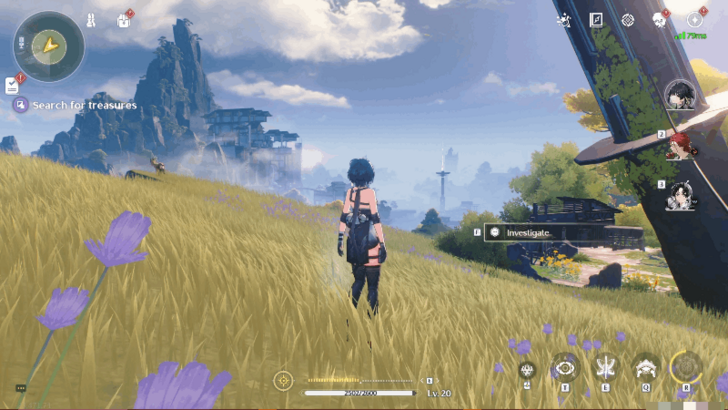
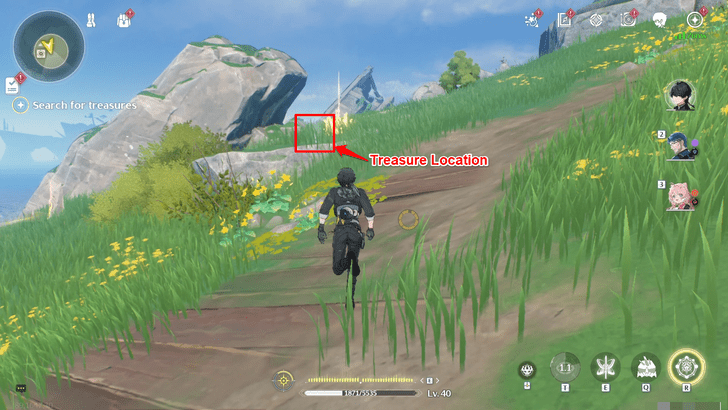
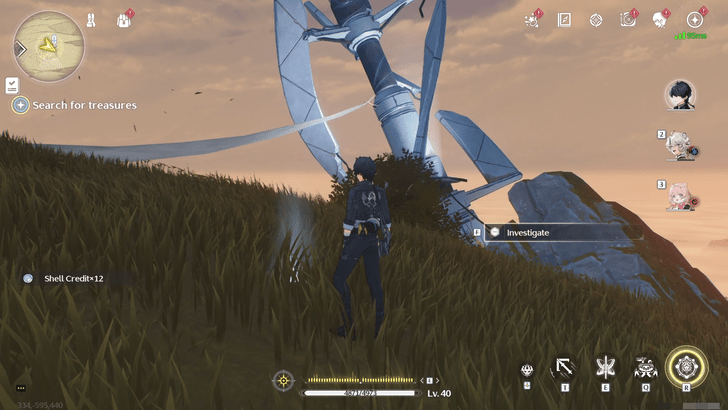
Locate the Treasure
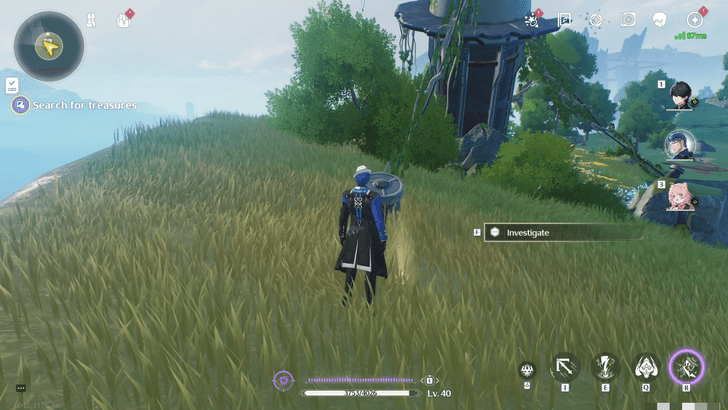
The treasure is located north of the lighthouse, near the edge of the cliff, indicated by a white beacon on the ground. Unearth it to be rewarded a Standard Supply Chest.
Repair the Lighthouse at Tiderise Cliff
Tiderise Cliff Lighthouse Location
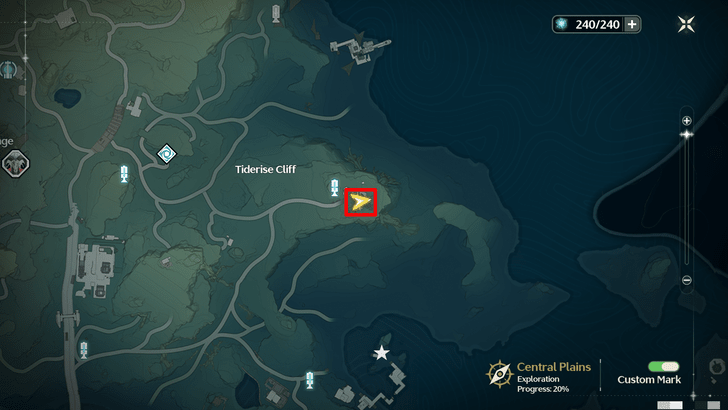
The lighthouse is located at Tiderise Cliff's edge. The nearest fast travel point to this area is the Huanglong-Dim Forest-Forbidden Forest Resonance Nexus.
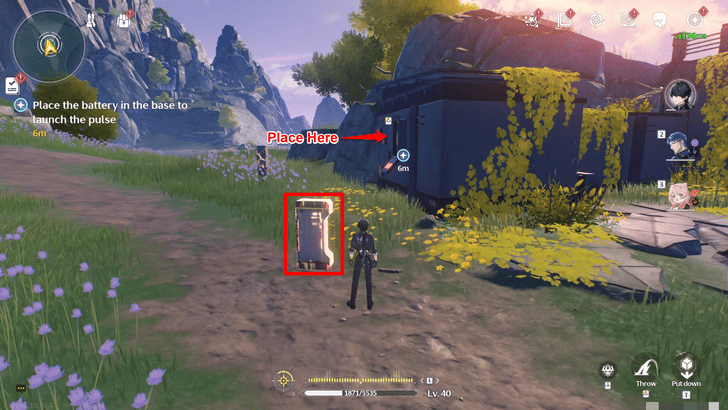
Insert Induction Cells into Cell Sockets
| First Induction Cell Location | 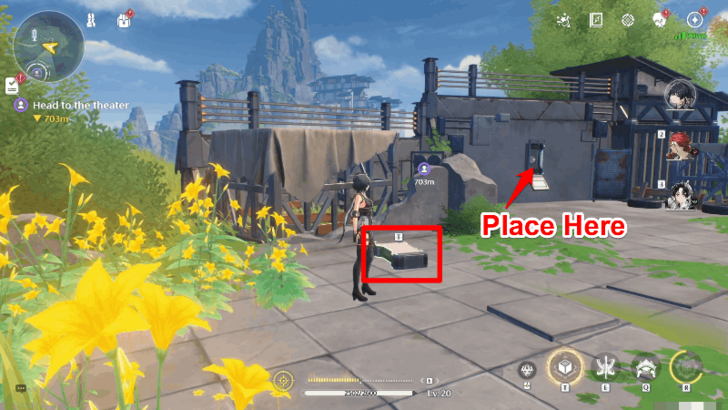 |
|---|---|
| Second Induction Cell Location | 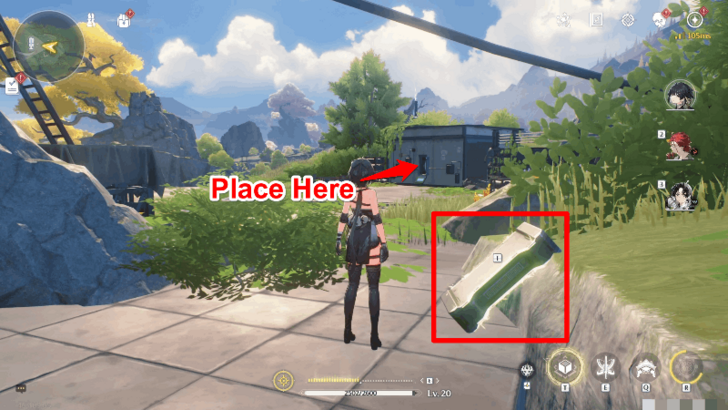 |
The Induction Cell for the first Cell Socket on the right side of the lighthouse is located near it. Use the Levitator function in order to insert it into the Cell Socket.
The Induction Cell for the second Cell Socket on the left side of the lighthouse is located by the bushes left of the lighthouse. Similar to the first Induction Cell, use the Levitator function and insert it into the Cell Socket.
Once completed, the lighthouse should now be functional and ready to repair.
Induction Cells and Transducers Puzzle Guide
Hack into the Lighthouse Terminal
Decrypt the terminal by connecting all of the same colors on the panel.
Locate the Treasure
The treasure is located north of the lighthouse near the cliff edge, indicated by a glowing white beacon. Dig this up in order to unearth a Standard Supply chest.
Repair the Lighthouse at Nameless Bay
Nameless Bay Lighthouse Location
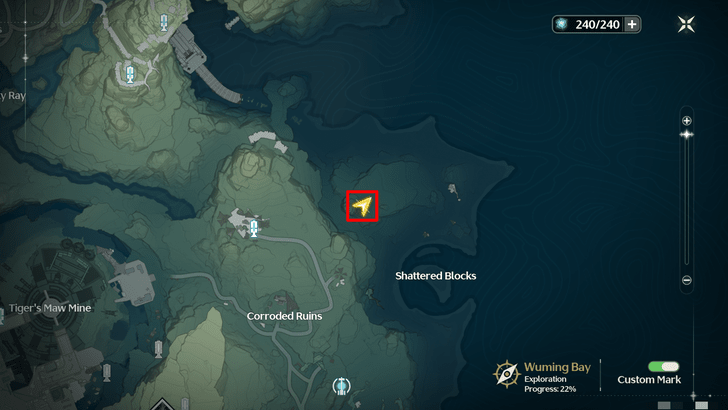
The lighthouse is located right where the quest location to repair it begins, north of Shattered Blocks. The nearest resonance beacon to this is the one in Huanglong-Wuming Bay.
Activate the Cell Socket and Connect the Pulse Circuit
After talking to the Infrastructure Division Member, place the Induction Cell into the Cell Socket using the Levitator function, then hit all of the Training Dummies within the 42-second time limit.
Once this is done, you should be able to hack into the lighthouse's terminal.
Hack into the Lighthouse Terminal
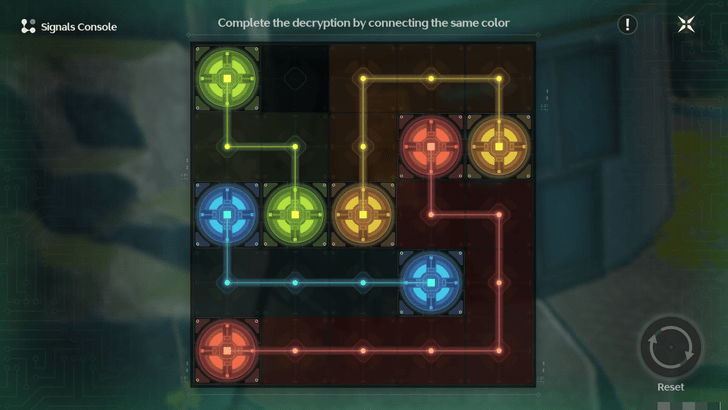
Decrypt the terminal by connecting all of the same colors on the panel.
Locate the Treasure
The treasure is located near the lighthouse, underneath a boulder. Interacting with this unearths a Standard Supply chest.
Repair the Lighthouse at Desorock Highland Bay
Desorock Highland Bay Lighthouse Location
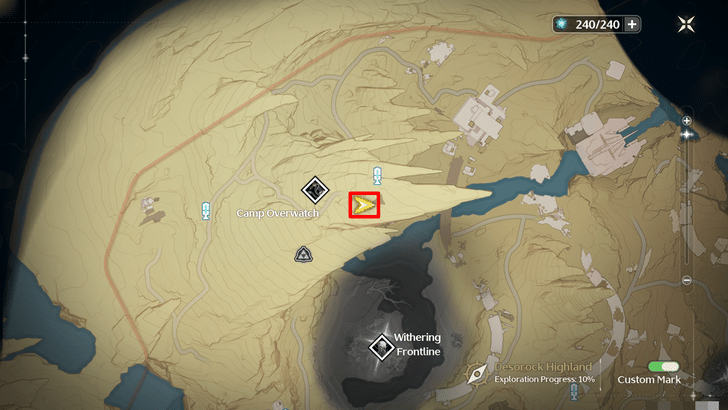
The lighthouse is located on a cliff not far from its quest starting point at Camp Overwatch.
Talk to the Junior Engineer
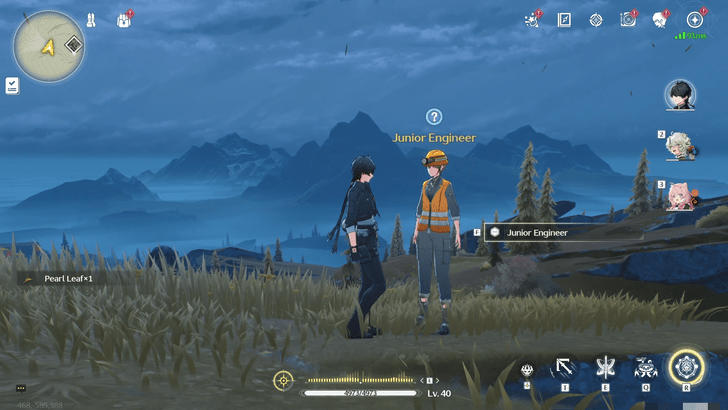
Talk to the Junior Engineer at Camp Overwatch and escort her to the lighthouse. TDs will spawn as you make your way to the lighthouse, so defeat them on the way.
Once you reach your location, the engineers will begin repairing the lighthouse, allowing you to hack into the terminal.
Hack into the Lighthouse Terminal

Decrypt the terminal by connecting all of the same colors on the panel.
Locate the Treasure
The treasure is located north of the lighthouse, near the cliff's edge, marked with a glowing white beacon on the ground. Dig the site to receive a Standard Supply chest.
Return to the Historian
After finding and repairing all 5 lighthouses, the Historian will notify you about its completion. Head back to Jinzhou city and speak with him. Afterwards, he will grant you a Premium Supply chest for finishing the quest.
Lost History Information
| Lost History Quest Information | |
|---|---|
| Required Union Lvl | None |
| Quest Location | Jinzhou |
| Version Release | 1.0 |
Lost History Rewards
Total Quest Rewards
| Lost History Quest Rewards |
|---|
|
|
Premium Supply Chest Rewards

Locating and repairing all 5 lighthouses will grant you a Premium Supply Chest that rewards you with the following after reporting back to the Historian.
- Astrites x40
- Union EXP x50
- Shell Credit x12000
- Advanced Resonance Potion x1
- Basic Resonance Potion x1
May the Beacons Guide Us Trophy
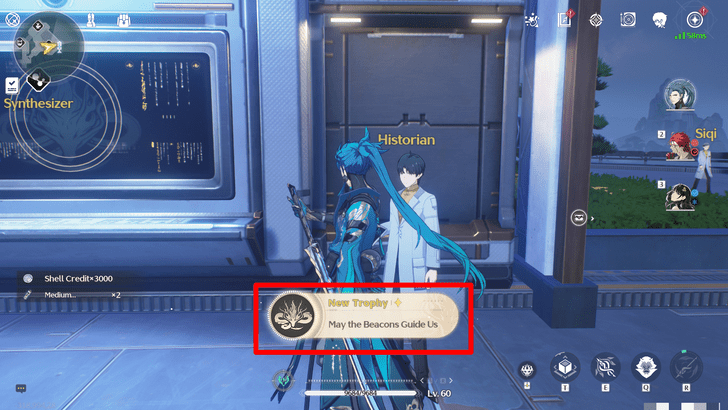
Repairing all 5 lighthouses and completing the Lost History side quest rewards you with the May the Beacons Guide Us Trophy, allowing you to claim 5 Astrites.
Do note that the trophy description erroneously refers to the Lost History side quest as Silent History.
Wuthering Waves Related Guides

List of Quest Types
| All Quest Types | |
|---|---|
| Main Quests | Companion Stories |
| Exploration Quests | Side Quests |
| Tutorial Quests | Daily Quests |
| Hidden Quests | - |
All Side Quest Guides
Comment
Author

Silent History - Lost History Quest Guide | All Lighthouse Locations
Premium Articles

Rankings

Gaming News


![Monster Hunter Stories 3 Review [First Impressions] | Simply Rejuvenating](https://img.game8.co/4438641/2a31b7702bd70e78ec8efd24661dacda.jpeg/thumb)
Popular Games

Genshin Impact Walkthrough & Guides Wiki
Honkai: Star Rail Walkthrough & Guides Wiki
Umamusume: Pretty Derby Walkthrough & Guides Wiki
Pokemon Pokopia Walkthrough & Guides Wiki
Resident Evil Requiem (RE9) Walkthrough & Guides Wiki
Monster Hunter Wilds Walkthrough & Guides Wiki
Wuthering Waves Walkthrough & Guides Wiki
Arknights: Endfield Walkthrough & Guides Wiki
Pokemon FireRed and LeafGreen (FRLG) Walkthrough & Guides Wiki
Pokemon TCG Pocket (PTCGP) Strategies & Guides Wiki


Recommended Games
Diablo 4: Vessel of Hatred Walkthrough & Guides Wiki
Cyberpunk 2077: Ultimate Edition Walkthrough & Guides Wiki
Fire Emblem Heroes (FEH) Walkthrough & Guides Wiki
Yu-Gi-Oh! Master Duel Walkthrough & Guides Wiki
Super Smash Bros. Ultimate Walkthrough & Guides Wiki
Pokemon Brilliant Diamond and Shining Pearl (BDSP) Walkthrough & Guides Wiki
Elden Ring Shadow of the Erdtree Walkthrough & Guides Wiki
Monster Hunter World Walkthrough & Guides Wiki
The Legend of Zelda: Tears of the Kingdom Walkthrough & Guides Wiki
Persona 3 Reload Walkthrough & Guides Wiki


All rights reserved
Copyright© 2024-2025 Kuro Games. All Rights Reserved.
The copyrights of videos of games used in our content and other intellectual property rights belong to the provider of the game.
The contents we provide on this site were created personally by members of the Game8 editorial department.
We refuse the right to reuse or repost content taken without our permission such as data or images to other sites.