2.6 Quest Part 2 - By Moon's Fated Light Quest Guide
★ Version 3.2 out now!
┣ Sigrika → Builds, Materials, Weapon
┣ Qiuyuan → Builds, Materials, Weapon
┗ Phase 2 → Lynae, Zani, Phoebe
★ 3.2 Main Story, All Events
★ Exclusives: Tier Maker | State of the Meta

Chapter 2 Act 9: By Moon's Fated Light is the ninth Act in Chapter 2 of the Main Quest in Wuthering Waves. See how to unlock By Moon's Fated Light, its walkthrough, and all the rewards of this quest here!
| ◄ Previous Quest | Next Quest ▶ |
|---|---|
| Chapter 2 Act 8: By Sun's Burning Hand | Chapter 2 Act 10: The Bygone Shall Always Return |
How to Unlock By Moon's Fated Light
Complete By Sun's Burning Hand
By Moon's Fated Light, which was released on September 17, 2025, automatically unlocks after completing the previous main quest, By Sun's Burning Hand.
By Sun's Burning Hand Quest Guide
By Moon's Fated Light Walkthrough
1. Return to the Hunter's Den
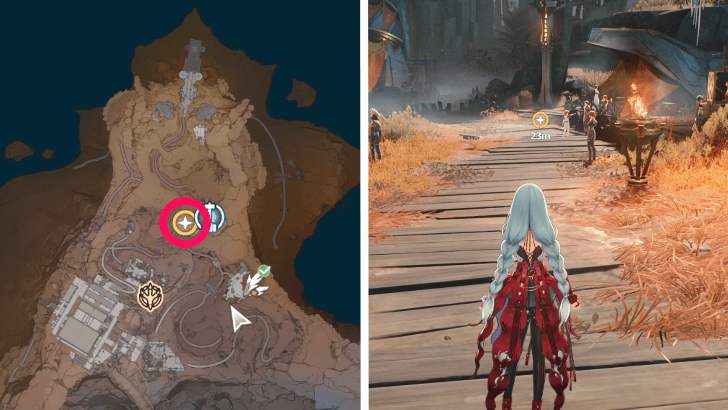
To start the By Moon's Fated Light quest, return to the Hunter's Den between 14:00-18:00 in game time. Adjust the time if you need to using the Clock icon in the terminal menu.
2. Hand Out Rose Petals
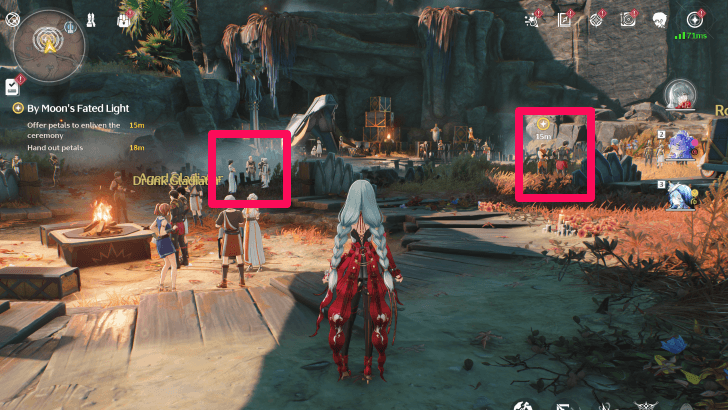
After approaching the quest marker, you will be greeted by a short cutscene. Once it's done, give the rose petals to two nearby groups of NPCs, before heading to the nearby tent to hear the priestess' oration.
3. Head to the Asphodel Barrens
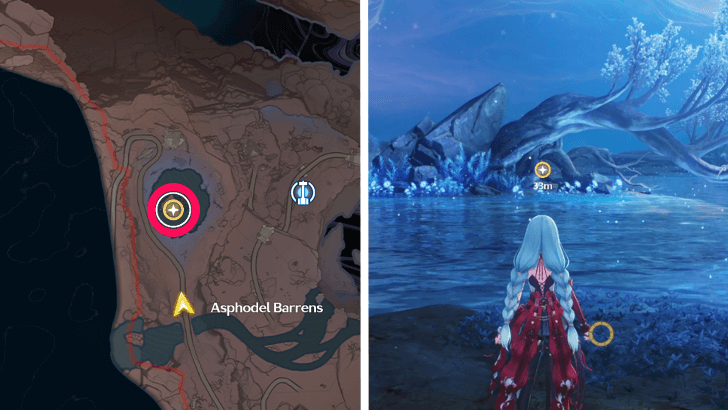
After the oration, sit down on the nearby bench to think. Augusta will eventually appear, and after the dialogue, you will be brought to the Asphodel Barrens. Approach the quest marker to further the story.
4. Return to Tetragon Temple
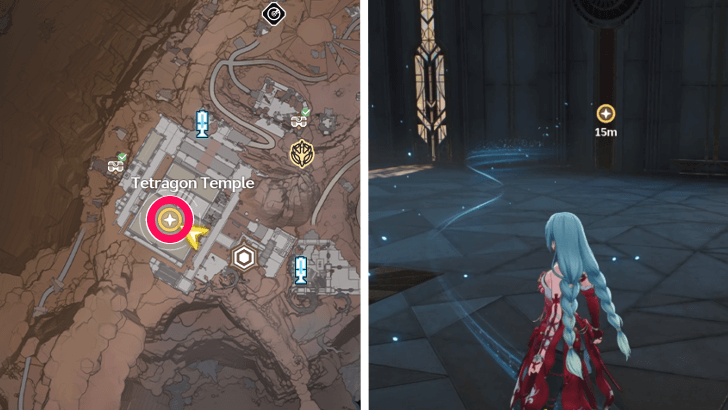
After further dialogue, a Wingray will spawn. Use it to head back to Tetragon Temple, and head inside until a sliver of moonlight guides you to a wall. Interact with it to open a secret passage; afterwards, continue following the sliver of moonlight deeper into the temple.
Reaching the innermost part of the Temple triggers a brief cutscene. After the dialogue, use the nearby portal to quickly meet with Lilibet to further the story. You will now need to return to the Asphodel Barrens; speak with Lilibet to be teleported there after your dialogue.
5. Go to Asphodel Barrens to Find Iuno
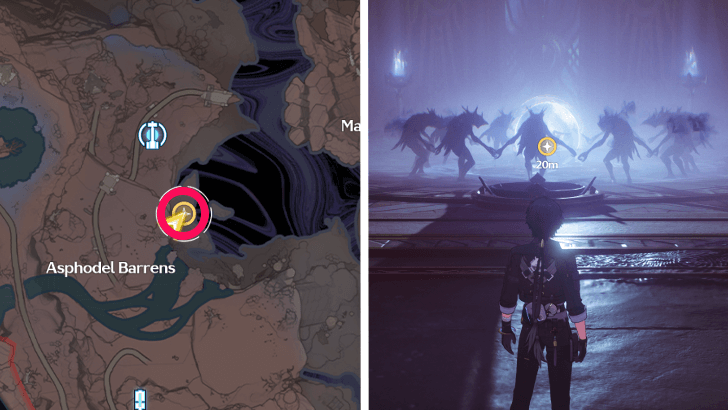
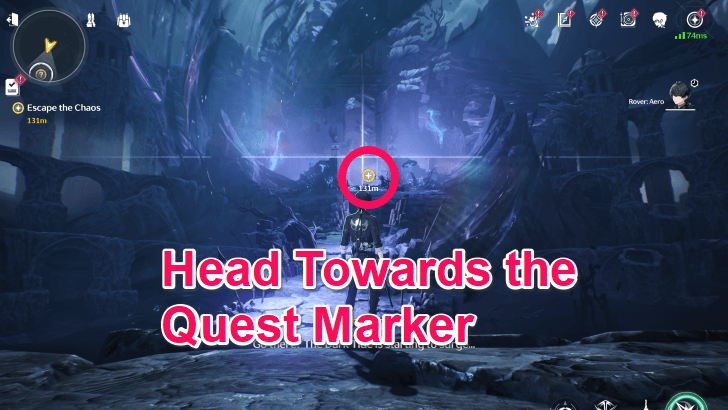
Approach the quest marker in the Asphodel Barrens to trigger a cutscene. Note that there are quick time events in the cutscene wherein you will need to press and hold the presented button.
Once it's done, you will awaken in the Chaos; proceed to find Iuno surrounded by Dark Tide creatures. Attack them all to destroy them and free Iuno.
6. Walk Through the Chaos With Iuno
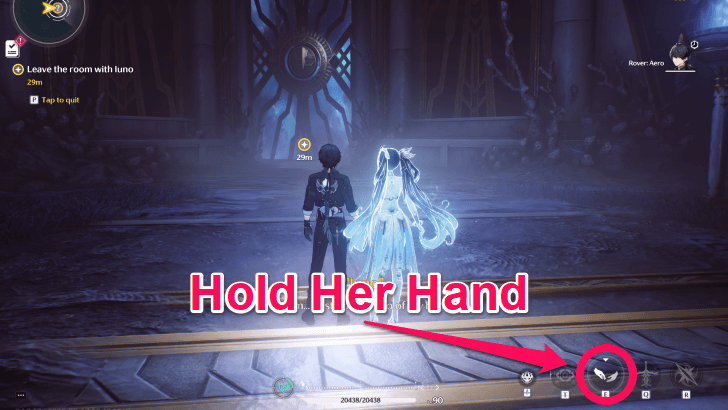
After the dialogue, press and hold the indicated button to take Iuno's hand, and together continue to walk through the Chaos. Eventually, you will come to a blacksmith who tells you about the Lunarum Bough.
7. Choose to Follow the Foretold Fate
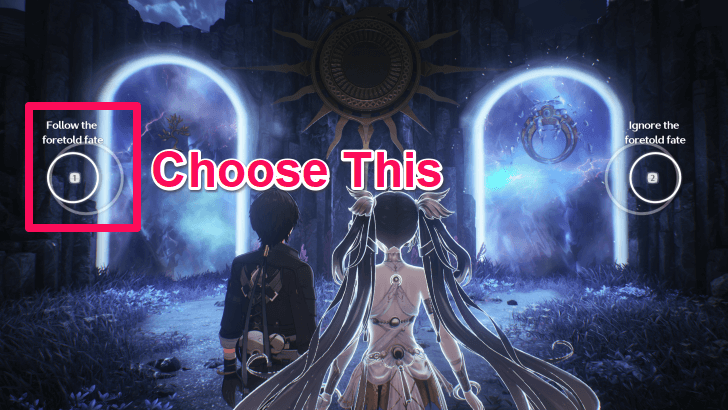
After speaking with the blacksmith, follow the quest marker to reach a branching path of fate. Opt to follow the foretold fate, as choosing to ignore it will return you to the two options. Pass through the gate and sit at the divination altar, after which you assume Iuno's role as priestess.
8. Inspect the Omens of Fate
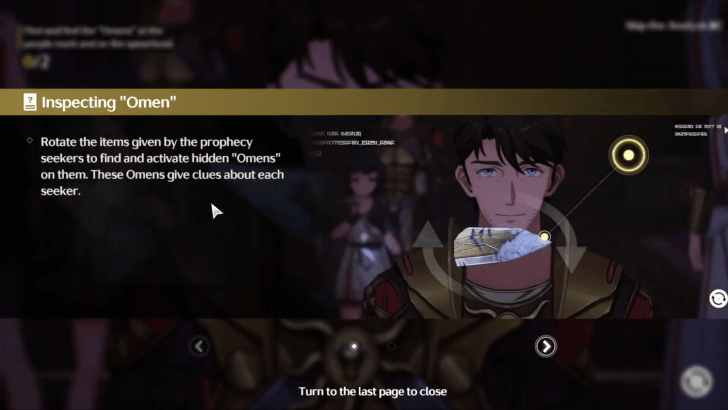
As priestess, turn the NPCs' presented objects to find Omens which provide clues as to the person's fate. After four divinations, return to the Lunarum Bough. Rest for a moment, and follow the second path that appears after speaking with Iuno.
Gladiator Harelius' Item
| Omens | |
|---|---|
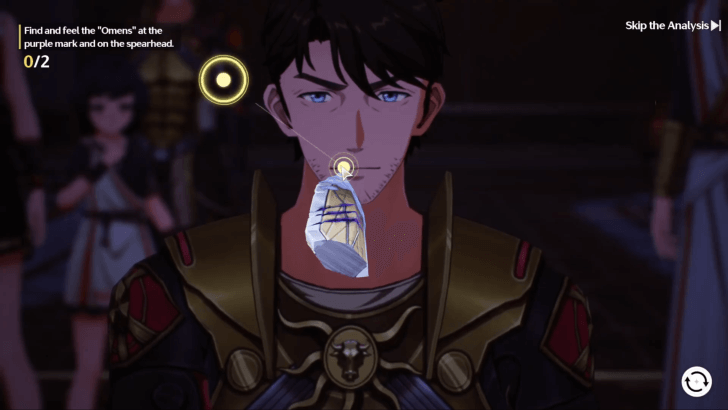 Tip of the Spearhead |
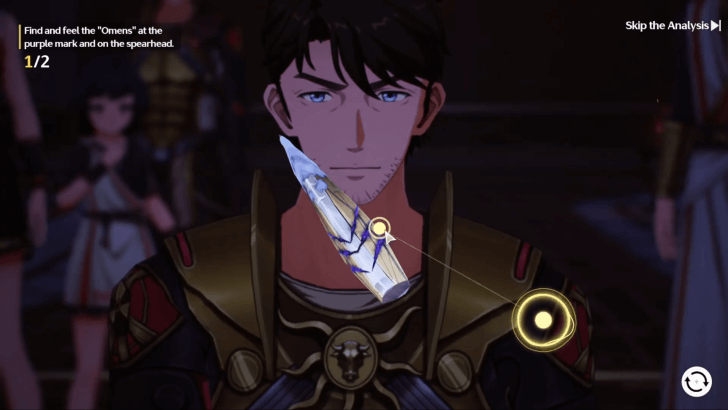 Claw Marks |
Infatuated Samara's Item
| Omens | ||
|---|---|---|
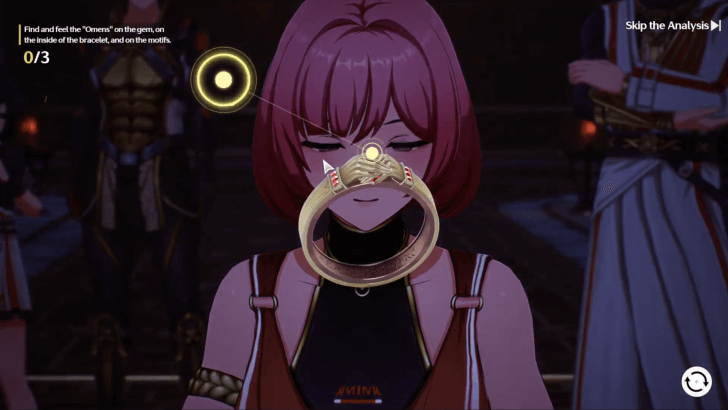 Clasped Hands |
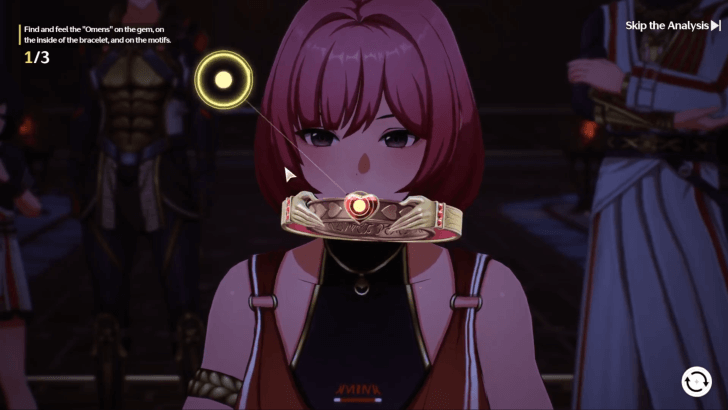 Heart Gem |
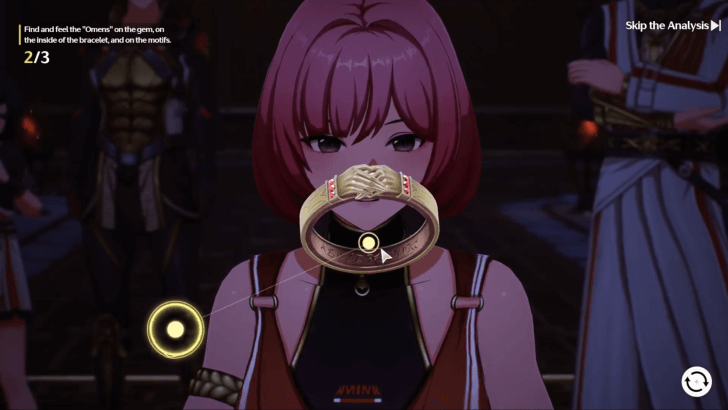 Engraved Names |
Clever Nikolas' Item
| Omens | |
|---|---|
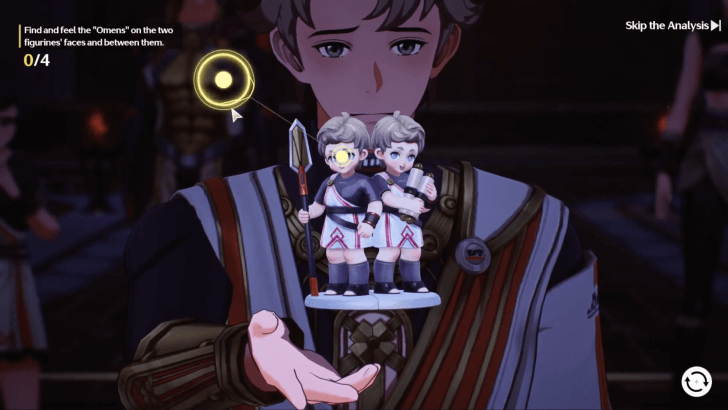 Left Figure's Face |
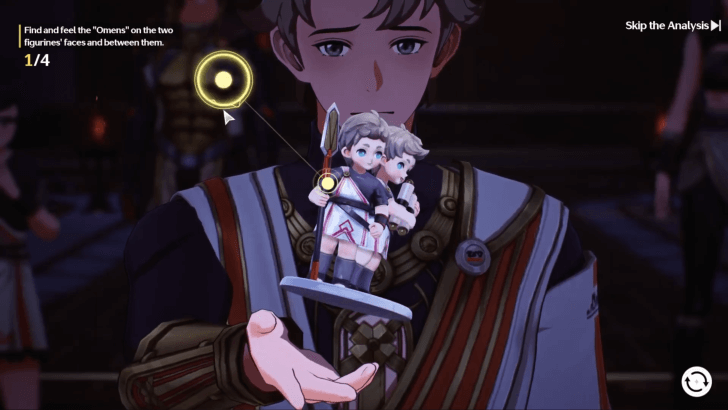 Spear |
 Scroll |
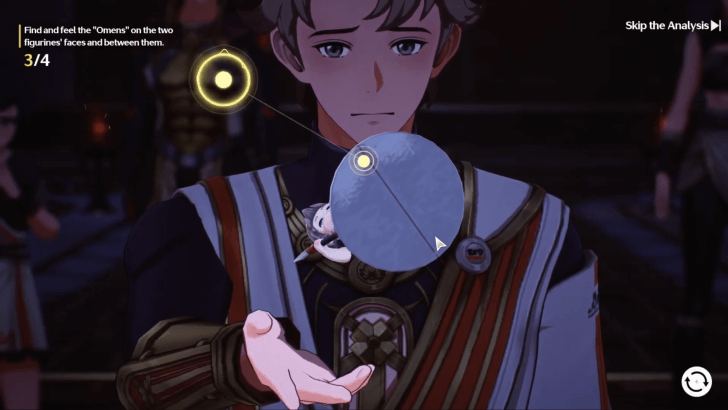 Underside of the Figure Plate |
Hopeful Maia's Item
| Omens | ||
|---|---|---|
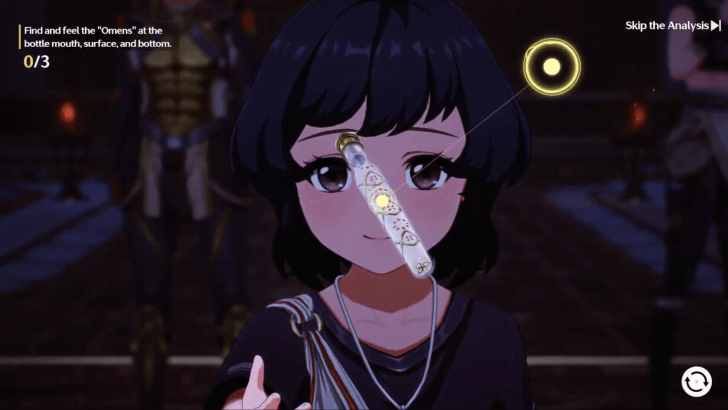 Liquid in the Vial |
 Bottle Stopper |
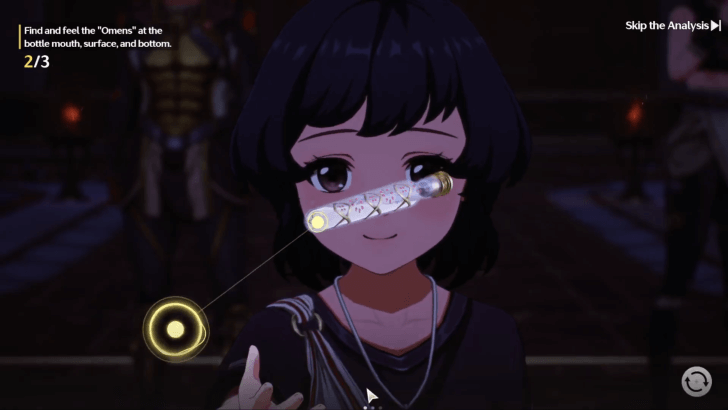 Bottom of the Vial |
9. Choose to Agree With Augusta
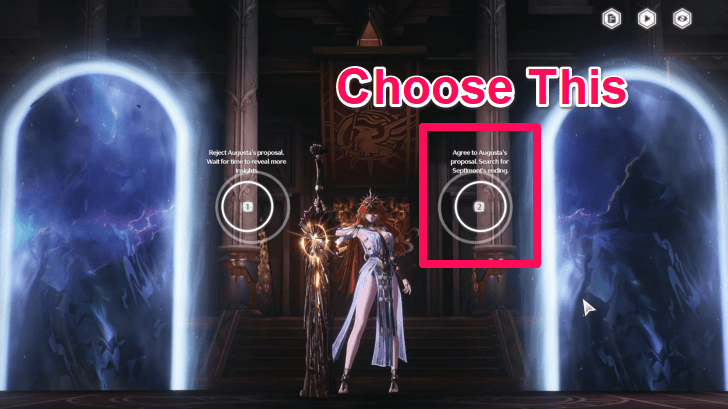
Another set of choices will appear after walking into the second path. This time, choose to agree with Augusta to proceed with the story. As you walk through the gate of Fate, Chaos Manifestations will appear. Take them out to proceed with the story.
10. Follow Iuno's Directions
Once you're done fighting, follow the quest marker and head to where Iuno wanted to go. Continue until you reach the Lunarum Bough once more, and speak with the Blacksmith to continue the story. Press and hold the indicated keys to chop at the Lunarum Bough.
11. Aid the Gladiators as Iuno

After a few swings at the bough, the quest will switch over to Iuno's POV. Proceed through the battlefield, aiding Gladiators and defeating Dark Tide creations as you go.
12. Head Back to the Hunter's Den
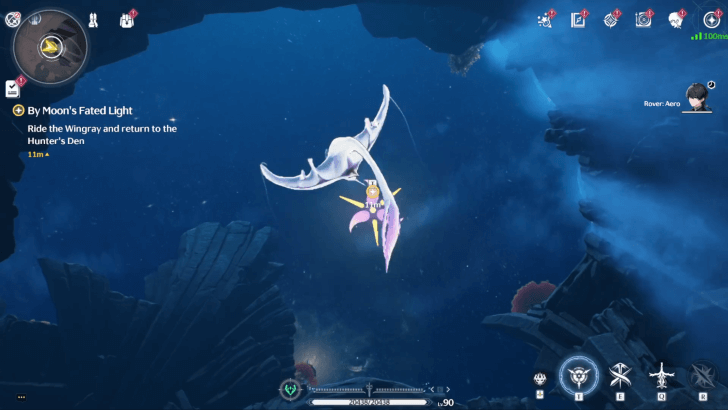
After Iuno's final fight, you are taken out of Chaos. Return to the Hunter's Den using the Wingray to look for Iuno; when you find her, speak with her for some cutscenes. After her dialogue, the quest will end.
By Moon's Fated Light Information
| By Moon's Fated Light Quest Information | |
|---|---|
| Questline | Chapter 2: Even When Divinity Remains Silent |
| Required Union Lvl | None |
| Quest Location | Hunter's Den |
| Version Release | 2.6 |
By Moon's Fated Light Quest Rewards
Total Quest Rewards
| By Moon's Fated Light Quest Rewards |
|---|
|
|
Advanced Supply Chests in Chaos
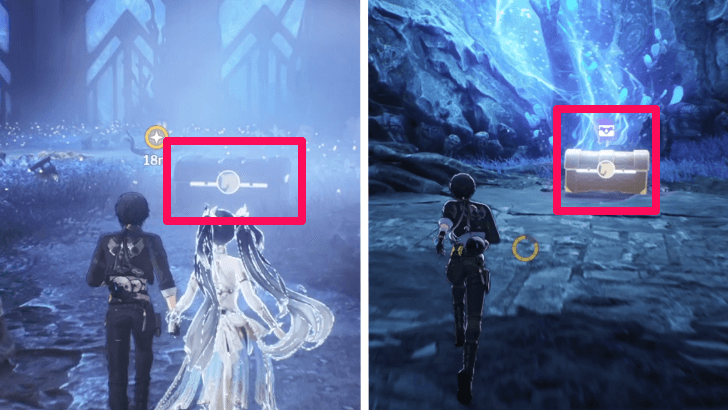
There are two Advanced Supply Chests that players can miss while exploring Chaos. One is located in front of the Lunarum Bough, the first time you see it after the Blacksmith. The second is found while exploring where Iuno told you to go after you get separated in Chaos again.
Awards Two Trophies

There are two Trophies related to the By Moon's Fated Light quest, called Fly Me to the Moon and Heartbeats Dancing in the Dark respectively. Both award some Astrite, so don't forget to claim them once you finish the quest!
Wuthering Waves Related Guides

List of Quest Types
| All Quest Types | |
|---|---|
| Main Quests | Companion Stories |
| Exploration Quests | Side Quests |
| Tutorial Quests | Daily Quests |
| Hidden Quests | - |
Main Quest Walkthrough
Comment
Author

2.6 Quest Part 2 - By Moon's Fated Light Quest Guide
Premium Articles

Rankings

Gaming News

![The Liar Princess and the Blind Prince Review [PC] | Lovely to Look at but Tedious to Play](https://img.game8.co/4442586/8d95f5faf05780f1765ce7e0938bd825.jpeg/show)

![Monster Hunter Stories 3 Review [First Impressions] | Simply Rejuvenating](https://img.game8.co/4438641/2a31b7702bd70e78ec8efd24661dacda.jpeg/thumb)
![The Seven Deadly Sins: Origin Review [First Impressions] | A Promising Start](https://img.game8.co/4440581/584e0bfb87908f12c4eab6e846eb1afd.png/thumb)
Popular Games

Genshin Impact Walkthrough & Guides Wiki
Umamusume: Pretty Derby Walkthrough & Guides Wiki
Pokemon Pokopia Walkthrough & Guides Wiki
Honkai: Star Rail Walkthrough & Guides Wiki
Monster Hunter Stories 3: Twisted Reflection Walkthrough & Guides Wiki
Arknights: Endfield Walkthrough & Guides Wiki
Wuthering Waves Walkthrough & Guides Wiki
Zenless Zone Zero Walkthrough & Guides Wiki
Pokemon TCG Pocket (PTCGP) Strategies & Guides Wiki
Monster Hunter Wilds Walkthrough & Guides Wiki


Recommended Games
Fire Emblem Heroes (FEH) Walkthrough & Guides Wiki
Diablo 4: Vessel of Hatred Walkthrough & Guides Wiki
Cyberpunk 2077: Ultimate Edition Walkthrough & Guides Wiki
Yu-Gi-Oh! Master Duel Walkthrough & Guides Wiki
Super Smash Bros. Ultimate Walkthrough & Guides Wiki
Pokemon Brilliant Diamond and Shining Pearl (BDSP) Walkthrough & Guides Wiki
Elden Ring Shadow of the Erdtree Walkthrough & Guides Wiki
Monster Hunter World Walkthrough & Guides Wiki
The Legend of Zelda: Tears of the Kingdom Walkthrough & Guides Wiki
Persona 3 Reload Walkthrough & Guides Wiki


All rights reserved
Copyright© 2024-2025 Kuro Games. All Rights Reserved.
The copyrights of videos of games used in our content and other intellectual property rights belong to the provider of the game.
The contents we provide on this site were created personally by members of the Game8 editorial department.
We refuse the right to reuse or repost content taken without our permission such as data or images to other sites.