This survey will take about 1 minute.
Your answers will help us to improve our website.
Wuthering Waves (WuWa)
Sakura Quarter Chests and Exploration Guide
★ 3.2 Phase 2 out now! → Best Pull Strategy
┣ Lynae → Builds, Materials, Sig. Weapon
┣ Zani → Builds, Materials, Sig. Weapon
┗ Phoebe → Builds, Materials, Sig. Weapon
★ Upcoming Characters: Hiyuki, Denia
★ Exclusives: Tier Maker | State of the Meta
This is a guide for Sakura Quarter located in Honami City, under the Stranger Things in Honami event in Wuthering Waves 2.8. See the best clear route, recommended teams and Namipons, as well as the locations of chests, missing Namipons, and side objectives here!
List of Contents
Sakura Quarter Full Clear Route
| Full Route Maps | |
|---|---|
 Tutorial (Surface) |
 Stage 1 (Surface) |
| Free Roam (Surface) | |
| Time to Finish: 10-15 Minutes (Free Roam) | |
※ The routes indicated here are intended for gaining the most amount of items while minimizing the incremental level risk before extracting.
Sakura Quarter will be visited at least 3 times as part of the tutorial, initial stage and free roam exploration of the area, each clear removing walled parts sections of this sector until it can be fully explored after two stages.
This area will also always be the player's starting point in Free Roam mode and will have certain Points-of-Interests change randomly or reset, paired with the presence of several pathways to reach certain locations and items.
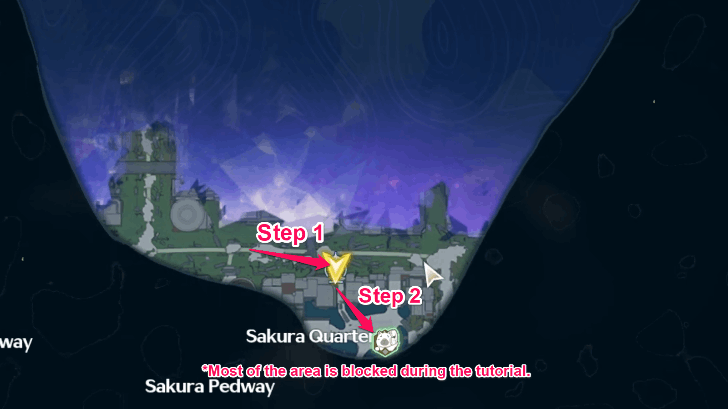
Sakura Quarter Tutorial Best Route
| # | Sakura Quarter Best Route Guide |
|---|---|
| 1 | 
You will be dropped in the western side of Sakura Quarter, with no visibility on the map. Head right to the road and read the tutorial headers provided about exploring, using the Namipon Shuttle, collecting Loot and enemy threat level. You will eventually reach a Namipon Lightbox with enemies around it needing to be wiped out. Eliminate them to access the Lightbox and gain fast travel. After the tutorial, head direct south to reach the next point-of-interest. |
| 2 | 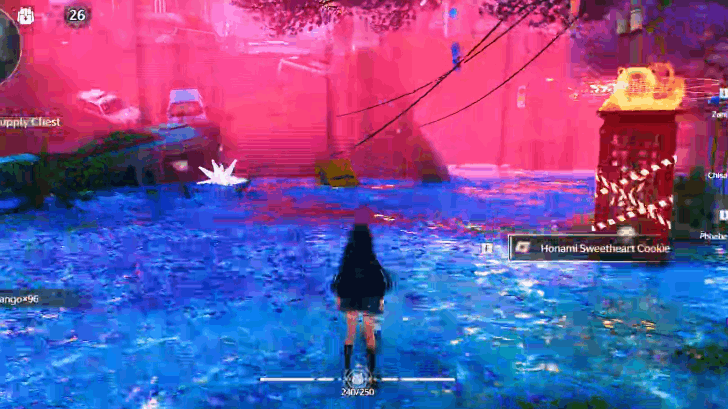
Head downstairs and defeat the enemy cluster near the point-of-interest to gain a treasure chest that gives several items. Your new Point-of-Interest here is a Namipon Telephone Booth, which you will need to reach to extract properly. The area is blocked further and you can only choose to extract now, completing the tutorial. Collect your rewards, check your cafe, and setup your next expedition as soon as you are ready. |
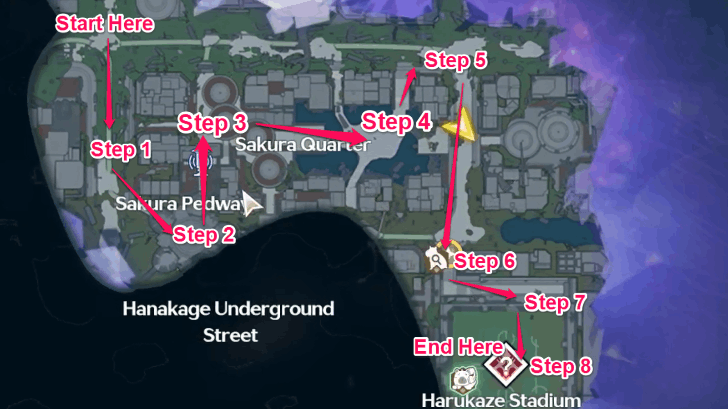
Sakura Quarter Stage 1 Surface Best Route
| # | Sakura Quarter Best Route Guide |
|---|---|
| 1 | 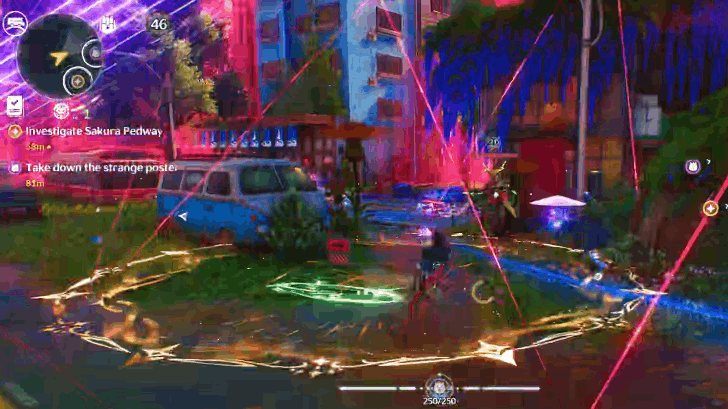 You will once again, be dropped on the western side of Sakura Quarter, but you now have some more available areas to explore. Continue the same route but defeat the group of enemies ahead, there is a treasure chest near their position that can be picked up for loot after defeating them. |
| 2 | 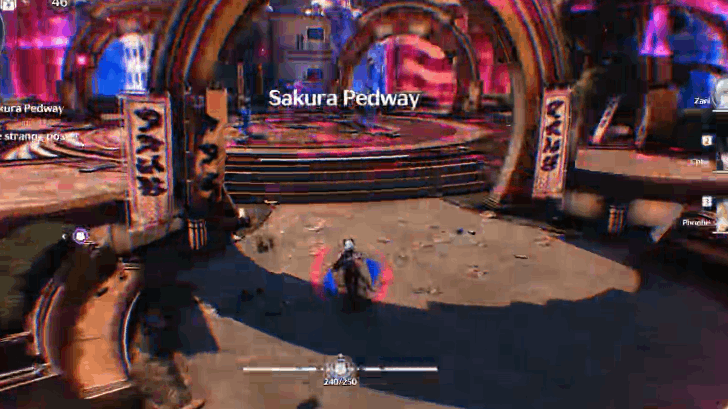 After clearing the mobs, head up to the Sakura Pedway to encounter enemies and clear the objective marker there. There will be drops here for stickers and sellable materials, so pick them up! |
| 3 | 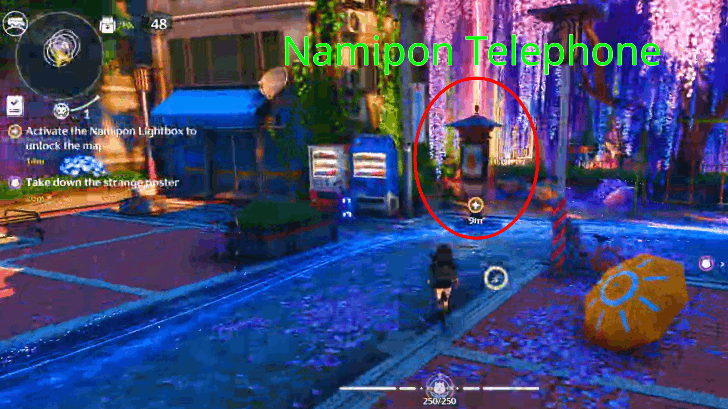 Once the mobs are clear, head north away from the Pedway and locate the Namipon Telephone, activate it to remove the shroud in the area. Make sure to remove the poster directly behind the telephone nearby! |
| 4 | 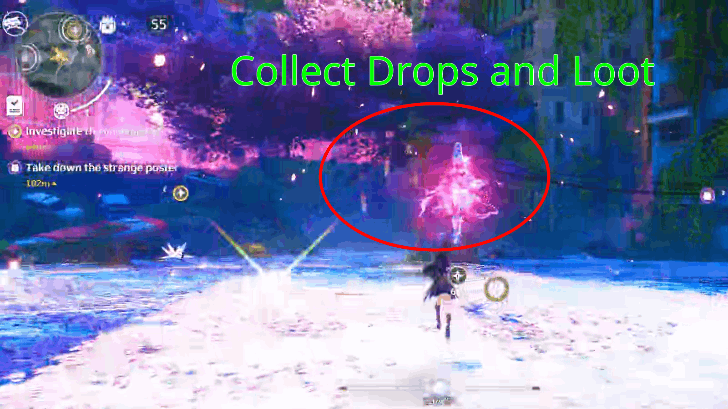 Continue northwards until you encounter more enemies on a flat patch of land to the west. Defeat them and continue proceeding north. Make sure to capture or take any supplies that contain loot in them! |
| 5 | 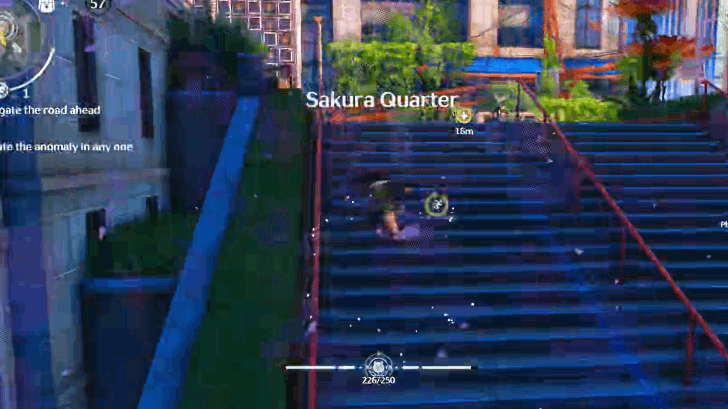 You will eventually head north, but turn downwards to face more enemies, continue taking them down as intended until you reach your next yellow marker. |
| 6 | 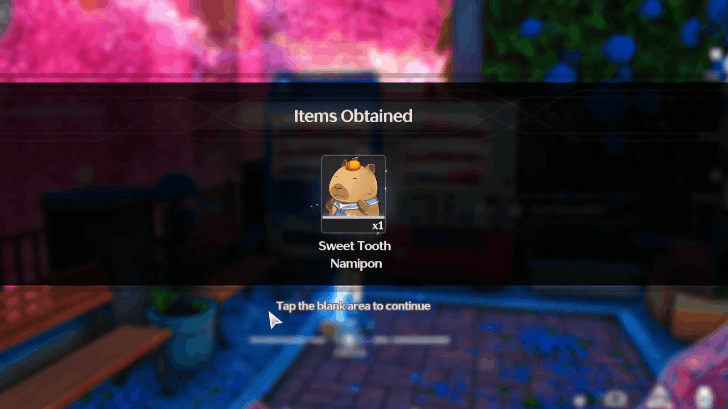 After heading southwards as indicated by your objective marker, you will be introduced to the Missing Namipon mechanics here, where you will need to find tagged Namipons in the map. Make sure not to collect this Sweet Tooth Namipon and continue afterwards! |
| 7 | 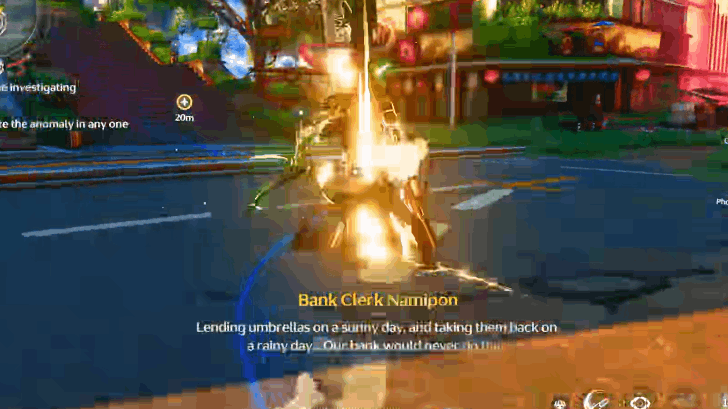 Continue heading to the nearby Harukaze Stadium by taking the northern staircase and running to an elevated walkway, but don't enter the field yet! You can interact with the Banker Namipon near a waiting shed, collect him and proceed. |
| 8 | 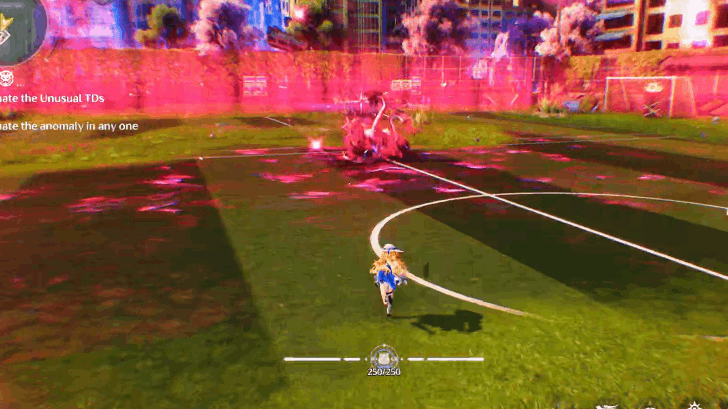 Enter the Stadium and you will encounter the last objective of this run, defeat the anomalous Impermanence Heron and save the nearby Honami citizen. Once done, you can exit and extract to unlock the Free Roam section of Sakura Quarter! |
Sakura Quarter Recommended Teams & Namipon
Initial Starter Team
| Character | Recommended Loadout |
|---|---|
|
|
Auto-Equipped Namipon ・Any supported stickers found |
|
|
Auto-Equipped Namipon ・Any supported stickers found |
|
|
Auto-Equipped Namipon ・Any supported stickers found |
The initial stage runs will not allow you to pick characters just yet, and you will be forced to run a team featuring Chisa, Phoebe and Zani. This team will be more than sufficient for the training and first stage runs, so just pick and equip whatever stickers or Namipon you have!
Phoebe Nuke Team
| Character | Recommended Loadout |
|---|---|
|
|
Sales Champ Main Skill: Casting Outro Skill summons 4 Combo - Support Missiles, each dealing DMG equal to 100% of the Resonator's ATK. Support Skill: Summon Namipon to fire 8 Combo - Support Missiles: Enhanced, each dealing DMG equal to 180% of the Resonator's ATK. For the next 10s, additionally fire 1 missile every 2.5s. Cooldown: 15s. ・Zani Stickers (Hexagon) x2 ・Photon Tunneling ・Crushing Grind ・Flawless Act |
|
|
Bowtie Butler Main Skill: When the Resonator inflicts Havoc Bane or when nearby enemies take damage from Spectro Frazzle and Aero Erosion, the Resonator gains a stack of Boost - Dessert Prep. Reaching 6 stacks of Boost - Dessert Prep removes all stacks to launch Combo - Dessert Strike 3 times, each dealing DMG equal to 75% of the Resonator's ATK and granting 1 stack of Boost - Satisfaction to the resonator. Boost - Satisfaction grants 25% All DMG Bonus for 10s, stacking up to 3 times. Support Skill: Summon Namipon to launch Combo - Dessert Strike: Enhanced 6 times, each dealing DMG equal to 300% of the Resonator's ATK and granting 1 stack of Boost - Dessert Prep to the Resonator on hit. Cooldown: 10s ・Phoebe Stickers (Hexagon or Circle) x2 ・Street Art ・Chain Reaction |
|
|
Sweet Tooth Namipon Main Skill: Each time the Resonator receives healing, they additionally recover 5 points of Concerto Energy and 10 points of Resonance Energy, triggered 1 time per second. Support Skill: Summon Namipon to recover HP for all Resonators in the team by 10% of the caster's Max HP and activate Boost - Namipon Aid. During this state, all Resonators in the team recover 1% of the caster's Max HP per second for 10s. Cooldown: 20s. ・Shorekeeper Stickers (Circle) x2 ・Healing or Buffing Stickers |
Once you gain Free Roam mode, you will be able to use different team members. One of the best picks is to use Phoebe as your damage nuke while supported by Shorekeeper for heals and buffs, while Zani provides Vibration Damage to clear enemy Vibration Strength.
Use the characters related stickers with specific buffs to them should you find them, as this will drastically improve your Namipon Level, paired with the appropriate shape of the Sticker you are slotting in to trigger the Namipon buff.
Sakura Quarter Chest Locations
All Sakura Quarter Chest Locations
| All Chest Locations in Sakura Quarter | |
|---|---|
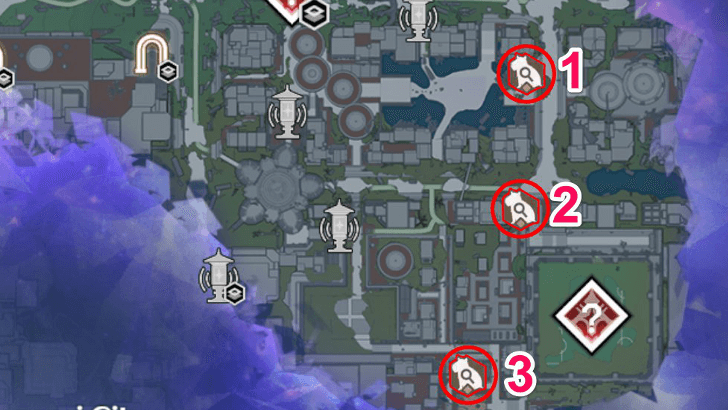
| 1 | 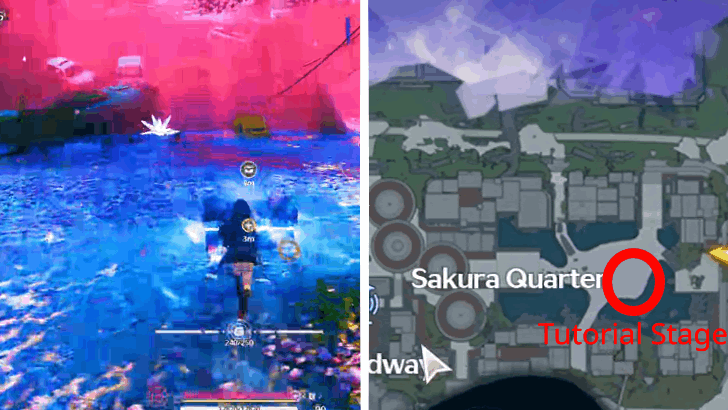 Part of the Tutorial Section, defeat the enemies near the Namipon Lightbox. |
| 2 |  Found at the first set of enemies as part of the first stage exploration to the side of the road. |
Sakura Quarter Missing Namipon Locations
Three Namipons can be found here in Sakura Quarter! Two are found during the first stage exploration of the game while the last one, the Rapper Namipon, can only be found in Free Roam.
Sweet Tooth Namipon
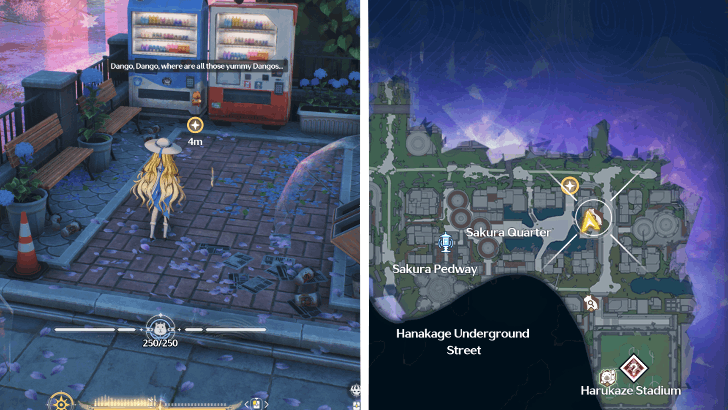
The Sweet Tooth Namipon is part of the objectives for your first run in Sakura Quarter, and cannot be missed. It is located near some vending machines on the way to the stadium.
Bank Clerk Namipon
The Bank Clerk Namipon can be found north of the Harukaze Stadium under a waiting shed, and can be encountered on the first stage of your run.
Rapper Namipon
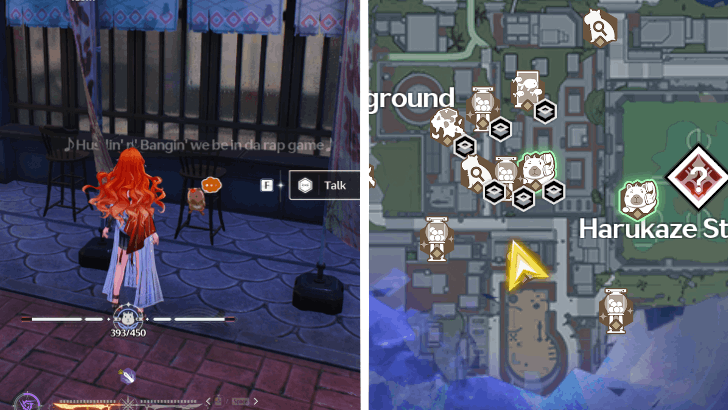
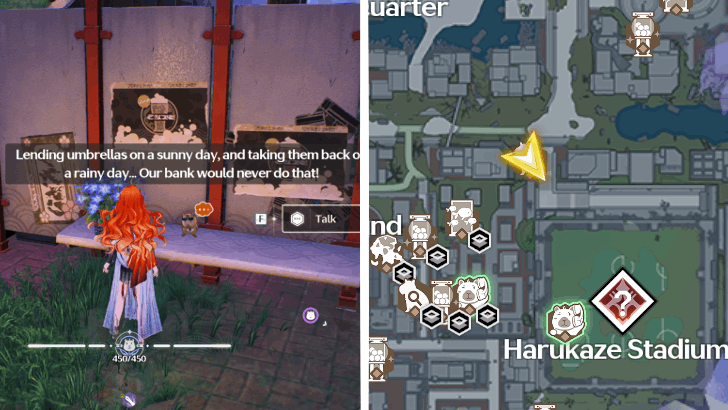
The Rapper Namipon can only be found on Free Roam and is located south of Harukaze Stadium, near a house with some interactable banners. Flip one of them to make the Namipon appear and add them to your Namipon list.
Sakura Quarter Side Objectives
1. Take Down the Namipon Poster in Sakura Quarter
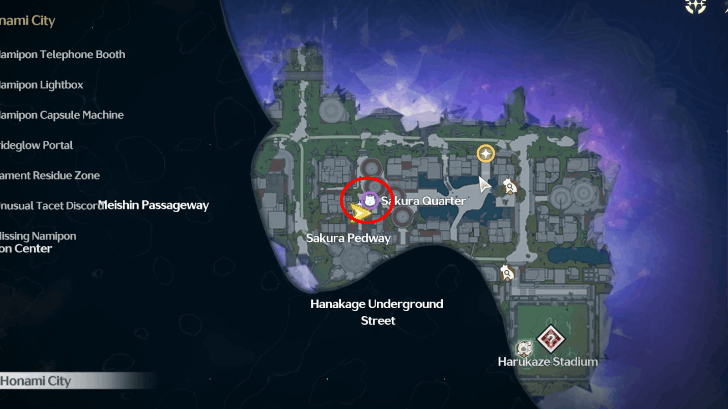
The Namipon Poster in Sakura Quarter is located midway into the first stage run of the area, located past the Pedway and is on a wall below the Namipon Lightbox behind the buildings.
2. Eliminate the Anomaly in Any One Area
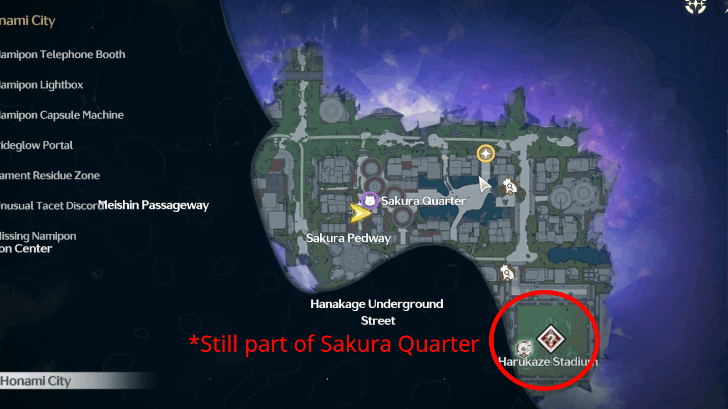
The anomalous TD required for this objective is the Impermanence Heron located dead center in Harukaze Stadium and can be killed in the first stage run. This section is still considered part of the Sakura Quarter area, so don't be confused if you ever notice you're moving away from the main plaza.
Wuthering Waves Related Guides

Stranger Things in Honami Event Guide
All Area Exploration Guides
| Honami City Exploration Guides | |
|---|---|
| Sakura Quarter | Meishin Passageway |
| Hanakage Underground Street | Honami Central Park |
| Neon Tower | |
Honami City Map and 100% Exploration Guide
All Points of Interest Guides
| Honami City Points of Interest Guides | ||
|---|---|---|
Namipon Lightbox |
Irideglow Portal |
|
Other Stranger Things in Honami Guides
| Cafe Decor Nodes to Unlock First | How to Farm Rice Dangos |
| How to Get Star of Solaris and Collectibles | Namipon Tier List |
| List of All Support Namipon | |
Comment
Author

Sakura Quarter Chests and Exploration Guide
Please participate in our site
improvement survey
04/2026
improvement survey
04/2026
Would you assist in
improving Game8's site?
improving Game8's site?

×
We are listening to our users' valuable opinions and discussing how to act on them.
The information collected through this survey will be used for the purpose of improving our services. In addition, the information will only be disclosed a part of a statistic in a format that will not allow identification of personal information.
Begin Survey
Not Now
×
Please rate each item regarding Game8.co's Advertisements.
Amount of Ads
Very Dissatisfied
Somewhat Dissatisfied
Fine
Somewhat Satisfied
Highly Satisfied
Placement of Ads
Timing of Ad Display
Ad Loading Speed
Safeness of Ads
Content of Ads
×
Please rate each item regarding Game8.co's Quality of Articles.
Amount of information
Very Dissatisfied
Somewhat Dissatisfied
Fine
Somewhat Satisfied
Highly Satisfied
Frequency of updates
Speed of new information
Accuracy of articles
Understandibility of articles
Readability of sentences
×
Please rate each item regarding Game8.co's Usability of the Site.
Ease of finding information
Very Dissatisfied
Somewhat Dissatisfied
Fine
Somewhat Satisfied
Highly Satisfied
Loading Speed
Use of Color
Font Size
Visibility of Images
Easy to Understand Layout
×
Please rate each item regarding Game8.co's Message Boards, Comments.
Ease of Writing
Very Dissatisfied
Somewhat Dissatisfied
Fine
Somewhat Satisfied
Highly Satisfied
Readability
Ease in Finding Information
Comment Quality
Comment Quantity
Admin Response
×
Please rate each item regarding Game8.co's Site's new design.
Please rate our site's new design
Very Dissatisfied
Somewhat Dissatisfied
Fine
Somewhat Satisfied
Highly Satisfied
Do you think that the website's design change makes the site easier to use?
Has the new design made it easier for you to find information on the site?
Has the new design improved the overall visual appeal of the site?
How would you rate your overall satisfaction with the new design of the site?
×
How likely are you to recommend Game8 to someone you know?
Very Unlikely
0
1
2
3
4
5
6
7
8
9
10
Very Likely
If you have other opinions regarding potential improvement to the website, please share them with us. We would appreciate your honest opinion.
Note: This is a free response section, so you can proceed without entering anything.
Note: Please be sure not to enter any kind of personal information into your response.
Note: Please be sure not to enter any kind of personal information into your response.
×
Thank You
×
Thank you for participating in our survey! Your answers will help us to improve the quality of our website and services.
We hope you continue to make use of Game8.
We hope you continue to make use of Game8.
Close
Premium Articles

Rankings

Gaming News


![Forza Horizon 6 Review [Preview] | Beautiful Roads With a Whole Lot of Oversteer](https://img.game8.co/4460981/a7254c24945c43fbdf6ad9bea52b5ce9.png/thumb)
![Borderlands Mobile Review [Playtest] | The Same Borderlands Made Easy](https://img.game8.co/4465500/aac0c880a39ec5cd46073e49d18f3ed5.png/thumb)
Popular Games

Genshin Impact Walkthrough & Guides Wiki
Crimson Desert Walkthrough & Guides Wiki
Umamusume: Pretty Derby Walkthrough & Guides Wiki
Honkai: Star Rail Walkthrough & Guides Wiki
Monster Hunter Stories 3: Twisted Reflection Walkthrough & Guides Wiki
Wuthering Waves Walkthrough & Guides Wiki
The Seven Deadly Sins: Origin Walkthrough & Guides Wiki
Pokemon TCG Pocket (PTCGP) Strategies & Guides Wiki
Pokemon Pokopia Walkthrough & Guides Wiki
Zenless Zone Zero Walkthrough & Guides Wiki


Recommended Games
Monster Hunter World Walkthrough & Guides Wiki
Fire Emblem Heroes (FEH) Walkthrough & Guides Wiki
Pokemon Brilliant Diamond and Shining Pearl (BDSP) Walkthrough & Guides Wiki
Super Smash Bros. Ultimate Walkthrough & Guides Wiki
Diablo 4: Vessel of Hatred Walkthrough & Guides Wiki
Cyberpunk 2077: Ultimate Edition Walkthrough & Guides Wiki
Yu-Gi-Oh! Master Duel Walkthrough & Guides Wiki
Elden Ring Shadow of the Erdtree Walkthrough & Guides Wiki
The Legend of Zelda: Tears of the Kingdom Walkthrough & Guides Wiki
Persona 3 Reload Walkthrough & Guides Wiki


All rights reserved
Copyright© 2024-2025 Kuro Games. All Rights Reserved.
The copyrights of videos of games used in our content and other intellectual property rights belong to the provider of the game.
The contents we provide on this site were created personally by members of the Game8 editorial department.
We refuse the right to reuse or repost content taken without our permission such as data or images to other sites.