This survey will take about 1 minute.
Your answers will help us to improve our website.
Wuthering Waves (WuWa)
Chapter 2 Even When Divinity Remains Silent Walkthrough
★ Version 3.2 Banners → Livestream Codes
┣ Sigrika → Materials, Weapon, Banner
┣ Qiuyuan → Builds, Materials, Weapon
┗ Phase 2 → Lynae, Zani, Phoebe
★ Tapes of Last Words | Soliskin | 3.1 Trophies
★ Exclusives: Tier Maker | State of the Meta

This is a complete walkthrough of the Prologue and all the acts under Chapter 2: Even When Divinity Remains Silent in Wuthering Waves. Learn details and information about all the acts and quests under Chapter 2 here!
List of Contents
How to Unlock Chapter 2: Even With Divinity Remains Silent
Complete Chapter 1 Act 8: To the Shore's End
To officially begin Chapter 2, players must finish the Act 8 of Chapter 1. Doing so involves completing the Beyond the Shore's End subquest.
To the Shore's End Quest Guide
Activate Early Access

To immediately play Chapter 2 without going through the required main quests, players can go to the events page and click on the Next Stop: Rinascita tab to find a button that will immediately unlock the chapter's prologue.
Chapter 2: Even With Divinity Remains Silent Walkthrough
| Chapter 2 Walkthrough | |
|---|---|
| Prologue | Act 1 |
| Act 2 | Act 3 |
| Act 4 | Act 5 |
| Act 6 | Act 7 |
| Act 8 | - |
Prologue: Through the Sea Thou Break
| Through the Sea Thou Break Walkthrough | |
|---|---|
| 1 |
 Fast Travel to the Greenhouse in the Black Shores and speak with Shorekeeper. |
| 2 |
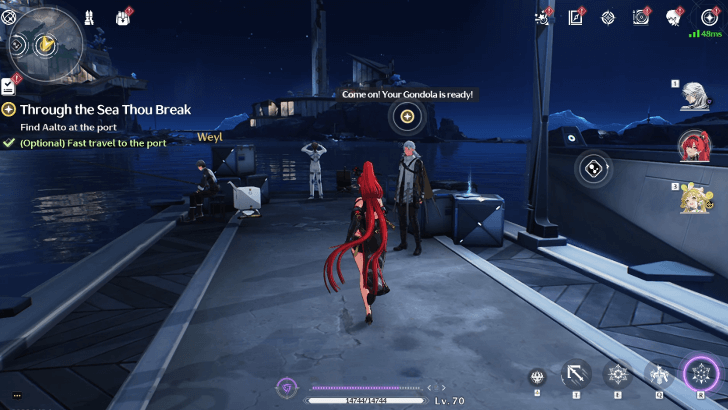 Use the Kuroro by the entrance of the Greenhouse to fast travel to the port then speak to Aalto to begin sailing towards Rinascita. |
| 3 |
 After the lengthy cutscenes and cinematics, fight and defeat six low-tier Tacet Discords at the front of the liner. |
| 4 |
 When done fighting, talk to Brant. Afterward, interact with Cuddle Wuddle and the Strange Box near Brant. |
| 5 |
 After arriving at Ragunna City's port, find and talk to the gondolier to unlock Chapter 2 Act 1 and the rest of Ragunna City. |
Through the Sea Thou Break Quest Guide
Act 1: The Sacred Breeze So Often Breathes
| The Sacred Breeze So Often Breathes Walkthrough | |
|---|---|
| 1 |
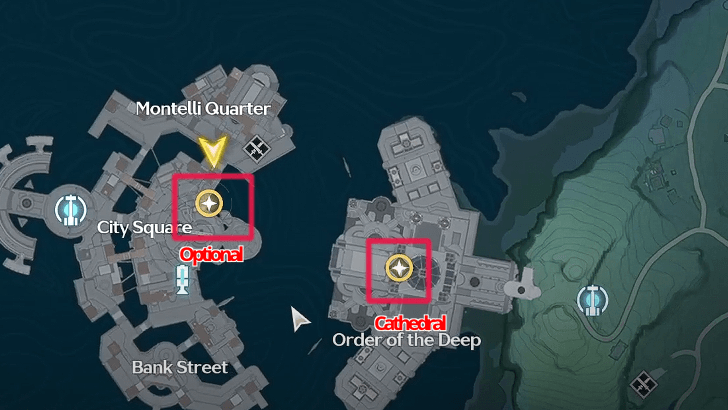
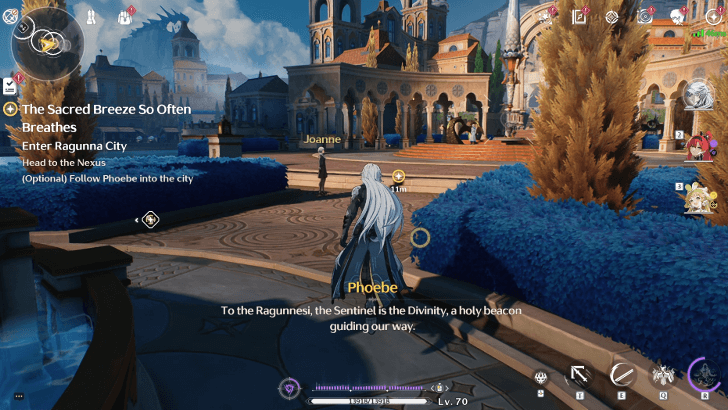 Head to the Resonance Nexus at the City Square after entering the city. |
| 2 |
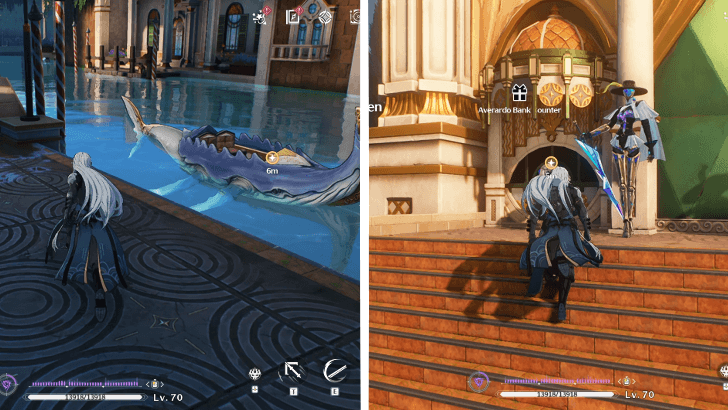 After the cutscene, ride the nearby gondola to Averardo Bank and interact with the bank counter to recieve funds and meet Zani. |
| 3 |
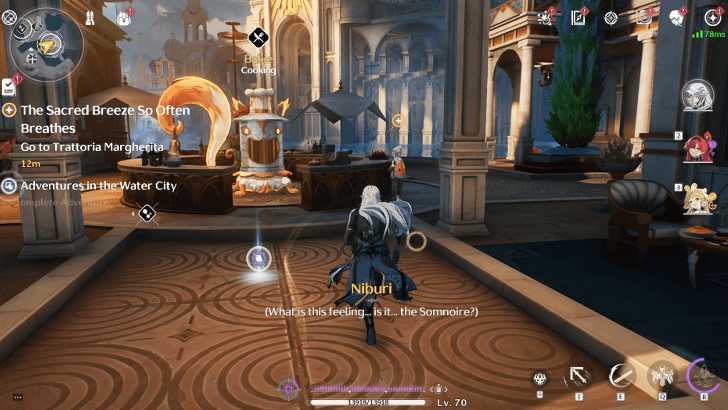 Head to Trattoria Margherita and talk to Margherita. Afterward, sit on the red chairs to the right to trigger a cutscene and cinematic. |
| 4 |
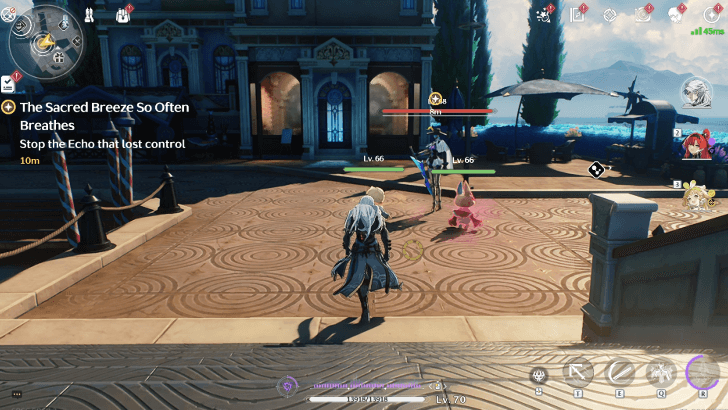 After the cinematic, follow the quest markers to find the out-of-control echo and defeat it, triggering another cutscene. |
| 5 |
 After the cutscene, go to the Pioneer Associate and talk to Fulmine. Players can also investigate Montelli Quarter and the scene for more clues. |
| 6 |
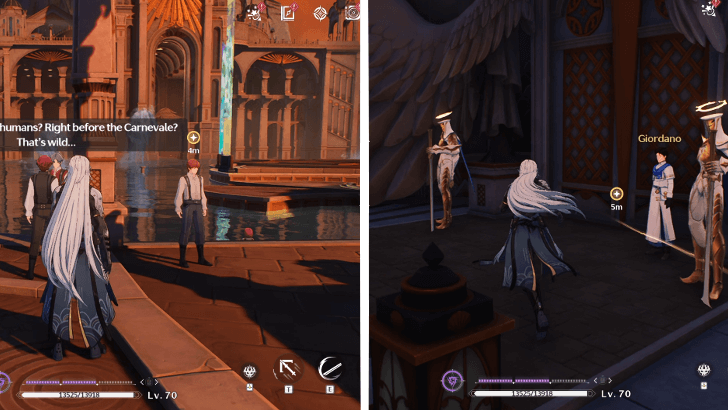
After talking to Fulmine, head to the Masked Reverie on the stairs to the right. Then, follow the quest marker and talk to the gondolier to go and enter the Cathedral of Mercy. |
| 7 |
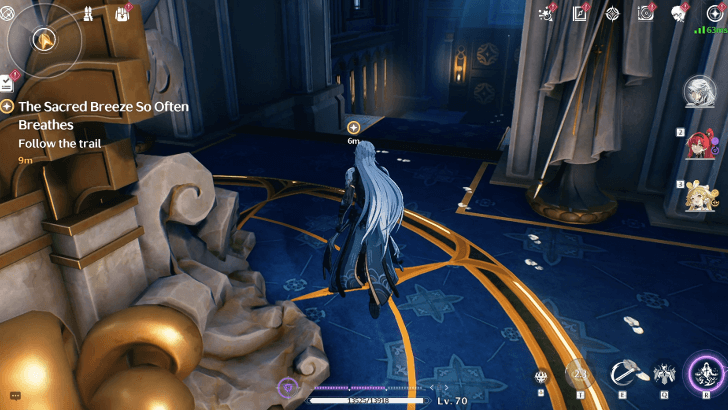 Once inside, talk to Alessio up ahead. After the conversation, use the Sensor to reveal and follow Gilberto's trail. Doing so leads to an elevator that unlocks Act 2 and a new area upon usage. |
The Sacred Breeze So Often Breathes Guide
Act 2: Veils Off in Sun or Shadow
| Veils Off in Sun or Shadow Walkthrough | |
|---|---|
| 1 |  Follow the quest marker and meet Zani below to continue the quest. |
| 2 |
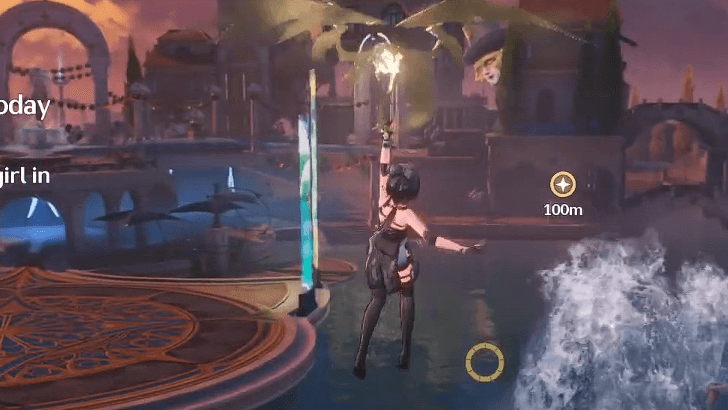
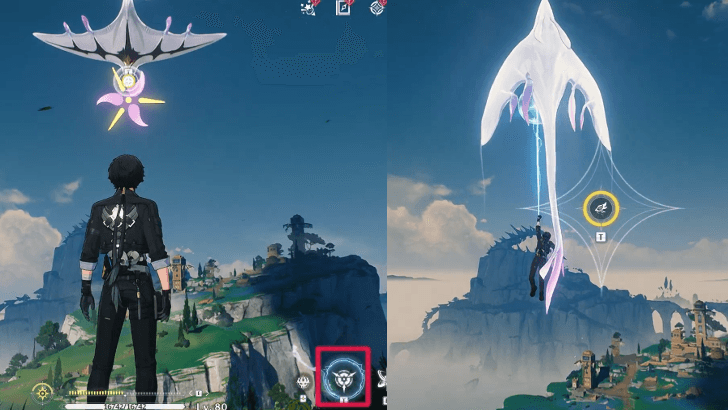 Use your grappler to catch a ride on the Wingray and glide to your next destination. |
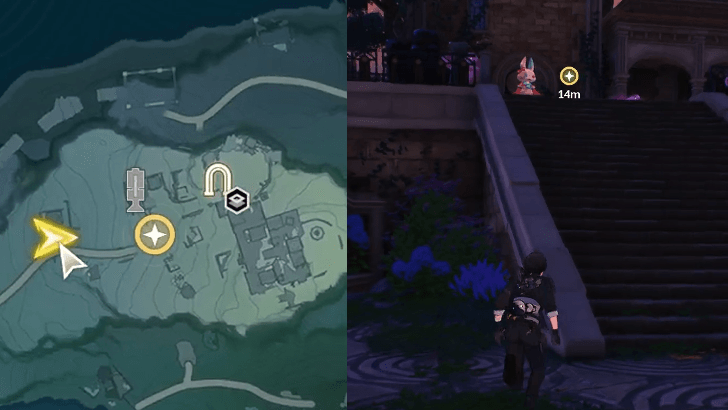
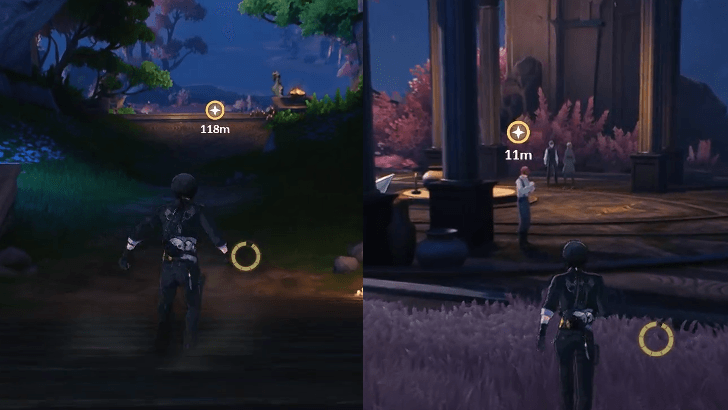
| 3 |
 Continue to climb up the hill until you reach a house. Once there, speak to the citizens with a yellow marker. |
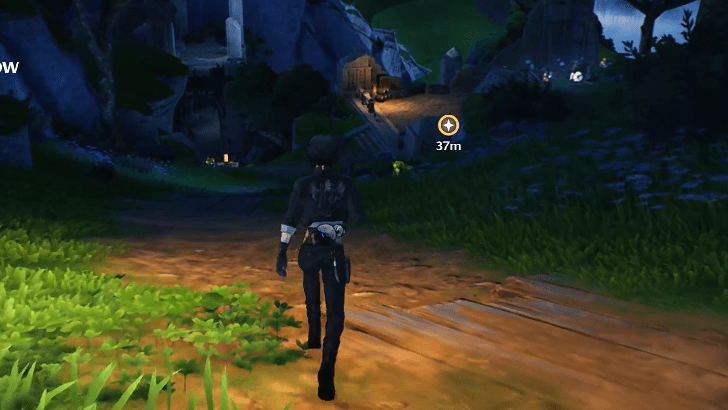
| 4 |
 After speaking with Cristoforo, head to the ruins above the hill until you reach the entryway with an Echo. |
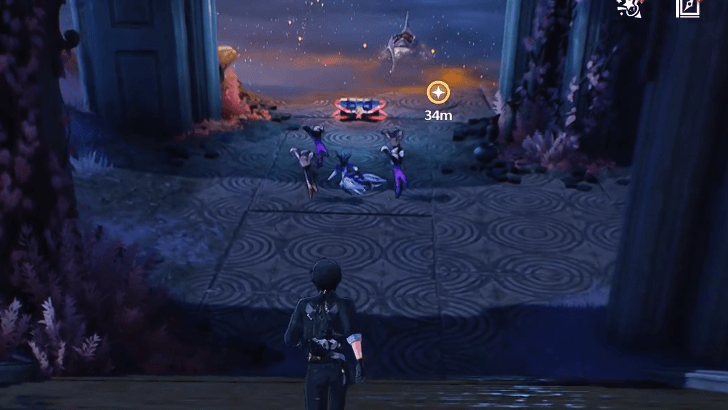
| 5 |
 Transform into echo Lottie Lost then clear all of the purple orbs. Inspect the red petal after clearing the orbs. |
| 6 |
 Go ahead and meet with Phoebe once you've finished speaking with Cristoforo. There will be a long cutscene with Phoebe, followed by another scene down the road in the ruins. |
| 7 |
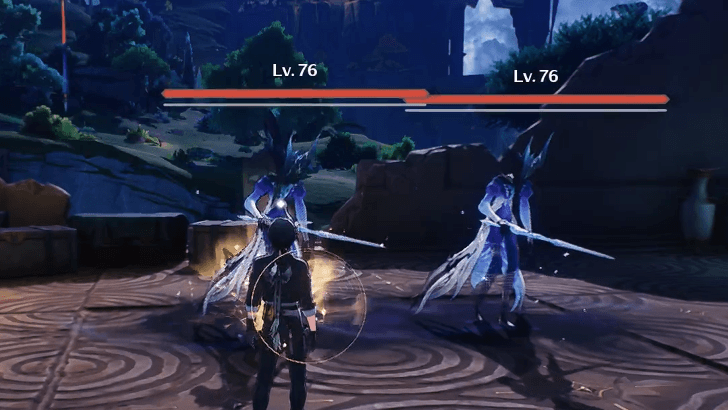 Defeat all of the TDs controlled by Gilberto. |
| 8 |
 Head to the port and speak with the Harbormaster. There you will also meet Carlotta. |
| 9 |
 Control the gondola and follow the marker all the way to the station. |
| 10 |
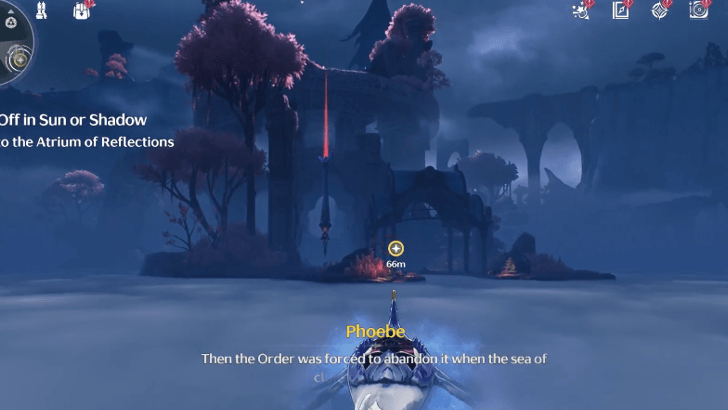 After bidding farewell to Carlotta, board the gondola again and proceed to the Atrium of Reflections. |
| 11 |
 Look for clues nearby; each hint will be indicated on your map, so simply approach and interact with them. |
| 12 |
 After gathering all of the clues, return to the door for another cutscene. Following the cutscene, you will engage Lorelei in battle. |
| 13 |
 After fighting Lorelei, board the gondola to the Averardo. |
| 14 |
 Once at Averardo, follow the quest marker to the vault. You will face opponents along the way, so be careful and defeat them. |
| 15 |
 After speaking with Carlotta, proceed to the Averardo Vault, set up your party, and enter the vault. |
| 16 |
 Once the Sentry Construct has been defeated grapple to the Wingray and take off for the next location. Once landed, move forward until you reach the tower ruins. |
| 17 |
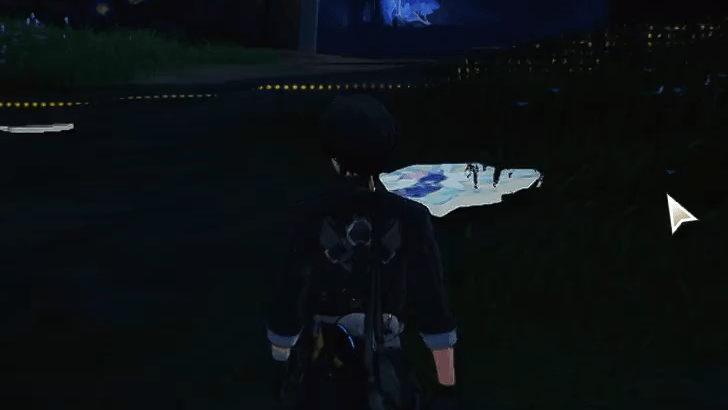 Equip your sensor and use it to reveal all scattered window glass nearby. |
| 18 |
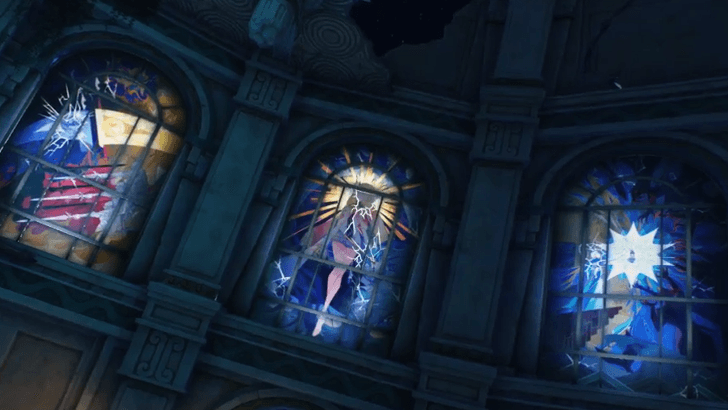 Restore the damaged window by returning all the shards to the relevant window. |
| 19 |
 After restoring the windows there will be another lengthy cutscene, then you will be thrown back into combat. Defeat the echoes to initiate another cutscene. |
| 20 |
 Follow the marker into the bridge and make your way through the Wailing Ascent. |
Veils Off in Sun or Shadow Guide
Act 3: What Yesterday Wept, Today Doth Sing
| What Yesterday Wept, Today Doth Sing Walkthrough | |
|---|---|
| 1 |
 Head straight and find two corroders nearby. Use it to destroy the spike wall ahead to open a path. |
| 2 |
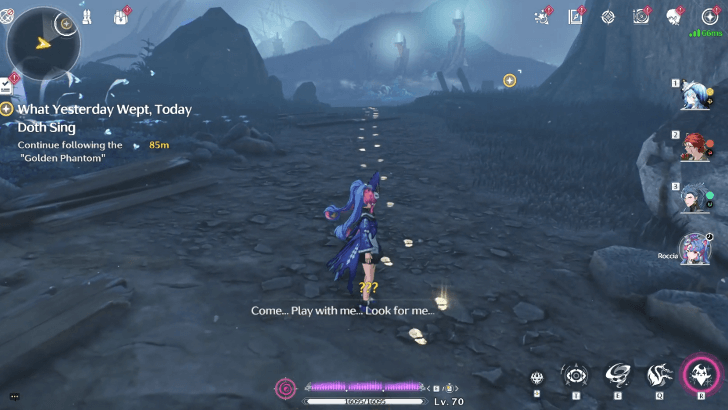 Continue following the path, then follow the golden footprints when they appear. |
| 3 |
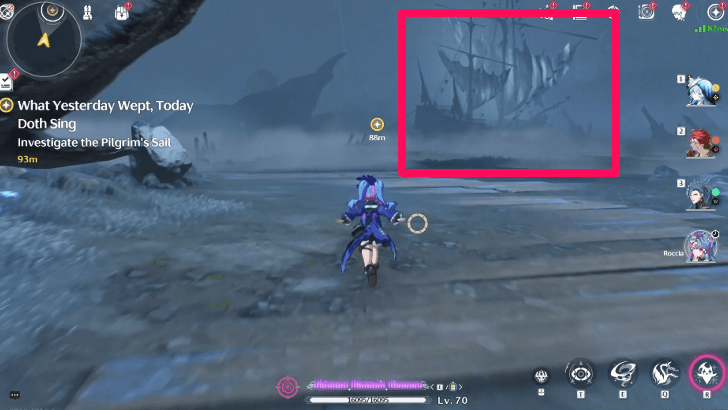 Head towards the ship wreckage to initiate a cutscene. Afterward, defeat the nearby Tacet Discords and head towards Brant. |
| 4 |
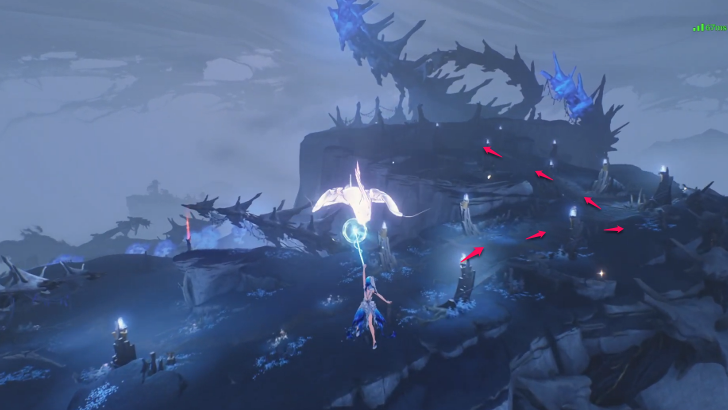 After the cutscene, grapple unto the nearby Wingray and follow the path upwards towards the Sacrificial Arena. |
| 5 |
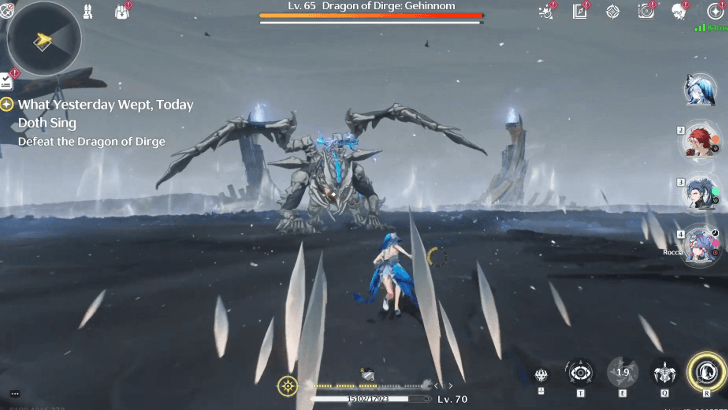 Fight and Defeat Gehinnom. |
| 6 |
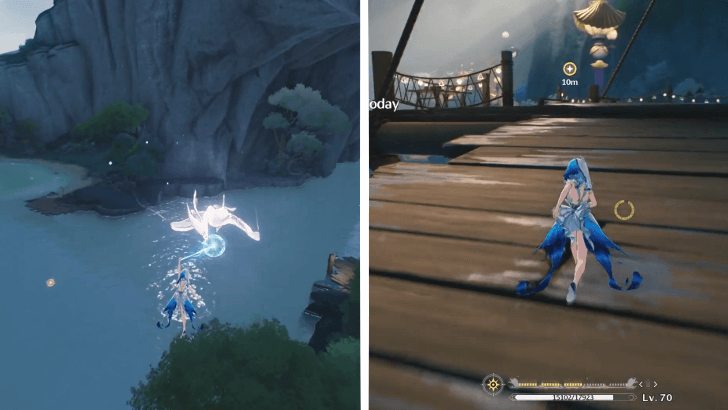 After the boss fight, grapple unto the nearby Wingray to meet the troupe at their base. |
| 7 |
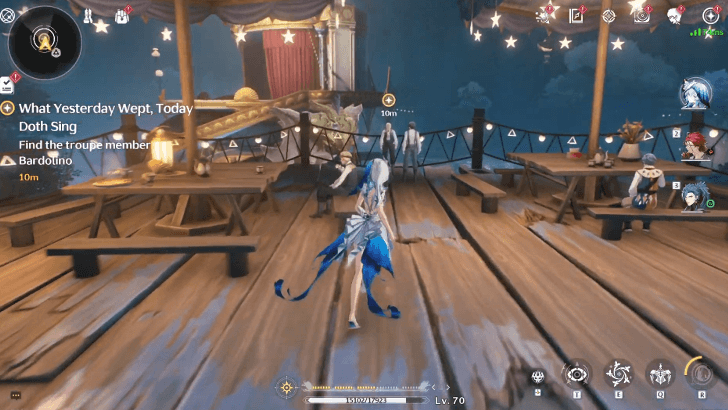 Follow the path to the right to find and speak with Bardolino. |
| 8 |
 Collect three Cloudchaser components by talking to Battier, Tina, and Levito. |
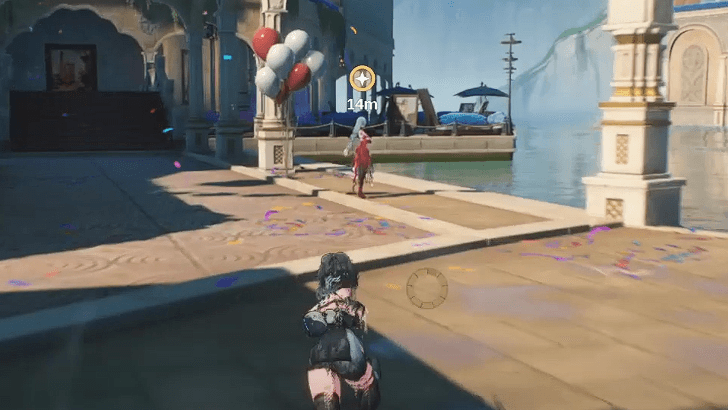
| 9 |
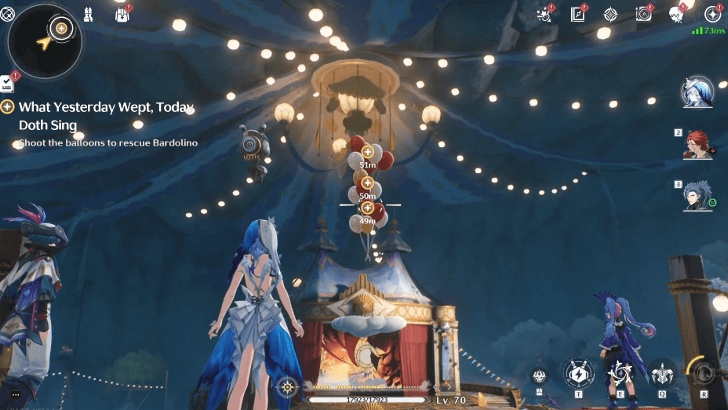 Use the Cloudchaser to shoot down the balloons and save Bardolino. Afterward, proceed to board the liner and rehearse with Roccia, Brant, and Carlotta. Prepare for quick-time events during the rehearsal. |
| 10 |
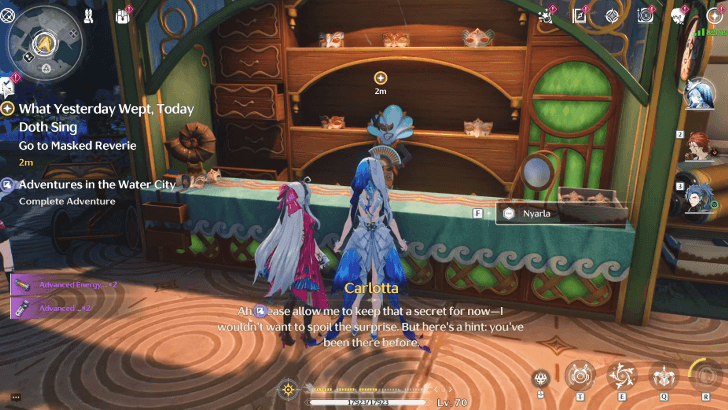 After coming back to Ragunna City, meet with Carlotta and follow her to the Masked Reverie. Afterward, continue following her until the bridge to trigger a cutscene. |
| 11 |
 Head towards the quest mark to speak with the hotel concierge and check-in. |
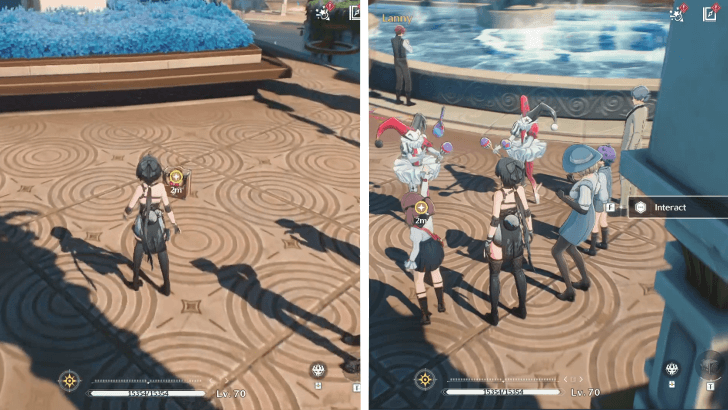
| 12 |
 Interact with Zani, then with Phoebe. For the latter, take a picture of her with the echoes and ensure that the lens capture all the subjects. |
| 13 |
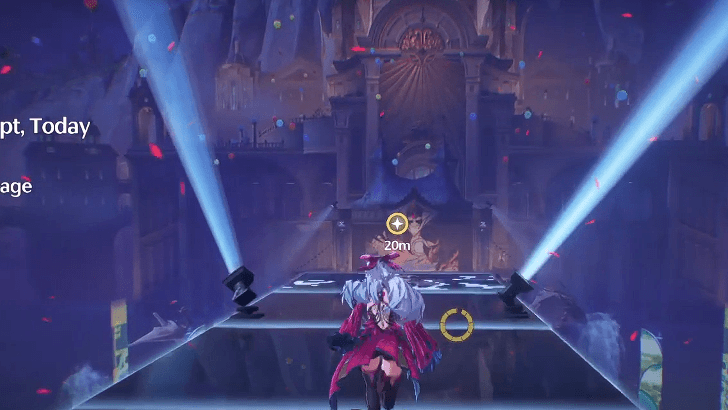
 Climb the stairs by the left path and interact with the two marked echoes. This will trigger a cutscene and a cinematic. |
| 14 |
Head to Phrolova's location below and chase her once she starts moving. Continue following her until she reaches the end of the hallway. |
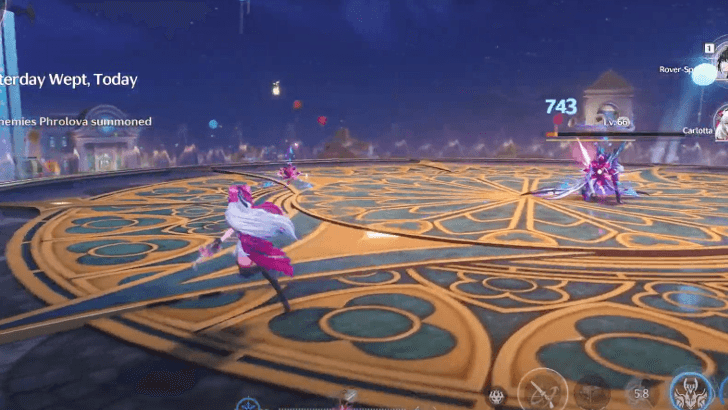
| 15 |
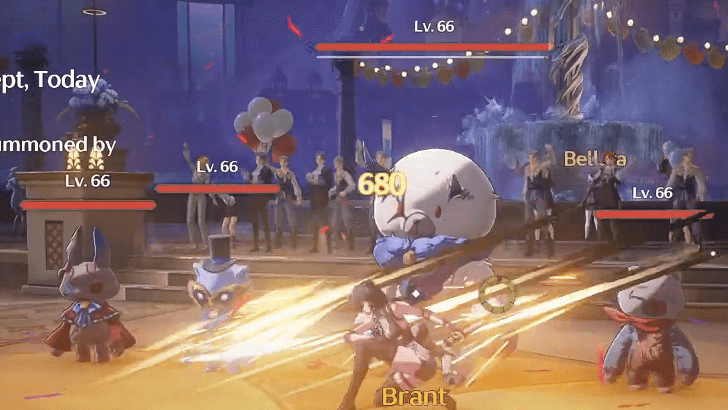
Following the lengthy cutscene, you will be put into a battle. Defeat all the echoes summoned by Phrolova. |
| 16 |
After beating the opponents, proceed to the following stage and grapple to the platform above. |
| 17 |
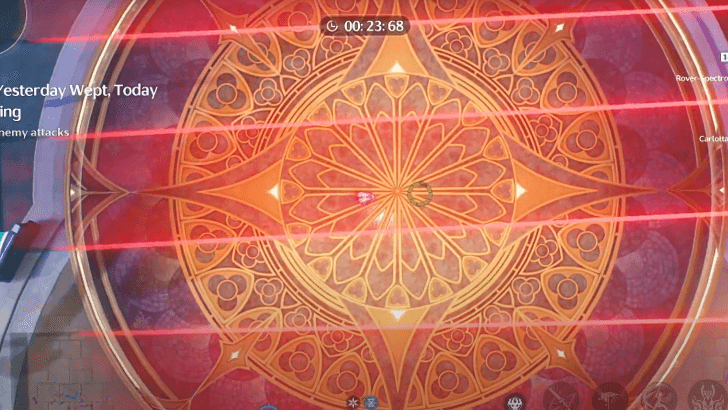
Face another wave of Echoes. After beating them, you will need to evade incoming enemy assaults; simply stay out of the red indicator to avoid being hit. |
| 18 |
Go to the next stage, where you will face multiple waves of enemies. |
| 19 |
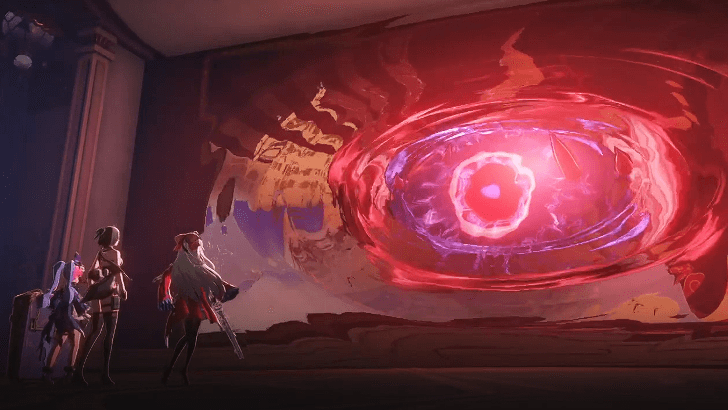
Enter the space made by Phrolova. To enter, simply speak with Carlotta. |
| 20 |

Inside, you will have to battle multiple phases of Hecate. |
| 21 |
Proceed across the platform and find the mysterious girl. After speaking with her, check the traces she left near Carlotta. |
| 22 |
Wait till noon, then head to the safe house. Simply follow the quest marker to go to the place. |
| 23 |
After speaking with everyone, go to the Cathedral of Mercury. You can also use the Wingray to travel to the cathedral swiftly. Head inside the cathedral for another scene, and the quest will be completed. |
What Yesterday Wept, Today Doth Sing Guide
Act 4: The Maiden, The Defier, The Death Crier
| 1 | The Maiden, The Defier, The Death Crier Walkthrough |
|---|---|
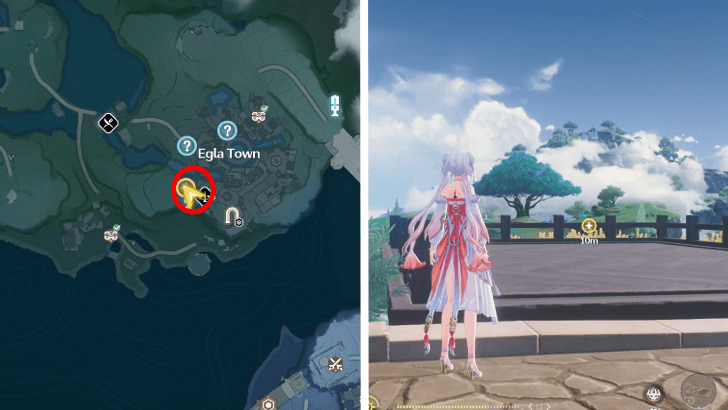 To start the quest, you must go to Egla Town, and head to the empty platform. A cutscene will automatically play that'll explain Rover and Abby's next plans. |
|
| 2 |  Afterwards, you must go to a high place to meet Carlotta's acquaintance, Ciaccona. You will talk to Cartethyia once more. After everything is done, you must accept the Fisalia's invitation and head to their castle. |
| 3 |  Head to Porto-Veno to meet up with Cantarella. After the exchange of pleasantries, you must follow Cantarella to her study. |
| 4 |  After the long talk, Cantarella will open a deeper part of the castle, revealing a train echo. Ride this train echo to arrive at the Beohr Water. Once you do Tacet Discords will jump at you. Get ready to defeat them using Cantarella. |
| 5 | 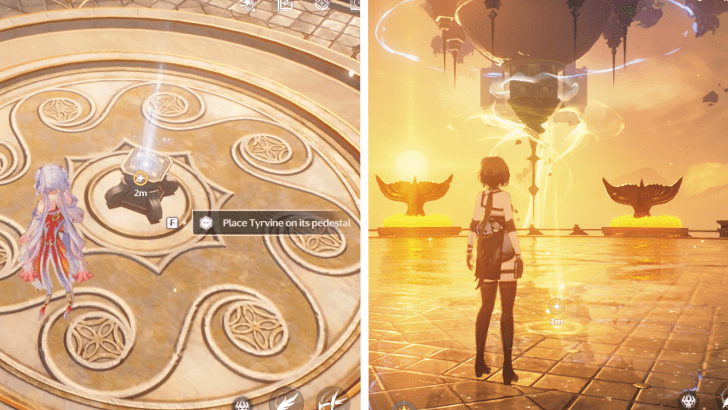 Once you emerge out of the ruins in Beohr Waters, use the Wingray to fly towards the building in the cliff. After the cutscene, you must place Tyrvine on the pedestal. This will cause the tower to rise toward the skies, and gravity to shift. After everything, you must leave the traction tower, and activate the Pool of Rising. Once you reach the top, summon Phaom, the Gondola. At this point, you will be prompted to choose between Cartethyia and Cantarella, but this choice does not affect the outcome, and you will ultimately go with Cartethyia. |
| 6 | Once you emerge out of the ruins in Beohr Waters, use the Wingray to fly towards the building in the cliff. After the cutscene, you must place Tyrvine on the pedestal. This will cause the tower to rise toward the skies, and gravity to shift. After everything, you must leave the traction tower, and activate the Pool of Rising. Once you reach the top, summon Phaom, the Gondola. At this point, you will be prompted to choose between Cartethyia and Cantarella, but this choice does not affect the outcome, and you will ultimately go with Cartethyia. |
| 7 | |
 Ride your Gondola until you can reach an area with three tainted statues. After the cutscene, approach the huge statue to the left, and it'll automatically be solved through another cutscene. |
|
| 8 |  Interact with the statue on the right to have Cartethyia purify the remnants. |
| 9 | 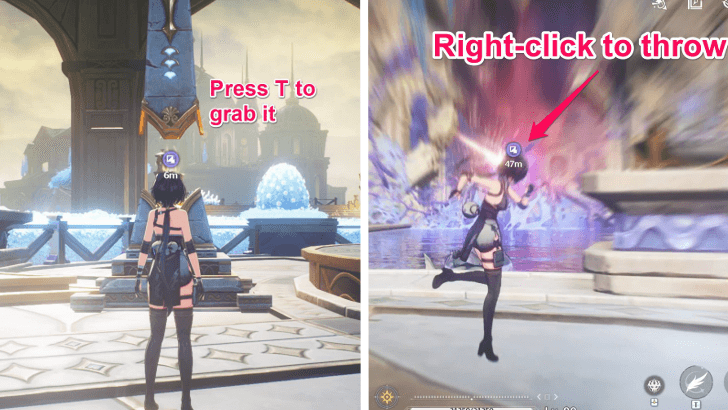 Use the Levitator to lift the Remnant Spark from its pedestal and throw it at the vines. Note that you only need to have the vines in your line of sight to successfully aim the Remnant Spark. Board your Gondola once more toward the next puzzle! |
| 10 | |
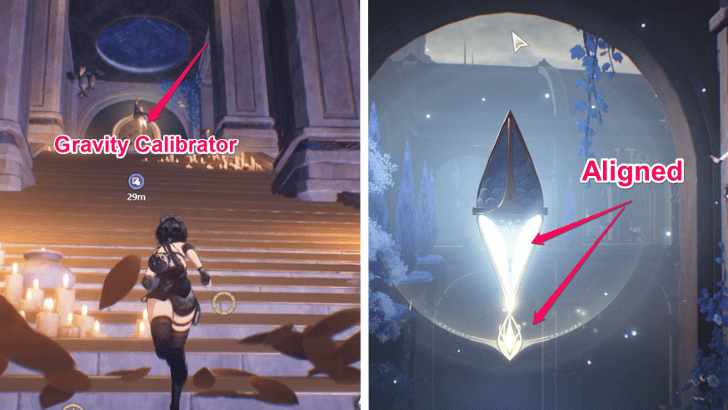
 Head to the Gravity Calibrator. Make sure that the lit part of the Calibrator is colored yellow and pointing at the opposite direction before exiting. |
|
| 11 | 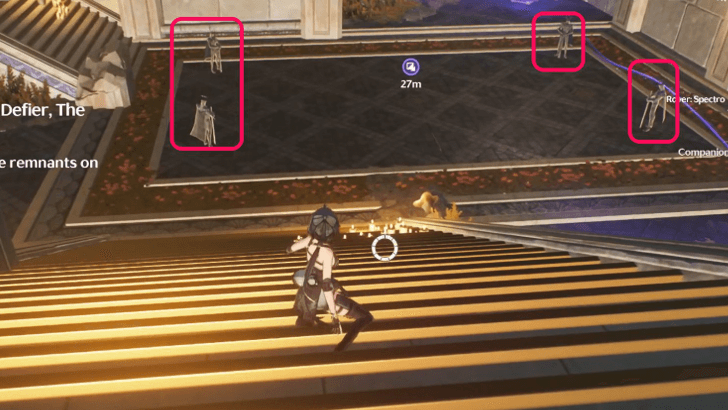
Continue onward until you find four suspicious statues. They will eventually turn into Tacet Discords that you must defeat as Spectro Rover. |
| 12 | 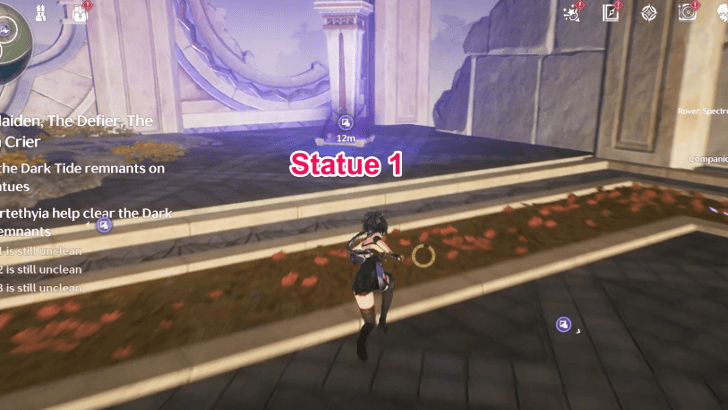
Head to the first statue and interact with it to have Cartethyia purify the remnants. Note that you can run to the other statues while Cartethyia is still purifying. This is useful as you only have 30 seconds before the statues become corrupted again. |
| 13 |  Look for the second and third statues and interact with them as soon as possible so they would be purified in time. |
| 14 | 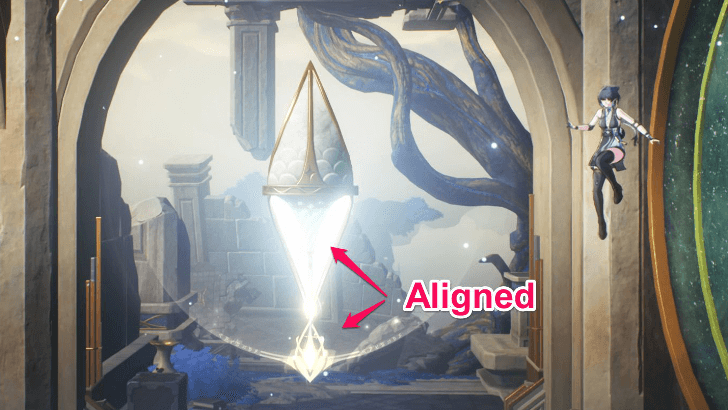
Head back to the Gravity Calibrator and turn it to its original orientation, making sure that the light's color is blue. |
| 15 |
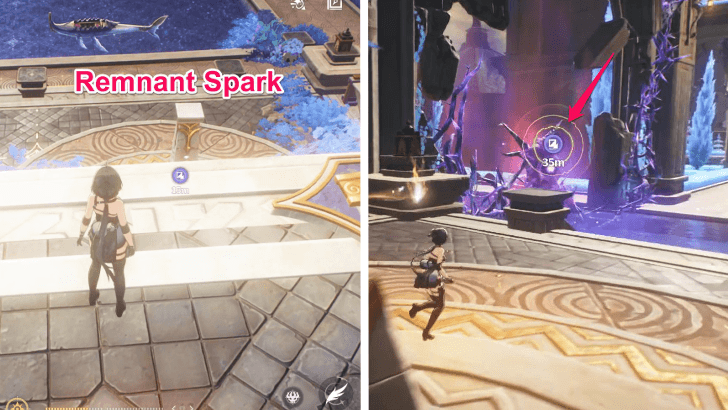 Use the Levitator to lift the Remnant Spark from its pedestal and throw it at the vines |
| 16 | |
 Ride your Gondola to the next destination. After the cutscene, head to the Gravity Calibrator and orient it to the way Cartethyia has requested, making sure that the light turns blue. |
|
| 17 | 
Defeat the two enemies. Head to the Tacetite device afterwards. |
| 18 | Once you interact with the Tacetite device, two waves of enemies will spawn with two enemies per wave. Defeat them to proceed. |
| 19 | Head back to the Gravity Calibrator and turn it to its original orientation, with the light colored yellow. |
| 20 |  Rush to the quest marker and Cartethyia will automatically clear all the Dark Tide. Afterwards, use the Levitator to lift the Remnant Spark from its pedestal and throw it at the vines. You can now go back to Phaom and use it to reach the Tower of Salvation. |
| 21 | 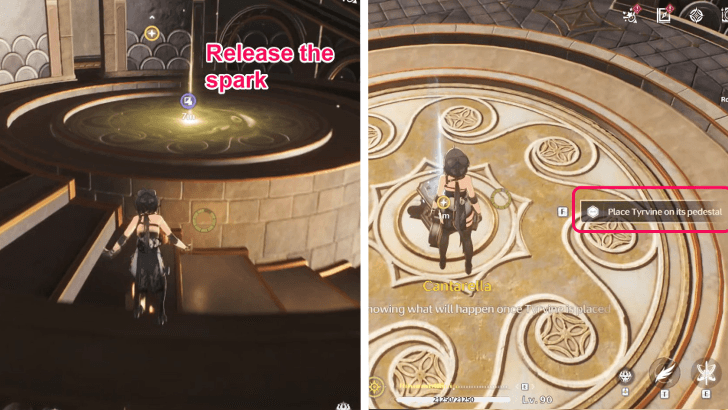 Climb up using the golden shelves and grapple on the way. When you go through the Door of Utility, head to the center to release the peculiar spark. Place Tyrvine on the pedestal inside the Tower of Unity. The day ends with everyone needing to rest. The next day, Cantarella hears something suspicious outside. Defeat all the Tacet Discords using Cantarella and Havoc Rover. |
| 22 | 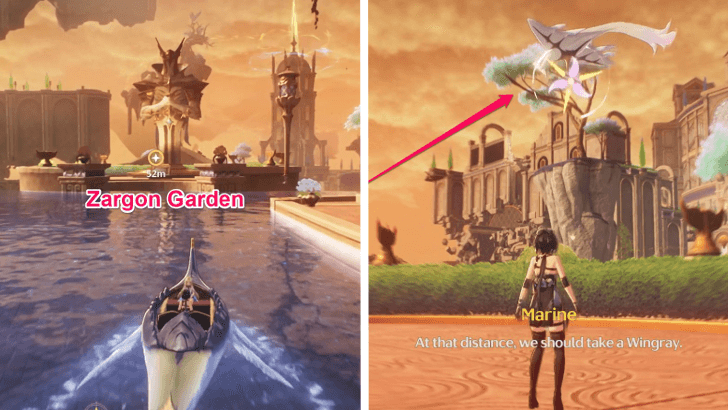 Head to the Zargon Garden using Phaom. Unfortunately, the next sword, Hognis, is nowhere to be found. By this time, Cartethyia realizes that the geography of the area isn't what it used to be. The two decide to move the waterways around before getting Hognis. Use the Wingray to go to the next objective. |
| 23 |
Jump to the Gravity Calibrator and change its orientation. Follow the quest marker using the Wingray and grapple on top of the Statue of the Divine Justice. Initiate a Plunge attack on it to put it back in its rightful place. |
| 24 |
Defeat the little draconic Tacet Discords that appear, then jump to the corrupted statue. Note that you have to transform back to Rover so you can call Cartethyia to purify it. |
| 25 |
Jump to the next corrupted statue, and cleanse it. Note that you only have 30 seconds before the first statue becomes corrupted again. |
| 26 |
Jump to the Remnant Spark. Lift it with the Levitator and throw it at the corrupted vines. |
| 27 | 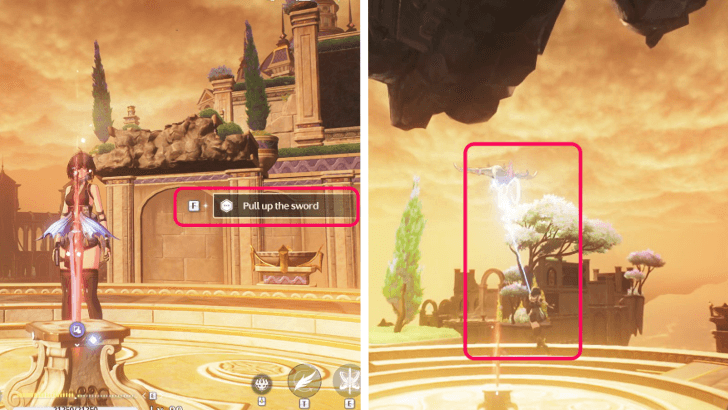 Use the newly unlocked Gravity Calibrator and change the orientation of its gravity. Afterwards, head back to Hognis and try to pull it out. Unfortunately the sword is stuck for now. You must fix more of the waterways which you can start by using the Wingray to proceed to the next area. |
| 27 | |
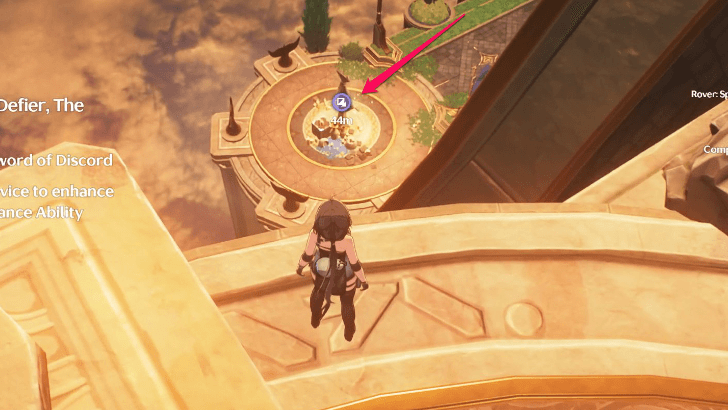
Go to the Tacetite device to enhance Cartethyia's abilities. |
|
| 28 | 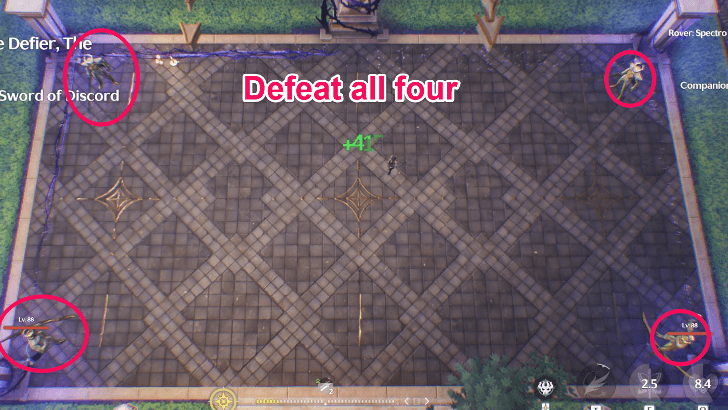 Afterwards, you must defeat all four of the Tacet Discords so Cartethyia could purify the statues. |
| 29 |  Use the Levitator to lift the Remnant Spark from its pedestal and throw it at the vines. |
| 30 | 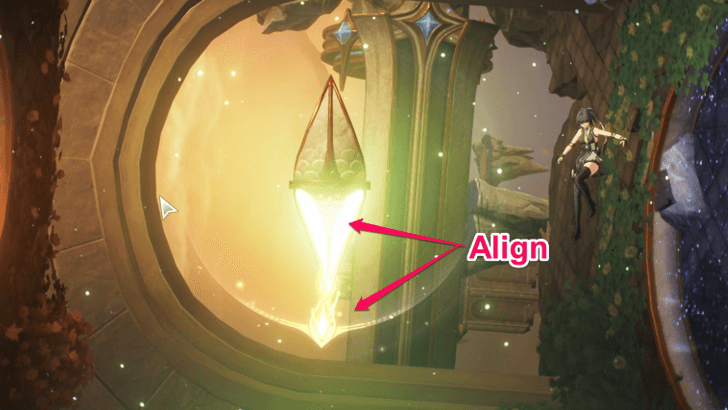 Jump to the newly unlocked Gravity Calibrator and change the orientation of its gravity. |
| 31 |  Reach the top of the Statue of the Divine Justice using the Wingray. Unfortunately, the location is too high for the Wingray which is why you must fly. Be sure to grapple at the end to plunge at the statue! |
| 32 | |
 Use the Wingray and fly to the next destination. Defeat the Tacet Discords. |
|
| 33 | 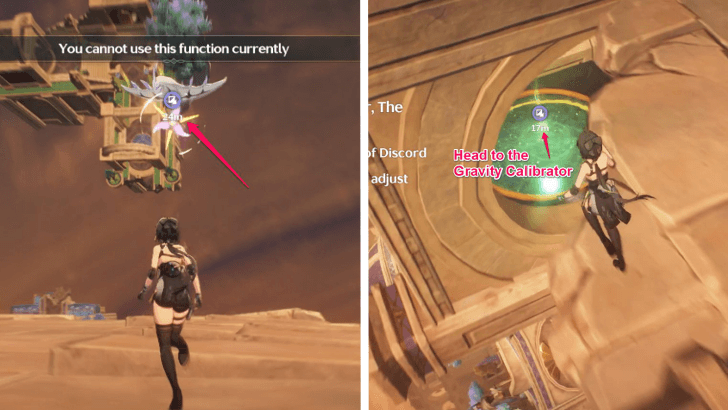 Head to the next Gravity Calibrator using the Wingray. Make sure to align the lighted portion with the yellow indicator. |
| 34 | 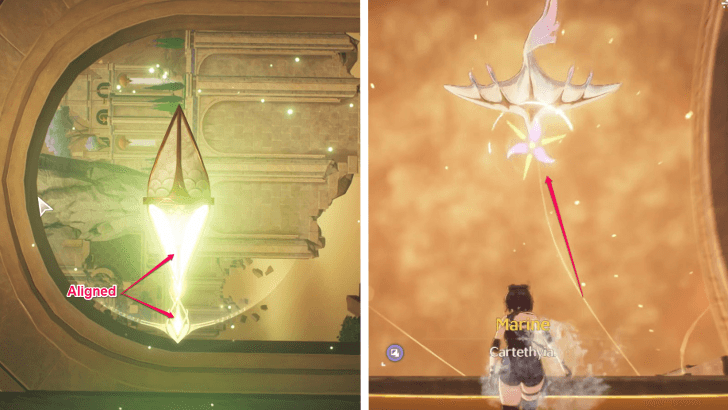 Head to another Gravity Calibrator nearby and change the gravity orientation. Use the Wingray afterwards. |
| 35 | 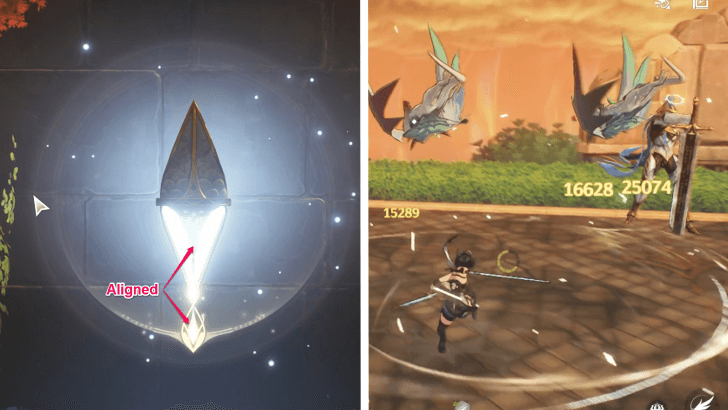 Head to another Gravity Calibrator nearby and change the gravity orientation. Defeat the Tacet Discords ahead to proceed. |
| 36 |  Fly towards the statue and enjoy the view. Grapple to the statue as this'll automatically trigger the plunge attack animation from Rover. Once everything is done head to Hognis, and pull it together with Cartethyia. |
| 37 |  Head back to the Tower of Unity by boarding your Gondola. When you arrive, place Hognis, the sword, on the pedestal. Afterwards, you must rest once more due to the long journey. You will be awoken by a singing voice. Use the Wingray to find its source, where you meet Cartethyia once again. A long and emotional cutscene will play afterwards. |
| 38 | 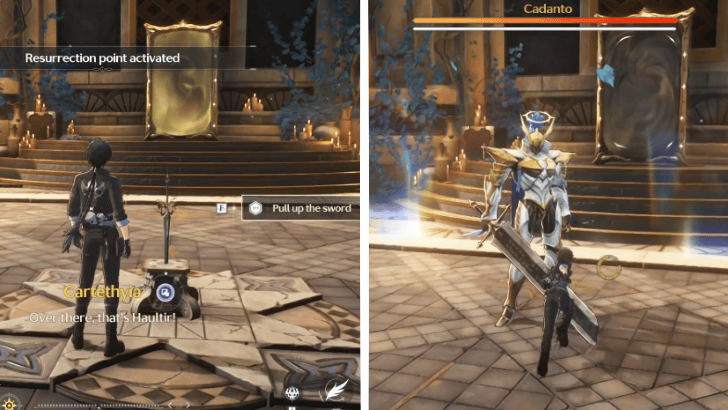 Once you wake up, use the Wingray to fly back to your Gondola and sail through the Knight's Waterways toward the Hall of Swordsmanship: Ruins. When you arrive, pull out the sword Haultir from its pedestal. An enemy named Cadanto will emerge, taking the form of a Capitaneus Echo. Defeat him and teleport using the Door of Utility afterwards. |
| 39 | |
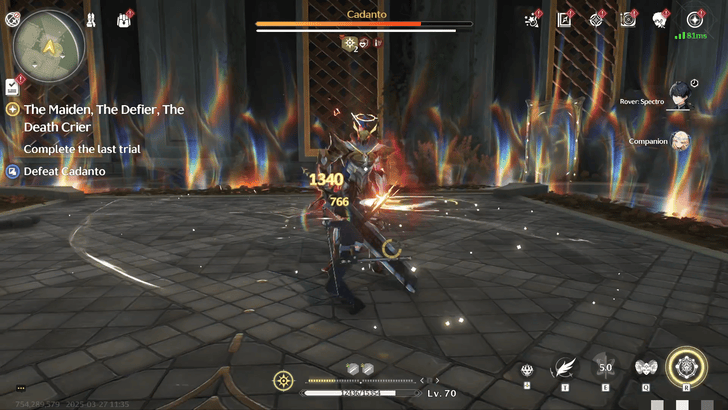 Use the Wingray to reach the Door of Utility. Once you cross through it, you have to defeat Cadanto again. Note that this version of his has two buffs. |
|
| 40 |  Smash the first obelisk by hitting it with a Basic Attack until purple cracks start to form. Head back to the Door of Utility afterwards. |
| 41 |  Same as the first area, defeat Cadanto and two other Tacet Discords. Unfortunately, this Cadanto has four buffs so stay vigilant. Once defeated, you can smash the second obelisk. Reach the third obelisk, by using the Wingray |
| 42 | 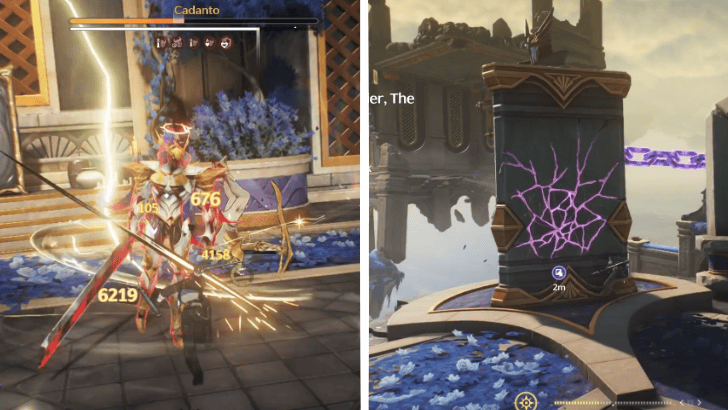 You must defeat Cadanto again, as well as his four Tacet Discord allies. Cadanto is stronger this time around, with his five buffs. After the battle, smash the third obelisk. |
| 43 |  Go through the Door of Utility where you'll face Cadanto with eight buffs. This version has a third of health left paired with a thick shield. Once defeated, smash the fourth and last obelisk. |
| 44 |  Head through the Door of Utility once more where a cutscene will play. Afterwards, you must ride your Gondola to face Cadanto one last time. He is now at full health and equipped with six buffs. Once the battle is over, head through the Door of Utility and place Haultir on the pedestal. |
| 45 | 
Go back through the Door of Utility and ride your Gondola to reach the Path of Bestowal. After the cutscene that'll play you must face Fleurdelys behind the huge door. Her movements will be quick, though don't worry if your Rover's health drops down to zero, as they are meant to be knocked out. A cutscene will play afterwards, where the Rover emerges with a new elemental attunement. With this newfound power, use all of your might to defeat Fleurdelys once and for all! |
| 46 | 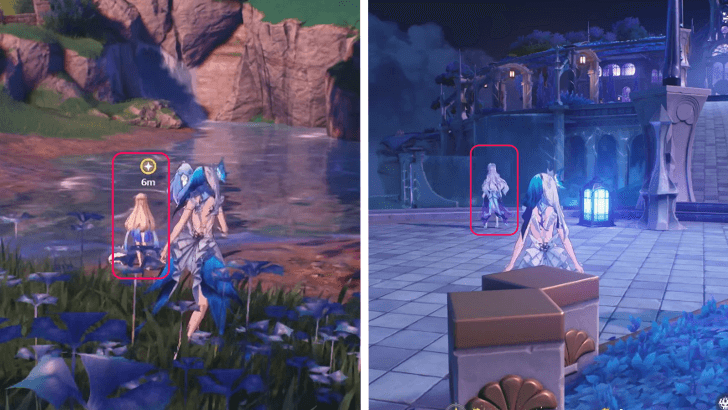 You must talk to Cartethyia after emerging victorious from your battle. Head to Porto-Veno castle one last time and share everything that happened to Cantarella. The quest officially ends after your conversation, giving this quest its rightful conclusion, and allowing you to claim your rewards! |
The Maiden, The Defier, The Death Crier Quest Guide
Act 5: Shadow of Glory
| 1 | Shadow of Glory Walkthrough |
|---|---|

To start the quest, head back to Aviloneum. Use a Wingray or the Flight mechanic to reach up to a floating island to find Cartethyia. |
|
| 2 | 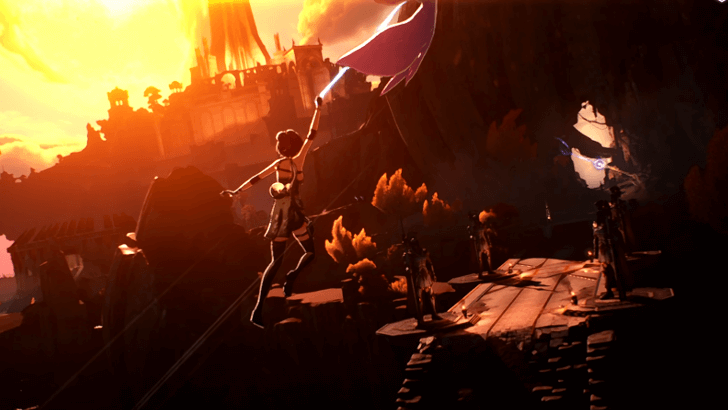
After the cutscene involving Cantarella, ride the Wingray to make your way to Septimont for the first time. This is the only way to unlock the region. You will be blocked through a thick layer of fog if you try to fly to the new region from Beohr Waters before you do this quest. |
| 3 | 
After reaching Septimont for the first time, the story then shifts to Cartethyia in another part of Septimont. Follow the Quick-Time Events to proceed with the story! |
| 4 | 
After Cartethyia's point of view, it returns to Rover. Head towards the nearby town southeast of where you landed. There is also a Resonance Nexus nearby the quest location. Activate it to reveal the first part of Septimont's map! |
| 5 | 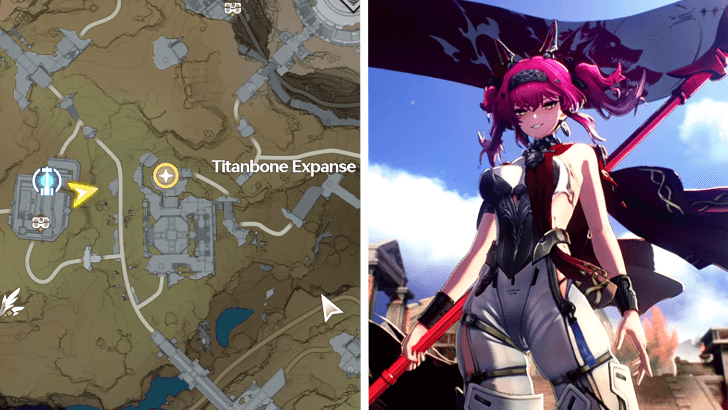
Head straight to the arena found west of the village. After reaching a certain area, a cutscene will play, introducing Lupa in the story for the first time! |
| 6 | 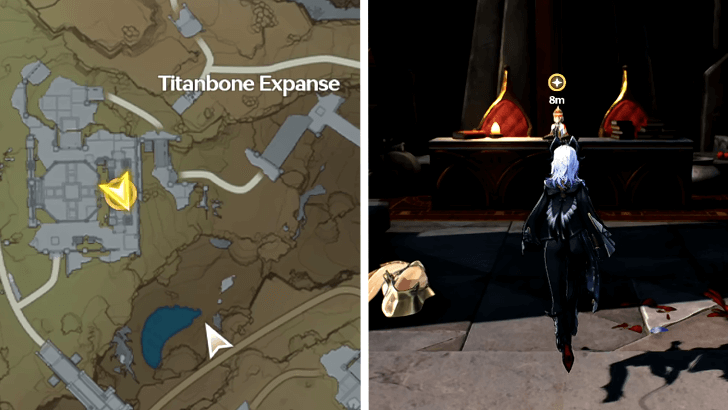
Lupa leaves her old team, the Bough of Legions, to invite you to her new team. Talk to the register near the arena. This is also where you get to pick between three choices for your team name, in which the announcer will call during the arena battles! |
| 7 | |
After registering the team, talk to the nearby assistant to participate in your first qualifier for the Great Agon! |
|
| 8 | 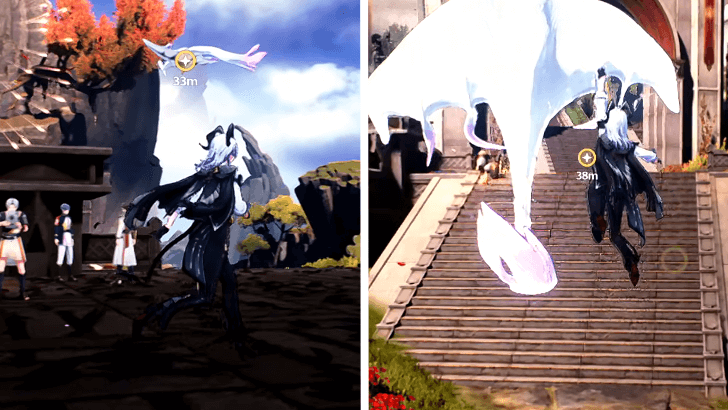
After winning your first special qualifier, ride the Wingray nearby to automatically bring you to the outskirts of the main city. |
| 9 | 
Enter the lower city with the help of the Speed Hoorays, then make your way to the arena northeast from the main entrance. Like in the first qualifier, talk to the nearby assistant to begin the fight. Make sure to activate the nearby Resonance Nexus to open up another part of the map! |
| 10 | |
After winning the qualifiers, follow the path towards the tower, and take the elevator. This should bring you to the top of the tower. |
|
| 11 | 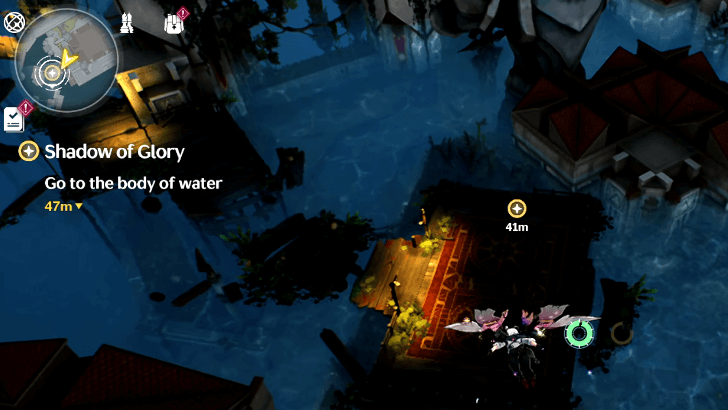
After reaching the top of the tower, drop down and hover to the area near the body of water. |
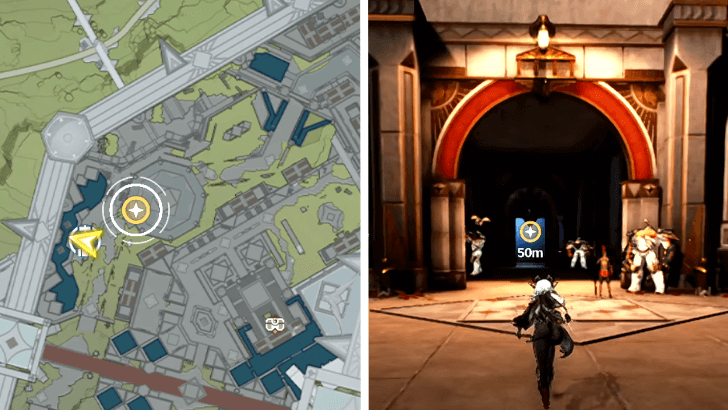
| 12 | 
A Wingray appearas after a short cutscene that will lead you to an elevator. This will bring you to the upper city of Septimont. |
| 13 | 
After arriving in the other city, Lupa invites you to have a meal at the nearby restaurant. Follow along to continue! |
| 14 | 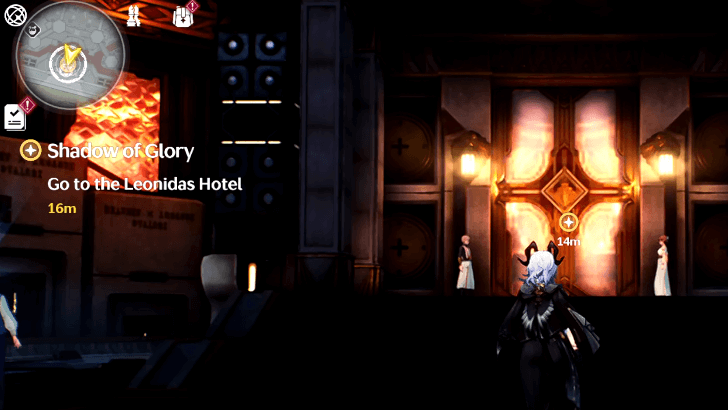
After finally having a meal, Lupa then invites you to rest up in Leonidas Hotel. She happens to own a room due to her status as a Gladiator. |
| 15 |

After entering Leonidas Hotel, you get to rest up for the semi-finals tomorrow. However, Phrolova makes an apperance in your dreams, taunting the Rover about the upcoming dangers they will face in Septimont. |
| 16 | |

After you wake up the next morning, talk to Lupa about today's match. Afterwards, head to the colosseum and participate in the Great Agon semi-finals against Lupa's old team: the Bough of Legions! |
|
| 17 | 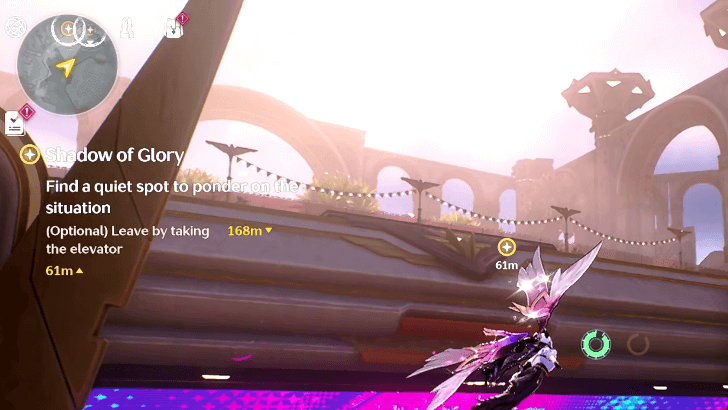
During the semi-finals, Lupa loses control of her spear but still scores the win for your team. After a tense scene involving Augusta, Iuno, and House Sylvia Head Julia, head back up to the upper city overlooking the arena to contemplate on what just happened. You can take the elevator, but it is faster to fly back up there. |
| 18 | |
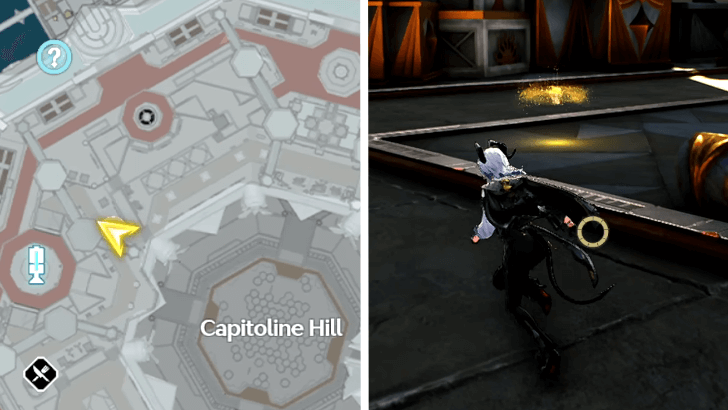 The first location is just nearby where you received the Copper Mirror of Truth. As a guide, it is found northeast from the Capitoline Hill Resonance Beacon. |
|
| 19 |  Head a little south, towards the edge of the arena where the audience would come to watch. It should be right beside the balcony wall. |
| 20 |  Go further south from the second location, until you are just nearby the resaurant you and Lupa just went to. It should be in the middle of the park, and this one triggers a cutscene involving Mya. |
| 21 | 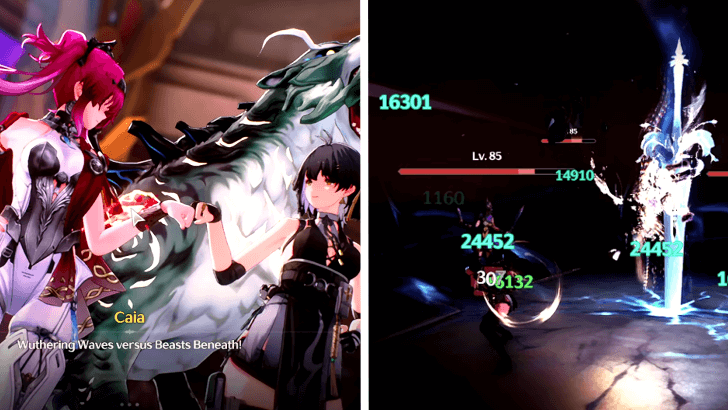 There are two parts to this section. First is the Finals of the Great Agon, where players will most likely fight a Kerasaur for the first time. After lowering the enemy team's HP down to a certain point, the battle will change. Now, you will have to fight multiple Tacet Discords on your own, also involving Gladiators and a Kerasaur. |
| 22 | 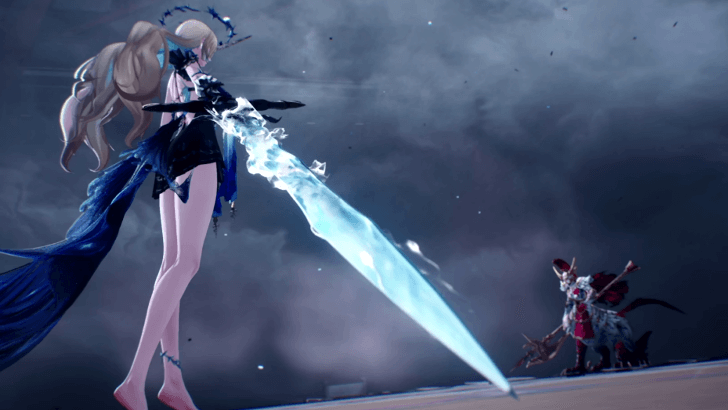 After defeating the waves of Tacet Discords, you get to control Cartethyia by hersel in the fight against the Guardian Echo, Arsinosa! Defeat the Echo to finish the quest! |
Act 6: Flames of Heart
| 1 | Flames of Heart Walkthrough |
|---|---|
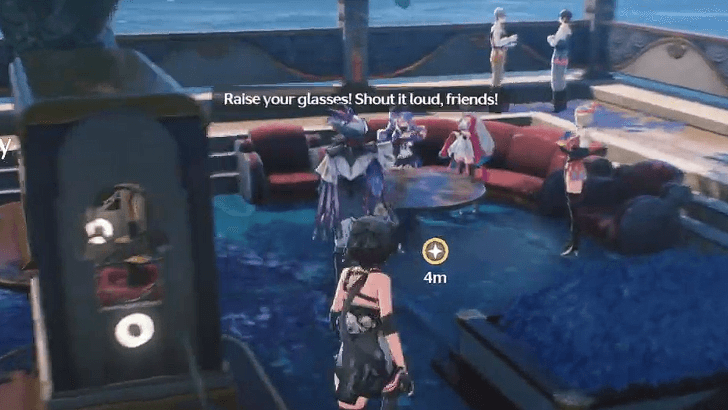
 The story starts at the main arena where the Great Agon takes place. Talk to Lupa and gather information. |
|
| 2 | 
Fly to the Vale of Glory to reach it faster. Defeat the multiple groups of Tacet Discords on the way! The game will also switch to Lupa, so enjoy her while you can. There will also be long but cinematic cutscenes before you can reach the Vale of Glory. |
| 3 | 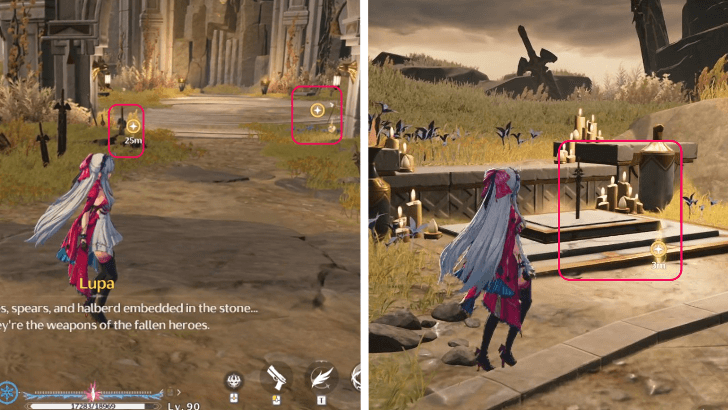 Once you arrive, you have to interact with the glowing yellow lights in front of specific swords. The last one is located at a well-made altar. Interact with it and defeat the Tacet Discords that are summoned! |
| 4 | 
The Recollection of Heroes are three glowing golden helmets scattered in the Vale of Glory. Collect all of them to eliminate the Tidal Blight. Transform into the echo and hold your skill button until the Rend at the center-bottom of your screen is charged! |
| 5 |  You will enter a hidden hub where a series of cutscenes will play. Once you gain control of Lupa, ride the Wingray until you can dive and land in the Old District. |
| 6 | 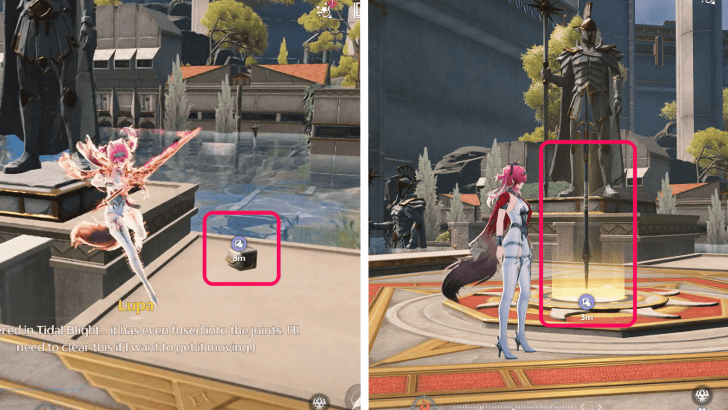 Activate the Patrol Unit, which is the tiny cube in the area. Follow it and interact with the spear it spawns. |
| 7 |  Use the Wingray and defeat the Tacet Discords near the Patrol Unit. Doing so will make the Patrol Unit spawn the spear that can cleanse the Tidal Blight. |
| 8 | 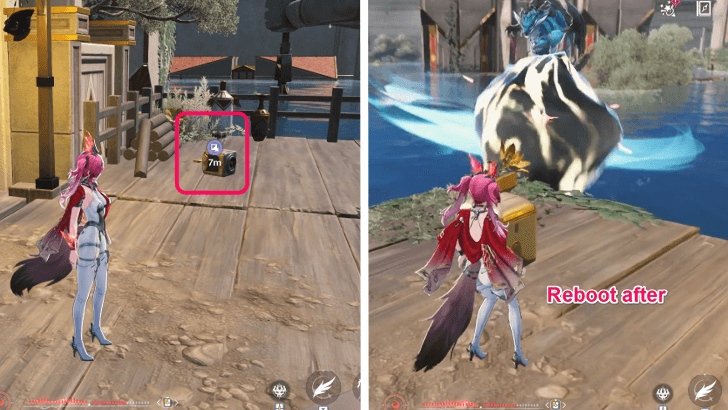 Fly with the Wingray to the next Patrol Unit. As you escort the Patrol Unit, a Kerasaur will ambush you and damage the Patrol Unit. Be sure to reboot it. |
| 9 | 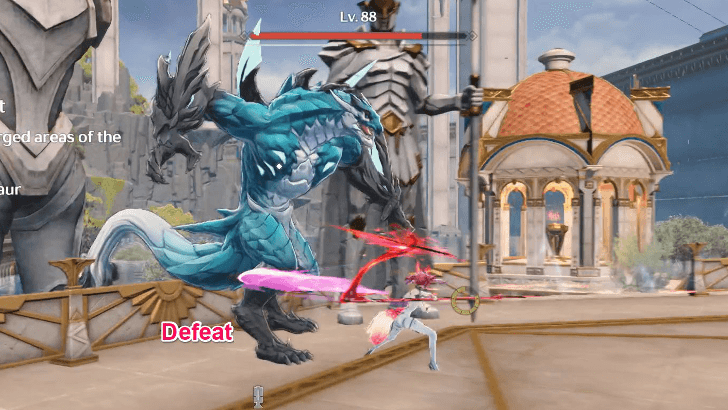 Fight the Kerasaur to give way for the Patrol Unit to spawn the spear that can cleanse the Tidal Blight! |
| 10 | 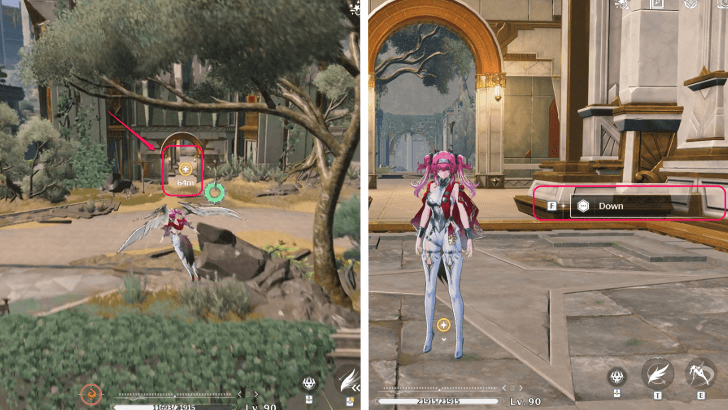 Fly to the Bell Tower and descend to the underground waterways using the elevator. |
| 11 |  Go near the copper mirror and trigger it using your own Copper Mirror of Truth by pressing the Utilitiy Button to open the gates! |
| 12 |  There are still Tacet Discords on the way, so be sure to defeat them! |
| 13 | 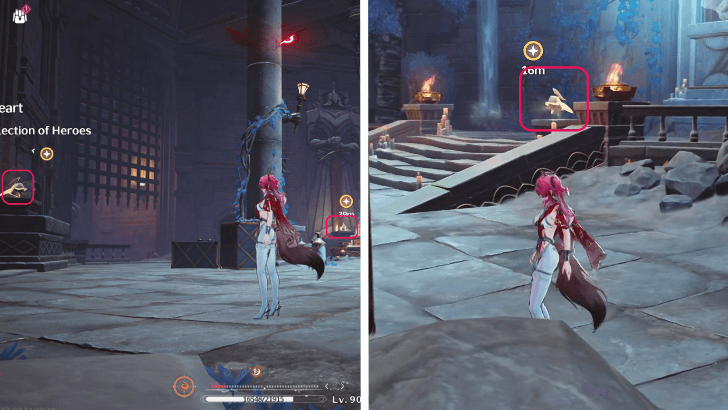 After progressing, there'll be multiple Tacet Discords you have to defeat again. Clearing them will give you space to locate three glowing golden helmets. These should give the warrior echo enough power to eliminate the blight covering the gate. Behind it is another truth you must reveal using the Copper Mirror. |
| 14 | 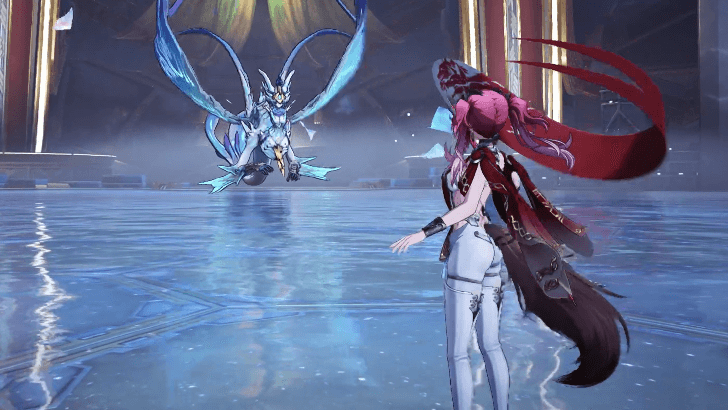
Head to the elevator once the two gates open after a cutscene. Be sure to pass through the quest marker before going down, as this could complicate the objective's progress. After a long set of cutscenes, get ready to defeat the Lady of the Sea using Lupa. |
| 15 | 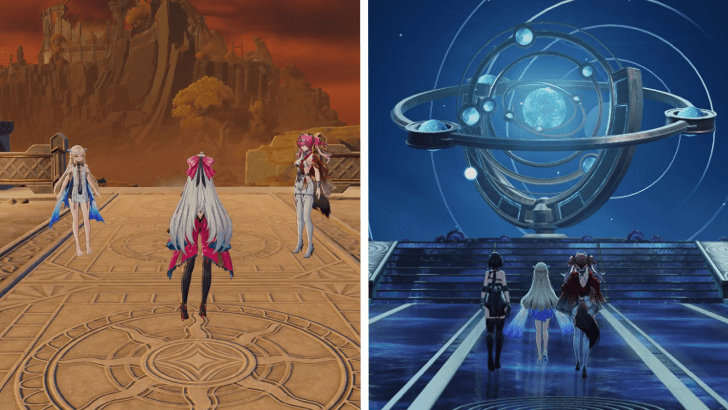 After the intense battle, talk to Cartethyia and Lupa to gather everything you've learned from the journey. Don't be afraid to check all options to gain a better understanding of the events that happened. To continue towards the next chapter, head back to the Central Hub in Vale of Glory. After a long and touching talk, the Flames of Heart quest ends here. |
Act 7: Dreamcatchers in the Secret Gardens
| 1 | Dreamcatchers in the Secret Gardens Walkthrough |
|---|---|
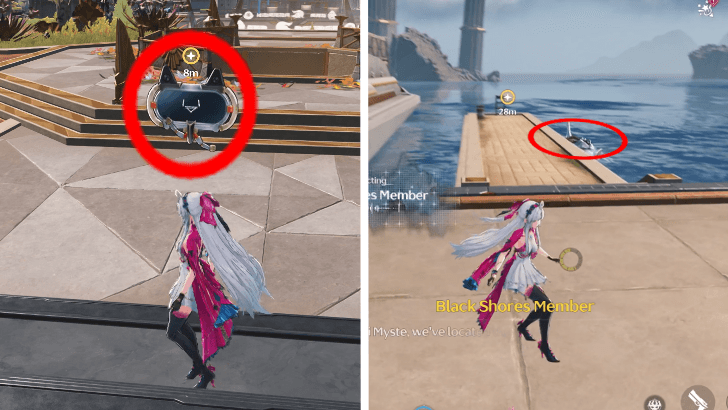 Teleport to the Leonidas Hotel, Septimont, and talk to the Broadcast Echo to start the quest. Afterwards, rush to Titanbone Expanse and ride the Gondola, waiting for you. |
|
| 2 | 
After a long set of cutscenes, use the Orchestration Skill to slow down the lasers and to get past them. There are more lasers up ahead, so be sure to use the Orchestration Skill so it's easier to dodge them. Note that the Orchestration Skill only lasts for 10s. You must stop using it to fill up its bar and use it again. |
| 3 | 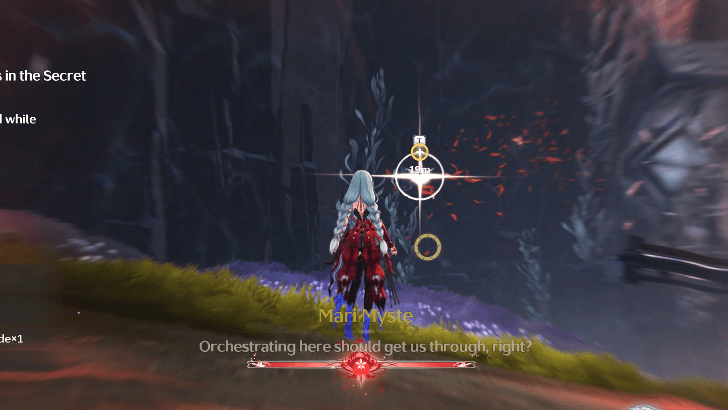
Continue until you see a circular floor. After some cutscenes, use the Orchestration Skill again to get past the lasers. Once you reach the edge of the cliff you are on, you'll learn to use Orchestration to summon grapples. Do this to reach the rail on the other side. Note that you can still grapple from place to place as long as you aim your camera towards it. |
| 4 | 
On the other side, there are Micro Echo Brooders that may push you off the cliff. Slow them down with Orchestration and run as soon as the path is clear. The best time to start Orchestration is when the Brooders are just about to deactivate or retreat backwards. This gives you enough time to reach a safe spot. If you are pushed off, you can always try again. You must do this multiple times as you follow reddish NPCs. |
| 5 | 
Eventually, you'll face a group of Fractsidus that you'll have to defeat with Aero Rover and Phrolova. Then, after talking to Phrolova, slide down until you reach the Music Stand. |
| 6 |  Draw a line from the music note to the number five all while the numbers in between are in an ascending order. This means you'll drag the note to 1,2,3,4 and until you reach 5. This basic concept is crucial for all future Orchestration Altar Puzzles you encounter. Once solved, a gate will open. Swim inside to reach the other side. Be sure to defeat the Fractsidus waiting. |
| 7 | 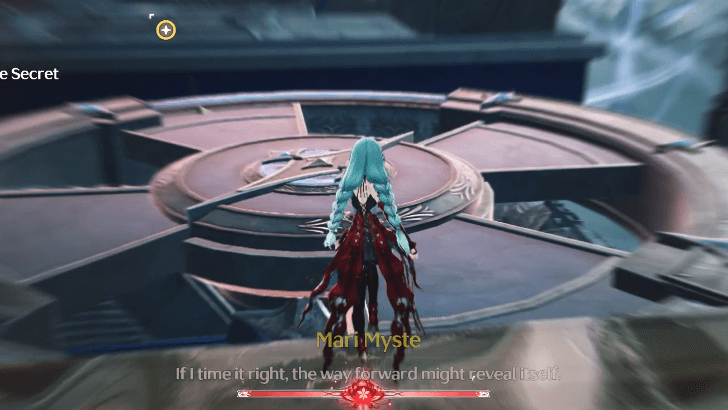
Decide which path you prefer. Either way, you'll eventually have to use the Orchestration to slow down the spinning huge gears. Use them as a bridge to get to the other side. Don't worry if you fail, as you can try again as many times as you need. |
| 8 | 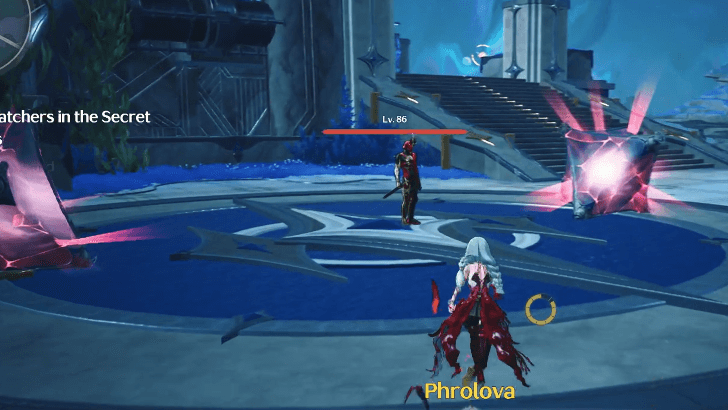 After a few steps ahead, you'll find Echo Brooders. After talking to Phrolova, they will hatch common echoes that you'll have to eliminate. |
| 9 |  After following a red NPC, use the cable to activate the rail, which you'll then use to reach the other side. After a while, you'll find a few spinning gears again, which you use as a bridge thanks to the Orchestration. Keep riding the rails to move forward, and defeat any Tacet Discords on the way. |
| 10 |  You need to ride another rail, but first, you must initiate the cable hidden inside a room guarded by lasers. This can be easily done by slowing down the lasers with Orchestration. There'll be more Tacet Discords waiting on the other side. Head to the Orchestration Altar by riding another set of rails and defeating a Capitaneus on the way. |
| 11 | 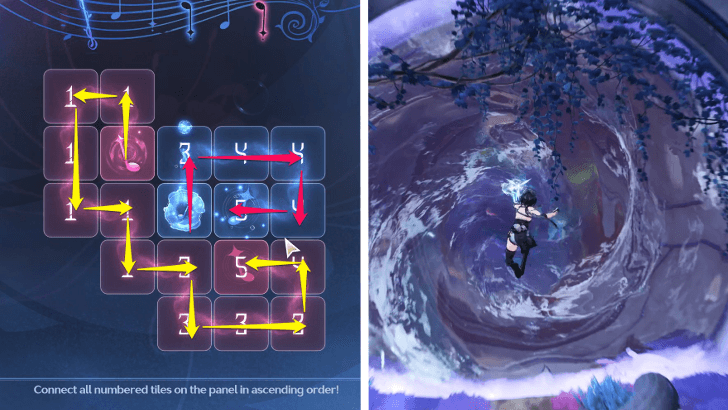 There are two music notes that you have to guide now. Be sure to connect them to the number 5 that has the same color as them. After solving it, and watching a few cutscenes unfold, enter the opened gate and swim across! |
| 12 | 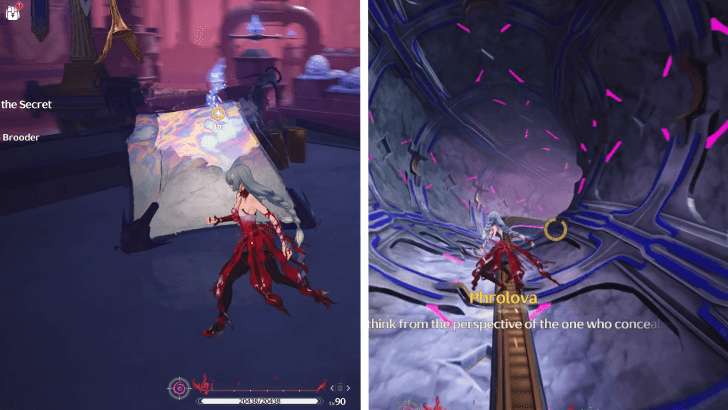 After a long cutscene, be sure to observe the Echo Brooder to the left. Then, head to the Music Stand and deliver the music piece you got from the Echo Brooder. Take the elevator and ride the rails to look for the rest of the music pieces. Be sure to eliminate all the Tacet Discords that spawn from active Echo Brooders. |
| 13 |  Continue into the narrow corridor. Due to unfortunate circumstances, Rover will be separated from Phrolova. Stay vigilant as you continue deeper into the rooms due to the Tacet Discords that will ambush you. After defeating them, continue forward until you can spot and activate a device. The platform will go up and spawn enemies, so be ready! |
| 14 | 
From here, continue going forward until you spot Phrolova. Use the device to push the Tacet Discords. Don't forget to use the device again to push off the Fractsidus,or else they'll attack Phrolova. |
| 15 | 
Examine the three monitors in question. This should open the door to another room that's guarded by Tacet Discords. Be sure to defeat them first. Continue moving forward until you can spot and grab the music piece on the pedestal. |
| 16 | |
 Without her weapon, Phrolova is forced to sneak around. Grapple to the hidden upper left room to avoid enemies. |
|
| 17 | 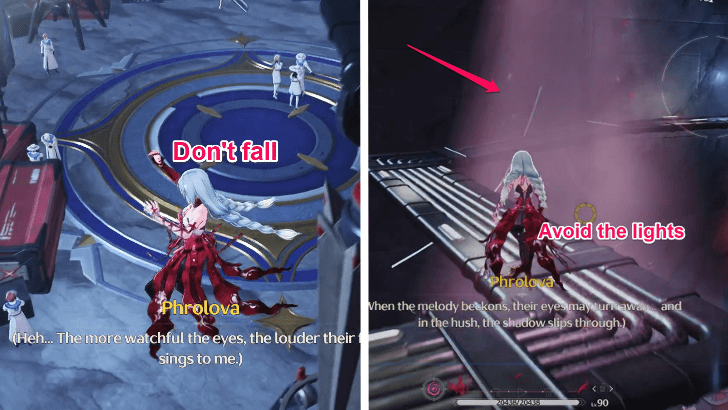 Walk carefully along the pipes. You can run, but if you fall, you'll have to restart again. Be sure to avoid the lights as well! |
| 18 | Destroy the device. This should get everyone's attention, giving you a chance to escape to the next room. Activate the device inside. |
| 19 | |
 Grapple out of the room. |
|
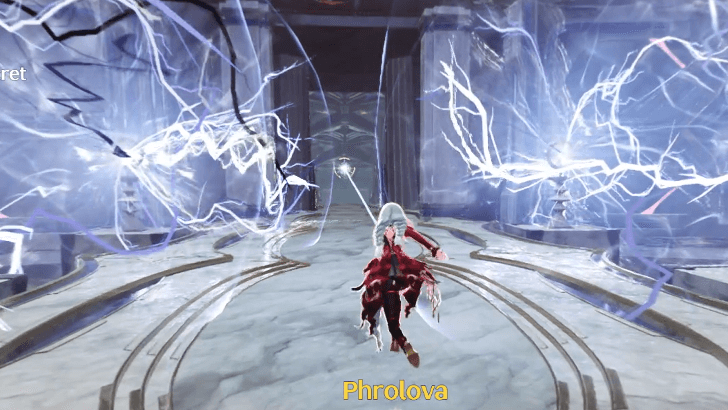
| 20 | 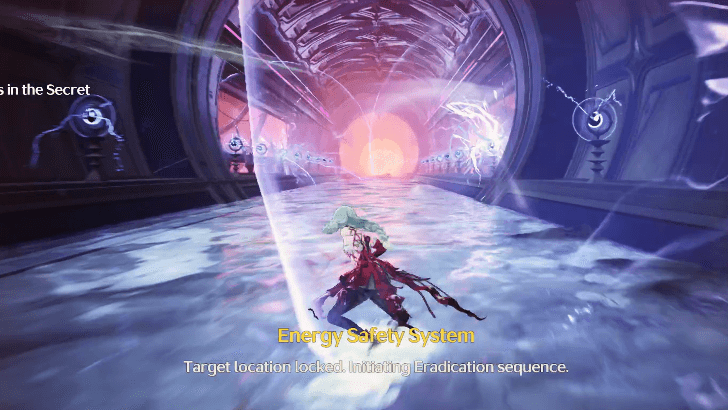 Dodge the dangerous electrifc spheres. This doesn't restart the scene but it'll damage Phrolova. |
| 21 |  Grapple to the rails and jump your way out! |
| 22 | 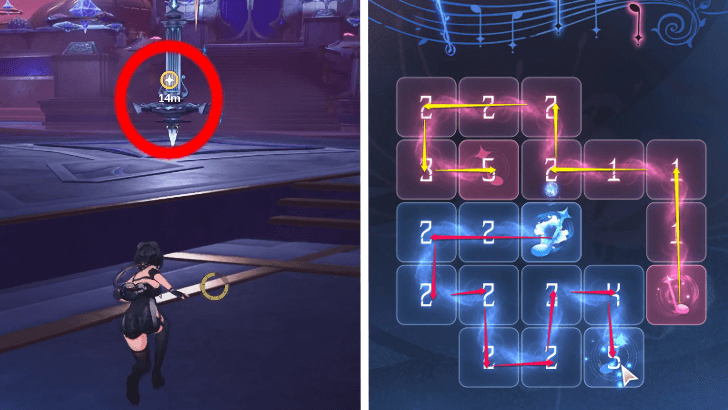 Head to the Music Stand and put all the Music Pieces. Solve the Orchestration Altar puzzle after. This should open a new gate where you can swim through. |
| 23 | |
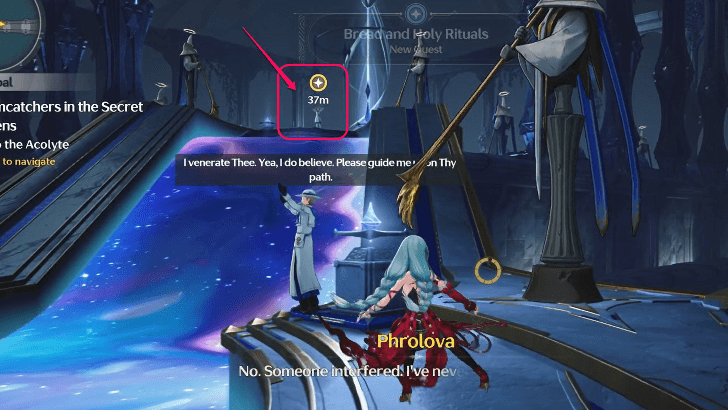 When you arrive at the Sanctuary of Faith, keep moving forward until you can talk to an Acolyte. |
|
| 24 |
 Follow what the other Acolytes are doing. The order would be pray, kneel, then raise your hands. The required action would be |
| 25 |  You'll be transported to another place that has an unstable path. Use the Orchestration Skill to freeze the blocks and create a usable bridge forward. Be sure to run as fast as you can towards the red gate, as the skill only lasts for 10s. In the next room, you'll have to investigate the file on the table and defeat the enemies on the lower level. |
| 26 | 
On the other realm, defeat the enemies until you reach the villagers. Head to the house ahead and investigate the two books inside. When you come out, check on the passive Tacet Discords. Afterwards, head to the well on the right. |
| 27 | 
Once you grab the violin, you'll be transported to another place. There are over 3-4 doors you must enter, which shows more about Phrolova's past. The very last would be the room behind the curtain. Once you finish your performance, head to Rover. |
| 28 | |
 Defeat the Tacet Discords at the start first. Afterwards, grapple towards Fenrico with the help of the Orchestration Skill. |
|
| 29 |  During the Fenrico battle, keep hitting his defensive barrier to drain the lower white bar. Don't forget to dodge all incoming attacks. Once the barrier breaks, deal your best combos as Fenrico is vulnerable! |
| 30 | 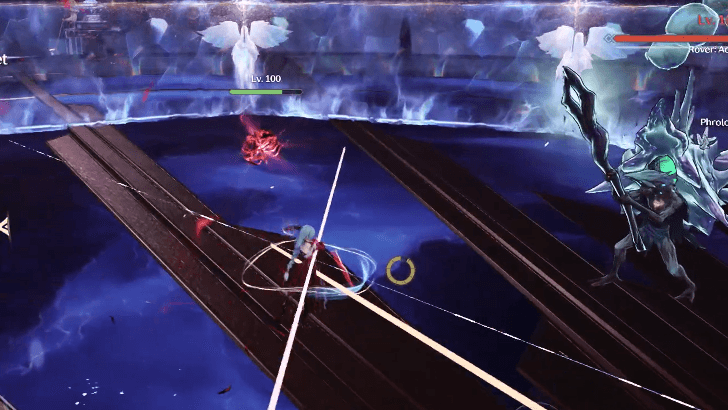 Fenrico will imprison you with a bunch of Tacet Discords. Defeat them and make sure they don't interrupt Phrolova charging up! |
| 31 |  Afterwards, rush to the golden defensive barrier Phrolova made to avoid a huge attack from Fenrico. Using Phrolova's barrier will also spawn a spinning attack that'll almost instantly drain Fenrico's white barrier. This means you can make Fenrico vulnerable even faster. |
Dreamcatchers in the Secret Gardens Guide
Act 8: By Sun's Burning Hand
| 1 | Dreamcatchers in the Secret Gardens Walkthrough |
|---|---|
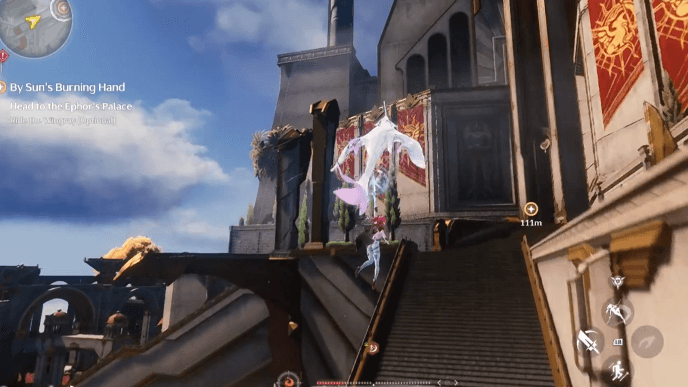
To start the quest, go to the Leonidas Hotel in Capitoline Hill and head over to Ephor's Palace to look for Augusta. Afterwards, leave Ephor's Palace to go to Tempest Cliffs. |
|
| 2 | 
In the Tempest Cliffs, interact with Avidius and follow him until you reach the top. You will fight the Corrosaurus after. |
| 3 | 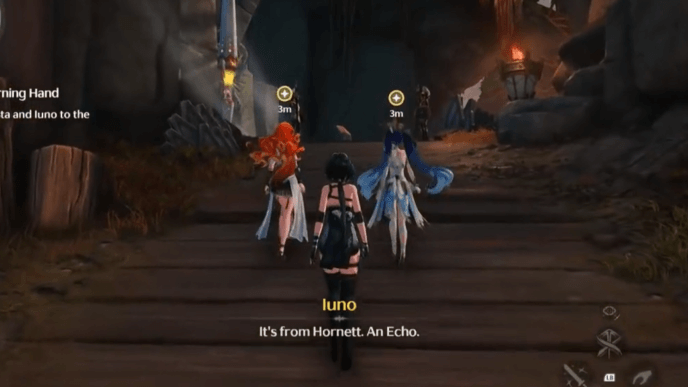
Follow Augusta and Iuno into the Hunter's Den. Walk around the Hunter's Den to listen in on some Gladiator conversations. After listening to all conversations, take the Wingray to the Tetragon Temple. |
| 4 | 
Enter the Tetragon Temple and interact with the murals by the entrance walls. After examining the large mural, talk to the lady holding a candelabra and then meet up with Augusta outside. |
| 5 | 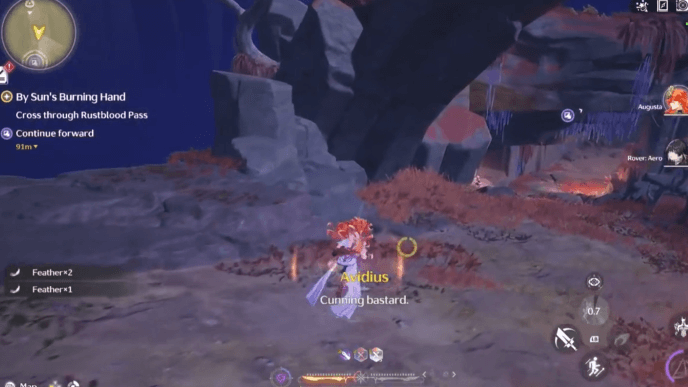
Move forward to cross the Rustblood Pass. You will have to avoid fireballs and fight some Tacet Discords along the way. Hide behind the pillars to protect yourself from the fireballs. Keep moving toward the marker to place the Anchor Stone into the Obelisk through quick-time events. |
| 6 | 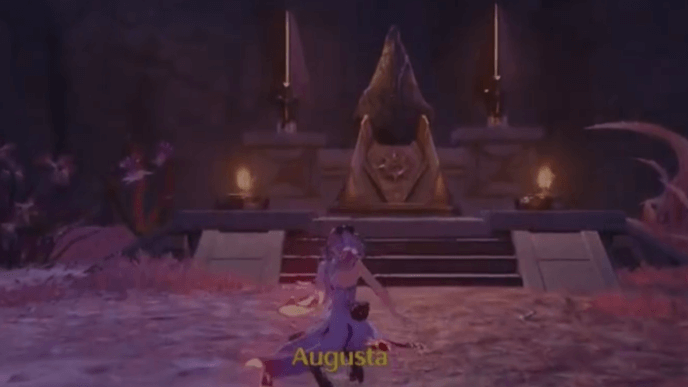 Use the Utility: Sensor to locate the Corrosaurus and follow the trail. There will be Tacet Discords on the way, Move forward and avoid the Corrosaurus' attacks on the way to the second and third Obelisks. You will head over the Asphodel Barrens to fight the Corrosaurus and then use the Utility: Sensor to track it down. |
| 7 | 
Head to the temporary camp to talk to Iuno and then head to the main tent to talk to Augusta. You can talk to Avidius before heading over to Augusta. Afterwards, ride the Wingray nearby to Murmurstown. |
| 8 | 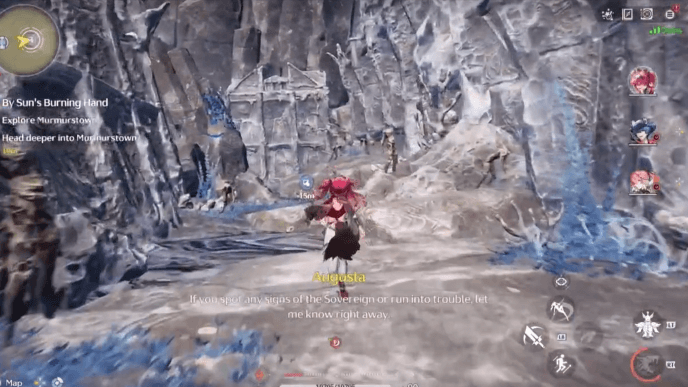 Move forward towards the path in Murmurstown and catch up with the mysterious light spark. Defeat the Tacet Discords along the way and avoid the Hollow Figure explosions. |
| 9 | 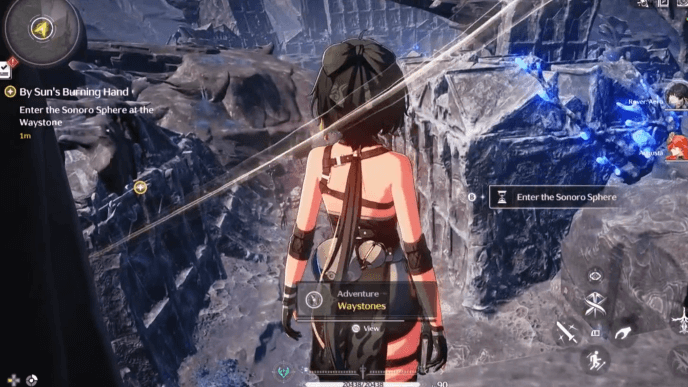 Enter the Sonoro Spheres to interact with the phantoms. You will have to do this a couple of times and enter the Oak Hollow. |
| 10 |  Follow the coordinates and go to it to fight the False Sovereign. |
| 11 | 
Go tot he Earthrend Wedge through the Anchor Stone. You can talk to Avidius before interacting with the Anchor Stone. After interacting with the Anchor Stone, pass through Murmurstown and defeat the Tacet Discords along the way. |
| 12 | 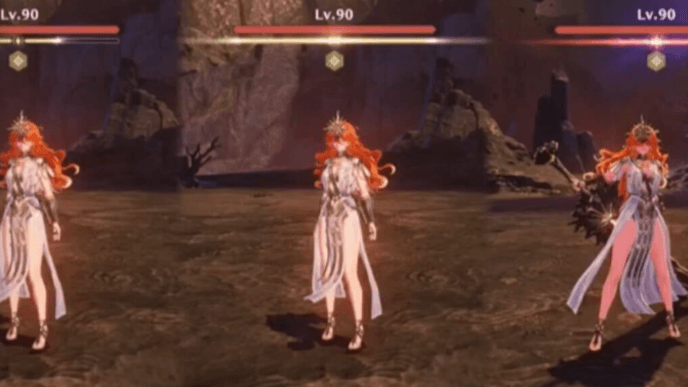 Defeat Augusta using the Aero Rover. Save your Resoannce Liberation until Augusta's Momentum bar turns red to cancel a powerful attack. After defeating Augusta, you will have to fight the False Sovereign again with Augusta and the Aero Rover. Retrieve the Imperator's Relic to complete the quest!. |
Wuthering Waves Related Guides

List of Quest Types
| All Quest Types | |
|---|---|
| Main Quests | Companion Stories |
| Exploration Quests | Side Quests |
| Tutorial Quests | Daily Quests |
| Hidden Quests | - |
Main Quest Walkthrough
Comment
Author

Chapter 2 Even When Divinity Remains Silent Walkthrough
Please participate in our site
improvement survey
03/2026
improvement survey
03/2026
Would you assist in
improving Game8's site?
improving Game8's site?

×
We are listening to our users' valuable opinions and discussing how to act on them.
The information collected through this survey will be used for the purpose of improving our services. In addition, the information will only be disclosed a part of a statistic in a format that will not allow identification of personal information.
Begin Survey
Not Now
×
Please rate each item regarding Game8.co's Advertisements.
Amount of Ads
Very Dissatisfied
Somewhat Dissatisfied
Fine
Somewhat Satisfied
Highly Satisfied
Placement of Ads
Timing of Ad Display
Ad Loading Speed
Safeness of Ads
Content of Ads
×
Please rate each item regarding Game8.co's Quality of Articles.
Amount of information
Very Dissatisfied
Somewhat Dissatisfied
Fine
Somewhat Satisfied
Highly Satisfied
Frequency of updates
Speed of new information
Accuracy of articles
Understandibility of articles
Readability of sentences
×
Please rate each item regarding Game8.co's Usability of the Site.
Ease of finding information
Very Dissatisfied
Somewhat Dissatisfied
Fine
Somewhat Satisfied
Highly Satisfied
Loading Speed
Use of Color
Font Size
Visibility of Images
Easy to Understand Layout
×
Please rate each item regarding Game8.co's Message Boards, Comments.
Ease of Writing
Very Dissatisfied
Somewhat Dissatisfied
Fine
Somewhat Satisfied
Highly Satisfied
Readability
Ease in Finding Information
Comment Quality
Comment Quantity
Admin Response
×
Please rate each item regarding Game8.co's Site's new design.
Please rate our site's new design
Very Dissatisfied
Somewhat Dissatisfied
Fine
Somewhat Satisfied
Highly Satisfied
Do you think that the website's design change makes the site easier to use?
Has the new design made it easier for you to find information on the site?
Has the new design improved the overall visual appeal of the site?
How would you rate your overall satisfaction with the new design of the site?
×
How likely are you to recommend Game8 to someone you know?
Very Unlikely
0
1
2
3
4
5
6
7
8
9
10
Very Likely
If you have other opinions regarding potential improvement to the website, please share them with us. We would appreciate your honest opinion.
Note: This is a free response section, so you can proceed without entering anything.
Note: Please be sure not to enter any kind of personal information into your response.
Note: Please be sure not to enter any kind of personal information into your response.
×
Thank You
×
Thank you for participating in our survey! Your answers will help us to improve the quality of our website and services.
We hope you continue to make use of Game8.
We hope you continue to make use of Game8.
Close
Premium Articles

Rankings
- We could not find the message board you were looking for.

Gaming News


![Monster Hunter Stories 3 Review [First Impressions] | Simply Rejuvenating](https://img.game8.co/4438641/2a31b7702bd70e78ec8efd24661dacda.jpeg/thumb)
Popular Games

Genshin Impact Walkthrough & Guides Wiki
Honkai: Star Rail Walkthrough & Guides Wiki
Umamusume: Pretty Derby Walkthrough & Guides Wiki
Pokemon Pokopia Walkthrough & Guides Wiki
Resident Evil Requiem (RE9) Walkthrough & Guides Wiki
Monster Hunter Wilds Walkthrough & Guides Wiki
Wuthering Waves Walkthrough & Guides Wiki
Arknights: Endfield Walkthrough & Guides Wiki
Pokemon FireRed and LeafGreen (FRLG) Walkthrough & Guides Wiki
Pokemon TCG Pocket (PTCGP) Strategies & Guides Wiki


Recommended Games
Diablo 4: Vessel of Hatred Walkthrough & Guides Wiki
Cyberpunk 2077: Ultimate Edition Walkthrough & Guides Wiki
Fire Emblem Heroes (FEH) Walkthrough & Guides Wiki
Yu-Gi-Oh! Master Duel Walkthrough & Guides Wiki
Super Smash Bros. Ultimate Walkthrough & Guides Wiki
Pokemon Brilliant Diamond and Shining Pearl (BDSP) Walkthrough & Guides Wiki
Elden Ring Shadow of the Erdtree Walkthrough & Guides Wiki
Monster Hunter World Walkthrough & Guides Wiki
The Legend of Zelda: Tears of the Kingdom Walkthrough & Guides Wiki
Persona 3 Reload Walkthrough & Guides Wiki


All rights reserved
Copyright© 2024-2025 Kuro Games. All Rights Reserved.
The copyrights of videos of games used in our content and other intellectual property rights belong to the provider of the game.
The contents we provide on this site were created personally by members of the Game8 editorial department.
We refuse the right to reuse or repost content taken without our permission such as data or images to other sites.