Divine Beast Dancing Lion Weakness and Locations | Best Build Against Dancing Lion
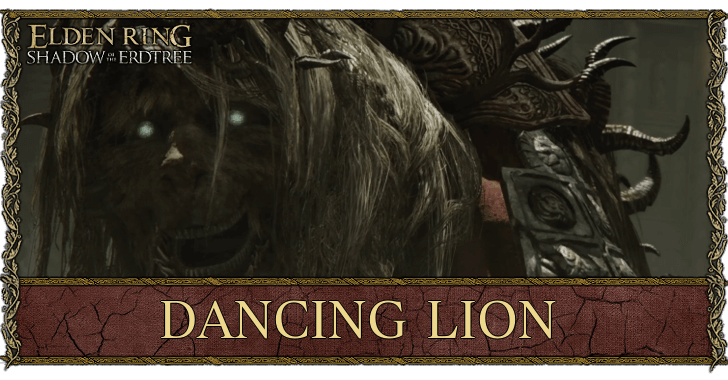
This is a guide for the Divine Beast Dancing Lion in the Elden Ring DLC Shadow of the Erdtree. Learn about the Divine Beast Dancing Lion's weakness and locations, as well as the best build against the Dancing Lion.
List of Contents
Divine Beast Dancing Lion Weakness
Pierce Damage is Highly Effective
Divine Beast Dancing Lion is very weak to attacks that deal Pierce damage compared to the other three physical damage types. Weapons with movesets that deal Pierce damage, such as Heavy Thrusting Swords and Great Spears, are excellent armaments against the Lion.
Weak to Fire Damage
Fire damage is slightly stronger against the Divine Beast Dancing Lion compared to the other elemental damage types. Apply Fire Grease, or use weapons like the Blasphemous Blade, Rivers of Blood and the DLC-exclusive Fire Knight's Greatsword that have both innate Fire damage and Pierce damage moves, to exploit his weaknesses.
Spellcasters, especially FAI builds, have several fire damage spells, such as Giantsflame Take Thee and Fire Serpent, that are perfect for slowly and surely burning the Lion to cinders.
Susceptible to Bleed, Poison and Scarlet Rot
The Dancing Lion is highly susceptible to certain debuffs, specifically Bleed, for bursts of damage, and Poison and Scarlet Rot for DoT. Using or infusing weapons with affinities that inflict Bleed or Fire are great choices for dealing the highest amount of damage per hit. The Antspur Rapier is an especially good choice, since it both builds up Scarlet Rot and deals Pierce damage.
Ranged players can use Rotbone Arrows or Poisonbone Arrows to safely cause the Lion to die to damage over time. For Bleed spellcasters, Impenetrable Thorns and Swarm of Flies are reliable ways of procing Blood Loss.
Best Builds Against Divine Beast Dancing Lion
Pierce Weapons are Highly Recommended
STR builds can rely on either pure physical Pierce damage or a split with Fire damage to penetrate the Dancing Lion's defenses. The Messmer Soldier's Spear is one of the best farmable Great Spears with Ash of War flexibility, but there are similarly good options from base game like the Lance and Godskin Stitcher.
Hybrid ARC builds also have great Pierce weapon choices to deal good damage while accumulating Bleed. The Bloody Helice and Mohgwyn's Sacred Spear are the prime selections for DEX-ARC or STR-ARC builds, respectively.
DEX builds will rely more on fast attacks to stack Poison and Scarlet Rot. Antspur Rapier and Venomous Fang can quickly accumulate each of these statuses, but the Milady is a very flexible alternative that can also be affixed with Poison using the Black Whetblade (or can be built for Bleed or physical damage instead).
Equip Talismans for Skill and Attack Power Buffs
 Lord of Blood's Exultation Lord of Blood's Exultation |
 Kindred of Rot's Exultation Kindred of Rot's Exultation |
Several talismans can be equipped to gain attack buffs depending on your playstyle and how reliant your build will be on Bleed, Poison or Scarlet Rot.
For fighting Dancing Lion, Shard of Alexander is a must-pick for Ash of War spammers, while the Lord of Blood's Exultation and Kindred of Rot's Exultation will be invaluable boosts to your attack power once you proc Bleed, Poison, or Scarlet Rot.
Fire Damage is Viable Versus the Lion
|
|
|
Aside from Pierce weapons, targetting the Dancing Lion's weakness to fire is a highly recommended build strategy. One of the strongest weapons for STR-FAI builds is the Blasphemous Blade, which deals high damage by spamming its Ash of War and can be further boosted by the DLC-exclusive Talisman of the Dread.
Pure STR build weapons, like the Greatsword and Giant-Crusher, can be affixed with Fire affinity while still retaining good scaling in STR. Or, they can be infused with the Bloodflame Blade incantation for both fire damage and bleed buildup.
DEX builds have especially good choices with Eleonora's Poleblade and Rivers of Blood, as they have innate bloodflame that allows them to rapidly deal fire damage and build up bleed.
Cast Fire, Bleed, Poison, or Scarlet Rot Spells
 Magma Shot Magma Shot
|
|
|
|
|
Casters have several spells to deal effective ranged damage against the Dancing Lion, and the boss' attack windows are long enough to cast them safely. For direct Fire damage, Magma Shot and Frenzied Burst are consistent and quick damage-dealers.
If your focus is on status effects, then Swarm of Flies and Ekzykes's Decay are reliable incantations to proc Bleed and Scarlet Rot.
Use Talismans and Armor for Physical and Non-Physical Damage Negation
 Pearldrake Talisman +2 Pearldrake Talisman +2 |
 Scaled Armor Scaled Armor |
The Divine Beast Dancing Lion will regularly cycle between different phases that focus on physical, lightning, cold, and storm damage. Early into the DLC, the most flexible talismans you can equip to negate every type of damage it can do will be the Pearldrake Talisman +2, Dragoncrest Greatshield Talisman, and the Scaled Armor set.
Cast Incantations and Ashes of War for Further Defense Buffs
 Golden Vow Golden Vow
|
|
For defensive spells, Golden Vow is the most reliable incantation or Ash of War to cast for general damage negations. To specifically resist the Dancing Lion's lightning phase attacks, Golden Lightning Fortification provides hefty lightning damage negation.
Equip and Use Items That Resist or Cure Death Blight For the Rauh Ruins Lion
 Rejuvenating Boluses Rejuvenating Boluses |
 Order Healing Order Healing
|
 Speckled Hardtear Speckled Hardtear |
 Prince of Death's Cyst Prince of Death's Cyst |
For the Dancing Lion in Rauh Ruins, try taking consumables or equipment that resist or cure the annoying Death Blight status inflicted by the boss and its Basilisk summons. If you have high Vitality from your ARC, you may not need these items, since Vitality increases your resistance to Death Blight.
To cure Death Blight buildup, memorize the Order Healing incantation or craft Rejuvenating Boluses beforehand. For Death Blight resistance, consider equipping the Prince of Death's Cyst to greatly raise Vitality, or drink Wondrous Physick with Speckled Hardtear to both cure Death Blight and increase your resistance to all statuses for the rest of the fight.
Specific Recommended Build: DoT and Stance Break Build
| Main Hand Weapon | Off-Hand Weapon | ||||||||
|---|---|---|---|---|---|---|---|---|---|
Skill: Impaling Thrust |
Skill: Repeating Thrust |
||||||||
| Character Stat Distribution | |||||||||
| VIG | 60 | MND | 20 | ||||||
| END | 30 | STR | 54 | ||||||
| DEX | 20 | INT | 9 | ||||||
| FAI | 25 | ARC | 25 | ||||||
Stats above are based on Confessor class's stat distribution at RL 164.
The DoT and Stance Break Build is a damage-focused STR-ARC build that targets three of the Dancing Lion's weaknesses: Scarlet Rot, Poison, and Pierce damage.
To maximize our damage, we will be affixing Poison affinity on the Antspur Rapier, which comes with innate Scarlet Rot buildup and will be able to proc both types of DoT. Then, our primary physical damage dealer will be a Heavy-affixed Messmer Soldier's Spear with Impaling Thrust to deal significant Pierce and poise damage for easy stance breaks.
Equip Armor and Talismans for Damage and Protection
| Helm | Armor | Gauntlets | Greaves |
|---|---|---|---|
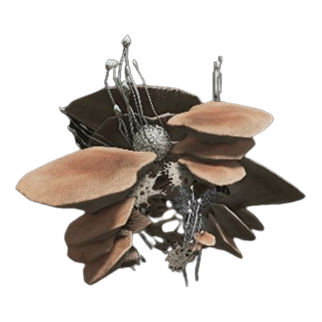 Mushroom Head Mushroom Head |
 Scaled Armor Scaled Armor |
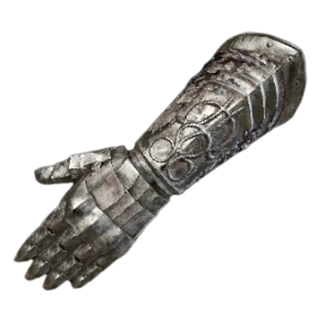 Scaled Gauntlets Scaled Gauntlets |
 Mushroom Legs Mushroom Legs |
| Talismans | |||
 Kindred of Rot's Exultation Kindred of Rot's Exultation |
|||
Your armor and talismans for this build will balance attack buffs and damage negation. Shard of Alexander will boost both your Ashes of War, and Rotten Winged Sword Insignia will specifically enhance Repeating Thrust. The Mushroom Head and Kindred of Rot's Exultation will enhance your attack power after you proc Poison or Scarlet Rot.
For defense, equip the Dragoncrest Greatshield Talisman and Scaled Armor pieces to negate incoming physical and non-physical damage. The Mushroom Legs are just equipped so you can still medium roll; they provide minimal defenses.
Proc Poison and Scarlet Rot for DoT and Damage Buffs
The gameplay clip above was recorded in NG+ at Scadutree Blessing Level 20.
Open the fight by quickly applying Poison and Scarlet Rot to the Lion with a Poison affinity Antspur Rapier via a combination of normal attacks and Repeating Thrust. The damage of Repeating Thrust can be boosted further by the Thorny Cracked Tear.
Spam Impaling Thrust for Big Pierce and Poise Damage
The gameplay clip above was recorded in NG+ at Scadutree Blessing Level 20.
After your DoTs have been procced, spam Impaling Thrust for the rest of the fight to deal heavy Pierce and poise damage while Poison and Scarlet Rot eat away at the Dancing Lion's HP. For faster stance breaks, make sure you have the Stonebarb Cracked Tear in your Wondrous Physick.
Divine Beast Dancing Lion General Tips (Belurat Settlement)
| Tips for Beating Divine Beast Dancing Lion (Belurat Settlement) | |
|---|---|
|
|
|
| Available Summons | ・Redmane Freyja ・Spirit Ashes |
Collect Scadutree Blessings Before the Fight
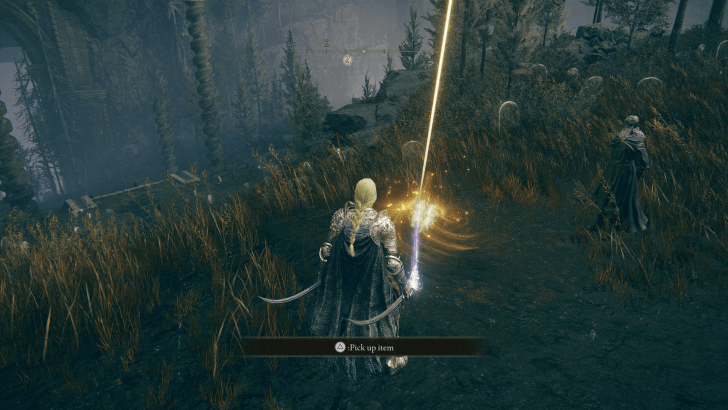
The Dancing Lion is likely the first Remembrance boss you will tackle due to how close it is to the start of the DLC. But, even with a high character level, it will be tough to deal damage to and take damage from it until you have upgraded your Scadutree Blessing level.
Collect Scadutree Fragments around the map before tackling this boss, up to at least Scadutree Blessing Level 3, to improve your odds of survival.
All Scadutree Fragment Locations
Adapt to the Lion's Elemental Phases
The Dancing Lion's main gimmick is when it jumps into the air to change its elemental phase. The most important part of fighting Dancing Lion is keeping track of the Dancing Lion's four phases and each phase's unique ranged attacks, which vary in terms of speed and AoE.
Memorize the Lion's Delayed Attacks
Dancing Lion's melee strings aren't too long, but they can be a bit annoying to dodge due to its tendency to delay attacks, like its dive rolls, to catch you if you roll spam. Stay composed and get used to the rhythm of the Dancing Lion's combos to exploit its highly telegraphed moveset.
Use Spirit Ashes and Summons to Draw Aggro
The Dancing Lion's attacks are a mix of single target and small AoE moves, but they are heavily focused on locking down single targets rather than widespread arena coverage. Take advantage of Redmane Freyja's NPC summon or your own Spirit Ashes to attract aggro so you can attack with impunity.
Divine Beast Dancing Lion General Tips (Rauh Ruins)
| Tips for Beating Divine Beast Dancing Lion (Rauh Ruins) | |
|---|---|
|
|
|
| Available Summons | ・Spirit Ashes |
Fights Similar to the Other Lion
This Divine Beast Dancing Lion fights similarly to the one in Belurat Settlement, but does not go into a lightning phase, making this a somewhat easier variant to fight.
Use the Pillars as Cover
Unlike the Belurat Settlement fight, this one takes place in an open area where you are free to retreat behind cover. As such, if you need some breathing space against the Lion, try putting a pillar between both of you.
This will cause the Lion to bump into the pillar during his attacks, giving you the chance to retaliate safely once his attack string is done.
Focus Down the Basilisks
When the Lion drops down near 50% HP, he will scream and summon for some Basilisks to appear at his position. These extra enemies usually are not anything special, and can be taken out quickly.
While these opponents are easy to kill, they should not be ignored as they can either be a nuisance during the fight, or can inflict Death Blight, which will automatically kill you, so try to focus them down quickly to prevent this.
Use Spirit Ashes to Draw Aggro
With the addition of more enemies to look out for during the fight at the half-time mark, using your Spirit Ash to draw the Lion's aggro while you take out the small enemies is highly beneficial.
This can give you a much-needed breather in an otherwise hectic fight, or give you the space needed to focus down the summoned foes.
Divine Beast Dancing Lion Locations
| Boss | Location and Rec. Level |
|---|---|
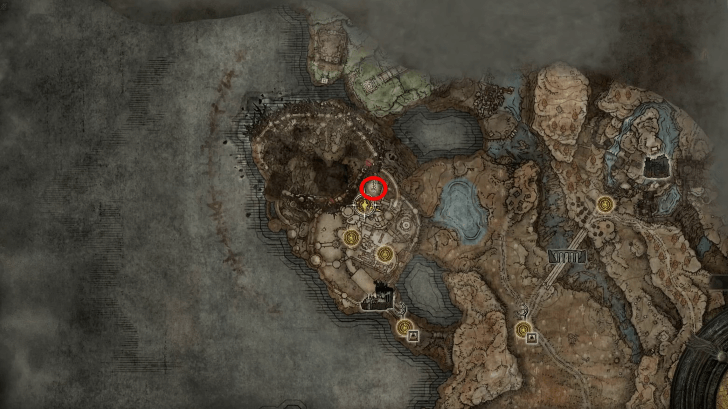 |
Rec. Lvl.: 150+
Location: Stagefront Where to Find: Optional Remembrance boss in the arena by the Stagefront site of grace, at the end of the Belurat legacy dungeon. |
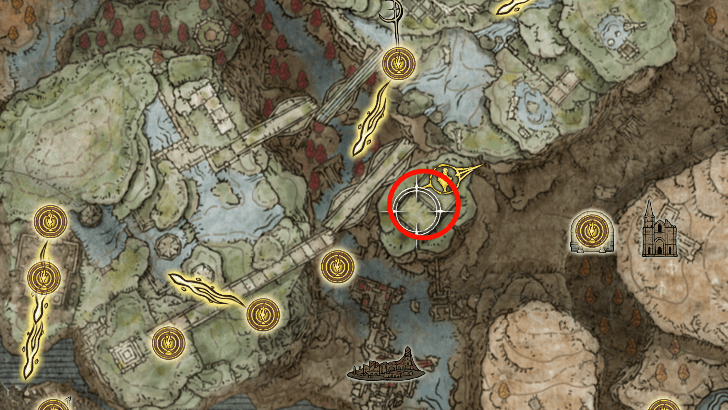 |
Rec. Lvl.: 170+
Location: Ancient Ruins, Grand Stairway Where to Find: Optional boss northeast of the Ancient Ruins, Grand Stairway site of grace, in an open temple at the end of the bridge. |
Divine Beast Dancing Lion Rewards
| Divine Beast Dancing Lion Rewards | |
|---|---|
| Belurat Settlement | ・230000 Runes ・Remembrance of the Dancing Lion |
| Rauh Ruins | ・180000 Runes ・Divine Beast Tornado |
Remembrance of the Dancing Lion Rewards
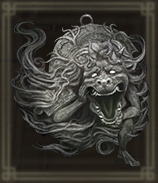 Enraged Divine Beast Enraged Divine Beast |
 Divine Beast Frost Stomp Divine Beast Frost Stomp |
The Remembrance of the Dancing Lion can be turned in to Finger Reader Enia at the Roundtable Hold.
Doing so lets the player choose either the Enraged Divine Beast, or the Divine Beast Frost Stomp as a reward.
Remembrance of the Dancing Lion Effects
Elden Ring Related Guides

DLC Bosses
Main Bosses
Optional Bosses
Mini-Bosses
| All Bosses in Elden Ring | |
|---|---|
| Elder Dragon Greyoll | Lion Guardian |
| Valiant Gargoyle (Leyndell) | - |
Hostile NPCs and Invaders
| Limgrave Invaders and Hostile NPCs | |
|---|---|
| Bloody Finger Nerijus | Old Knight Istvan |
| Recusant Henricus | - |
| Liurnia of the Lakes Invaders and Hostile NPCs | |
| Great Horned Tragoth | Festering Fingerprint Vyke |
| Altus Plateau Invaders and Hostile NPCs | |
| Eleonora, Violet Bloody Finger | Inquisitor Ghiza |
| Maleigh Marais, Shaded Castle Castellan | Rileigh the Idle |
| Vargram the Raging Wolf & Errant Sorcerer Wilhelm | Magnus the Beast Claw |
| Mountaintops of the Giants Invaders and Hostile NPCs | |
| Juno Hoslow, Knight of Blood | - |
| The Roundtable Hold Invaders and Hostile NPCs | |
| Mad Tongue Alberich | - |
| Multiple Location Invaders and Hostile NPCs | |
| Anastasia, Tarnished-Eater | - |
Comment
Author
Divine Beast Dancing Lion Weakness and Locations | Best Build Against Dancing Lion
Rankings
- We could not find the message board you were looking for.
Gaming News
Popular Games

Genshin Impact Walkthrough & Guides Wiki

Honkai: Star Rail Walkthrough & Guides Wiki

Arknights: Endfield Walkthrough & Guides Wiki

Umamusume: Pretty Derby Walkthrough & Guides Wiki

Wuthering Waves Walkthrough & Guides Wiki

Pokemon TCG Pocket (PTCGP) Strategies & Guides Wiki

Abyss Walkthrough & Guides Wiki

Zenless Zone Zero Walkthrough & Guides Wiki

Digimon Story: Time Stranger Walkthrough & Guides Wiki

Clair Obscur: Expedition 33 Walkthrough & Guides Wiki
Recommended Games

Fire Emblem Heroes (FEH) Walkthrough & Guides Wiki

Pokemon Brilliant Diamond and Shining Pearl (BDSP) Walkthrough & Guides Wiki

Diablo 4: Vessel of Hatred Walkthrough & Guides Wiki

Super Smash Bros. Ultimate Walkthrough & Guides Wiki

Yu-Gi-Oh! Master Duel Walkthrough & Guides Wiki

Elden Ring Shadow of the Erdtree Walkthrough & Guides Wiki

Monster Hunter World Walkthrough & Guides Wiki

The Legend of Zelda: Tears of the Kingdom Walkthrough & Guides Wiki

Persona 3 Reload Walkthrough & Guides Wiki

Cyberpunk 2077: Ultimate Edition Walkthrough & Guides Wiki
All rights reserved
ELDEN RING™ & ©BANDAI NAMCO Entertainment Inc. / ©2021 FromSoftware, Inc.
The copyrights of videos of games used in our content and other intellectual property rights belong to the provider of the game.
The contents we provide on this site were created personally by members of the Game8 editorial department.
We refuse the right to reuse or repost content taken without our permission such as data or images to other sites.


