This survey will take about 1 minute.
Your answers will help us to improve our website.
Elden Ring
How to Beat Vargram the Raging Wolf & Errant Sorcerer Wilhelm: Boss Fight Guide
This is a guide on how to beat Vargram the Raging Wolf and Errant Sorcerer Wilhelm, an optional NPC fight in Elden Ring found in the Fortified Manor. Read on to learn more about Vargram and Wilhelm's drops, weaknesses, and recommended level!
List of Contents
Vargram the Raging Wolf and Errant Sorcerer Wilhelm General Info
Stats and Rewards
| Vargram the Raging Wolf and Errant Sorcerer Wilhelm | ||
|---|---|---|
|
||
| Weakness | Resistance | Immune |
| ━ | ━ | ━ |
| Affected By | Poison, Bleed, Frost | |
| Spirit Ashes Available? | No | |
| Rune Rewards |
3659 (NG) |
|
| Summonable NPCs |
・Bernahl |
|
| Location | ||
| Item Drops |
・Raging Wolf Armor
・Raging Wolf Gauntlets ・Raging Wolf Greaves ・Raging Wolf Helm |
|
Vargram the Raging Wolf and Errant Sorcerer Wilhelm Location
Where to Find Vargram the Raging Wolf and Errant Sorcerer Wilhelm

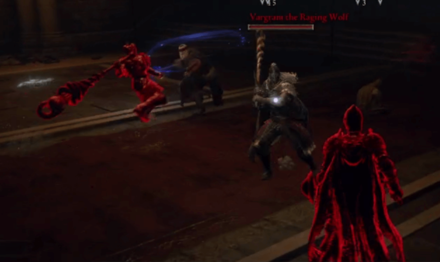
The red sign for this double invasion is found nearest the Fortified Manor, First Floor site of grace in the large room that leads back outside.
How to Beat Vargram the Raging Wolf and Errant Sorcerer Wilhelm
| Tips for Beating Vargram the Raging Wolf and Errant Sorcerer Wilhelm |
|---|
| How to Beat Strategies | ||
|---|---|---|
| Ranged Strategy | Melee Strategy | |
Click a link above to take you to that section.
Ranged Strategy
| Vargram the Raging Wolf and Errant Sorcerer Wilhelm Boss Tips |
|---|
Attack From Range to Draw Aggro
Keep either Vargram or Wilhelm focused on you by firing spells/arrows/consumables at them while Bernahl deals damage to the other. If you are too passive they will both target Bernahl, and if he dies you will be outnumbered.
Stun From Range to Help Bernahl Land Hits
Stunning an enemy at the right time from range can allow Bernahl to land extra hits. When Vargram or Wilhelm is focused on your teammate, try firing a well-timed projectile to catch them off guard and extend Bernahl's combo.
Melee Strategy
| Vargram the Raging Wolf and Errant Sorcerer Wilhelm Boss Tips |
|---|
Make it a 2 vs. 1 and Go for the Sorcerer First
Although the sorcerer Wilhelm is less dangerous than Vargram, he can still deal considerable damage and cause you or Bernahl to get stunned into one of Vargram's harder-hitting attacks. Taking out Wilhelm first will make the fight go much smoother.
If you manage to take down Wilhelm while Bernahl is still alive, Vargram can easily be stun locked to death.
Backstab Enemies Targeting Bernahl
Any time you see either Vargram or Wilhelm targeting Bernahl, go for a free backstab if you can manage it. Not only will this help take down your targets, but it will also help keep Bernahl alive.
Heal Punish
If the enemy tries to heal, take advantage of this and go for a backstab if you are close enough to them. If not, a jump attack or Ash of War can also help to cancel out the HP the enemy just recovered.
Alternatively, you can use this chance to safely heal if the other target is distracted by Bernahl.
Vargram the Raging Wolf and Errant Sorcerer Wilhelm Attack Patterns
Vargram's Attacks
| Vargram's Attack Patterns |
|---|
 Black Flame Slash: Vargram coats his blade in black flames and performs a slashing attack. |
 Rolling Attack: Rolling thrust attack with a Greatsword. |
 One-handed Running R1: Running attack with a Greatsword. Scrapes the blade along the ground before swinging forward. |
 One-handed Running R2: Performs a running overhead attack with a Greatsword. |
 One-handed R1: Performs an diagonal slash attack. |
 One-handed R2: Performs an overhead slam attack. |
 Two-handed R1: Two-handed R1 attack with a Greatsword. A diagonal slash starting high and ending low. |
 Two-Handed R2: Performs a charged overhead attack with a Greatsword. |
Wilhelm's Attacks
| Wilhelm's Attack Patterns |
|---|
 Crystal Burst: Casts a spreadshot of of magic projectiles. |
 Night Comet: Casts a single magic projectile. Can be cast rapidly. |
 Ambush Shard: Casts a small magic projectile from behind the target. Can be cast rapidly. |
 Star Shower: Casts a barrage of magic projectiles at the target. |
 Staff Attack: Performs a melee bashing attack with a staff. |
Elden Ring Related Guides
DLC Bosses
Main Bosses
Optional Bosses
Mini-Bosses
| All Bosses in Elden Ring | |
|---|---|
| Elder Dragon Greyoll | Lion Guardian |
| Valiant Gargoyle (Leyndell) | - |
Hostile NPCs and Invaders
| Limgrave Invaders and Hostile NPCs | |
|---|---|
| Bloody Finger Nerijus | Old Knight Istvan |
| Recusant Henricus | - |
| Liurnia of the Lakes Invaders and Hostile NPCs | |
| Great Horned Tragoth | Festering Fingerprint Vyke |
| Altus Plateau Invaders and Hostile NPCs | |
| Eleonora, Violet Bloody Finger | Inquisitor Ghiza |
| Maleigh Marais, Shaded Castle Castellan | Rileigh the Idle |
| Vargram the Raging Wolf & Errant Sorcerer Wilhelm | Magnus the Beast Claw |
| Mountaintops of the Giants Invaders and Hostile NPCs | |
| Juno Hoslow, Knight of Blood | - |
| The Roundtable Hold Invaders and Hostile NPCs | |
| Mad Tongue Alberich | - |
| Multiple Location Invaders and Hostile NPCs | |
| Anastasia, Tarnished-Eater | - |
Author

How to Beat Vargram the Raging Wolf & Errant Sorcerer Wilhelm: Boss Fight Guide
Please participate in our site
improvement survey
03/2026
improvement survey
03/2026
Would you assist in
improving Game8's site?
improving Game8's site?

×
We are listening to our users' valuable opinions and discussing how to act on them.
The information collected through this survey will be used for the purpose of improving our services. In addition, the information will only be disclosed a part of a statistic in a format that will not allow identification of personal information.
Begin Survey
Not Now
×
Please rate each item regarding Game8.co's Advertisements.
Amount of Ads
Very Dissatisfied
Somewhat Dissatisfied
Fine
Somewhat Satisfied
Highly Satisfied
Placement of Ads
Timing of Ad Display
Ad Loading Speed
Safeness of Ads
Content of Ads
×
Please rate each item regarding Game8.co's Quality of Articles.
Amount of information
Very Dissatisfied
Somewhat Dissatisfied
Fine
Somewhat Satisfied
Highly Satisfied
Frequency of updates
Speed of new information
Accuracy of articles
Understandibility of articles
Readability of sentences
×
Please rate each item regarding Game8.co's Usability of the Site.
Ease of finding information
Very Dissatisfied
Somewhat Dissatisfied
Fine
Somewhat Satisfied
Highly Satisfied
Loading Speed
Use of Color
Font Size
Visibility of Images
Easy to Understand Layout
×
Please rate each item regarding Game8.co's Message Boards, Comments.
Ease of Writing
Very Dissatisfied
Somewhat Dissatisfied
Fine
Somewhat Satisfied
Highly Satisfied
Readability
Ease in Finding Information
Comment Quality
Comment Quantity
Admin Response
×
Please rate each item regarding Game8.co's Site's new design.
Please rate our site's new design
Very Dissatisfied
Somewhat Dissatisfied
Fine
Somewhat Satisfied
Highly Satisfied
Do you think that the website's design change makes the site easier to use?
Has the new design made it easier for you to find information on the site?
Has the new design improved the overall visual appeal of the site?
How would you rate your overall satisfaction with the new design of the site?
×
How likely are you to recommend Game8 to someone you know?
Very Unlikely
0
1
2
3
4
5
6
7
8
9
10
Very Likely
If you have other opinions regarding potential improvement to the website, please share them with us. We would appreciate your honest opinion.
Note: This is a free response section, so you can proceed without entering anything.
Note: Please be sure not to enter any kind of personal information into your response.
Note: Please be sure not to enter any kind of personal information into your response.
×
Thank You
×
Thank you for participating in our survey! Your answers will help us to improve the quality of our website and services.
We hope you continue to make use of Game8.
We hope you continue to make use of Game8.
Close
Rankings
- We could not find the message board you were looking for.
Gaming News


Popular Games

Genshin Impact Walkthrough & Guides Wiki
Honkai: Star Rail Walkthrough & Guides Wiki
Umamusume: Pretty Derby Walkthrough & Guides Wiki
Pokemon Pokopia Walkthrough & Guides Wiki
Resident Evil Requiem (RE9) Walkthrough & Guides Wiki
Monster Hunter Wilds Walkthrough & Guides Wiki
Wuthering Waves Walkthrough & Guides Wiki
Arknights: Endfield Walkthrough & Guides Wiki
Pokemon FireRed and LeafGreen (FRLG) Walkthrough & Guides Wiki
Pokemon TCG Pocket (PTCGP) Strategies & Guides Wiki


Recommended Games
Diablo 4: Vessel of Hatred Walkthrough & Guides Wiki
Fire Emblem Heroes (FEH) Walkthrough & Guides Wiki
Yu-Gi-Oh! Master Duel Walkthrough & Guides Wiki
Super Smash Bros. Ultimate Walkthrough & Guides Wiki
Pokemon Brilliant Diamond and Shining Pearl (BDSP) Walkthrough & Guides Wiki
Elden Ring Shadow of the Erdtree Walkthrough & Guides Wiki
Monster Hunter World Walkthrough & Guides Wiki
The Legend of Zelda: Tears of the Kingdom Walkthrough & Guides Wiki
Persona 3 Reload Walkthrough & Guides Wiki
Cyberpunk 2077: Ultimate Edition Walkthrough & Guides Wiki


All rights reserved
ELDEN RING™ & ©BANDAI NAMCO Entertainment Inc. / ©2021 FromSoftware, Inc.
The copyrights of videos of games used in our content and other intellectual property rights belong to the provider of the game.
The contents we provide on this site were created personally by members of the Game8 editorial department.
We refuse the right to reuse or repost content taken without our permission such as data or images to other sites.