Curseblade Labirith Weakness and Location

Curseblade Labirith is a boss in the Elden Ring DLC Shadow of the Erdtree. See Curseblade Labirith's weakness and location, rewards, and general tips for Curseblade Labirith here.
List of Contents
Curseblade Labirith Weakness
Weak to Slash Weapons
Curseblade Labirith takes increased damage from Slash Weapons, which ranked highest in our damage tests compared to the other damage types.
Since Curseblade Labirith is a nimble opponent, use fast Slash Weapons such as Katanas, Curved Swords, and Backhand Blades so you can keep up with its movements and easily recover from your attacks.
Curseblade Labirith General Tips
| Tips for Beating Curseblade Labirith |
|---|
|
|
Listen for Labirith's Sneak Attacks
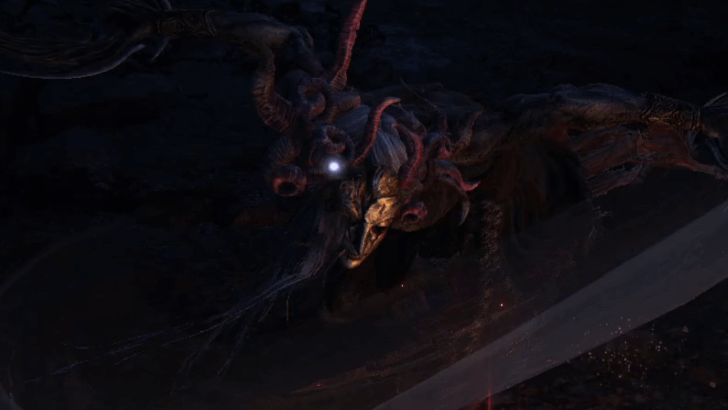
Curseblade Labirith's unique gimmick is shrouding the boss arena in darkness to make it more difficult to track them. This helps conceal a move of theirs where they enter a portal of darkness that has them reappear and attack from either in front of or above you.
Rely on the audio cue of them emerging from the portal to time your dodge. Unmute our footage above to listen for the sound cue.
Fight Bleed with Bleed
Labirith's main damage comes from fast multi-hit melee attacks, which have the added threat of stacking Bleed.
Roll towards Labirith for these attacks to avoid getting hit, and at the same time, use Bleed weapons like the Reduvia against Labirith, as they are still vulnerable to Bleed themselves.
Labirith can Close Distance Quickly
At mid-range distance, Labirith can quickly close the distance with several spinning moves that propel them forward.
Time your heals and dodges accordingly, and never assume you are safe while healing unless you are extremely far from Labirith or they are still recovering from an animation.
Watch for Ranged Attacks
While primarily attacking at melee range, Labirith has a few ranged attacks in their arsenal that will zone you out if you are pressuring them too much in close-quarters combat.
Backflip Throws
Labirith will sometimes try to recuperate by backflipping while throwing two projectiles at you. These come in quick succession, but one or two rolls forward should be enough to keep pressuring Labirith.
Smoke Breath
Labirith will sometimes spew smoke in a frontal cone to zone you out, especially if you're already at a distance. Simply walk around Labirith to flank and keep attacking.
Backstab After Combos End
After committing to long combos, there is plenty of recovery time to walk around Labirith and backstab them. You can aim for this moment multiple times instead of trying to attack from the front to play the fight safe.
Curseblade Labirith Location
Located Inside Bonny Gaol
| World View | Map Location |
|---|---|
 |
 |
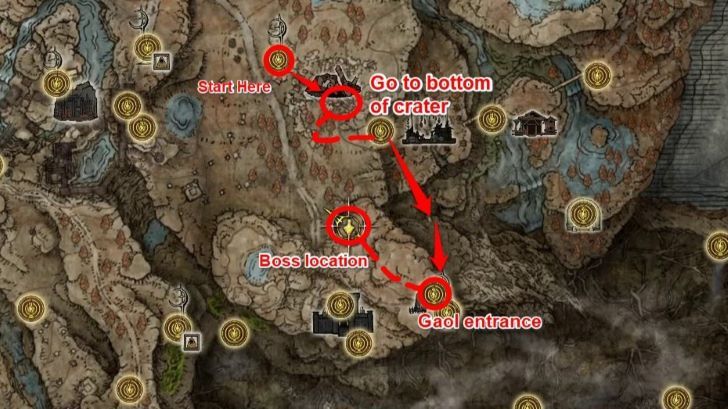
Curseblade Labirith can be found at the very end of Bonny Gaol. The Gaol itself is located south of Bonny Village, and Labirith waits at the bottom of the dungeon, which you reach by descending via various tunnels, jail cells, and hanging jars.
Curseblade Labirith Rewards
| Curseblade Labirith Details | |
|---|---|
 |
|
| Runes | 100000 |
| Drops | |
| Spirit Summons? | Spirit Ashes Allowed |
| Gold Summons? |
None
|
Elden Ring Related Guides

DLC Bosses
Main Bosses
Optional Bosses
Mini-Bosses
| All Bosses in Elden Ring | |
|---|---|
| Elder Dragon Greyoll | Lion Guardian |
| Valiant Gargoyle (Leyndell) | - |
Hostile NPCs and Invaders
| Limgrave Invaders and Hostile NPCs | |
|---|---|
| Bloody Finger Nerijus | Old Knight Istvan |
| Recusant Henricus | - |
| Liurnia of the Lakes Invaders and Hostile NPCs | |
| Great Horned Tragoth | Festering Fingerprint Vyke |
| Altus Plateau Invaders and Hostile NPCs | |
| Eleonora, Violet Bloody Finger | Inquisitor Ghiza |
| Maleigh Marais, Shaded Castle Castellan | Rileigh the Idle |
| Vargram the Raging Wolf & Errant Sorcerer Wilhelm | Magnus the Beast Claw |
| Mountaintops of the Giants Invaders and Hostile NPCs | |
| Juno Hoslow, Knight of Blood | - |
| The Roundtable Hold Invaders and Hostile NPCs | |
| Mad Tongue Alberich | - |
| Multiple Location Invaders and Hostile NPCs | |
| Anastasia, Tarnished-Eater | - |
Comment
Author
Curseblade Labirith Weakness and Location
improvement survey
03/2026
improving Game8's site?

Your answers will help us to improve our website.
Note: Please be sure not to enter any kind of personal information into your response.

We hope you continue to make use of Game8.
Rankings
- We could not find the message board you were looking for.
Gaming News
Popular Games

Genshin Impact Walkthrough & Guides Wiki

Honkai: Star Rail Walkthrough & Guides Wiki

Umamusume: Pretty Derby Walkthrough & Guides Wiki

Pokemon Pokopia Walkthrough & Guides Wiki

Resident Evil Requiem (RE9) Walkthrough & Guides Wiki

Monster Hunter Wilds Walkthrough & Guides Wiki

Wuthering Waves Walkthrough & Guides Wiki

Arknights: Endfield Walkthrough & Guides Wiki

Pokemon FireRed and LeafGreen (FRLG) Walkthrough & Guides Wiki

Pokemon TCG Pocket (PTCGP) Strategies & Guides Wiki
Recommended Games

Diablo 4: Vessel of Hatred Walkthrough & Guides Wiki

Cyberpunk 2077: Ultimate Edition Walkthrough & Guides Wiki

Fire Emblem Heroes (FEH) Walkthrough & Guides Wiki

Yu-Gi-Oh! Master Duel Walkthrough & Guides Wiki

Super Smash Bros. Ultimate Walkthrough & Guides Wiki

Pokemon Brilliant Diamond and Shining Pearl (BDSP) Walkthrough & Guides Wiki

Elden Ring Shadow of the Erdtree Walkthrough & Guides Wiki

Monster Hunter World Walkthrough & Guides Wiki

The Legend of Zelda: Tears of the Kingdom Walkthrough & Guides Wiki

Persona 3 Reload Walkthrough & Guides Wiki
All rights reserved
ELDEN RING™ & ©BANDAI NAMCO Entertainment Inc. / ©2021 FromSoftware, Inc.
The copyrights of videos of games used in our content and other intellectual property rights belong to the provider of the game.
The contents we provide on this site were created personally by members of the Game8 editorial department.
We refuse the right to reuse or repost content taken without our permission such as data or images to other sites.


![Monster Hunter Stories 3 Review [First Impressions] | Simply Rejuvenating](https://img.game8.co/4438641/2a31b7702bd70e78ec8efd24661dacda.jpeg/thumb)


