How to Beat Crucible Knight: Boss Fight Guide
This is a guide on how to beat Crucible Knight, an optional boss in Elden Ring. Read on to learn more about Crucible Knight's strengths, weaknesses, attack patterns, and lore!
List of Contents
Crucible Knight General Info
Stats and Rewards
| Crucible Knight | ||
|---|---|---|

|
||
| Weakness | Resistance | Immune |
| ━ |
Standard Strike Slash Holy Frost Scarlet Rot Sleep Poison Thrust |
Bleed Madness |
| Affected By | Poison, Scarlet Rot, Frost, Sleep | |
| Spirit Ashes Available? | No | |
| Rune Rewards |
2100 (NG) |
|
| Summonable NPCs |
None
|
|
| Location | ||
| Item Drops |
・Aspects of the Crucible: Tail
|
|
Crucible Knight Location
Where to Find
| Map Location | |
|---|---|
 View Full Image |
|
| Recommended Level | Lv.30 |
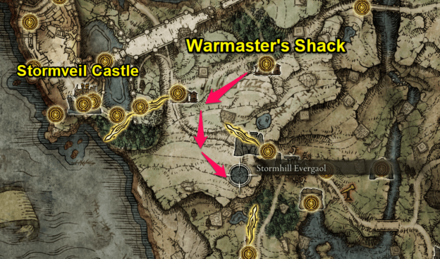
Crucible Knight is within Stormhill Evergaol, up on the cliffs towering above Gatefront Ruins. We recommend heading there from the Warmaster's Shack site of grace instead the one nearest to it (Gatefront) because the path is safer.
How to Beat Crucible Knight
| Tips for Beating Crucible Knight |
|---|
| How to Beat Strategies | ||
|---|---|---|
| Ranged Strategy | Melee Strategy | |
Click a link above to take you to that section.
Ranged Strategy
| Crucible Knight Boss Tips |
|---|
Strike After Crucible Knight's Attack Combos
Crucible Knight is unstoppable when it starts its flurry of greatsword, shield, and magic attacks. Take advantage of its recovery animation for each hard-hitting combo and never overcommit to attacking. Always step back and bait out the next attack afterward after performing your counter.
Watch out for Crucible Knight's Lunges and Dash Attacks
Crucible Knight isn't going to just let you maintain the distance. Anticipate his distance-closing attacks, especially when it goes down to 50% HP.
Melee Strategy
| Crucible Knight Boss Tips |
|---|
Parries and Blocks are Essential
Crucible Knight can be a relentless boss if players just let it swing away. Consider parrying its attacks to turn its aggressive nature to your advantage. Every attack can be blocked as well, providing another layer of protection for shielded players.
Bait Foot Stomps
Foot Stomps can easily lock Crucible Knight in long-winded combos, allowing you to either reposition for counter attacks or chug your flask safely. Stay within melee range to bait this attack.
Stay Just Outside of Its Greatsword Range
Crucible Knight gets even deadlier at 50% HP as it unlocks its spells at this stage of the fight. Try to avoid its devastating Double Charged Tail Sweep by staying just within range of its greatsword since maintaining a large distance between you and Crucible Knight forces it to use the attack more often.
Never Heal When Its Idle
Crucible Knight likes to lunge or close the distance on players whenever its idle for too long. It seems to be especially receptive to whenever a player chugs a flask in front of it. Make sure its performing an long attack combos such as Foot Stomp and Airborne Assault to heal safely.
Crucible Knight Attack Patterns
Greatsword Attacks
| Greatsword Attack Variations |
|---|
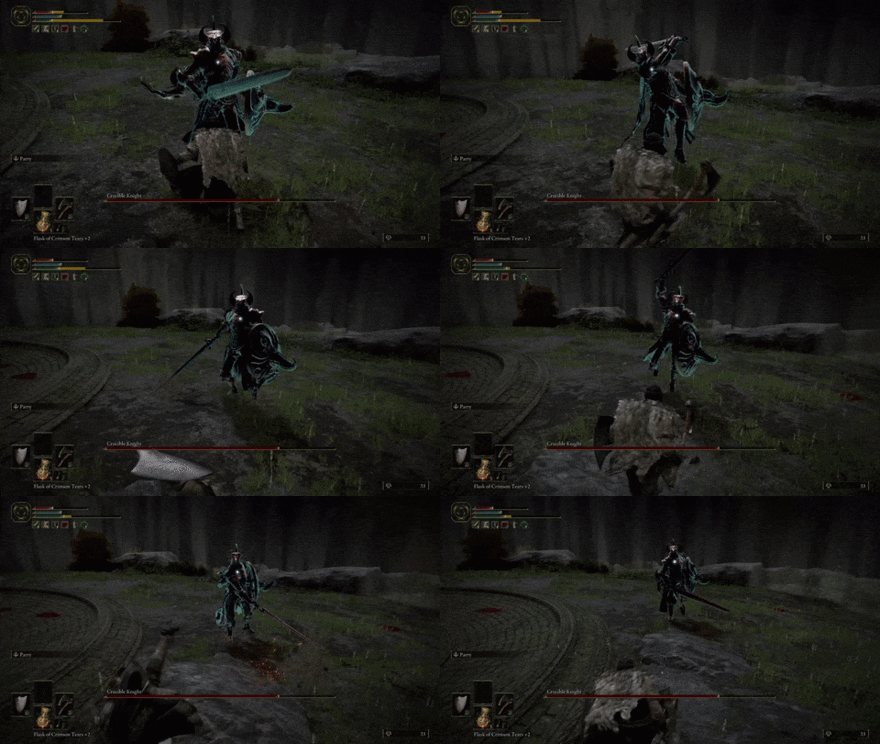 Double Overhead Slash: A simple yet effective combo that can throw anyone off. The first slash is a quick overhead slash in either diagonal position, while the follow-up is a vertical slash in the opposite direction with a staggered timing. Melee players can easily parry either strike to interrupt the combo. It's important to note that Crucible Knight can do this combo two-handed, which increases the damage and slightly alters the timings. |
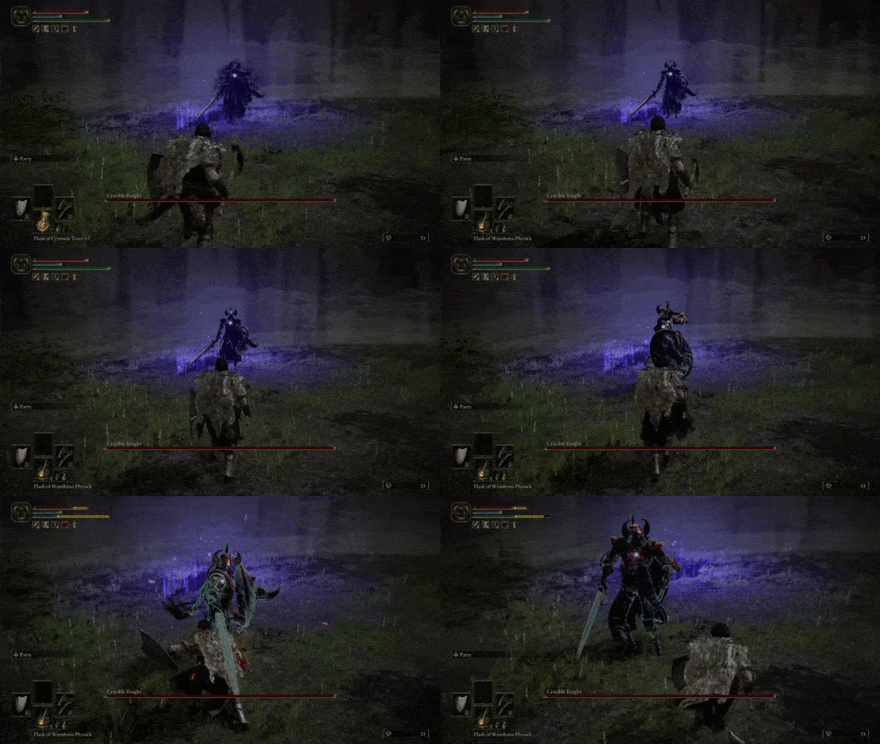 Forward Lunge: Crucible Knight performs a quick lunge that covers a large distance in front of it. Anticipate its charge, then dodge as soon as it springs forward. You can also parry this attack with the right timing. |
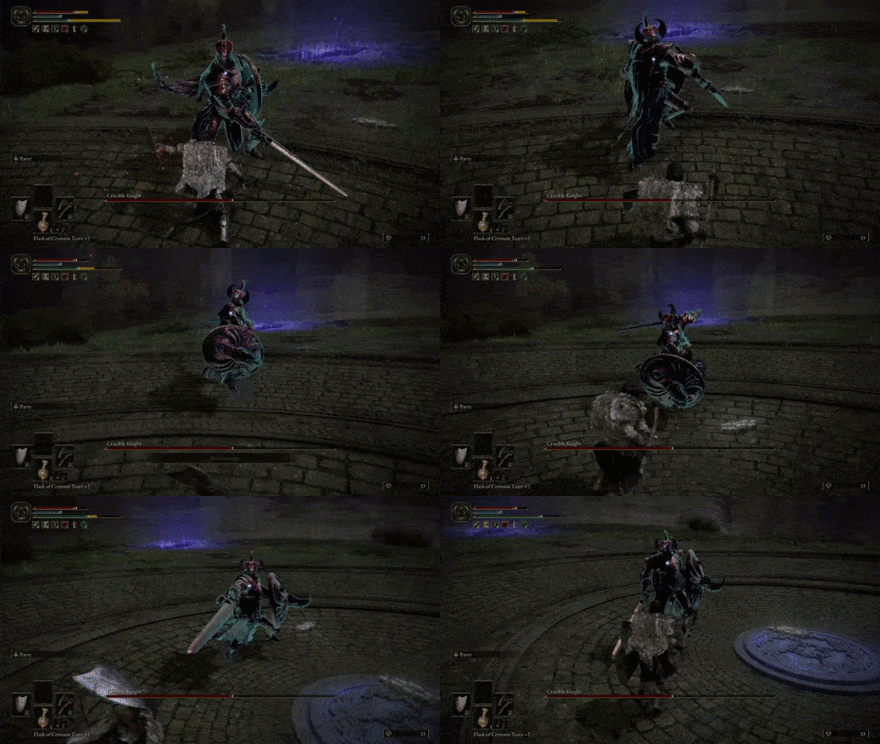 Charging Lateral Slash: A two-hit combo that starts with a charging horizontal slash, followed by any attack in its Crucible Knight's arsenal. |
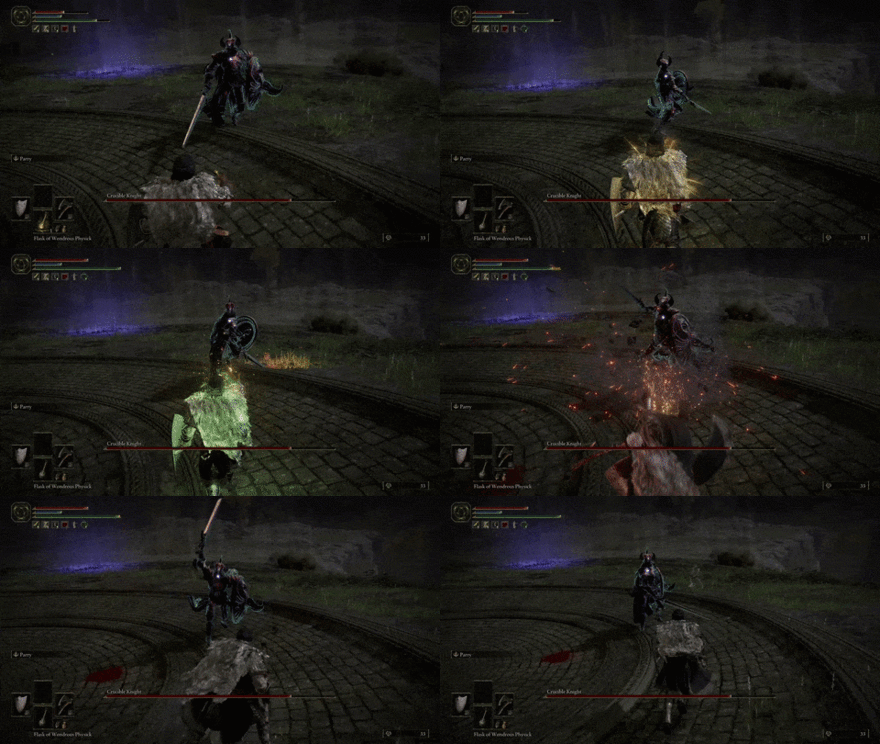 Grinding Uppercut: Crucible Knight grinds its sword on the ground as it charges towards you for a quick uppercut, this can be followed by any of its attacks and can be devastating when it connects. Dodge as soon as Crucible Knight starts lifting its greatsword off the ground. |
Shield Bash
| Shield Bash Attack Information |
|---|
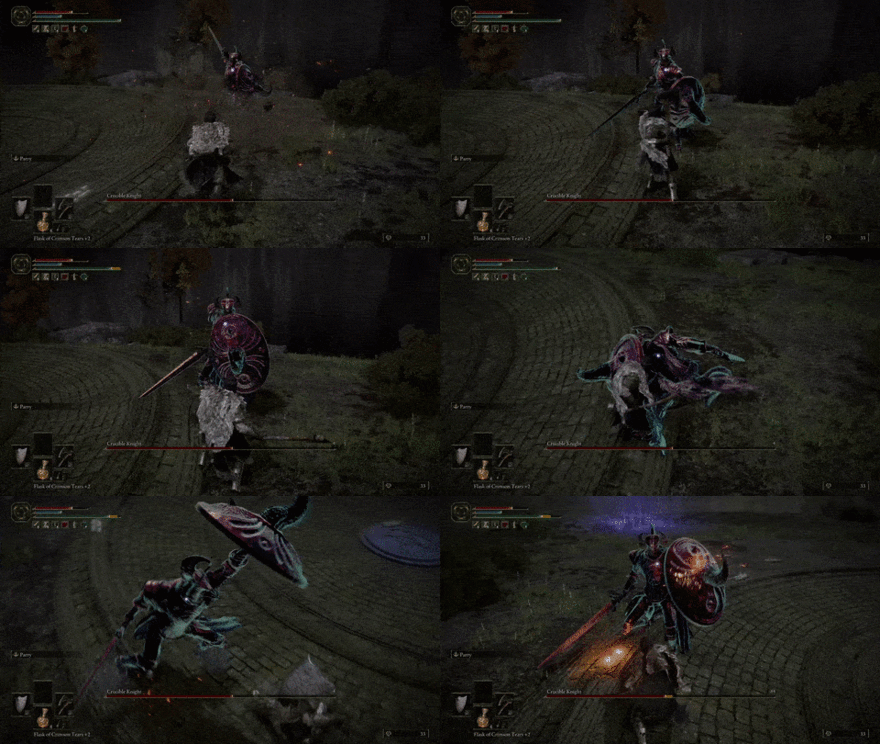 Shield Bash: Crucible Knight braces low with its horned shield in front before lunging forward towards its target. The attack launches anyone it hits, opening you to potential follow-up attacks with its greatsword. Fortunately, this attack is heavily telegraphed, making it easy to dodge. |
Foot Stomp
| Foot Stomp Attack Information |
|---|
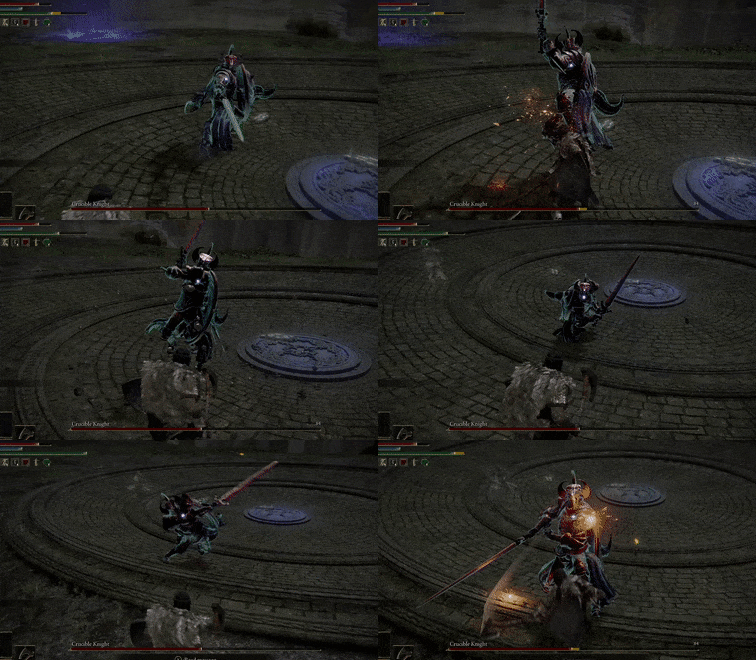 Foot Stomp: Crucible Knight plants its foot on the ground, sending a three-pronged quake in front that covers a considerable distance. They key to evading this move is to dodge or block just before its foot hits the ground. This is usually followed-up by a Double Overhead Slash or Forward Lunge if players are too far from it. |
Tail Attacks
Crucible Knight starts using these attacks once it drops to about 50% HP.
| Tail Attack Variations |
|---|
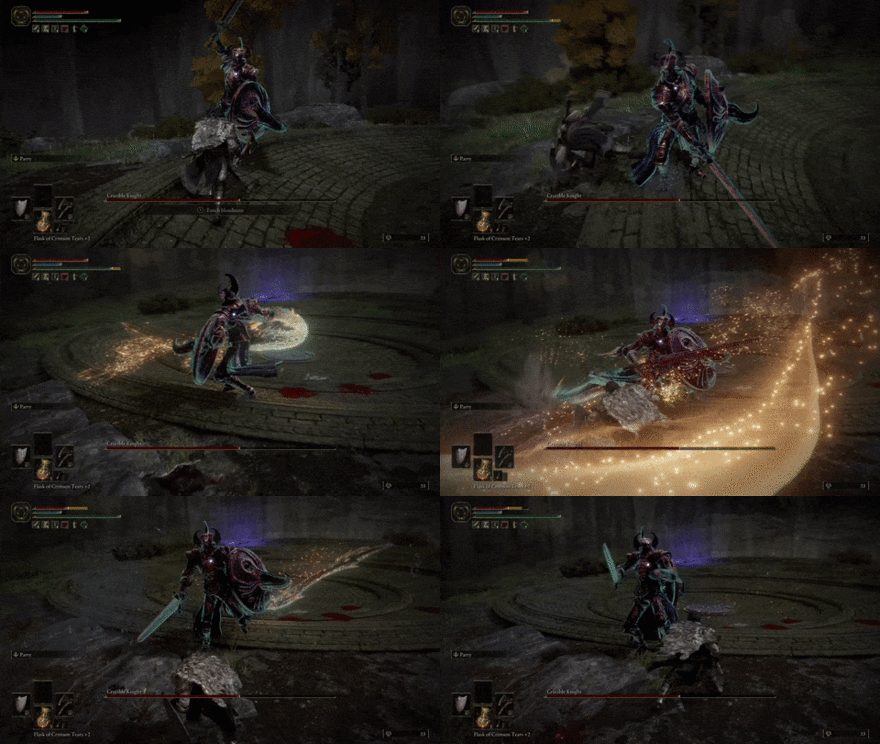 Single Tail Sweep: An incredibly fast tail sweep that can be chained from almost any attack in its arsenal. Check Crucible Knight's body language once it hits 50% HP. There's a good chance it'll perform this move whenever his body twists towards either side after an attack |
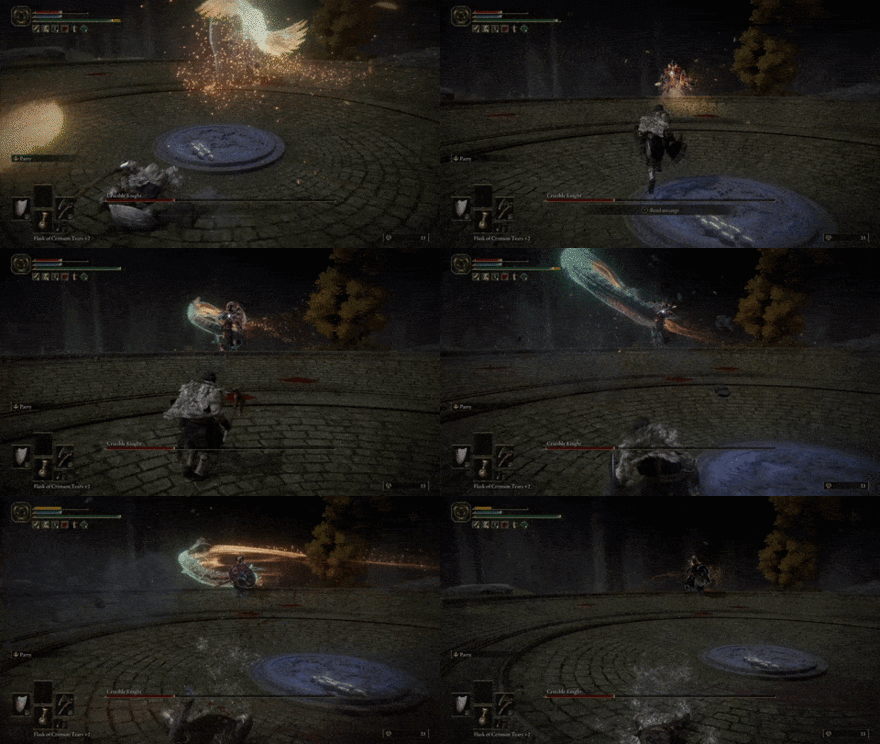 Charged Double Tail Sweep: This is a devastating variation that can easily one-shot anyone hit by the second sweep. Crucible Knight performs a fast Tail Sweep that covers a larger radius than the single version, followed up by an even larger charged tail sweep that covers an even greater radius. Not much can be done except to block or dodge both strikes when caught within range. You can reduce the odds of Crucible Knight performing this move by staying just within range of its greatsword attacks at all times. |
Airborne Assault
| Airborne Assault Attack Information |
|---|
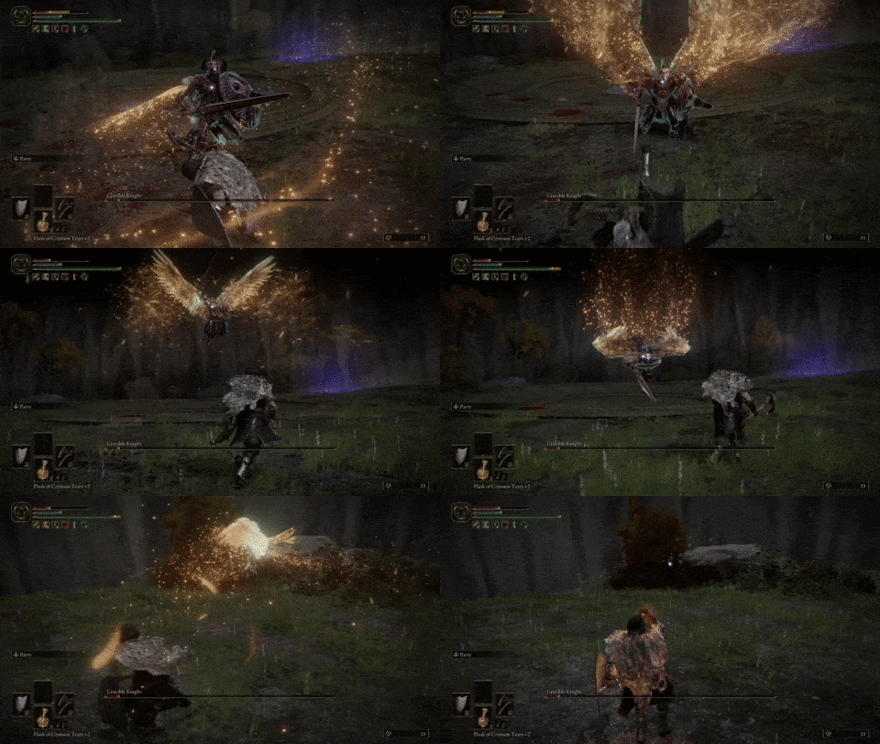 Airborne Assault: Crucible Knight summons its wings and takes flight. It stays in the air for a few seconds before swooping down towards the target with its greatsword. You can easily dodge this attack by moving towards its shield arm as soon as it takes flight, then dodge once it starts swooping towards you. |
Elden Ring Related Guides

DLC Bosses
Main Bosses
Optional Bosses
Mini-Bosses
| All Bosses in Elden Ring | |
|---|---|
| Elder Dragon Greyoll | Lion Guardian |
| Valiant Gargoyle (Leyndell) | - |
Hostile NPCs and Invaders
| Limgrave Invaders and Hostile NPCs | |
|---|---|
| Bloody Finger Nerijus | Old Knight Istvan |
| Recusant Henricus | - |
| Liurnia of the Lakes Invaders and Hostile NPCs | |
| Great Horned Tragoth | Festering Fingerprint Vyke |
| Altus Plateau Invaders and Hostile NPCs | |
| Eleonora, Violet Bloody Finger | Inquisitor Ghiza |
| Maleigh Marais, Shaded Castle Castellan | Rileigh the Idle |
| Vargram the Raging Wolf & Errant Sorcerer Wilhelm | Magnus the Beast Claw |
| Mountaintops of the Giants Invaders and Hostile NPCs | |
| Juno Hoslow, Knight of Blood | - |
| The Roundtable Hold Invaders and Hostile NPCs | |
| Mad Tongue Alberich | - |
| Multiple Location Invaders and Hostile NPCs | |
| Anastasia, Tarnished-Eater | - |
Author
How to Beat Crucible Knight: Boss Fight Guide
improvement survey
03/2026
improving Game8's site?

Your answers will help us to improve our website.
Note: Please be sure not to enter any kind of personal information into your response.

We hope you continue to make use of Game8.
Rankings
- We could not find the message board you were looking for.
Gaming News
Popular Games

Genshin Impact Walkthrough & Guides Wiki

Honkai: Star Rail Walkthrough & Guides Wiki

Umamusume: Pretty Derby Walkthrough & Guides Wiki

Pokemon Pokopia Walkthrough & Guides Wiki

Resident Evil Requiem (RE9) Walkthrough & Guides Wiki

Monster Hunter Wilds Walkthrough & Guides Wiki

Wuthering Waves Walkthrough & Guides Wiki

Arknights: Endfield Walkthrough & Guides Wiki

Pokemon FireRed and LeafGreen (FRLG) Walkthrough & Guides Wiki

Pokemon TCG Pocket (PTCGP) Strategies & Guides Wiki
Recommended Games

Diablo 4: Vessel of Hatred Walkthrough & Guides Wiki

Fire Emblem Heroes (FEH) Walkthrough & Guides Wiki

Yu-Gi-Oh! Master Duel Walkthrough & Guides Wiki

Super Smash Bros. Ultimate Walkthrough & Guides Wiki

Pokemon Brilliant Diamond and Shining Pearl (BDSP) Walkthrough & Guides Wiki

Elden Ring Shadow of the Erdtree Walkthrough & Guides Wiki

Monster Hunter World Walkthrough & Guides Wiki

The Legend of Zelda: Tears of the Kingdom Walkthrough & Guides Wiki

Persona 3 Reload Walkthrough & Guides Wiki

Cyberpunk 2077: Ultimate Edition Walkthrough & Guides Wiki
All rights reserved
ELDEN RING™ & ©BANDAI NAMCO Entertainment Inc. / ©2021 FromSoftware, Inc.
The copyrights of videos of games used in our content and other intellectual property rights belong to the provider of the game.
The contents we provide on this site were created personally by members of the Game8 editorial department.
We refuse the right to reuse or repost content taken without our permission such as data or images to other sites.


