Crumbling Farum Azula Legacy Dungeon Walkthrough and Location

Crumbling Farum Azula is one of the Legacy Dungeons that you can explore in Elden Ring. Read on for a complete walkthrough of the dungeon, its location on the map, list of bosses and how to beat them, and obtainable items in Crumbling Farum Azula!
| Previous Dungeon | Next Dungeon |
|---|---|
| Mountaintops of the Giants | Leyndell, Ashen Capital Walkthrough |
Crumbling Farum Azula Overview
Crumbling Farum Azula Basic Information
| Crumbling Farum Azula | |
|---|---|
 View Full Map |
|
| Type | Legacy Dungeon |
| Region | Crumbling Farum Azula |
| Location | Unlocked and reached after the events at the Forge of the Giants |
| Boss |
Maliketh, The Black Blade
Dragonlord Placidusax |
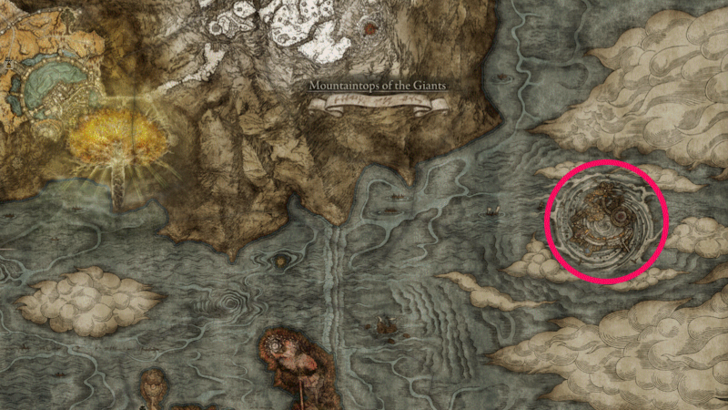
How to Get to Crumbling Farum Azula
After defeating Morgott, the Omen King in Leyndell and receiving the Rold Medallion from Melina, travel east from the Royal Capital until you reach the Grand Lift of Rold. Activate the lift using the medallion to reach the Mountaintops of the Giants.
Make your way around the region to the eastern half to reach the Forge of the Giants. After the cutscene at the top of the forge, you will automatically unlock and reach Crumbling Farum Azula.
Leyndell, Royal Capital Legacy Dungeon Walkthrough and Location
Defeating the Undead Beastmen
The undead beastmen patrolling around Crumbling Farum Azula will need to be killed twice like any other undead in the game. Once to get them down, and then their glowing remains will need to be hit to stop them from respawning.
However, there are a couple of weapons and Ashes of War that can take these undead down in one go, without having to strike the remains.
The notable weapons are the Inseparable Sword, Golden Order Greatsword, and the Golden Epitaph.
The Ashes of War that can be used to take down the undead are Sacred Blade, Sacred Order, and Shared Order.
Crumbling Farum Azula Walkthrough
Crumbling Farum Azula Objectives
| 1 | 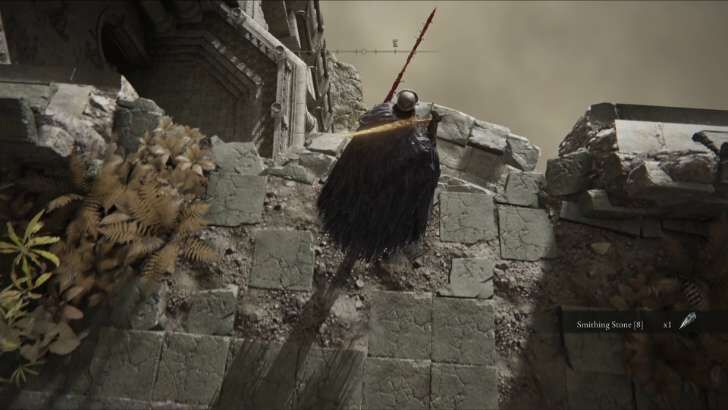 |
|---|---|
| 2 | 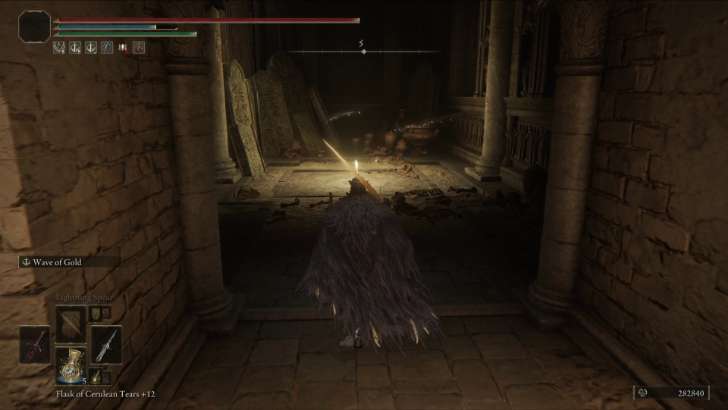 Pass through the corridor and find the Crumbling Beast Grave Site of Grace near the end |
| 3 | 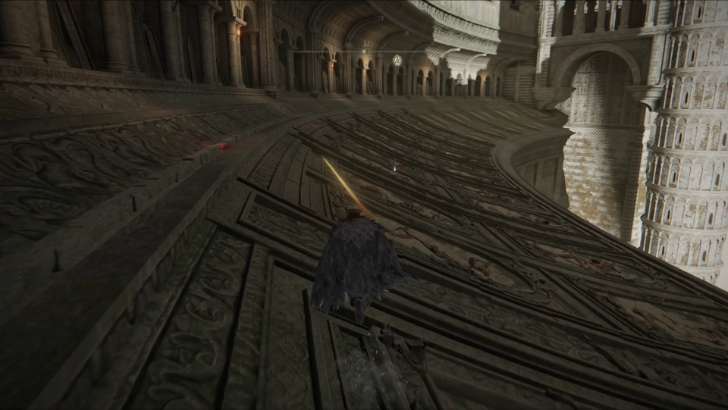 Exit the room and continue heading west for the Crumbling Beast Grave Depths Site of Grace A dragon will swoop down along the way but you can just run past it. |
| 4 | 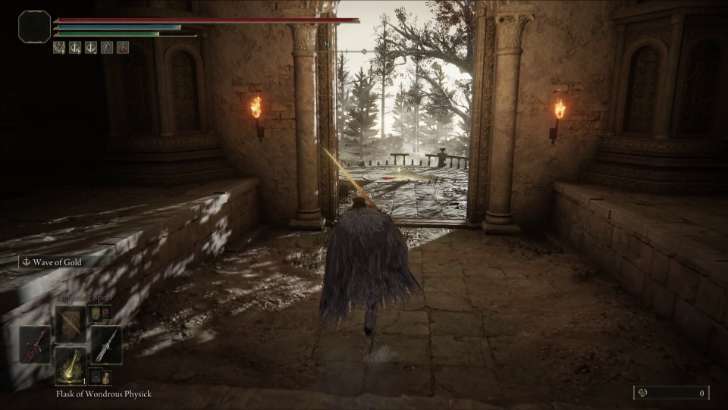 Move two rooms north, drop down the hall, and exit east to find the Site of Grace of the Tempest-Facing Balcony You'll also find a Somberstone Miner's Bell Bearing [4] nearby. |
| 5 | 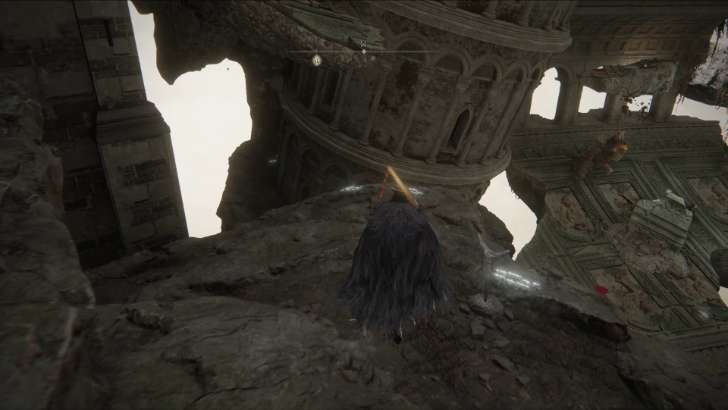 Follow the path down to the west, then northeast once you reach a curve to find the Dragon Temple Site of Grace |
| 6 | Head east, turn right on the hallway, then go down the stairs to reach the boss room for the Godskin Duo ▶ How to Beat Godskin Duo |
| 7 |  Exit north, drop down the area below, then left down the stairs |
| 8 | From the small room, run north until you reach the path with the dragon statues, then turn right and exit on the other side |
| 9 | 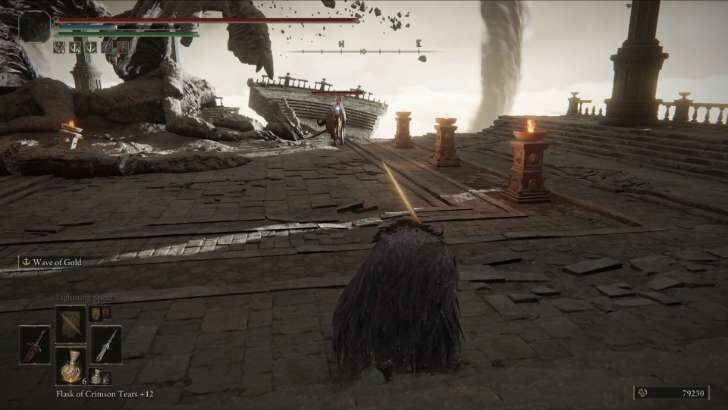 Continue running north until you reach the balcony with a Crucible Knight, then jump down the platform below to reach the Dragon Temple Rooftop Site of Grace |
| 10 | 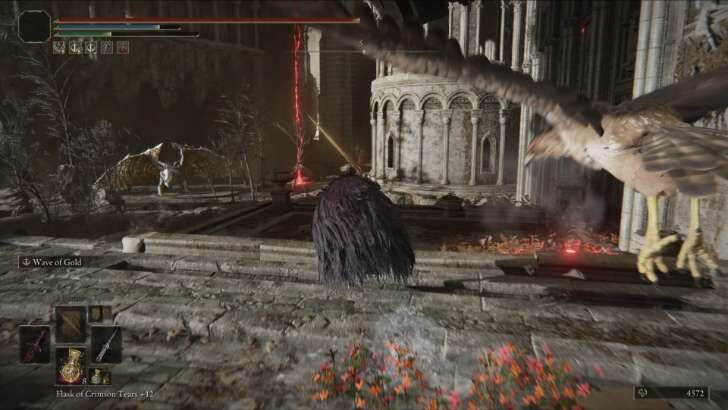 Drop down the floating platform below, turn south, and run towards the dragon while dodging its lightning strikes Aside from the lightning, you also need to look out for the hawks' attacks along the way |
| 11 | 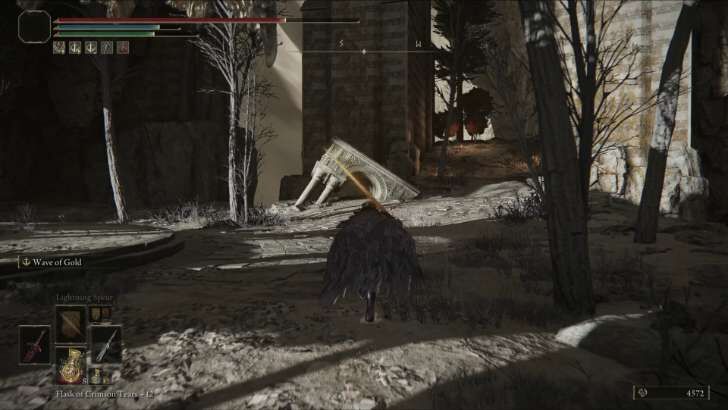 Turn right from the dragon and follow the path until you cross a broken tower |
| 12 | 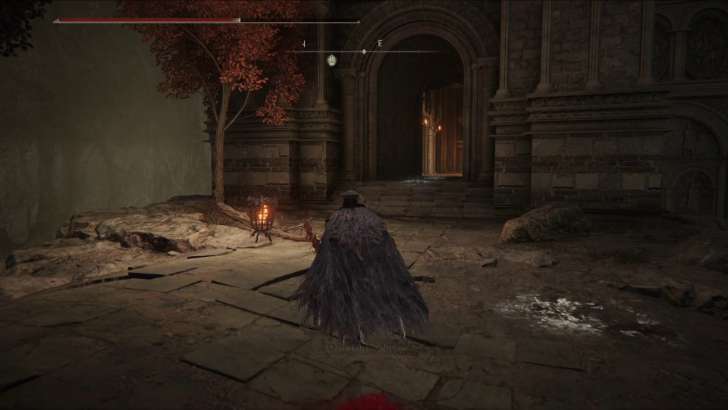 Enter the building and ride the lift on the other side to reach the Site of Grace "Beside the Great Bridge" |
| 13 | 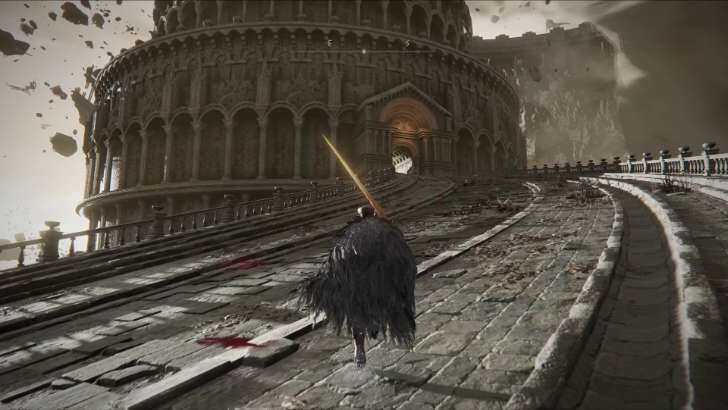 Follow the path outside all the way to the top, past the Draconic Tree Sentinel, and defeat the Beast Clergyman, who will transform into Maliketh, the Black Blade on the second half of the battle. ▶ How to Beat Maliketh, The Black Blade |
What to Do in Crumbling Farum Azula
| Crumbling Farum Azula Checklist |
|---|
|
|
Get the Somberstone Miner's Bell Bearing 4

The Somberstone Miner's Bell Bearing 4 is found on a hanging corpse right in front of the Tempest-Facing Balcony Site of Grace.
Get the Glovewort Picker's Bell Bearing 3
| World View | Map Location |
|---|---|
 View Full Image |
 View Full Image |
The Glovewort Picker's Bell Bearing 3 is on a gazebo in front a lake with two Wormface enemies. The lake area is accessible by heading down using the elevator near the Crumbling Beast Grave Depths Site of Grace.
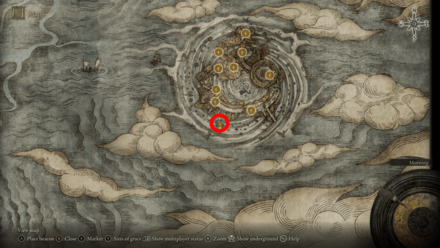
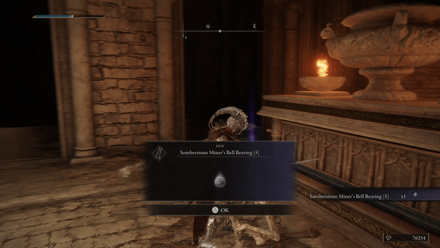
Get the Somberstone Miner's Bell Bearing 5
| World View | Map Location |
|---|---|
 View Full Image |
 View Full Image |
You can find the Somberstone Miner's Bell Bearing 5 on a dead body inside the small church near the Beside the Great Bridge Site of Grace.
Get the Ancient Dragon Apostle's Cookbook 4
| World View | Map Location |
|---|---|
 View Full Image |
 View Full Image |
You can find the Ancient Dragon Apostle's Cookbook 4 on the roof. You need to defeat the large dragon to access the building behind to grab the item.
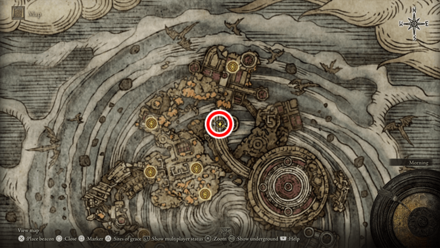
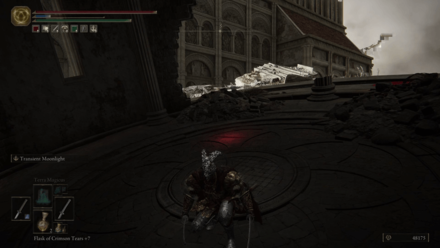
Get the Dragoncrest Shield Talisman +2
| Map Location |
|---|
 View Full Image |
You can find the Dragoncrest Shield Talisman +2 on the floating platform east of the Dragon Temple Lift.
Get the Boltdrake Talisman +2
| World View | Map Location |
|---|---|
 View Full Image |
 View Full Image |
The Boltdrake Talisman +2 can be found on a dead body hanging on an open window south of Dragon Temple Rooftop Site of Grace.
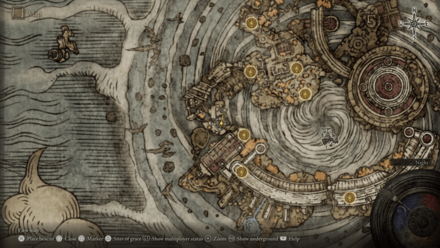
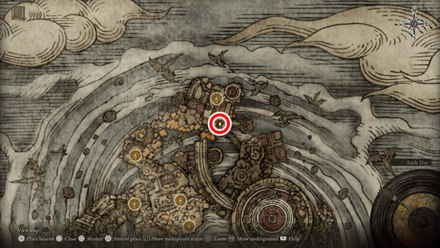
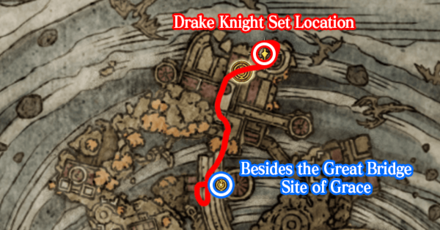
Get the Drake Knight Set
 View Full Image |
 View Full Image |
Drake Knight set can be obtained by traveling to the Besides the Great Bridge Site of Grace. After climbing up to the bridge, head north and into the building. Once you exit to the balcony, stick to the left, and you'll be able to see a platform down with a beastmen on it.
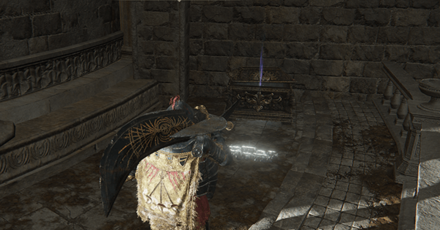
Jump down, defeat the beastmen, and head inside another building. Interact with the lever and take the elevator down. Exit the building, take a left, and at the end will be a chest containing the set.
The Drake Knight set is made of the Drake Knight Helm, Drake Knight Armor, Drake Knight Gauntlets, and Drake Knight Greaves.
Get the Golden Lightning Fortification Incantation
| In-Game View | Map Location |
|---|---|
 |
 |
| Location ▶︎ Mountaintops of the Giants - South of the Dragon Temple Lift Site of Grace in Crumbling Farum Azula Reward ▶︎ Incantation: Golden Lightning Fortification |
|
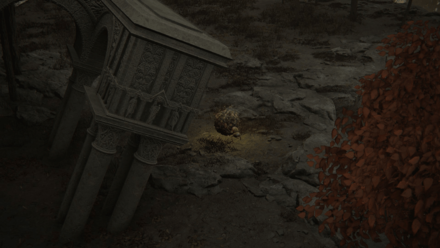
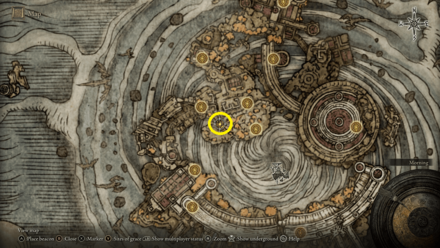
From the Dragon Temple Lift, head to the south exit and continue moving south until you see reach a group of pillars leaning sideways. Go down that area and you will see a scarab. Use long-ranged attacks or items to immediately kill the Scarab. The Scarab will drop the Golden Lightning Fortification Incantation.
Get the Azula Beastman Ashes
| World View | Map Location |
|---|---|
 View Full Image |
 View Full Image |
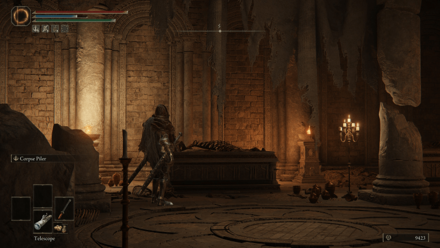
From the Dragon Temple Site of Grace, jump down to the west onto the stairs, then turn to the right and jump down again. There will be a door with stairs that leads to an area with several coffins. The farthest one has the Azula Beastman Ashes.
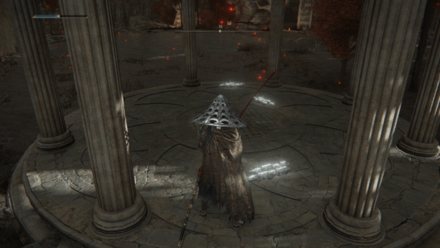
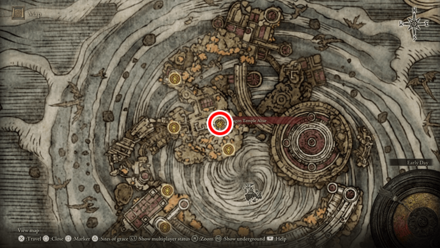
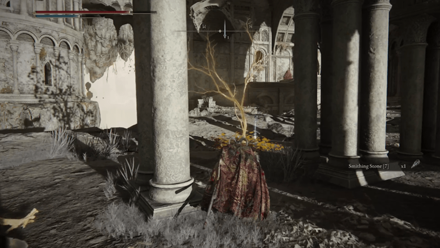
Get the Ancient Dragon Smithing Stone

From the lift next to the Dragon Temple Lift Site of Grace (the one sealed by imp statues), head east and turn right to find a floating column. Walk on it and follow the path to find an Ancient Dragon Smithing Stone at the top.
Defeat the weakened dragon
When you reach the dragon past the Dragon Temple Rooftop Site of Grace, you'll notice that it's already at low health. Defeat the dragon and obtain another Ancient Dragon Smithing Stone as a drop.
Get the Somber Ancient Dragon Smithing Stone

Look for a gazebo behind the dragon to find a Somber Ancient Dragon Smithing Stone.
Get the Old Lord's Talisman
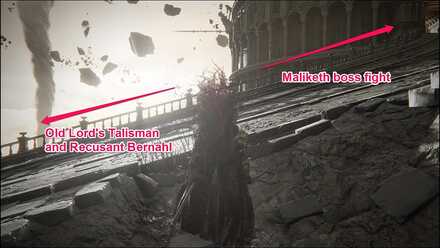
From the "Beside the Great Bridge" Site of Grace, the path will split to two directions: one towards the Maliketh boss area and the other to where the Old Lord's Talisman is.
Follow the path north until you reach a smaller bridge that leads to a tower. As you approach the tower, Recusant Bernahl will invade your world. Defeat him to obtain his armor set and the legendary armament, Devourer's Scepter.
Continue to the tower where you'll find three more enemies and a chest containing the Old Lord's Talisman.
How to Get Old Lord's Talisman: Effects and Locations
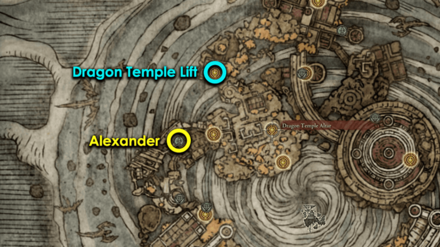
Fight and Defeat Alexander
| Map Location |
|---|
 |
| World View |
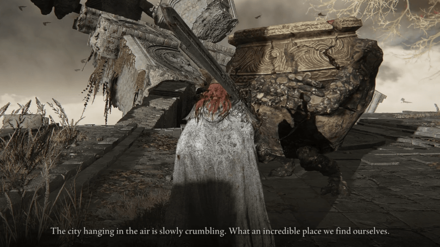 |
Alexander's final encounter will be on a platform to the east of the Dragon Temple. The only way to get to that platform is from the Dragon Temple Lift Site of Grace.
Defeating him here will make him drop the Shard of Alexander.
Alexander: Location and Questline Walkthrough
Defeat the Godskin Duo

The Godskin Duo can be found at the Dragon Temple and will need to be defeated in order to reach the Draconic Tree Sentinel and Malekith.
They will drop the Smithing-Stone Miner's Bell Bearing 4 and the Black Flame Tornado Ash of War.
How to Beat Godskin Duo: Boss Fight Guide
Defeat the Draconic Tree Sentinel
Defeat the Draconic Tree Sentinel blocking your path to Maliketh to obtain the Malformed Dragon Armor Set.
How to Beat Draconic Tree Sentinel: Boss Fight Guide
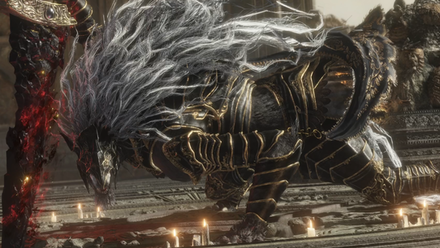
Defeat Dragonlord Placidusax
You can also fight Dragonlord Placidusax in a hidden area within Crumbling Farum Azula. Defeating this boss rewards you with the Remembrance of the Dragonlord. This area is where you can also use Miquella's Needle to remove the frenzied flame and exit the Lord of Frenzied Flame ending.
| How to Find Dragonlord Placidusax | |
|---|---|
| 1 |  |
| 2 | 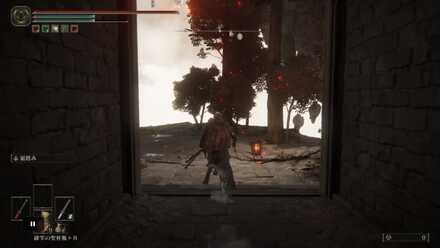 |
| 3 |  |
| 4 | 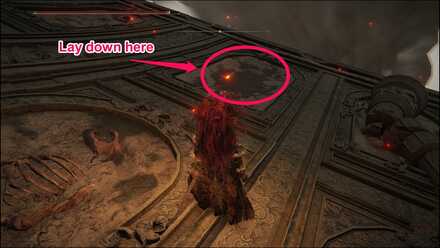 |
How to Beat Dragonlord Placidusax: Boss Fight Guide
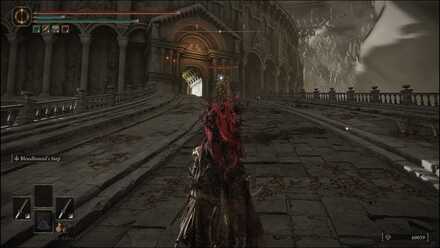
Defeat Maliketh, the Black Blade
Maliketh, the Black Blade can be found in the temple to the right of the Beside the Great Bridge Site of Grace, after defeating the Draconic Tree Sentinel. He is required to be beaten to access the final story area of the game.
Defeating Maliketh will have him drop the Remembrance of the Black Blade.
How to Beat Maliketh, The Black Blade: Boss Fight Guide
Crumbling Farum Azula Sacred Tears and Golden Seeds
Sacred Tears increase the potency of your Flasks, while Golden Seeds increase your Flask's number of uses. These are two very useful bolstering items that will help keep you alive longer.
| How to Get Sacred Tears | How to Get Golden Seeds |
|---|
Near Dragon Temple Altar
| World View | Map View |
|---|---|
 View Full Image |
 View Full Image |
A Golden Seed can be found on the glowing tree sapling near the Dragon Temple Altar site of grace.
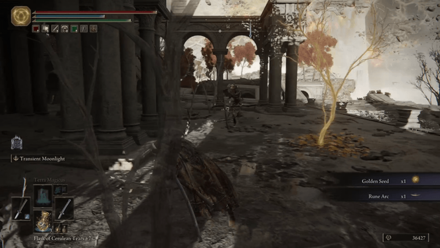
Southeast of Dragon Temple Rooftop
| World View | Map View |
|---|---|
 View Full Image |
 View Full Image |
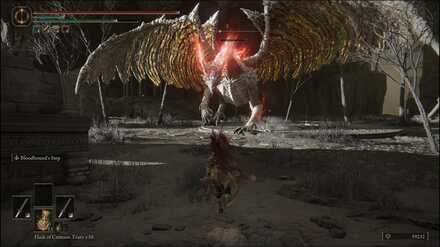
You can find the Golden Seed near the pillars southeast of the Dragon Temple Rooftop site of grace. Be wary of the giant Stormhawk that appears as you approach the glowing tree sapling.
Elden Ring Related Guides

All Legacy Dungeons
| Legacy Dungeons Guides | ||
|---|---|---|
| Stormveil Castle | Academy of Raya Lucaria | Redmane Castle |
| Leyndell, Royal Capital | Volcano Manor | Mohgwyn Palace |
| Crumbling Farum Azula | Miquella's Haligtree | - |
All DLC Legacy Dungeons
| DLC Legacy Dungeon Guides | ||
|---|---|---|
| Castle Ensis | Belurat Tower Settlement | Shadow Keep |
| Midra's Manse | Enir-Ilim | Specimen Storehouse |
Author

Crumbling Farum Azula Legacy Dungeon Walkthrough and Location
Rankings
- We could not find the message board you were looking for.
Gaming News
![Neverness to Everness (NTE) Review [Beta Co-Ex Test] | Rolling the Dice on Something Special](https://img.game8.co/4414628/dd3192c8f1f074ea788451a11eb862a7.jpeg/show)


Popular Games

Genshin Impact Walkthrough & Guides Wiki
Honkai: Star Rail Walkthrough & Guides Wiki
Arknights: Endfield Walkthrough & Guides Wiki
Umamusume: Pretty Derby Walkthrough & Guides Wiki
Wuthering Waves Walkthrough & Guides Wiki
Pokemon TCG Pocket (PTCGP) Strategies & Guides Wiki
Abyss Walkthrough & Guides Wiki
Zenless Zone Zero Walkthrough & Guides Wiki
Digimon Story: Time Stranger Walkthrough & Guides Wiki
Clair Obscur: Expedition 33 Walkthrough & Guides Wiki


Recommended Games
Fire Emblem Heroes (FEH) Walkthrough & Guides Wiki
Pokemon Brilliant Diamond and Shining Pearl (BDSP) Walkthrough & Guides Wiki
Diablo 4: Vessel of Hatred Walkthrough & Guides Wiki
Super Smash Bros. Ultimate Walkthrough & Guides Wiki
Yu-Gi-Oh! Master Duel Walkthrough & Guides Wiki
Elden Ring Shadow of the Erdtree Walkthrough & Guides Wiki
Monster Hunter World Walkthrough & Guides Wiki
The Legend of Zelda: Tears of the Kingdom Walkthrough & Guides Wiki
Persona 3 Reload Walkthrough & Guides Wiki
Cyberpunk 2077: Ultimate Edition Walkthrough & Guides Wiki


All rights reserved
ELDEN RING™ & ©BANDAI NAMCO Entertainment Inc. / ©2021 FromSoftware, Inc.
The copyrights of videos of games used in our content and other intellectual property rights belong to the provider of the game.
The contents we provide on this site were created personally by members of the Game8 editorial department.
We refuse the right to reuse or repost content taken without our permission such as data or images to other sites.