All Larval Tear Locations and Map

Larval Tears are used to respec stats and can be found in different locations in Elden Ring. Check out all the Larval Tear locations in our Larval Tear Interactive map and how to use them to respec.
| Base Game Larval Tears | DLC Larval Tears |
List of Contents
All Larval Tears Map
Larval Tears Interactive Map
The Interactive Map both shows the location of key points on the map, and doubles as a collectible checker.
- Click an icon on the right side to show all the pins of a specific type, or click the magnifying glass button to search for a specific pin by name.
- Click a pin on the map to see its name and description, and a relevant picture or video if available.
- From here, click Mark as Acquired to indicate that you've gotten a collectible already. This will change its icon on the map to show that it has been collected, and add 1 to that pin type's Counter.
- To undo this, click on the same pin and click Restore to unclaimed.
- To check how many pins you have marked so far, check the Counter in the bottom left, and click the icon that looks like a checklist to see counters for all pin types.
- If the collected pins start to get in the way, you can hide them all by clicking the green Show Pins button on the left side.
| Icon | How to Use |
|---|---|
 | Show Names This button reveals the Name of every icon currently shown. |
 | Show Pins This button will toggle between showing and hiding all the pins which you have already marked as acquired. |
 | Fullscreen This button will change the map display to fill the screen. |
 | Search Mode Toggle This button will display a searchbar which you can use to search for an individual pin by its name. |
 | Icon Mode Toggle In Search Mode, this button will toggle you back to Icon Mode, removing the search bar and displaying the icons again. |
 | All Pins This button is shown along with the Icons on the right when there are over 6 types of pins. Click it for a full selection of all available pin types. |
 | Counter Tracks the number of pins you have of a certain type. The pin type shown is set to the page and currently cannot be changed; however, all pin type counters can be viewed by clicking the checklist icon on the right side. |
| View All Counters This icon is found on the right side of the Counter. When a map has more than one pin type, click this icon to see Counters for all pin types. | |
| Zoom In / Zoom Out This icon is found on the top left side of the map. You can press these buttons, or use your scroll wheel while hovering, to Zoom In and Out of the interactive map. |
All Larval Tear Locations
| Jump to a Location! | ||
|---|---|---|
| Limgrave | Liurnia of the Lakes | Caelid |
| Altus Plateau | Mountaintops of the Giants | Nokron, Eternal City |
| Nokstella, Eternal City | Purchase from Merchant | - |
Limgrave
Agheel Lake South
| World View | Map Location |
|---|---|
 |
 |
There is an undead-like enemy on top of the cliffside east of the Agheel Lake South Site of Grace that turns into a large bear when defeated. If you defeat the bear, you will receive a Larval Tear as a reward.
Liurnia of the Lakes
North of the Folly on the Lake
| World View | Map Location |
|---|---|
 |
 |
You can find a lobster roaming around on the northern section of the Folly on the Lake Site of Grace. Similar to the undead-like enemy, the lobster is a decoy that turns into a miniboss version of the Grafted Scion upon defeat.
Defeating its true form rewards you with a Larval Tear.
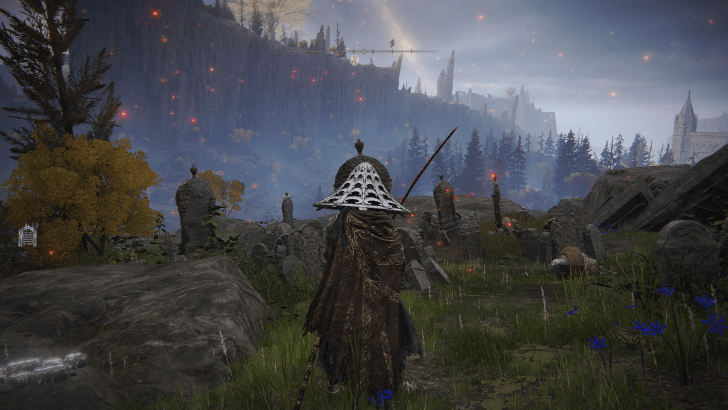
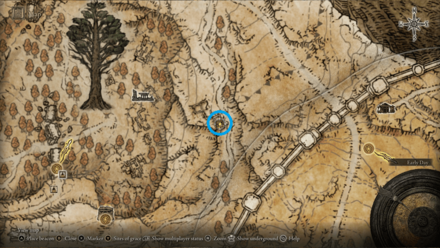
Near an Altar in the Village of the Albinaurics
| World View | Map Location |
|---|---|
 |
 |
You can find a Larval Tear near an altar at the graveyard area of the Village of the Albinaurics. The area contains plenty of undead-like enemies, so you may need to defeat them first before obtaining the item.
Village of the Albinaurics Location and What to Do
Caria Manor Painting
| World View | Map Location |
|---|---|
 |
 |
A Larval Tear is one of the rewards for finding the real world location of the Resurrection painting. After finding the painting first, you must head to Caria Manor and defeat Royal Knight Loretta.
This grants access to the graveyard behind the manor. Head Southeast of the Behind Caria Manor Site of Grace to find the correct location.
All Painting Locations and Rewards
Caelid
West of Cathedral of Dragon Communion
| World View | Map Location |
|---|---|
 |
 |
On the area west of Cathedral of Dragon Communion is a graveyard that contains an enemy that turns into a giant troll when defeated. If you defeat its true form, you will receive a Larval Tear as a reward.
Cathedral of Dragon Communion Location and What to Do
Altus Plateau
Ruins South of Windmill Village
| World View | Map Location |
|---|---|
 |
 |
The ruins south of the Windmill Village has a Noble crouched in the corner inside the crumbling building. Attacking the Noble will reveal that its acually a Lion Guardian. Defeating it will drop the Larval Tear.
Dominula, Windmill Village Walkthrough and Location
East of Road of Iniquity
| World View | Map Location |
|---|---|
 |
 |
East of the Road of Iniquity Site of Grace at Mt. Gelmir is a ruined campsite with a giant Wormface facing the fire. Defeating this enemy will reward the Larval Tear.
Mountaintops of the Giants
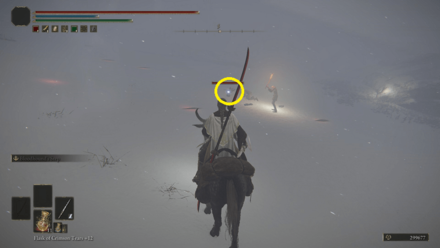
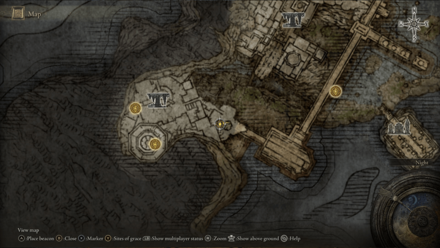
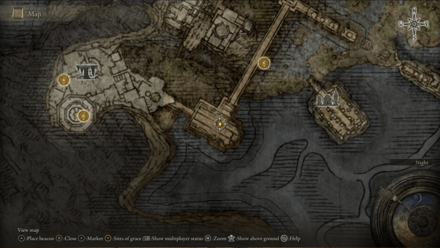
Near Inner Consecrated Snowfield
| World View | Map Location |
|---|---|
 |
 |
Southeast of the Inner Consecrated Snowfield Site of Grace is a Noble half buried in the snow and accompanied by two other Nobles. The half-buried Noble is a Runebear in disguise and will drop the Larval Tear on defeat.
Nokron, Eternal City
In the Building Southeast of the Site of Grace
| World View | Map Location |
|---|---|
 |
 |
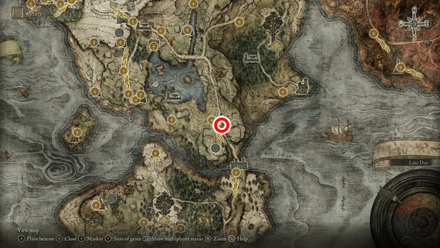
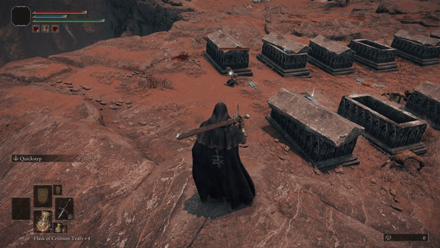
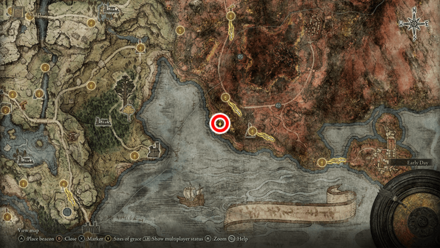
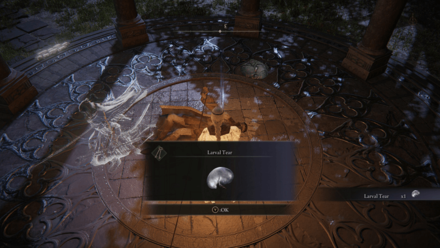
Inside the building southeast of the Nokron, Eternal City Site of Grace is a coprse containing the Larval Tear.
In the Middle of a Gazebo
| World View | Map Location |
|---|---|
 |
 |
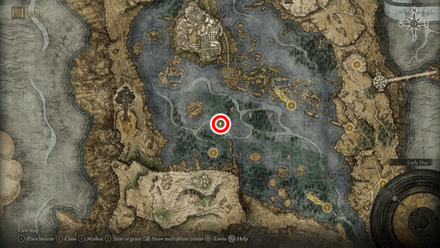
In the middle of a gazebo is another corpse with a Larval Tear. Be careful however, as Silver Tears will drop from the ceiling when you get closer.
Dropped by Mimic Tear
| World View | Map Location |
|---|---|
 |
 |
The Mimic Tear boss will award 2 Larval Tears on defeat.
How to Beat Mimic Tear: Boss Fight Guide
Dropped by a Silver Sphere
| World View | Map Location |
|---|---|
 |
 |
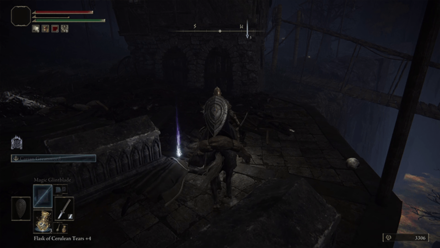
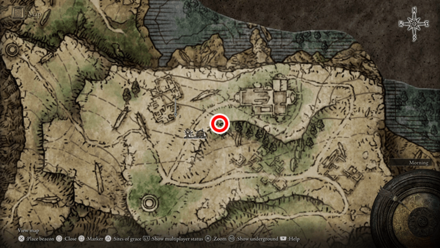
A first large building you can enter in Night's Sacred Ground will have a Silver Sphere. Snipe the Sphere from above with arrows to prevent yourself from taking damage. It will drop a Larval Tear on defeat.
Nokstella, Eternal City
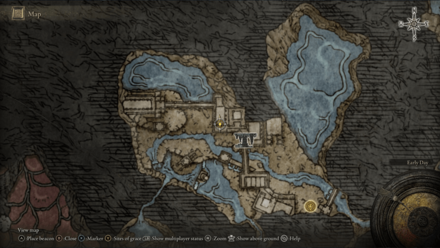
Dropped by a Silver Sphere on the Bridge
| World View | Map Location |
|---|---|
 |
 |
A Silver Sphere will appear on the bridge in Nokstella and will drop a Larval Tear on defeat.
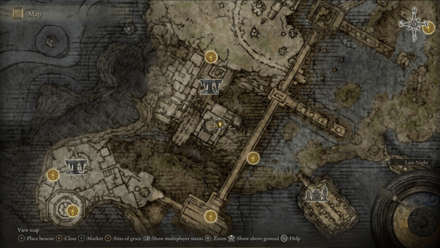
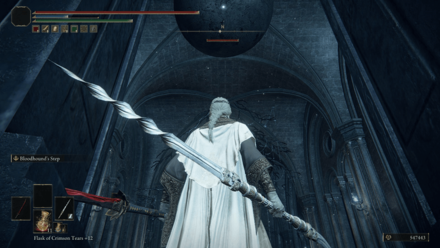
From a Silver Sphere on the Ceiling of a Building
| World View | Map Location |
|---|---|
 |
 |
After the bridge is a building to the northeast with a Silver Sphere hanging from the ceiling. It will drop down when you proceed towards the far end of the room. You can snipe it with arrows but do not finish it off while it's hanging, otherwise you will be unable to reach the Larval Tear.
Damage the Silver Sphere until it has a sliver of health left and then run towards the end of the room to force it to drop down. Finish it off to get the Larval Tear.
From a Silver Sphere in the Room Full of Silver Tears
| World View | Map Location |
|---|---|
 |
 |
The building at the top of Nokstella will have the Silver Sphere hanging at the end of the room. Upon entering, several Silver Tears will also drop, filling the room and moving slowly towards you.
The Silver Sphere will also drop, but for some reason, this is hostile towards the other Silver Tears. Let it take care of the ones inside the room while you deal with the stragglers coming towards you.
When all the Silver Tears are dead, finish the Silver Sphere off to obtain the Larval Tear.
Purchase From a Merchant
Larval Tear can be purchased from the following merchants:
| Merchant | Price |
|---|---|
 Abandoned Merchant (Siofra River) Abandoned Merchant (Siofra River)
|
3000 Runes |
 Pidia, Carian Servant Pidia, Carian Servant
|
3000 Runes |
How to Use Larval Tears
Respec Your Character's Stats
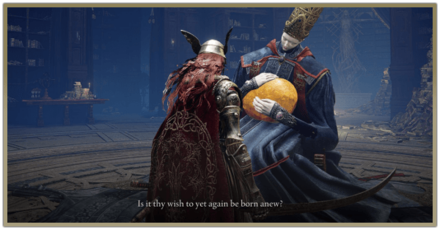
You can give your Larval Tears to Rennala after defeating her to have her reallocate your stats.
How to Respec Stats: All Respec Item Locations
Larval Tear Overview
Larval Tear Effect
 Larval Tear Larval Tear
|
|
| Effect | |
|---|---|
| Material needed by Rennala to grant rebirth. | |
| Type | Key Item |
| Buy Price | Sell Price |
| 3000 | Currently unknown |
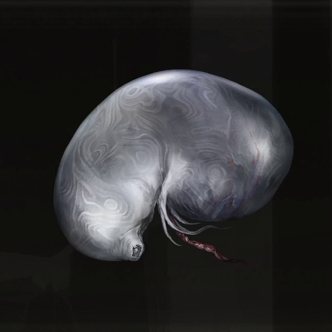
Larval Tear Lore Description
| Lore Description |
|---|
|
"Core of a creature of mimicry known as a silver tear. As much a substance as it is a living organism. Material required by the amber egg cradled by Rennala, Queen of the Full Moon, to birth people anew. Being born anew allows the reallocation of attributes boosted by leveling up." |
Elden Ring Related Guides

Recommended Guides
Elden Ring Wiki
 DLC
DLC Story Walkthrough
 Maps and Locations
 NPCs
NPCs Tips and Tricks
 Talismans
 Spirit Ashes
 Bell Bearings
 Great Runes
 Whetblades
 Items
Items Endings
 Bosses
 Weapons
 Magic Spells
 Armor
Armor Builds
 Starting Classes
 Ashes of War
 Divine Towers
 Smithing Stones
 Scrolls
 News and Game Info
 Patch Notes
 Message Boards
 Dungeons
Author

All Larval Tear Locations and Map
Rankings
- We could not find the message board you were looking for.
Gaming News


![Monster Hunter Stories 3 Review [First Impressions] | Simply Rejuvenating](https://img.game8.co/4438641/2a31b7702bd70e78ec8efd24661dacda.jpeg/thumb)
Popular Games

Genshin Impact Walkthrough & Guides Wiki
Honkai: Star Rail Walkthrough & Guides Wiki
Umamusume: Pretty Derby Walkthrough & Guides Wiki
Pokemon Pokopia Walkthrough & Guides Wiki
Resident Evil Requiem (RE9) Walkthrough & Guides Wiki
Monster Hunter Wilds Walkthrough & Guides Wiki
Wuthering Waves Walkthrough & Guides Wiki
Arknights: Endfield Walkthrough & Guides Wiki
Pokemon FireRed and LeafGreen (FRLG) Walkthrough & Guides Wiki
Pokemon TCG Pocket (PTCGP) Strategies & Guides Wiki


Recommended Games
Diablo 4: Vessel of Hatred Walkthrough & Guides Wiki
Cyberpunk 2077: Ultimate Edition Walkthrough & Guides Wiki
Fire Emblem Heroes (FEH) Walkthrough & Guides Wiki
Yu-Gi-Oh! Master Duel Walkthrough & Guides Wiki
Super Smash Bros. Ultimate Walkthrough & Guides Wiki
Pokemon Brilliant Diamond and Shining Pearl (BDSP) Walkthrough & Guides Wiki
Elden Ring Shadow of the Erdtree Walkthrough & Guides Wiki
Monster Hunter World Walkthrough & Guides Wiki
The Legend of Zelda: Tears of the Kingdom Walkthrough & Guides Wiki
Persona 3 Reload Walkthrough & Guides Wiki


All rights reserved
ELDEN RING™ & ©BANDAI NAMCO Entertainment Inc. / ©2021 FromSoftware, Inc.
The copyrights of videos of games used in our content and other intellectual property rights belong to the provider of the game.
The contents we provide on this site were created personally by members of the Game8 editorial department.
We refuse the right to reuse or repost content taken without our permission such as data or images to other sites.