Best Talismans
Talismans are accessories that you can add to your overall equipment in Elden Ring. Read on to see the best talismans to use for exploring and combat!
| Related Talisman Articles | |
|---|---|
| List of All Talismans | Best Talismans |
List of Contents
List of Best Talismans
Best Talismans for Combat
| Ranking | Talisman | Explanation |
|---|---|---|
| 1st | 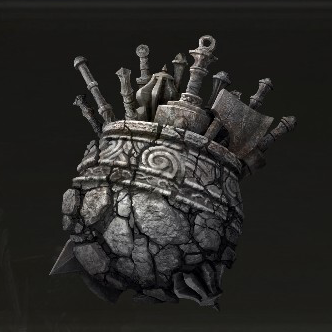 Great-Jar's Arsenal Great-Jar's Arsenal |
・ Vastly raises maximum equip load by 1.2 x ・ Useful when equipping multiple and heavy weapons |
| 2nd |  Dragoncrest Greatshield Talisman Dragoncrest Greatshield Talisman |
・ Increases physical damage negation by 20% ・ Useful for many enemy encounters since they deal mostly physical damage |
| 3rd |  Shard of Alexander Shard of Alexander |
・ Greatly increases the attack power of skills ・ Useful when using weapons with powerful skills, such as Rivers of Blood |
| 4th |  Radagon Icon Radagon Icon |
・ Shortens spell casting time of both sorceries and incantations ・ Casting time buff stacks with Azur's Glintstone Staff |
| 5th |  Graven-Mass Talisman Graven-Mass Talisman |
・ Greatly increases the power of sorceries ・ A must-have Talisman for pure Intelligence caster builds |
| 6th | 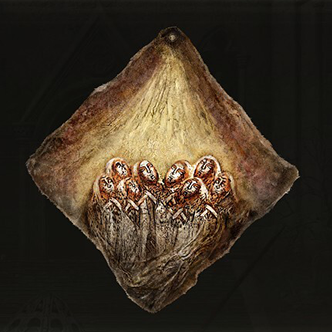 Faithful's Canvas Talisman Faithful's Canvas Talisman |
・ Greatly increases the power of incantations ・ A must-have Talisman for pure Faith caster builds |
Best Talismans for Exploration
| Ranking | Talisman | Explanation |
|---|---|---|
| 1st | 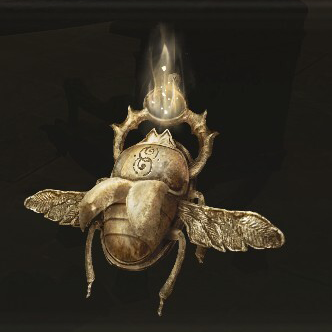 Gold Scarab Gold Scarab |
・ Increases the amount of runes earned by 1.2 x ・Useful for quickly levelling up characters |
| 2nd |  Silver Scarab Silver Scarab |
・ Increases the drop rate of items ・ Useful for farming rare equipment, weapons, and crafting materials from enemies |
| 3rd |  Erdtree's Favor +2 Erdtree's Favor +2 |
・ Increases maximum HP, Stamina, and Equip Load ・ Available in three versions |
| 4th |  Longtail Cat Talisman Longtail Cat Talisman |
・ Prevents fall damage ・ Useful in locations that require careful traversal or platforming, such as Miquella's Haligtree |
| 5th |  Ancestral Spirit's Horn Ancestral Spirit's Horn |
・ Restores FP after defeating enemies ・ A useful talisman when using weapon skills that have heavy FP consumption |
Best Combat Talisman Analyses
Great-Jar Talisman
|
Great-Jar's Arsenal
|
|
| Weight | Effect |
|---|---|
| 1.5 | Vastly raises maximum equip load. |
| How to Obtain | |
| Obtained as a reward for defeating the Great Jar's three champions summoned from the red simmon signs on the ground. | |
Increases Equipment Load
The Great-Jar's Arsenal provides a 1.2x boost to equipment load, allowing characters to wear and wield heavier armor and weapons.
This Talisman allows players to skip levelling Endurance in favor of other stats such as Vigor, which is very useful in multiplayer when meeting certain level caps.
Dragoncrest Greatshield Talisman
|
Dragoncrest Greatshield Talisman
|
|
| Weight | Effect |
|---|---|
| 0.8 | Enormously boosts physical damage negation. |
| How to Obtain | |
| Obtained in a chest on a balcony northeast of Haligtree Roots in Elphael, Brace of the Haligtree. | |
Increases Physical Damage Negation
The Dragoncrest Greatshield Talsiman increases physical damage negation by 20%, and is very useful in both normal combat and against bosses since most enemies deal physical damage.
Shard of Alexander
|
Shard of Alexander
|
|
| Weight | Effect |
|---|---|
| 0.9 | Greatly boosts the attack power of skills. |
| How to Obtain | |
| Obtained after defeating Iron-Fist Alexander in Crumbling Farum Azula at the conclusion of his questline. | |
Boosts the Power of Skills
The Shard of Alexander greatly increases the power of weapon skills and Ashes of War equipped on weapons. This Talisman is it boosts the power weapon skills, such as the Dark Moon Greatsword's Moonlight Greatsword and Rivers of Blood's Corpse Piler.
Radagon Icon
|
Radagon Icon
|
|
| Weight | Effect |
|---|---|
| 0.7 | Shortens spell casting time. |
| How to Obtain | |
| Obtained from a treasure chest in Academy of Raya Lucaria on the second floor of the Debate Parlor accessible after climbing up a ladder from the courtyard. | |
Shortens Spell Casting Time
Radagon Icon is a very useful talsiman for both Intelligence and Faith-based caster builds. Many powerful sorceries and incantations, such as the Comet Azur and Fortissax's Lightning Spear, have very long casting times that leave the player vulnerable to enemy attacks.
This talisman shortens casting time, allowing players to fire powerful spells quickly and quickly dodge or reposition themselves before getting hit. The talisman's effect also stacks with Azur's Glintstone Staff.
Graven-Mass Talisman
|
Graven-Mass Talisman
|
|
| Weight | Effect |
|---|---|
| 1.0 | Raises potency of sorceries. |
| How to Obtain | |
| Obtained at the top of Albinauric Rise after solving the tower's puzzle. | |
Boosts the Power of Sorceries
The Graven-Mass Talisman is a must-have for intelligence-based caster builds that rely on offensive sorceries. It's also a good alternative to Lusat's Glintstone Staff since it doesn't increase FP consumption, though you can alternatively equip both to further boost the power of your sorceries.
Faithful's Canvas Talisman
|
Faithful's Canvas Talisman
|
|
| Weight | Effect |
|---|---|
| 0.7 | Raises potency of incantations. |
| How to Obtain | |
| Obtained in the upper part of Sellia Crystal Tunnel in a room guarded by two Kindred of Rot.. | |
Boosts the Power of Incantations
The Faithful's Canvas Talisman is a must-have for faith-based caster builds that rely on offensive incantations. It also boosts the power of Dragon Incantations, making them useful for Faith/Arcane hybrids.
Best Exploration Talisman Analyses
Gold Scarab
|
Gold Scarab
|
|
| Weight | Effect |
|---|---|
| 1.2 | Increases runes obtained from defeated enemies. |
| How to Obtain | |
| Obtained as a reward for defeating two Cleanrot Knights that serve as the boss for the Abandoned Cave. | |
Increases the Amount of Runes Earned
The Gold Scarab talisman is very useful when focusing on levelling up your character as it doubles the runes earned from defeated enemies.
It's best equipped in relatively safe levelling areas, such as the path with the Albinaurics near the Palace Approach Ledge-Road site of Grace in Mohgwyn Palace.
Silver Scarab
|
Silver Scarab
|
|
| Weight | Effect |
|---|---|
| 1.2 | Raises item discovery. |
| How to Obtain | |
| Obtained from a chest behind an illusory wall in the Hidden Path to the Haligtree accessible after dropping down from the central room and onto an invisible bridge. | |
Increases Item Drop Rate
The Silver Scarab talisman is very useful when farming rare equipment, weapons, or crafting materials from enemies such as the Magma Blade from the Man-Serpents in Volcano Manor.
Erdtree's Favor +2
 Erdtree's Favor +2 Erdtree's Favor +2
|
|
| Weight | Effect |
|---|---|
| 1.5 | Raises maximum HP, stamina and equip load. |
| How to Obtain | |
| Obtained on a branch in a courtyard surrounded by Ulcerated Tree Spirits in Leyndell, Capital of Ash. | |
Boosts Max HP, Stamina, and Equip Load
The Erdtree's Favor +2 is a useful talisman for general exploring as it raises the character's max HP, Stamina, and Equip Load significantly. Although the +2 version provides the strongest boost, the regular and +1 versions are also good alternatives as the stat boosts are still very high.
Longtail Cat Talisman
|
Longtail Cat Talisman
|
|
| Weight | Effect |
|---|---|
| 0.6 | Renders the wearer immune to fall damage. |
| How to Obtain | |
| Obtained from a dead body left of the Abductor Virgin enemy in the area with the large moving gear at the Academy of Raya Lucaria. | |
Prevents Fall Damage
The Longtail Cat Talisman is very useful when exploring unknown locations that have trecherous terrain, such as the exterior of the Divine Tower of Caelid and Miquella's Haligtree.
Keep in mind that while it prevents fall damage, it doesn't protect from falls from lethal heights that instantly kill the character, such as falling into bottomless pits.
Ancestral Spirit's Horn
|
Ancestral Spirit's Horn
|
|
| Weight | Effect |
|---|---|
| 1.2 | Restores FP upon defeating enemies. |
| How to Obtain | |
| Obtained from Enia, the Finger Reader at Roundtable Hold by using the Remembrance of the Regal Ancestor after defeating the Regal Ancestor Spirit. | |
Restores FP when Defeating Enemies
The Ancestral Spirit's Horn is a very useful talisman when going through locations and legacy dungeons while using weapons with expensive skills or spells, and helps the character preserve their Flask of Cerulean Tears for tougher encounters or bosses.
Elden Ring Related Guides

Recommended Guides
Elden Ring Wiki
 DLC
DLC Story Walkthrough
 Maps and Locations
 NPCs
NPCs Tips and Tricks
 Talismans
 Spirit Ashes
 Bell Bearings
 Great Runes
 Whetblades
 Items
Items Endings
 Bosses
 Weapons
 Magic Spells
 Armor
Armor Builds
 Starting Classes
 Ashes of War
 Divine Towers
 Smithing Stones
 Scrolls
 News and Game Info
 Patch Notes
 Message Boards
 Dungeons
Author

Rankings
- We could not find the message board you were looking for.
Gaming News
![Neverness to Everness (NTE) Review [Beta Co-Ex Test] | Rolling the Dice on Something Special](https://img.game8.co/4414628/dd3192c8f1f074ea788451a11eb862a7.jpeg/show)


Popular Games

Genshin Impact Walkthrough & Guides Wiki
Honkai: Star Rail Walkthrough & Guides Wiki
Arknights: Endfield Walkthrough & Guides Wiki
Umamusume: Pretty Derby Walkthrough & Guides Wiki
Wuthering Waves Walkthrough & Guides Wiki
Pokemon TCG Pocket (PTCGP) Strategies & Guides Wiki
Abyss Walkthrough & Guides Wiki
Zenless Zone Zero Walkthrough & Guides Wiki
Digimon Story: Time Stranger Walkthrough & Guides Wiki
Clair Obscur: Expedition 33 Walkthrough & Guides Wiki


Recommended Games
Fire Emblem Heroes (FEH) Walkthrough & Guides Wiki
Pokemon Brilliant Diamond and Shining Pearl (BDSP) Walkthrough & Guides Wiki
Diablo 4: Vessel of Hatred Walkthrough & Guides Wiki
Super Smash Bros. Ultimate Walkthrough & Guides Wiki
Yu-Gi-Oh! Master Duel Walkthrough & Guides Wiki
Elden Ring Shadow of the Erdtree Walkthrough & Guides Wiki
Monster Hunter World Walkthrough & Guides Wiki
The Legend of Zelda: Tears of the Kingdom Walkthrough & Guides Wiki
Persona 3 Reload Walkthrough & Guides Wiki
Cyberpunk 2077: Ultimate Edition Walkthrough & Guides Wiki


All rights reserved
ELDEN RING™ & ©BANDAI NAMCO Entertainment Inc. / ©2021 FromSoftware, Inc.
The copyrights of videos of games used in our content and other intellectual property rights belong to the provider of the game.
The contents we provide on this site were created personally by members of the Game8 editorial department.
We refuse the right to reuse or repost content taken without our permission such as data or images to other sites.