This survey will take about 1 minute.
Your answers will help us to improve our website.
Elden Ring
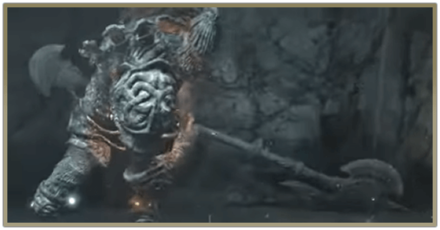
How to Beat Guardian Golem: Boss Fight Guide

This is a guide on how to beat Guardian Golem, an optional boss in Elden Ring. Read on to learn more about Guardian Golem's drops, weaknesses, and recommended level!
List of Contents
Guardian Golem General Info
Stats and Rewards
| Guardian Golem | |||
|---|---|---|---|
|
|||
| Weakness | Resistance | Immune | |
| ━ |
Fire Holy Lightning |
Poison Sleep Scarlet Rot Frost Bleed |
|
| Affected By | ━ | ||
| Spirit Ashes Available? | Yes | ||
| Rune Rewards | ・1700 (Highroad Cave) ・1039 (South of Stormhill Shack) ・1091 (Castle Morne) ・1439 (Ainsel River Well) ・3 x 2546 (Outskirts of Leyndell, Royal Capital) (NG) |
||
| Summonable NPCs |
None
|
||
| Locations | |||
| Optional Boss Version: ・Highroad Cave, Limgrave Mini-Boss Versions: ・South of Stormhill Shack, Limgrave ・Castle Morne, Limgrave ・Ainsel River Well, Liurnia of the Lakes ・Outskirts of Leyndell, Royal Capital, Altus Plateau |
|||
| Item Drops | |
|---|---|
| Highroad Cave: ・Blue Dancer Charm |
Guardian Golem Location
Highroad Cave
| Map Location | |
|---|---|
 View Full Image |
|
| Recommended Level | Lv.30 |
The Optional Guardian Golem Boss can be found in Highroad Cave, which is a slightly hidden cave north of Limgrave. You can get here by traveling along the river northward.
Fight at Level 30+
It would be wise to enter this dungeon when you've completed most of the other dungeons in West Limgrave and had the chance to level up a bit. The Guardian Golem is slow but its attacks hit hard.
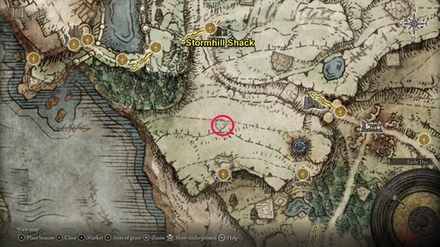
South of Stormhill Shack
| Map Location | |
|---|---|
 View Full Image |
|
| Recommended Level | Lv.25 |
A Golem can be found in the ruins directly south of Stormhill Shack. It will initially be laying on the ground.
Fight at Level 25+
This Golem is fairly easy to beat due to its low health. This may be your first encounter with a Golem since it's located fairly early in the game. Focus on attacking its heels and staying right below it and you shoudn't have a problem beating it.
Castle Morne
| Map Location | |
|---|---|
 View Full Image |
|
| Recommended Level | Lv.40 |
An archer Golem will be guarding the entrance to Castle Morne, located in the furthest southern part of Limgrave.
Fight at Level 40+
This Golem can be difficult to defeat since it wields a bow. Make sure you use your horse to reach it otherwise it can be difficult to dodge its giant arrows.
Ainsel River Well
| Map Location | |
|---|---|
 View Full Image |
|
| Recommended Level | Lv.60 |
A Golem will be guarding the entrance to the Ainsel River Well in eastern Liurnia of the Lakes.
Fight at Level 60+
This Golem will deal significantly more damage compared to the previous ones and will also have more health. While the same strategy of focusing on its heels applies, make sure you have a decent amount of Vigor before fighting it.
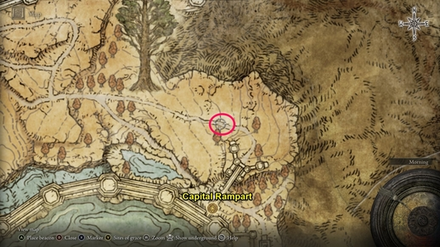
Outskirts of Leyndell, Royal Capital
| Map Location | |
|---|---|
 View Full Image |
|
| Recommended Level | Lv.70 |
Three Golems will be located patrolling the outskirts Leyndell, Royal Capital, near the Draconic Tree Sentinel.
Fight at Level 70+
This will be the most difficult Golem encounter since you'll have to face three of them, with two wielding bows. They're fairly spread out so you don't have to worry about fighting multiple ones at the same time.
Just be aware of when the other archer Golem is about to fire at you since they can interrupt your attacks.
How to Beat Guardian Golem
| Tips for Beating Guardian Golem |
|---|
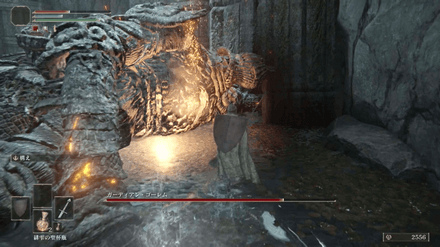
Hit Its Ankles to Topple It Over

While the Guardian Golem is standing up, its weak spots are its ankles. Hit these exposed weak spots, ideally with jumping strong attacks, to make the Guardian Golem fall over. Around three to four jump attacks done in quick succession are enough to make the Guardian Golem fall over.
Do a Critical Attack on Its Chest
When it is on the ground, attack its chest to execute a critical hit. This will do a ton of damage that will help you defeat the Guardian Golem much quicker.
Stay Behind its Heels
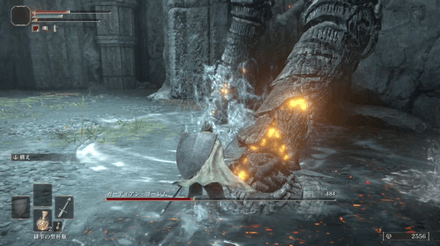
Stay behind its left or right heel, since this lets you avoid most of its attacks and you can easily hack at its ankles. Be wary of its stomping attacks though. Once you see it raise its legs, dodge out of the way.
Use Physical Attacks or Sorceries
| Weapon Type Weaknesses | ||
|---|---|---|
| Standard Weapons | Striking Weapons | Slashing Weapons |
| Piercing Weapons | Magic Weapons | - |
Guardian Golems don't have any weaknesses and are particularly strong against Fire, Holy, and Lightning. Prioritize using physical and magic attacks to deal damage more efficiently.
Guardian Golem Attack Patterns
Melee Attacks
| Melee Attack Variations |
|---|
 Overhead Slam: Guardian Golem raises its axe overhead for a few seconds before slamming it down. This has a long delay so don't spam your rolls. You can anticipate it by watching out for when it moves its left foot back. |
 Charging Golem: Guardian Golem pushes its axe down to the ground and rushes forward. This move will end with it turning and tossing rocks at you. Run behind once this move starts then prepare to dodge the rocks as the Golem turns. |
 Multiple Stabs: The boss stabs the ground four times with the hilt of its weapon. Watch for when it brings its right foot down to know when to start dodging. You can back away from the AoE entirely or try to get behind it. |
 Plunging Axe: Guardian Golem stabs its weapon deep into the ground then pulls it back out. This causes AoE damage so back away before the axe is pulled out. |
 Stomp and Swipe: If you're attacking its heels, the Guardian Golem will stomp to hit you. It'll usually follow this up with an axe swipe. Be cautious when attacking this area and prepare to dodge since this attack's animation is fairly quick. |
 Sweeping Axe: Guardian Golem swings its axe and sweeps the area in front of it. Roll as the axe approaches you. |
Elden Ring Related Guides
DLC Bosses
Main Bosses
Optional Bosses
Mini-Bosses
| All Bosses in Elden Ring | |
|---|---|
| Elder Dragon Greyoll | Lion Guardian |
| Valiant Gargoyle (Leyndell) | - |
Hostile NPCs and Invaders
| Limgrave Invaders and Hostile NPCs | |
|---|---|
| Bloody Finger Nerijus | Old Knight Istvan |
| Recusant Henricus | - |
| Liurnia of the Lakes Invaders and Hostile NPCs | |
| Great Horned Tragoth | Festering Fingerprint Vyke |
| Altus Plateau Invaders and Hostile NPCs | |
| Eleonora, Violet Bloody Finger | Inquisitor Ghiza |
| Maleigh Marais, Shaded Castle Castellan | Rileigh the Idle |
| Vargram the Raging Wolf & Errant Sorcerer Wilhelm | Magnus the Beast Claw |
| Mountaintops of the Giants Invaders and Hostile NPCs | |
| Juno Hoslow, Knight of Blood | - |
| The Roundtable Hold Invaders and Hostile NPCs | |
| Mad Tongue Alberich | - |
| Multiple Location Invaders and Hostile NPCs | |
| Anastasia, Tarnished-Eater | - |
Author

How to Beat Guardian Golem: Boss Fight Guide
Please participate in our site
improvement survey
03/2026
improvement survey
03/2026
Would you assist in
improving Game8's site?
improving Game8's site?

×
We are listening to our users' valuable opinions and discussing how to act on them.
The information collected through this survey will be used for the purpose of improving our services. In addition, the information will only be disclosed a part of a statistic in a format that will not allow identification of personal information.
Begin Survey
Not Now
×
Please rate each item regarding Game8.co's Advertisements.
Amount of Ads
Very Dissatisfied
Somewhat Dissatisfied
Fine
Somewhat Satisfied
Highly Satisfied
Placement of Ads
Timing of Ad Display
Ad Loading Speed
Safeness of Ads
Content of Ads
×
Please rate each item regarding Game8.co's Quality of Articles.
Amount of information
Very Dissatisfied
Somewhat Dissatisfied
Fine
Somewhat Satisfied
Highly Satisfied
Frequency of updates
Speed of new information
Accuracy of articles
Understandibility of articles
Readability of sentences
×
Please rate each item regarding Game8.co's Usability of the Site.
Ease of finding information
Very Dissatisfied
Somewhat Dissatisfied
Fine
Somewhat Satisfied
Highly Satisfied
Loading Speed
Use of Color
Font Size
Visibility of Images
Easy to Understand Layout
×
Please rate each item regarding Game8.co's Message Boards, Comments.
Ease of Writing
Very Dissatisfied
Somewhat Dissatisfied
Fine
Somewhat Satisfied
Highly Satisfied
Readability
Ease in Finding Information
Comment Quality
Comment Quantity
Admin Response
×
Please rate each item regarding Game8.co's Site's new design.
Please rate our site's new design
Very Dissatisfied
Somewhat Dissatisfied
Fine
Somewhat Satisfied
Highly Satisfied
Do you think that the website's design change makes the site easier to use?
Has the new design made it easier for you to find information on the site?
Has the new design improved the overall visual appeal of the site?
How would you rate your overall satisfaction with the new design of the site?
×
How likely are you to recommend Game8 to someone you know?
Very Unlikely
0
1
2
3
4
5
6
7
8
9
10
Very Likely
If you have other opinions regarding potential improvement to the website, please share them with us. We would appreciate your honest opinion.
Note: This is a free response section, so you can proceed without entering anything.
Note: Please be sure not to enter any kind of personal information into your response.
Note: Please be sure not to enter any kind of personal information into your response.
×
Thank You
×
Thank you for participating in our survey! Your answers will help us to improve the quality of our website and services.
We hope you continue to make use of Game8.
We hope you continue to make use of Game8.
Close
Rankings
- We could not find the message board you were looking for.
Gaming News


Popular Games

Genshin Impact Walkthrough & Guides Wiki
Honkai: Star Rail Walkthrough & Guides Wiki
Umamusume: Pretty Derby Walkthrough & Guides Wiki
Pokemon Pokopia Walkthrough & Guides Wiki
Resident Evil Requiem (RE9) Walkthrough & Guides Wiki
Monster Hunter Wilds Walkthrough & Guides Wiki
Wuthering Waves Walkthrough & Guides Wiki
Arknights: Endfield Walkthrough & Guides Wiki
Pokemon FireRed and LeafGreen (FRLG) Walkthrough & Guides Wiki
Pokemon TCG Pocket (PTCGP) Strategies & Guides Wiki


Recommended Games
Diablo 4: Vessel of Hatred Walkthrough & Guides Wiki
Fire Emblem Heroes (FEH) Walkthrough & Guides Wiki
Yu-Gi-Oh! Master Duel Walkthrough & Guides Wiki
Super Smash Bros. Ultimate Walkthrough & Guides Wiki
Pokemon Brilliant Diamond and Shining Pearl (BDSP) Walkthrough & Guides Wiki
Elden Ring Shadow of the Erdtree Walkthrough & Guides Wiki
Monster Hunter World Walkthrough & Guides Wiki
The Legend of Zelda: Tears of the Kingdom Walkthrough & Guides Wiki
Persona 3 Reload Walkthrough & Guides Wiki
Cyberpunk 2077: Ultimate Edition Walkthrough & Guides Wiki


All rights reserved
ELDEN RING™ & ©BANDAI NAMCO Entertainment Inc. / ©2021 FromSoftware, Inc.
The copyrights of videos of games used in our content and other intellectual property rights belong to the provider of the game.
The contents we provide on this site were created personally by members of the Game8 editorial department.
We refuse the right to reuse or repost content taken without our permission such as data or images to other sites.