Black Steel Greathammer Guard Counter Build Guide

The Black Steel Greathammer Guard Counter build is a defensive holy damage and guard counter-based setup in the Elden Ring DLC Shadow of the Erdtree. Read on to learn how to make and play the Black Steel Greathammer Guard Counter build, including its stat distribution and required equipment.
| Black Steel Greathammer Guides | |
|---|---|
Black Steel Greathammer Build Guide
Uses the Black Steel Greathammer with Sacred Affinity Cragblade
| Main Weapon Loadout | |||||||||
|---|---|---|---|---|---|---|---|---|---|
 Black Steel Greathammer Black Steel Greathammer
|
Ash of War: Cragblade Affinity: Upgrade Level: +25 Off-Hand: Finger Seal |
||||||||
| Weapon Scaling (+25) | |||||||||
| Str: D | Dex: E | Int: - | Fai: C | Arc: - | |||||
| Stat Requirements | |||||||||
| Str: 25 | Dex: 11 | Int: 0 | Fai: 17 | Arc: 0 | |||||
This build infuses the DLC-exclusive Black Steel Greathammer with the Sacred affinity, while using the base game Ash of War Cragblade.
Stance breaking and guard counters are the primary advantages of this build, meaning the most important components you need are the Cragblade skill, the Deflecting Hard Tear and Stonebarb-Shrouding Cracked Tear Wondrous Physick mix, and the Curved Sword Talisman. Further damage or defense-boosting incantations and talismans are just bonuses.
Black Steel Greathammer Location and Stats
Enhanced Holy Damage and Guard Counters Due to Unique Weapon Passive
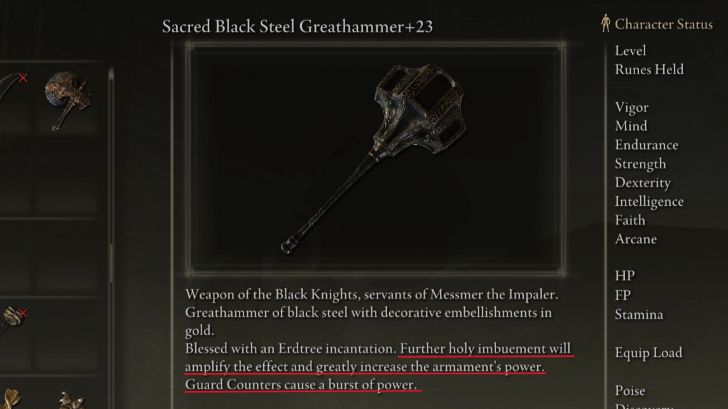
The Black Steel Greathammer has two unique passives that make it especially suitable for a Faith and Strength-based guard counter playstyle. The first is that it sees a significant boost in base Holy damage when imbued with the Sacred affinity, similar to the Fire Knight's Greatsword's passive with the Flame Arts affinity.
The second is that it has a unique guard counter that does an initial slam, then releases a second AoE burst of holy damage from the ground that does additional poise damage. These are both reasons why despite being able to reach A scaling in STR with the Heavy affinity, it's better to imbue it with the Sacred affinity.
Further Enhanced Poise Damage from Physick and Cragblade
The Greathammer's excellent poise damage becomes even stronger when buffed by the Cragblade Ash of War and the DLC-exclusive Deflecting Hardtear in your Wondrous Physick.
When under the effect of Deflecting Hardtear specifically, guarding right before an attack lands will result in a spontaneous guard that can be followed up with a stronger, more poise-damaging counter.
Optional: Use Black Steel Greatshield for Additional Protection
If you're not confident in your ability to time spontaneous guard counters, you can opt to equip the Black Steel Greatshield for maximum defense. It provides 100% physical damage negation, and upwards of 74 Guard Boost when upgraded, which can be bolstered further with the Barricade Shield Ash of War.
However, if you do equip the Greatshield, it will be necessary to also equip the Great-Jar's Arsenal so that you can still medium roll if the need arises.
Stacks Buffs to Buff Guard and Guard Counters
The goal of your buffs pre-fight will be to maximize the potential of your guard counters' HP and poise damage to ensure consistent staggers against even the toughest opponents.
| How to Buff Before a Boss | |
|---|---|
| 1 | Cast Golden Vow for a damage buff and defense buff. |
| 2 | Drink your Wondrous Physick to buff your stance breaking potential. The optimal mix for this build is the Deflecting Hardtear with the Stonebarb-Shrouding Cracked Tear. |
| 3 | Cast Cragblade to further boost your attack power and poise damage. |
| 4 | Cast Flame, Grant Me Strength for a physical damage buff. Must be cast as late as possible during prep due to its short uptime. |
| 5 | With Shield: Cast Barricade Shield to boost Guard Boost and reduce stamina drain when blocking attacks. |
All Buffs and Debuffs and What They Do
Viable as Early as Level 150
As this is a DLC build, this setup is viable even at Level 150, as by this point you will already have enough points for the minimum survivability and FP stats while already reaching the 50s in your FAI stat, which is where most of your damage and scaling will come from.
If you're running the Greatshield, you can even allocate some points away from VGR to FAI if you're feeling confident, since so long as you're properly blocking and deflecting, your HP should barely be scratched.
Black Steel Greathammer Guard Counter Build Stat Distribution
Recommended Stats
| Recommended Level | ||
|---|---|---|
| 190 | ||
| Stat | Points | Explanation |
| VGR | 60 | 60 Vigor should be your target for a high enough HP value to comfortably tank high-damage attacks from bosses. |
| MND | 25 | 25 Mind is a comfortable target in order to cast Golden Vow, Flame, Grant Me Strength, and Cragblade, while still being able to reapply Barricade Shield multiple tiimes throughout a fight. |
| END | 35 | 35 Endurance is the minimum to be able to wield both the Greathammer and Greatshield while still being able to equip armor that will give you at least 51 poise. |
| STR | 49 | Strength should only be prioritized until you reach the 25 points necessary to wield the Black Steel Greathammer. You can revisit this stat after reaching the soft cap of FAI, then decide if you'll aim for 54 if you're two-handing the hammer, or 80 if you're one-handing it along with a Greatshield . |
| DEX | 12 | The minimum Dexterity requirement to wield the Black Steel Greathammer is 11. |
| INT | 9 | INT will not be needed. |
| FAI | 70 | After being imbued with Sacred affinity, the Greathammer's highest scaling will be a C in Faith. Level up your Faith as much as possible to boost the holy damage of your attacks and guard counters. |
| ARC | 9 | ARC will not be needed. |
Recommended Starting Class

| VGR | MND | END | STR | DEX | INT | FAI | ARC |
|---|---|---|---|---|---|---|---|
| 10 | 13 | 10 | 12 | 12 | 9 | 14 | 9 |
The best starting class for the Black Steel Greathammer Guard Counter build is the Confessor because its starting allocation weighs heavily towards FAI and STR, while also giving just enough DEX to meet the minimum requirements to wield the Greathammer.
For beginners, prioritize FAI and STR first so you can wield other holy damage heavy weapons as practice before you actually get the Black Steel Greathammer, while also leveling VGR and END to gradually boost your survivability and equip load.
Respec Stats at Rennala in Raya Lucaria
Before hitting the DLC, make sure to respec your stats by offering a Larval Tear to Rennala at the Academy of Raya Lucaria in Liurnia. You can do this before going to the DLC since the Black Steel Greathammer can be obtained without having to fight any DLC bosses.
Required Equipment for the Black Steel Greathammer Build
| How to Get All Required Build Items | ||
|---|---|---|
| Weapon | Ash of War | Armor Set |
| Talismans | Incantations | Great Rune |
Get Black Steel Greathammer from Black Knight in Church of Consolation
| Map Location | World View |
|---|---|
 |
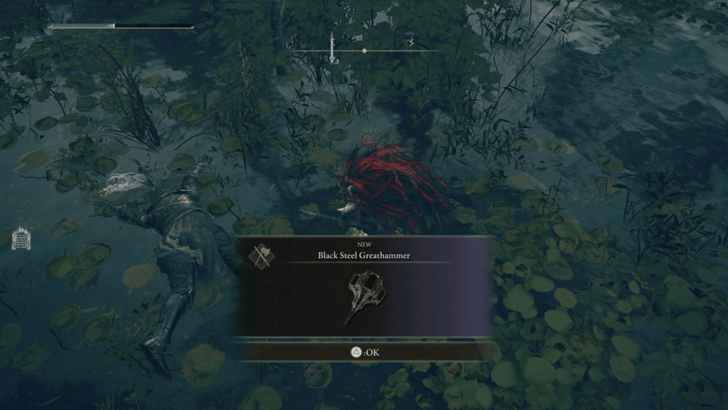 |
The Black Steel Greathammer is dropped by a Black Knight in the Church of Consolation, located a bit southeast of the Scorched Ruins. Follow the southbound road which starts from the Ruins to reach the Church.
Black Steel Greathammer Stats and Scaling
Get Black Steel Greatshield After Defeating Black Knight Garrew in Fog Rift Fort
| Map Location | World View |
|---|---|
 |
 |
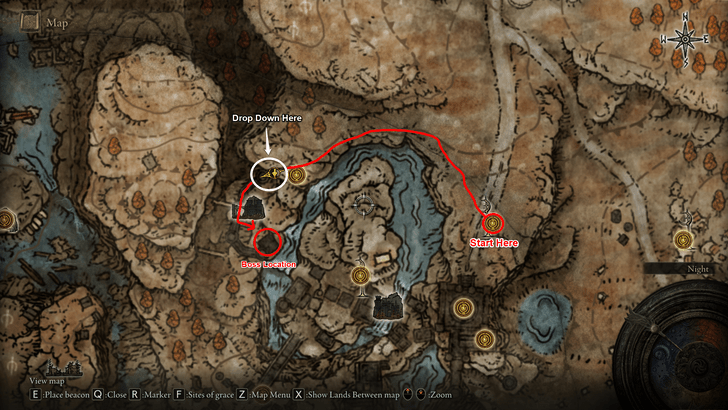
The Black Steel Greatshield is obtained as a reward for defeating Black Knight Garrew in Fog Rift Fort, which can be reached by descending from the Scadu Altus, West site of grace.
Black Steel Greatshield Stats and Scaling
Buy the Finger Seal from the Twin Maiden Husks in the Roundtable Hold
The Finger Seal can be bought from the Twin Maiden Husks in the Roundtable Hold for 800 Runes. Since this is a physical build, you won't be requiring higher-scaling Seals, as you just need a Seal to apply buffs rather than deal damage with spells.
Finger Seal Stats and How to Get
Get Cragblade West of the Impassable Greatbridge in Caelid
| Map Location | World View |
|---|---|
 |
 |
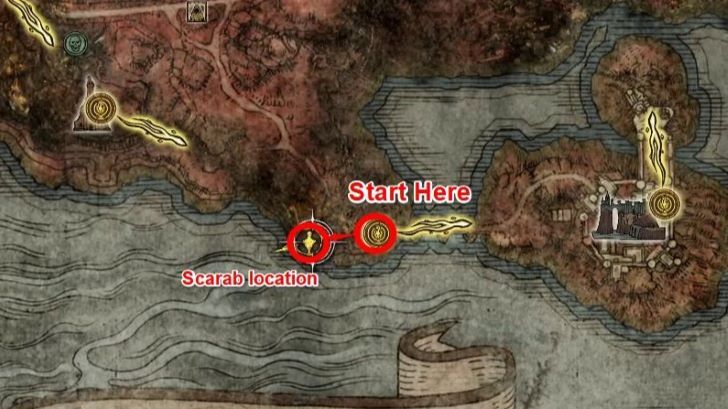
The Cragblade Ash of War is held by a scarab west of the Impassable Bridge Site of Grace in southern Caelid. You'll be able to find it near the monument of swords.
Cragblade Ash of War Location and Effect
Get Sanctified Whetblade in Leyndell to Imbue Sacred Affinity
| Map Location | World View |
|---|---|
 |
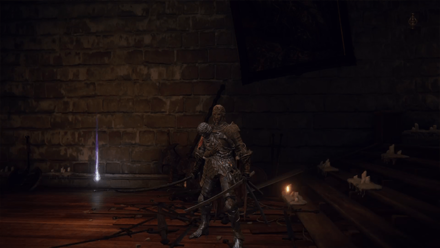 |
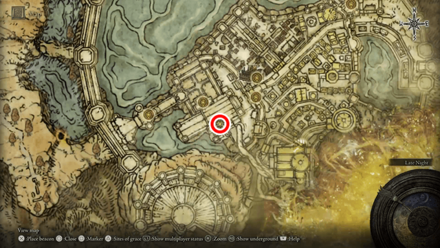
Since Cragblade does not allow come with the Sacred affinity by default, you will need to obtain the Sanctified Whetblade to imbue it with said affinity.
You can find the Sanctified Whetblade near the anvil at the abandoned Roundtable Hold in the Fortified Manor in Leyndell.
Sanctified Whetblade Location and Effects
Get Blaidd's Armor Set After Defeating Blaidd During his Questline
| Map Location | World View |
|---|---|
 |
 |
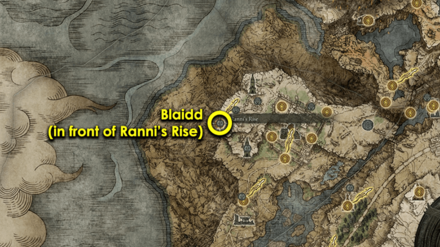
Blaidd's Armor, Gauntlets and Greaves altogether reach the 51 poise breakpoint while also being light enough to allow you to medium roll, even with both the Black Steel Greathammer and Greatshield equipped.
Getting the armor set will require you to defeat Blaidd at the end of his questline, which will also require concluding Ranni's questline.
Blaidd the Half-Wolf Quest and Location
Get the Blade of Mercy Talisman from the Scorched Ruins
Since this build is reliant on breaking the stance of opponents, the Blade of Mercy Talisman's passive of raising attack power after critical hits will be procced regularly, making it highly viable for this build's damage output.
This talisman is located early into the DLC, in a tower within the Scorched Ruins, but requires some platforming with Torrent to obtain it. Follow the video above to reach the chest containing the talisman.
Blade of Mercy Talisman Location and Effects
For Shielders: Obtain the Pearl Shield Talisman Northwest of Ancient Ruins Base
| Map View | World View |
|---|---|
 |
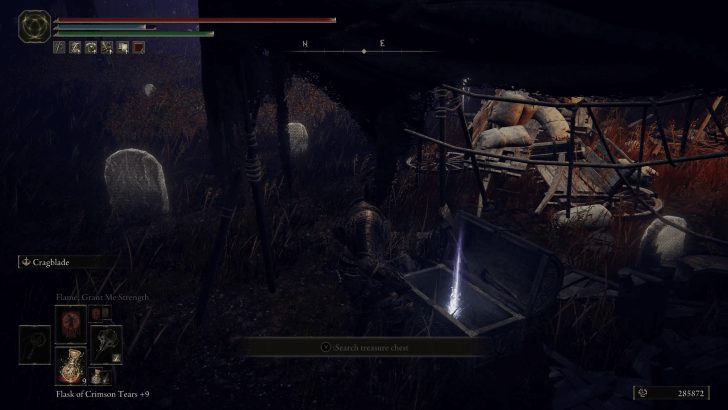 |
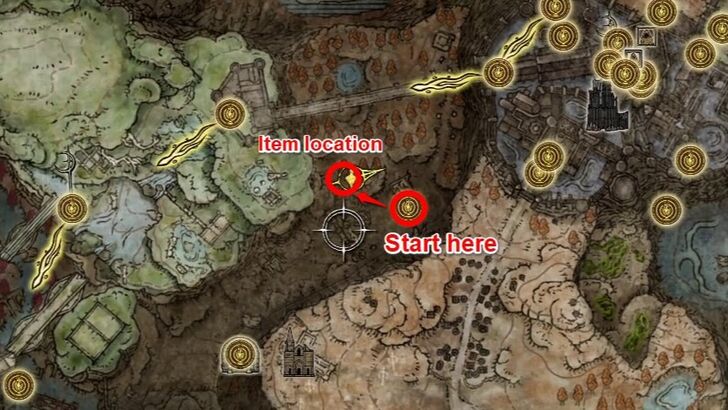
The Pearl Shield Talisman will boost your non-physical damage negation and help you take less chip damage if you are not able to do spontaneous guard counters, complementing the 100% physical damage negation of the Black Steel Greatshield.
The talisman can be obtained from a chest located under a tent, close northwest of the Ancient Ruins Base Site of Grace.
Pearl Shield Talisman Location and Effects
For Two-Handers: Obtain the Two-Handed Sword Talisman in Temple Town Ruins
| Map View | World View |
|---|---|
 |
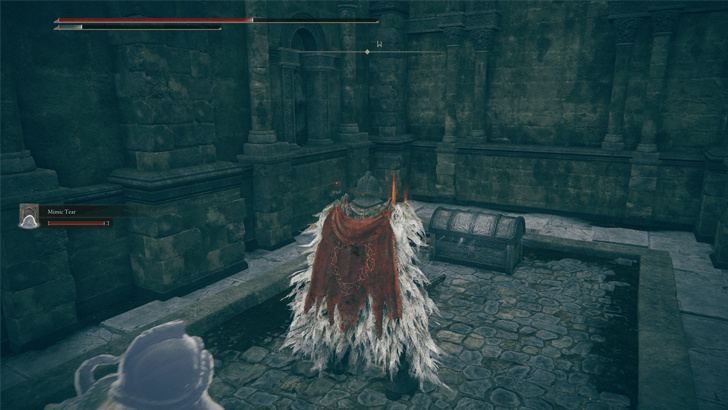 |
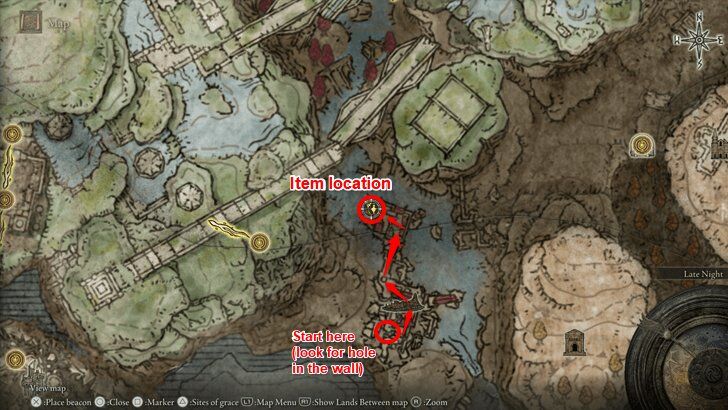
Players that would rather equip heavier armor than take the Greatshield can opt to get the Two-Handed Sword Talisman to boost their damage.
This talisman can be found in a treasure chest in the Temple Town Ruins, located in Rauh Base. Go through the small opening on the backside and make your way to the highest tower inside. You'll find the treasure chest at the end of the tower.
Two-Handed Sword Talisman Location and Effects
Obtain the Rest of the Talismans from the Base Game
The rest of the talismans used in this build can be obtained from the base game. The most important base game talisman for this build is the Curved Sword Talisman. Luckily, it can be obtained early game inside the first Legacy Dungeon, Stormveil Castle.
| Talisman | Effect and How to Get |
|---|---|
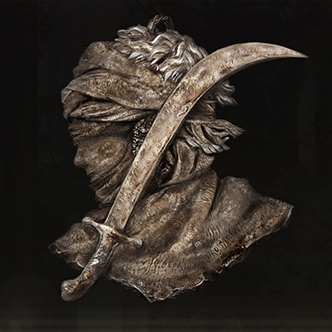 Curved Sword Talisman Curved Sword Talisman |
Effect:
Enhances guard counters.
How to Get: Located in a chest in the same room as the Banished Knight, where Gostoc locks you inside in Stormveil Castle. |
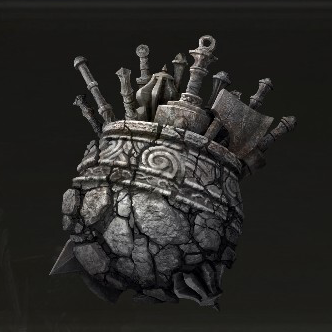 Great-Jar's Arsenal Great-Jar's Arsenal |
Effect:
Vastly raises maximum equip load.
How to Get: Defeat the Giant Jar's three champions in northern Caelid, accessible from Deep Siofra Well. |
 Greatshield Talisman Greatshield Talisman
|
Effect:
Boosts guarding ability.
How to Get: Located in a treasure chest on a wagon west of the Altus Highway Junction at the Altus Plateau. |
Obtain All Required Incantations from the Base Game
Both the incantations required to buff your damage can be found in the base game. Neither of them are gated by a major boss, allowing you to pick them up even if you're in the middle of a DLC run.
| Spells | Effect and How to Get |
|---|---|
 Golden Vow Golden Vow |
Effect: Increases attack and defense for self and nearby allies. Looted from the Corpse-Stench Shack in Mt. Gelmir. On approach, you will be invaded by Anastasia, Tarnished Eater. |
|
Effect: Raises physical and fire-affinity attack power. Looted from a corpse in between two fire-breathing Giant Heads, behind Fort Gael in the region of Caelid. |
Activate Malenia's Great Rune if Available
For cases when you take chip damage or are attacked during your guard counter, we recommend using Malenia's Great Rune so that you immediately recover HP upon guard counter, or whatever attack you conduct immediately after being hit.
However, this Rune might be difficult to obtain since you must get it from Malenia, one of the hardest bosses in the base game. If you succeed, activate it in the Isolated Divine Tower, the waygate to which is located at the top of an elevator located in the Fortified Manor in Leyndell. Don't forget to use a Rune Arc before any big fight to get the Great Rune's effects.
Malenia's Great Rune Effects and Locations
Alternative: Radahn's Great Rune
If you are not confident with fighting Malenia, you can instead activate Radahn's Great Rune for its boost to HP, FP and, most importantly, stamina, which will allow you to guard for longer without having your stance broken.
As defeating Radahn is a prerequisite for the DLC, you should have this Great Rune on-hand. However, before you can use it, you'll need to activate it at the Divine Tower of Caelid, then consume a Rune Arc before big fights to get its effects.
Radahn's Great Rune Effect and Location
Elden Ring Related Guides

List of All Builds
Comment
Author
Black Steel Greathammer Guard Counter Build Guide
improvement survey
03/2026
improving Game8's site?

Your answers will help us to improve our website.
Note: Please be sure not to enter any kind of personal information into your response.

We hope you continue to make use of Game8.
Rankings
- We could not find the message board you were looking for.
Gaming News
Popular Games

Genshin Impact Walkthrough & Guides Wiki

Honkai: Star Rail Walkthrough & Guides Wiki

Umamusume: Pretty Derby Walkthrough & Guides Wiki

Pokemon Pokopia Walkthrough & Guides Wiki

Resident Evil Requiem (RE9) Walkthrough & Guides Wiki

Monster Hunter Wilds Walkthrough & Guides Wiki

Wuthering Waves Walkthrough & Guides Wiki

Arknights: Endfield Walkthrough & Guides Wiki

Pokemon FireRed and LeafGreen (FRLG) Walkthrough & Guides Wiki

Pokemon TCG Pocket (PTCGP) Strategies & Guides Wiki
Recommended Games

Diablo 4: Vessel of Hatred Walkthrough & Guides Wiki

Cyberpunk 2077: Ultimate Edition Walkthrough & Guides Wiki

Fire Emblem Heroes (FEH) Walkthrough & Guides Wiki

Yu-Gi-Oh! Master Duel Walkthrough & Guides Wiki

Super Smash Bros. Ultimate Walkthrough & Guides Wiki

Pokemon Brilliant Diamond and Shining Pearl (BDSP) Walkthrough & Guides Wiki

Elden Ring Shadow of the Erdtree Walkthrough & Guides Wiki

Monster Hunter World Walkthrough & Guides Wiki

The Legend of Zelda: Tears of the Kingdom Walkthrough & Guides Wiki

Persona 3 Reload Walkthrough & Guides Wiki
All rights reserved
ELDEN RING™ & ©BANDAI NAMCO Entertainment Inc. / ©2021 FromSoftware, Inc.
The copyrights of videos of games used in our content and other intellectual property rights belong to the provider of the game.
The contents we provide on this site were created personally by members of the Game8 editorial department.
We refuse the right to reuse or repost content taken without our permission such as data or images to other sites.


![Monster Hunter Stories 3 Review [First Impressions] | Simply Rejuvenating](https://img.game8.co/4438641/2a31b7702bd70e78ec8efd24661dacda.jpeg/thumb)


