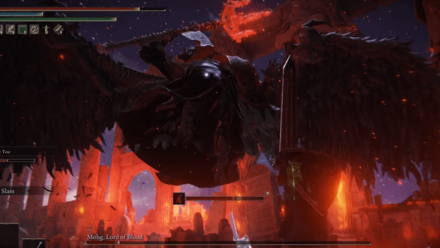
How to Beat Mohg, Lord of Blood: Boss Fight Guide
This is a guide on how to beat Mohg, Lord of Blood, a boss in Elden Ring. Read on to learn more about Mohg, Lord of Blood's drops, weaknesses, and recommended level!
List of Contents
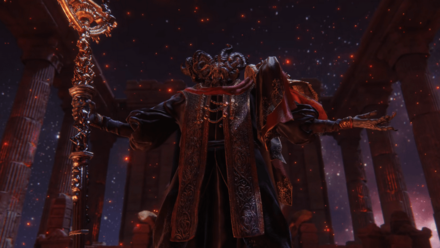
Mohg, Lord of Blood General Info
Stats and Rewards
| Mohg, Lord of Blood | ||
|---|---|---|
|
||
| Weakness | Resistance | Immune |
| ━ |
Standard Strike Slash Magic Fire Holy Lightning Thrust |
Madness Instant Death |
| Affected By | Poison, Scarlet Rot, Bleed, Frost | |
| Spirit Ashes Available? | Yes | |
| Rune Rewards |
420000 (NG) |
|
| Summonable NPCs |
None
|
|
| Location | ||
| Item Drops |
・Mohg's Great Rune
・Remembrance of the Blood Lord |
|
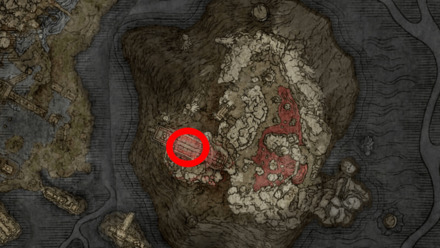
Mohg, Lord of Blood Location
Where to Find Mohg, Lord of Blood
| Map Location | |
|---|---|
 View Full Image |
|
| Recommended Level | Lv.120 |
Mohg, Lord of Blood can be found in Mohgwyn Dynasty Mausoleum, in Siofra River.
This location can be unlocked by progressing through White-Faced Varre's questline. Use the Pureblood Knight's Medal you obtain from him to travel to Mohgwyn's Palace. Mohg, Lord of Blood can be found at the top of the area.
Obtaining the War Surgeon Set
Take note that in order to obtain the War Surgeon's Set, you will need to first defeat the White Mask Invaders in the blood lake outside Mohgwyn Dynasty Mausoleum.
If you defeat Mohg before obtaining the set, you will be unable to until NG+ since all the Invaders will disappear.
How to Beat Mohg, Lord of Blood
| How to Beat Strategies | ||
|---|---|---|
| Ranged Strategy | Melee Strategy | |
Click a link above to take you to that section.
Ranged Strategy
| Mohg, Lord of Blood Boss Tips |
|---|
Use Purifying Crystal Tear and Mohg's Shackle
Equip the Purifying Crystal Tear into your Wondrous Physick mix and use the flask to lessen the effects of Mohg's deadly bloodloss spell. Mohg's Shackle can be used twice during his first phase to pin him to the ground, allowing you to get a few hits in.
Use Scarlet Rot Attacks
Mohg, despite being the Lord of Blood, is susceptible to Scarlet Rot, so make sure to inflict these on him with your skills and items. The Rotten Breath incantation will work well, as will throwing Rot Pots and equipping your bows and crossbows with Rotbone Arrows and Rotbone Bolts. Keeping your distance should be easy, as his attacks are easy to dodge when you're not too close to him. Rotten Stray may also be able to inflict Scarlot Rot if it has been upgraded.
Summon a Tanky Spirit
Mohg has long reach with his weapon and his bleed attacks can overwhelm, so summon a tanky Spirit Ash such as Lhutel the Headless or an upgraded Mimic Tear so that they can distract him while you attack from afar. Use your strongest spells and attacks while his attention is diverted.
Melee Strategy
| Mohg, Lord of Blood Boss Tips |
|---|
Use Purifying Crystal Tear and Mohg's Shackle
Equip the Purifying Crystal Tear into your Wondrous Physick mix and use the flask to lessen the effects of Mohg's deadly bloodloss spell. Mohg's Shackle can be used twice during his first phase to pin him to the ground, allowing you to get a few hits in.
Boost Robustness and Fire Defense
Since you will be up close with Mohg, it's important to defend against his Bleed and fire-based attacks. Use equipment and items that increase your resistance, like Dappled Cured Meat, and Stanching Boluses to cure Bleed buildup.
Inflict Bleed with Fast Weapons
Use the Bloodflame Blade incantation or simply Blood Grease on your weapon to inflict huge bleed damage on Mohg. Fast weapons like Daggers, Straight Swords, Curved Swords, and Katanas are recommended for this tactic.
Attempting to do this alone is a bit tougher and requires precise timing of dodges and being conservative with your attacks, so summon a Spirit Ash like Mimic Tear to divert his attention while you wail on his back.
Aim to Do Crits with Heavy Weapons
Mohg has incredible defense but will be quicker to take down if you aim to crit him while he's staggered. Bring his stagger meter down with heavy attacks, jump attacks, and guard counters, then perform a critical attack on his face when he staggers.
With this tactic, it's best to always keep your distance from Mohg, since he does quick flame attacks that are difficult to dodge. Only hit him once or twice at the end of his combo string, and immediately retreat till it's safe to hit him once more.
Mohg, Lord of Blood Attack Patterns
Phase 1
Trident Attacks
| Trident Attack Variations |
|---|
 5-Hit Combo: Mohg, Lord of Blood does a series of up to 5 hits. The first three are slashes and are easily dodged with the right timing. The fouth is a ground stab, which is dodged backwards. The fifth hit is Mohg pulling the trident from the ground, causing damage, which is best avoided by staying away. Note that he won't always do the complete 5-hit combo, and will often mix up his slashes, so keep on your toes. |
 Backstep Slash: Mohg, Lord of Blood will slash while stepping backwards. He often uses this move to end a shoter combo. |
 Overhead Smash: Mohg, Lord of Blood runs at you and smashes his trident down on the ground. Easily dodged in any direction. It's good to get a hit in after he does this. |
 Thrust: Mohg, Lord of Blood Thrusts his trident straight at you. This is best dodged diagonally forwards, and followed up with a quick attack. |
Fire Attacks
| Fire Attack Variations |
|---|
 Exploding Swipe: Mohg, Lord of Blood does a swift claw attack, which is immedately followed by a small explosion. Try not to stay too close to him when he does this attack. This attack can be avoided by dodging at the exact moment of explosion. |
 Combustion: Mohg, Lord of Blood charges up briefly for a magic attack, and sends and even bigger explosion right at you. Once you see him do this, back away or try to dodge behind him. |
Blood Attacks
| Blood Attack Variations |
|---|
 Blood Spray: Mohg, Lord of Blood casts blood magic over his head and sprays bloodfire in an arc in front of him. Easily dodge this by dodging forward, not backwards or sideways. |
 Blood Throw: Mohg, Lord of Blood casts blood magic over his head and throws bloodfire in a straight line, damaging anything in its path. This can be distinguished from Blood Spray since Blood Spray is cast directly over his head, while Blood Throw is cast a bit more to the side of his head. |
 Blood Rain: Mohg, Lord of Blood casts blood magic over his head and summons bloodfire rain from above. If he does this, stay away and do not approach him while the spell is still active. |
 Blood Curse: Mohg, Lord of Blood casts a curse on you. He swings his trident while doing this, so make sure to stay back. Mohg will cast a total of 3 curses on you, depending on his remaining health. |
 Blood Loss Spell: After he has placed 3 curses on you, Mohg will activate the curses, dealing immense bleed damage to you, while restoring his health. In order to survive this, you must have used a Wondrous Physick flask that contains the Purifying Crystal Tear. While Mohg is activating the curse is also the best time to deal massive continuous damage to him, since he will be immobile. |
Phase 2
In addition to his previous moveset, which has been upgraded with bloodflame, Mohg will gain a few new moves in Phase 2.
Trident Attacks
| Trident Attack Variations |
|---|
 Blood Thrust: Mohg, Lord of Blood does a regular thrust, then follows it up with a small AoE burst. Dodge twice away from this attack to be safe. |
 Super Thrust: Mohg, Lord of Blood does a forward thrust that reaches farther and hits harder owing to his new wings. The windup is slow and obvious, and is dodged diagonally forwards. |
 Flying Blood Spray into Slash: Mohg, Lord of Blood flies up into the air and sprays blood at an even greater distance. This is a good time to dodge forward and move in closer. Then, Mohg swoops in with a slash, which you dodge forward into. Mohg lands far away from you so it is difficult to get a hit off him during this move. |
Jumping Smash: Mohg, Lord of Blood jumps into the air and smashes his trident on the ground. Easily dodged to the sides. You can use this move to dodge roll to his back and get a few hits in. |
 Smash and Explosion: Mohg, Lord of Blood thrusts his trident down into the ground. Dodge this in any direction. Then, he will trigger a small explosion. Make sure not to stay too close, but you will be free to land a few hits right after the explosion. |
Uppercut to Aerial Smash and Explosion: Mohg, Lord of Blood readies his trident to make an uppercut, flies up into the air, then smashes down onto the ground. Both strikes can be dodged. Then, he will trigger a small explosion. Make sure not to stay too close, but you will be free to land a few hits right after the explosion. |
Elden Ring Related Guides
DLC Bosses
Main Bosses
Optional Bosses
Mini-Bosses
| All Bosses in Elden Ring | |
|---|---|
| Elder Dragon Greyoll | Lion Guardian |
| Valiant Gargoyle (Leyndell) | - |
Hostile NPCs and Invaders
| Limgrave Invaders and Hostile NPCs | |
|---|---|
| Bloody Finger Nerijus | Old Knight Istvan |
| Recusant Henricus | - |
| Liurnia of the Lakes Invaders and Hostile NPCs | |
| Great Horned Tragoth | Festering Fingerprint Vyke |
| Altus Plateau Invaders and Hostile NPCs | |
| Eleonora, Violet Bloody Finger | Inquisitor Ghiza |
| Maleigh Marais, Shaded Castle Castellan | Rileigh the Idle |
| Vargram the Raging Wolf & Errant Sorcerer Wilhelm | Magnus the Beast Claw |
| Mountaintops of the Giants Invaders and Hostile NPCs | |
| Juno Hoslow, Knight of Blood | - |
| The Roundtable Hold Invaders and Hostile NPCs | |
| Mad Tongue Alberich | - |
| Multiple Location Invaders and Hostile NPCs | |
| Anastasia, Tarnished-Eater | - |
Author

How to Beat Mohg, Lord of Blood: Boss Fight Guide
Rankings
- We could not find the message board you were looking for.
Gaming News


![Monster Hunter Stories 3 Review [First Impressions] | Simply Rejuvenating](https://img.game8.co/4438641/2a31b7702bd70e78ec8efd24661dacda.jpeg/thumb)
Popular Games

Genshin Impact Walkthrough & Guides Wiki
Honkai: Star Rail Walkthrough & Guides Wiki
Umamusume: Pretty Derby Walkthrough & Guides Wiki
Pokemon Pokopia Walkthrough & Guides Wiki
Resident Evil Requiem (RE9) Walkthrough & Guides Wiki
Monster Hunter Wilds Walkthrough & Guides Wiki
Wuthering Waves Walkthrough & Guides Wiki
Arknights: Endfield Walkthrough & Guides Wiki
Pokemon FireRed and LeafGreen (FRLG) Walkthrough & Guides Wiki
Pokemon TCG Pocket (PTCGP) Strategies & Guides Wiki


Recommended Games
Diablo 4: Vessel of Hatred Walkthrough & Guides Wiki
Cyberpunk 2077: Ultimate Edition Walkthrough & Guides Wiki
Fire Emblem Heroes (FEH) Walkthrough & Guides Wiki
Yu-Gi-Oh! Master Duel Walkthrough & Guides Wiki
Super Smash Bros. Ultimate Walkthrough & Guides Wiki
Pokemon Brilliant Diamond and Shining Pearl (BDSP) Walkthrough & Guides Wiki
Elden Ring Shadow of the Erdtree Walkthrough & Guides Wiki
Monster Hunter World Walkthrough & Guides Wiki
The Legend of Zelda: Tears of the Kingdom Walkthrough & Guides Wiki
Persona 3 Reload Walkthrough & Guides Wiki


All rights reserved
ELDEN RING™ & ©BANDAI NAMCO Entertainment Inc. / ©2021 FromSoftware, Inc.
The copyrights of videos of games used in our content and other intellectual property rights belong to the provider of the game.
The contents we provide on this site were created personally by members of the Game8 editorial department.
We refuse the right to reuse or repost content taken without our permission such as data or images to other sites.