Bloodfiend's Arm Build Guide
The Bloodfiend's Arm is a build that deals massive stagger, physical, and bleed damage in the Elden Ring DLC Shadow of the Erdtree. Read on to learn how to make and play the Bloodfiend's Arm build, including its stat distribution and required equipment.
| Bloodfiend's Arm Guides | |
|---|---|
| Bloodfiend's Arm Location | Bloodfiend's Arm Build Guide |
Bloodfiend's Arm Build Guide
Maximize Your Damage With Bloodfiend Arm's Strong Attacks
| Main Weapon | Off-Hand Weapon | ||||||||
|---|---|---|---|---|---|---|---|---|---|
 Bloodfiend's Arm Bloodfiend's Arm
|
 Finger Seal Finger Seal
|
||||||||
| Weapon Scaling (+25) | |||||||||
| Str: C | Dex: E | Int: - | Fai: - | Arc: B | |||||
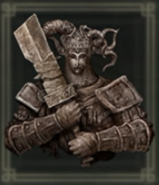
This build is centered around the Bloodfiend Arm which is a colossal weapon with the capability to spray blood when using its strong attacks which can allow it to deal huge amounts of damage
All DLC Bleed Weapons
Deals High Amounts of Damage While Also Applying Bleed
This build converts Bloodfiend's Arm's affinity into blood. This will allow it to apply bleed and scale with Arcane which is usually not that great for colossal weapons due to their slow attack speed. However, Bloodfiend's Arm is capable of reaching high amounts of blood loss which can reach 190 with this setup.
Additionally, its charged attack also allows it to hit a 2nd time with every charged attack which contributes to the speed that it can apply blood loss which makes it strong damage-dealing weapon.
Blood Spray Status Buildup Nerfed in Patch 1.12.3
It's second splash attack's status buildup has been nerfed in the patch 1.12.3 update and due to this, our efficiency with applying blood loss has been lessened.
Bloodfiend's Arm Build Stat Distribution
Recommended Stats
| Recommended Level | ||
|---|---|---|
| 150 | ||
| Stat | Points | Explanation |
| VGR | 60 | We highly recommend increasing your Vigor stat to 60. The Rakshasa set increases the damage we take from enemies and the build also doesn't have any defensive shields as options. Making sure that our Vigor is at a high level is recommended to avoid untimely deaths. |
| MND | 9 | Mind Stat is not needed save for using your buffs at the start of the fight. |
| END | 36 | 36 Endurance is a good endurance to aim for due to the weapon's weight as well as other gear we need to equip for the build to work. 35 Endurance gives a little bit of leeway for more talisman/gear adjustment while being able to stay at medium load. |
| STR | 30+ | Strength is our secondary damage stat for the build. It is not mandatory to reach 30 strength but we'll need Strength to be at least be able to reach the minimum value of 19 to meet the weapon's strength requirement via two-handing. |
| DEX | 11 | We want a minimum of 11 Dexterity to be able to use Bloodfiend's Arm. Despite having Uchigatana as our 2nd right hand weapon, it will not be necessary to have 15 Dexterity to wield it as we'll only use it for the Seppuku buffs. |
| INT | 9 | INT will not be needed. |
| FAI | 25 | Our staple buffs from incantations comes from Golden Vow and Flame Grant me Strength which gives us a decent damage boost for the first few moments of the fight. Sitting at 25 Faith will give us the ability to use these buffs (mainly Golden Vow). |
| ARC | 50 | Arcane will be our main damage stat for this build. When changing Bloodfiend's Arm to blood affinity, it will have a C scaling in arcane which make Arcane our best stat to increase in terms of physical damage output. High arcane will also increase the blood loss buildup that this weapon can dish out. |
Recommended Starting Class

| VGR | MND | END | STR | DEX | INT | FAI | ARC |
|---|---|---|---|---|---|---|---|
| 14 | 9 | 12 | 16 | 9 | 7 | 8 | 11 |
Hero is the best class to start a Bloodfiend Arm character build due to its naturally high Vigor, Endurannce, Strength, and Arcane which are the main stats that the build values. It also has an abyssmal Mind and Intelligence stat which are both stats that we want to be as low as possible due to them not providing any value to our build.
Respec Stats at Rennala in Raya Lucaria
Before hitting the DLC, make sure to respec your stats by offering a Larval Tear to Rennala at the Academy of Raya Lucaria in Liurnia. You can do this before going to the DLC since the Lightning Perfume Bottle can be obtained without having to fight any DLC bosses.
Required Equipment for the Bloodfiend Arm Build
| How to Get All Required Build Items | |
|---|---|
| Weapon | Spells |
| Armor Set | Talismans |
Weapons
| Weapon | Explanation |
|---|---|
|
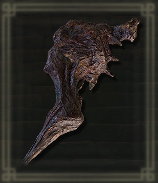
Bloodfiend's Arm
|
Main Weapon ・The main star of the build. It's able to sport 200+ blood loss and can easily proc it with its charged attacks while also being a coloosal weapon and staggering enemies non-stop. |
|
|
2nd Main Hand ・We include the Uchigatana in this setup simply for the Seppuku buffs. This is also the reason why we don't gear our stat to be able to wield the weapon effectively. |
|
|
Best Offhand ・As we'll only be using incantation that provide buffs, the Finger Seal is more than enough as it has low stat requirements and can easily be purchased from the twin maiden husk in the Roundtable hold. |
Spells
| Spells | Explanation |
|---|---|
 Golden Vow Golden Vow
|
・A great physical damage buff and also a damage negation buff which can offset the extra damage we take from the Rakshasa set's low defenses. |
|
|
・Increases our physical damage and it also stacks with Golden Vow which allows us to hit harder with our charged attacks.. |
Armor
| Armor of Choice | |
|---|---|
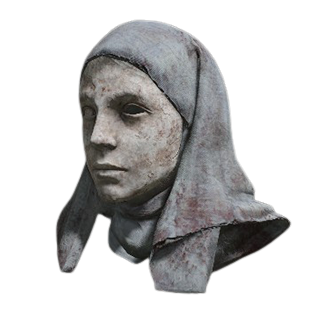 White Mask White Mask
|
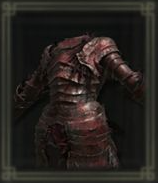 Rakshasa Armor Rakshasa Armor
|
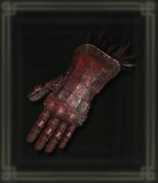 Rakshasa Gauntlets Rakshasa Gauntlets
|
 Rakshasa Greaves Rakshasa Greaves
|
Our main armor set for the build consists of the White Mask which amplifies our damage after a blood loss has occured which is extremely easy due to our use of Seppuku and Bloodfiend Arm's naturally high blood loss build up. For the rest of the set, we use the Rakshasa armor pieces. Despite having low defensive stats, the extra 2% damage each piece provides greatly increases our total damage output.
Obtain White Mask from the White Mask Invader in Blood Palace
| Map | Path |
|---|---|
 |
 |
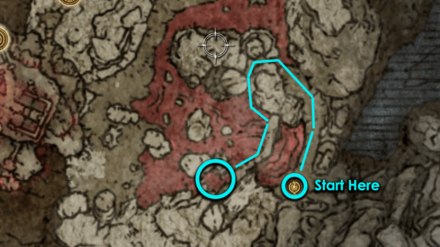
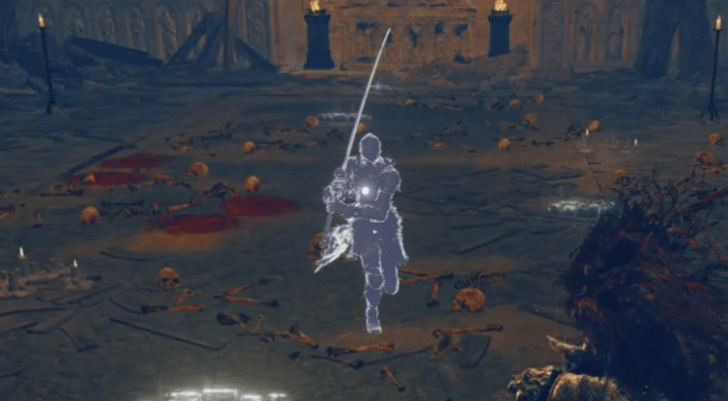
To get the White Mask which is included in the white surgeon set, travel to Palace Approach Ledge-Road site of grace. Mount up and access the hidden passage along the cliff to skip the first two White Mask invasions. Follow the cliff edge, and eventually, you will get to the marked location.
Defeating the White Mask invader will drop the War Surgeon set. Take note that the White Mask will no longer appear if you have already defeated Mohg.
Obtain The Rakshasa Set from Rakshasa in the Eastern Nameless Mausoleum
| World View | Map View |
|---|---|
 |
 |
Rakshasa can found in the Eastern Nameless Mausoleum . From the Recluses' River site of grace, descend using the tomb platforms and enter the waterfall cave. The Mausoleum is found at the end of the cave where the knight can be fought.
Rakshasa Location and How to Beat
Talismans
Best Talismans
| Talisman | Effect |
|---|---|
 Lord of Blood's Exultation Lord of Blood's Exultation
|
・
Blood loss in vicinity increases attack power.
Explanation: Must-have in any bleed build, with the attack power buff easily triggered. |
 Two-Handed Sword Talisman Two-Handed Sword Talisman
|
・
Enhances attacks with two-handed weapons.
Explanation: Consider this a free damage boost as we'll want to always two-hand the Bloodfiend's Arm. |
 Axe Talisman Axe Talisman
|
・
Enhances charge attacks.
Explanation: Bloodfiend Arm's charge attacks is one of its strongest effects due to its additional blood spray effect. With the Axe Talisman, we'll be able to further increase the weapon's charge attacks! |
 Blade of Mercy Talisman Blade of Mercy Talisman
|
・
Raises attack power after each critical hit.
Explanation:Due to the weapon's naturally high stagger rate, the Blade of Mercy's critical strike damage becomes extermely easy to activate. |
Optional Talismans
| Talisman | Effect |
|---|---|
 Retaliatory Crossed-Tree Retaliatory Crossed-Tree
|
・
Enhances attacks executed after rolling or backstepping.
Explanation: Increases our damage everytime we dodge roll. This esentially gives us a free damage boost without relying on fp usage. |
 Crimson Amber Medallion +3 Crimson Amber Medallion +3
|
・
Boosts magic damage negation by the utmost.
Explanation: A straight up increase to Vigor which makes us more durable. |
 Dragoncrest Shield Talisman Dragoncrest Shield Talisman
|
・
Boosts physical damage negation.
Explanation: Enhances our physical damage reduction which can offset the damage increase we take from the Rakshasa set. |
 Flamedrake Talisman +3 Flamedrake Talisman +3
|
・
Boosts fire damage negation.
Explanation: Defensive option against bosses that mainly uses physical damage. |
 Boltdrake Talisman +3 Boltdrake Talisman +3
|
・
Boosts lightning damage negation by the utmost.
Explanation: Defensive option against bosses that mainly uses lightning damage. |
 Spelldrake Talisman +3 Spelldrake Talisman +3
|
・
Boosts magic damage negation by the utmost.
Explanation: Defensive option against bosses that mainly uses magic damage. |
 Golden Braid Golden Braid
|
・
Boosts magic damage negation by the utmost.
Explanation: Defensive option against bosses that mainly uses holy damage. |
 Two-Headed Turtle Talisman Two-Headed Turtle Talisman
|
・
Greatly raises stamina recovery speed.
Explanation: Improves our stamina regeneration which makes it easier to use more dodge rolls or more attacks/charged attacks. |
Elden Ring Related Guides
List of All Builds
Comment
Author

Bloodfiend's Arm Build Guide
Rankings
- We could not find the message board you were looking for.
Gaming News
![Animal Crossing: New Horizons Review [Switch 2] | Needlessly Crossing Over to a New Generation](https://img.game8.co/4391759/47d0408b0b8a892e453a0b90f54beb8a.png/show)


Popular Games

Genshin Impact Walkthrough & Guides Wiki
Honkai: Star Rail Walkthrough & Guides Wiki
Arknights: Endfield Walkthrough & Guides Wiki
Umamusume: Pretty Derby Walkthrough & Guides Wiki
Wuthering Waves Walkthrough & Guides Wiki
Pokemon TCG Pocket (PTCGP) Strategies & Guides Wiki
Abyss Walkthrough & Guides Wiki
Zenless Zone Zero Walkthrough & Guides Wiki
Digimon Story: Time Stranger Walkthrough & Guides Wiki
Clair Obscur: Expedition 33 Walkthrough & Guides Wiki


Recommended Games
Fire Emblem Heroes (FEH) Walkthrough & Guides Wiki
Pokemon Brilliant Diamond and Shining Pearl (BDSP) Walkthrough & Guides Wiki
Diablo 4: Vessel of Hatred Walkthrough & Guides Wiki
Super Smash Bros. Ultimate Walkthrough & Guides Wiki
Yu-Gi-Oh! Master Duel Walkthrough & Guides Wiki
Elden Ring Shadow of the Erdtree Walkthrough & Guides Wiki
Monster Hunter World Walkthrough & Guides Wiki
The Legend of Zelda: Tears of the Kingdom Walkthrough & Guides Wiki
Persona 3 Reload Walkthrough & Guides Wiki
Cyberpunk 2077: Ultimate Edition Walkthrough & Guides Wiki


All rights reserved
ELDEN RING™ & ©BANDAI NAMCO Entertainment Inc. / ©2021 FromSoftware, Inc.
The copyrights of videos of games used in our content and other intellectual property rights belong to the provider of the game.
The contents we provide on this site were created personally by members of the Game8 editorial department.
We refuse the right to reuse or repost content taken without our permission such as data or images to other sites.