Ancient Dragon Senessax Weakness, Location, and Drop Rewards
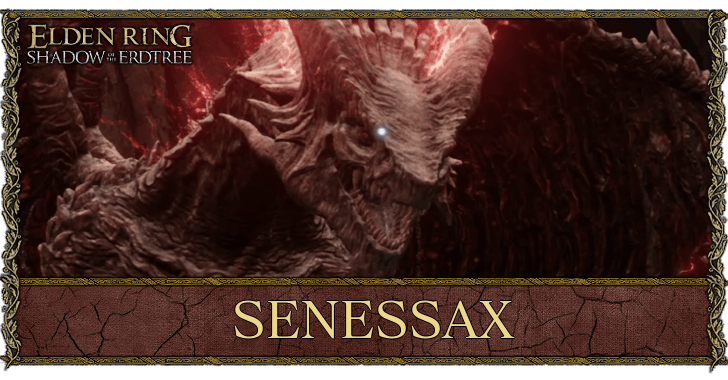
This is a guide for Ancient Dragon Senessax in the Elden Ring DLC Shadow of the Erdtree. Learn Ancient Dragon Senessax's weakness and location, the drop rewards, and the best build against Ancient Dragon Senessax.
List of Contents
Ancient Dragon Senessax Weakness
Weak to Anti-Dragon and Pierce Damage
Ancient Dragon Senessax is weak to Anti-Dragon and Pierce damage. Some good Anti-Dragon options are Dragon-Hunter's Great Katana (which you should have gotten to reach Jagged Peak) and any regular weapon coated with Dragonwound Grease.
Weapons that do pierce damage and have a thrusting moveset like Spears and Thrusting Swords are best paired with greatshields such as a lightning-infused Fingerprint Stone Shield or a Dragonclaw Shield since they allow you to attack while also blocking Senessax's lightning AoE attacks.
Bleed and Scarlet Rot are Also Effective
When planning to apply status effects, Bleed and Scarlet Rot are effective against Ancient Dragon Senessax. The Dragon-Hunter's Great Katana already has innate Bleed damage. For other options, look for weapons that do pierce damage and can proc Bleed such as the Mohgwyn's Sacred Spear.
For applying Scarlet Rot, you can use a thrusting weapon like the Antspur Rapier. You can also use a bow with Rotbone Arrows. For spellcasting, you can use the incantation Ekzyke's Decay or Rotten Breath to apply Scarlet Rot.
Best Build Against Ancient Dragon Senessax
Anti-Dragon and Pierce Weapons are Recommended
|
Skill: Dragonwound Slash |
Skill: Giant Hunt |
Anti-Dragon or Pierce weapons are good for dealing damage to Ancient Dragon Senessax. The Dragon-Hunter's Great Katana is a good all-around weapon for STR/DEX builds that also deals anti-dragon damage. This damage type is also present in its easy-to-use ranged weapon skill Dragonwound Slash.
The Lance is a good Great Spear for dealing Pierce damage and is best paired with a lightning-infused Fingerprint Stone Shield on your off-hand. You can also pick up similar weapons such as the Messmer Soldier's Spear or the Great Epee so as long as you can also equip Giant Hunt. When going for ranged combat, you can use the Lion Greatbow on your off-hand.
Pair with Damage and Skill Talismans
 Shard of Alexander Shard of Alexander
|
 Two-Handed Sword Talisman Two-Handed Sword Talisman
|
 Spear Talisman Spear Talisman
|
The Shard of Alexander is a good talisman for boosting damage for weapon skills such as the Dragonwound Slash or Giant Hunt. For regular melee attacks, the Two-Handed Sword Talisman or Spear Talisman are recommended for consistent damage boosts.
Use Ranged Spells and Buffs to Deal Damage
 Pest-Thread Spears Pest-Thread Spears
|
 Ekzykes's Decay Ekzykes's Decay
|
 Great Glintstone Shard Great Glintstone Shard
|
When spellcasting, Pest-Thread Spears is a good FP-efficient incantation for damaging Senessax from afar. The dragon incantation Ekzykes's Decay is also good for dealing massive damage and applying Scarlet Rot (especially when equipped for a Mimic Tear). For sorceries, you can use the Great Glintstone Shard or other glintstone spells during openings in Senessax's attacks.
For buffs, use Flame, Grant Me Strength to buff your physical and fire damage (this also buffs physical damage from spells). It can be stacked with Golden Vow which increases the damage of spells in general while also giving you more damage negation.
Use Talismans for Lightning and Physical Damage Negation
 Boltdrake Talisman +3 Boltdrake Talisman +3
|
 Pearldrake Talisman +3 Pearldrake Talisman +3
|
 Dragoncrest Greatshield Talisman Dragoncrest Greatshield Talisman
|
The Boltdrake Talisman +3 is the best defense talisman for increasing lightning damage negation since Ancient Dragon Senessax frequently uses lightning-based AoE attacks. This is followed by the Pearldrake Talisman +3 for an increase to general non-physical damage negation.
Against Senessax's physical attacks such as bites and swipes at close range or the flying nosedive from afar, the Dragoncrest Greatshield Talisman is recommended for more physical damage negation.
Specific Recommended Build: Shield Poke Build
| Main Hand Weapon | Off-Hand Weapon | ||||||||
|---|---|---|---|---|---|---|---|---|---|
|
Skill: Giant Hunt |
Skill: No Skill |
||||||||
| Character Stat Distribution | |||||||||
| VGR | 55 | STR | 50 | ||||||
| DEX | 50 | END | 44 | ||||||
| MIND | 15 | FAI | 9 | ||||||
| INT | 9 | ARC | 7 | ||||||
Stats above are based on Vagabond class's stat distribution.
If you're willing to respec or do a stat distribution overhaul, we recommended going with a Shield Poke Build to defeat Ancient Dragon Senessax. This build can be made at RL 160 at the earliest with a Vagabond class and up to RL168 if you started from the Prophet class. Adjust rune levels when needed, but you will want to focus on having high STR, DEX, and END with a minimum of 55 VGR.
This build relies on thrust attacks and Giant Hunt with a Quality Lance while blocking with a lightning-infused Fingerprint Stone Shield equipped with No Skill. For added lightning damage negation, you can use parts or the entire Malformed Dragon Set with the Great-Jar's Arsenal to meet Medium Load. For more HP, consider using Morgott's Great Rune.
Guard and Poke Senessax from Behind
Ancient Dragon Senessax's hind legs and tail are the easiest body parts to poke with the Lance. Being near these parts will also give you ample spacing to react to Senessax's AoE attacks with guards or repositions since they usually come from the front. You'll want to disable auto-targeting temporarily for attacking those parts and re-enable it only for defensive or reorientation purposes.
Use Giant Hunt on Senessax's Openings
Take advantage of your Lance's Giant Hunt for reaching Ancient Dragon Senessax's body and dealing burst damage on openings, such as when it lands after a fire breath. This move will be quicker to use since your Fingerprint Stone Shield will have No Skill to prevent interrupting your main-hand's ash of war.
Manage Thrust and Guard Stamina via Talisman or Crystal Tear
On top of your weapon thrusts, blocking and taking hits from Ancient Dragon's Senessax's attacks and AoE will regularly drain stamina. Equip a Two-Headed Turtle Talisman or drink a physick mixed with the Greenburst Crystal Tear (lasts 3 minutes) to greatly increase stamina recovery and Deflecting Hardtear (lasts 5 minutes) for reducing stamina consumption on deflect.
Ancient Dragon Senessax General Tips
| Tips for Beating Ancient Dragon Senessax |
|---|
|
|
Latenna Summon Cheese Strategy
For anyone that doesn't want to deal with fighting Senessax but still wants his drops, you can employ a cheese strat where you summon Latenna by the Stake of Marika near Senessax's arena to poke at him long-range, while you ride in circles around Senessax to draw his aggro.
This is can be a time-consuming tactic if your Latenna and Revered Spirit Ash levels are not properly raised, but it does keep you from having to deal with Senessax's annoying hitbox and high-damage attacks.
How to Get Latenna the Albinauric
Prepare Heavy Lightning Resistance
Senessax deals heavy damage through a variety of fire and lighting-based attacks, but his lightning attacks are especially deadly because you are forced to fight him in a wet arena, where the water amplifies his lightning damage.
Equip talismans like the Boltdrake Talisman +3 and Pearldrake Talisman +3, and consume items like Lightningproof Dried Livers to reduce the lightning damage you take from Senessax's attacks.
How to Get Boltdrake Talisman +3
Use Pierce Weapons for the Most Damage
Ancient Dragons are least resistant against Pierce weapons, only negating up to 10% of this type of damage. This makes weapons like Great Spears, normal Spears, and Thrusting Swords the arms of choice against Senessax.
You can go even further by equipping a Greatshield for a Spear and Shield Cheese Build to penetrate Senessax's defenses while maintaining maximum protection.
List of the Best Pierce Weapons
Ready Bonus Damage Against Dragons

To speed up the fight and leave less room for error, coat your weapons in Dragonwound Grease to get bonus damage against dragons, including Senessax.
Alternatively you can equip weapons like the Dragon Greatclaw or the DLC-exclusive Dragon-Hunter's Great Katana, which have attacks or skills that are designated as effective against dragon-type enemies.
Get the Dragon-Hunter's Great Katana
Beware of Delayed Lightning Effects
Several of Senessax's attacks involve residual lightning the pulse out or explode after the initial thrusts or hit. Prepare to dodge or jump multiple times in a row to avoid or reduce the damage you take.
Widespread Lightning Storm
Senessax's opener when you first wake him up, and a move he can repeat throughout the fight, is a roar followed by random lightning strikes throughout the arena that are skewed to target your position.
Aside from rolling, an easy way to avoid them is to ride Torrent. On horseback, you can outrun the lightning or simply jump over them.
Triple Claw Attack
At close range, Senessax's most-used attack will be a triple claw swipe combo with delayed lightning explosions.
Make sure to roll through, or move away from, both his claws and the lightning explosions that follow. The lightning can hit you even if you are behind his claws, so do not be too greedy.
Delayed Lightning Spear Attacks
Senessax has a single and double-spear version of this melee attack, where he charges lightning spears and plunges them into the ground to send out a pulse of lightning on the ground.
Simply delay your roll to when he actually plunges the bolt into the ground. If you're far enough, you can also just jump the outward lightning pulse that happens upon each plunge.
Punish Senessax's Firebreathing Attacks
The attacks that leave Senessax the most vulnerable tend to be his firebreathing attacks because he takes a long time to recover from his animation. Take advantage of this by avoiding these attacks and punishing him right away.
Attack His Tail During Self AoE Firebreath
When you are under Senessax for too long, he will breath fire directly under him in a small AoE to zone you out. However, this is his biggest opening, as you can just run to his tail and hit it while the attack is ongoing for free damage.
Roll Sideways for Ranged Firebreaths
At range or when repositioning, Senessax will breath fire at you either from afar or while flying backwards. In both cases, rolling sideways until you're out of reach of the flames is enough, then you can push forward right away to get some hits on his head.
For INT Builds: Use Glintstone Sorceries
There are several periods where rather than being overly aggressive, Senessax will just slowly walk towards you as he prepares his next attack sequences.
Spellcasters can take advantage of this, and his other close-range attacks, by simply hitting him with spells like Great Glinstone Shard to whittle him down.
Ancient Dragon Senessax Location
Located Southeast of the Foot of the Jagged Peak
| World View | Map Location |
|---|---|
 |
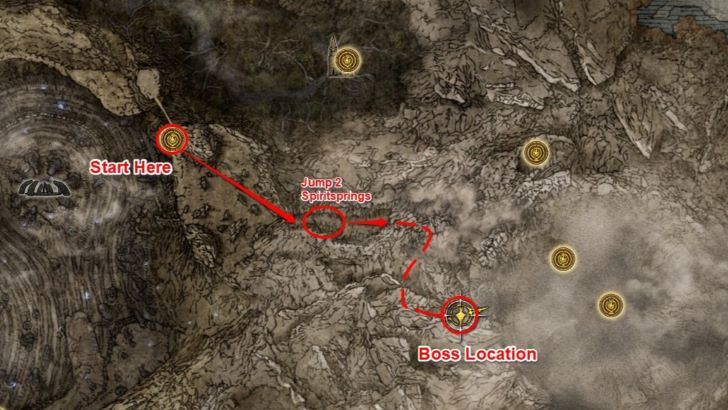 |
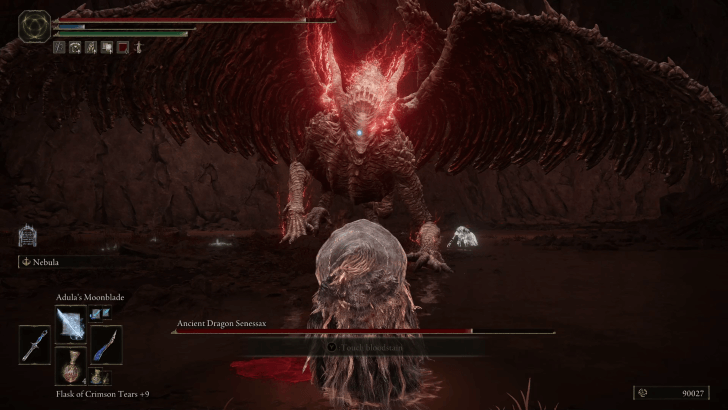
Ancient Dragon Senessax can be found sleeping in a cavern southeast of the Foot of the Jagged Peak site of grace. You will have to ride past two drakes and jump two Spiritsprings to find the way to its spot.
Ancient Dragon Senessax Rewards
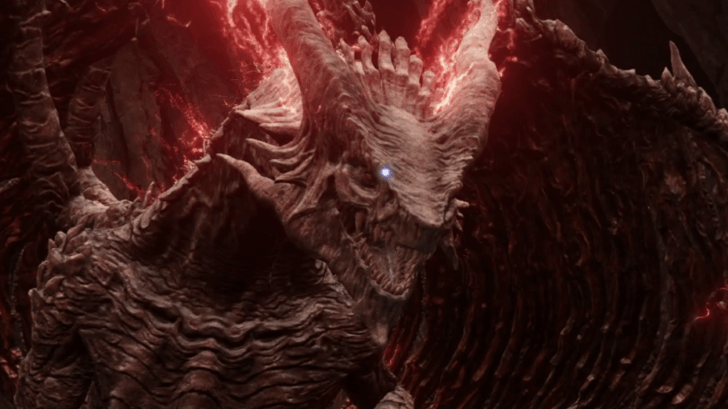
| Ancient Dragon Senessax Details | |
|---|---|
 |
|
| Runes | 200000 |
| Drops | |
| Spirit Summons? | Spirit Ashes Allowed |
| Gold Summons? |
None
|
Elden Ring Related Guides

DLC Bosses
Main Bosses
Optional Bosses
Mini-Bosses
| All Bosses in Elden Ring | |
|---|---|
| Elder Dragon Greyoll | Lion Guardian |
| Valiant Gargoyle (Leyndell) | - |
Hostile NPCs and Invaders
| Limgrave Invaders and Hostile NPCs | |
|---|---|
| Bloody Finger Nerijus | Old Knight Istvan |
| Recusant Henricus | - |
| Liurnia of the Lakes Invaders and Hostile NPCs | |
| Great Horned Tragoth | Festering Fingerprint Vyke |
| Altus Plateau Invaders and Hostile NPCs | |
| Eleonora, Violet Bloody Finger | Inquisitor Ghiza |
| Maleigh Marais, Shaded Castle Castellan | Rileigh the Idle |
| Vargram the Raging Wolf & Errant Sorcerer Wilhelm | Magnus the Beast Claw |
| Mountaintops of the Giants Invaders and Hostile NPCs | |
| Juno Hoslow, Knight of Blood | - |
| The Roundtable Hold Invaders and Hostile NPCs | |
| Mad Tongue Alberich | - |
| Multiple Location Invaders and Hostile NPCs | |
| Anastasia, Tarnished-Eater | - |
Comment
Author
Ancient Dragon Senessax Weakness, Location, and Drop Rewards
improvement survey
03/2026
improving Game8's site?

Your answers will help us to improve our website.
Note: Please be sure not to enter any kind of personal information into your response.

We hope you continue to make use of Game8.
Rankings
- We could not find the message board you were looking for.
Gaming News
Popular Games

Genshin Impact Walkthrough & Guides Wiki

Honkai: Star Rail Walkthrough & Guides Wiki

Umamusume: Pretty Derby Walkthrough & Guides Wiki

Pokemon Pokopia Walkthrough & Guides Wiki

Resident Evil Requiem (RE9) Walkthrough & Guides Wiki

Monster Hunter Wilds Walkthrough & Guides Wiki

Wuthering Waves Walkthrough & Guides Wiki

Arknights: Endfield Walkthrough & Guides Wiki

Pokemon FireRed and LeafGreen (FRLG) Walkthrough & Guides Wiki

Pokemon TCG Pocket (PTCGP) Strategies & Guides Wiki
Recommended Games

Diablo 4: Vessel of Hatred Walkthrough & Guides Wiki

Cyberpunk 2077: Ultimate Edition Walkthrough & Guides Wiki

Fire Emblem Heroes (FEH) Walkthrough & Guides Wiki

Yu-Gi-Oh! Master Duel Walkthrough & Guides Wiki

Super Smash Bros. Ultimate Walkthrough & Guides Wiki

Pokemon Brilliant Diamond and Shining Pearl (BDSP) Walkthrough & Guides Wiki

Elden Ring Shadow of the Erdtree Walkthrough & Guides Wiki

Monster Hunter World Walkthrough & Guides Wiki

The Legend of Zelda: Tears of the Kingdom Walkthrough & Guides Wiki

Persona 3 Reload Walkthrough & Guides Wiki
All rights reserved
ELDEN RING™ & ©BANDAI NAMCO Entertainment Inc. / ©2021 FromSoftware, Inc.
The copyrights of videos of games used in our content and other intellectual property rights belong to the provider of the game.
The contents we provide on this site were created personally by members of the Game8 editorial department.
We refuse the right to reuse or repost content taken without our permission such as data or images to other sites.


![Monster Hunter Stories 3 Review [First Impressions] | Simply Rejuvenating](https://img.game8.co/4438641/2a31b7702bd70e78ec8efd24661dacda.jpeg/thumb)


