This survey will take about 1 minute.
Your answers will help us to improve our website.
Elden Ring Shadow of the Erdtree
Bayle the Dread Weakness and Location

This is a boss guide for Bayle the Dread in the Elden Ring DLC Shadow of the Erdtree. Learn about Bayle's weakness, location, as well as the best build against Bayle here.
List of Contents
Bayle the Dread Weakness
Weak to Piercing Attacks
Bayle receives the most damage from Pierce-type weapons. We recommend using your strongest weapon under the Spear, Great Spear, Thrusting Sword, or Heavy Thrusting Sword class against Bayle.
Since you can do a critical hit on Bayle once he's staggered, Great Spears and Heavy Thrusting Swords are better choices due to their ability to deal more Poise damage per hit.
Receives More Damage From Lightning Attacks
Ranged builds can use Lightning incantations as Bayle has less resistance to this element. As always, Dragon Incantations paired with the Radagon Icon talisman makes it easier to land hits on Bayle in between his attacks.
Weak to Dragonslayer Weapons
You can also use any Dragonslayer weapon that you are most proficient with against Bayle. The Dragon King's Cragblade that you can get through the Remembrance of the Dragonlord would be the best choice under this category. The Dragon-Hunter's Great Katana also works wonders against Bayle as a dragon slayer weapon.
Best Builds Against Bayle the Dread
Thrusting Sword and Shield Combo is Recommended
 Rogier's Rapier Rogier's Rapier |
 Fingerprint Stone Shield Fingerprint Stone Shield |
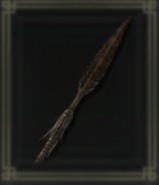 Messmer Soldier's Spear Messmer Soldier's Spear |
Like most bosses in Elden Ring, Bayle the Dread is weak to Pierce damage. We recommend using a Thrusting Sword like Rogier's Rapier and pairing it with a Greatshield like the Fingerprint Stone Shield for a safe poke build that isn't stamina hungry.
Alternatively, players can also opt to use the Messmer Soldier's Spear for a two-handed, Great Spear build. With its high poise damage and two-hit, charged heavy attack, this spear is one of the kings of stance breaks for both the DLC and base game.
Talismans That Enhance a Shield Poke Playstyle
 Spear Talisman Spear Talisman
|
 Curved Sword Talisman Curved Sword Talisman
|
 Axe Talisman Axe Talisman
|
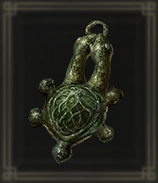 Two-Headed Turtle Talisman Two-Headed Turtle Talisman
|
The Spear Talisman, Curved Sword Talisman, and the Axe Talisman are all damage-boosting talismans that synergize with a shield poke playstyle. The Spear Talisman enhances your damage against attacking enemies, Curved Sword for guard counters, and the Axe Talisman for charged attacks.
If you find yourself constantly out of stamina, consider swapping out one of the damage talismans and replacing it with the Two-Headed Turtle Talisman.
Gravelstone Seal is Strong for Faith Players
 Gravel Stone Seal Gravel Stone Seal
|
The Gravel Stone Seal is the best Sacred Seal to use if you're planning to use Incantations against Bayle as the Gravelstone Seal naturally strengthens Dragon Cult Incantations which primarily deals lightning damage.
If you're an ARC build, you can also equip the Gravelstone Seal into your off-hand slot and then equip the Dragon Communion Seal in your main hand so you can get the Gravelstone Seal's Dragon Cult incantation damage bonuses.
Lightning Incantations Deal More Damage
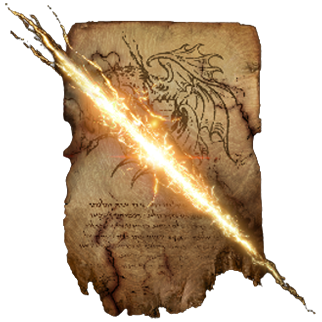 Lightning Spear Lightning Spear
|
|
Since Bayle is weak to lightning, using incantations belonging to the Dragon Cult Incantations like the Lightning Spear and Ancient Dragons' Lightning Strike will be extremely effective for players using a Faith build.
Talismans That Strengthens Incantations and Lightning Damage
 Radagon Icon Radagon Icon
|
 Flock's Canvas Talisman Flock's Canvas Talisman
|
Talismans that can strengthen the damage and casting time of Incantations are great to have if you wish to go for an Incantation setup.
Additionally, the Lightning Scorpion Charm also increases the damage of Dragon Cult Incantations thanks to its bonus damage to lightning, however take note that you'll take extra damage when using this Talisman.
Use Fire, Physical, and Lightning Resistance Talismans
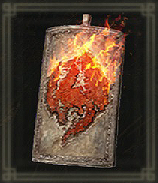 Flamedrake Talisman +3 Flamedrake Talisman +3
|
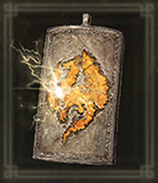 Boltdrake Talisman +3 Boltdrake Talisman +3
|
 Dragoncrest Greatshield Talisman Dragoncrest Greatshield Talisman
|
 Pearl Shield Talisman Pearl Shield Talisman
|
Equip the necessary Talisman based on your lowest damage resistance as Bayle can inflict Physical, Lightning, and Flame damage. The Pearldrake Shield Talisman is a great alternative talisman if you're using a shield poke build as your shield will negate most damage when guarding and you'll take significantly less damage from non-physical attacks.
Specific Recommended Build: Shield Poke Build
| Main Hand Weapon | Off-Hand Weapon | ||||||||
|---|---|---|---|---|---|---|---|---|---|
| Messmer's Soldier's Spear
|
Fingerprint Stone Shield |
||||||||
| Character Stat Distribution | |||||||||
| VIG | 60 | MND | 9 | ||||||
| END | 50 | STR | 50 | ||||||
| DEX | 50 | INT | 7 | ||||||
| FAI | 25 | ARC | 11 | ||||||
If you wish to fully respec into a new build to best Bayle, we recommend going with the Shield Poke build.
The Shield Poke build is capable of weathering out Bayle's attacks while also being able to utilize piercing weapons which can target Bayle's weakness. This allows you to easily negate most of Bayle's wide AoE attacks by using your shield and damaging him safely behind your shield.
Note: You may need to invest more stats into Endurance if you wish to equip a heavy armor set to couple with the build such as Radahn's armor set or the Verdigris armor set.
Poke Bayle After His Attacks
When playing the Shield Poke build, you'll want to always ensure that you're hitting right after Bayle's hits or combos. This will ensure that you'll be able to get a clean hit in but also be able to manage your stamina much better due to the build's stamina-heavy playstyle.
Bayle the Dread General Tips
| Tips for Beating Bayle | |
|---|---|
|
|
|
| Available Summons | ・Igon ・Spirit Ashes |
Gold Summon Only Appears if You Have Igon's Furled Finger
In order to acquire Igon as a gold summon for this fight, you will need to have progressed his questline to the point where he gives you Igon's Furled Finger. This item allows you to see and use Igon's summon sign inside Bayle's arena.
Gain Levels and Collect Scadutree Fragments
| Recommended Levels for Bayle | |
|---|---|
| Rune Level | Level 170 or Higher |
| Scadutree Blessing | Level 13 or Higher |
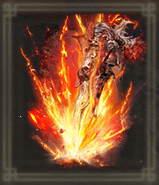
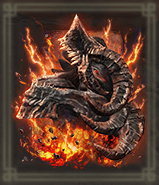
Bayle the Dread is the optional boss at the end of Jagged Peak, one of several optional regions of the DLC.
He has a large health pool and high-damage attacks, encouraging you to stock up on more levels and Scadutree Fragments to give you more damage reduction and leeway in case of a prolonged engagement with Bayle.
All Scadutree Fragment Locations
Prepare Fire and Lightning Resistance
Fighting with Bayle the Dread will be a battle of attrition due to Bayle's large HP pool, and he will assault you with fire and lightning attacks that can accumulate heavy damage over the course of the battle. Boost fire and lightning resistance to mitigate the dragon's damage and lessen the Flasks of Crimson Tears you'll need to consume.
Try equipping talismans such as the Boltdrake Talisman and Flamedrake Talisman +3 at the same time to mitigate both damage types. You can even stack the protection of the Flame, Protect Me incanation on top to fortify your defenses even further.
Alternate Between Auto Lock and Manual Camera
Like fighting other dragons and large enemies, it can be difficult to keep track of Bayle's windups and attacks if he closes in on you or you are trying to attack his body. This is especially frustrating here as you can only auto lock to Bayle's head, resulting in camera and model clipping.
Consider locking and unlocking the camera, depending on how close Bayle is, so that you can keep track of his animations.
Attack the Body
Trying to hit Bayle's head, especially with short melee weapons like Curved Swords or Daggers, can be difficult due to how much his neck will sway. An easier, more consistent target is the large hitbox of his body.
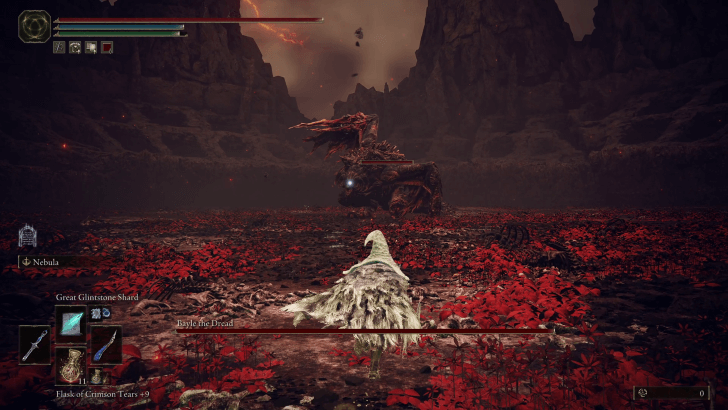
Skills like Adula's Moonblade or Ashes of War like Nebula are especially effective because they have multiple hits within an area, which equals to multiple instances of damage on Bayle's large body.
Retreat When Bayle Breathes Fire on Himself
If you stay too long right under Bayle, you may get caught by the attack where he zones you out by breathing fire in AoE right under him. Roll or run away as soon as you see him doing this or hear the flames.
Watch for Delayed Explosions in Phase 2
Bayle will do an eruption and storm AoE attack at around 60% HP, then his flying circling projectile attack, to mark the second phase of the fight. During Bayle's second phase, aside from his new moves, his Phase 1 combos where he drives lightning into the ground will also have delayed lightning explosions to punish you for countering too early or roll spamming.
Be more cautious during Phase 2 by adding delayed dodges and holding off on your counterattacks to adapt to this gimmick.
Dodge and Aggressively Punish His Powerful Attacks
Bayle has a mix of fast and slow attacks, but his strongest attacks reward you for good dodge timing with long windows for you to damage him. Attack him aggressively during these windows and avoid unnecessary risks during Bayle's other combos, where he may be faster to counter.
Bait His Grab Attack
When you see Bayle charging lightning in his mouth, prepare to roll forward at the last minute to get a few hits in after he misses. If you're lucky, you'll roll directly in front of his head so that you can easily spot if he's starting his next attack.
Dodge His Normal Aerial Slam Attack
During the attack wherein Bayle charges lightning around his feet, roll the moment Bayle starts to descend from the air to avoid the attack and get free damage on his body.
Roll Twice During His Phase 2 Aerial Slam Attack
Follow the same principle as avoiding Bayle's Phase 1 Aerial Slam by dodging last-second, but walk a bit or time a second roll afterwards to avoid the delayed lightning explosion.
Jump his Earthquake
When Bayle thrusts his lightning bolt into the ground, dodge or stay at a safe distance for the first thrust, then jump once the ground cracks to avoid the tremor attack. It's better to be running towards Bayle as you jump the earthquake so that you have more time to punish him.
Attack from Range During His Eruption Storm AoE
Bayle's AoE eruption and lightning storm attack will strike in spots near and around him, so you can simply sprint away to avoid the lightning strikes and use the time to restore HP and FP, or safely hit Bayle with spells and bow attacks.
Track Projectiles During His Flying Attacks
Bayle has two specific attacks where he flies and attacks you from the air that can get you to waste your stamina or hit you if you dodge improperly. For both these attacks, watch the projectiles more than Bayle to avoid the majority of the potential damage.
Run Directly to the Side During His Delayed Projectiles
During the flying attack where Bayle flies into the air and circles you while leaving delayed projectiles, lock onto Bayle and sprint directly right to avoid the beams, then dodge once Bayle descends and starts sliding towards you.
Unlock then Lock the Camera During Bayle's Flying Beam Attack
Bayle has a flying attack during Phase 2 where he fires two beams at you, but there's a specific behavior to these beams. Alternate between watching the ground and Bayle himself.
For the first beam, look at the ground in front of you to time your dodge against the wave of flames approaching you instead of the beam. Then, for the second beam, aim at Bayle and roll when Bayle closes in with the beam, and hold your last dodge in time to i-frame the delayed explosions.
For Magic Builds: Great Glintstone Shard Shreds Him
Great Glintstone Shard is a very good sorcery for spellcaster characters against Bayle due to its consistent damage, low FP cost for endgame builds, and relatively quick casting time. It's a flexible spell for you to continuously poke at Bayle while having enough time to dodge his attacks when needed due to the short animation of firing the shard.
Get Great Glintstone Shard Location
Bayle the Dread Location
Found at the Summit of Jagged Peak
| World View | Map Location |
|---|---|
 |
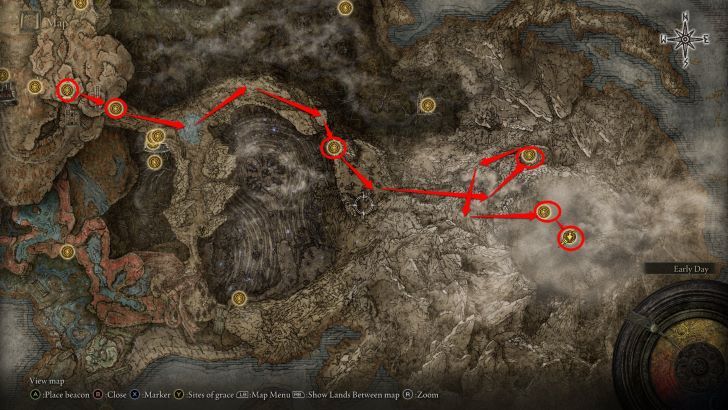 |
Bayle the Dread is found at the summit, and end, of the Jagged Peak region. From the end of the Dragon's Pit cave, cross over to Jagged Peak and journey along the north side, eventually climbing the mountain and jumping numerous Spiritsprings to get to the summit.
Jagged Peak Map and Location Guide
How to Get to Bayle
| 1 | 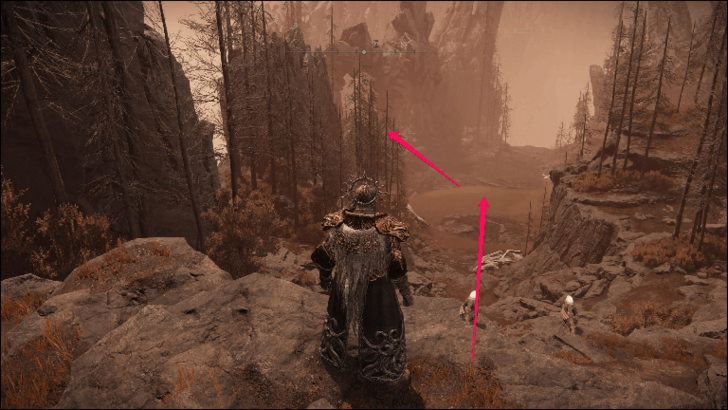 From the Dragon's Pit Terminus site of grace, take the dungeon's east exit and follow the rocky path ahead where you will fight a Jagged Peak Drake. Take the northeast path to continue. |
|---|---|
| 2 | 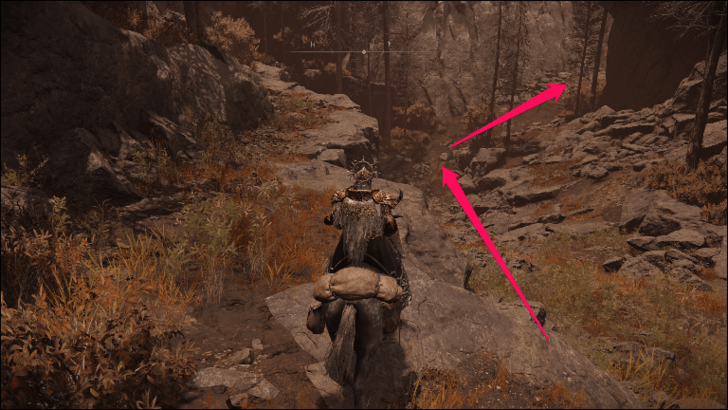 Turn right to a cliffside and continue heading east. |
| 3 | 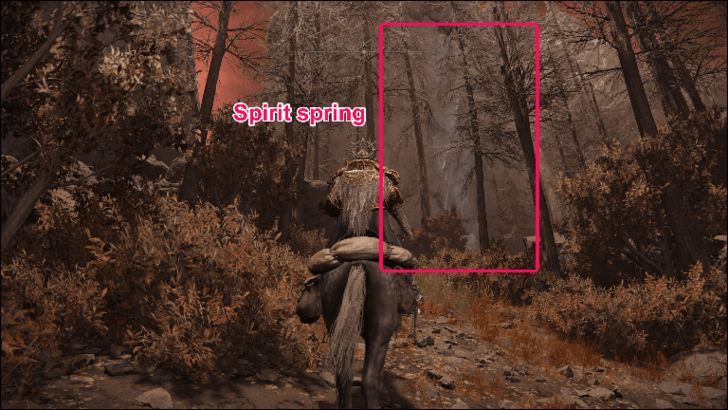 At the end of this path will be a spirit spring that will take you to up to a bridge. Cross the bridge to reach the Foot of the Jagged Peak site of grace. |
| 4 | 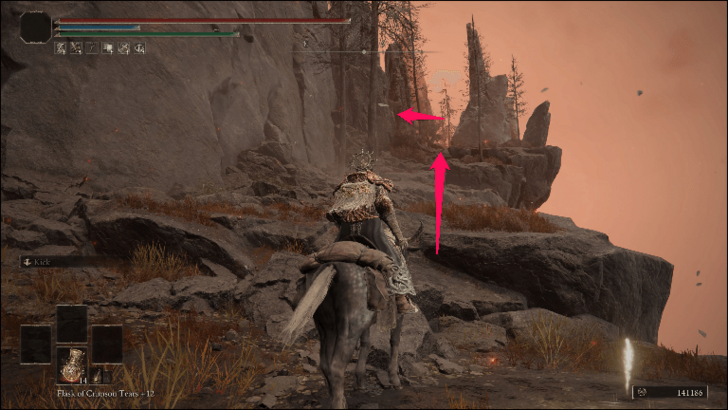 Continue the trail up and turn left at the end to find a large area with stone spikes and two Jagged Peak Drakes fighting. |
| 5 | 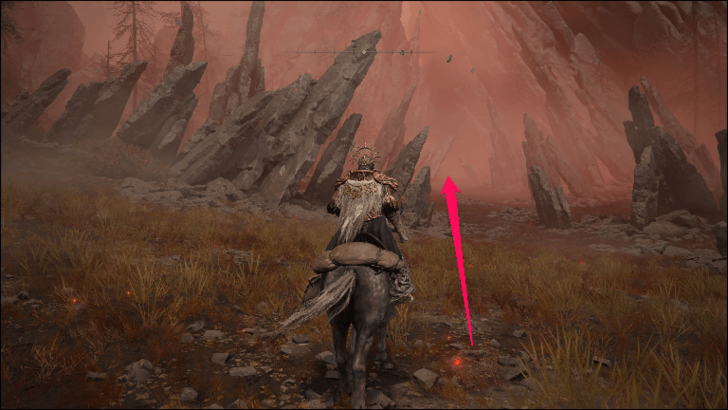 Head east past this area and jump up the next two spirit springs. |
| 6 | 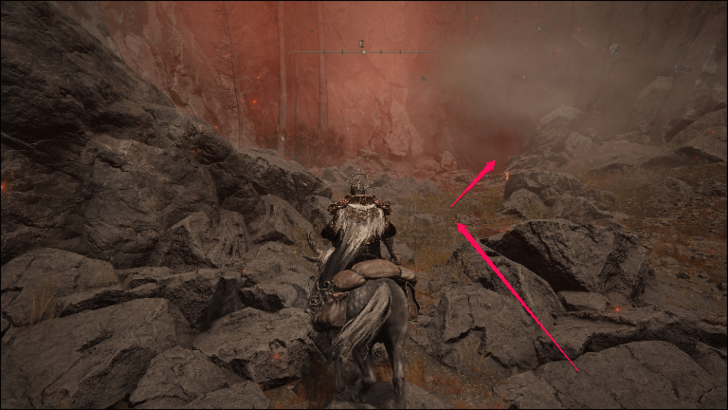 Turn right into a tunnel. |
| 7 |  Follow this path while avoiding the incoming boulders and turn left at the end to reach Ancient Dragon Senessax's boss arena. |
| 8 |  After the fight, turn left to the steep slope that leads north and you will find the Jagged Peak Mountainside site of grace. |
| 9 |  Head west and pass through the trail with dragon corpses and take the spirit spring up. |
| 10 | 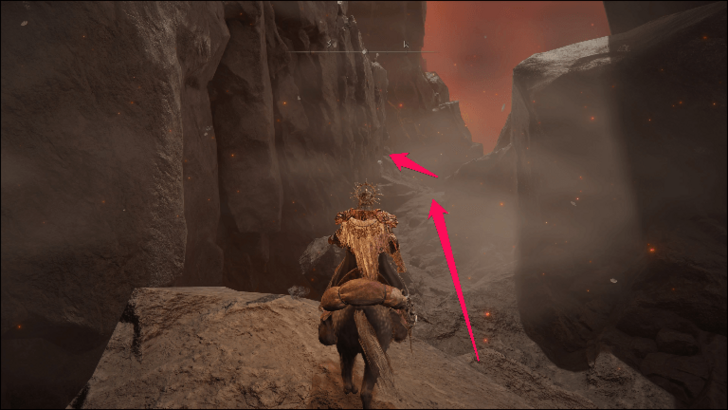 Run southwest and turn left at the corner. |
| 11 |  Make for the end of this path for the next spirit spring while minding the gaps along the way. |
| 12 |  Enter the cave ahead where you will run into electric slimes. |
| 13 | 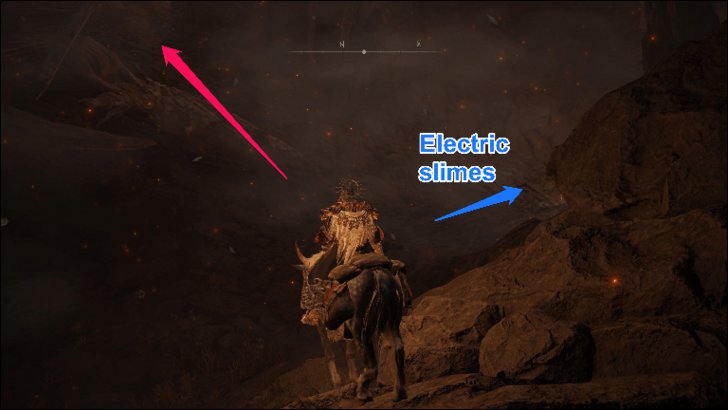 It will be quite difficult to find the path up as the cave is dark, but you should find a slope north of where the electric slimes are. The spirit spring at the end will take you to the Jagged Peak Summit site of grace and the entrance to Bayle's boss arena. |
Bayle the Dread Rewards
| Bayle the Dread Rewards | |
|---|---|
 |
|
| Runes | 490000 Runes |
| Drops | ・Heart of Bayle |
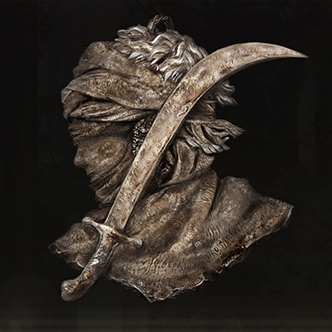
Heart of Bayle Rewards
 Bayle's Flame Lightning Bayle's Flame Lightning |
 Bayle's Tyranny Bayle's Tyranny |
The Heart of Bayle can be exchanged at the Grand Altar of Dragon Communion to receive either Bayle's Flame Lightning, or Bayle's Tyranny.
Elden Ring Related Guides

DLC Bosses
Main Bosses
Optional Bosses
Mini-Bosses
| All Bosses in Elden Ring | |
|---|---|
| Elder Dragon Greyoll | Lion Guardian |
| Valiant Gargoyle (Leyndell) | - |
Hostile NPCs and Invaders
| Limgrave Invaders and Hostile NPCs | |
|---|---|
| Bloody Finger Nerijus | Old Knight Istvan |
| Recusant Henricus | - |
| Liurnia of the Lakes Invaders and Hostile NPCs | |
| Great Horned Tragoth | Festering Fingerprint Vyke |
| Altus Plateau Invaders and Hostile NPCs | |
| Eleonora, Violet Bloody Finger | Inquisitor Ghiza |
| Maleigh Marais, Shaded Castle Castellan | Rileigh the Idle |
| Vargram the Raging Wolf & Errant Sorcerer Wilhelm | Magnus the Beast Claw |
| Mountaintops of the Giants Invaders and Hostile NPCs | |
| Juno Hoslow, Knight of Blood | - |
| The Roundtable Hold Invaders and Hostile NPCs | |
| Mad Tongue Alberich | - |
| Multiple Location Invaders and Hostile NPCs | |
| Anastasia, Tarnished-Eater | - |
Comment
Author

Bayle the Dread Weakness and Location
Please participate in our site
improvement survey
03/2026
improvement survey
03/2026
Would you assist in
improving Game8's site?
improving Game8's site?

×
We are listening to our users' valuable opinions and discussing how to act on them.
The information collected through this survey will be used for the purpose of improving our services. In addition, the information will only be disclosed a part of a statistic in a format that will not allow identification of personal information.
Begin Survey
Not Now
×
Please rate each item regarding Game8.co's Advertisements.
Amount of Ads
Very Dissatisfied
Somewhat Dissatisfied
Fine
Somewhat Satisfied
Highly Satisfied
Placement of Ads
Timing of Ad Display
Ad Loading Speed
Safeness of Ads
Content of Ads
×
Please rate each item regarding Game8.co's Quality of Articles.
Amount of information
Very Dissatisfied
Somewhat Dissatisfied
Fine
Somewhat Satisfied
Highly Satisfied
Frequency of updates
Speed of new information
Accuracy of articles
Understandibility of articles
Readability of sentences
×
Please rate each item regarding Game8.co's Usability of the Site.
Ease of finding information
Very Dissatisfied
Somewhat Dissatisfied
Fine
Somewhat Satisfied
Highly Satisfied
Loading Speed
Use of Color
Font Size
Visibility of Images
Easy to Understand Layout
×
Please rate each item regarding Game8.co's Message Boards, Comments.
Ease of Writing
Very Dissatisfied
Somewhat Dissatisfied
Fine
Somewhat Satisfied
Highly Satisfied
Readability
Ease in Finding Information
Comment Quality
Comment Quantity
Admin Response
×
Please rate each item regarding Game8.co's Site's new design.
Please rate our site's new design
Very Dissatisfied
Somewhat Dissatisfied
Fine
Somewhat Satisfied
Highly Satisfied
Do you think that the website's design change makes the site easier to use?
Has the new design made it easier for you to find information on the site?
Has the new design improved the overall visual appeal of the site?
How would you rate your overall satisfaction with the new design of the site?
×
How likely are you to recommend Game8 to someone you know?
Very Unlikely
0
1
2
3
4
5
6
7
8
9
10
Very Likely
If you have other opinions regarding potential improvement to the website, please share them with us. We would appreciate your honest opinion.
Note: This is a free response section, so you can proceed without entering anything.
Note: Please be sure not to enter any kind of personal information into your response.
Note: Please be sure not to enter any kind of personal information into your response.
×
Thank You
×
Thank you for participating in our survey! Your answers will help us to improve the quality of our website and services.
We hope you continue to make use of Game8.
We hope you continue to make use of Game8.
Close
Rankings
- We could not find the message board you were looking for.
Gaming News


![Monster Hunter Stories 3 Review [First Impressions] | Simply Rejuvenating](https://img.game8.co/4438641/2a31b7702bd70e78ec8efd24661dacda.jpeg/thumb)
Popular Games

Genshin Impact Walkthrough & Guides Wiki
Honkai: Star Rail Walkthrough & Guides Wiki
Umamusume: Pretty Derby Walkthrough & Guides Wiki
Pokemon Pokopia Walkthrough & Guides Wiki
Resident Evil Requiem (RE9) Walkthrough & Guides Wiki
Monster Hunter Wilds Walkthrough & Guides Wiki
Wuthering Waves Walkthrough & Guides Wiki
Arknights: Endfield Walkthrough & Guides Wiki
Pokemon FireRed and LeafGreen (FRLG) Walkthrough & Guides Wiki
Pokemon TCG Pocket (PTCGP) Strategies & Guides Wiki


Recommended Games
Diablo 4: Vessel of Hatred Walkthrough & Guides Wiki
Cyberpunk 2077: Ultimate Edition Walkthrough & Guides Wiki
Fire Emblem Heroes (FEH) Walkthrough & Guides Wiki
Yu-Gi-Oh! Master Duel Walkthrough & Guides Wiki
Super Smash Bros. Ultimate Walkthrough & Guides Wiki
Pokemon Brilliant Diamond and Shining Pearl (BDSP) Walkthrough & Guides Wiki
Elden Ring Shadow of the Erdtree Walkthrough & Guides Wiki
Monster Hunter World Walkthrough & Guides Wiki
The Legend of Zelda: Tears of the Kingdom Walkthrough & Guides Wiki
Persona 3 Reload Walkthrough & Guides Wiki


All rights reserved
ELDEN RING™ & ©BANDAI NAMCO Entertainment Inc. / ©2021 FromSoftware, Inc.
The copyrights of videos of games used in our content and other intellectual property rights belong to the provider of the game.
The contents we provide on this site were created personally by members of the Game8 editorial department.
We refuse the right to reuse or repost content taken without our permission such as data or images to other sites.