Backhand Blade Build Guide

The Backhand Blade build is a power-stancing build that can deal high amounts of physical and bleed damage in the Elden Ring DLC Shadow of the Erdtree. Read on to learn how to make and play the Backhand Blade build, including its stat distribution and required equipment.
| Backhand Blade Guides | |
|---|---|
| Backhand Blade Build Guide | Backhand Blade Location and Stats |
Backhand Blade Build Guide
Uses a Blood Infused Backhand Blade
| Main Weapon Loadout | |||||||||
|---|---|---|---|---|---|---|---|---|---|
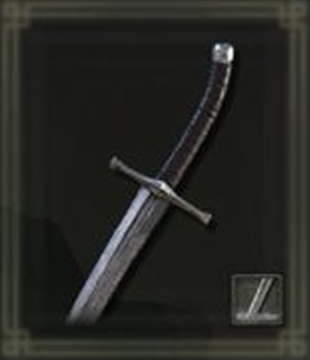 Backhand Blade Backhand Blade
|
Ash of War: Blind Spot Affinity: Upgrade Level: +25 Off-Hand: Finger Seal |
||||||||
| Weapon Scaling (+25) | |||||||||
| Str: C | Dex: B | Int: - | Fai: - | Arc: D | |||||
| Stat Requirements | |||||||||
| Str: 10 | Dex: 13 | Int: 0 | Fai: 0 | Arc: 0 | |||||
The Backhand Blade is a paired weapon, which means you can dual-wield it by two-handing; no extra Backhand Blade needed. We take advantage of the its fast and evasive moveset by infusing it with the Blood affinity to proc bleed quickly and easily.
Using an almost even stat distribution between Dexterity (55) and Arcane (45) at Rune Level 150, we can achieve a decent attack rating while still boasting a whopping 108 Blood loss buildup.
Unleash Consecutive Attacks for DPS and Bleed
The Backhand Blade has a very aggressive playstyle due to its ability to dodge enemy attacks while retaliating with Blind Spot (an Ash of War only available to Backhand Blade).
Its light attacks are also extremely fast to execute while dishing out tons of damage. Capitalize on its fast attacks and evasive capabilities to maximize the build's damage output!
Use Jump Attacks to Cover Extra Distance and Stagger Enemies
Despite being a light weapon, the Backhand Blade's strong jump attack has a decent amount of poise damage which makes it effective against elites you battle in the map. You can also use it as a gap closer if you find your weapon reach lacking mid-combat.
Stack Damage Buffs to Increase Your DPS
Aside from the Backhand Blade's naturally high damage and bleed capability, we also include buffing spells and ashes of war to further increase your damage for the first few moments of the fight which can give us a slight advantage against the boss fight we're going to challenge.
| How to Buff Before a Boss | |
|---|---|
| 1 | Cast Golden Vow for a damage buff and defense buff. The buff lasts for a whole minute, making it the first buff to prioritize. |
| 2 | Use Seppuku to activate Lord of Blood's Exultation and and White Mask. Both the White Mask and Lord of Blood's Exultation lasts for 20 seconds but we are able to re-apply our bleed mid-fight via the weapon's natural bleed build-up which makes Seppuku a secondary priority. |
| 3 | Cast Flame, Grant Me Strength for a physical damage buff. Lasts for 30 seconds and must be the final buff we use due to its short duration. |
Backhand Blade Build Stat Distribution
Recommended Stats
| Recommended Level | ||
|---|---|---|
| 150 | ||
| Stat | Points | Explanation |
| VGR | 50 | Our recommended Vigor level for the build is 50 Vigor. This gives you enough durability to survive enemy attacks when we do get hit. |
| MND | 14 | 14 Mind will put our build at 91 FP. Blind Spot costs 9 FP per use which essentially means that we can use our Ash of War 10 times in a single fight provided that we replenish our FP after using our buffs at the start of the battle. |
| END | 20 | Gives us enough Weight Load limit to equip all of our gear while maintaining medium load. This also gives us enough stamina together with the Two-Headed Turtle Talisman to last in fights without running out of stamina. |
| STR | 10 | The only strength we need is 10 which is the bare minimum required to equip the Backhand Blade. |
| DEX | 55 | Dexterity will still be our main source of damage despite the build relying on the weapon's bleed buildup via its blood infusion. The weapon will still have a B scaling in Dexterity which will amplify our physical damage output per hit. |
| INT | 10 | INT will not be needed in the build. |
| FAI | 25 | Our staple buffs from incantations comes from Golden Vow and Flame, Grant me Strength which gives us a decent damage boost for the first few moments of the fight. Sitting at 25 Faith will give us the ability to use these buffs (mainly Golden Vow). |
| ARC | 45 | Arcane will be our secondary main damage stat for this build. When changing Backhand Blade to blood affinity, it will have a D scaling in arcane which is low in terms of bonus damage output. However, we still increase our Arcane to 45 to maximize the Blood loss scaling we can get from its blood infusion. |
Recommended Starting Class

| VGR | MND | END | STR | DEX | INT | FAI | ARC |
|---|---|---|---|---|---|---|---|
| 11 | 12 | 11 | 10 | 16 | 10 | 8 | 14 |
The Warrior is the best class to have when gearing up your character for a Backhand Blade build. It has a high base Dexterity and Arcane stat which are the build's main stat. It also sits at a comfortable 10 Strength which is the bare minimum Strength we need to wield the said weapon.
It also has a low base Intelligence which is one of the build's stats and with this class, we won't have much stat loss as our unused stats are already at a low base value.
Respec Stats at Rennala in Raya Lucaria
Before hitting the DLC, make sure to respec your stats by offering a Larval Tear to Rennala at the Academy of Raya Lucaria in Liurnia. You can do this before going to the DLC since the Lightning Perfume Bottle can be obtained without having to fight any DLC bosses.
Required Equipment for the Backhand Blade Builds
| How to Get All Required Build Items | |
|---|---|
| Weapon | Spells |
| Armor Set | Talismans |
Weapons
| Weapon | Explanation |
|---|---|
 Backhand Blade Backhand Blade
|
Ash of War: Blind Spot ( Since this is a paired weapon, the Backhand Blade will be our main weapon. Make sure to change its affinity to Blood to give it blood loss buildup. |
|
|
Ash of War: Seppuku We'll be using the Uchigatana as a buff stick for the Seppuku Ash of War. You must two-hand the weapon to meet its Strength requirement and use the Ash of War. |
|
|
As we'll only be using incantation that provides buffs, the Finger Seal is more than enough as it has low stat requirements and can easily be purchased from the Twin Maiden Husks in the Roundtable hold. |
Spells and Ashes of War
| Spells | Explanation |
|---|---|
 Seppuku Seppuku
|
An Ash of War that can apply blood loss to the caster while also allowing the weapon to deal an extra blood loss build up. |
 Golden Vow Golden Vow
|
A great physical damage buff and also a damage negation buff which grants this purely aggressive build a bit of safety. |
|
|
Increases our physical damage and it also stacks with Golden Vow which allows us to hit harder with our charged attacks. |
Armor
| Head | White Mask |
|---|---|
| Chest | Gravebird's Blackquill Armor |
| Arms | Gravebird Bracelets |
| Legs | Gravebird Anklets |
Our main armor set choice of the build consists of the White Mask and Gravebird set combo. The Gravebird's Blackquill Armor piece enchances our jump attacks which is one of the weapon's stronger movesets. It can stagger many elite enemies with one use like the Fire Knights in the DLC and the armor piece makes it stronger.
Take note that the Gravebird Bracelet and Anklets do not have any passive effects and can be changed at will.
Obtain White Mask from the White Mask Invader in Blood Palace
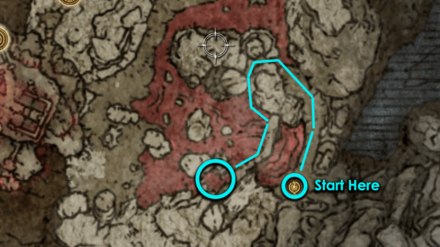
To get the White Mask which is included in the white surgeon set, travel to Palace Approach Ledge-Road site of grace. Mount up and access the hidden passage along the cliff to skip the first two White Mask invasions. Follow the cliff edge, and eventually, you will get to the marked location.
Defeating the White Mask invader will drop the War Surgeon set. Take note that the White Mask will no longer appear if you have already defeated Mohg.
Obtain the Gravebird's Blackquill Armor North of Temple Town Ruins
| Map Image | World Image |
|---|---|
 |
 |
Gravebird's Blackquill Armor can be found on an altar north of the Temple Town Ruins Site of Grace on the left cliffside. The altar is surrounded by Gravebirds perched on a pillar.
Talismans
Best Talismans
For Talismans, we raise our attack power using a combination of base game and DLC talismans: Lord of Blood's Exultation (for more attack power when bleed occurs), Rotten Winged Sword Insignia (more damage via successive attacks), and Retaliatory Crossed-Tree (more damage after rolling or backstepping).
| Talisman | Effect and How to Get |
|---|---|
 Lord of Blood's Exultation Lord of Blood's Exultation
|
Effect:
Blood loss in vicinity increases attack power.
How to Get: You can obtain the Lord of Blood's Exultation after defeating Esgar, Priest of Blood inside the Leyndell Catacombs. You can find the catacombs northeast of the West Capital Rampart. |
 Two-Headed Turtle Talisman Two-Headed Turtle Talisman
|
Effect:
Greatly raises stamina recovery speed.
How to Get: The Two-Headed Turtle Talisman is in a cave hidden by a waterfall at the end of Ellac River. To find it, simply head northwest from the Ellac River Cave Site of Grace and follow the path up north until the end. |
 Rotten Winged Sword Insignia Rotten Winged Sword Insignia
|
Effect:
Greatly raises attack power with successive attacks.
How to Get: Obtained by helping Millicent at the end of her questline. Locks you out of getting Millicent's Prosthesis until NG+. |
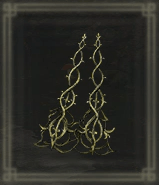 Retaliatory Crossed-Tree Retaliatory Crossed-Tree
|
Effect:
Enhances attacks executed after rolling or backstepping.
How to Get: The Retaliatory Crossed-Tree can be obtained from Leda after helping her take down Ansbach as part of their questlines. To trigger this event, you must first take down Hornset with Leda and progress Ansbach's story until he transfers to the Specimen Storehouse in the Shadow Keep. |
Optional Talismans
For our optional talismans, we recommend using the necessary defensive talisman depending on the boss or enemies you are fighting. If unsure, you can go for the trusty Crimson Amber Medallion +3 for more HP.
For the other offensive talismans, Millicent's Prosthesis is a great Talisman due to its bonus DEX and boost to successive attacks. If you find yourself using jump attacks a lot, you can use the Claw Talisman to deal more damage.
| Talisman | Effect |
|---|---|
 Millicent's Prosthesis Millicent's Prosthesis
|
Effect:
Boosts dexterity, raises attack power with successive attacks.
How to Get: Obtained by invading and killing Millicent at the end of her questline. Locks you out of getting the Rotten Winged Sword Insignia until NG+. |
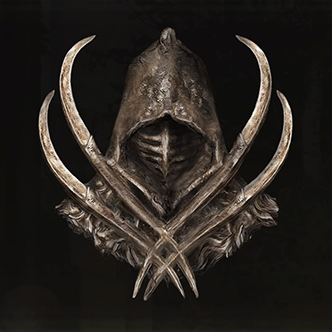 Claw Talisman Claw Talisman
|
Effect:
Enhances jump attacks.
How to Get: You can find the Claw Talisman on one of the watchtowers at Stormveil Castle. jump to the Stormveil Castle bridge by climbing up the stairs from the liftside chamber site of grace. |
 Crimson Amber Medallion +3 Crimson Amber Medallion +3
|
Effect:
Boosts maximum HP by the utmost.
How to Get: The Crimson Amber Medallion +3 talisman is obtained as a reward for defeating the Death Knight in the Fog Rift Catacombs. |
 Dragoncrest Greatshield Talisman Dragoncrest Greatshield Talisman
|
Effect:
Enormously boosts physical damage negation.
How to Get: Looted from a chest at the upper level of the cathedral filled with Kindred of Rot in Elphael. The upper level is reached by jumping down from the cathedral roof while coming from the Drainage Channel site of grace. |
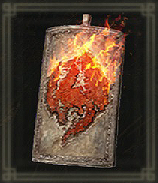 Flamedrake Talisman +3 Flamedrake Talisman +3
|
Effect:
Boosts fire damage negation.
How to Get: The Flamedrake Talisman +3 can be found at the Fort of Reprimand. From the Fort of Reprimand Site of Grace, follow the stairs down into a hallway filled with cages. When you first enter, face left and jump over the cages. The chest containing a talisman will be at the end of the path. |
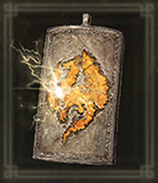 Boltdrake Talisman +3 Boltdrake Talisman +3
|
Effect:
Boosts lightning damage negation by the utmost.
How to Get: The Boltdrake Talisman +3 can be found on a slumped corpse in a room to the right of the Storehouse, First Floor Site of Grace. Look for a dark, narrow room with book piles to get there. |
 Spelldrake Talisman +3 Spelldrake Talisman +3
|
Effect:
Boosts magic damage negation by the utmost.
How to Get: The Spelldrake Talisman +3 is found in a room below the bridge before Castle Ensis. From the Castle Front Site of Grace, navigate to below the bridge that leads to Castle Ensis and head eastward along the path until you find a room you can jump into. The talisman will be on a corpse at the end of the room. |
 Golden Braid Golden Braid
|
Effect:
Boosts magic damage negation by the utmost.
How to Get: The Golden Braid Talisman can be found inside a dead tree in Shaman Village. From the Hinterland Site of Grace, proceed southeast to reach the Shaman Village. Once you're there, make your way to the end of the village and you will see the tree containing the talisman. |
Elden Ring Related Guides

List of All Builds
Comment
Author
Backhand Blade Build Guide
Rankings
- We could not find the message board you were looking for.
Gaming News
Popular Games

Genshin Impact Walkthrough & Guides Wiki

Honkai: Star Rail Walkthrough & Guides Wiki

Umamusume: Pretty Derby Walkthrough & Guides Wiki

Pokemon Pokopia Walkthrough & Guides Wiki

Resident Evil Requiem (RE9) Walkthrough & Guides Wiki

Monster Hunter Wilds Walkthrough & Guides Wiki

Wuthering Waves Walkthrough & Guides Wiki

Arknights: Endfield Walkthrough & Guides Wiki

Pokemon FireRed and LeafGreen (FRLG) Walkthrough & Guides Wiki

Pokemon TCG Pocket (PTCGP) Strategies & Guides Wiki
Recommended Games

Diablo 4: Vessel of Hatred Walkthrough & Guides Wiki

Cyberpunk 2077: Ultimate Edition Walkthrough & Guides Wiki

Fire Emblem Heroes (FEH) Walkthrough & Guides Wiki

Yu-Gi-Oh! Master Duel Walkthrough & Guides Wiki

Super Smash Bros. Ultimate Walkthrough & Guides Wiki

Pokemon Brilliant Diamond and Shining Pearl (BDSP) Walkthrough & Guides Wiki

Elden Ring Shadow of the Erdtree Walkthrough & Guides Wiki

Monster Hunter World Walkthrough & Guides Wiki

The Legend of Zelda: Tears of the Kingdom Walkthrough & Guides Wiki

Persona 3 Reload Walkthrough & Guides Wiki
All rights reserved
ELDEN RING™ & ©BANDAI NAMCO Entertainment Inc. / ©2021 FromSoftware, Inc.
The copyrights of videos of games used in our content and other intellectual property rights belong to the provider of the game.
The contents we provide on this site were created personally by members of the Game8 editorial department.
We refuse the right to reuse or repost content taken without our permission such as data or images to other sites.


![Monster Hunter Stories 3 Review [First Impressions] | Simply Rejuvenating](https://img.game8.co/4438641/2a31b7702bd70e78ec8efd24661dacda.jpeg/thumb)


