How to Beat Death Rite Bird: Boss Fight Guide

This is a guide on how to beat Death Rite Bird, an optional boss in Elden Ring. Read on to learn more about Death Rite Bird's drops, weaknesses, and recommended level!
List of Contents
Death Rite Bird General Info
Stats and Rewards
| Death Rite Bird | ||
|---|---|---|

|
||
| Weakness | Resistance | Immune |
|
Strike Holy |
Lightning Scarlet Rot Thrust |
Bleed Frost Sleep Poison Madness Instant Death |
| Affected By | Scarlet Rot | |
| Spirit Ashes Available? | Yes | |
| Rune Rewards | ・Academy Gate Town: 7800 (NG) ・Southern Aeonia Swamp Bank: 15000 (NG) ・Mountaintops of the Giants: 77000 (NG) ・Consecrated Snowfield: 220000 (NG) ・Charo's Hidden Grave: 230000 (NG+) |
|
| Summonable NPCs |
None
|
|
| Location | ・Academy Gate Town
・Southern Aeonia Swamp Bank ・Mountaintops of the Giants ・Consecrated Snowfield ・Charo's Hidden Grave |
|
| Item Drops |
Academy Gate Town: ・Ancient Death Rancor Southern Aeonia Swamp Bank: ・Death's Poker Mountaintops of the Giants: ・Death Ritual Spear Consecrated Snowfield: ・Explosive Ghostflame Charo's Hidden Grave: ・Ghostflame Call |
|
Death Rite Bird Location
Where to Find Death Rite Bird
| Boss | Location and Rec. Level |
|---|---|
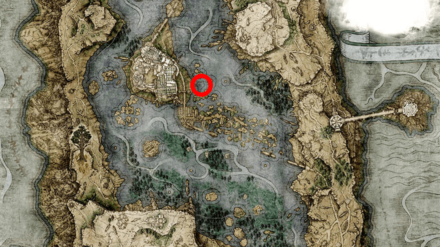 |
Rec. Lvl.: 40+
Location: Academy Gate Town Where to Find: Optional boss that appears at night northwest of Academy Gate Town site of grace. |
 |
Rec. Lvl.: 50+
Location: Southern Aeonia Swamp Bank Where to Find: Optional boss that appears at night south of the Southern Aeonia Swamp Bank Site of Grace. |
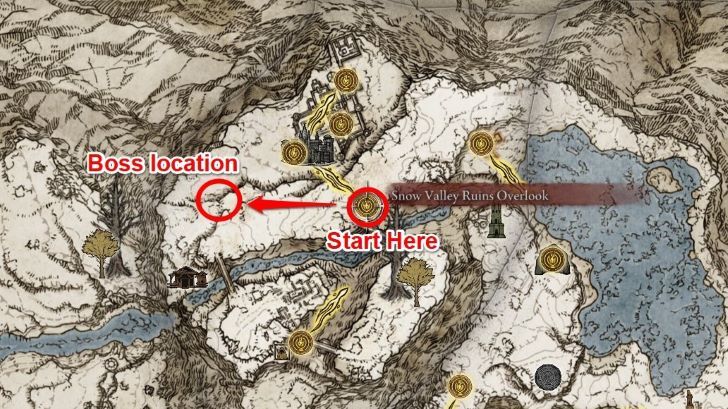 |
Rec. Lvl.: 80+
Location: Snow Valley Ruins Overlook Where to Find: Optional boss that appears at night west of the Snow Valley Ruins Overlook site of grace. |
 |
Rec. Lvl.: 100+
Location: Ordina, Liturgical Town Where to Find: Optional boss that appears at night northwest of Ordina, Liturigical Town. |
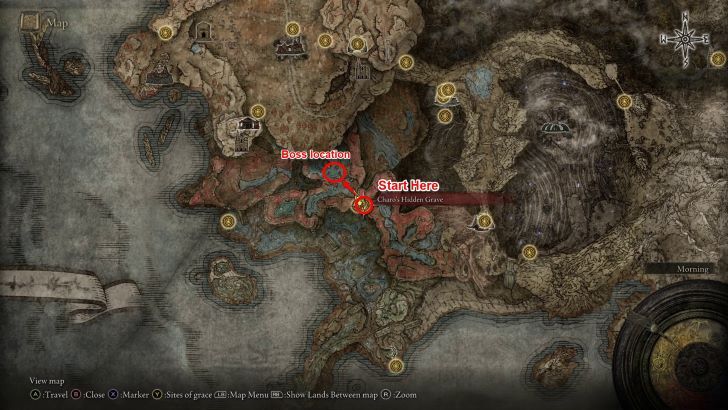 |
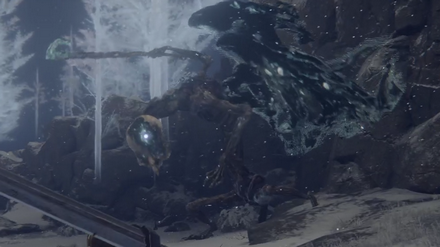
Rec. Lvl.: 160+
Location: Charo's Hidden Grave Where to Find: Optional Boss northwest of Charo's Hidden Grave site of grace. |
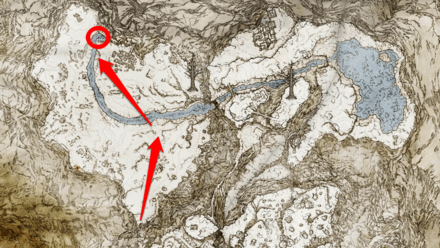
Form the Haligtree Secret Medallion to Reach the Consecrated Snowfield
To reach the Death Rite Bird northwest of Ordina, Liturgical Town, you will need to collect the Left and Right sides of the Haligtree Secret Medallion and use them together at the Grand Lift of Rold.
After reaching the Lift's secret floor, you will have to go through the Hidden Path to the Haligtree dungeon to finally reach the Consecrated Snowfield.
Hidden Path to the Haligtree Location
DLC Only: Pass Through Dragon's Pit to Reach Charo's Hidden Grave
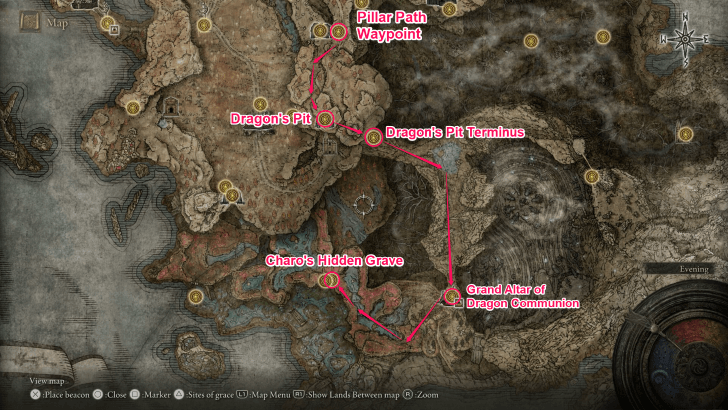
The Death Rite Bird in Charo's Hidden Grave is only accessible if you have the Shadow of the Erdtree DLC and gained access to the Land of Shadow. It will require you to clear the Dragon's Pit cave dungeon.
From there, you will unlock the way to Jagged Peak and be able to go south to climb the Giant Dead Dragon and reach Charo's Hidden Grave.
How to Get to Charo's Hidden Grave (Red Area)
How to Beat Death Rite Bird
| Tips for Beating Death Rite Bird |
|---|
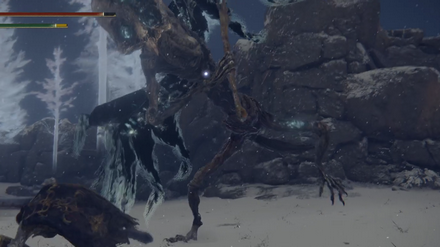
Try to Stay Directly Under It
If you position yourself under its body, right in between its legs, a lot of its wider swings will completely miss you. This is a good position to hack at its legs or body. You still have to look out for its pecking moves, and its Black Flame Explosion AoE attack, though.
Attack Its Head for More Damage
Attacking its head will do more damage and help to stagger it quicker than attacking its body. This is a riskier tactic though, as its head moves around a lot, and your attacks could miss quite often. If you're not too confident about its movesets yet, you can take the safer route and focus on its body.
Perform Critical Hits
Perform lots of jumping attacks to try to stagger Death Rite Bird, then do a critical hit on its head while it's staggered. These critical hits will do a lot of damage, making the fight go by a little faster.
Apply Scarlet Rot
The only status ailment Death Rite Bird can be affected by is Scarlet Rot. Try equipping a Scarlet Rot weapon or using Scarlet Rot spells like Rotten Breath or Ekzykes's Decay.
Use Holy Attacks
Equip a Holy weapon to inflict massive Holy damage on Death Rite Bird. A lot of Incantations will also be very effective against this boss.
Equip Striking Weapons
Death Rite Bird is particularly weak against Striking weapons. If you have striking weapons at your disposal, combining these weapons plus jumping attacks to stagger this boss will make this a much easier fight.
Death Rite Bird Attack Patterns
Regular Attacks
| Regular Attack Variations |
|---|

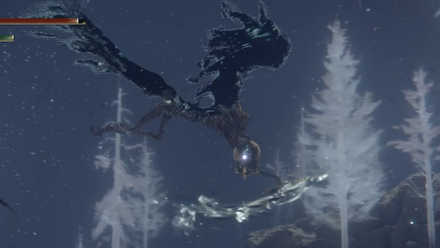
Talon Smash: Death Rite Bird briefly flies up into the air, shows you its talons, then smashes down on you, talons first. This can be easily dodged completely by rolling at the exact moment it starts to come down. Get a couple of hits in after Death Rite Bird lands. |
One-Handed Cane Smash: Death Rite Bird readies its cane for a swing, then brings its weapon smashing down upon you. This can be easily dodged left or right as the swing comes down. Get a couple of hits in right after. |
Two-Handed Cane Smash: Death Rite Bird Lifts its cane up vertically with both hands, and smashes it down upon you. This move doesn't have a lot of range and can easily be dodge rolled in any direction. Get a couple of hits in right after. |

Peck Attacks: If you are too close to Death Rite Bird, it will start pecking at you. It's best to stay away while this move is going on, as it pecks at you several times. This is a good chance to get behind Death Rite Bird and get some free hits in. |
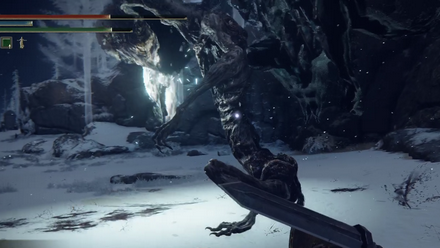
Death Roar: Death Rite Bird roars at you, often twice. This roar builds up your Instant Death gauge, so stay away while it is roaring at you. Thankfully, these roars don't have good range, so you can stay relatively close to Death Rite Bird for a quick counterattack as it finishes roaring. |
Black Flame Attacks
| Black Flame Attack Variations |
|---|
Ball of Fire Thrust: Death Rite Bird thrusts at you. This thrust simultaneously summons a ball of Black Flame, which explodes. First, dodge the thrust to the side, then dodge the explosion immediately after by rolling once more. Once you have the timings down, it's possible to avoid all damage entirely from these two hits. |
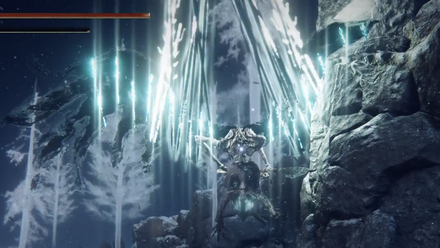
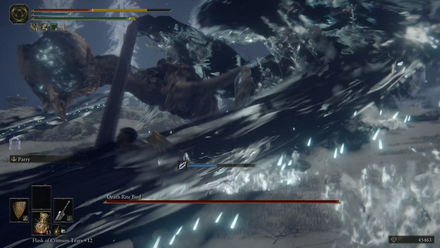
Black Flame Rain: Death Rite Bird floats, then fires tons of spears of Black Flame into the air. These spears will begin raining down on the battle area, so make sure to flee to safety. Getting far away enough will ensure you won't get hit, but if it's too late to run away, you can try to avoid the rain by spamming dodge roll. |
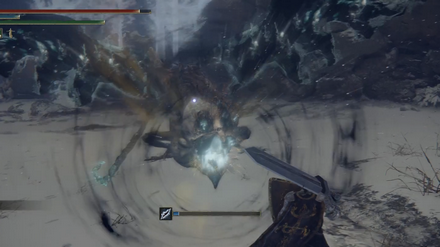
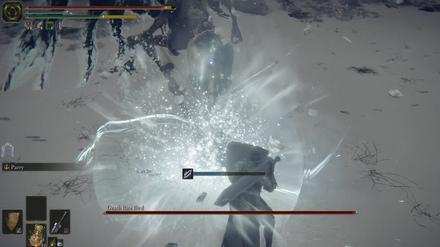
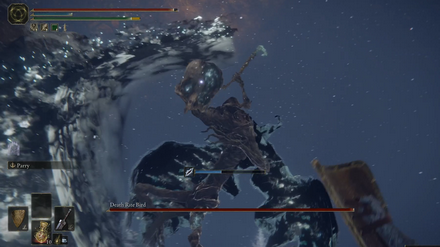
Black Flame Explosion: Death Rite Bird brings its flaming weapon close to its body, staying still for a couple of seconds. Once you see it do this, run away as far as possible, as it will create a massive explosion that sets the ground on fire. This powerful attack can one-shot you, so stay away, or if it's too late, try to mitigate the damage with a shield. |
Backstep Slash: Death Rite Bird steps backwards while performing a wide sweep with its cane. Dodge forwards or backwards. |

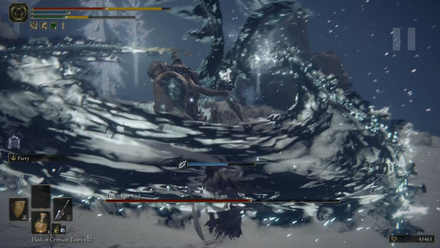
Black Flame Row: This move is often done right after the Ball of Fire Thrust. Death Rite Bird does a wide sweep with its cane, then sends a wave of fire straight ahead at you. Avoid this by dodging to the sides. |
Black Flame Slash Combo: Death Rite Bird can perform up to three slashes with its cane. The wind-ups to the slashes are easy to guess, and these moves can be dodged in any direction. try to dodge close to its body and perform a quick counterattack when the combo ends. |

Black Flame Thrust: Death Rite Bird thrusts once with its cane. This move is a simple short-range attack that can be defended against with a shield or dodged in any direction. |
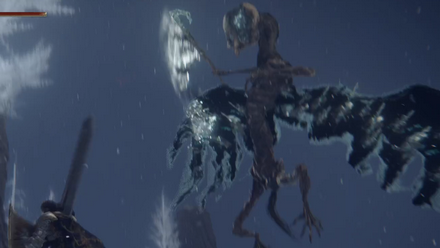
Flying Black Flame Slash: Death Rite Bird flies around in an arc, then swoops down toward you with a slash. This attack can be avoided completely with a well-timed dodge. |
Jumping Black Flame Slash: Death Rite Bird jumps into the air and smashes its cane down onto the ground. Black Flame will start to spread quickly outward, so don't stay still and keep on moving to the side. |
Jumping Uppercut to Black Flame Smash: Death Rite Bird does a powerful jumping uppercut, then smashes its cane down on the ground. Both attacks are avoidable with well-timed dodges. Black Flame will start to spread quickly outward, so don't stay still and keep on moving to the side. |
Elden Ring Related Guides
DLC Bosses
Main Bosses
Optional Bosses
Mini-Bosses
| All Bosses in Elden Ring | |
|---|---|
| Elder Dragon Greyoll | Lion Guardian |
| Valiant Gargoyle (Leyndell) | - |
Hostile NPCs and Invaders
| Limgrave Invaders and Hostile NPCs | |
|---|---|
| Bloody Finger Nerijus | Old Knight Istvan |
| Recusant Henricus | - |
| Liurnia of the Lakes Invaders and Hostile NPCs | |
| Great Horned Tragoth | Festering Fingerprint Vyke |
| Altus Plateau Invaders and Hostile NPCs | |
| Eleonora, Violet Bloody Finger | Inquisitor Ghiza |
| Maleigh Marais, Shaded Castle Castellan | Rileigh the Idle |
| Vargram the Raging Wolf & Errant Sorcerer Wilhelm | Magnus the Beast Claw |
| Mountaintops of the Giants Invaders and Hostile NPCs | |
| Juno Hoslow, Knight of Blood | - |
| The Roundtable Hold Invaders and Hostile NPCs | |
| Mad Tongue Alberich | - |
| Multiple Location Invaders and Hostile NPCs | |
| Anastasia, Tarnished-Eater | - |
Author

How to Beat Death Rite Bird: Boss Fight Guide
Rankings
- We could not find the message board you were looking for.
Gaming News
![Neverness to Everness (NTE) Review [Beta Co-Ex Test] | Rolling the Dice on Something Special](https://img.game8.co/4414628/dd3192c8f1f074ea788451a11eb862a7.jpeg/show)


Popular Games

Genshin Impact Walkthrough & Guides Wiki
Honkai: Star Rail Walkthrough & Guides Wiki
Arknights: Endfield Walkthrough & Guides Wiki
Umamusume: Pretty Derby Walkthrough & Guides Wiki
Wuthering Waves Walkthrough & Guides Wiki
Pokemon TCG Pocket (PTCGP) Strategies & Guides Wiki
Abyss Walkthrough & Guides Wiki
Zenless Zone Zero Walkthrough & Guides Wiki
Digimon Story: Time Stranger Walkthrough & Guides Wiki
Clair Obscur: Expedition 33 Walkthrough & Guides Wiki


Recommended Games
Fire Emblem Heroes (FEH) Walkthrough & Guides Wiki
Pokemon Brilliant Diamond and Shining Pearl (BDSP) Walkthrough & Guides Wiki
Diablo 4: Vessel of Hatred Walkthrough & Guides Wiki
Super Smash Bros. Ultimate Walkthrough & Guides Wiki
Yu-Gi-Oh! Master Duel Walkthrough & Guides Wiki
Elden Ring Shadow of the Erdtree Walkthrough & Guides Wiki
Monster Hunter World Walkthrough & Guides Wiki
The Legend of Zelda: Tears of the Kingdom Walkthrough & Guides Wiki
Persona 3 Reload Walkthrough & Guides Wiki
Cyberpunk 2077: Ultimate Edition Walkthrough & Guides Wiki


All rights reserved
ELDEN RING™ & ©BANDAI NAMCO Entertainment Inc. / ©2021 FromSoftware, Inc.
The copyrights of videos of games used in our content and other intellectual property rights belong to the provider of the game.
The contents we provide on this site were created personally by members of the Game8 editorial department.
We refuse the right to reuse or repost content taken without our permission such as data or images to other sites.