Ancient Meteoric Ore Greatsword Build Guide
The Ancient Meteoric Ore Greatsword build is a gap closing and weapon skill-heavy setup in the Elden Ring DLC Shadow of the Erdtree. Read on to learn how to make and play the Ancient Meteoric Ore Greatsword build, including its stat distribution and required equipment.
| Ancient Meteoric Ore Greatsword Guides | |
|---|---|
Ancient Meteoric Ore Greatsword Build Guide
Uses the Unique Ancient Meteoric Ore Greatsword
| Main Weapon | Off-Hand Weapon | ||||||||
|---|---|---|---|---|---|---|---|---|---|
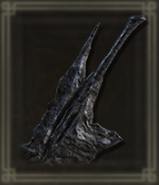 Ancient Meteoric Ore Greatsword Ancient Meteoric Ore Greatsword
Infused Ash of War: White Light Charge |
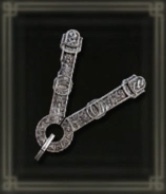 Finger Seal Finger Seal
Ash of War: N/A |
||||||||
| Weapon Scaling (+10) | |||||||||
| Str: B | Dex: E | Int: - | Fai: - | Arc: D | |||||
| Stat Requirements | |||||||||
| Str: 35 | Dex: 10 | Int: 0 | Fai: 0 | Arc: 19 | |||||
This build deals fast and heavy strikes of Pierce and poise damage by spamming the Ancient Meteoric Ore Greatsword's unique Ash of War, White Light Charge - a swift gap-closing thrust that deals physical damage, with minor split magic damage.
Ancient Meteoric Ore Greatsword Location
Focus on Physical Damage and Ignore the Magic Damage Split

While the Ancient Meteoric Ore Greatsword has an inherent split between physical and magical damage, most of the scaling from stats will end up going to physical damage, and ARC barely raises the bonus magic damage.
It's better to consider this build a pseudo-pure physical build and plan your equipment and buffs around that.
Spams the White Light Charge Skill
The Ancient Meteoric Ore Greatsword's unique Ash of War is White Light Charge, a skill with two inputs: the first input will quickly thrust towards an enemy, then a second follow-up input will trigger a small AoE burst to deal additional damage.
Despite being a Colossal Sword, the Ancient Meteoric Ore Greatsword's Ash of War gives you a quick gap-closer, offering a highly mobile colossal build that rivals most quality Strength builds in the game.
White Light Charge Ash of War Effect
Follow-Up AoE Explosion is Smaller Than it Seems
However, do note that White Light Charge's follow-up AoE explosion does not reach as far forward as it appears. To ensure that the follow-up explosion hits, it is best to either trigger it only if your initial thrust hits, or to slightly delay the explosion to when the enemy gets closer to you.
Save FP by Mixing in Normal Attacks
To change up your attacks and conserve FP, you can follow up the initial thrust with a normal or heavy attack instead of triggering the explosion. Since this is a colossal, you'll still be dealing decent stance damage despite the damage trade-off.
Such mix-ups might be necessary if you're working with a small FP pool, as the FP drain from spamming the Ancient Meteoric Ore Greatsword's skill is heavy, costing a total of 27 FP per thrust-explosion attack even with the Carian Filigreed Crest equipped.
Stacks Damage Buffs for Higher HP and Poise Damage
It will be important to stack buffs to improve your skill damage, as well as the charged heavy attacks you'll be doing for poise damage. Make sure to apply buffs in the proper order to maximize all of their uptimes.
| How to Buff Before a Boss | |
|---|---|
| 1 | Cast Golden Vow for a damage buff and defense buff. |
| 2 | Drink your Wondrous Physick for additional buffs or survival purposes. A good mix for poise damage and buffed charged attacks is Stonebarb-Shrouding Cracked Tear with Spiked Cracked Tear. |
| 3 | Cast Flame, Grant Me Strength for a physical damage buff. Must be cast as late as possible during prep due to its short uptime. |
| 4 | Switch to two-handing the Ancient Meteoric Ore Greatsword to get Two-Handed Sword Talisman's buff for non-skill attacks. |
All Buffs and Debuffs and What They Do
Most Viable Around Level 173
While the general setup can technically be achieved around level 150, the Ancient Meteoric Ore Greatsword build will start to hit its stride at around Level 173, since you'll have enough points in Strength, Mind, and Endurance to efficiently spam the weapon's skill.
As you are leveling, it would be advisable to follow the previously mentioned tip by mixing in normal attacks rather than relying solely on White Light Charge's follow-up AoE attack, especially if your FP and stamina levels are still too low to use it safely and frequently.
Ancient Meteoric Ore Greatsword Build Stat Distribution
Recommended Stats
| Recommended Level | ||
|---|---|---|
| 173 | ||
| Stat | Points | Explanation |
| VGR | 60 | 60 Vigor should be your target for a high enough HP value to comfortably tank high-damage attacks from bosses. |
| MND | 40 | You want as much MND as reasonably possible to be able to spam White Light Charge several times before having to drink a Cerulean Flask. With 40 MND and Carian Filigreed Crest, you'll be able to Charge, with follow-up explosions, at least 8 times before having to replenish FP. |
| END | 35 | 35 END will be important not just for equip load, but for higher max stamina to be able to spam your weapon skill while still having the ability to roll afterwards. |
| STR | 54 | STR is the primary stat to raise the attack power of the Ancient Meteoric Ore Greatsword, due to its B scaling in Strength. In this case, you can cap the stat off at 54 since you get an effective 81 STR due to stat multipliers when you two-hand a weapon. |
| DEX | 10 | The minimum DEX requirement to wield the Ancient Meteoric Ore Greatsword is 10. Its E scaling means it's not worth leveling DEX beyond that unless you're min-maxing. |
| INT | 7 | INT will not be needed. |
| FAI | 25 | You should have at least 25 Faith to access the buffing incantations necessary to maximize your physical damage. |
| ARC | 21 | Level ARC to 19 to meet the minimum requirements. Only revisit this stat after reaching 54 STR and optimal max stamina and FP levels, because a maxed out Ancient Meteoric Ore Greatsword only receives minor damage boosts from Arcane, due to its D scaling. |
Recommended Starting Class

| VGR | MND | END | STR | DEX | INT | FAI | ARC |
|---|---|---|---|---|---|---|---|
| 14 | 9 | 12 | 16 | 9 | 7 | 8 | 11 |
The ideal starting class for the Ancient Meteoric Ore Greatsword build is the Hero for its high starting STR and VGR, and decent allocation for ARC. Furthermore, it starts off being only one point away from the minimum DEX requirement for the Greatsword.
Early into your game, focus on leveling STR and the other necessary minimum requirements to eventually wield the build's titular weapon and to cast the suggested buffs. However, when you're closer to reaching the DLC area and obtaining the weapon, start investing more into MND and END to have the FP and stamina necessary to spam White Light Charge.
Respec Stats at Rennala in Raya Lucaria
Before hitting the DLC, make sure to respec your stats by offering a Larval Tear to Rennala at the Academy of Raya Lucaria in Liurnia. You can do this before going to the DLC since the Milady can be obtained without having to fight any DLC bosses.
Required Equipment for the Ancient Meteoric Ore Greatsword Build
| How to Get All Required Build Items | ||
|---|---|---|
| Weapon | Armor Set | Talismans |
| Incantations | Great Rune | - |
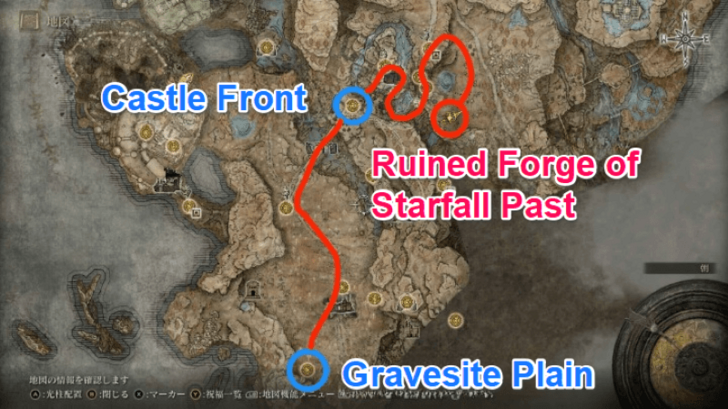
Ancient Meteoric Ore Greatsword is in Ruined Forge of Starfall Past
| Map Location | World View |
|---|---|
 |
 |
The Ancient Meteoric Ore Greatsword can be found in an active forge inside the Ruined Forge of Starfall Past, which is reachable once you get past Castle Ensis.
Inside the Ruined Forge, it's possible to miss the weapon's location if you don't platform on the gates in the area, so follow these steps to find the Greatsword.
| How to Find the Ancient Meteoric Ore Greatsword | |
|---|---|
| 1 | Starting at the Ruined Forge of Starfall Past Site of Grace, cross the bridge to the southeast and pull the lever to open the gate. |
| 2 | Head inside the newly opened path then turn right. Proceed through the corridor until you see a ladder to your right then climb it. |
| 3 | Continue moving forward and go up the rubble past some enemies until you reach an elevated platform. Drop down onto the bridge and pull another lever to unlock the gate. |
| 4 | Pull the lever behind the gate you just opened and hop onto the gate as it rises. You'll see a forge to the west where you can pick up the Ancient Meteoric Ore Greatsword, along with an Ancient Dragon Smithing Stone. |
Ancient Meteoric Ore Greatsword Stats
Buy the Finger Seal from the Twin Maiden Husks in the Roundtable Hold
The Finger Seal can be bought from the Twin Maiden Husks in the Roundtable Hold for 800 Runes. Since this is a mostly physical build, you won't be requiring higher-scaling Seals, as you just need a Seal to apply buffs rather than deal damage with spells.
Finger Seal Stats and How to Get
Get Scaled Armor After Defeating Istvan Near Limgrave's Colosseum
| Map Location | World View |
|---|---|
 |
 |
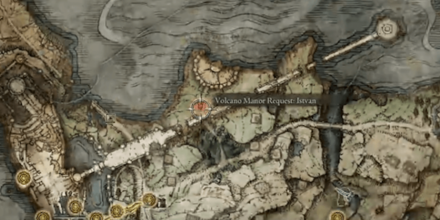
The Scaled Armor set is a reasonably weighted metal armor set that reaches past the 51 poise breakpoint and has high effectiveness against non-physical attacks. You get this right after defeating Old Knight Istvan by the Limgrave Colosseum north of the Warmaster's Shack site of grace.
To be able to invade Istvan, you will need to join Volcano Manor by speaking to Tanith, then receive him as a target via the Letter from Volcano Manor item that can be found on the dining table beside Bernahl in the Drawing Room.
Scaled Armor Stats and How to Get
For +3 Arcane: Loot Mask of Confidence from Inverted Carian Study Hall
| Map Location | World View |
|---|---|
 |
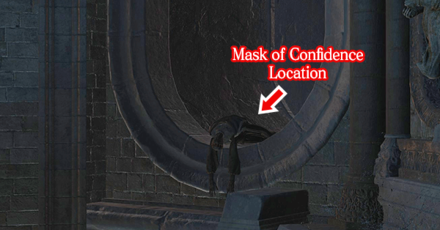 |
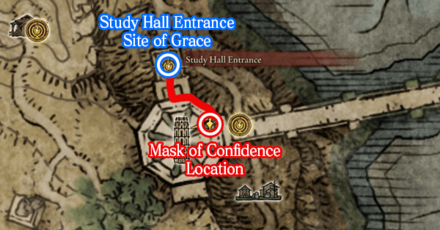
The Mask of Confidence gives 3 points of ARC, which can provide a very minor boost in damage or simply be used to meet the minimum weapon wield requirements. It can be found in the Inverted Carian Study Hall on a corpse, in an inverted alcove left of the entrance.
Turning the Carian Study Hall into its inverted form will require you to get the Inverted Carian Statue from progressing through Ranni the Witch's questline.
Mask of Confidence Stats and How to Get
Obtain the Two-Handed Sword Talisman in Temple Town Ruins
| Map View | World View |
|---|---|
 |
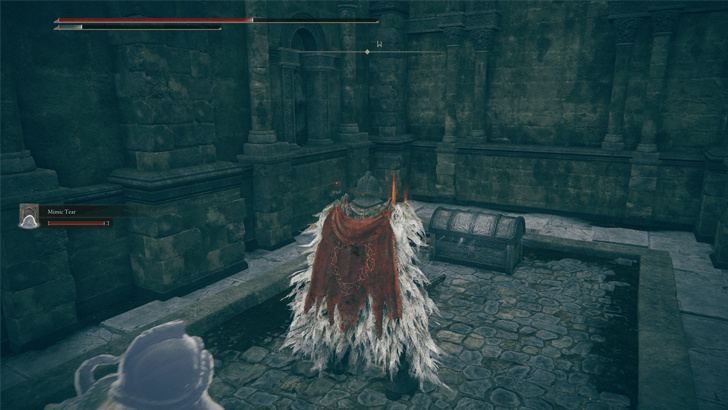 |
You will be solely two-handing the Ancient Meteoric Ore Greatsword in actual combat, making the Two-Handed Sword Talisman an unconditional buff to your build. However, this will only enhance your normal and heavy attacks, not your Ash of War attacks.
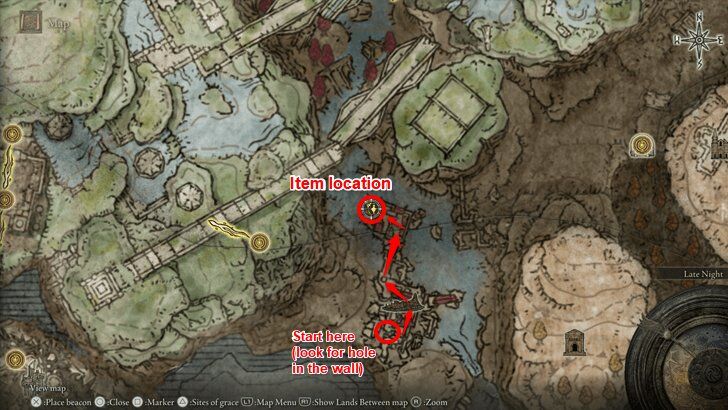
The talisman can be found in a treasure chest in the Temple Town Ruins, located in Rauh Base. Go through the small opening on the backside and make your way to the highest tower inside. You'll find the treasure chest at the end of the tower.
Two-Handed Sword Talisman Effects
Obtain the Rest of the Talismans from the Base Game
The rest of the talismans used in this build can be obtained from the base game. The best base game talisman for this build specifically is the Shard of Alexander since it buffs the damage of White Light Charge.
Other options or alternatives for a less skill spam-heavy playstyle include the Claw Talisman and the Axe Talisman, but these will mostly likely just serve as placeholders until you are able to get the Shard of Alexander.
| Talisman | Effect and How to Get |
|---|---|
 Shard of Alexander Shard of Alexander
|
Effect:
Greatly boosts the attack power of skills.
How to Get: Obtained after defeating Alexander in the Crumbling Farum Azula. |
 Carian Filigreed Crest Carian Filigreed Crest
|
Effect:
Lowers FP consumed by skills.
How to Get: Can be bought from Iji for 5000 Runes at the outskirts of Caria Manor in Liurnia. Requires you to have helped Blaidd complete his quest in Limgrave. |
 Great-Jar's Arsenal Great-Jar's Arsenal
|
Effect:
Vastly raises maximum equip load.
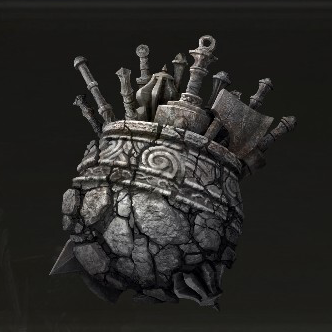
How to Get: Defeating the Giant Jar's three champions in northern Caelid, accessible from Deep Siofra Well. |
Obtain All Required Incantations from the Base Game
Both the incantations required to buff your damage can be found in the base game. Neither of them are gated by a major boss, allowing you to pick them up even if you're in the middle of a DLC run.
| Spells | Effect and How to Get |
|---|---|
 Golden Vow Golden Vow |
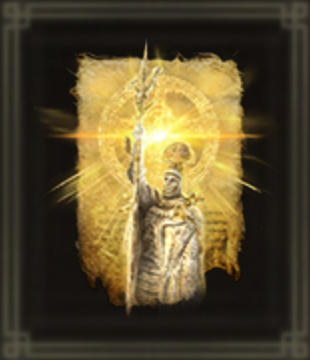
Effect: Increases attack and defense for self and nearby allies. Looted from the Corpse-Stench Shack in Mt. Gelmir. On approach, you will be invaded by Anastasia, Tarnished Eater. |
|
Effect: Raises physical and fire-affinity attack power. Looted from a corpse in between two fire-breathing Giant Heads, behind Fort Gael in the region of Caelid. |
Activate Radahn's Great Rune if Available
We recommend using Radahn's Great Rune, as the bonus FP and Stamina it provides will allow you to spam White Light Charges with follow-up explosions more often before you have to drink a Cerulean Flask, and also ensure you have enough stamina to roll if needed.
As defeating Radahn is a prerequisite for the DLC, you should have this Great Rune on-hand. However, before you can use it, you'll need to activate it at the Divine Tower of Caelid, then consume a Rune Arc before big fights to get its effects.
Radahn's Great Rune Effect and Location
Elden Ring Related Guides

List of All Builds
Comment
Author
Ancient Meteoric Ore Greatsword Build Guide
Rankings
- We could not find the message board you were looking for.
Gaming News
Popular Games

Genshin Impact Walkthrough & Guides Wiki

Honkai: Star Rail Walkthrough & Guides Wiki

Arknights: Endfield Walkthrough & Guides Wiki

Umamusume: Pretty Derby Walkthrough & Guides Wiki

Wuthering Waves Walkthrough & Guides Wiki

Pokemon TCG Pocket (PTCGP) Strategies & Guides Wiki

Abyss Walkthrough & Guides Wiki

Zenless Zone Zero Walkthrough & Guides Wiki

Digimon Story: Time Stranger Walkthrough & Guides Wiki

Clair Obscur: Expedition 33 Walkthrough & Guides Wiki
Recommended Games

Fire Emblem Heroes (FEH) Walkthrough & Guides Wiki

Pokemon Brilliant Diamond and Shining Pearl (BDSP) Walkthrough & Guides Wiki

Diablo 4: Vessel of Hatred Walkthrough & Guides Wiki

Super Smash Bros. Ultimate Walkthrough & Guides Wiki

Yu-Gi-Oh! Master Duel Walkthrough & Guides Wiki

Elden Ring Shadow of the Erdtree Walkthrough & Guides Wiki

Monster Hunter World Walkthrough & Guides Wiki

The Legend of Zelda: Tears of the Kingdom Walkthrough & Guides Wiki

Persona 3 Reload Walkthrough & Guides Wiki

Cyberpunk 2077: Ultimate Edition Walkthrough & Guides Wiki
All rights reserved
ELDEN RING™ & ©BANDAI NAMCO Entertainment Inc. / ©2021 FromSoftware, Inc.
The copyrights of videos of games used in our content and other intellectual property rights belong to the provider of the game.
The contents we provide on this site were created personally by members of the Game8 editorial department.
We refuse the right to reuse or repost content taken without our permission such as data or images to other sites.


![Neverness to Everness (NTE) Review [Beta Co-Ex Test] | Rolling the Dice on Something Special](https://img.game8.co/4414628/dd3192c8f1f074ea788451a11eb862a7.jpeg/show)


