How to Beat Valiant Gargoyle (Leyndell): Boss Fight Guide
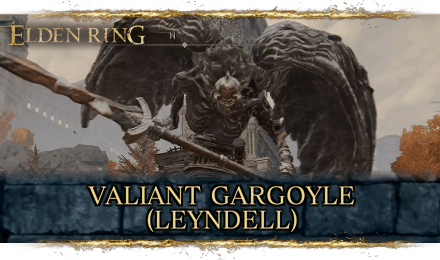
This is a guide on how to beat Valiant Gargoyle (Leyndell), a mini-boss in Elden Ring. Read on to learn more about Valiant Gargoyle (Leyndell)'s drops, weaknesses, and recommended level!
List of Contents
Valiant Gargoyle (Leyndell) General Info
Stats and Rewards
| Valiant Gargoyle (Leyndell) | ||
|---|---|---|

|
||
| Weakness | Resistance | Immune |
| ━ | ━ |
Poison Sleep Scarlet Rot Frost Bleed |
| Affected By | ━ | |
| Spirit Ashes Available? | Yes | |
| Rune Rewards |
2835 (NG) |
|
| Summonable NPCs |
None
|
|
| Location | ||
| Item Drops |
・Gargoyle's Great Axe
|
|
Valiant Gargoyle (Leyndell) Location
Where to Find Valiant Gargoyle (Leyndell)
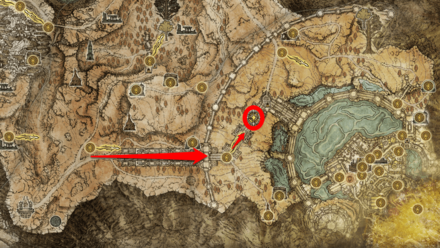
A mini-boss version of the Valiant Gargoyle can be found in the Capital Outskirts of Leyndell, Royal Capital.
After entering the gates, guarded by two Tree Sentinels, that lead you to the Capital Outskirts, head northeast. The Valiant Gargoyle mini-boss will swoop down from above, entering into battle with you.
How to Beat Valiant Gargoyle (Leyndell)
| How to Beat Strategies | ||
|---|---|---|
| Ranged Strategy | Melee Strategy | |
Click a link above to take you to that section.
Ranged Strategy
| Valiant Gargoyle Boss Tips |
|---|
Use Fast, Homing Spells or Magic Arrows
Valiant Gargoyle is a slim, fast-moving target so stay on your feet and ready to dodge at any given moment by equipping quick-release spells like Swift Glintstone Shard. For archer builds, use magic-infused arrows like Dwelling Arrows.
Summon a Melee Spirit Ash
Mimic Tear Ashes or Banished Knight Engvall will be excellent tanky melee spirit ashes that will do well to draw Valiant Gargoyle's attention while you unleash your slower, more powerful spells.
Learn to Dodge All Its Moves
Backpedaling and dodging backwards are good strategies to keep your distance while you dish out long-range attacks. Taking advantage of its axe form is simple and easy, as it doesn't have a wide variety of movesets, and has shorter range than other Gargoyle variations.
Melee Strategy
| Valiant Gargoyle Boss Tips |
|---|
Jump Attacks to Stagger
Valiant Gargoyle likes to move around a lot and it is also immune to statuss ailments, so stringing hits is not a good idea. so Aim to stagger this boss by performing jump attacks. Perform critical attacks on Valiant Gargoyle's face when it staggers.
Attack After Combos
You will need to learn Valiant Gargoyle's combos and how to dodge each one of them. The best time to attack Valiant Gargoyle is at the very end of each of its combos.
Try to Stay Close to or Behind It
Valiant Gargoyle is relatively easy to fight at close range, as its attacks are easy to learn how to dodge, so stay close to it, or better yet, behind it.
Imbue Your Weapon with Magic
Imbuing your weapon with additional magic damage with an item like Magic Grease or a spell like Scholar's Armament will do good to increase your damage output.
Valiant Gargoyle (Leyndell) Attack Patterns
Twinblade Attacks
| Twinblade Attack Variations |
|---|
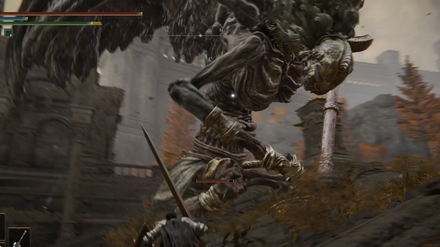
Jumping Ground Thrust: Valiant Gargoyle does a forward jump and thrusts one side of its twinblade into the ground. Dodge in any direction and land a quick hit on its body. |

Moving Twinblade Slash: Valiant Gargoyle changes its position while slashing horizontally. It's easy to dodge this if you anticipate its swing with correct timing but it's not ideal for you to land a counterattack as this mini-boss moves away. |

Single Twinblade Slash: Valiant Gargoyle gears up for a swing and does a single slash with its twinblades. Dodged forward or backward. |

Spinning Backstep Slash: Valiant Gargoyle spins around, bringing its whole twinblade with it for a wide slash, then moves away to safety. Avoided by dodging into the attack or backwards. Only ranged builds can retaliate with a few hits, since this boss will be out of melee range after it moves around. |

Twinblade Uppercut: Valiant Gargoyle charges up for an attack, then moves forward with a twinblade uppercut. Dodged to the side with correct timing. Do not attempt to counterattack, as it may continue its combo. |
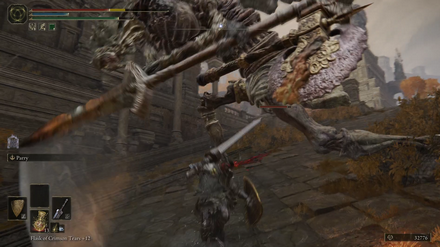
Twinblade Combo: Valiant Gargoyle sometimes follows up its uppercut with a series of twirling twinblade slashes. Keep on dodging to the side to try to stay behind Black Blade Kindred as this move is happening. It's a tricky move to avoid but you'll be safe if you're dodging to the boss' back. |

Twinblade Poke: Valiant Gargoyle does a single poke with its twinblades. This move is easily dodged in any direction. |

Twinblade Sweep: Valiant Gargoyle does a single, full horizontal sweep. Dodged forward or sideways into the attack with correct timing. Feel free to land a hit immediately after dodging. |
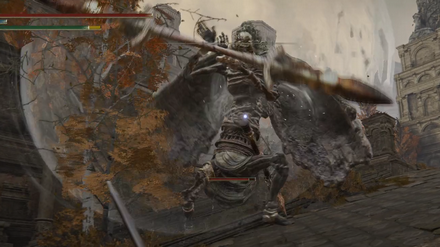
Twirling Twinblade into Hyper Slash: Valiant Gargoyle twirls its twinblade around for a few seconds, then follows it up with a huge slash that sends airwaves whirling all around. The huge horizontal powered-up slash is possible to dodge but the timing is tight, and damage is immense. It would be wiser to back away from this attack. |
Axe Attacks
| Axe Attack Variations |
|---|
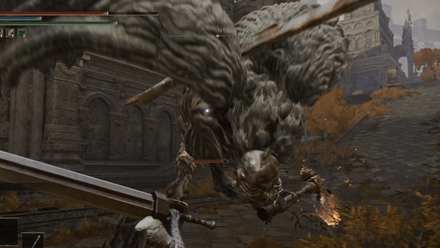
Grinding Axe Uppercut to Ground Pound: Valiant Gargoyle drags its axe on the ground and does an upward slash. Then, it slams its axe on the ground immediately after. Avoided by trying to stay behind the enemy and dodging sideways. |
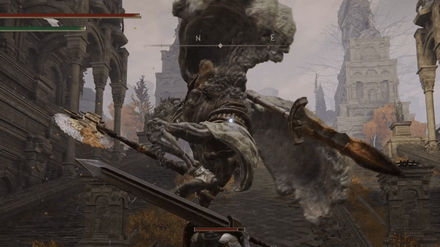
Ground Stomp into Axe Smash: Valiant Gargoyle stomps its foot on the ground, then performs an axe smash. Dodged either diagonally forward or sideways. You are free to get a hit in immediately after. |
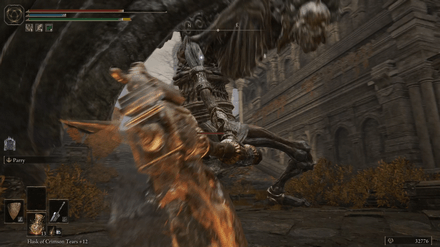
Single Axe Downward Slash: Valiant Gargoyle does a single light smash on the ground. Easily dodged sideways. You are free to get a hit in immediately after. |

Roar Power Up: Valiant Gargoyle roars loudly, imbuing itself with increased power. |

Ground-Destroying Smash: Usually done after the Roar Power Up. Valiant Gargoyle Smashes its axe on the ground with both hands. This sends a shockwave, destroying the ground in front of it. This deadly attack does two counts of large damage, so keep your distance if you're already far away or if you're too close, try to get behind this mini-boss. |
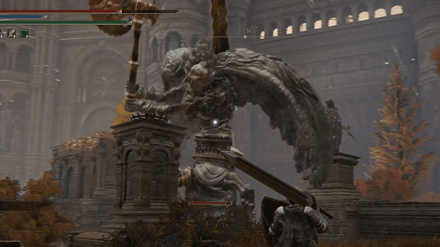
Two-Handed Axe Smash: Valiant Gargoyle does a single smash on the ground with both hands. Easily dodged sideways. You are free to get a hit in immediately after. |
Weapon Change Attacks
| Weapon Change Attack Variations |
|---|
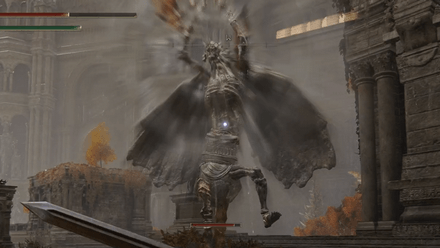
Change to Axe: Valiant Gargoyle sheathes its twinblades and equips its axe. This move is usually followed up by a Roar Power Up, and a Ground-Destroying Smash, which causes AoE damage. Stay away when you see it equip its axe. |

Change to Twinblade: Valiant Gargoyle sheathes its axe and brings its twinblades out with a twirl and a slash. After this slash is the perfect time to hit it once or twice. |
Elden Ring Related Guides

DLC Bosses
Main Bosses
Optional Bosses
Mini-Bosses
| All Bosses in Elden Ring | |
|---|---|
| Elder Dragon Greyoll | Lion Guardian |
| Valiant Gargoyle (Leyndell) | - |
Hostile NPCs and Invaders
| Limgrave Invaders and Hostile NPCs | |
|---|---|
| Bloody Finger Nerijus | Old Knight Istvan |
| Recusant Henricus | - |
| Liurnia of the Lakes Invaders and Hostile NPCs | |
| Great Horned Tragoth | Festering Fingerprint Vyke |
| Altus Plateau Invaders and Hostile NPCs | |
| Eleonora, Violet Bloody Finger | Inquisitor Ghiza |
| Maleigh Marais, Shaded Castle Castellan | Rileigh the Idle |
| Vargram the Raging Wolf & Errant Sorcerer Wilhelm | Magnus the Beast Claw |
| Mountaintops of the Giants Invaders and Hostile NPCs | |
| Juno Hoslow, Knight of Blood | - |
| The Roundtable Hold Invaders and Hostile NPCs | |
| Mad Tongue Alberich | - |
| Multiple Location Invaders and Hostile NPCs | |
| Anastasia, Tarnished-Eater | - |
Author
How to Beat Valiant Gargoyle (Leyndell): Boss Fight Guide
improvement survey
03/2026
improving Game8's site?

Your answers will help us to improve our website.
Note: Please be sure not to enter any kind of personal information into your response.

We hope you continue to make use of Game8.
Rankings
- We could not find the message board you were looking for.
Gaming News
Popular Games

Genshin Impact Walkthrough & Guides Wiki

Honkai: Star Rail Walkthrough & Guides Wiki

Umamusume: Pretty Derby Walkthrough & Guides Wiki

Pokemon Pokopia Walkthrough & Guides Wiki

Resident Evil Requiem (RE9) Walkthrough & Guides Wiki

Monster Hunter Wilds Walkthrough & Guides Wiki

Wuthering Waves Walkthrough & Guides Wiki

Arknights: Endfield Walkthrough & Guides Wiki

Pokemon FireRed and LeafGreen (FRLG) Walkthrough & Guides Wiki

Pokemon TCG Pocket (PTCGP) Strategies & Guides Wiki
Recommended Games

Diablo 4: Vessel of Hatred Walkthrough & Guides Wiki

Fire Emblem Heroes (FEH) Walkthrough & Guides Wiki

Yu-Gi-Oh! Master Duel Walkthrough & Guides Wiki

Super Smash Bros. Ultimate Walkthrough & Guides Wiki

Pokemon Brilliant Diamond and Shining Pearl (BDSP) Walkthrough & Guides Wiki

Elden Ring Shadow of the Erdtree Walkthrough & Guides Wiki

Monster Hunter World Walkthrough & Guides Wiki

The Legend of Zelda: Tears of the Kingdom Walkthrough & Guides Wiki

Persona 3 Reload Walkthrough & Guides Wiki

Cyberpunk 2077: Ultimate Edition Walkthrough & Guides Wiki
All rights reserved
ELDEN RING™ & ©BANDAI NAMCO Entertainment Inc. / ©2021 FromSoftware, Inc.
The copyrights of videos of games used in our content and other intellectual property rights belong to the provider of the game.
The contents we provide on this site were created personally by members of the Game8 editorial department.
We refuse the right to reuse or repost content taken without our permission such as data or images to other sites.


![Everwind Review [Early Access] | The Shaky First Step to A Very Long Journey](https://img.game8.co/4440226/ab079b1153298a042633dd1ef51e878e.png/thumb)

![Monster Hunter Stories 3 Review [First Impressions] | Simply Rejuvenating](https://img.game8.co/4438641/2a31b7702bd70e78ec8efd24661dacda.jpeg/thumb)


