Jori, Elder Inquisitor Location and How to Beat
Jori, Elder Inquisitor is the boss found at the end of the Blacklight Catacombs in the Elden Ring DLC Shadow of the Erdtree. See Jori, Elder Inquisitor's location, stats and drops, and how to beat Jori, Elder Inquisitor here.
List of Contents
Jori, Elder Inquisitor Location
Found at end of Darklight Catacombs
| World View | Map Location |
|---|---|
 |
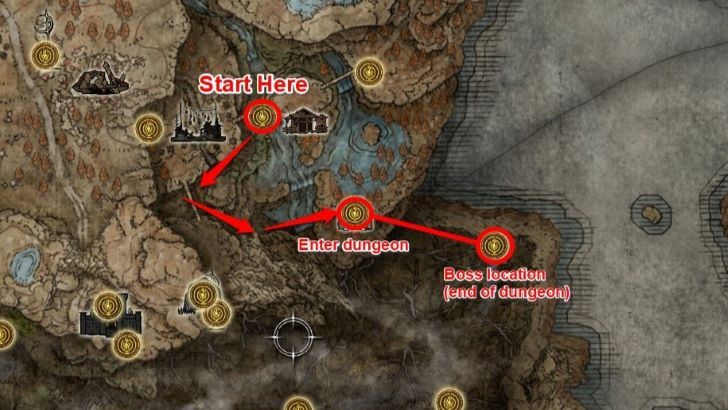 |
Jori, Elder Inquisitor is found at the bottom of the Darklight Catacombs in Scadu Altus, guarding the boundary to the Abyssal Woods. Navigate the Catacombs to search for lifts to keep descending until you reach the fog wall.
Reach Darklight Catacombs From Castle Watering Hole
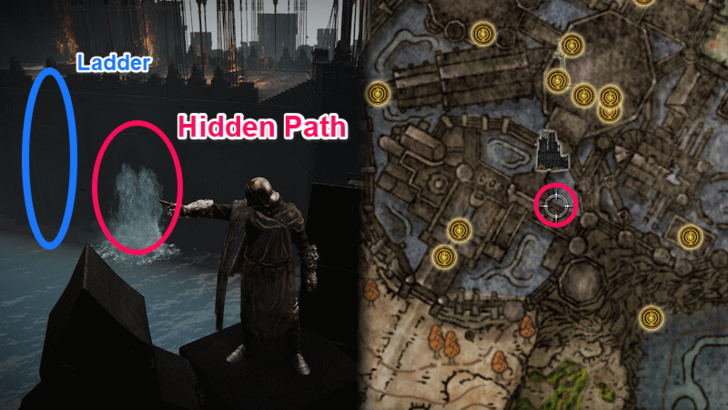
To get to Darklight Catacombs, you will need find the coffin in Shadow Keep in order to reach Recluses' River, which leads to the Catacombs. The coffin can be found behind an illusory wall after taking the lift down from Specimen Storehouse, First Floor Site of Grace.
Jori, Elder Inquisitor Weakness
Weak to Slash Damage
Jori, Elder Inquisitor is weak to Slash damage, so try to equip Curved Swords, Katanas, Great Katanas, or other types of weapons that deal Slash-type damage.
Backhand Blade, Rakshasa's Great Katana and Claws of Night are great DLC options, while Rivers of Blood and Bloodhound's Fang from the base game are also effective against Jori.
Weak to Fire and Lightning Damage
Fire damage is the most effective element against Jori, but Lightning is almost equal in performance with Fire. Both of these elements are affected by the water in the boss arena.
Infuse weapons with Fire or Lightning affinities using the Red-Hot Whetblade or Sanctified Whetblade to deal extra damage. Or, take armaments with innate Fire or Lightning damage like the Fire Knight's Greatsword and the Death Knight's Twin Axes.
For spellcasters, memorize incantations like Knight's Lightning Spear and Fire Serpent to poke Jori from range in a magic firefight.
Susceptible to Sleep
Jori can be temporarily stunned with Sleep, as he succumbs to the status after just 4 Sleepbone Arrows. You can also craft and toss Sleep Pots and Eternal Sleep Pots if you have any prepared.
Melee builds can instead use the Sword of St. Trina or Velvet Sword of St. Trina to build up sleep with melee hits. Or, you can craft Eternal Sleep Grease to infuse your preferred weapon with Sleep buildup.
Jori, Elder Inquisitor General Tips
| Tips for Beating Jori, Elder Inquisitor |
|---|
|
|
Keep Track of Jori's Summons
Jori, Elder Inquisitor is heavily reliant on casting spells from a distance, and will frequently summon different types of mobs to harass you in different ways. Memorize the different mobs and their behaviors to know how to avoid or deal with them so you can keep your focus trained on Jori.
Tank Summon

Jori's tank summon will slowly pursue and try to body slam you. Keep it in view, but it is normally too slow to be a threat. It will dissipate once it does its candle fire breath attack.
Caster Summons

Jori will sometimes spawn a pair of casters that will charge then fire a full-auto barrage of arc spells similar to Jori's own spell attack. Run directly sideways to avoid their tracking. They will dissipate after doing their spells.
Candlebearer Summons

Jori can spawn a pair of candlebearing mobs that will either pursue and melee you with their candlesticks, or blow the candles to breathe fire similar to the tank summon. They will dissipate after either of these attacks.
Simultaneous Summon

Jori will sometimes spawn all three types of mobs at once to swarm you. The casters will fire their spells at you, the candlebearers will either breathe fire or try to melee you, and the tank summon will do a new move where it continuously spins while tracking you.
All the mobs will despawn once they finish their attacks, so run away from the spinning tank and the spells of the casters until the summons expire.
Rush Jori After Dodging Spells
Unless there are summons barring your way, you will typically want to poke and attack Jori, be it melee or ranged, right after dodging spells, as there is a pretty comfortable delay between spells being cast.
For melee builds specifically, be advised that Jori can teleport to reposition when in danger, so maximize your damage window before you have to chase them again.
For High INT Builds, Moons Eat Spells
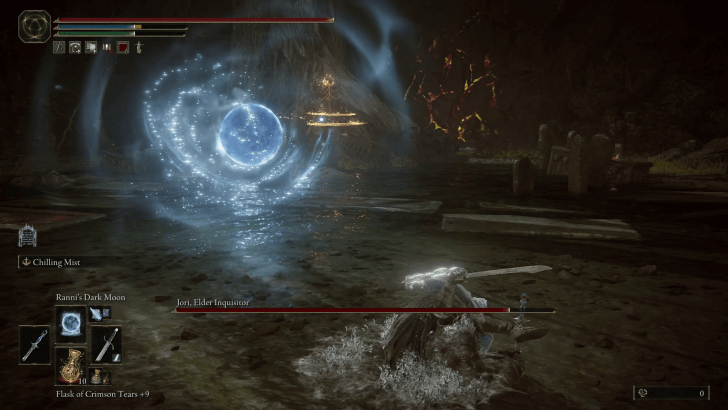
Magic users are likely to find themselves dodging and trading spells against Jori in pitched ranged battles. There's a particularly interesting interaction with moon spells and Jori's full-auto spell attack wherein the moon can absorb Jori's projectiles while still traveling and hitting Jori.
If you have 68-70 INT, consider using Rennala's Full Moon or Ranni's Dark Moon to negate one of Jori's more annoying attacks that you would normally have to run or dodge from.
Jori, Elder Inquisitor Rewards
| Jori, Elder Inquisitor Details | |
|---|---|
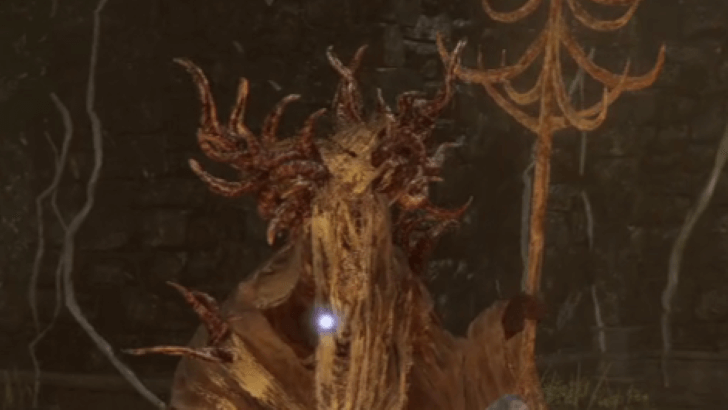 |
|
| Runes | 260000 |
| Drops | |
| Spirit Summons? | Spirit Ashes Allowed |
| Gold Summons? |
None
|
Elden Ring Related Guides

DLC Bosses
Main Bosses
Optional Bosses
Mini-Bosses
| All Bosses in Elden Ring | |
|---|---|
| Elder Dragon Greyoll | Lion Guardian |
| Valiant Gargoyle (Leyndell) | - |
Hostile NPCs and Invaders
| Limgrave Invaders and Hostile NPCs | |
|---|---|
| Bloody Finger Nerijus | Old Knight Istvan |
| Recusant Henricus | - |
| Liurnia of the Lakes Invaders and Hostile NPCs | |
| Great Horned Tragoth | Festering Fingerprint Vyke |
| Altus Plateau Invaders and Hostile NPCs | |
| Eleonora, Violet Bloody Finger | Inquisitor Ghiza |
| Maleigh Marais, Shaded Castle Castellan | Rileigh the Idle |
| Vargram the Raging Wolf & Errant Sorcerer Wilhelm | Magnus the Beast Claw |
| Mountaintops of the Giants Invaders and Hostile NPCs | |
| Juno Hoslow, Knight of Blood | - |
| The Roundtable Hold Invaders and Hostile NPCs | |
| Mad Tongue Alberich | - |
| Multiple Location Invaders and Hostile NPCs | |
| Anastasia, Tarnished-Eater | - |
Comment
Author
Jori, Elder Inquisitor Location and How to Beat
improvement survey
03/2026
improving Game8's site?

Your answers will help us to improve our website.
Note: Please be sure not to enter any kind of personal information into your response.

We hope you continue to make use of Game8.
Rankings
- We could not find the message board you were looking for.
Gaming News
Popular Games

Genshin Impact Walkthrough & Guides Wiki

Honkai: Star Rail Walkthrough & Guides Wiki

Umamusume: Pretty Derby Walkthrough & Guides Wiki

Pokemon Pokopia Walkthrough & Guides Wiki

Resident Evil Requiem (RE9) Walkthrough & Guides Wiki

Monster Hunter Wilds Walkthrough & Guides Wiki

Wuthering Waves Walkthrough & Guides Wiki

Arknights: Endfield Walkthrough & Guides Wiki

Pokemon FireRed and LeafGreen (FRLG) Walkthrough & Guides Wiki

Pokemon TCG Pocket (PTCGP) Strategies & Guides Wiki
Recommended Games

Diablo 4: Vessel of Hatred Walkthrough & Guides Wiki

Cyberpunk 2077: Ultimate Edition Walkthrough & Guides Wiki

Fire Emblem Heroes (FEH) Walkthrough & Guides Wiki

Yu-Gi-Oh! Master Duel Walkthrough & Guides Wiki

Super Smash Bros. Ultimate Walkthrough & Guides Wiki

Pokemon Brilliant Diamond and Shining Pearl (BDSP) Walkthrough & Guides Wiki

Elden Ring Shadow of the Erdtree Walkthrough & Guides Wiki

Monster Hunter World Walkthrough & Guides Wiki

The Legend of Zelda: Tears of the Kingdom Walkthrough & Guides Wiki

Persona 3 Reload Walkthrough & Guides Wiki
All rights reserved
ELDEN RING™ & ©BANDAI NAMCO Entertainment Inc. / ©2021 FromSoftware, Inc.
The copyrights of videos of games used in our content and other intellectual property rights belong to the provider of the game.
The contents we provide on this site were created personally by members of the Game8 editorial department.
We refuse the right to reuse or repost content taken without our permission such as data or images to other sites.


![Monster Hunter Stories 3 Review [First Impressions] | Simply Rejuvenating](https://img.game8.co/4438641/2a31b7702bd70e78ec8efd24661dacda.jpeg/thumb)


