How to Beat Bell Bearing Hunter: Boss Fight Guide
This is a guide on how to beat Bell Bearing Hunter, an optional boss in Elden Ring. Read on to learn more about Bell Bearing Hunter's drops, weaknesses, and recommended levels!
List of Contents
Bell Bearing Hunter General Info
Stats and Rewards
| Bell Bearing Hunter | ||
|---|---|---|
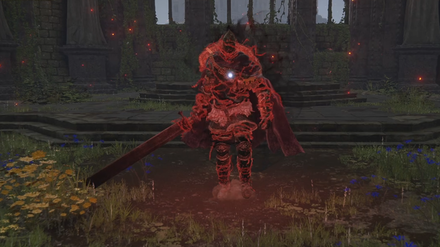
|
||
| Weakness | Resistance | Immune |
| ━ |
Standard Strike Slash Fire Holy Bleed Frost Scarlet Rot Sleep Poison |
Madness Instant Death |
| Affected By | Poison, Scarlet Rot, Bleed, Frost | |
| Spirit Ashes Available? | Yes | |
| Rune Rewards |
• 2700 • 6000 • 20000 • 50000 (NG) |
|
| Summonable NPCs |
None
|
|
| Location | • Church of Vows • Hermit Merchant's Shack • Isolated Merchant's Shack • Warmaster's Shack |
|
| Item Drops | Limgrave: • Bone Peddler's Bell Bearing Liurnia of the Lakes: • Meat Peddler's Bell Bearing Altus Plateau: • Medicine Peddler's Bell Bearing Caelid • Gravity Stone Peddler's Bell Bearing |
|
Bell Bearing Hunter Location
Where to Find Bell Bearing Hunter
There are four Bell Bearing Hunters you can encounter in separate regions. Each one only spawns at night.
Warmaster's Shack
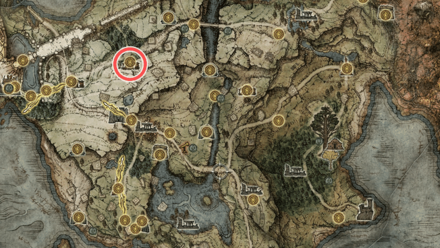
The first Bell Bearing Hunter can be found at the Warmaster's Shack in West Limgrave.
Church of Vows
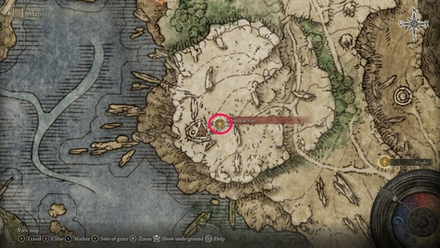
The second can be found at the Church of Vows in East Liurnia of the Lakes.
Hermit Merchant's Shack
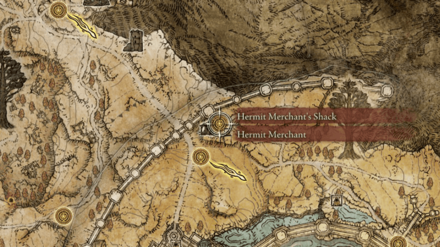
The third can be found at the Hermit Merchant's Shack in Altus Plateau.
Isolated Merchant's Shack
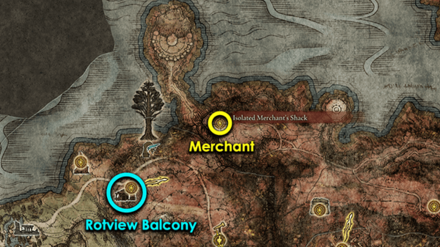
The fourth can be found at the Isolated Merchant's Shack in North Caelid.
When to Fight Bell Bearing Hunter
| Location | Recommended Level |
|---|---|
|
Church of Vows |
Lv. 60 |
|
Hermit Merchant's Shack |
Lv. 80 |
|
Isolated Merchant's Shack (Caelid) |
Lv. 100 |
|
Warmaster's Shack |
Lv. 40 |
How to Beat Bell Bearing Hunter
| Tips for Beating Bell Bearing Hunter |
|---|
| How to Beat Strategies | ||
|---|---|---|
| Ranged Strategy | Melee Strategy | |
Click a link above to take you to that section.
Ranged Strategy
| Bell Bearing Hunter Boss Tips |
|---|
Use your horse to evade the Bell Bearing Hunter's attacks
Ranged users will find it difficult to fight this boss on foot due to both the speed and range of his attacks. In particular, his Arcane Sword Swings pose a great threat since they can reach you even if you keep your distance.
Take advantage of the open boss area by using Torrent to quickly ride around him. This makes it much easier to avoid his attacks, and you can attack him on horseback.
Cast Comet Azur at the start of the fight
When this boss first spawns, there will be a brief period where he won't attack you and will just walk towards you. Take advantage of these few seconds by using Terra Magica then casting Comet Azur to immediately deal heavy damage. Don't get greedy, however, since he'll eventually start attacking you.
Prioritize quick-release spells to avoid getting punished
It'll be difficult to use spells with long cast times due to the Bell Bearing Hunter's speed. Use spammable quick-release spells instead to safely dodge or block attacks when needed. Great options would be Lightning Spear or Lightning Strike since these deal additional damage due to his weakness to Lightning. Other options would be Swift Glintstone Shard and Rock Sling.
Poison Mist will also be a great defensive spell since he's susceptible to Poison.
Melee Strategy
| Bell Bearing Hunter Boss Tips |
|---|
Stay close to the Bell Bearing Hunter
Stay near this boss as much as possible since he'll mostly use his normal melee attacks instead of his Arcane attacks when you're near him. These are much easier to avoid and you'll have a lot of great openings to counterattack.
Exploit his weapon type weaknesses
| Weapon Type Weaknesses | ||
|---|---|---|
| Lightning Weapons | Scarlet Rot Weapons | Poison Weapons |
You'll deal increased damage to this boss by equipping Lightning, Scarlet Rot, or Poison weapons. Scarlet Rot and Poison will be particularly effective since you can build up and inflict their Status Effects much quicker.
If you don't have any, you can also coat your weapon in Lightning Grease, Poison Grease, or Rot Grease.
Bell Bearing Hunter Attack Patterns
Sword Attacks
| Sword Attack Variations |
|---|
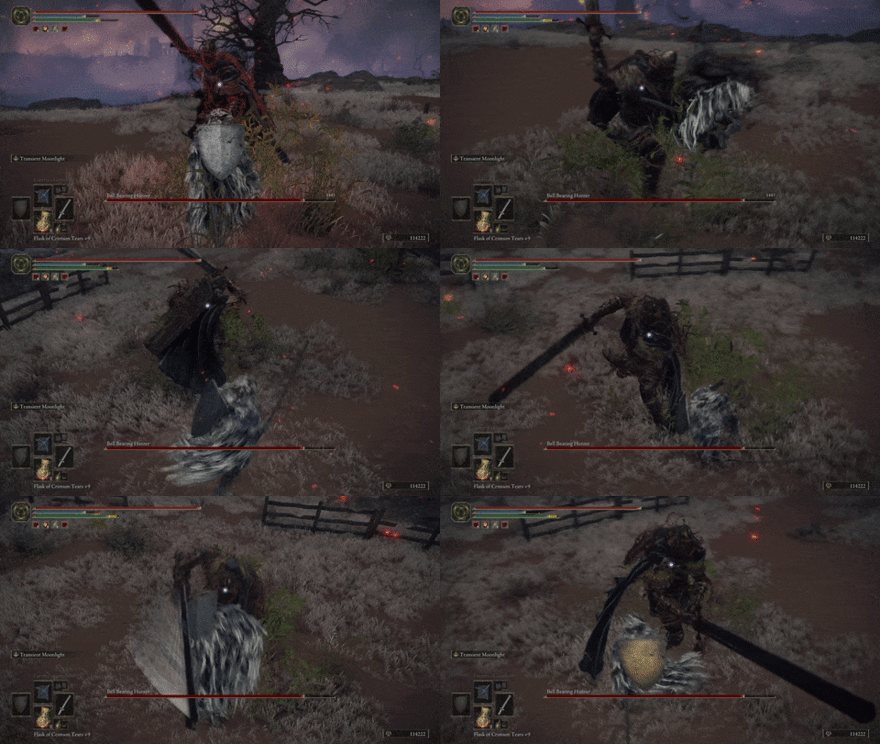 Sword Shove Combo: Bell Bearing Hunter swipes his sword from side to side before shoving it forward. You can block these with your shield, or time your rolls to when he's about to swing his sword. |
 Sword Slam Combo: This is similar to the Shove Combo, but will instead end with a slam to the ground. You can still use the previous method to avoid this combo. |
Shield Attacks
| Shield Attack Information |
|---|
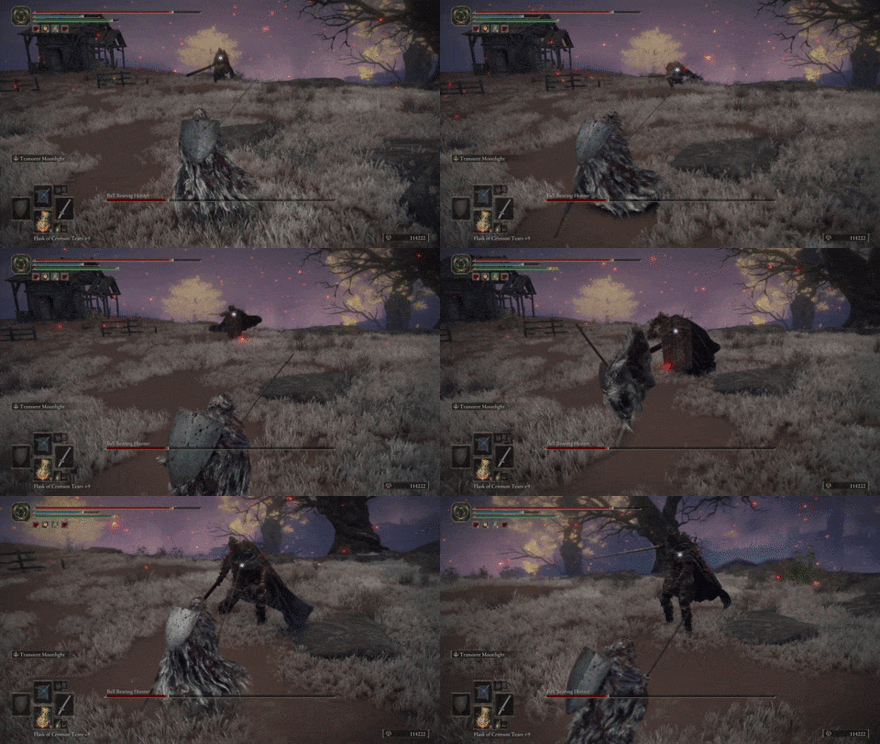 Shield Rush: Bell Bearing Hunter crouches then dashes forward with his shield, dealing heavy damage if you're hit. Back away as soon as he starts this move since it has a limited range. |
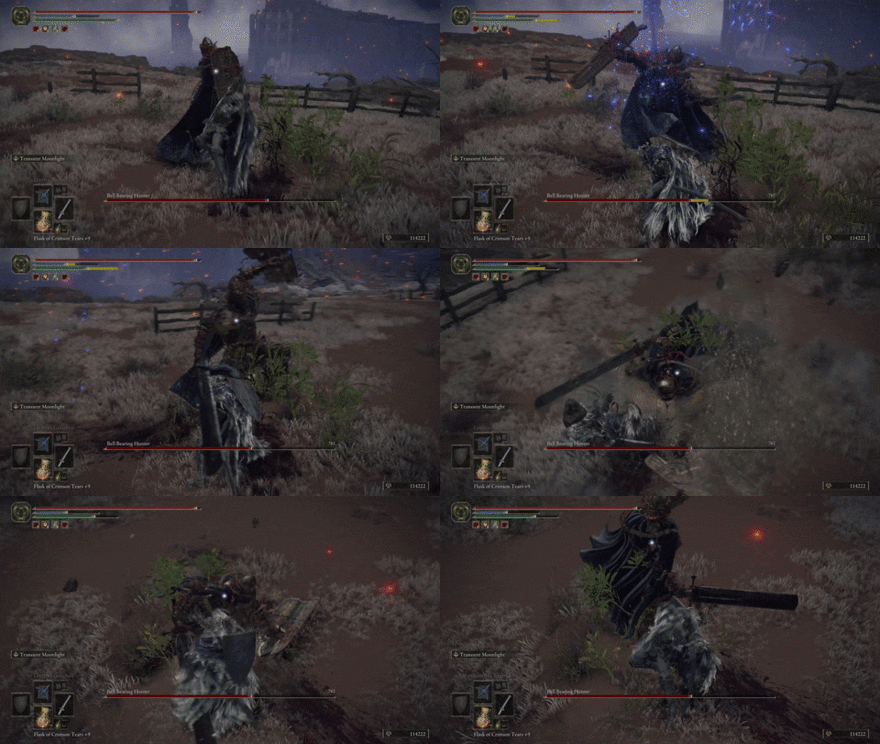 Shield Bash: Bell Bearing Hunter slams his shield into the ground. This is easily telegraphed by when he pulls the shield out, so roll as he slams it to avoid this. |
Arcane Attacks
| Arcane Attack Information |
|---|
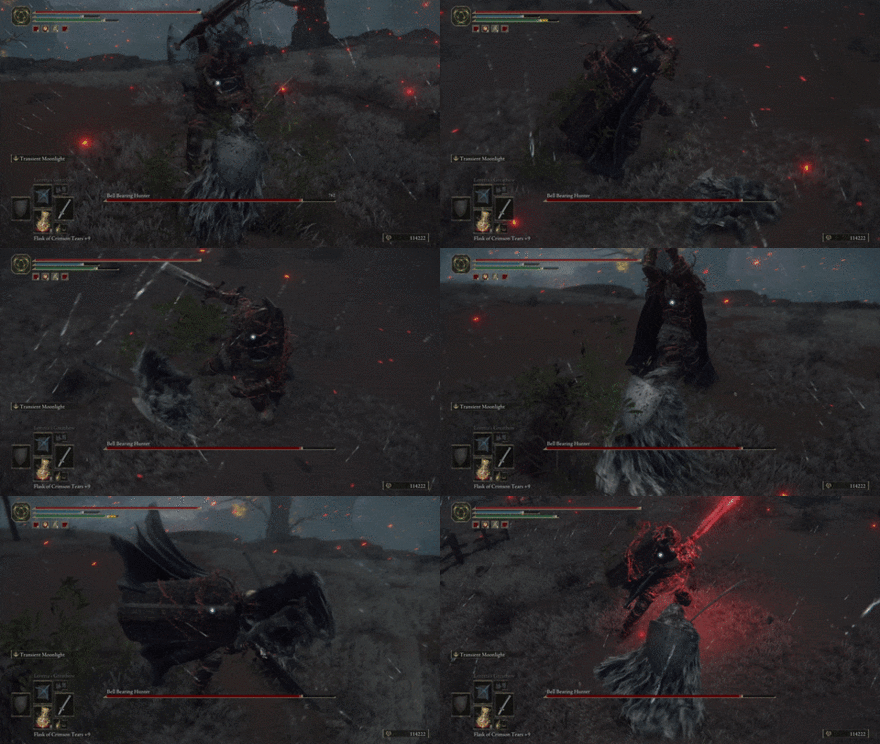
 Twirling Sword: Bell Bearing Hunter twirls his sword around twice, hitting you if you're in its path. He ends this move by slamming it to the ground. Roll immediately for the first swipe, then delay your roll until the sword approaches you again. For the final slam, roll to the side. |
 Grab: Bell Bearing Hunter's hand starts lighting up before he grabs you and strikes you down with his sword. While this is easily telegraphed by his glowing hand, he delays the grab to bait you into rolling. Wait until after he fully pulls his hand back before dodging. |
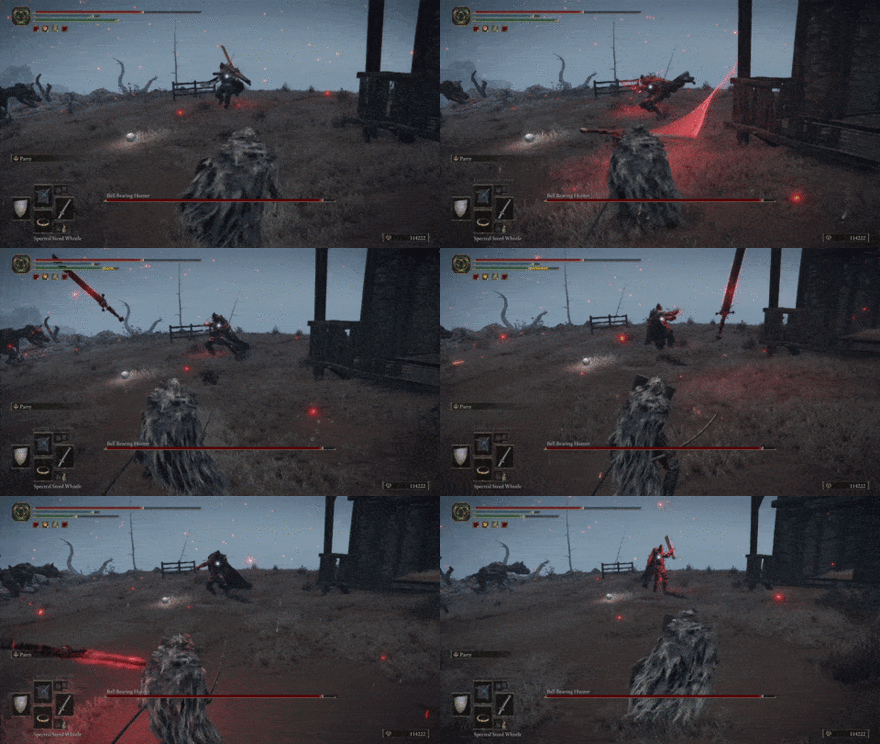 Arcane Swings: Bell Bearing Hunter launches his sword forward and swipes it from side to side multiple times before pulling it back. The safest way to avoid this attack is by just keeping your shield up since it won't deal too much poise or stamina damage. |
 Short Swing: This is similar to the Arcane Swings but will have a shorter range. This will be easier to roll through, but it'll be safer to use your shield. |
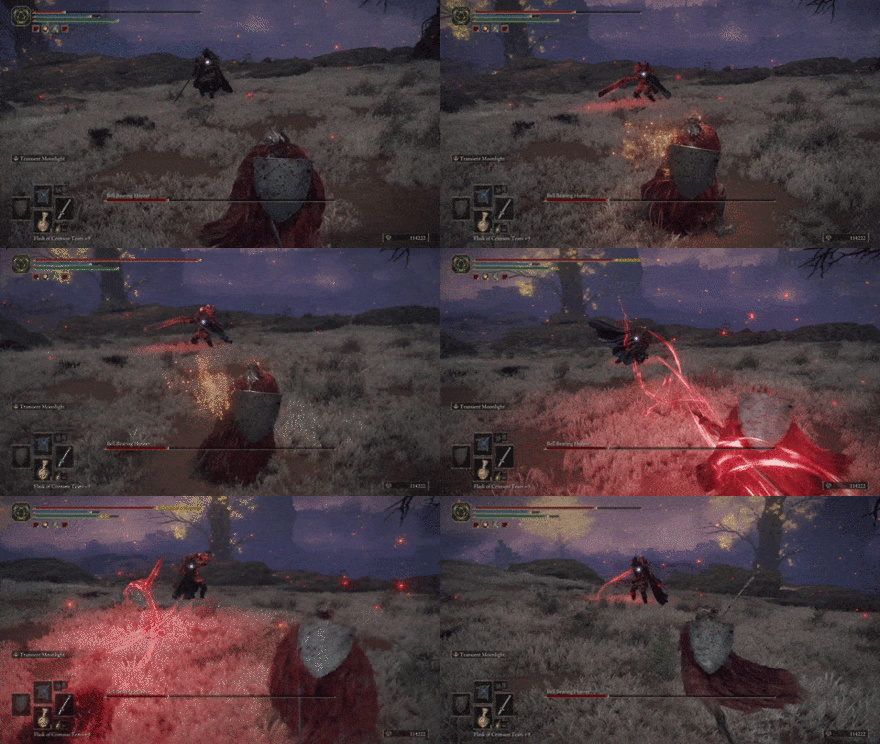 Arcane Flurry: Bell Bearing Hunter starts rapidly spinning his sword and launches it at you. This can track you so delay your roll to just as it gets launched. |
Elden Ring Related Guides

DLC Bosses
Main Bosses
Optional Bosses
Mini-Bosses
| All Bosses in Elden Ring | |
|---|---|
| Elder Dragon Greyoll | Lion Guardian |
| Valiant Gargoyle (Leyndell) | - |
Hostile NPCs and Invaders
| Limgrave Invaders and Hostile NPCs | |
|---|---|
| Bloody Finger Nerijus | Old Knight Istvan |
| Recusant Henricus | - |
| Liurnia of the Lakes Invaders and Hostile NPCs | |
| Great Horned Tragoth | Festering Fingerprint Vyke |
| Altus Plateau Invaders and Hostile NPCs | |
| Eleonora, Violet Bloody Finger | Inquisitor Ghiza |
| Maleigh Marais, Shaded Castle Castellan | Rileigh the Idle |
| Vargram the Raging Wolf & Errant Sorcerer Wilhelm | Magnus the Beast Claw |
| Mountaintops of the Giants Invaders and Hostile NPCs | |
| Juno Hoslow, Knight of Blood | - |
| The Roundtable Hold Invaders and Hostile NPCs | |
| Mad Tongue Alberich | - |
| Multiple Location Invaders and Hostile NPCs | |
| Anastasia, Tarnished-Eater | - |
Author
How to Beat Bell Bearing Hunter: Boss Fight Guide
improvement survey
03/2026
improving Game8's site?

Your answers will help us to improve our website.
Note: Please be sure not to enter any kind of personal information into your response.

We hope you continue to make use of Game8.
Rankings
- We could not find the message board you were looking for.
Gaming News
Popular Games

Genshin Impact Walkthrough & Guides Wiki

Honkai: Star Rail Walkthrough & Guides Wiki

Umamusume: Pretty Derby Walkthrough & Guides Wiki

Pokemon Pokopia Walkthrough & Guides Wiki

Resident Evil Requiem (RE9) Walkthrough & Guides Wiki

Monster Hunter Wilds Walkthrough & Guides Wiki

Wuthering Waves Walkthrough & Guides Wiki

Arknights: Endfield Walkthrough & Guides Wiki

Pokemon FireRed and LeafGreen (FRLG) Walkthrough & Guides Wiki

Pokemon TCG Pocket (PTCGP) Strategies & Guides Wiki
Recommended Games

Diablo 4: Vessel of Hatred Walkthrough & Guides Wiki

Fire Emblem Heroes (FEH) Walkthrough & Guides Wiki

Yu-Gi-Oh! Master Duel Walkthrough & Guides Wiki

Super Smash Bros. Ultimate Walkthrough & Guides Wiki

Pokemon Brilliant Diamond and Shining Pearl (BDSP) Walkthrough & Guides Wiki

Elden Ring Shadow of the Erdtree Walkthrough & Guides Wiki

Monster Hunter World Walkthrough & Guides Wiki

The Legend of Zelda: Tears of the Kingdom Walkthrough & Guides Wiki

Persona 3 Reload Walkthrough & Guides Wiki

Cyberpunk 2077: Ultimate Edition Walkthrough & Guides Wiki
All rights reserved
ELDEN RING™ & ©BANDAI NAMCO Entertainment Inc. / ©2021 FromSoftware, Inc.
The copyrights of videos of games used in our content and other intellectual property rights belong to the provider of the game.
The contents we provide on this site were created personally by members of the Game8 editorial department.
We refuse the right to reuse or repost content taken without our permission such as data or images to other sites.


