This survey will take about 1 minute.
Your answers will help us to improve our website.
Elden Ring Shadow of the Erdtree
Midra, Lord of Frenzied Flame Location and Weakness | How to Get to Midra
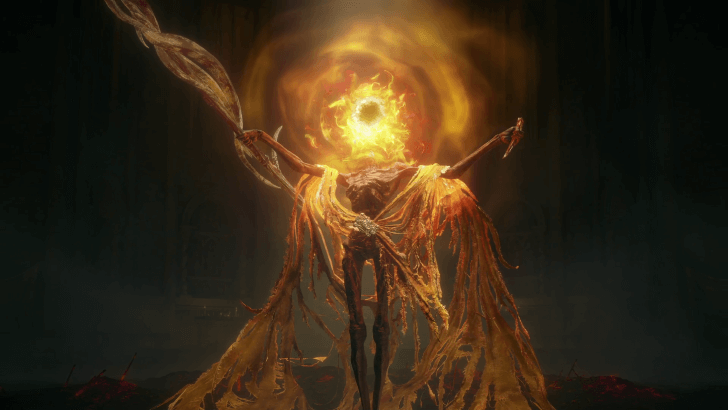
This is a boss guide for Midra, Lord of Frenzied Flame in Elden Ring DLC Shadow of the Erdtree. Learn about Midra's weakness, location, as well as the best build against Midra here.
List of Contents
Midra, Lord of Frenzied Flame Location
Found at the End of Midra's Manse
| World View | Map Location |
|---|---|
 |
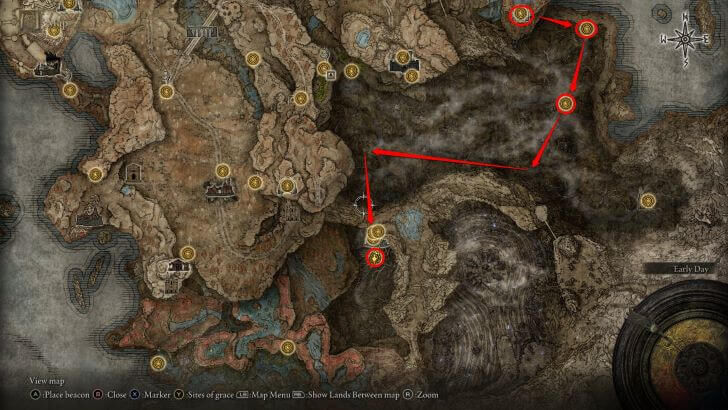 |
Midra, Lord of Frenzied Flame is found at the end of exploring Midra's Manse, a bit south past the Abyssal Woods. You will have to hit illusory walls marked by paintings and search for levers that move bookcases to clear a path to Midra.
Midra's Manse Legacy Dungeon Walkthrough
How to Get to Midra
| 1 |  Progress through the Shadow Keep until you reach the area with the burning boats, Vulgar Militamen, and a Fire Knight. If you've already opened the door that leads back to the Golden Hippopotamus room, you can fast travel to the Main Gate Plaza site of grace to get here. Walk southeast and find a corpse on your left next to a ladder. |
|---|---|
| 2 | 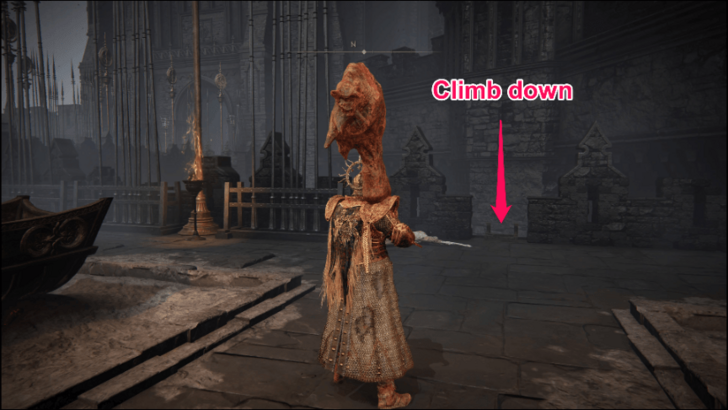 Climb down the ladder and walk along the edge. Be careful not to fall into the water. |
| 3 | 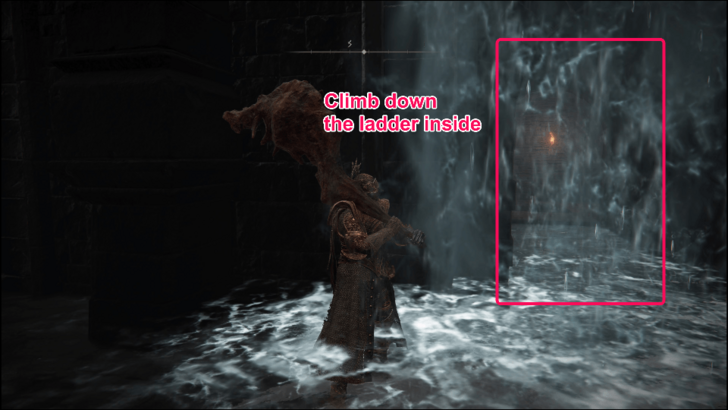 Pass through the waterfall to find a hidden room with a long ladder. Climb down and enter the room to your left. |
| 4 | 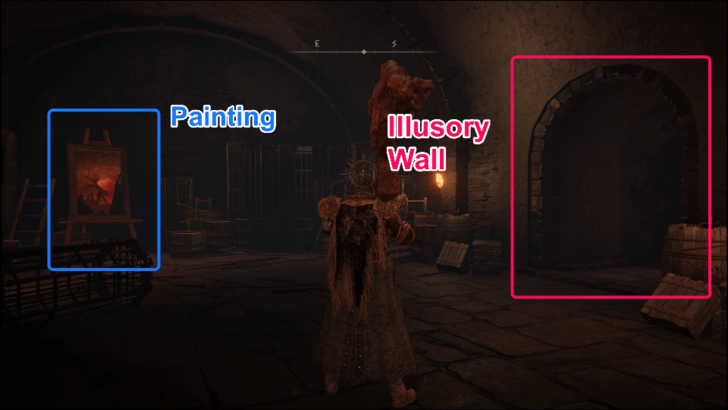 The wall on your right is actually an illusory wall that you can attack or roll into to reveal a hidden path. |
| 5 | 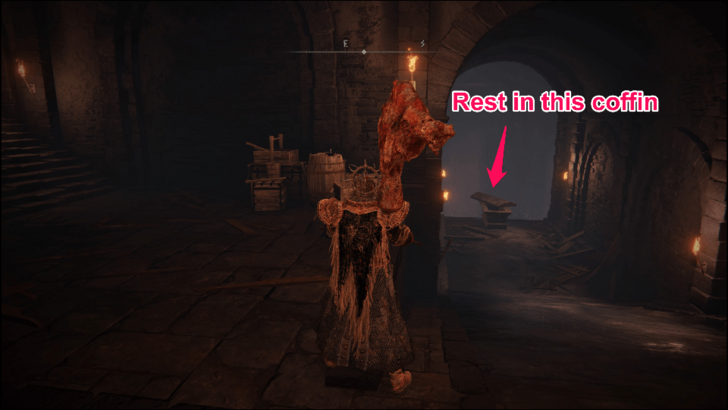 Follow the path and interact with the coffin at the end to let it take you to a hidden section of the Shadow Keep. Go outside to find the Castle Watering Hole site of grace. |
| 6 | 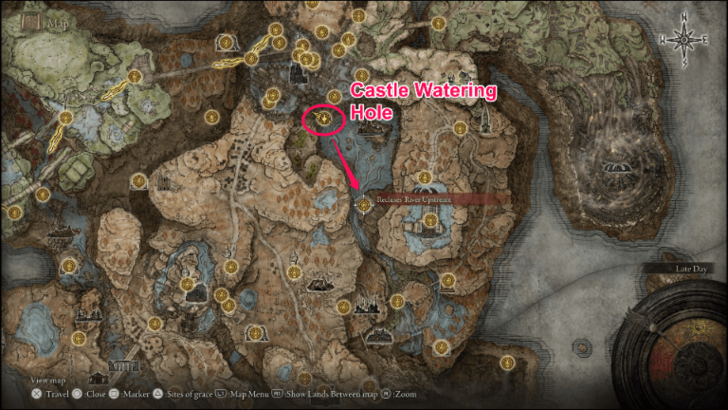 The next step is to ride south and reach the Recluses' River Upstream site of grace. Take note that you will awaken a Furnace Golem halfway through, so be sure to not get caught in its flame spiral attack. |
| 7 | 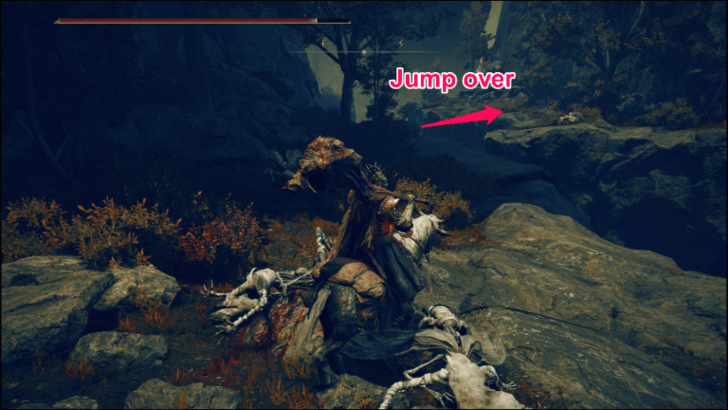 Keep heading south, minding the gaps along the cliff, and jump over to the other side when you reach a dead end. |
| 8 | 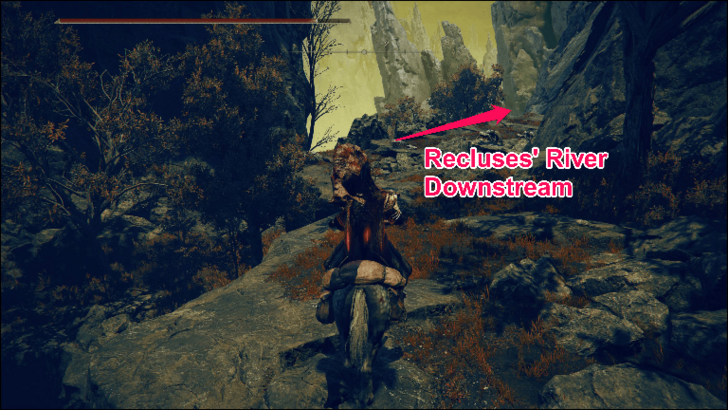 Turn right past more bug enemies to the Recluses' River Downstream site of grace. |
| 9 | 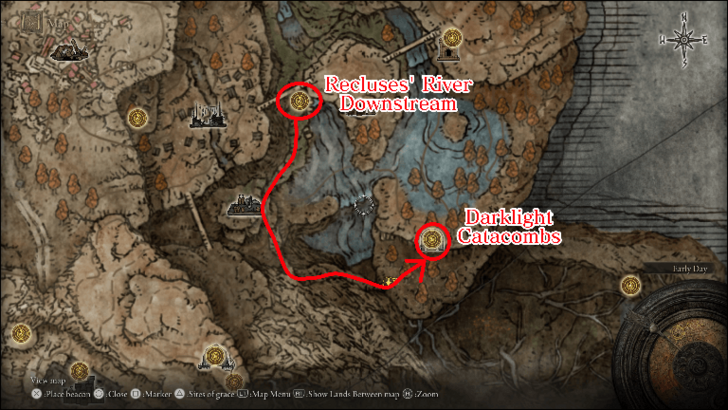 Continue heading south while hugging the right side wall. You will need to jump down on rock platforms and pass through a lot of bug enemies as you make your way to the cliff southeast where the Darklight Catacombs are. |
| 10 |  You will end up in the Forsaken Graveyard after passing through the Darklight Catacombs and defeating the dungeon boss. Now you must get across to the southwest end of the Abyssal Woods where Midra's Manse is on foot while avoiding the roaming frenzied flame enemies. |
| 11 | 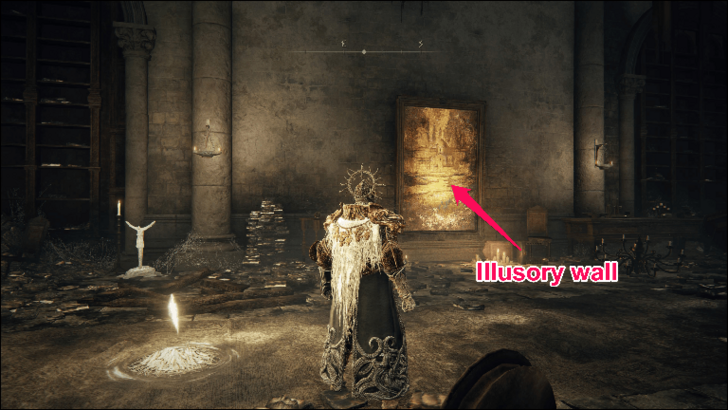 Upon entering, roll into or attack the painting to the left of the site of grace to reveal a path. |
| 12 |  Walk to the other end of the hallway and turn right. |
| 13 |  Enter the doorway on the left of the dining hall. |
| 14 | 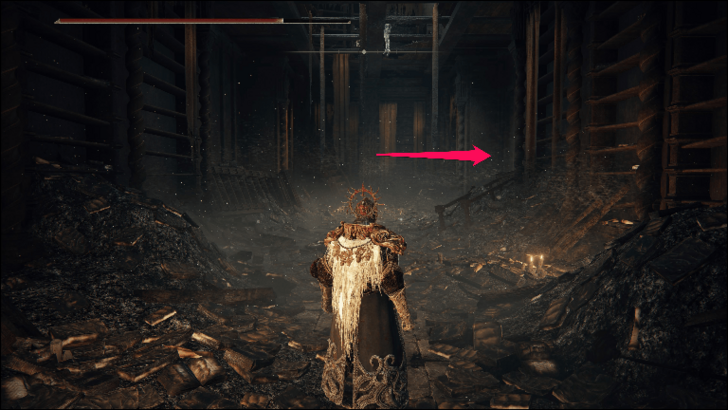 Take the first right to find a small room. |
| 15 |  Find the lever behind the room to reveal a hidden area with a ladder on the other side. |
| 16 | 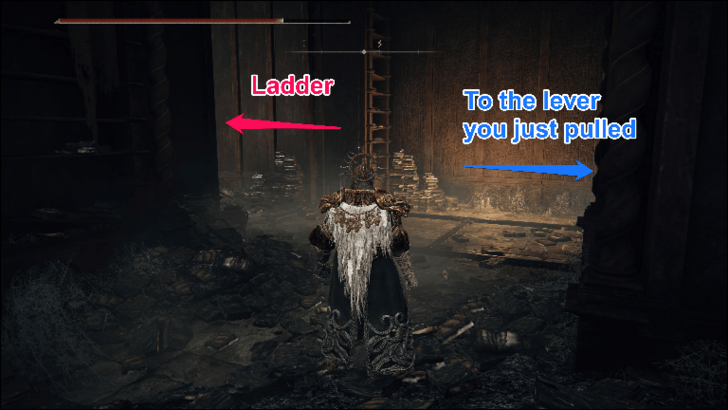 Climb the ladder to reach the upper floor. |
| 17 | 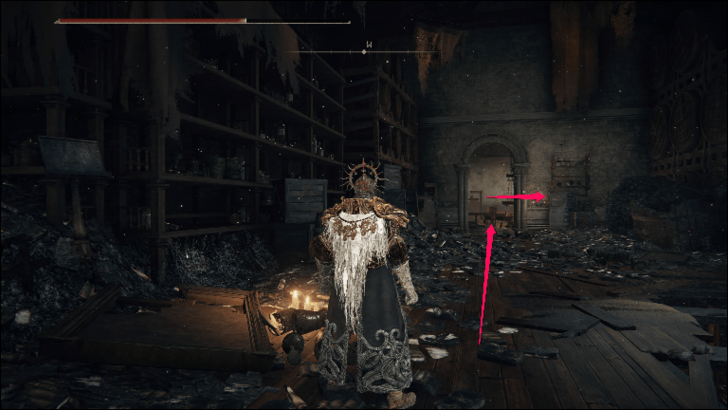 The doorway ahead will lead you to the dining hall's balcony, where you will also find the enemy who's been throwing frenzied flames below. |
| 18 |  Go up the ladder on the north side of the hall. |
| 19 | 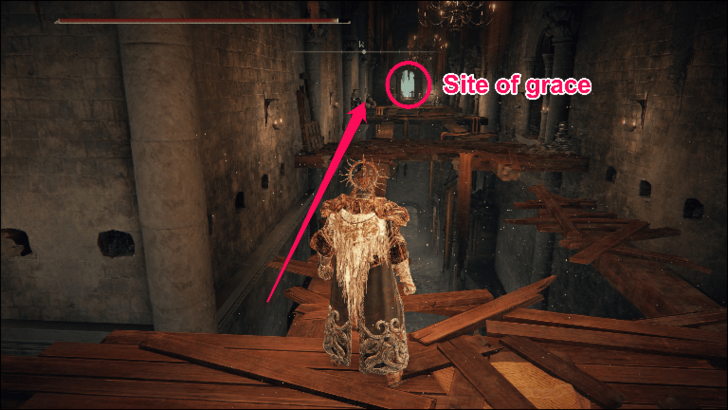 Carefully walk across the wooden beams to reach the Midra's Library site of grace. |
| 20 | 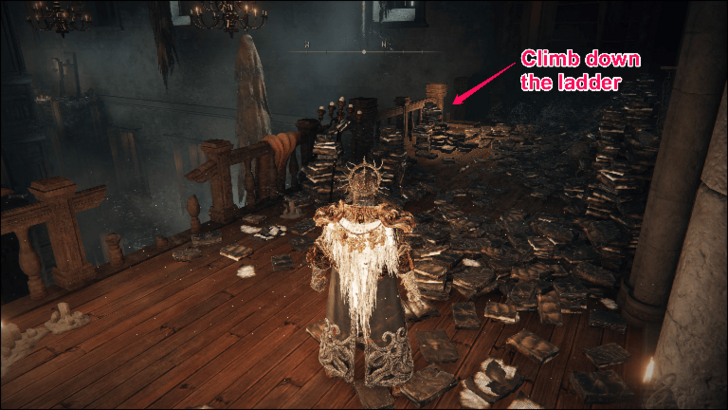 Climb down the ladder on your right and turn around to find a room with a large painting. |
| 21 |  This painting is another illusory wall that you can roll into or attack to reveal a path. Pull the lever at the end to make a bookshelf on the northwest corner of the library to move, opening a path to the southwest quadrant. |
| 22 | 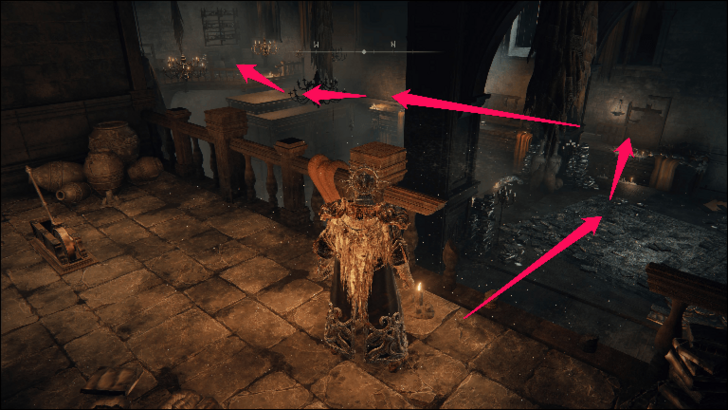 To get there, jump over to the platform in the middle and into the bookshelf on the north side. Hop onto the bookshelf you just moved and to the balcony above it. |
| 23 | 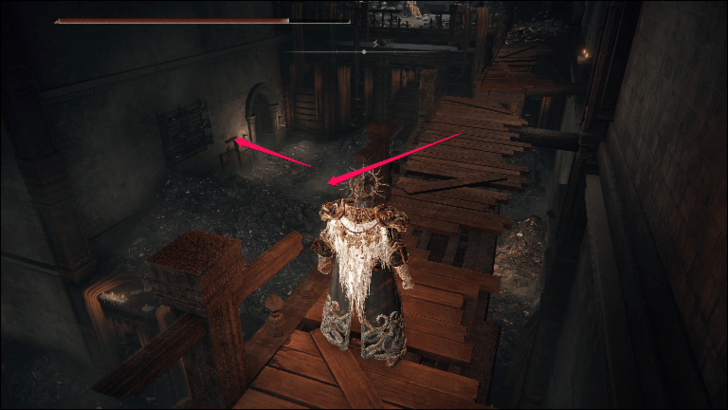 Jump down the platform with the shamans and move two rooms east to find the Second Floor Chamber site of grace. You will find Midra inside the next room further to the east. |
Midra, Lord of Frenzied Flame Weakness
Weak to Slash Damage
Midra, Lord of Frenzied Flame, takes increased Slash damage compared to the other physical damage types. Target this weakness with weapons that deal Slash damage, such as Reapers, Curved Swords, Katanas, and Great Katanas.
Weak to Magic, Lightning, and Holy Damage
From tests using the Backhand Blades with changed damage affinities, we found Midra's weaknesses to be Magic, Lightning, and Holy damage. The best weapons to target these weaknesses are those that also deal Slash damage, such as Moonveil, Winged Scythe, and the Meteoric Ore Blade.
For ranged playstyles, INT spellcasters can use sorceries like Glintstone Cometshard and Gravitational Missile to break Midra down from a safe range. FAI builds also have several offensive Lightning and Holy damage incantation options, such as Knight's Lightning Spear and Multilayered Ring of Light.
Susceptible to Bleed and Frostbite
Burst damage status effects like Bleed and Frostbite are easy to proc and highly effective against Midra, and can provide some breathing room by interrupting his attack animations.
Melee builds can use weapons with innate Bleed or Frost buildup like the Sword of Night and Death's Poker, or infuse fast-attacking weapons like the Backhand Blade with Grease or affinities that will allow them to accumulate those statuses. Spellcasters also have great ways to build up these debuffs with spells such as Adula's Moonblade and Impenetrable Thorns.
Best Build Against Midra, Lord of Frenzied Flame
Slash, Bleed, and Frostbite Weapons Are Recommended
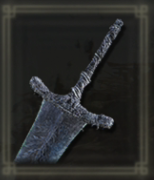
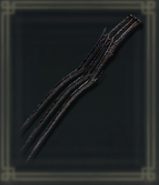
 Bloodhound's Fang Bloodhound's Fang |
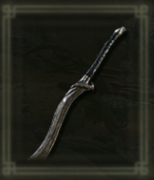
 Backhand Blades Backhand Blades |
 Dark Moon Greatsword Dark Moon Greatsword |
 Claws of Night Claws of Night |
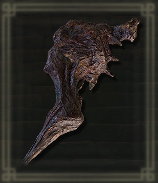 Bloodfiend's Arm Bloodfiend's ArmAffinity:( |
 Zweihander ZweihanderAsh of War: Chilling Mist Affinity: |
Weapons that naturally deal slash damage while having the capability to apply blood loss or frostbite will work wonders against Midra, Lord of Frenzied Flame.
Bloodhound's Fang and Backhand Blades are strong slashing weapons and the backhand blade can even be infused with either Cold or Blood affinity. Dark Moon Greatsword and a Cold Zweihander are some of our recommendation for a frostbite weapon and if you wish to use bleed, the Bloodfiend's Arm (blood affinity) and Claws of Night are good to consider.
Use Talismans, Armor, and Consumables to Boost Attack Power After Triggering Bleed
 Lord of Blood's Exultation Lord of Blood's Exultation
|
 White Mask White Mask |
When running a bleed build, you can boost your damage output by equipping the Lord of Blood's Exultation talisman and the White Mask. Both will increase your attack power whenever you proc Blood Loss.
For consumables, you have the option of using the new Sacred Bloody Flesh DLC consumable that boosts arcane once, and your attack power multiple times whenever you proc Blood Loss.
Fire Attacks Can Remove Frostbite
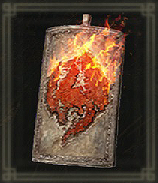
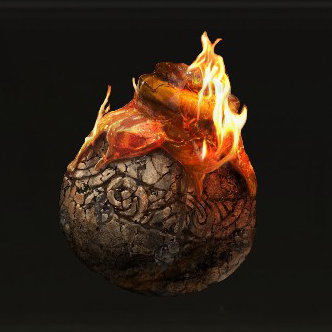 Fire Pot Fire Pot |
 Dagger DaggerAffinity: Fire |
If you opted for a frostbite setup, you can use a fire attack either by using a consumable Fire Pot or hitting Midra with a fire-infused attack. Doing so will remove the Frostbite, allowing you to apply the debuff to Midra again for more damage.
Take note that Frostbite also increases the damage that bosses take while afflicted so you can also consider not resetting the debuff and have the frostbite linger for its full duration!
Use Spells that Inflict Bleed or Frostbite
|
|
|
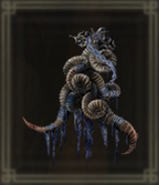
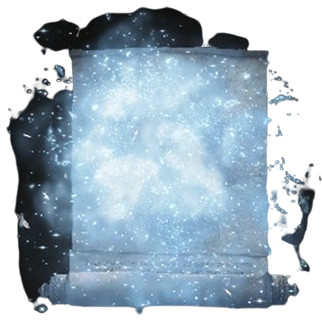 Freezing Mist Freezing Mist
|
|
We highly recommend going for bleed spells like Swarm of Flies and Impenetrable Thorns as these spells will quickly build up blood loss to Midra, rapidly draining his HP pool.
Frostbite spells such as Freezing Mist and Borealis's Mist are also effective against Midra due to his inherent weakness to the said status ailment.
Use Fire and Physical Damage Negation
 Dragoncrest Greatshield Talisman Dragoncrest Greatshield Talisman
|
 Flamedrake Talisman +3 Flamedrake Talisman +3
|
Midra can deal both Physical and Flame damage. To mitigate this, we recommend equipping the Dragoncrest Greatshield Talisman and the Flamedrake Talisman +3 with a higher importance for Dragoncrest Greatshield as Midra's physical attacks hit harder than his frenzied flame attacks.
Include Anti-Madness Talismans, Consumables, and Sorceries
 Clarifying Horn Charm +2 Clarifying Horn Charm +2
|
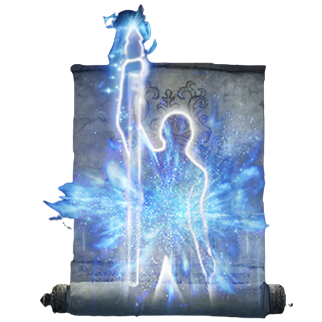 Lucidity Lucidity |
If you find yourself getting hit by Midra's madness attacks and succumbing to the status ailment, consider equipping the Clarifying Horn Charm +2 as it massively increases your Focus stat which in turn, reduces the buildup of Madness. Alternatively, the Shield of the Guilty is a great off-hand to consider as it can increase your Focus stat as well by a small amount.
If you wish to further increase your Focus stat, consider consuming a Dappled Cured Meat as it also increases your Focus for 1 minute.
Midra, Lord of Frenzied Flame General Tips
| Tips for Beating Midra |
|---|
|
|
Gather Levels and Scadutree Fragments
| Recommended Levels for Midra, Lord of Frenzied Flame |
|
|---|---|
| Rune Level | Level 170 or Higher |
| Scadutree Blessing | Level 11 or Higher |
Midra, Lord of Frenzied Flame is a boss within Midra's Manse, a dungeon deep inside the Abyssal Woods, one of the optional regions of the DLC. He is more powerful than the early mandatory bosses you have encountered, encouraging you to stock up on more levels and Scadutree Fragments.
All Scadutree Fragment Locations
Increase Focus to Resist Madness
Midra's main threat is his ability to inflict Madness that will apply bursts of damage, drain some of your FP, and briefly stun you, which will allow him to do follow-up attacks on you. Consider increasing Focus to resist Madness buildup with talismans like the Clarifying Horn Charm and Mottled Necklace, or curing Madness build up with Clarifying Boluses or the Lucidity spell.
If you don't want to sacrifice a Talisman slot, you can also equip Shield of the Guilty, as this will also grant bonus Focus even while on your back.
Use Cold Damage to Burst and Slow Midra
Midra is susceptible to frostbite. Work to inflict this status effect since it renders his slow moves even slower, making dodging him and avoiding Madness buildup a breeze.
Consider using Freezing Grease or the Chilling Mist Ash of War to infuse your weapon with cold damage to increase your damage and dodge windows against Midra.
Avoid Midra's Scream During his First Phase
Every time you fight Midra, you will first have to defeat his frail form before reaching his actual boss form. While he won't damage you too much as a mob, his scream can build up Madness that will carry over to his actual boss phase if you're careless, so walk away if he gets ready to scream.
Midra's Attack Animations are Difficult to Interrupt
Despite looking like a frail humanoid, Midra is very difficult to interrupt when he starts attacking. He can easily shrug off charged heavy attacks, colossal attacks, and even spells like the first charge level of Carian Grandeur without breaking his attack animation chain.
During the fight, try not to trade hits with him, especially if you're using a colossal melee build, since you may find that his damage overtakes yours quickly. You can still work towards gradually breaking his poise, but don't expect your heavy hitters to interrupt his own attacks.
Heal to Max HP Before Midra's Bomb Attack
When Midra reaches 25% HP, he will float into the air and fall to the ground as a fireball, exploding with a massive radius with minor Madness buildup. This attack is difficult to i-frame, and running away for distance might be difficult depending on where in the arena you are, so just heal to max HP to be safe and tank the explosion.
Be advised that he can do this move multiple times. So stay on alert for it, even in Phase 2.
Be Wary of Lingering Flames
In Phase 2, more of Midra's attacks will leave brief lingering flames on the ground that can catch you if roll in the wrong direction. Make sure to avoid the paths of flames.
Midra's Moves Hit Slow But Hard
Midra's moveset is not as fast as other bosses, but they make up for it in reach, damage, and tricky delayed timings. Be patient as you attack him, as just one hit from his sword can take a large chunk of your HP.
Avoid His Grab Attack
Midra can leap into the air then slam down to skewer you with his greatsword, so time your heals, and stay at a safe distance, to avoid getting hit.
Delay Countering the Grab Attack
If Midra misses with his grab attack, he will plunge his sword deeper into the ground to sprout spikes in an AoE around him, so make sure you dodge a second time, or jump, to avoid this before punishing Midra's aggression.
Patiently Dodge Into his Spin Attack
The timing of Midra's spin attack can be tricky because of the awkward speed and delay between twirls, which also have good reach and tracking. If you are far enough, it is possible to dodge backward, but it's safer to dodge into the spins: once during the first two spins, then twice during the last three spins.
Run or Dodge After Delay From his Small Bomb Attack
During Phase 2, Midra will sometimes toss out a smaller version of his Phase 2 transformation move bomb that will flash then detonate with a small delay in between.
There is enough time before it detonates, even if you are close, to run away, or you can opt to delay your dodge after the flash to i-frame the actual explosion.
Midra, Lord of Frenzied Flame Rewards
| Midra, Lord of Frenzied Flame Details | |
|---|---|
 |
|
| Runes | 410000 |
| Drops | |
| Spirit Summons? | Spirit Ashes Allowed |
| Gold Summons? |
None
|
Elden Ring Related Guides
DLC Bosses
Main Bosses
Optional Bosses
Mini-Bosses
| All Bosses in Elden Ring | |
|---|---|
| Elder Dragon Greyoll | Lion Guardian |
| Valiant Gargoyle (Leyndell) | - |
Hostile NPCs and Invaders
| Limgrave Invaders and Hostile NPCs | |
|---|---|
| Bloody Finger Nerijus | Old Knight Istvan |
| Recusant Henricus | - |
| Liurnia of the Lakes Invaders and Hostile NPCs | |
| Great Horned Tragoth | Festering Fingerprint Vyke |
| Altus Plateau Invaders and Hostile NPCs | |
| Eleonora, Violet Bloody Finger | Inquisitor Ghiza |
| Maleigh Marais, Shaded Castle Castellan | Rileigh the Idle |
| Vargram the Raging Wolf & Errant Sorcerer Wilhelm | Magnus the Beast Claw |
| Mountaintops of the Giants Invaders and Hostile NPCs | |
| Juno Hoslow, Knight of Blood | - |
| The Roundtable Hold Invaders and Hostile NPCs | |
| Mad Tongue Alberich | - |
| Multiple Location Invaders and Hostile NPCs | |
| Anastasia, Tarnished-Eater | - |
Comment
Author

Midra, Lord of Frenzied Flame Location and Weakness | How to Get to Midra
Please participate in our site
improvement survey
03/2026
improvement survey
03/2026
Would you assist in
improving Game8's site?
improving Game8's site?

×
We are listening to our users' valuable opinions and discussing how to act on them.
The information collected through this survey will be used for the purpose of improving our services. In addition, the information will only be disclosed a part of a statistic in a format that will not allow identification of personal information.
Begin Survey
Not Now
×
Please rate each item regarding Game8.co's Advertisements.
Amount of Ads
Very Dissatisfied
Somewhat Dissatisfied
Fine
Somewhat Satisfied
Highly Satisfied
Placement of Ads
Timing of Ad Display
Ad Loading Speed
Safeness of Ads
Content of Ads
×
Please rate each item regarding Game8.co's Quality of Articles.
Amount of information
Very Dissatisfied
Somewhat Dissatisfied
Fine
Somewhat Satisfied
Highly Satisfied
Frequency of updates
Speed of new information
Accuracy of articles
Understandibility of articles
Readability of sentences
×
Please rate each item regarding Game8.co's Usability of the Site.
Ease of finding information
Very Dissatisfied
Somewhat Dissatisfied
Fine
Somewhat Satisfied
Highly Satisfied
Loading Speed
Use of Color
Font Size
Visibility of Images
Easy to Understand Layout
×
Please rate each item regarding Game8.co's Message Boards, Comments.
Ease of Writing
Very Dissatisfied
Somewhat Dissatisfied
Fine
Somewhat Satisfied
Highly Satisfied
Readability
Ease in Finding Information
Comment Quality
Comment Quantity
Admin Response
×
Please rate each item regarding Game8.co's Site's new design.
Please rate our site's new design
Very Dissatisfied
Somewhat Dissatisfied
Fine
Somewhat Satisfied
Highly Satisfied
Do you think that the website's design change makes the site easier to use?
Has the new design made it easier for you to find information on the site?
Has the new design improved the overall visual appeal of the site?
How would you rate your overall satisfaction with the new design of the site?
×
How likely are you to recommend Game8 to someone you know?
Very Unlikely
0
1
2
3
4
5
6
7
8
9
10
Very Likely
If you have other opinions regarding potential improvement to the website, please share them with us. We would appreciate your honest opinion.
Note: This is a free response section, so you can proceed without entering anything.
Note: Please be sure not to enter any kind of personal information into your response.
Note: Please be sure not to enter any kind of personal information into your response.
×
Thank You
×
Thank you for participating in our survey! Your answers will help us to improve the quality of our website and services.
We hope you continue to make use of Game8.
We hope you continue to make use of Game8.
Close
Rankings
- We could not find the message board you were looking for.
Gaming News


![Monster Hunter Stories 3 Review [First Impressions] | Simply Rejuvenating](https://img.game8.co/4438641/2a31b7702bd70e78ec8efd24661dacda.jpeg/thumb)
Popular Games

Genshin Impact Walkthrough & Guides Wiki
Honkai: Star Rail Walkthrough & Guides Wiki
Umamusume: Pretty Derby Walkthrough & Guides Wiki
Pokemon Pokopia Walkthrough & Guides Wiki
Resident Evil Requiem (RE9) Walkthrough & Guides Wiki
Monster Hunter Wilds Walkthrough & Guides Wiki
Wuthering Waves Walkthrough & Guides Wiki
Arknights: Endfield Walkthrough & Guides Wiki
Pokemon FireRed and LeafGreen (FRLG) Walkthrough & Guides Wiki
Pokemon TCG Pocket (PTCGP) Strategies & Guides Wiki


Recommended Games
Diablo 4: Vessel of Hatred Walkthrough & Guides Wiki
Cyberpunk 2077: Ultimate Edition Walkthrough & Guides Wiki
Fire Emblem Heroes (FEH) Walkthrough & Guides Wiki
Yu-Gi-Oh! Master Duel Walkthrough & Guides Wiki
Super Smash Bros. Ultimate Walkthrough & Guides Wiki
Pokemon Brilliant Diamond and Shining Pearl (BDSP) Walkthrough & Guides Wiki
Elden Ring Shadow of the Erdtree Walkthrough & Guides Wiki
Monster Hunter World Walkthrough & Guides Wiki
The Legend of Zelda: Tears of the Kingdom Walkthrough & Guides Wiki
Persona 3 Reload Walkthrough & Guides Wiki


All rights reserved
ELDEN RING™ & ©BANDAI NAMCO Entertainment Inc. / ©2021 FromSoftware, Inc.
The copyrights of videos of games used in our content and other intellectual property rights belong to the provider of the game.
The contents we provide on this site were created personally by members of the Game8 editorial department.
We refuse the right to reuse or repost content taken without our permission such as data or images to other sites.